Project Org Structure
Last updated: April 2, 2026
Understanding the Organization–Project Hierarchy
As modern companies scale across teams, regions, and security needs, a robust model for managing user access, integrations, and operations becomes critical. Our platform introduces a hierarchical structure that starts with a single Organization, within which multiple Projects can be created and managed independently.
Note: The Organization serves as the top-level secure domain that isolates your company’s data and operations from others.
What is a Project?
A Project is a modular, isolated unit within your Organization. It allows your teams to manage resources, integrations, users, and configurations that are specific to a business need — without affecting other parts of the company.
Depending on your structure, a Project can represent:
Project Type | Example Use Case |
Subsidiary | A parent company like Microsoft creating Projects for LinkedIn, GitHub, and Xbox under a single Organization. |
Region | Regional headquarters as Projects such as US, EMEA, and APAC division. |
Business Unit | Separate Projects for IT, DevOps, and Engineering teams within the same company. |
Each Project has its own:
Access control rules
Third-party integrations
Activity logs and monitoring settings
This modular approach improves security, auditability, and scale — all within a single, unified Organization.
Creating Projects under the Organisation
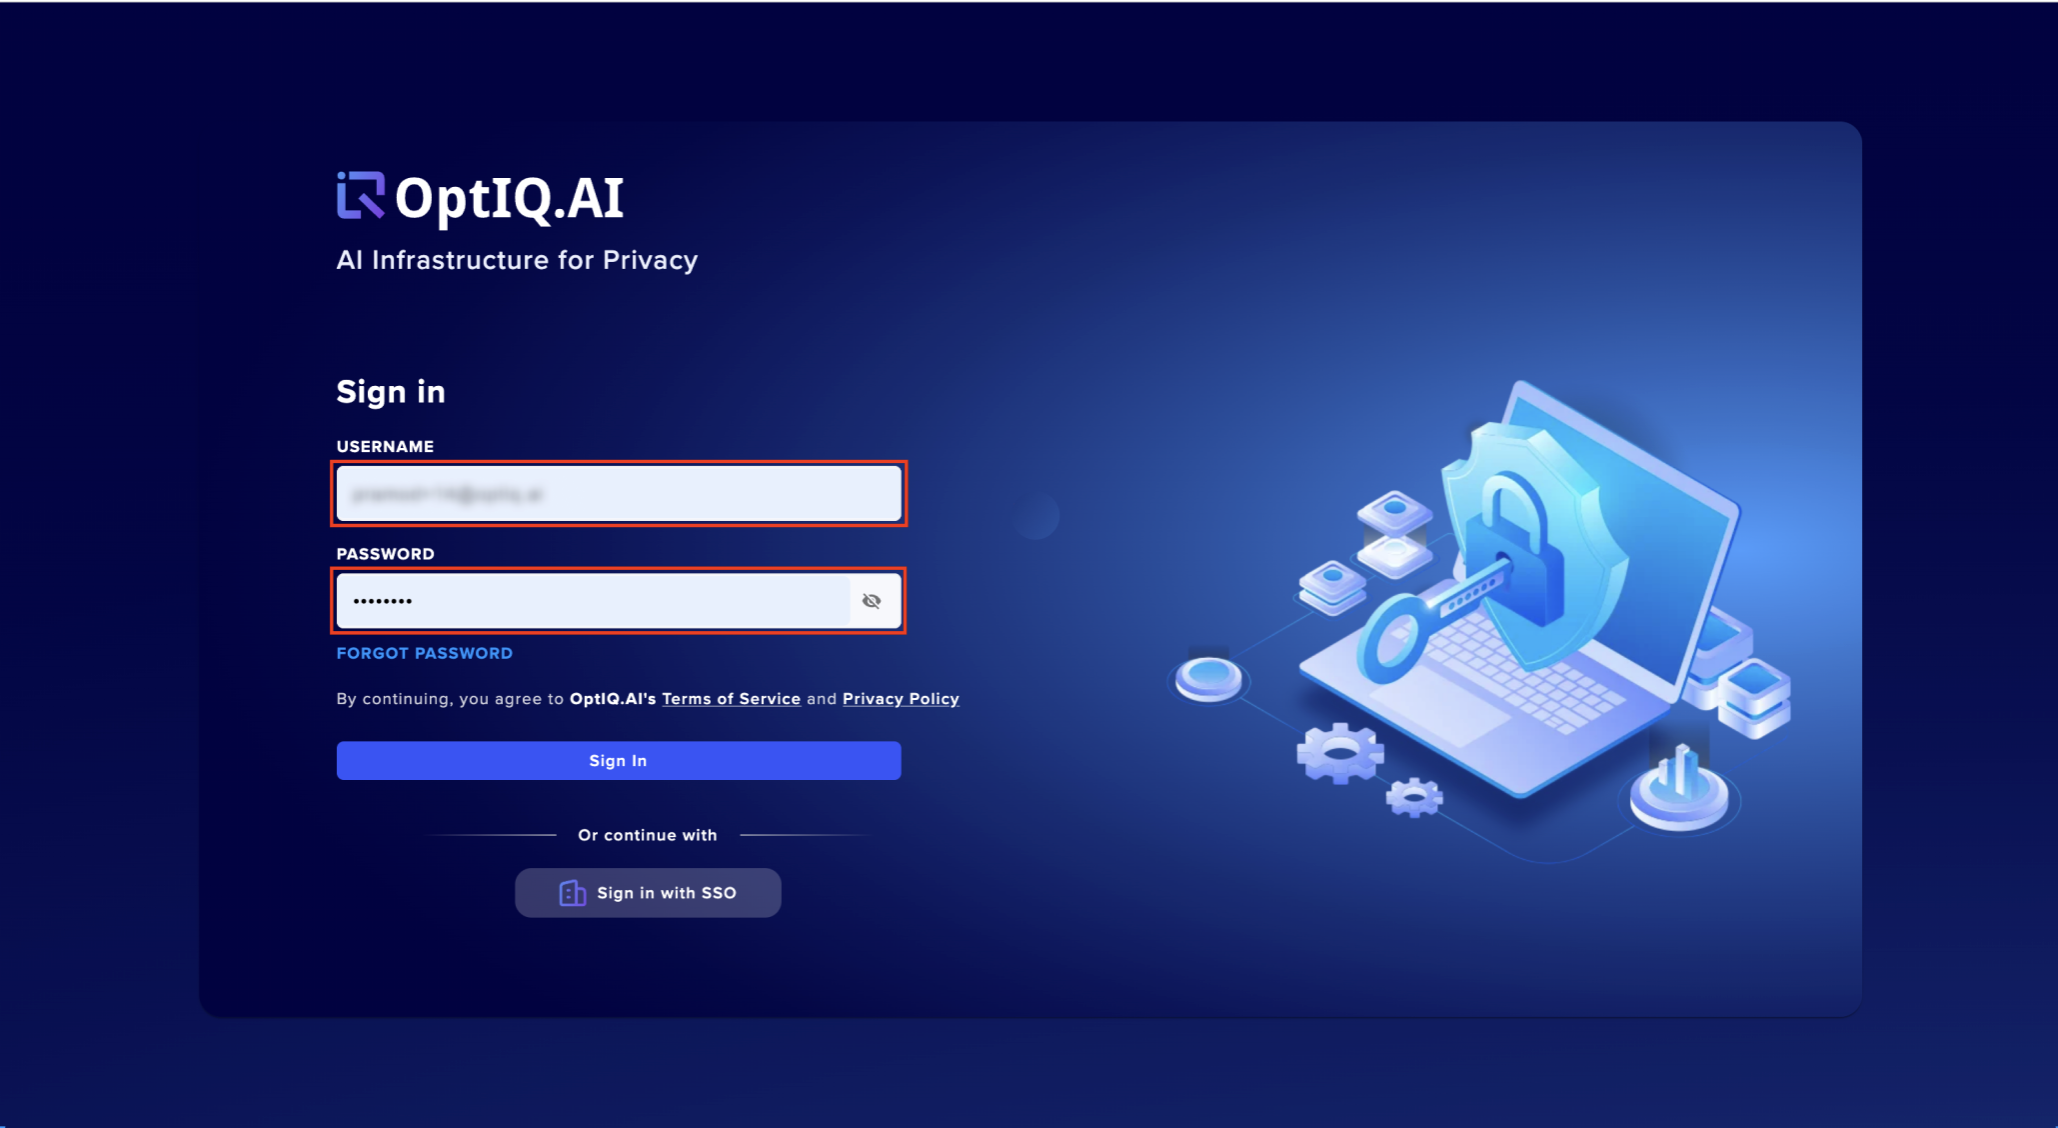
Step 1: Login to the Dashboard
Use your Super Admin credentials to log in to the dashboard.
Step 2: Access the Dashboard Overview
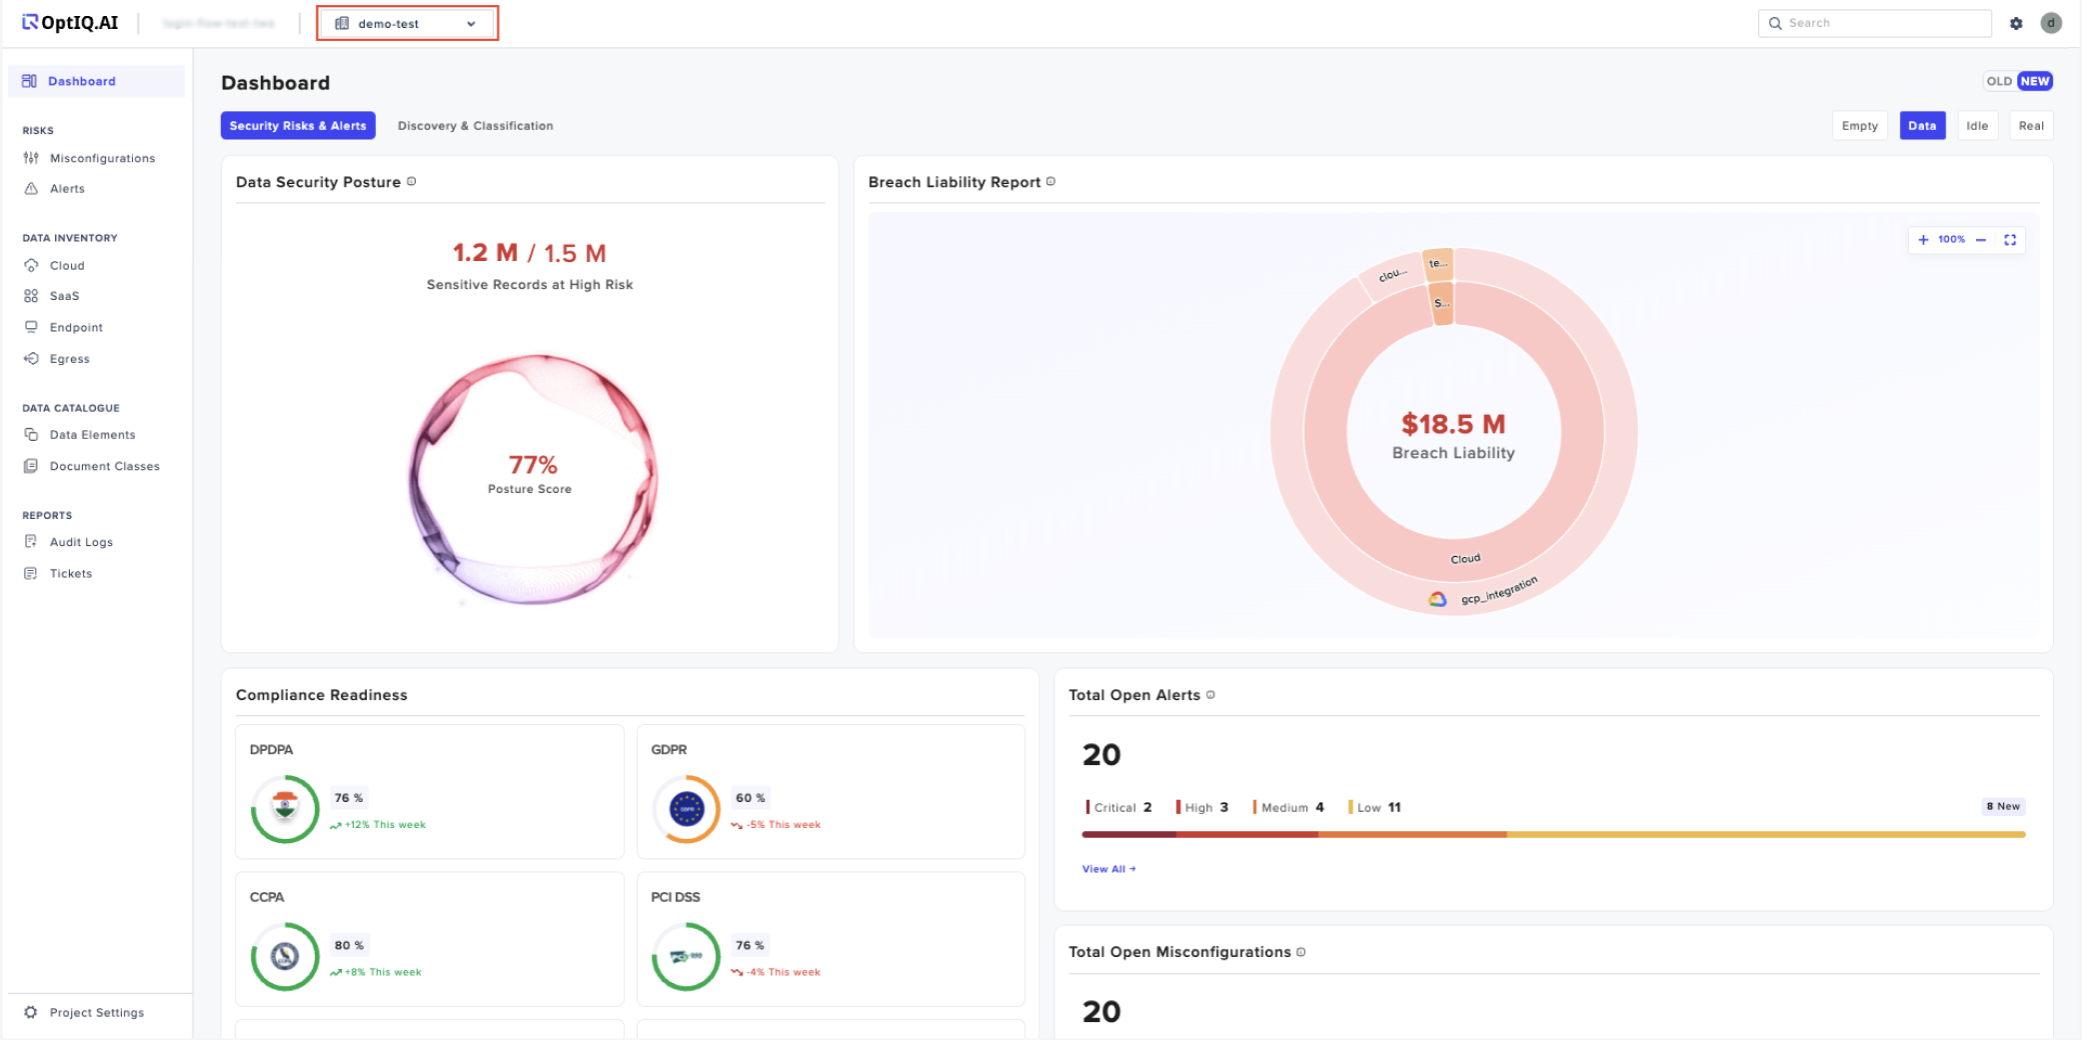
Upon successful login, you will be directed to the Dashboard Overview page. To create a new project, click on the "Projects" from Drop down option as shown below.
Step 3: Initiate Project Creation
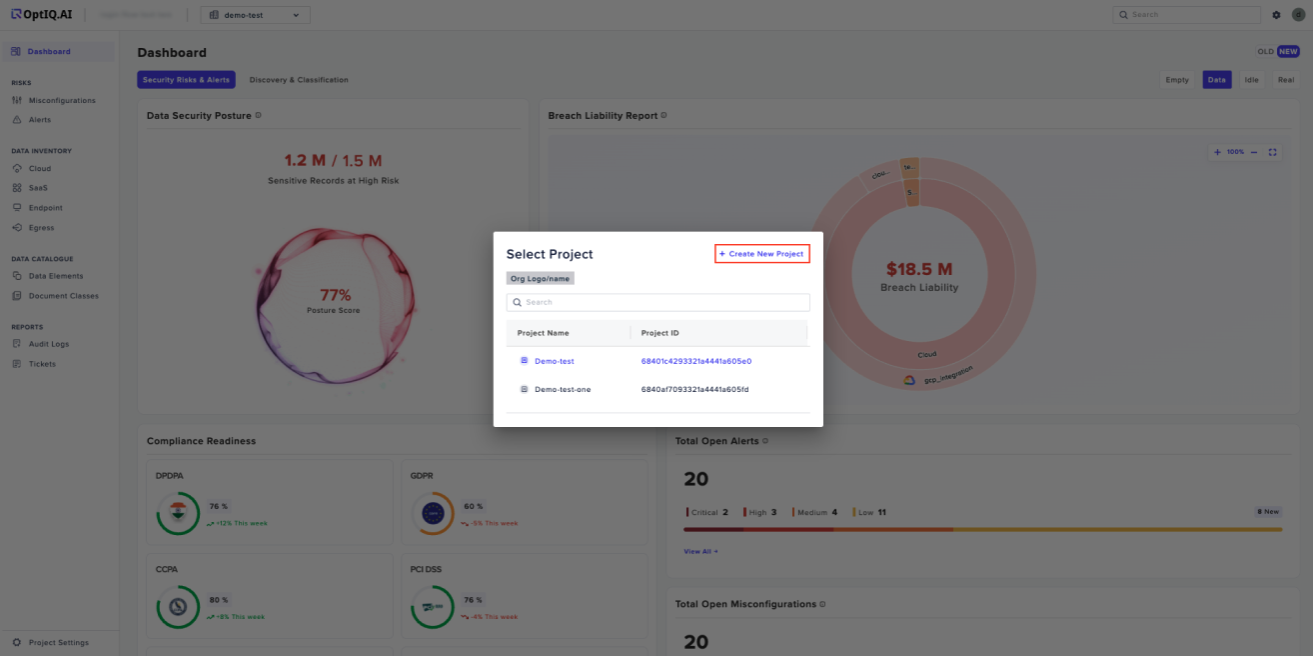
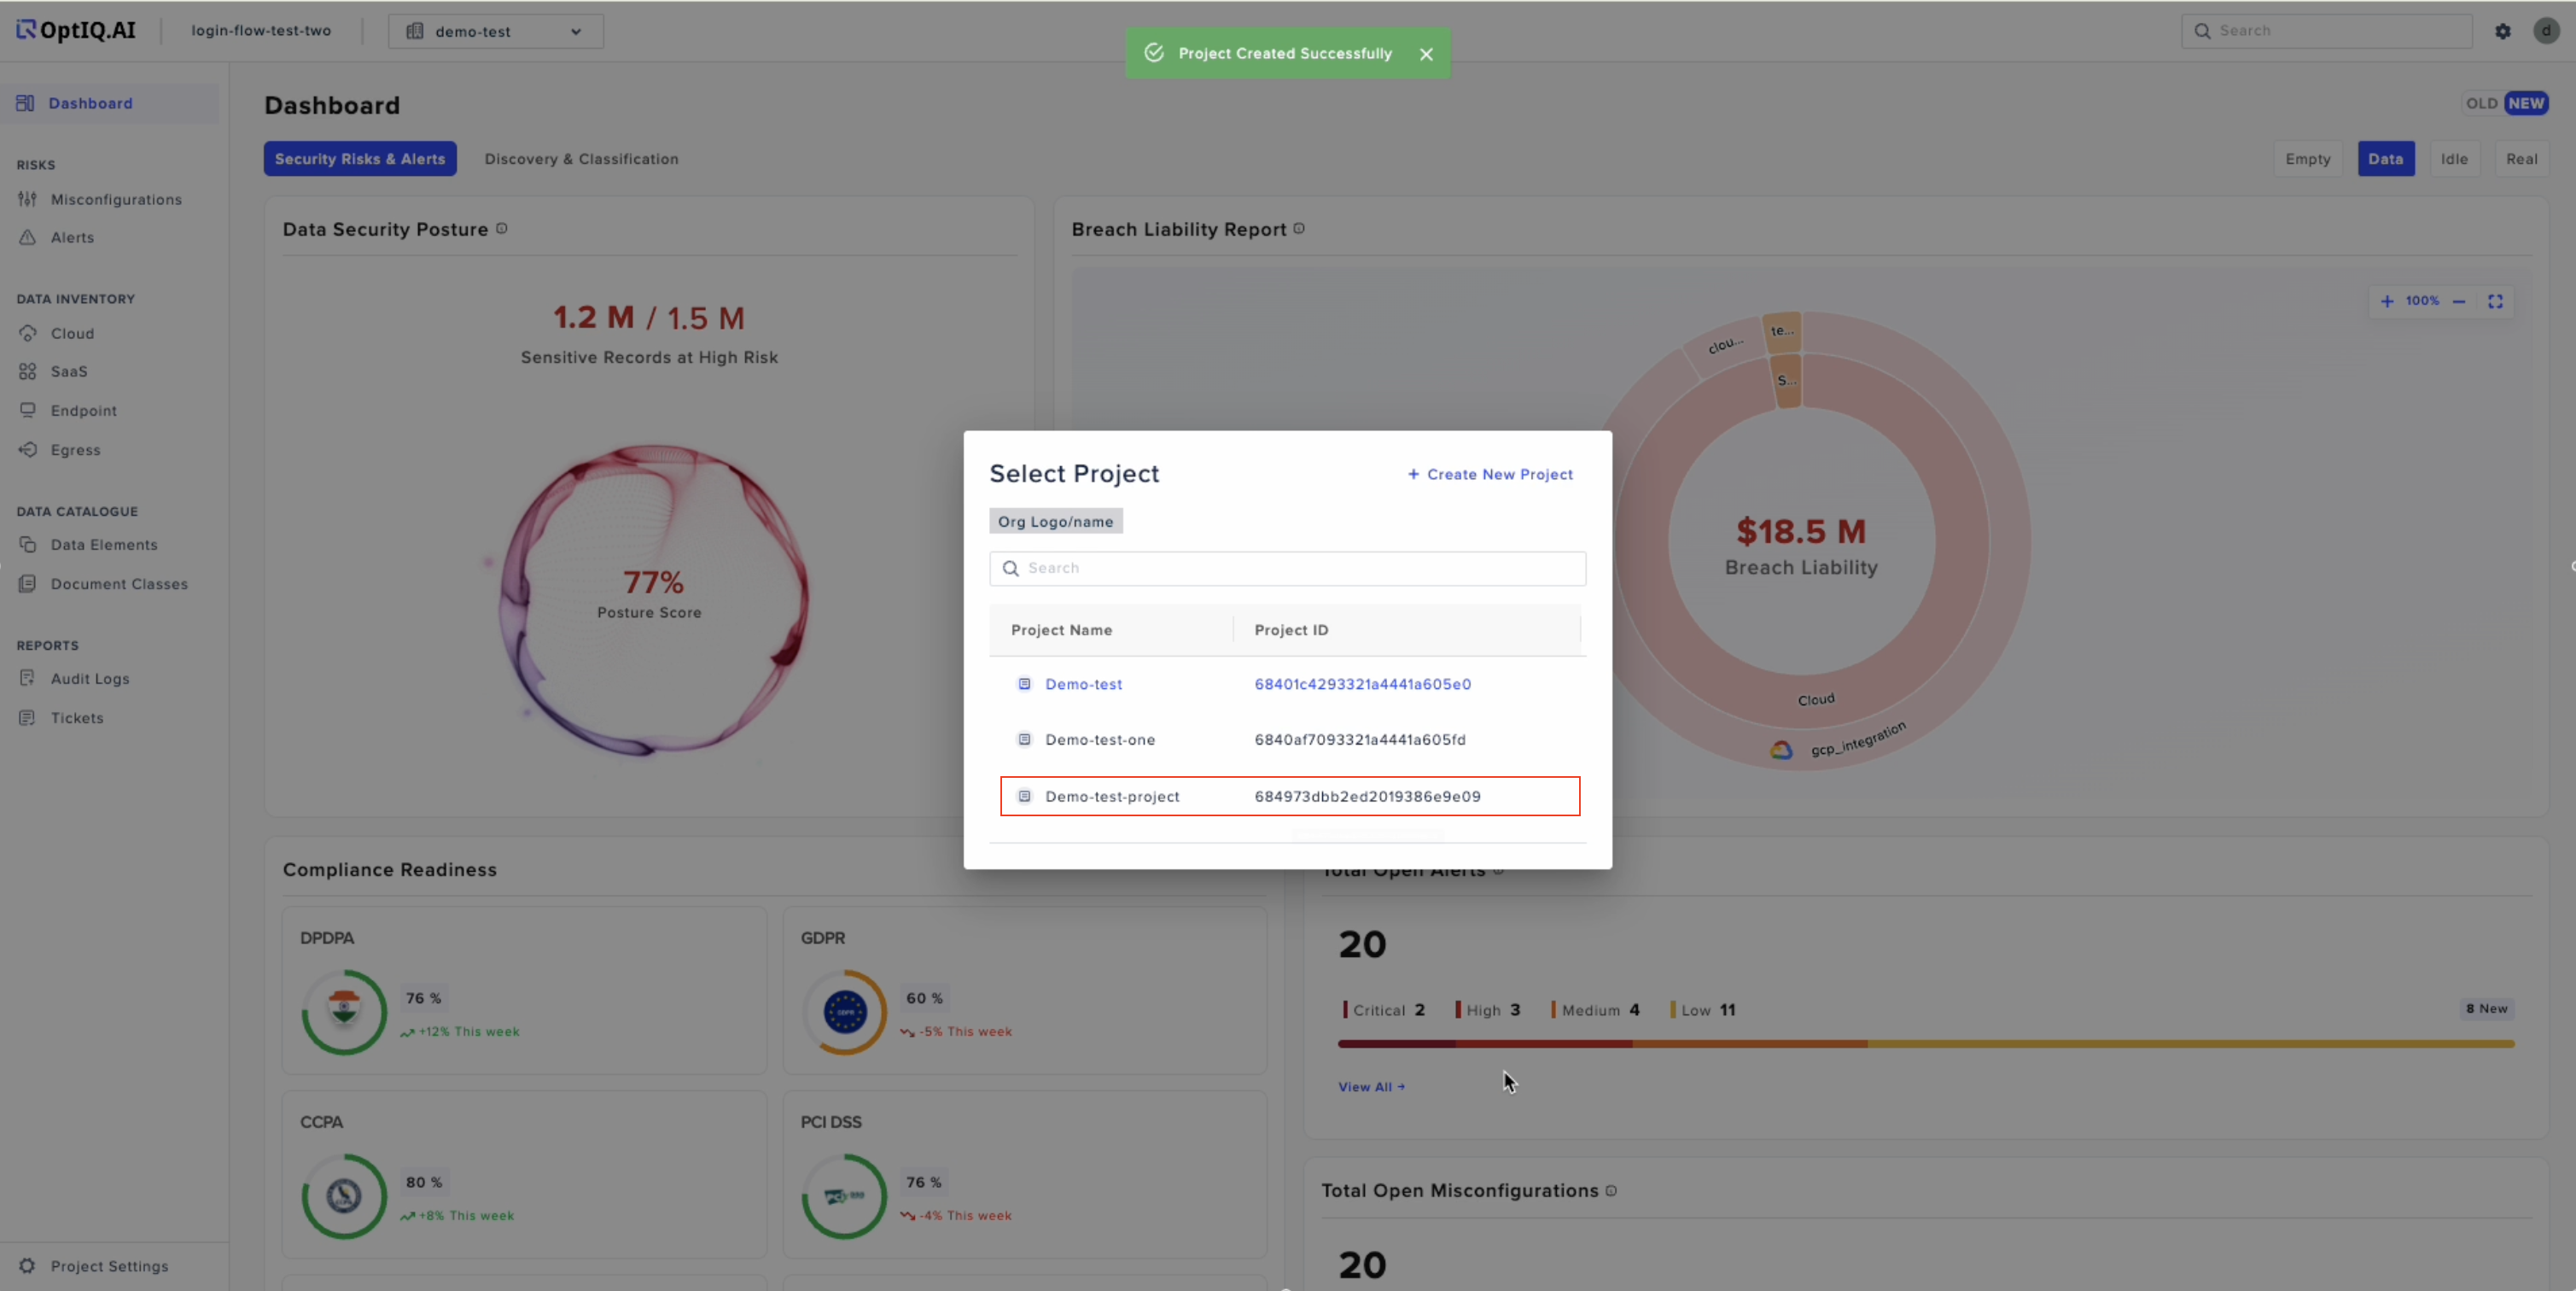
A popup window will appear. Click on the "Create New Project" button to proceed with project creation.
Step 4: Enter Project Details
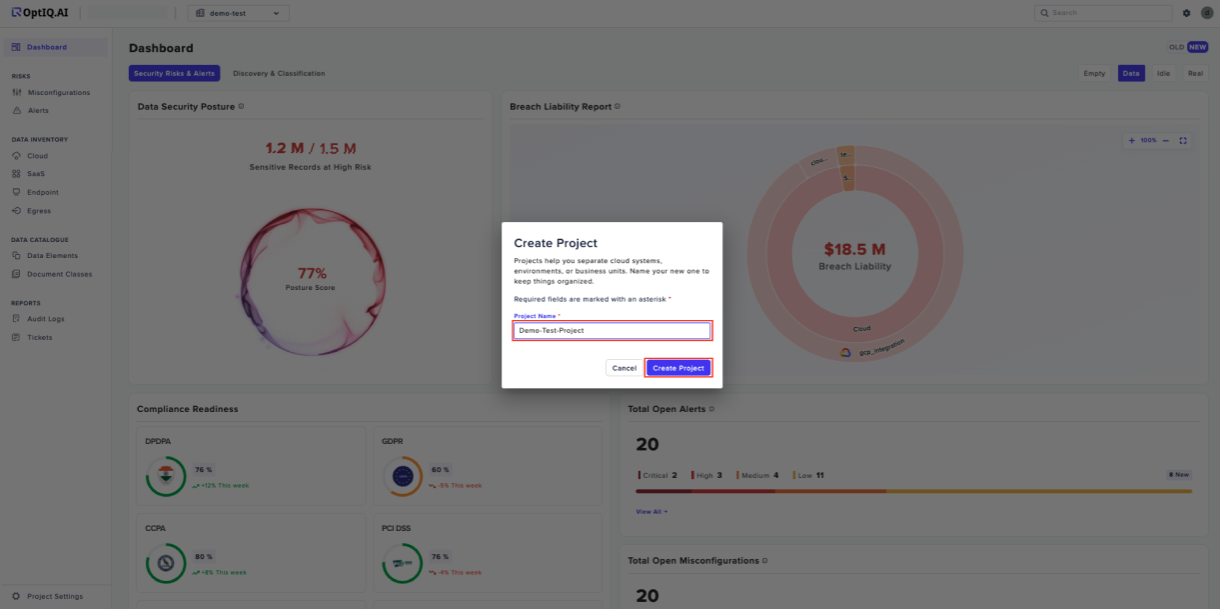
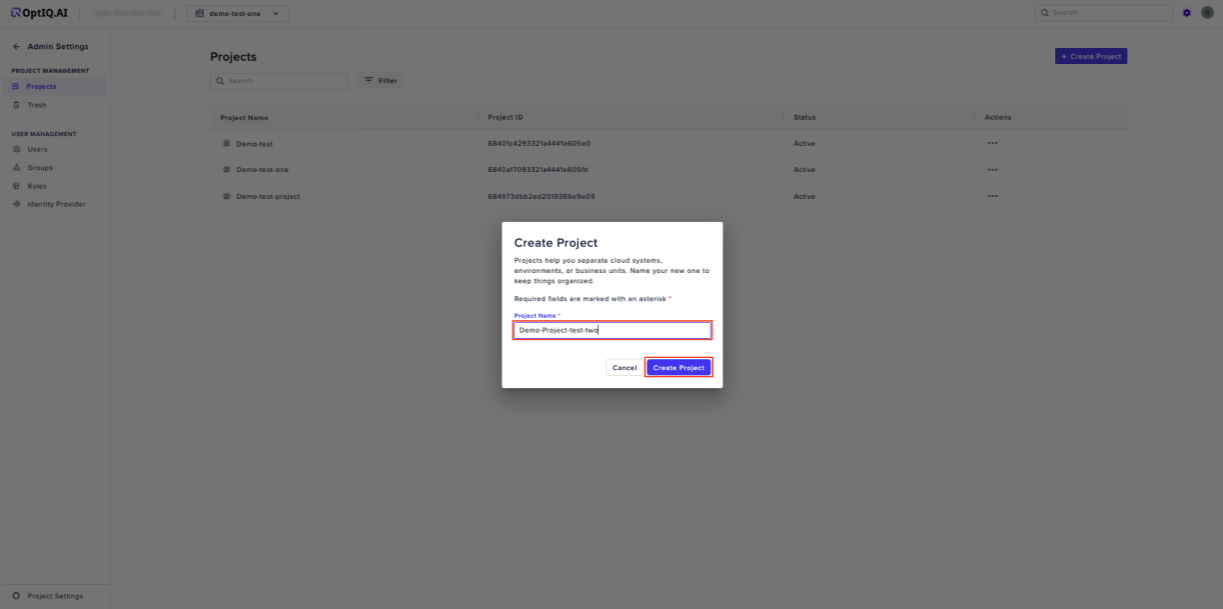
In the subsequent popup window, input the name of your new project. Once completed, click the "Create Project" button to finalize the process.
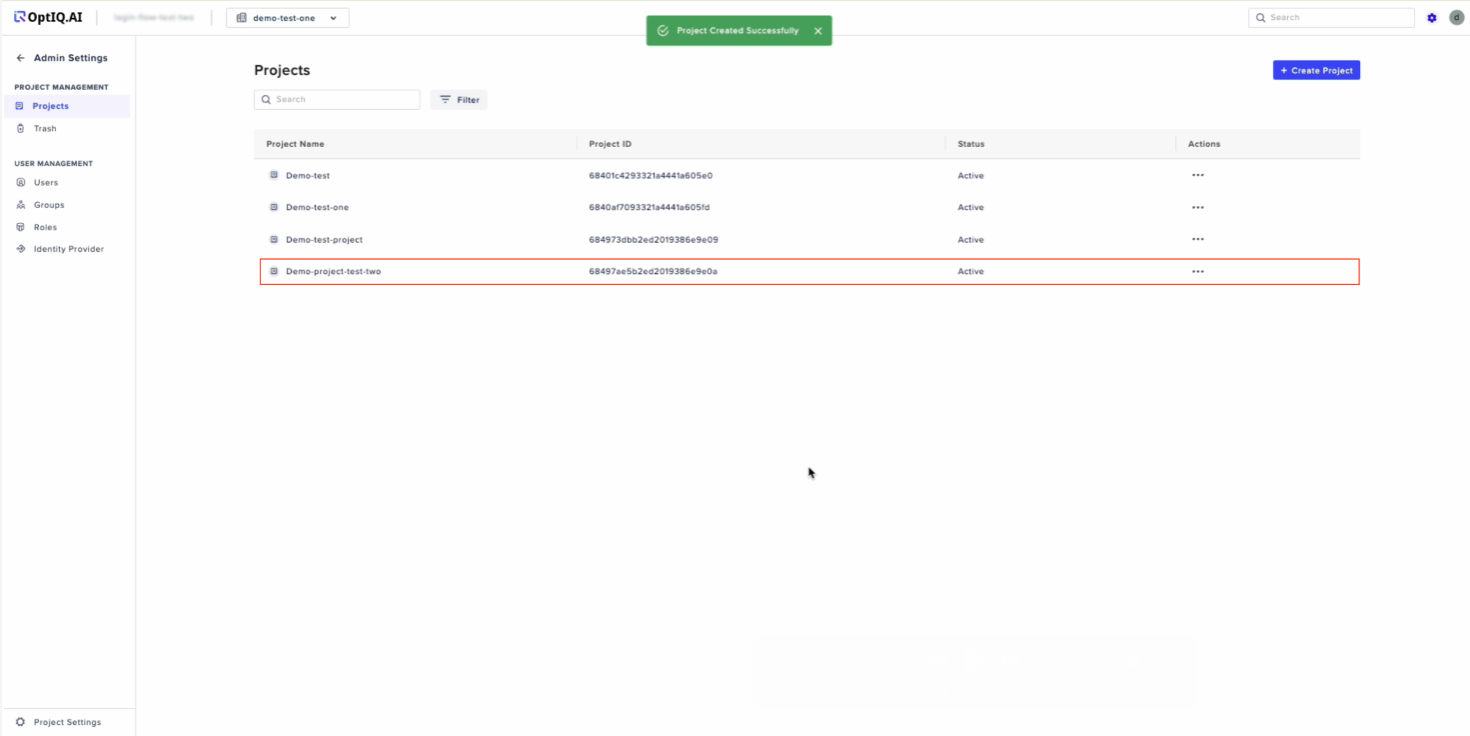
Upon successfully creating the project, a confirmation message stating "Project Created Successfully" will appear.
Step 5: Verify Project Creation
The newly created project will now be listed under your organization's projects. You can confirm its presence by viewing the updated project list.
Step 6: Navigate to a Specific Project
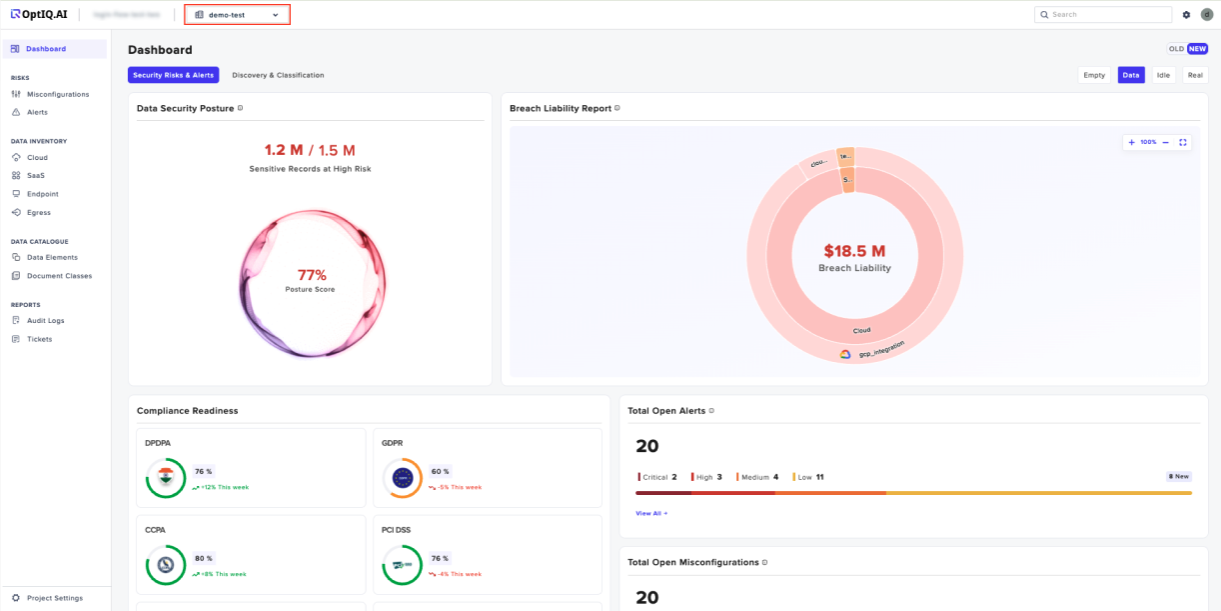
To access a specific project, click on the dropdown menu as shown in the image below. A list of all projects within your organization will appear. Select the desired project to continue with further configurations or integrations.
Alternative Method to Create a Project
Step 1:
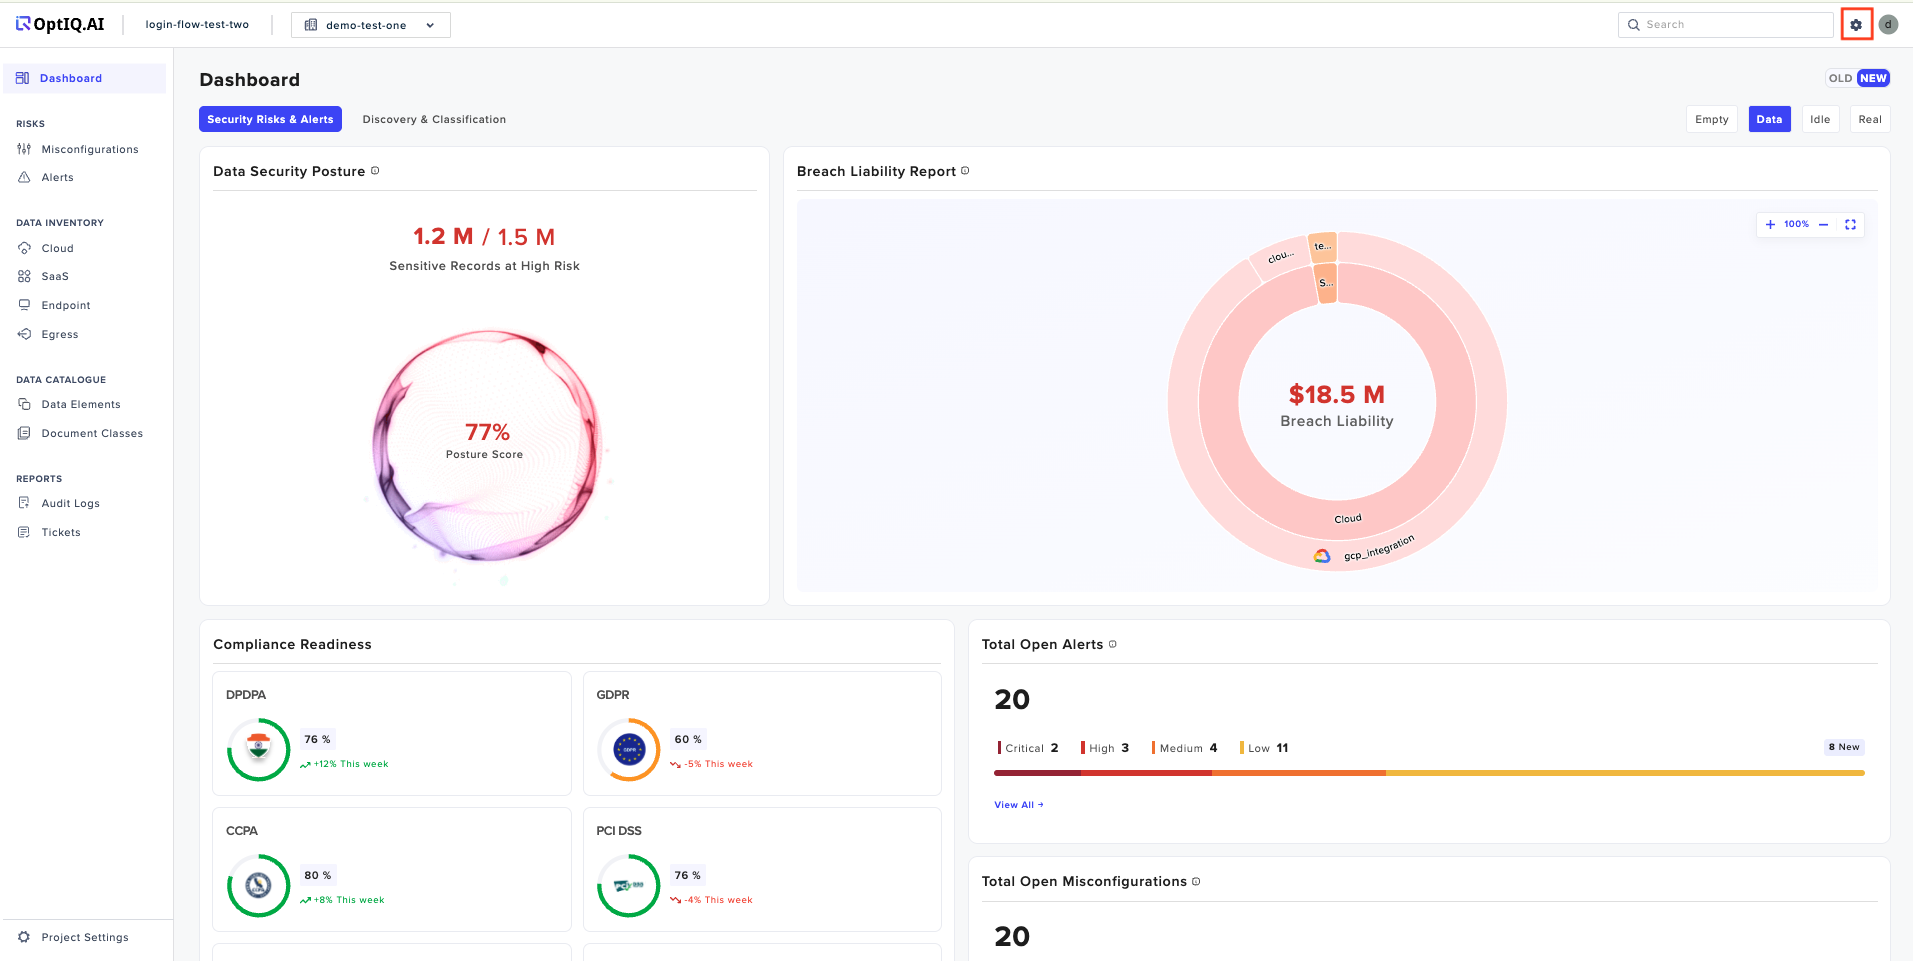
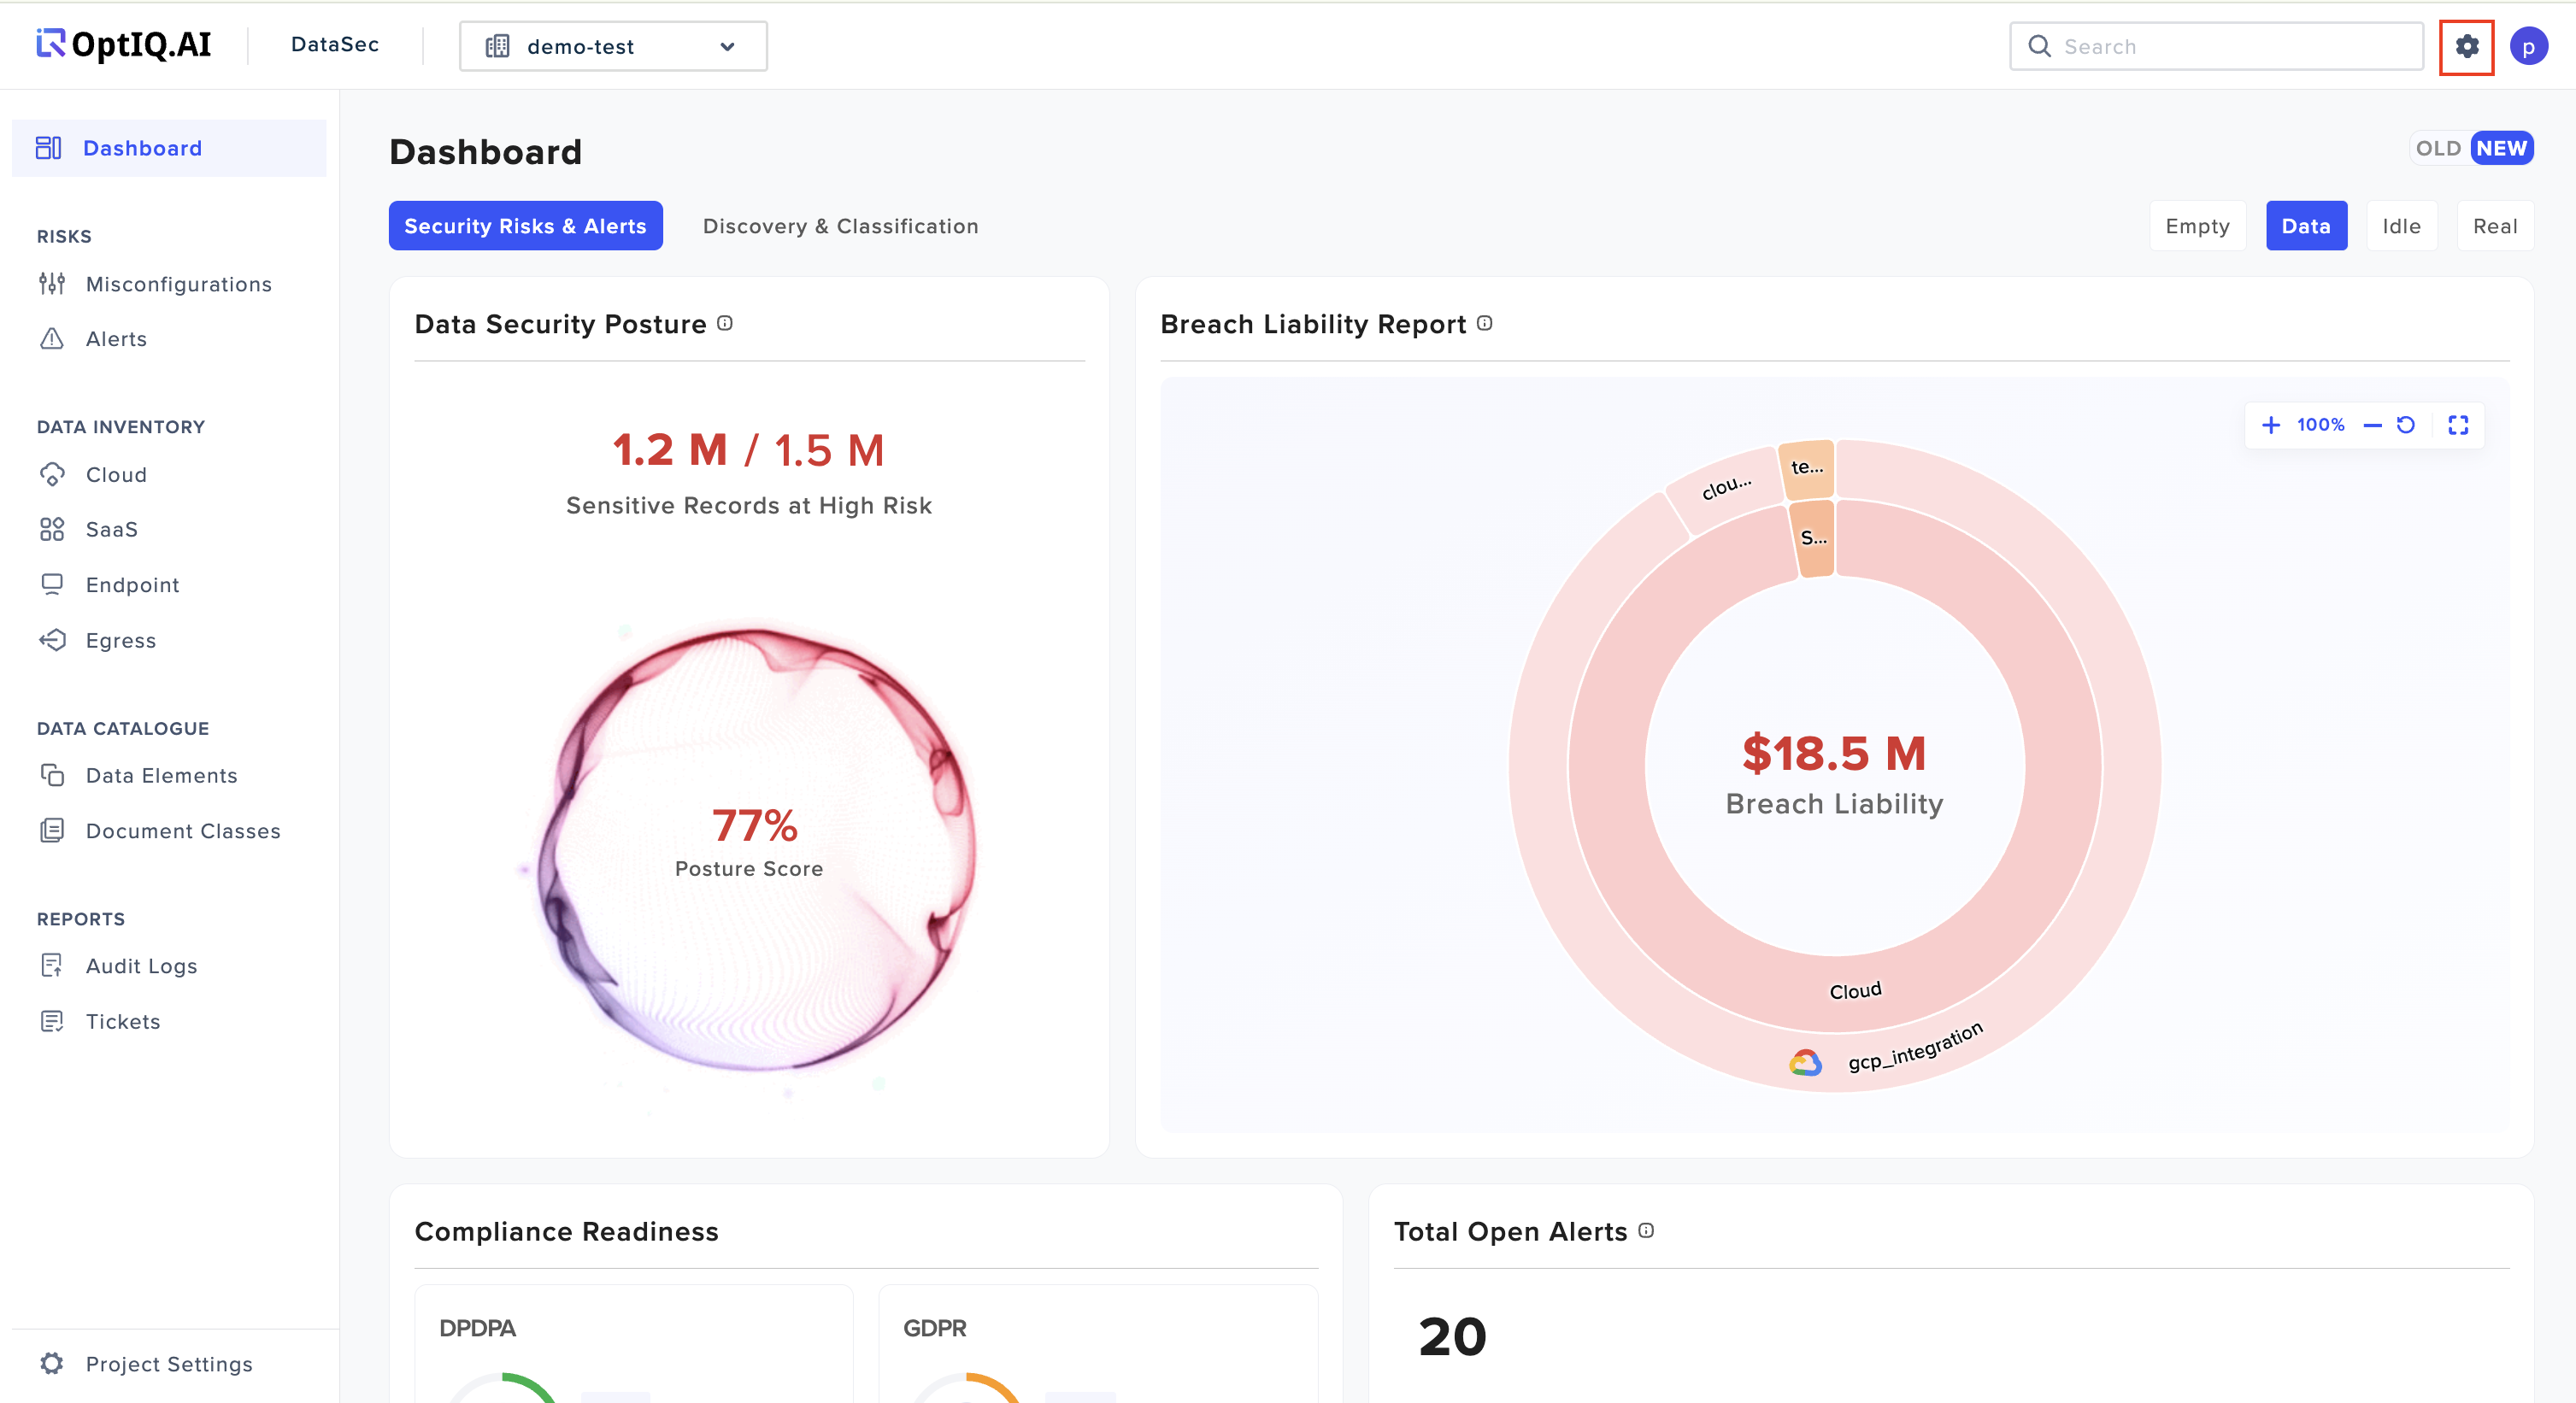
Click on the "Project Settings" option located in the top-right corner of your screen.
Step 2:
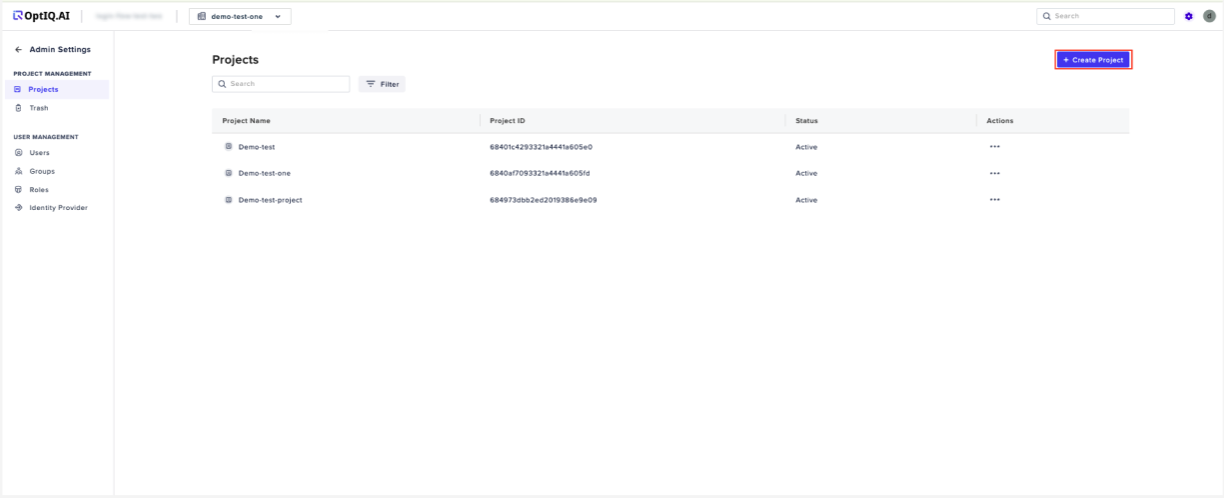
Once you are logged in, click on the "Create Project" button as shown in the image below.
Step 3:
A pop-up will appear, prompting you to enter a project name. After entering the name, click on the "Create Project" button to finalize the creation process.
The newly created project will now be listed under your organization's projects. You can confirm its presence by viewing the updated project list.
User Creation Guide: Organizational and Project-Level Users
This guide will walk you through the process of creating new users at both the Organization and Project levels.
Organization-level users have access to all the projects within the organization. These users can manage and view resources across the entire organization.
Project-level users, on the other hand, have access only to the specific project they have been granted access to. They cannot access other projects within the organization.
Follow the steps below for an easy and straightforward user creation experience.
Step 1: Accessing User Management Settings
Navigate to Settings:
To begin, click on the Settings button located at the top right corner of your dashboard.
Step 2: Access the User Management Section
Select User Management:
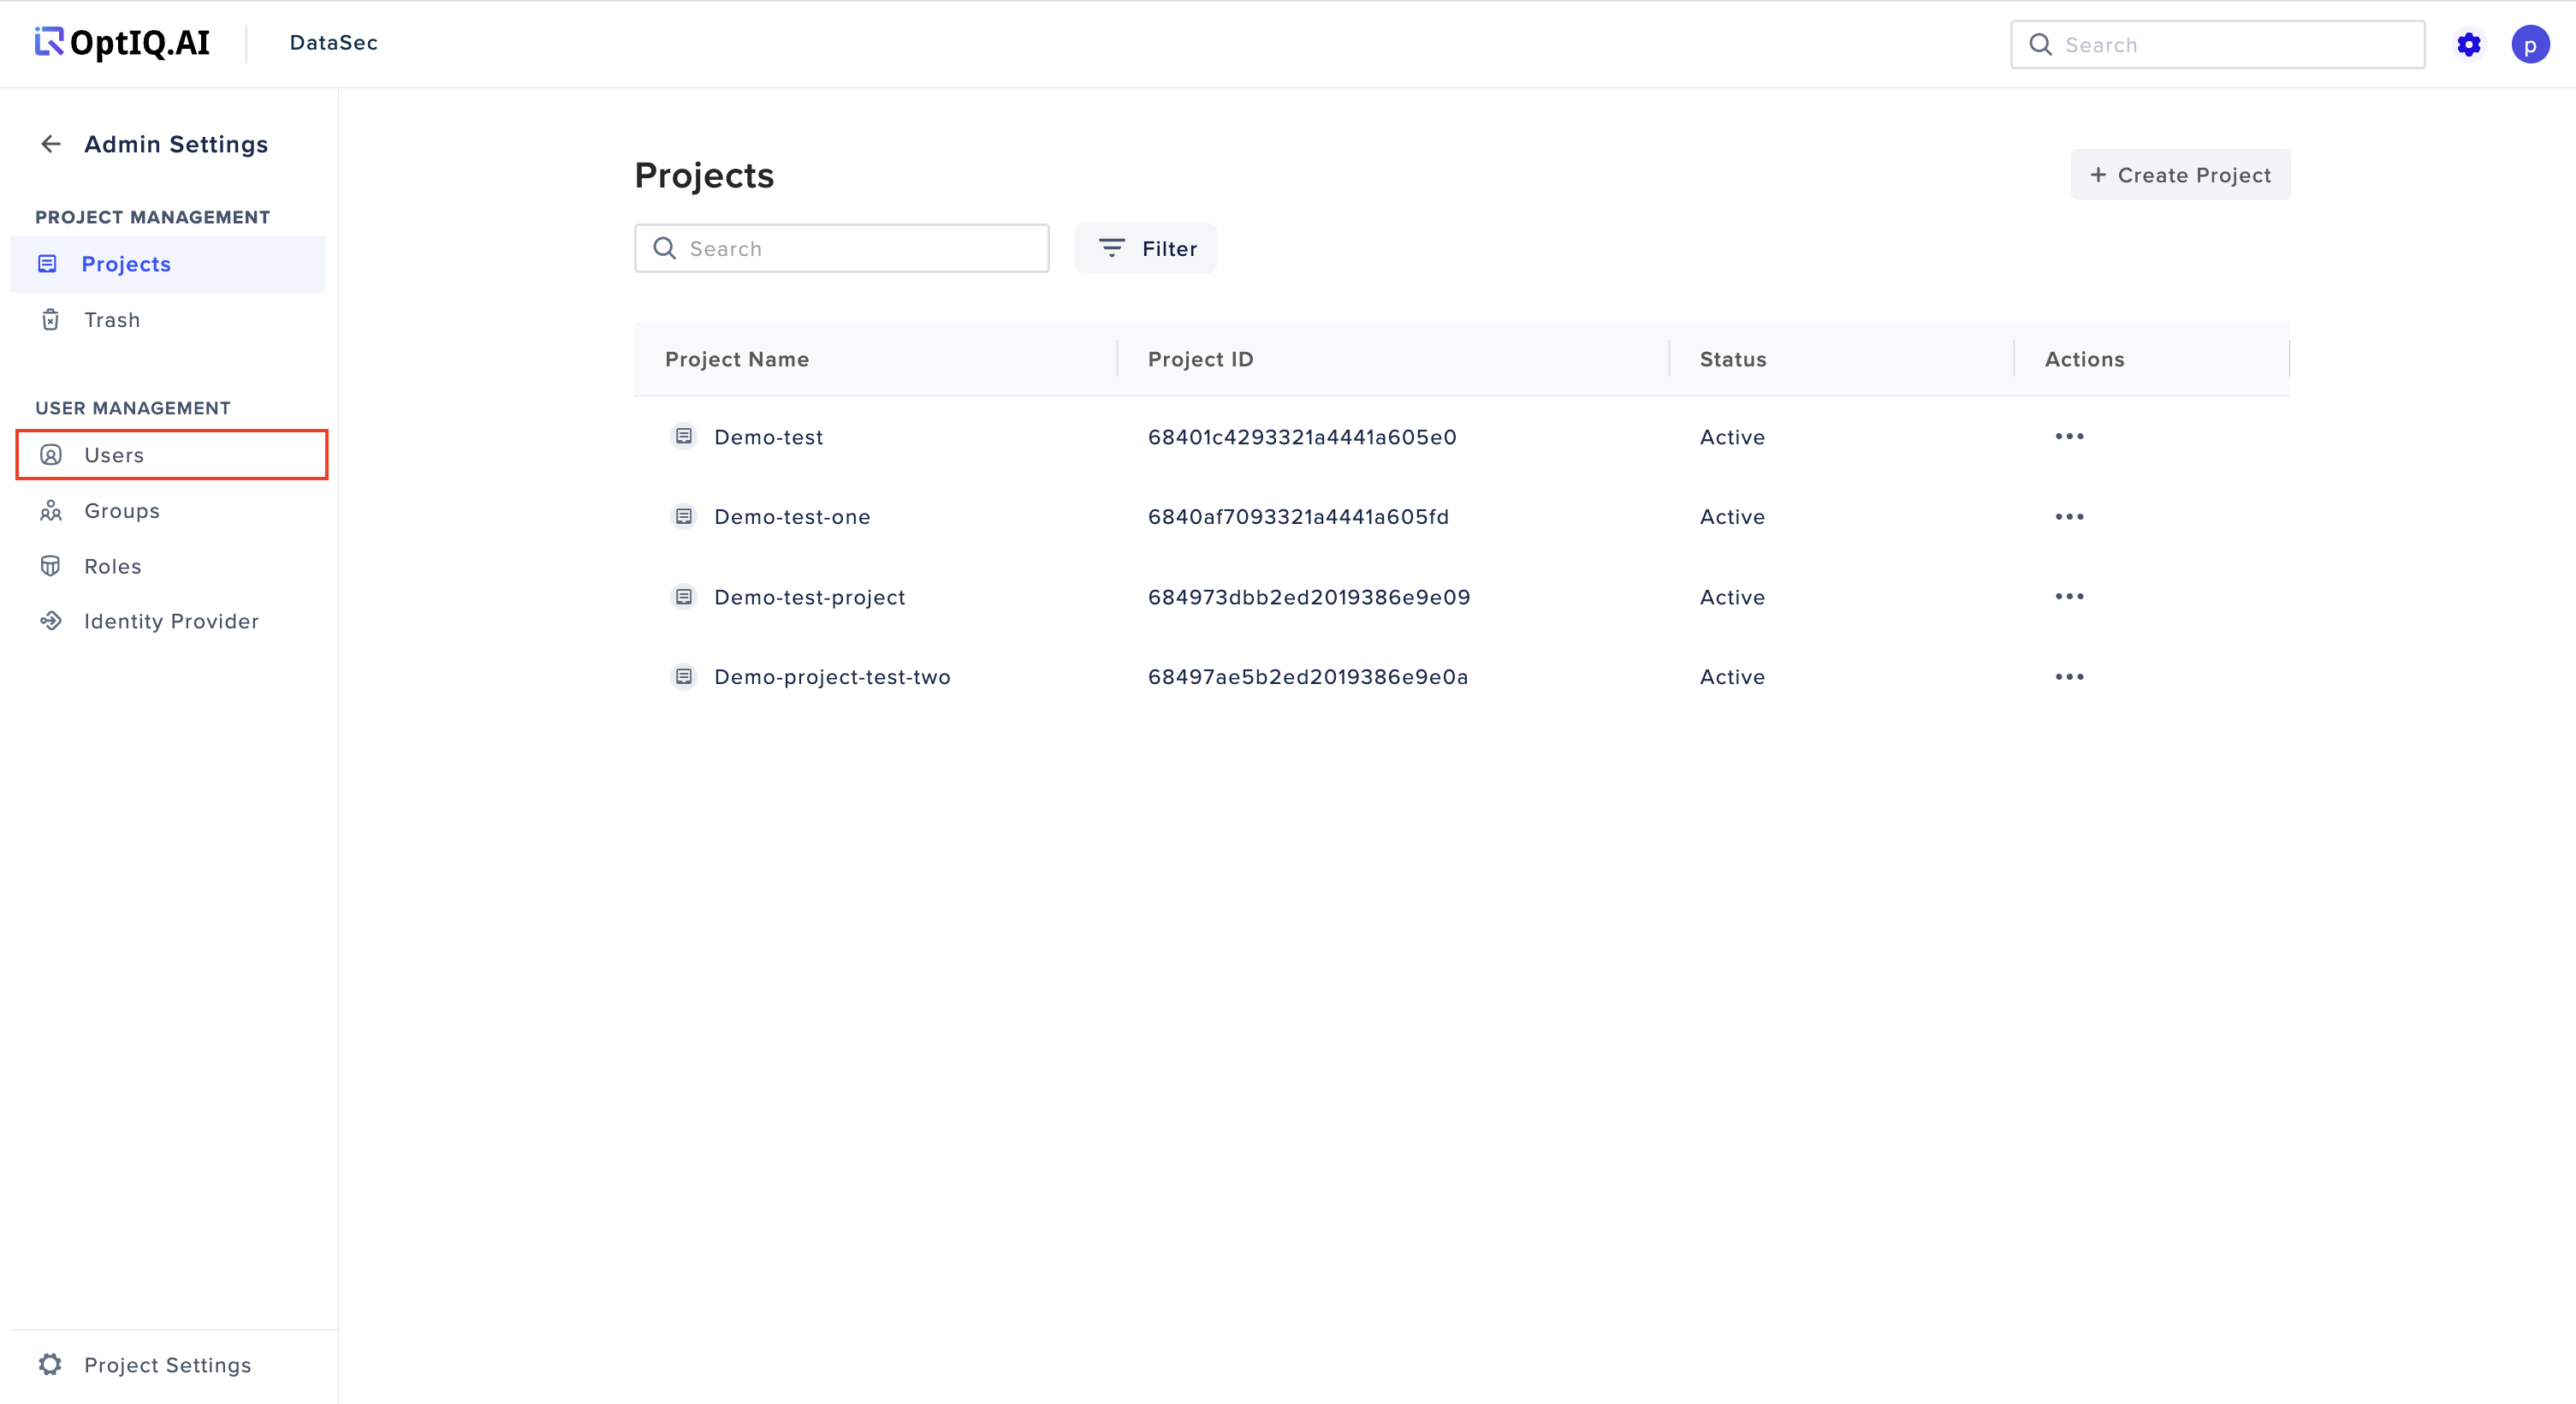
Once in the Settings menu, under User Management section select the Users tab to view the list of current users within your organization.
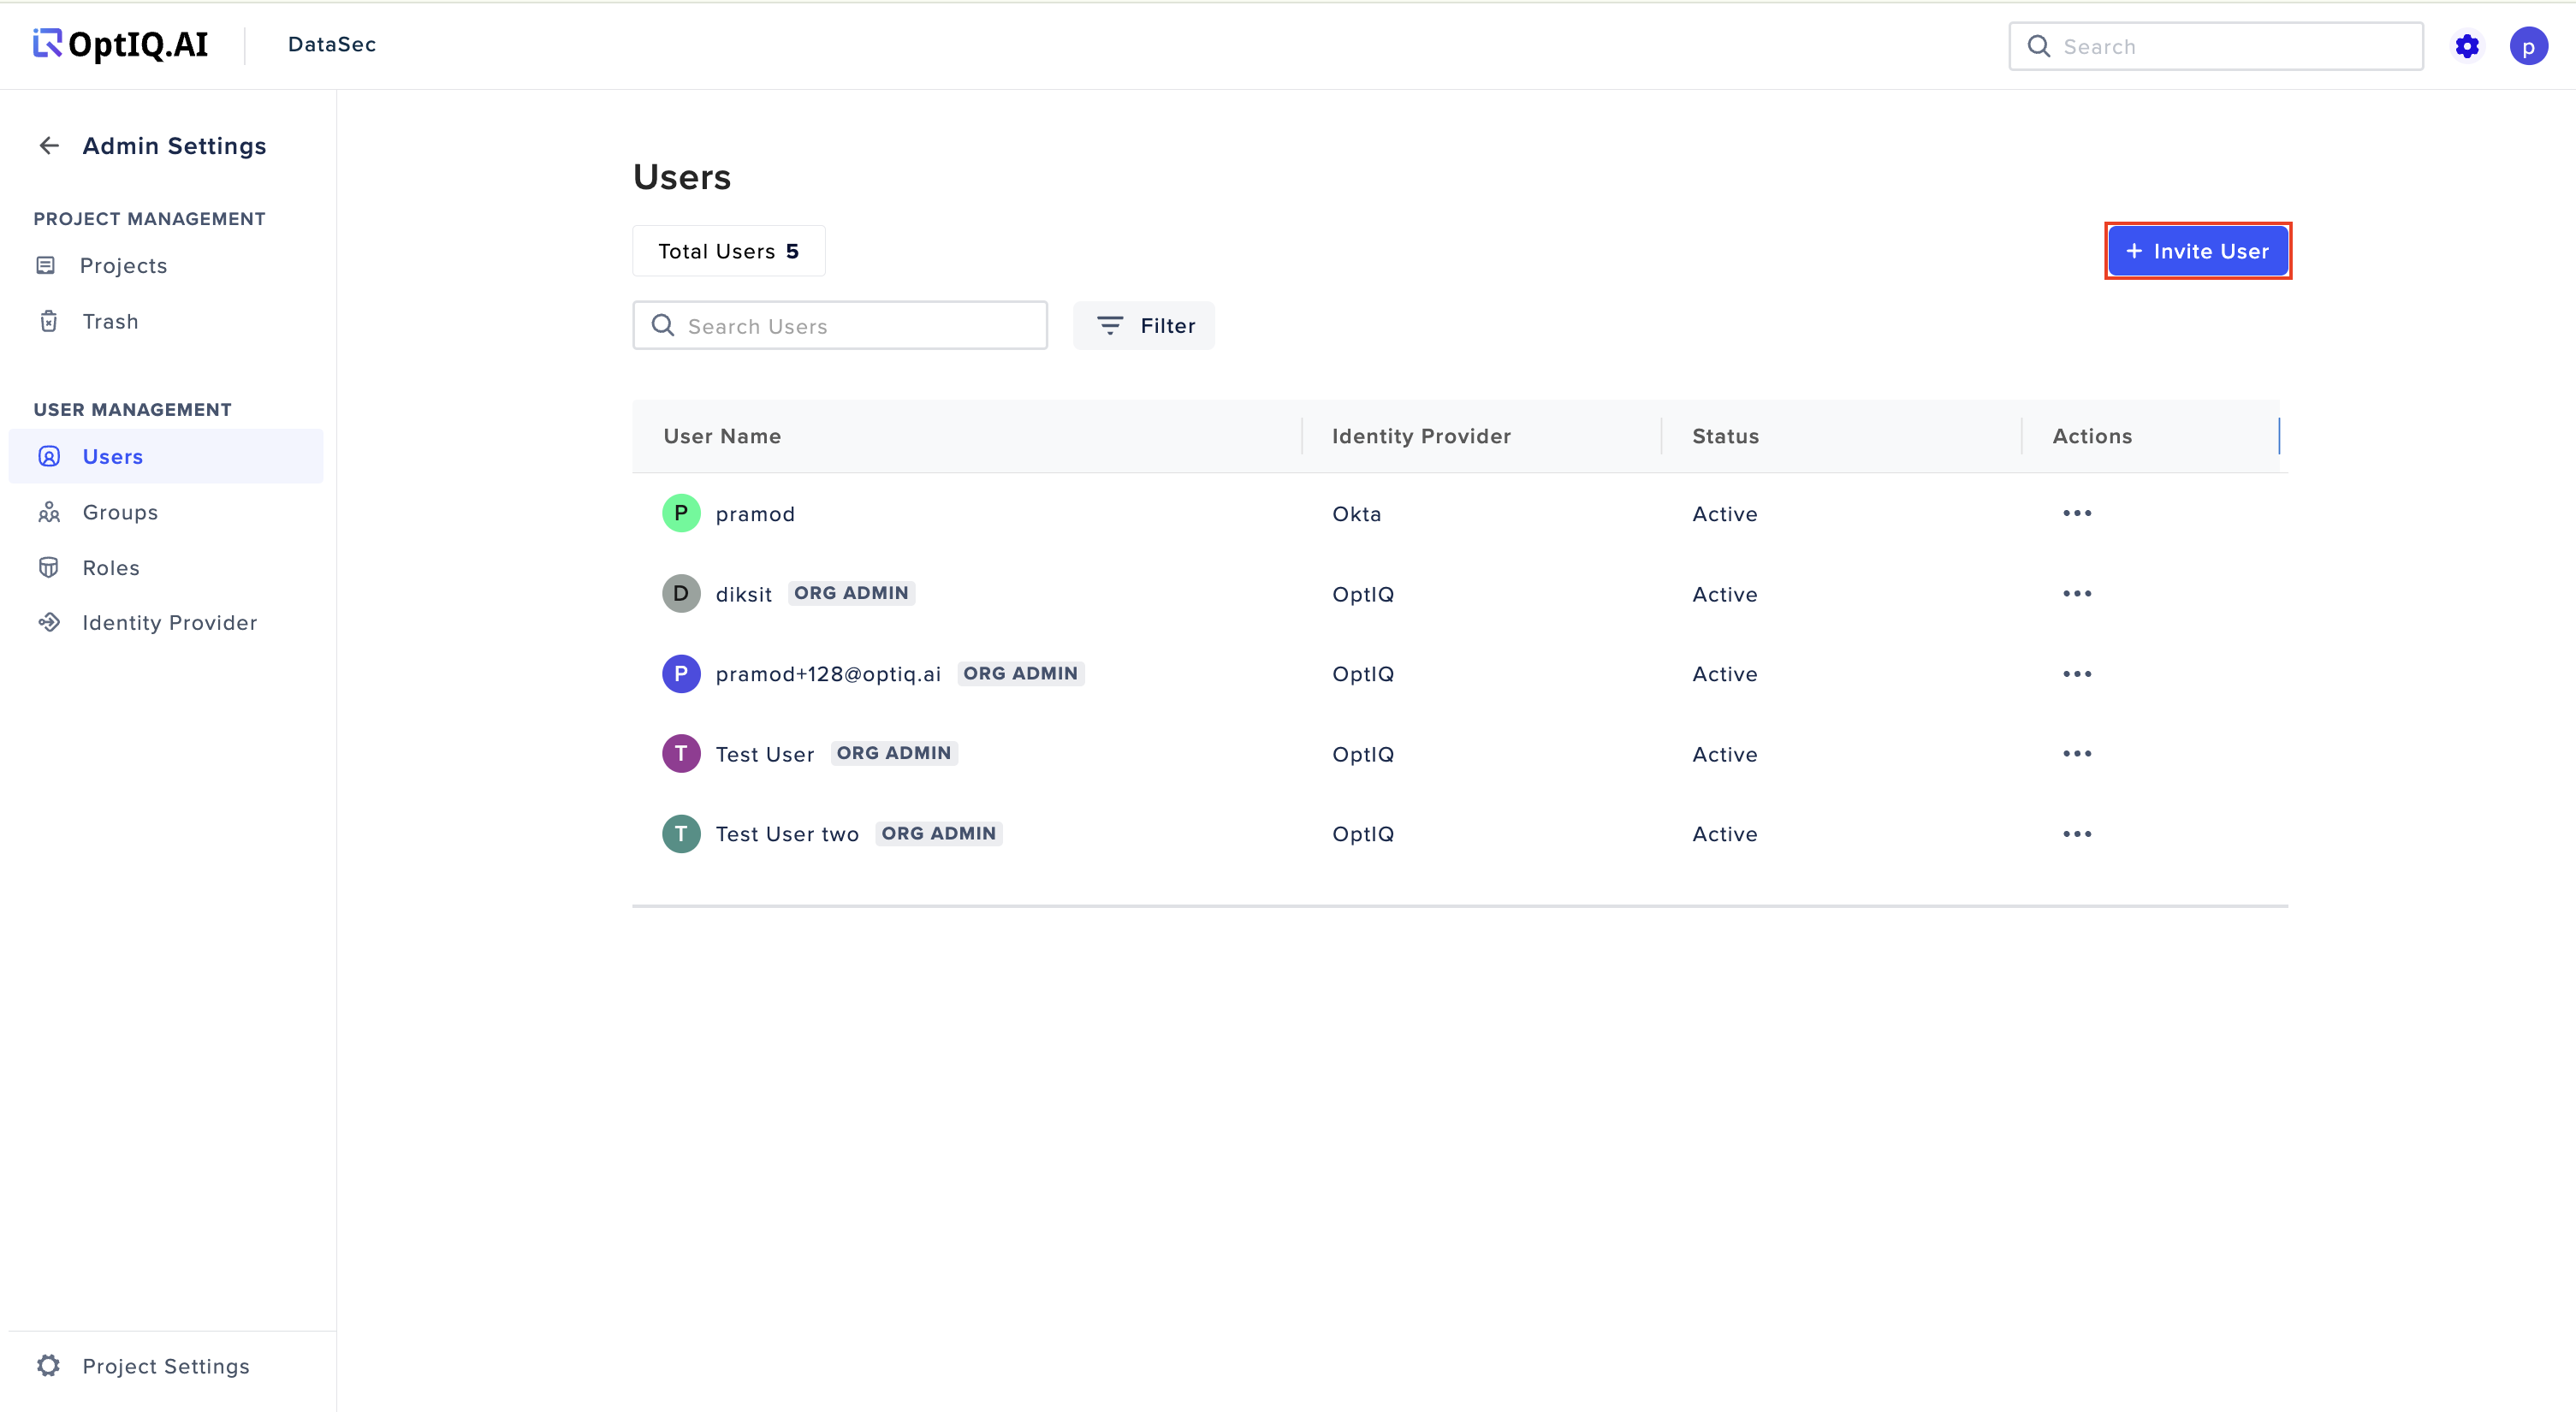
Step 3: Invite a New User
Click on 'Invite User':
To add a new user, click the “Invite User” button. This will trigger a side drawer where you can input the details for the new user.
Step 4: Enter User Details
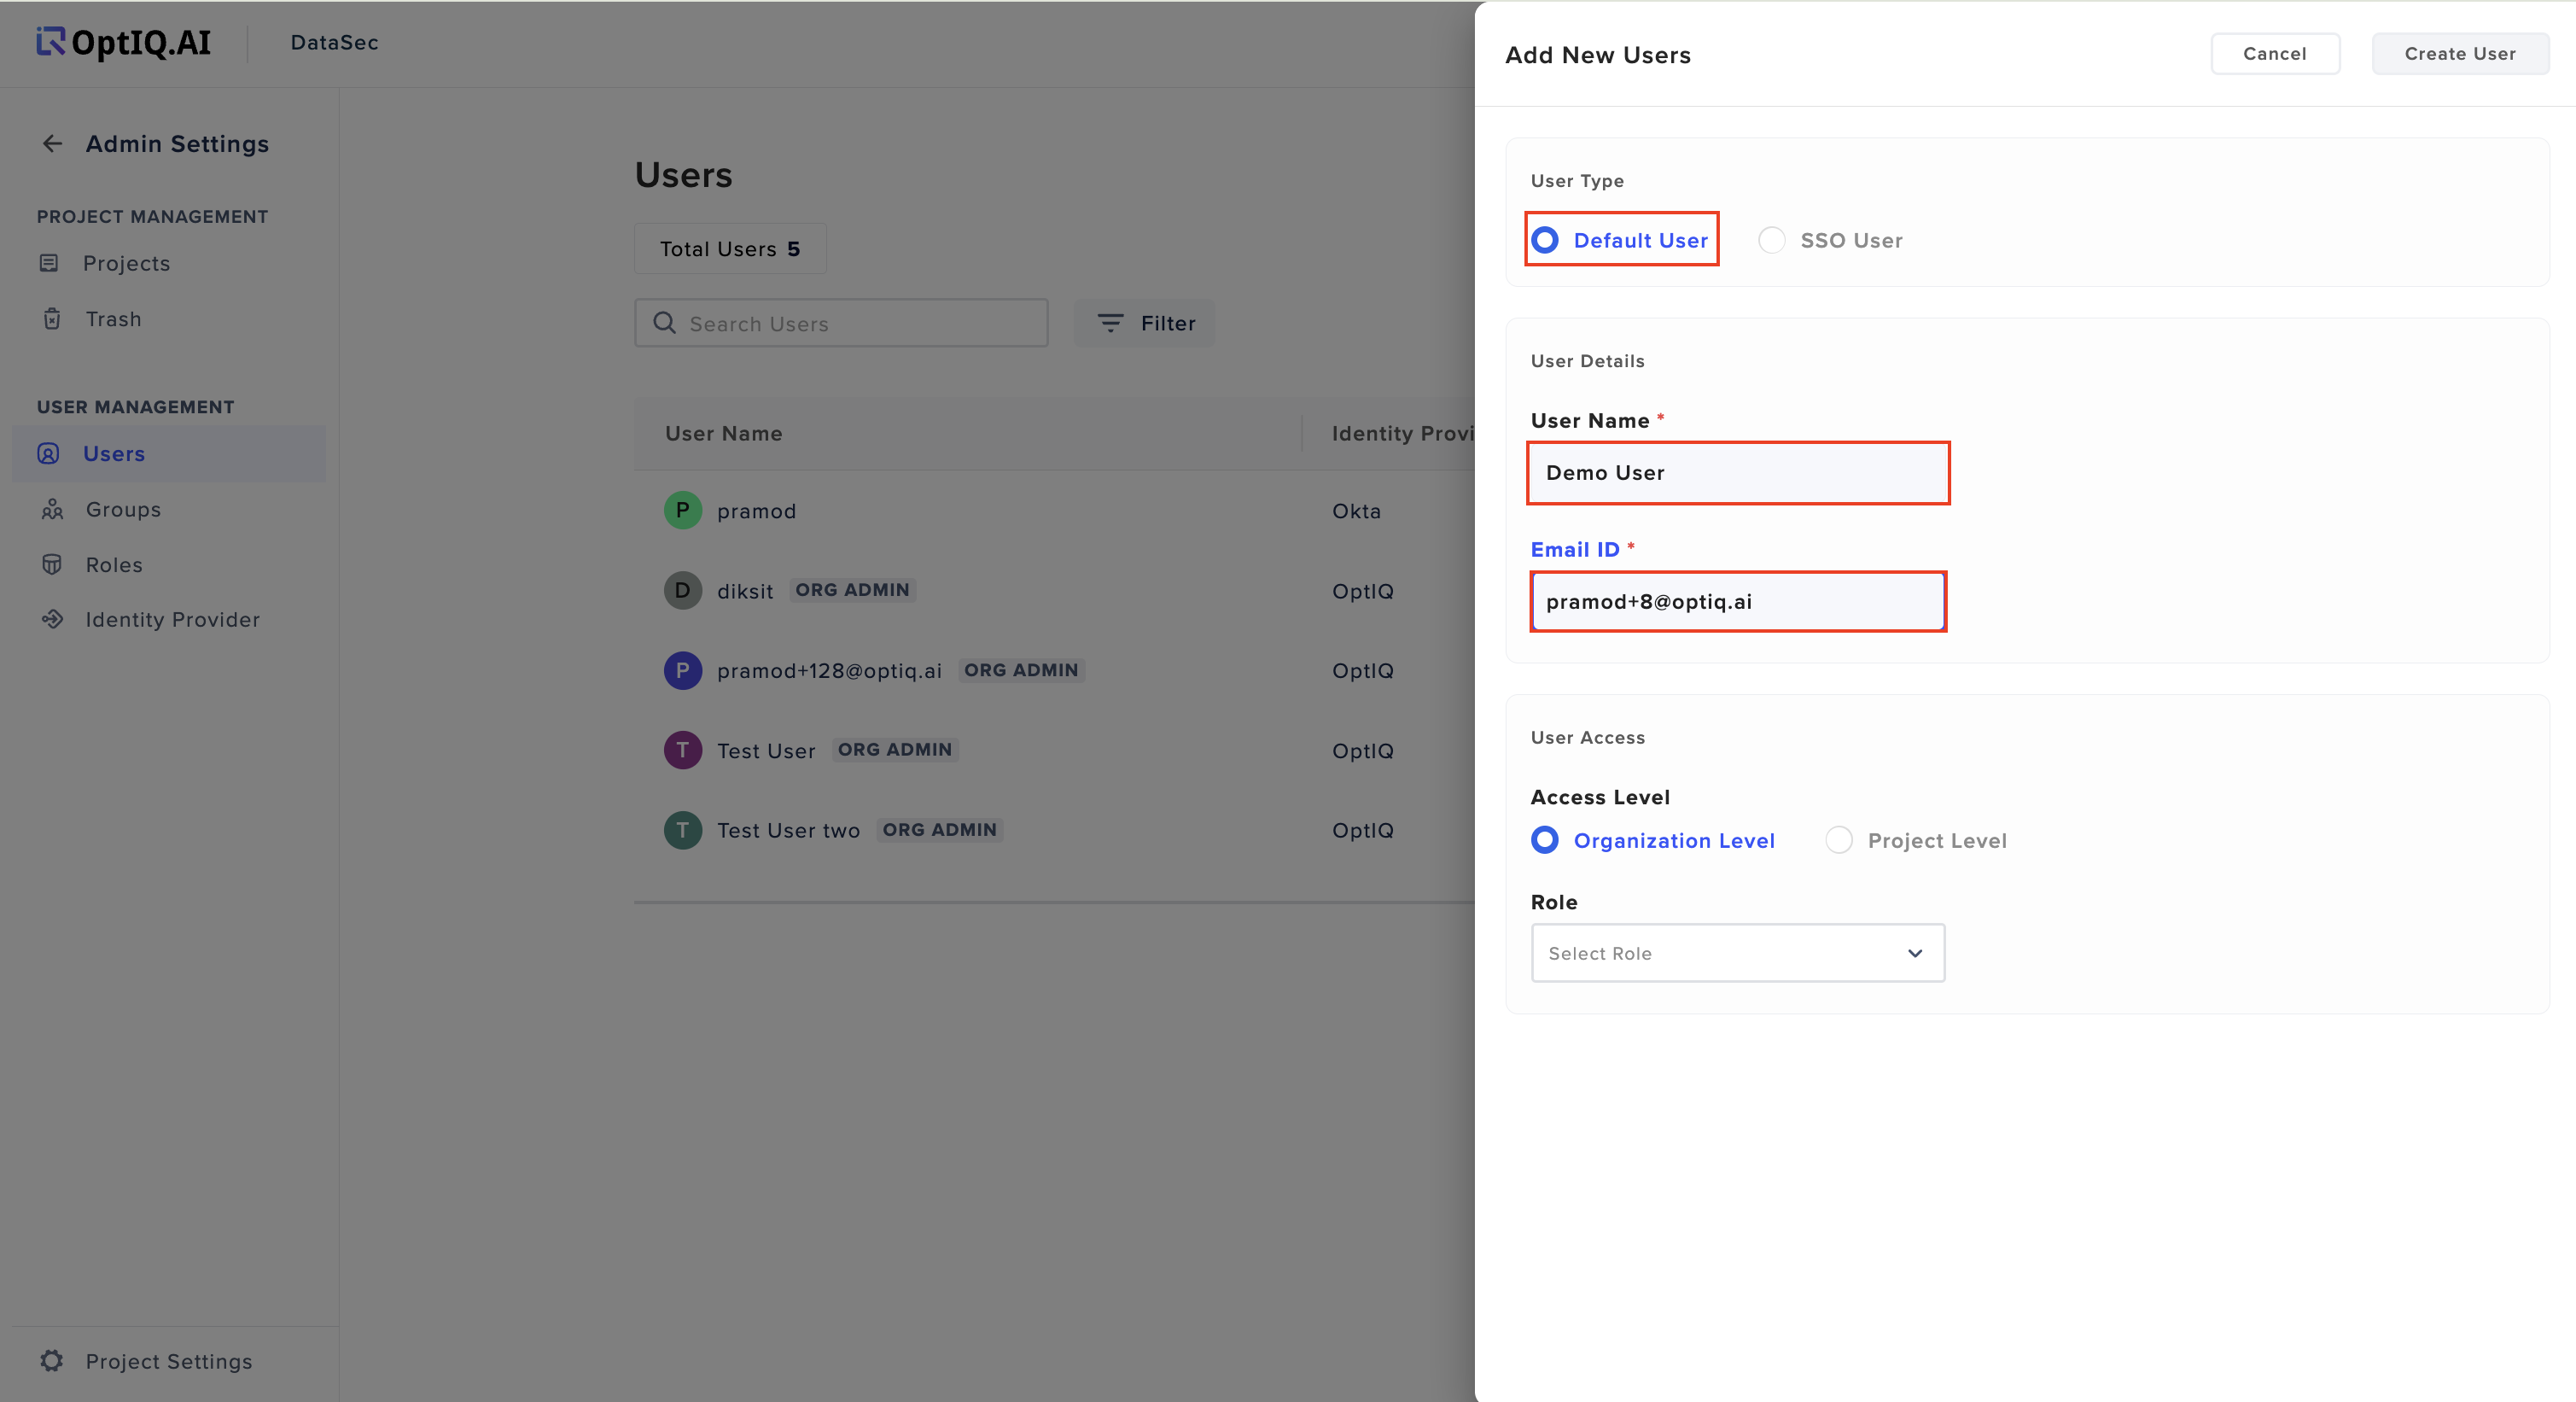
1. Choose User Type and Provide Information:
In the side drawer, you will need to select the appropriate user type:
Default User: If you are adding a default user, select the Default User radio button. Then, enter the Username and Email ID for the new user.
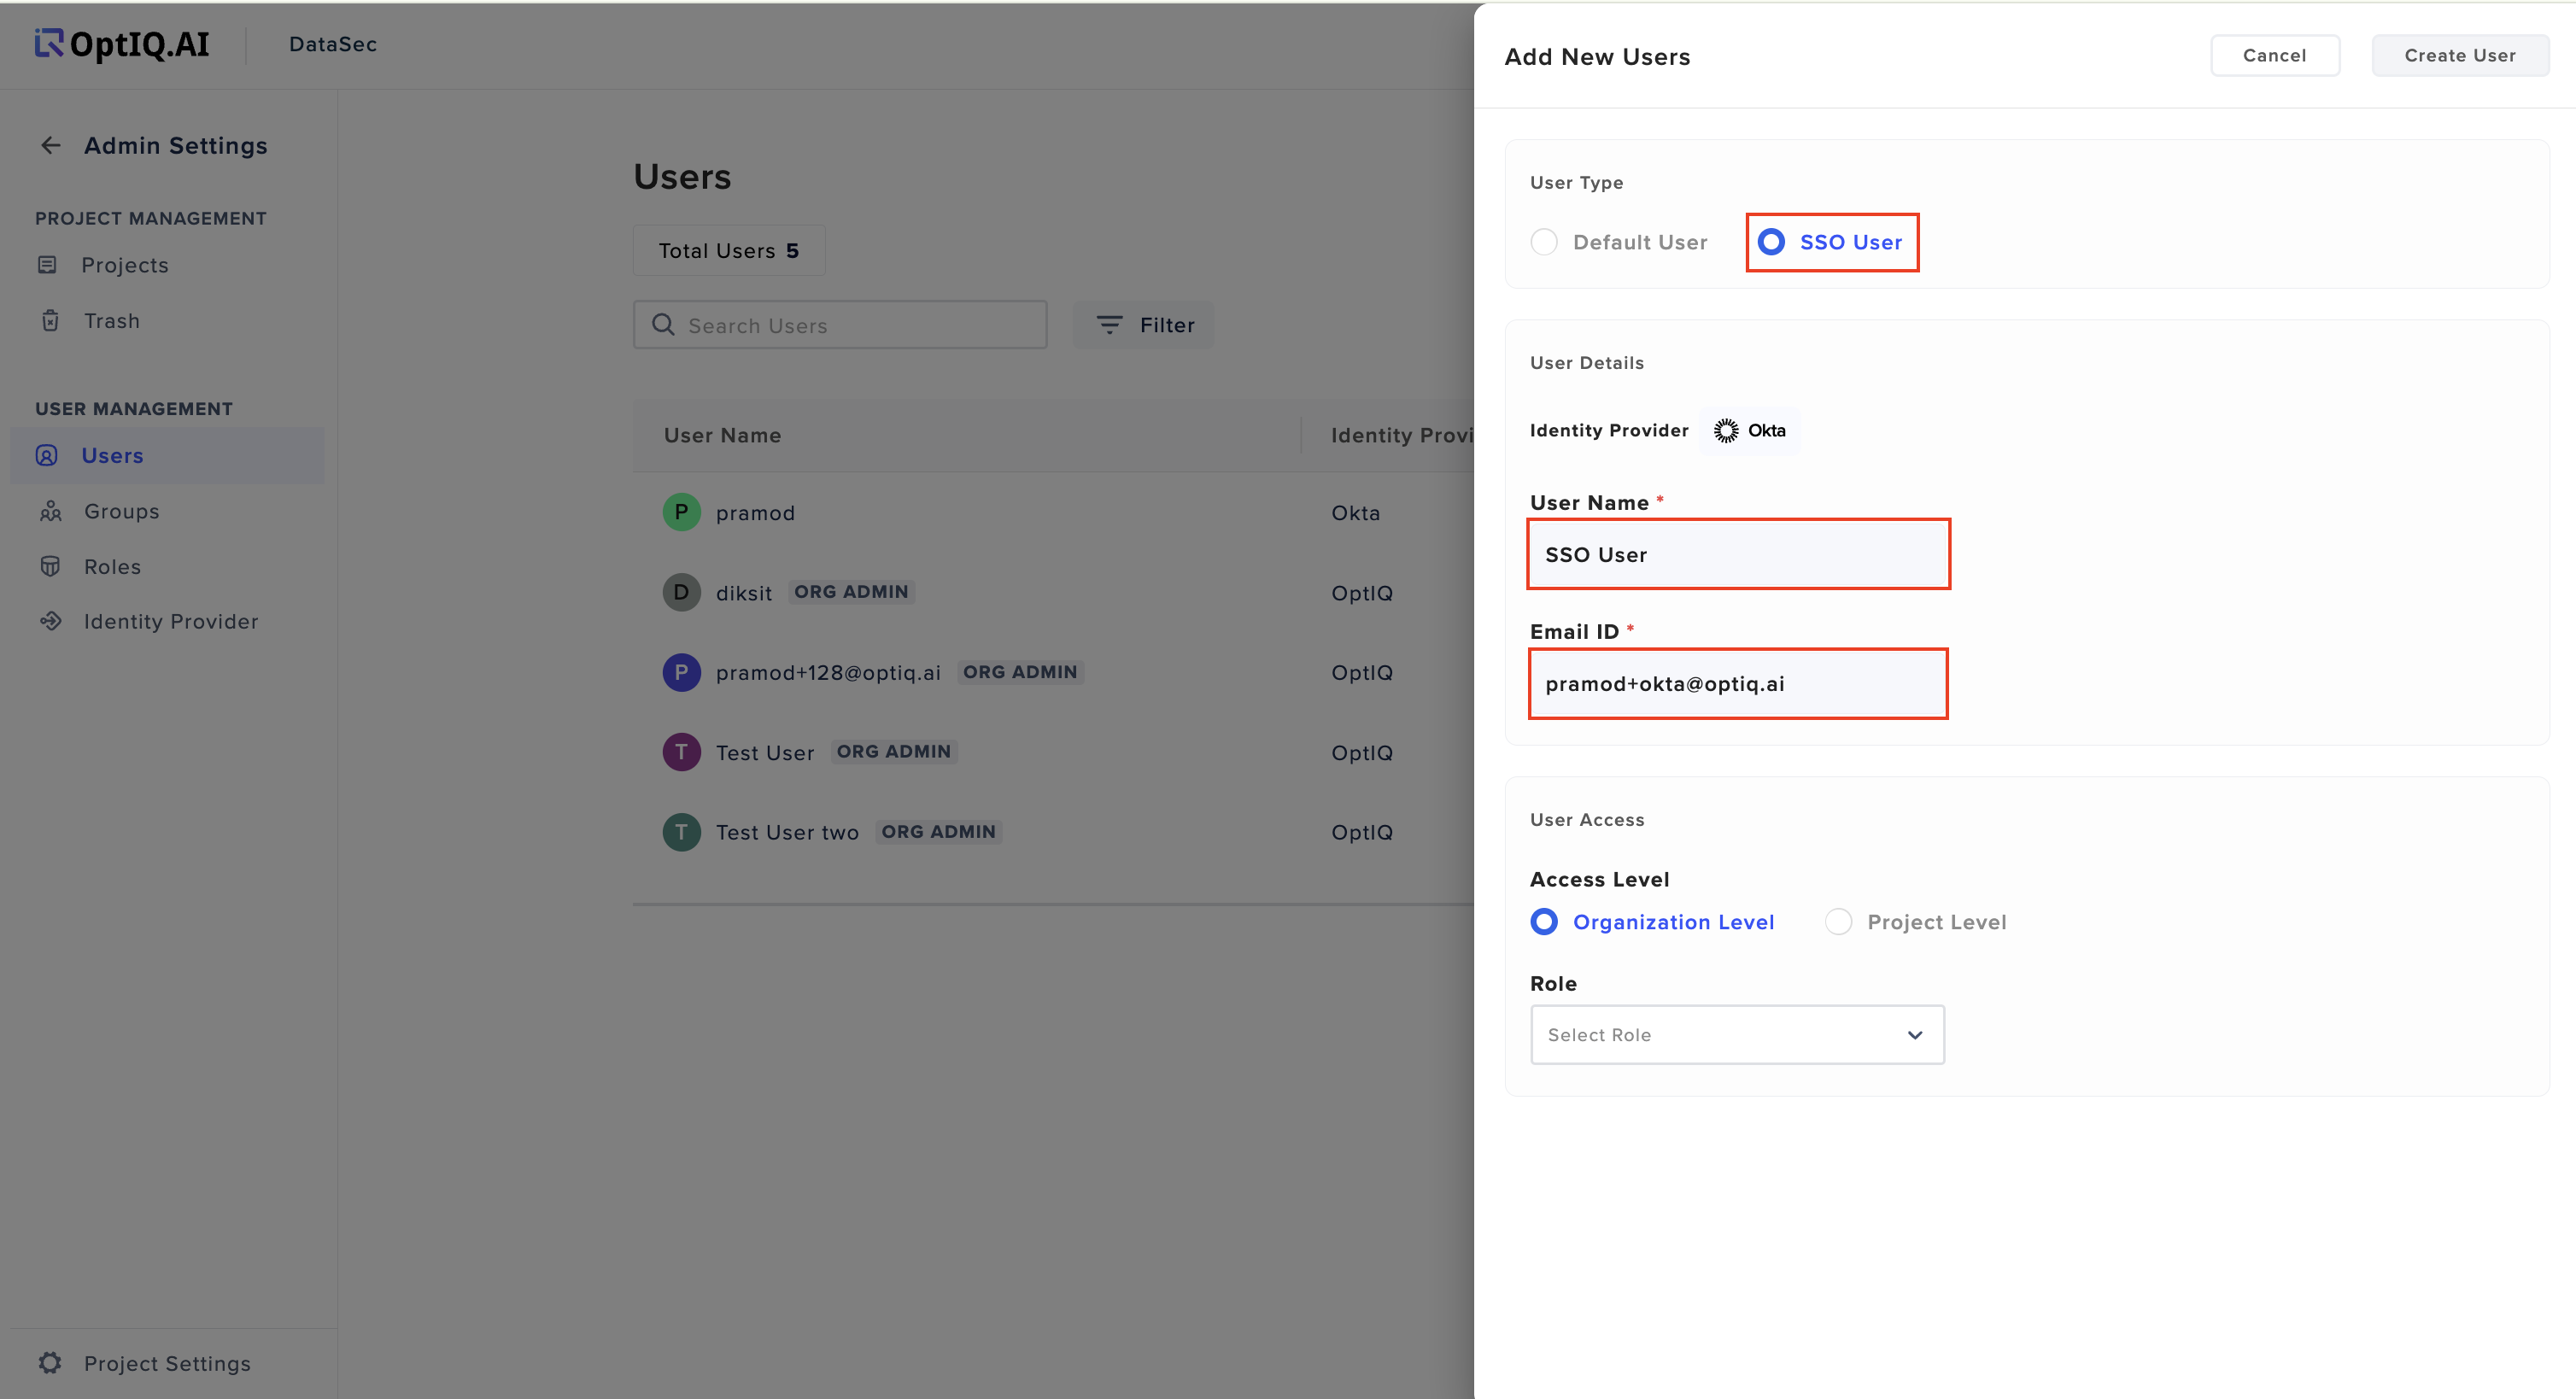
SSO User: If the user will be authenticated via a Single Sign-On (SSO) system, select the SSO User radio button. Enter the Username and Email ID corresponding to the specific identity provider linked to your organization.
Step 5: Select User Access Level
Choose the Access Level:
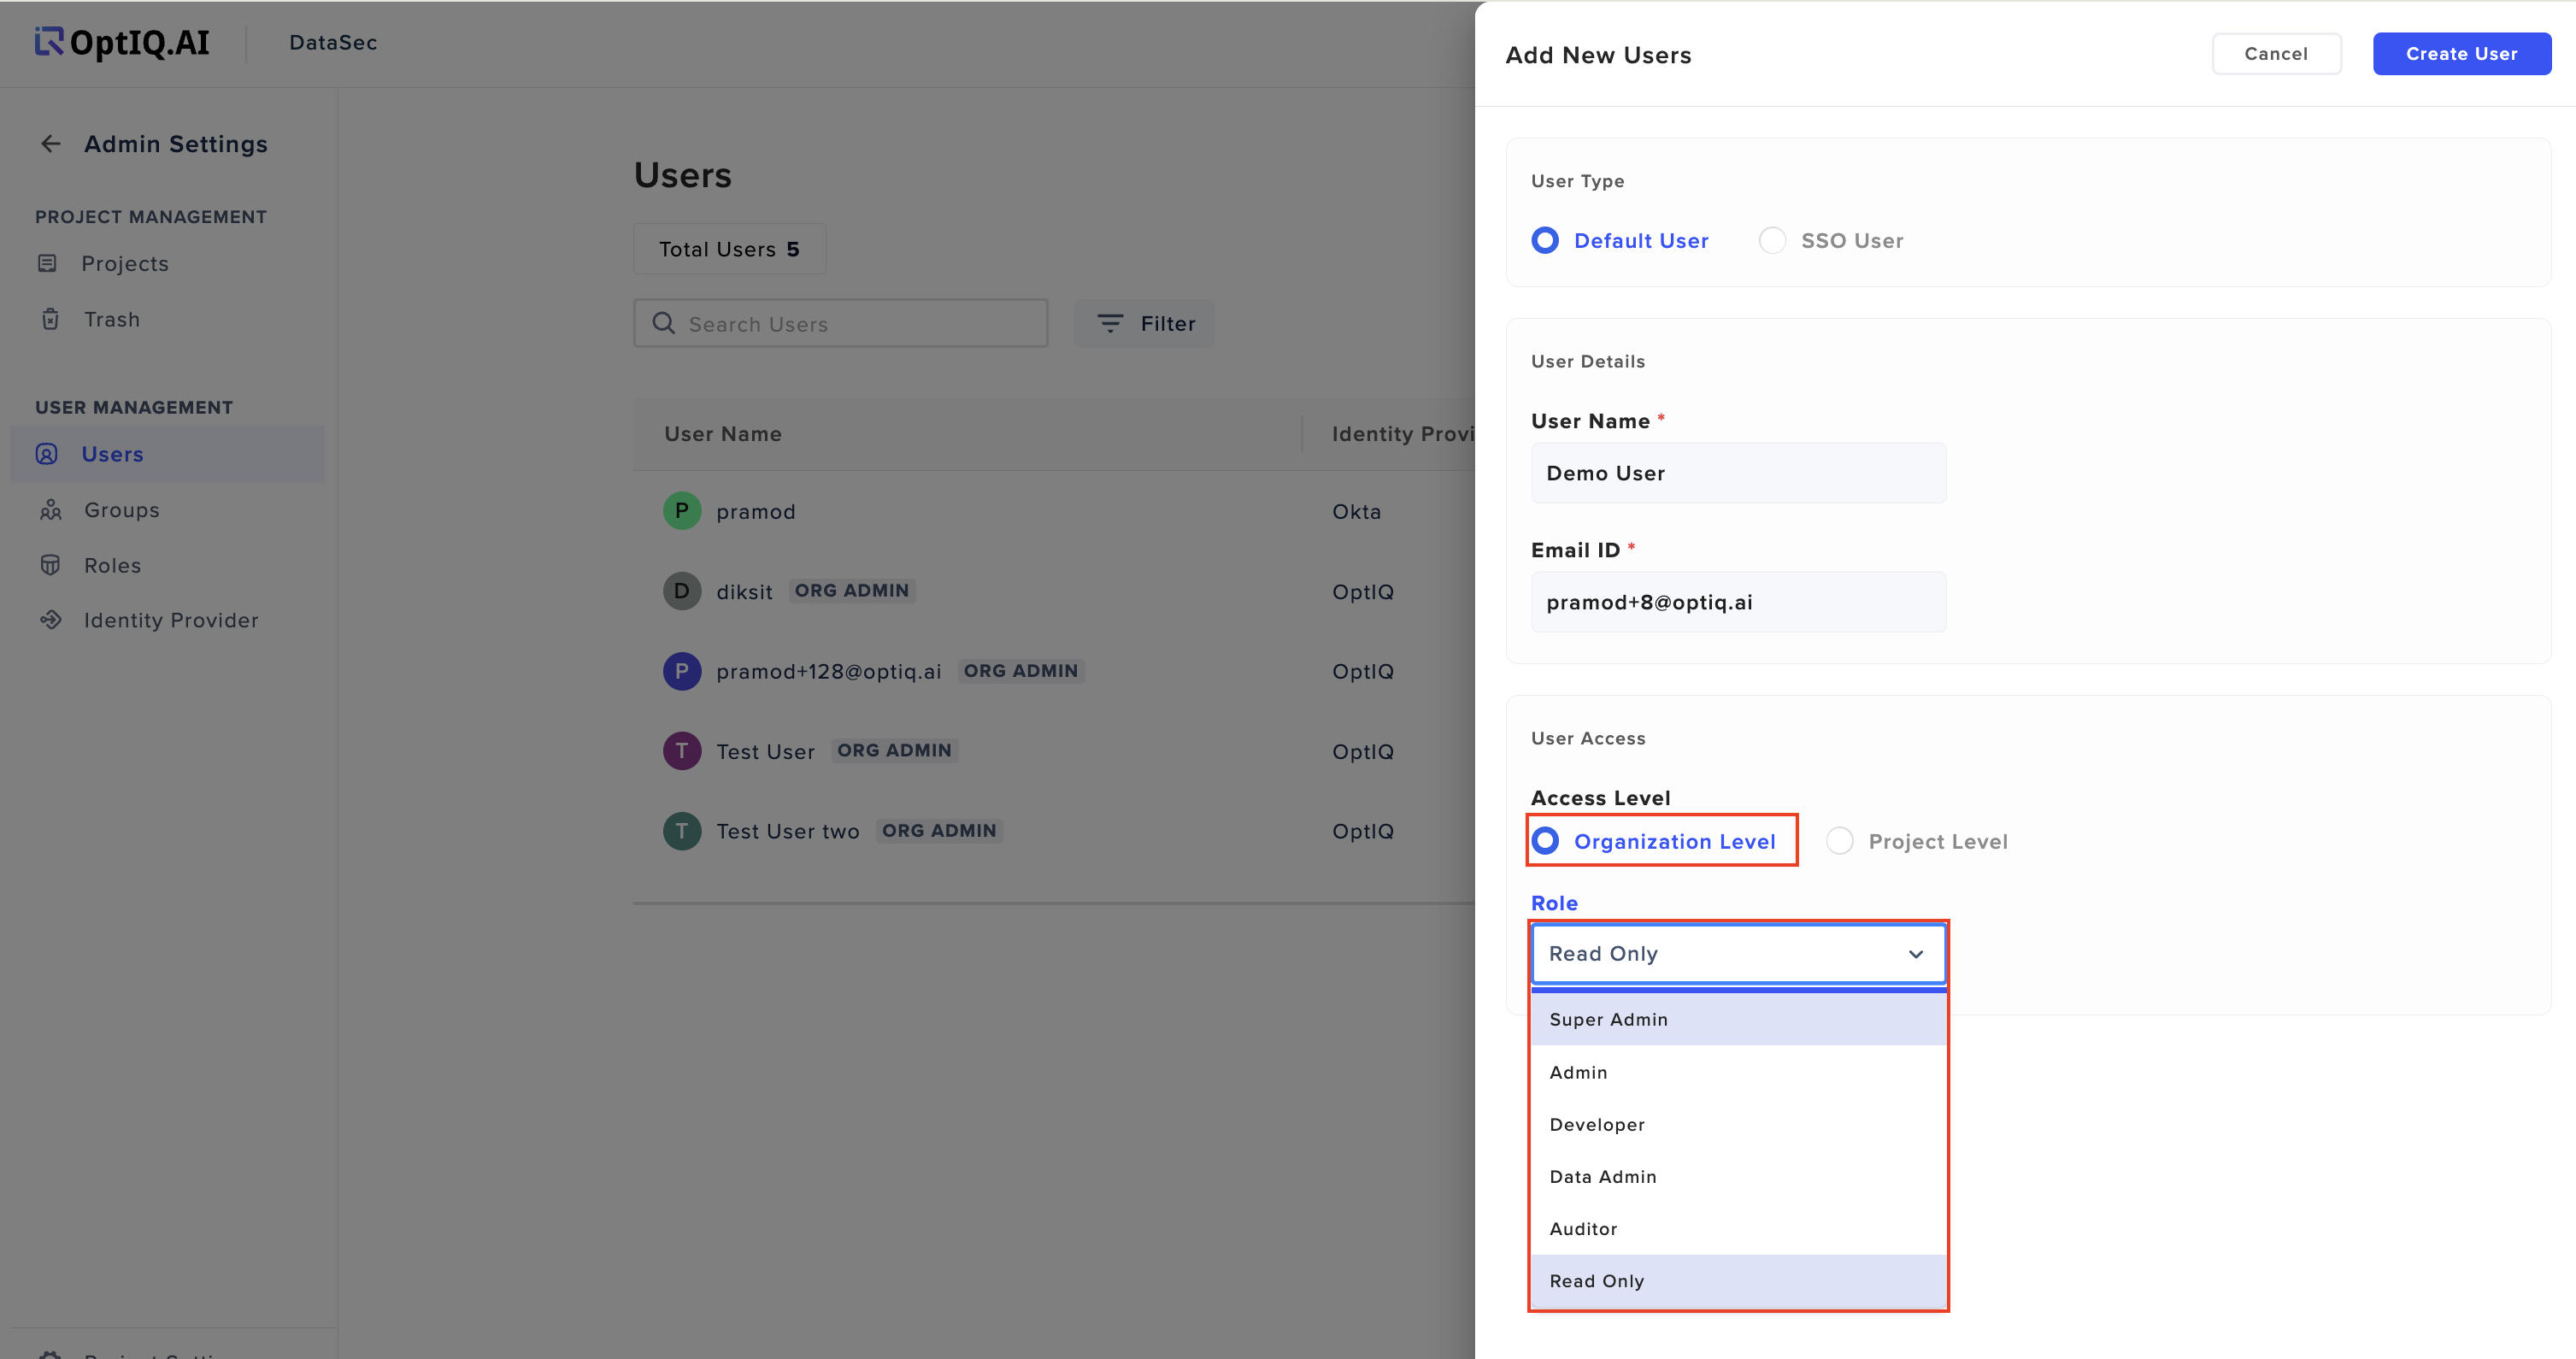
You must specify whether the user will be assigned access at the Organization Level or the Project Level. Select the appropriate option:
Organization Level: Select the Organization Level option to assign the user a role at the organizational level. You will then see a dropdown menu with a list of available roles. Choose the desired role for the user.
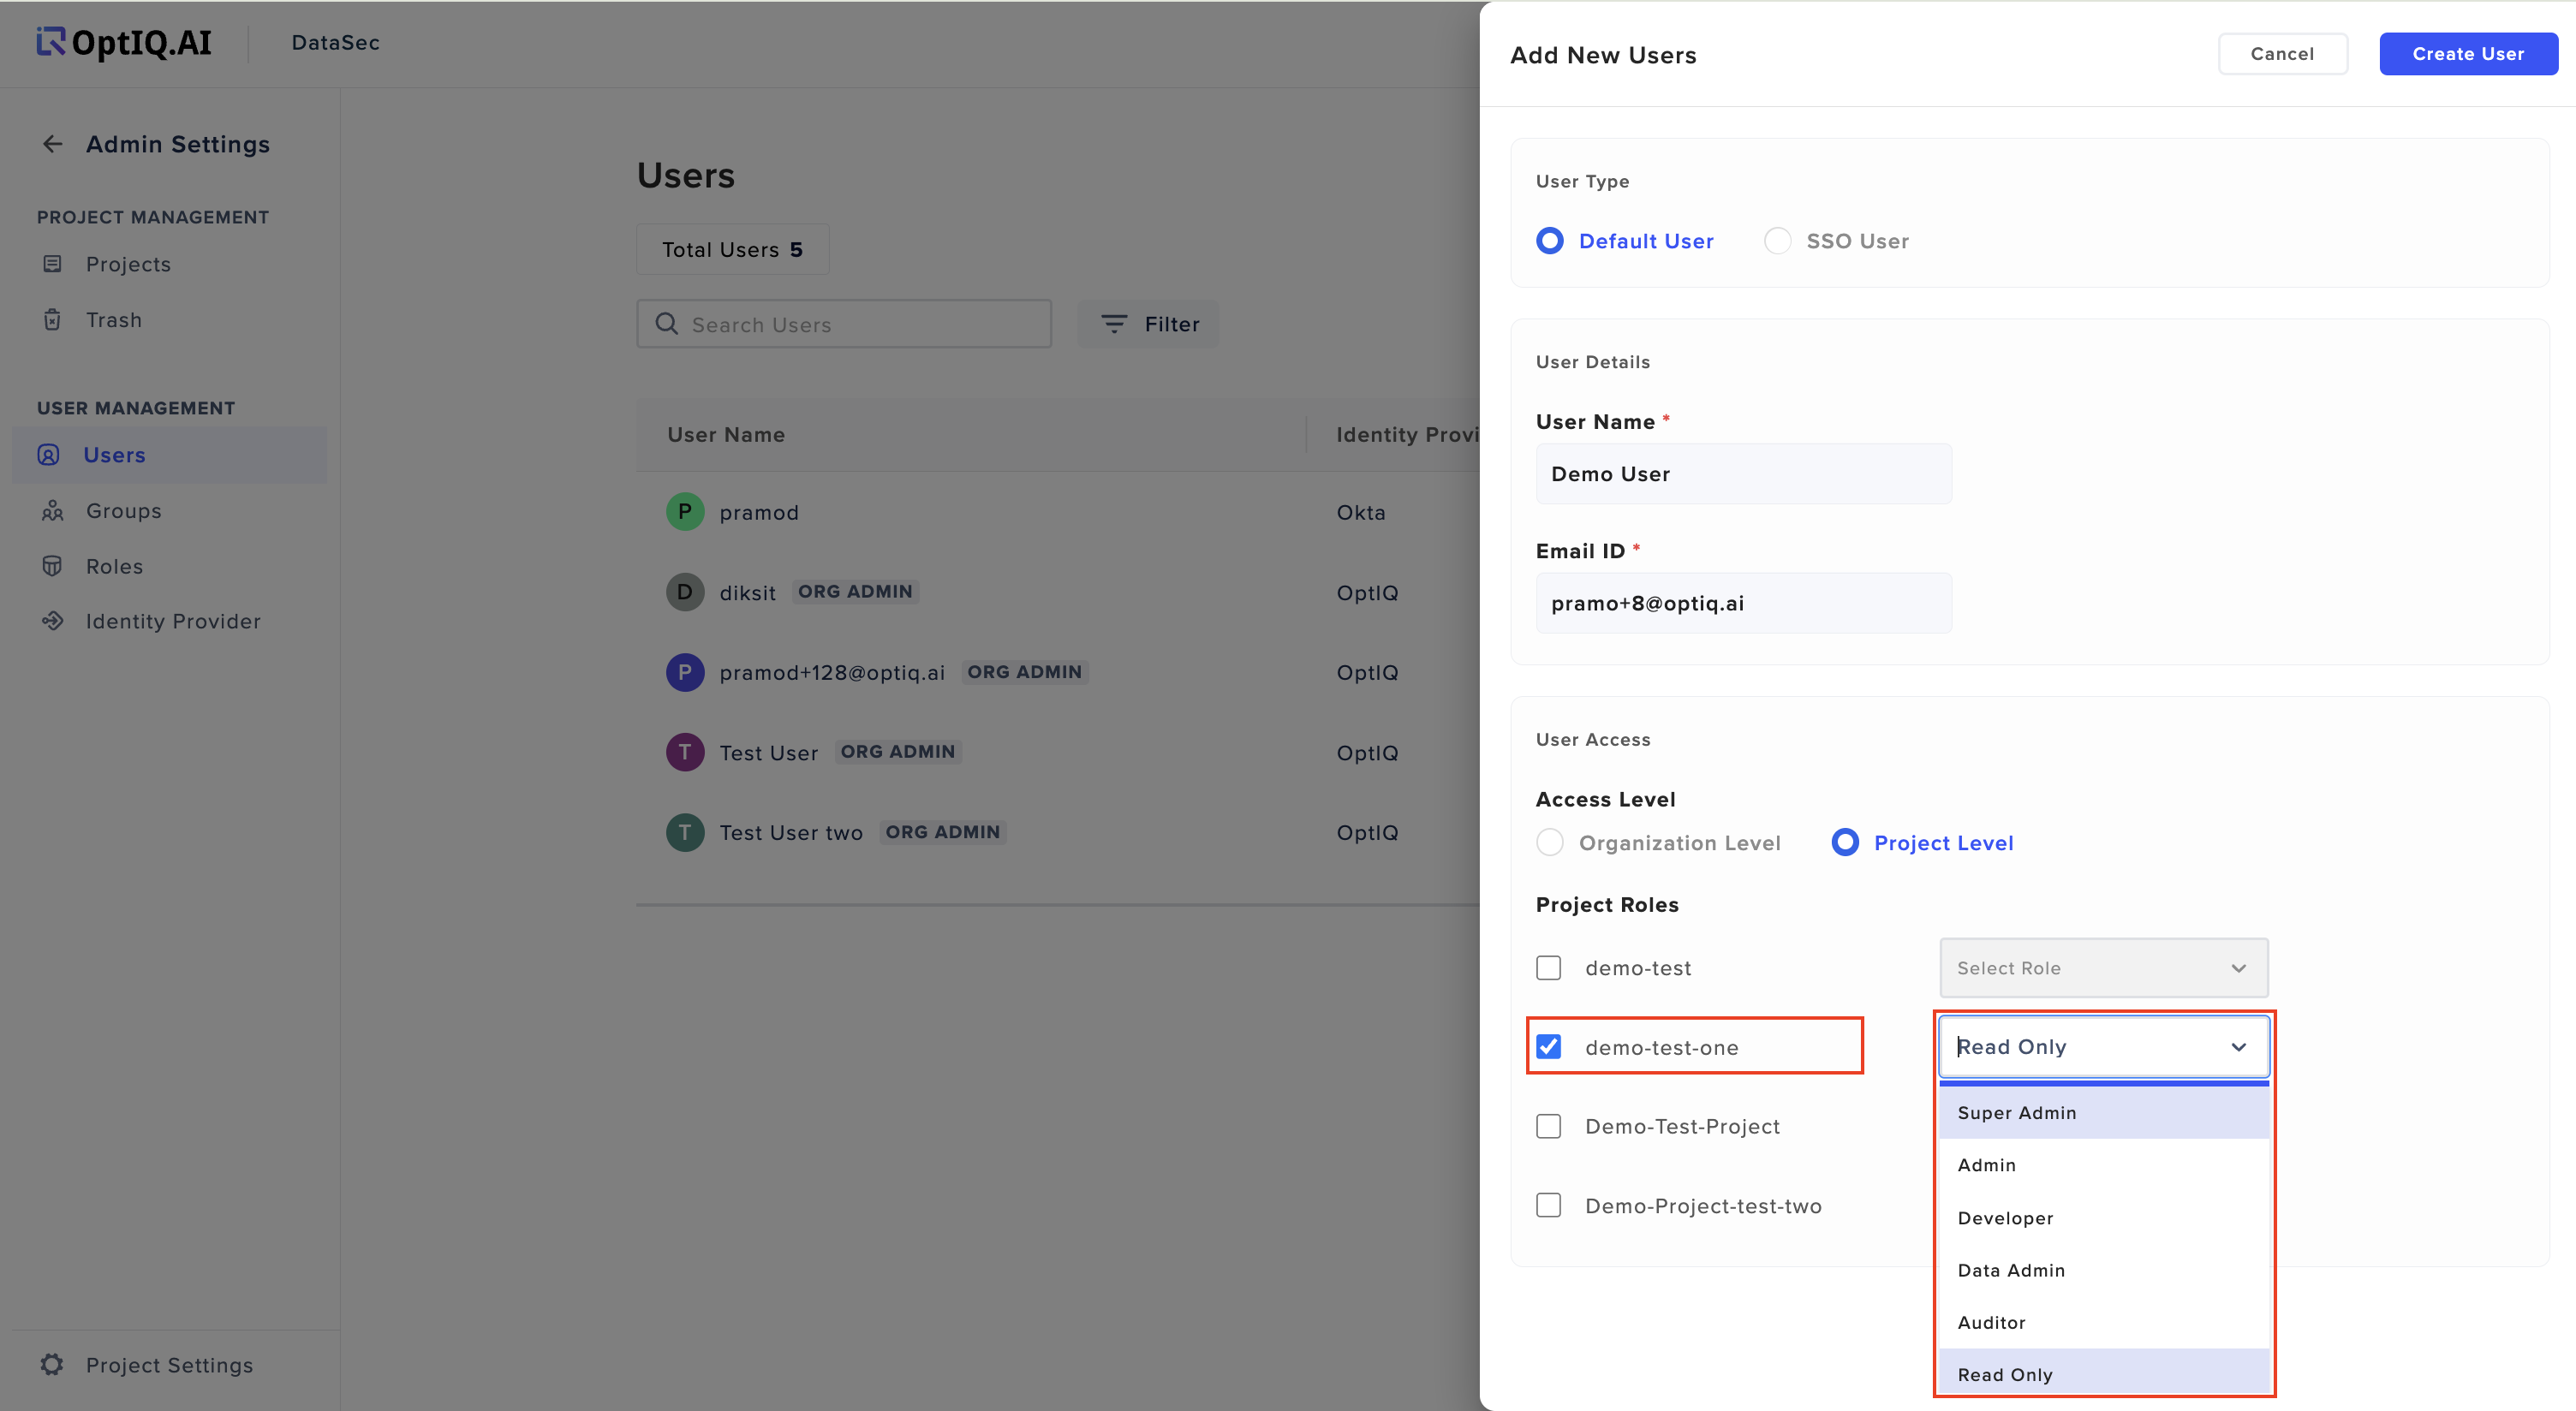
Project Level: If you need to create a user for a specific project, select the Project Level option. A list of available projects within the organization will be displayed. Choose the relevant project and assign the appropriate role for the user.
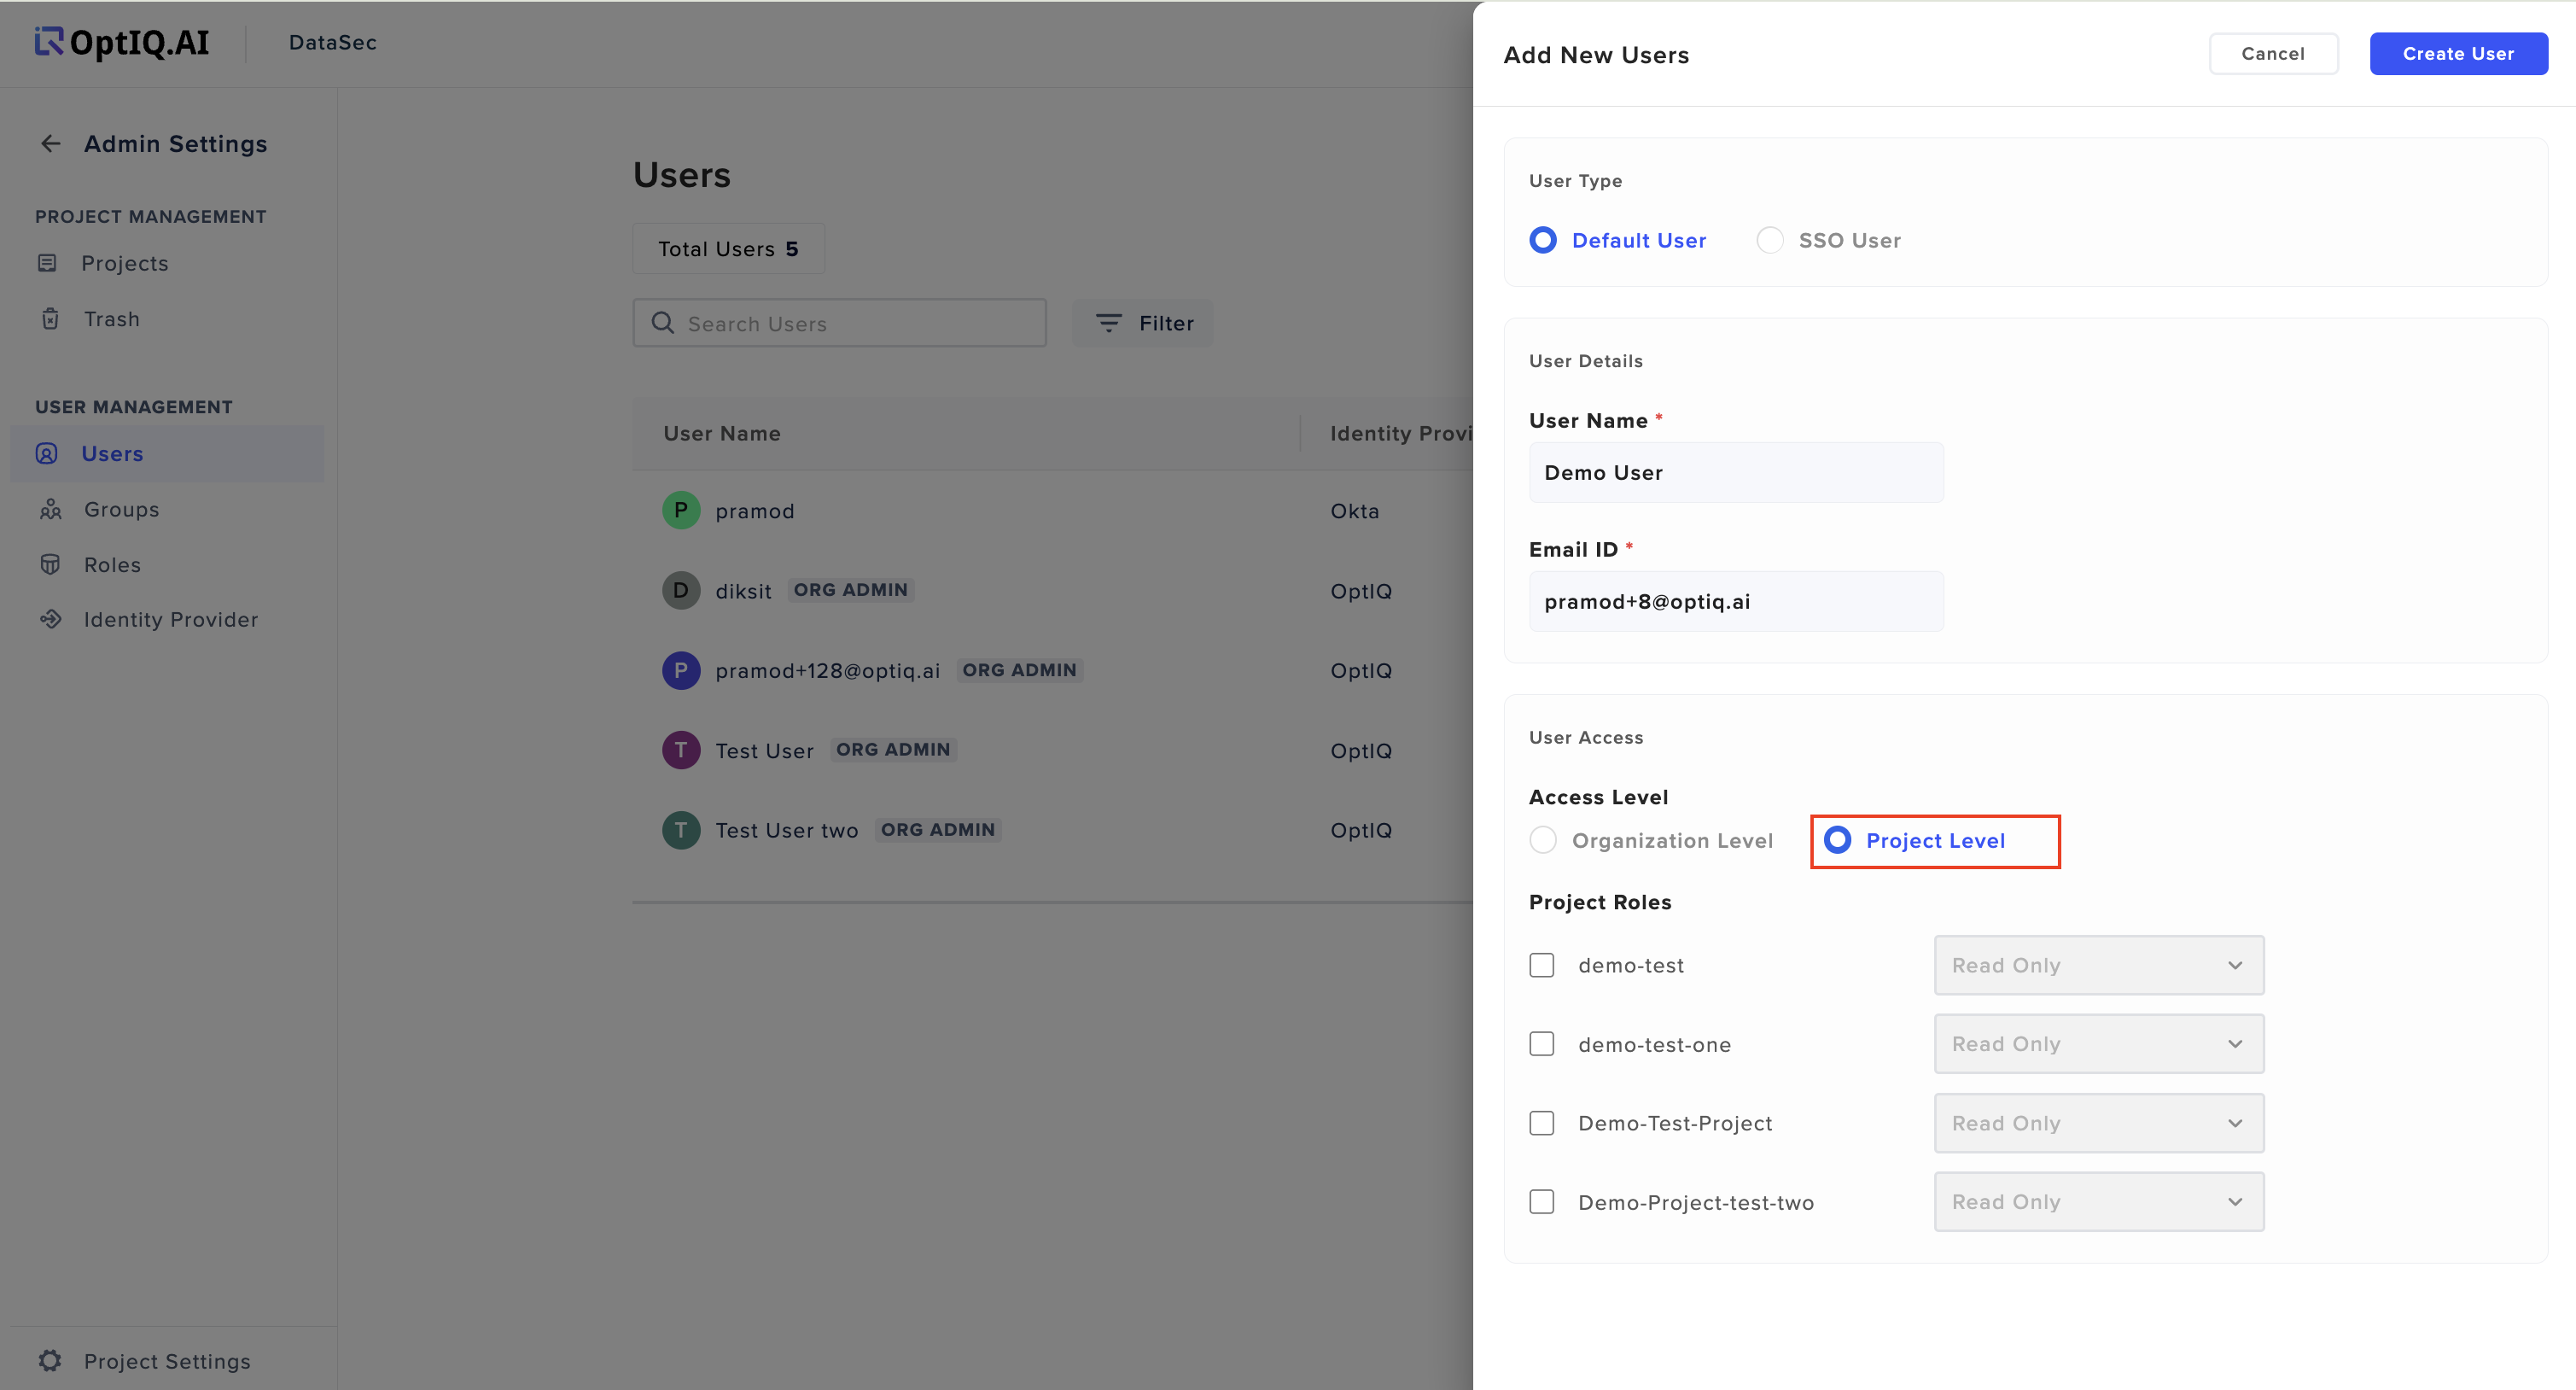
Once the project is selected, you will also be prompted to choose the user’s specific role within the project.
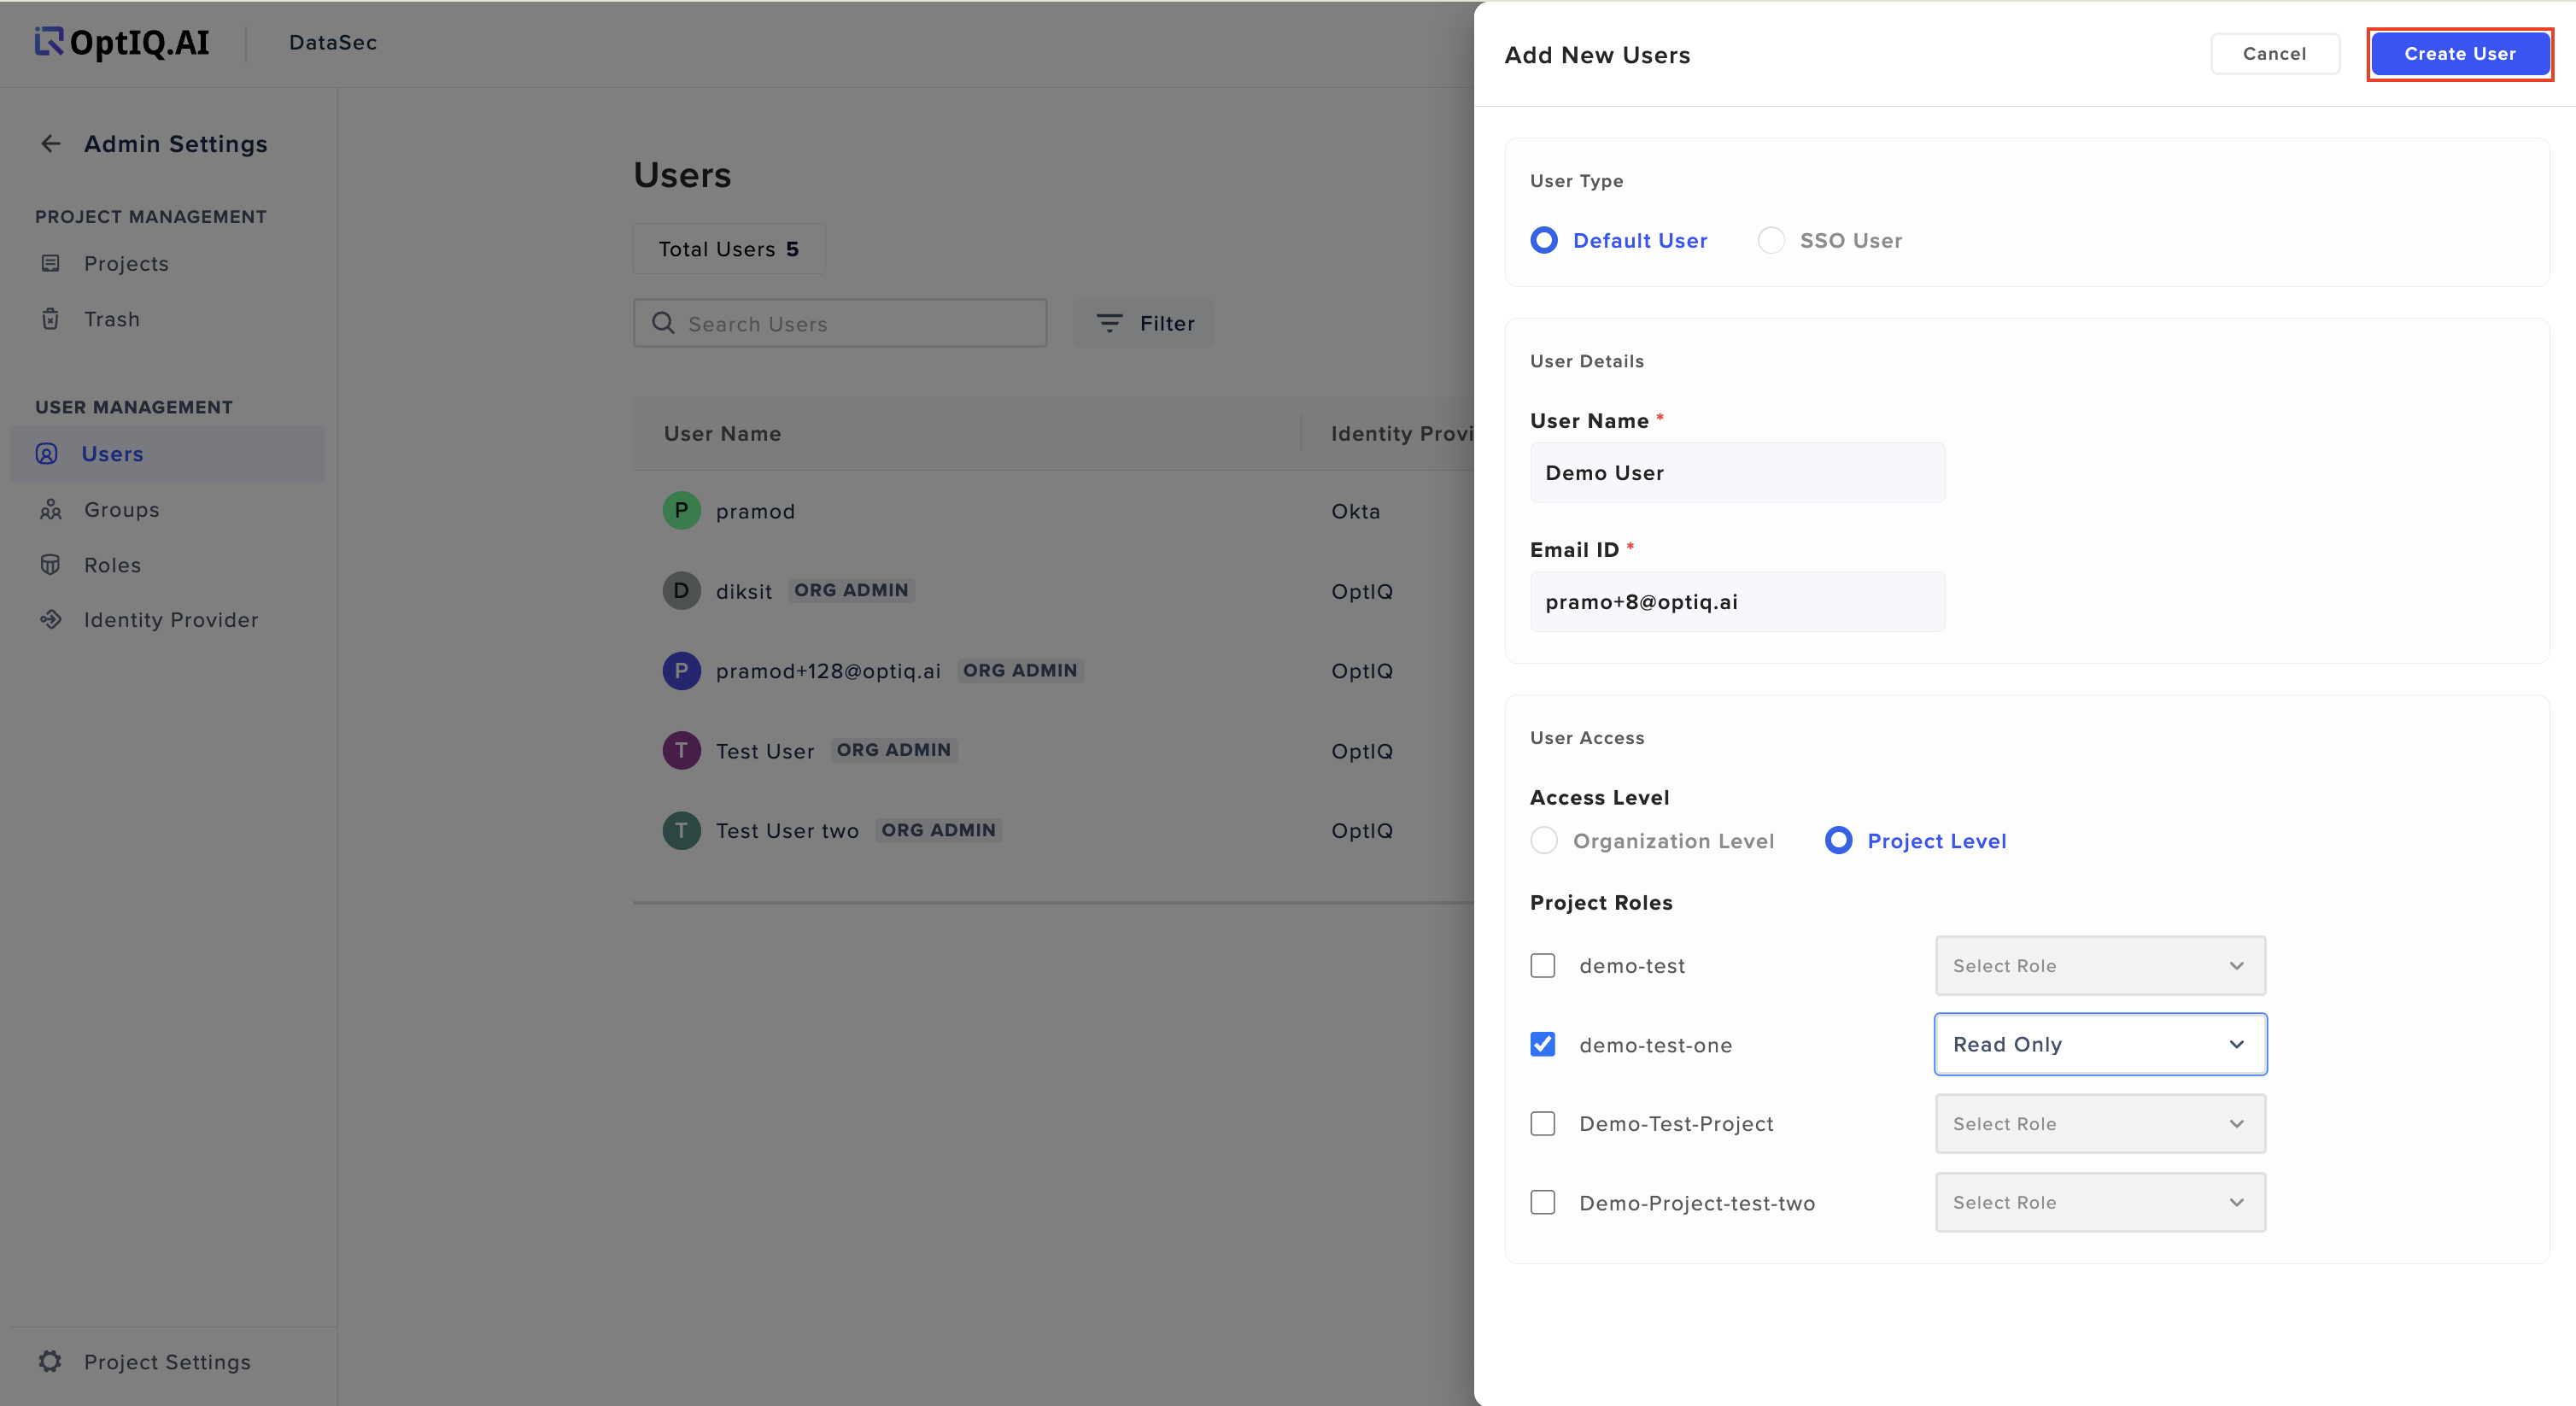
Step 6: Finalizing the User Creation
Create the User:
After selecting the appropriate project or organization level and role, click on the Create User button located at the top right of the drawer. This will initiate the creation of the new user.
Step 7: Confirmation of User Addition
Success Notification:
Upon successful user creation, you will see a confirmation message indicating that the user has been successfully added.
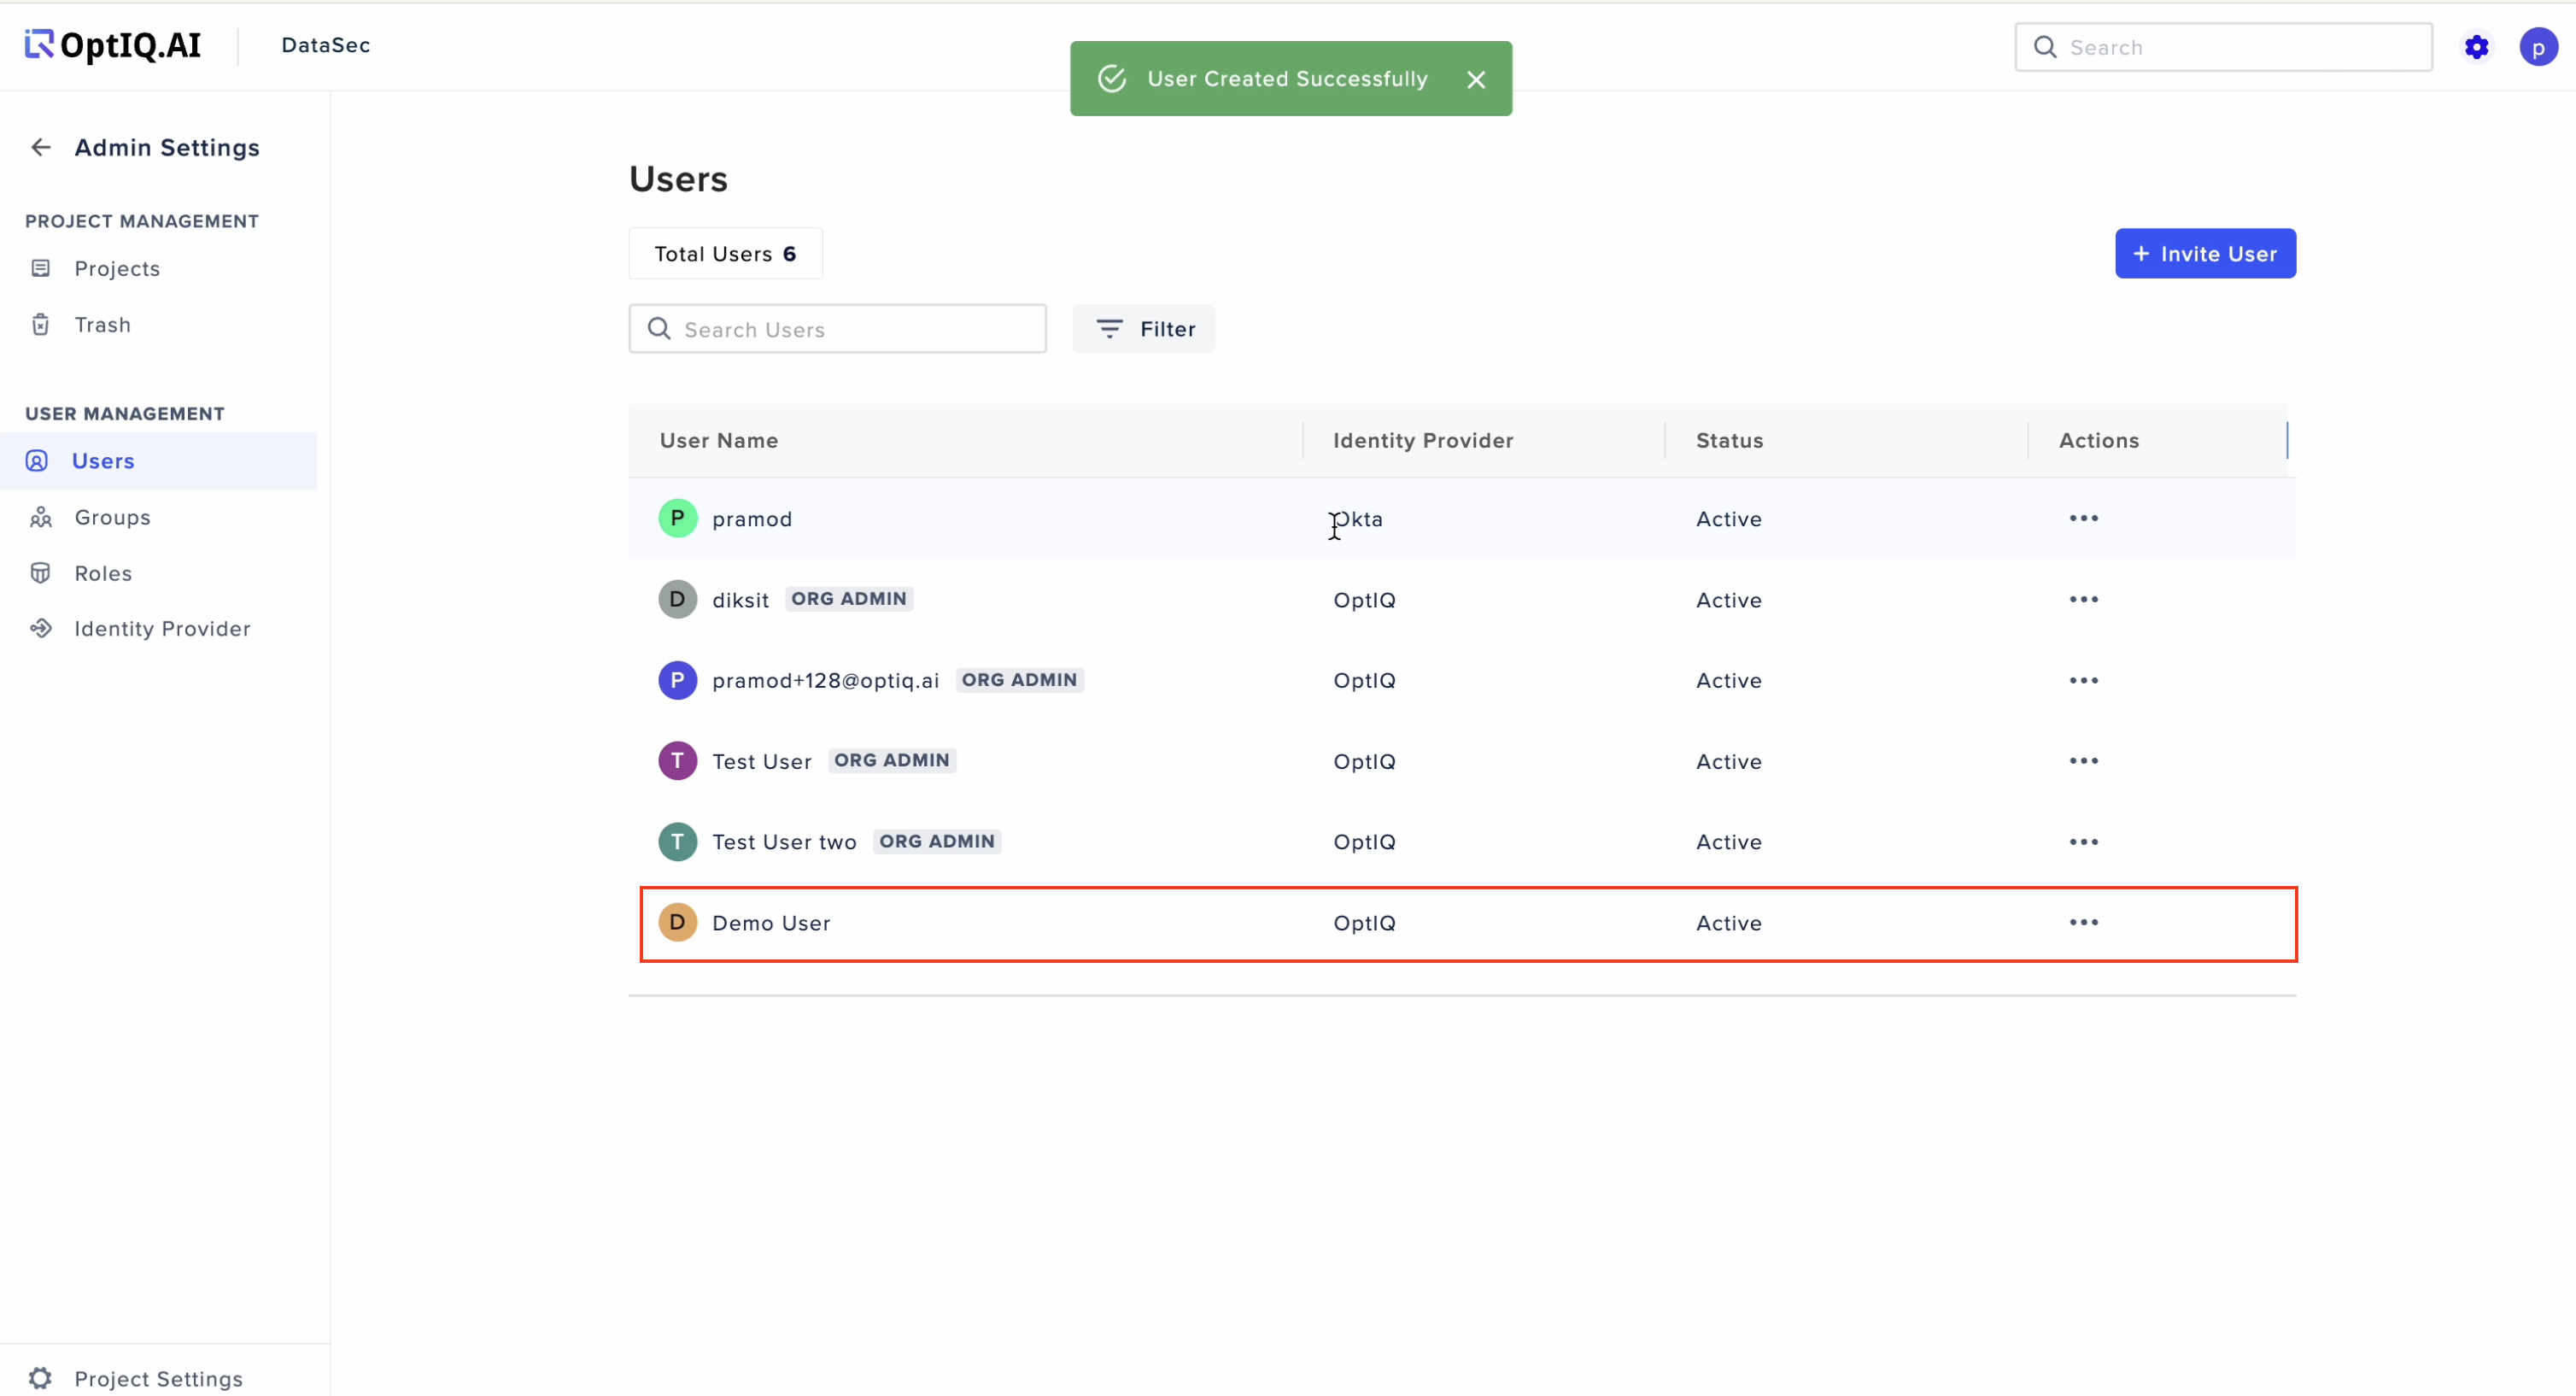
b. View User Details:
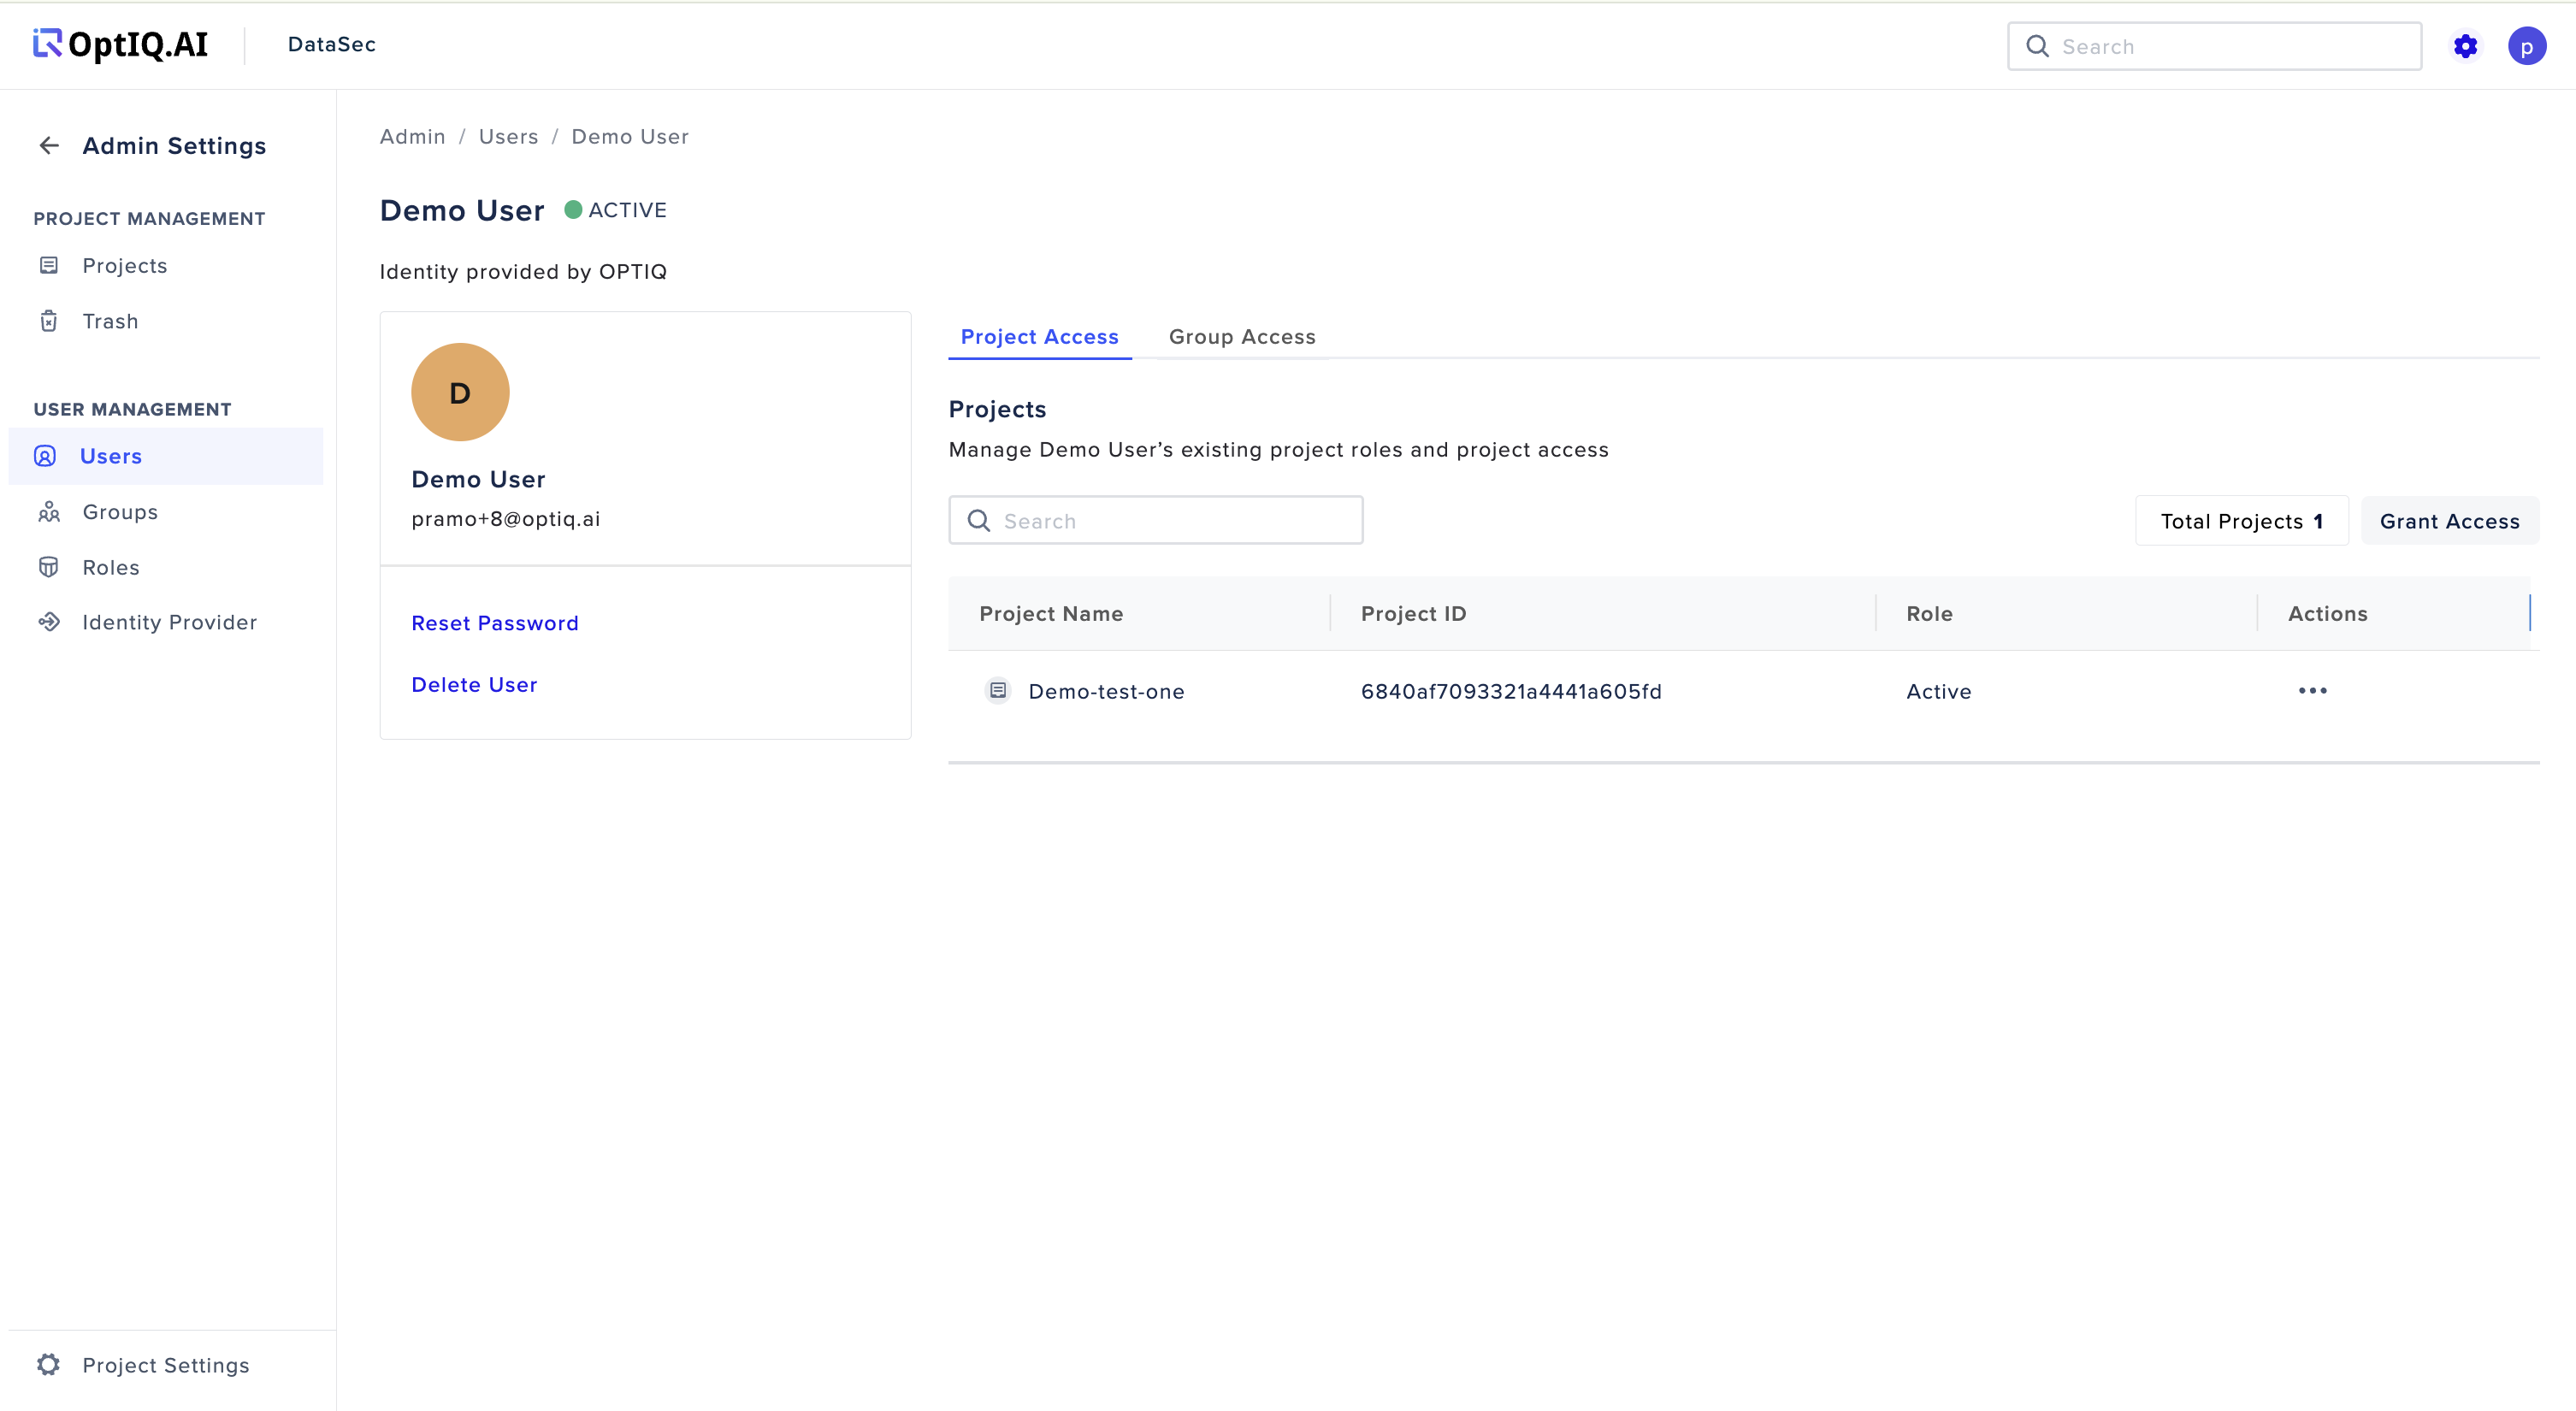
The new user will now appear in the user list. To view the user’s details, simply click on the user's name.
Step 8: Default User Email Setup
Email for Default User:
If you created a Default User, they will receive an email with instructions to set their password. Once the password is set, the user can log in to the dashboard.
Notes:
Role Assignment: Be sure to choose the correct role for users based on their responsibilities within the organization or project.
User Management: The list of users can be filtered and searched for easy management.
By following these steps, you can efficiently add users at both the organization and project levels, ensuring proper role-based access control across your platform.
Group Creation Guide: Organizational and Project-Level
Creating and managing groups within your organization or project is a key aspect of access control and collaboration. Groups help streamline user permissions, ensuring that users can only access the resources and projects they are authorized to interact with.
Only Super Admins have the authority to create, modify, or delete users and groups, ensuring a controlled and secure environment for all users. Group-level users are granted access strictly to the project they are assigned to, preventing them from accessing other projects or groups unless explicitly permitted.
This guide will provide a step-by-step process for creating groups at both the Organization and Project levels, ensuring that you can efficiently manage user access and collaboration across your platform.
Follow the below given steps for Successful creation of Groups,
Step 1: Accessing Group Management Settings
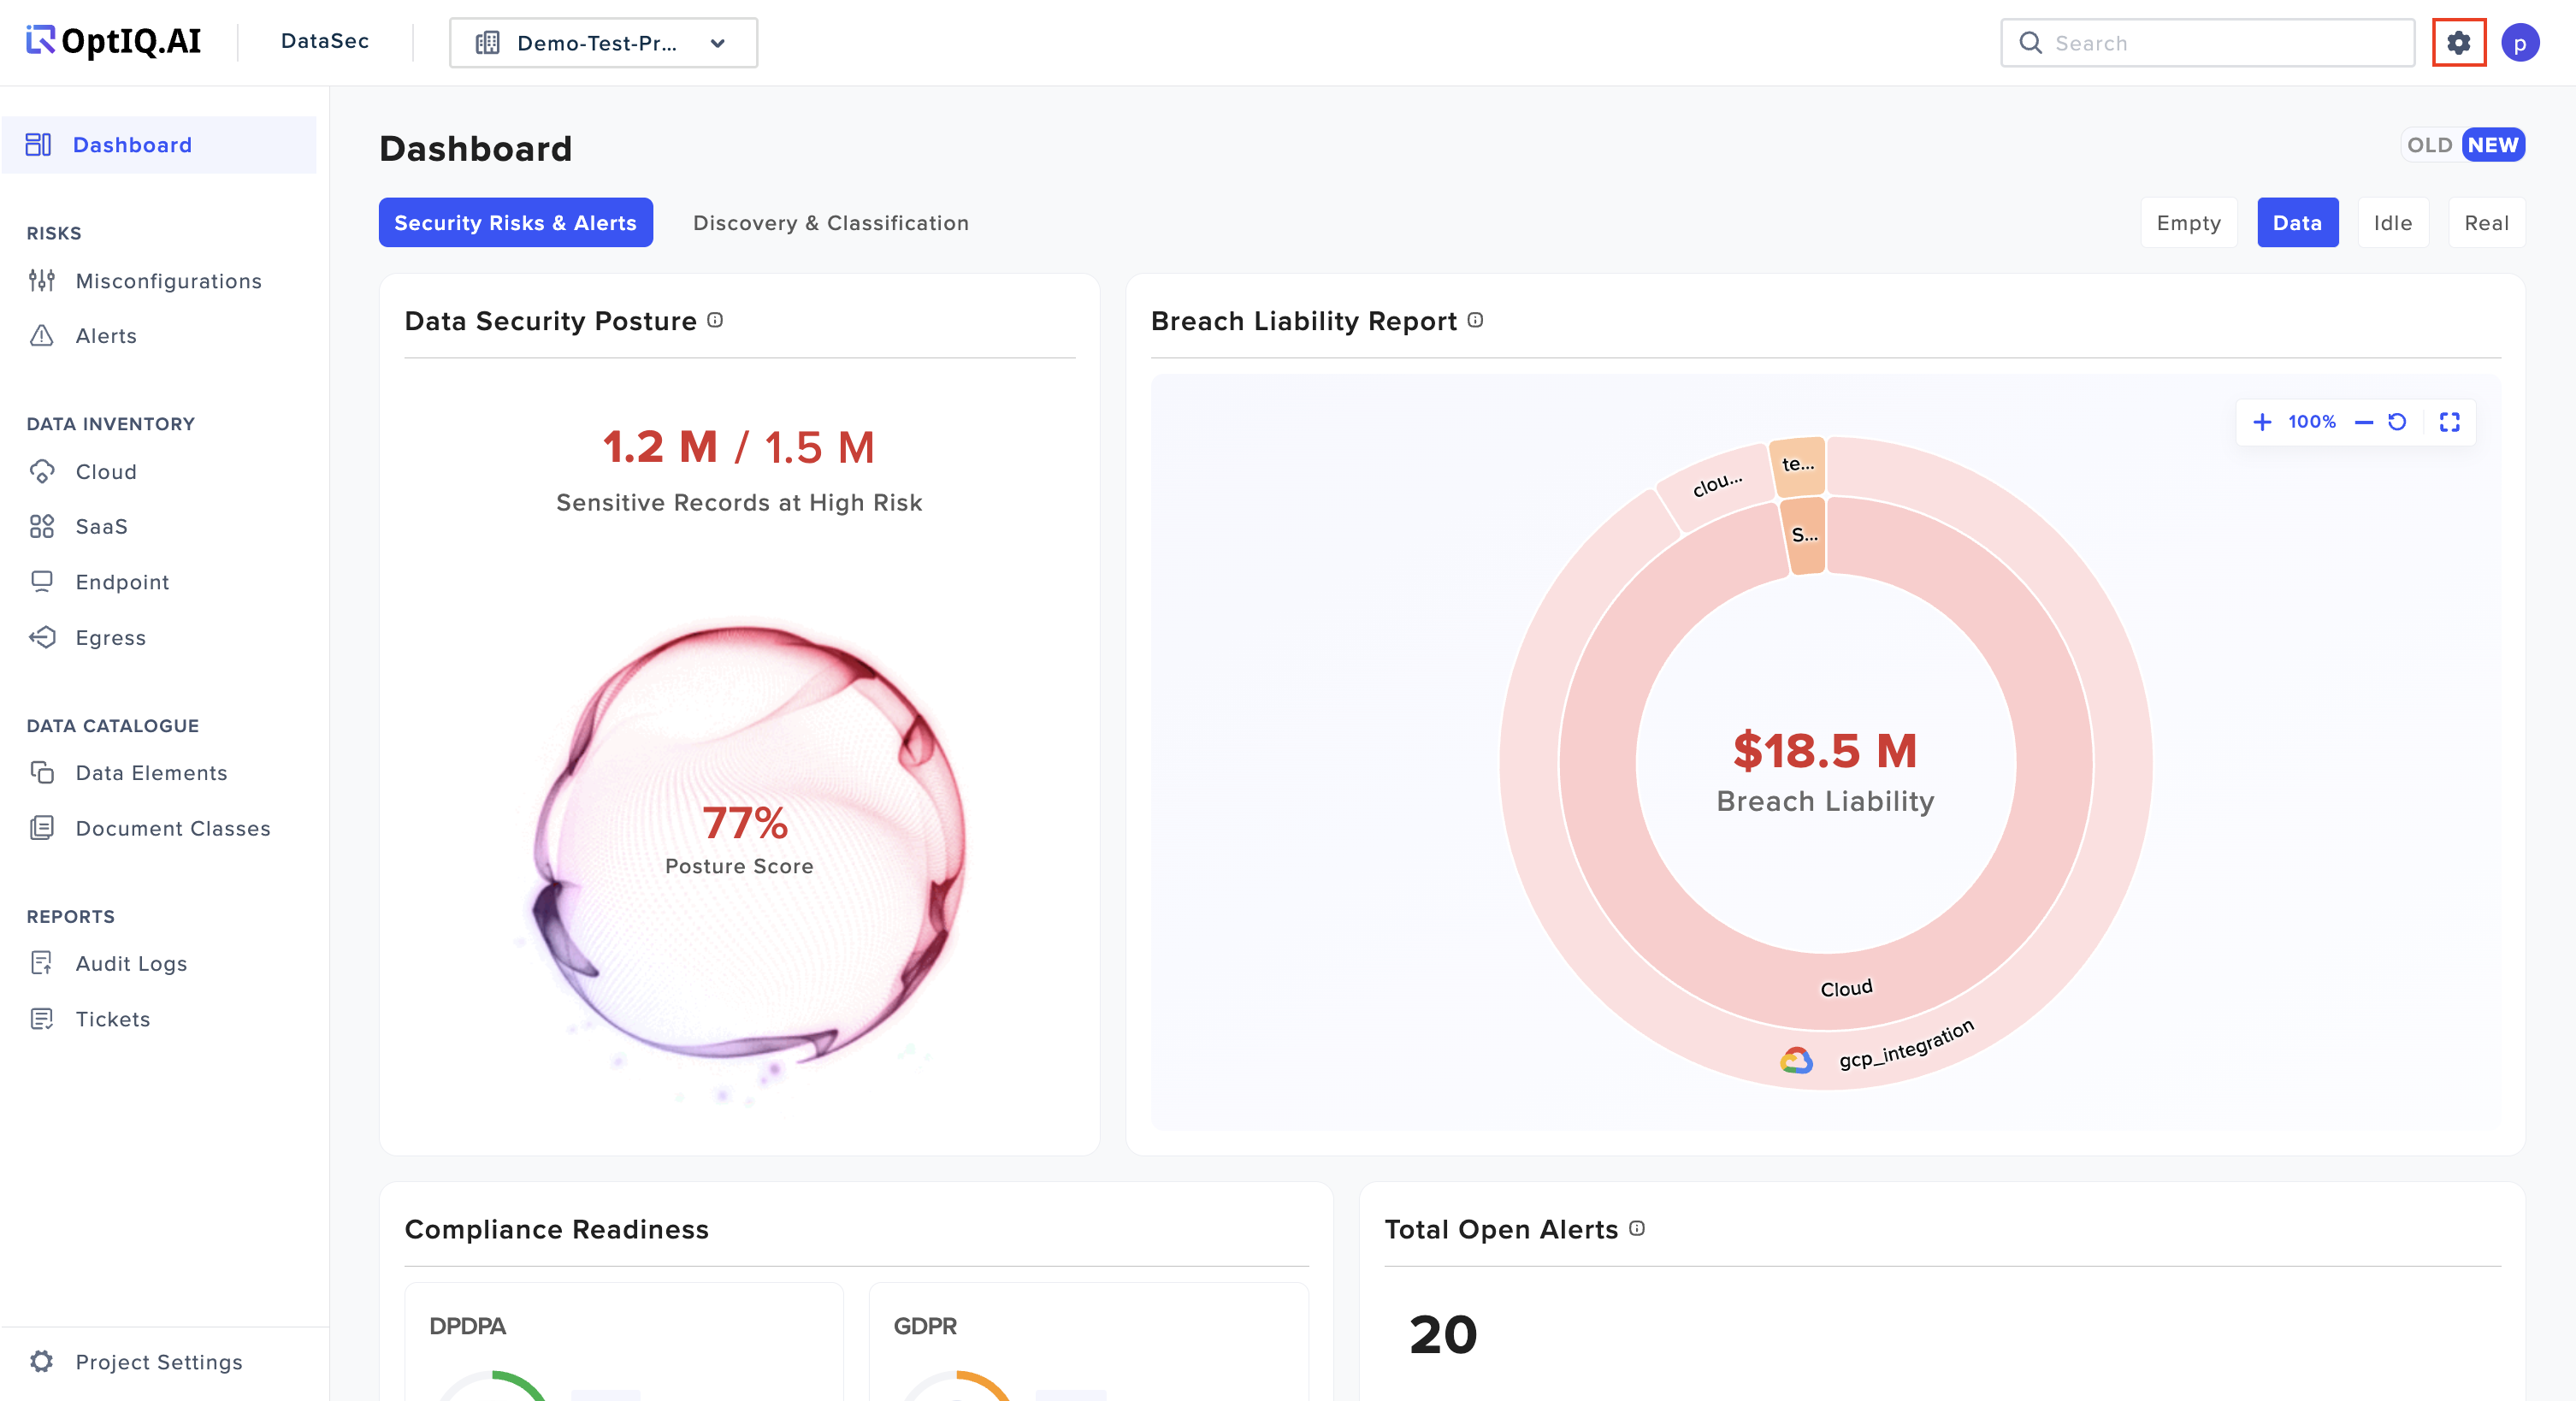
Navigate to Settings:
To start, click on the Settings tab located at the top right corner of your dashboard.
Step 2: Access the Groups Management Section and Initiating the Group Creation Process
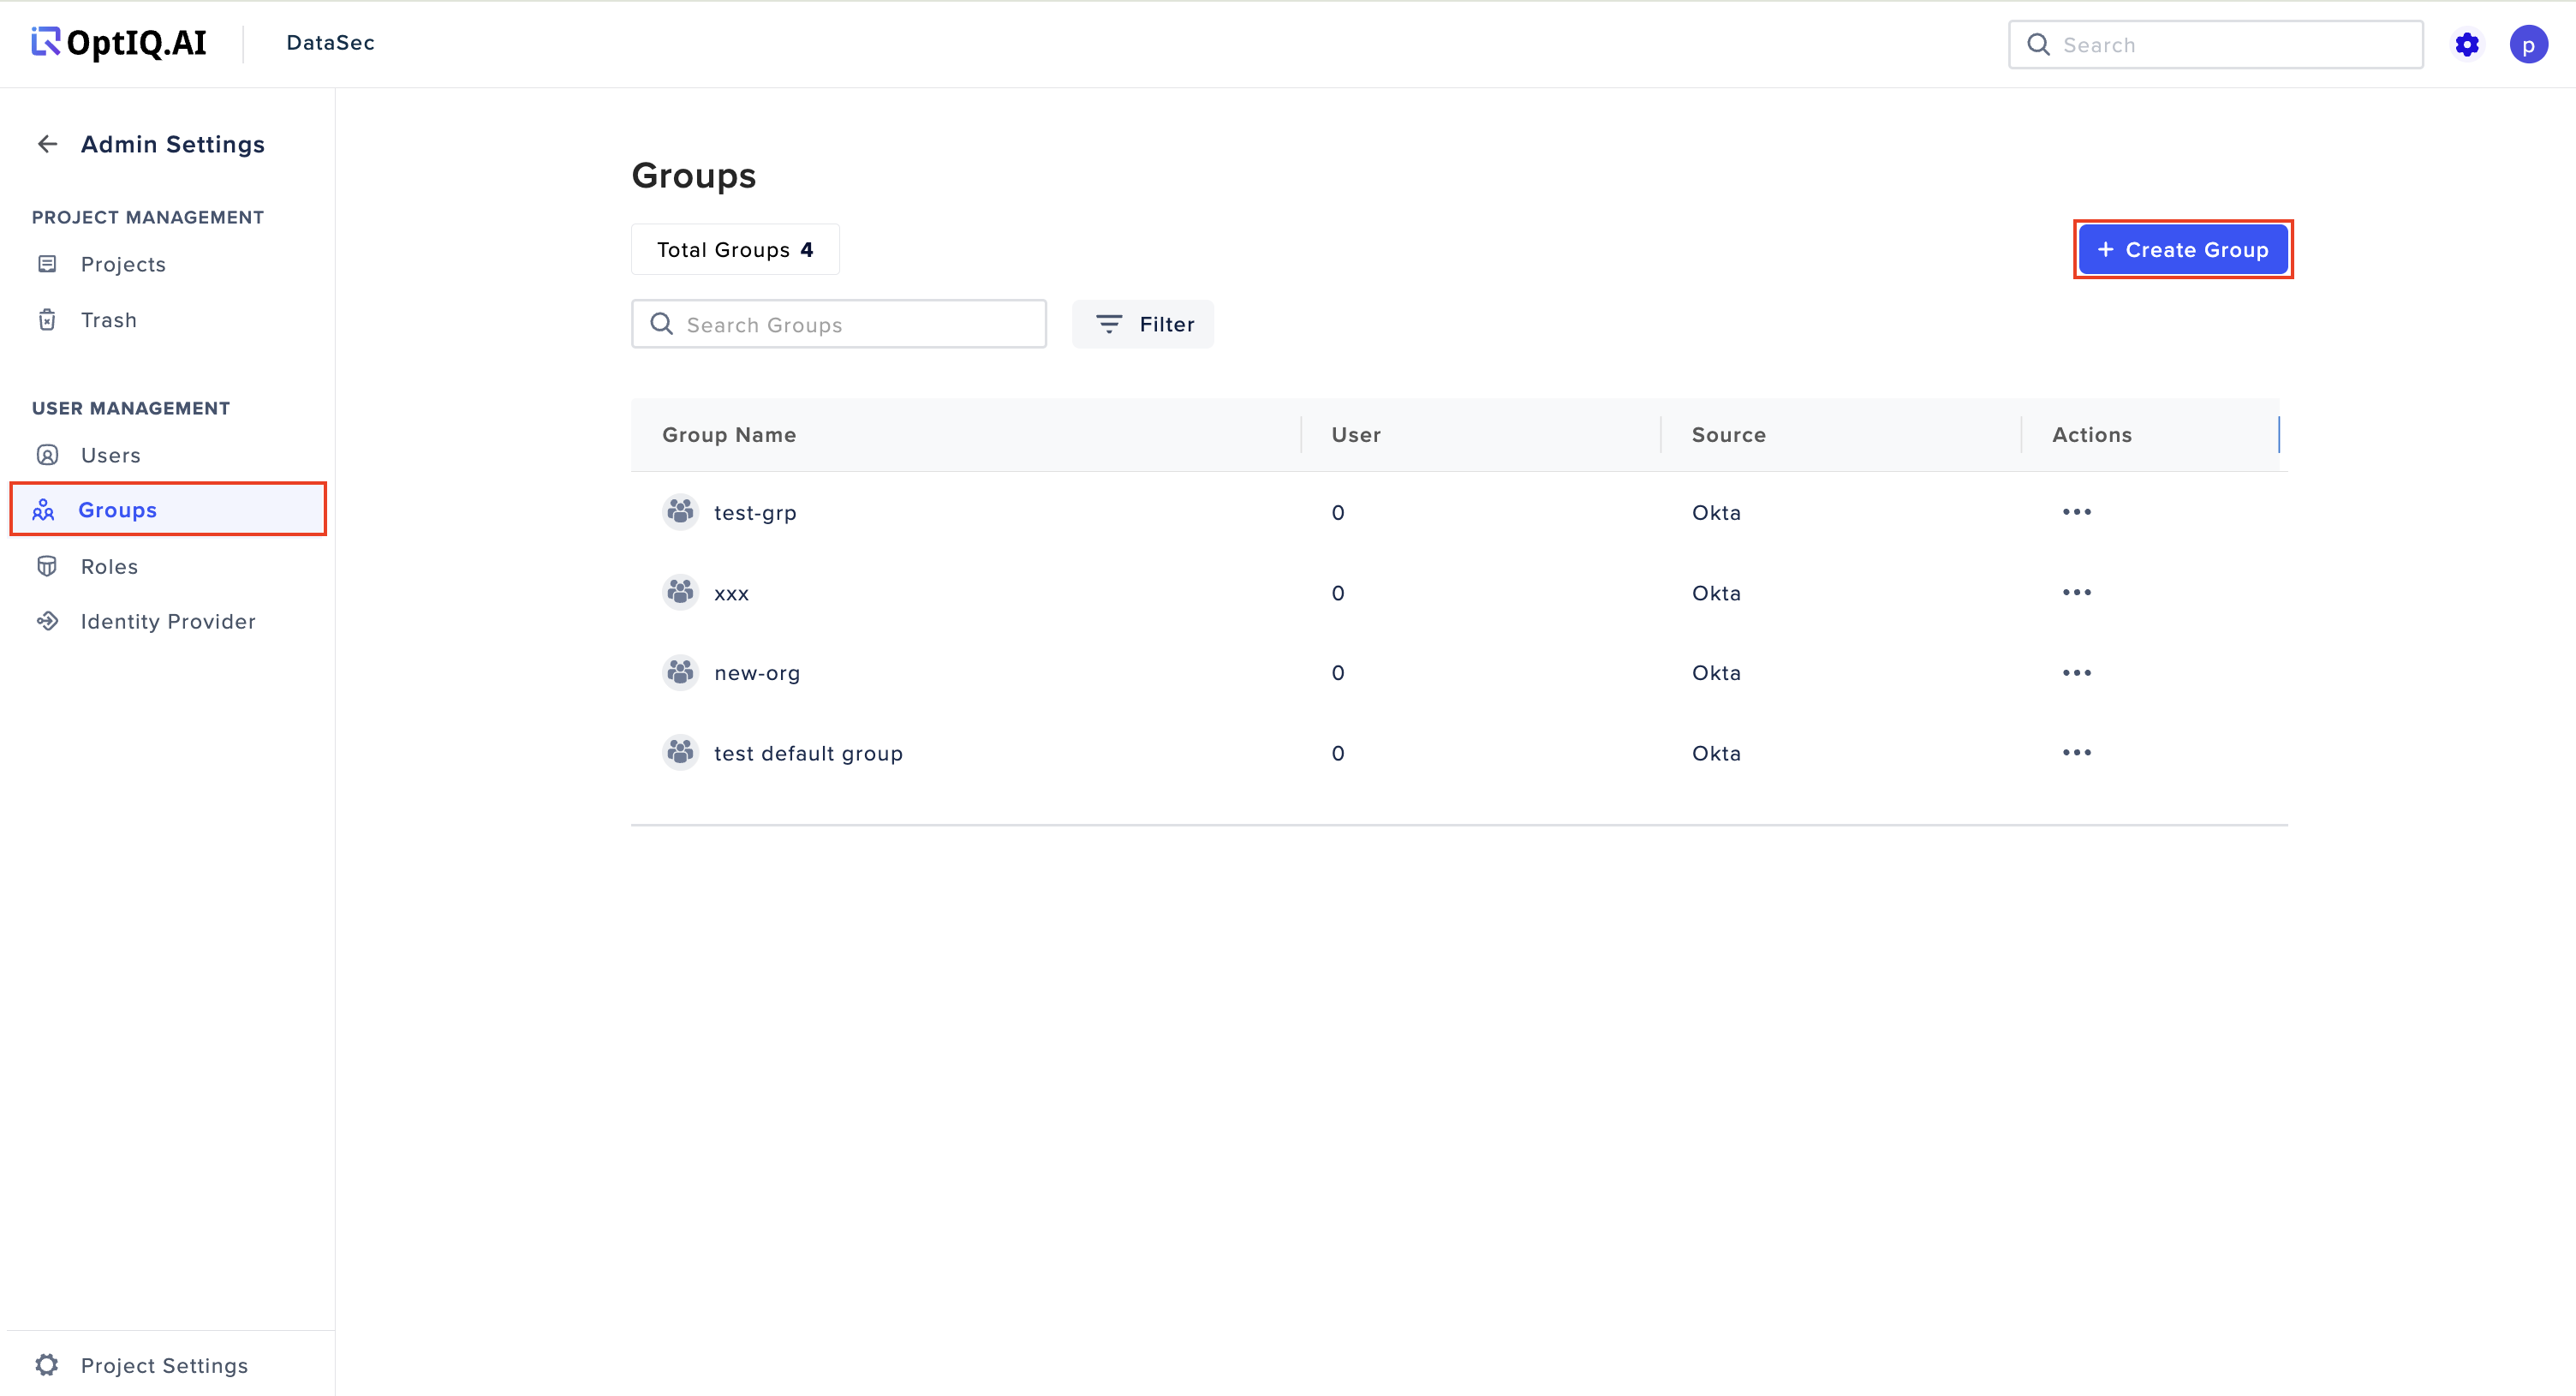
Click on the 'Groups' Tab:
Under the User Management section, click on the Groups tab. This will display a list of all existing groups, including the number of users assigned to each group. These groups may be at the Organization or Project level.
Click on the 'Create Group' Button:
To create a new group, click on the Create Group button. This will open a side drawer where you can enter the necessary details for the new group.
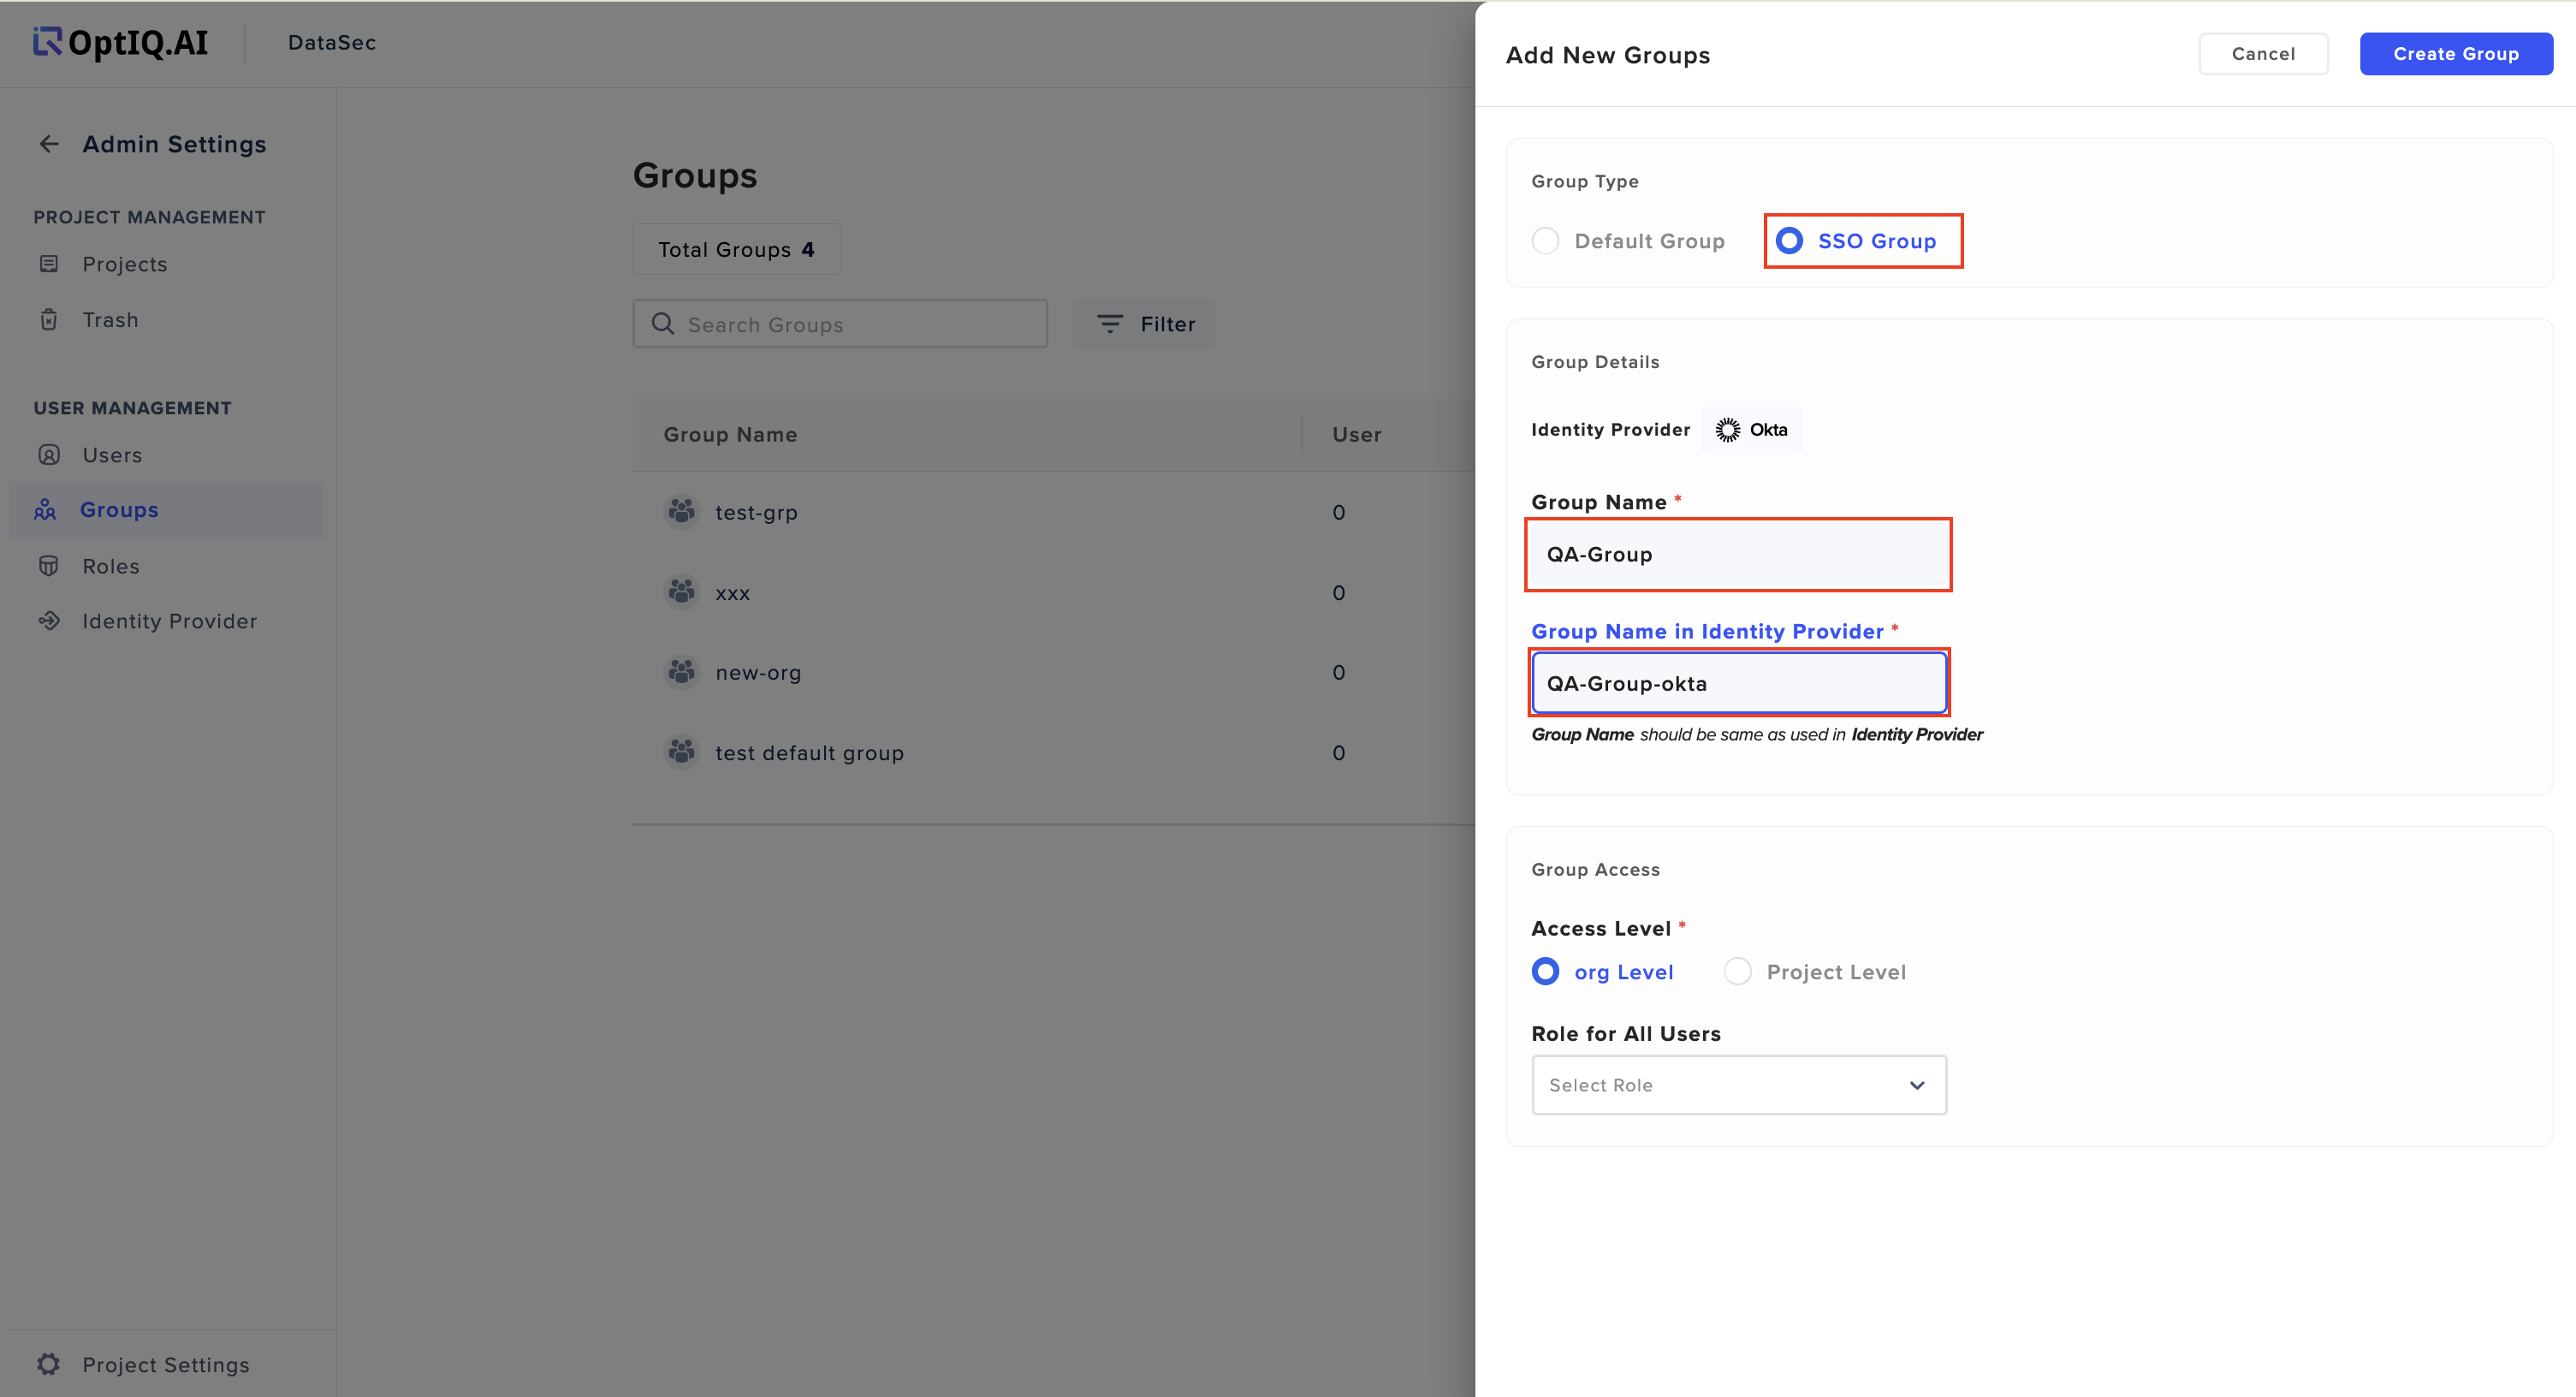
Step 4: Choose the Group Type
Select the Group Type:
You have to choose between two types of groups:
Default Group: For creating a standard group, select the Default Group radio button. Enter the Group Name and select users from the list to assign them to the group.
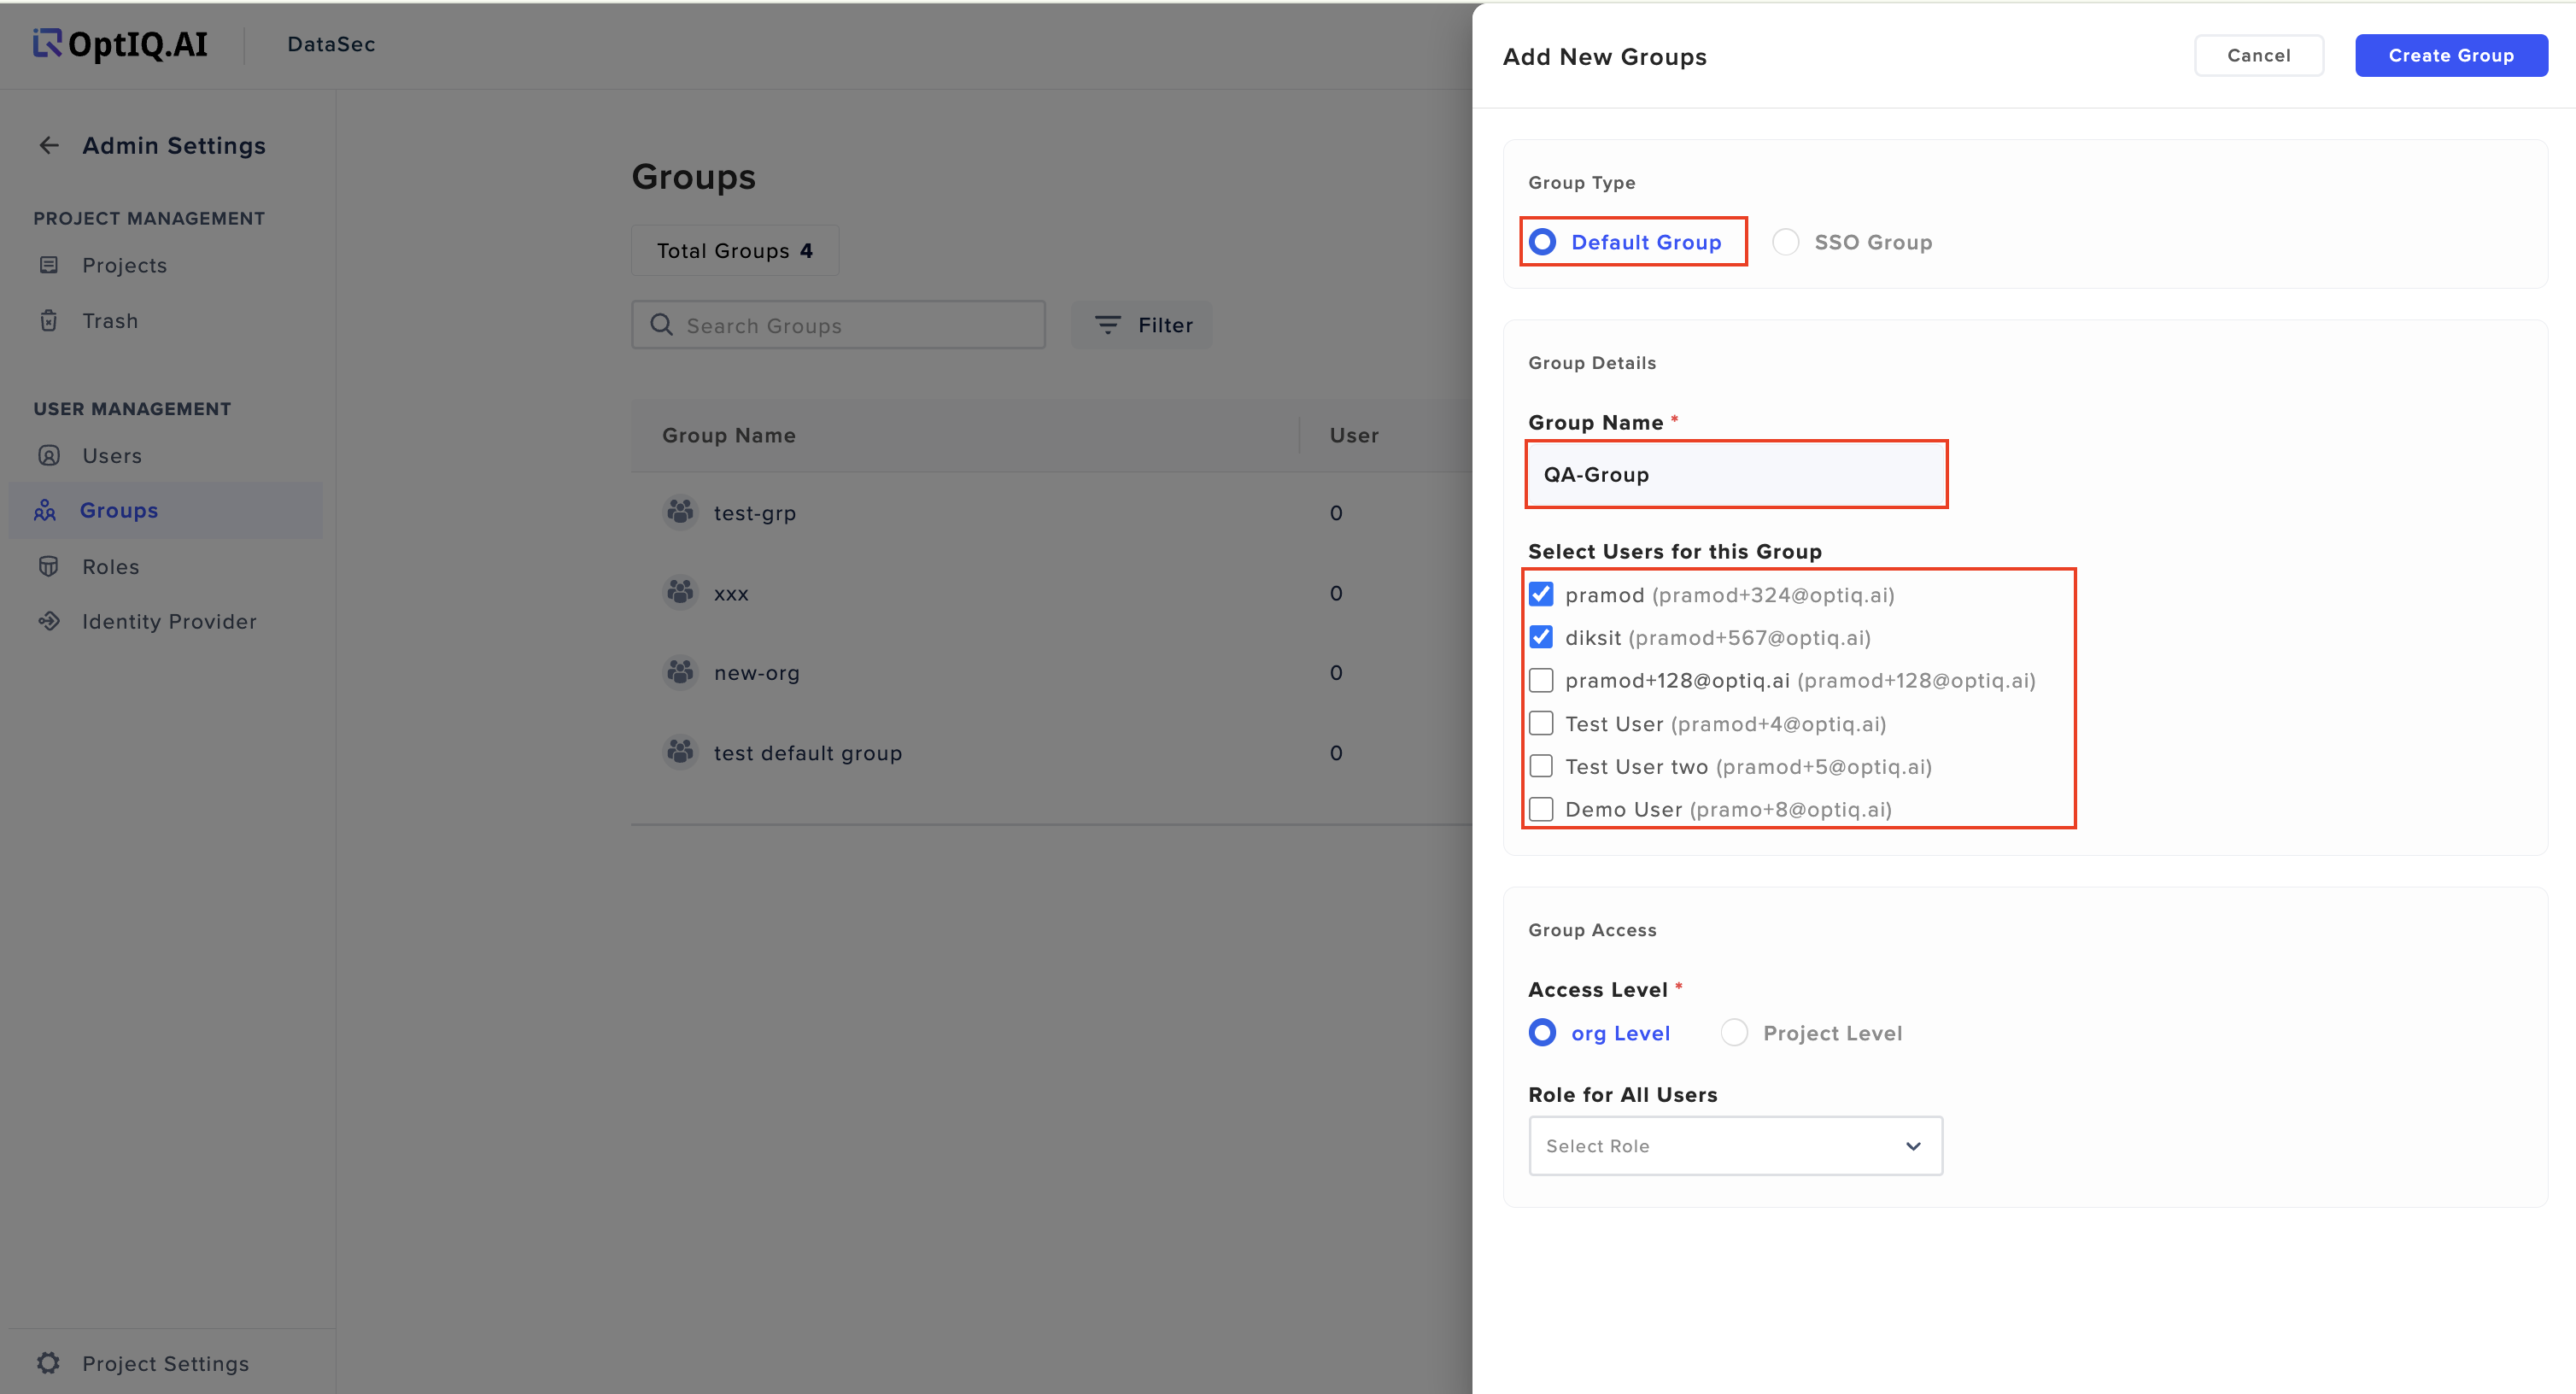
SSO Group: If you want to create an SSO (Single Sign-On) group, select the SSO Group radio button. Enter the Group Name for both the dashboard and the corresponding Group name in your Identity Provider.
Note: Refer SSO-Integration Guide under User Management for Detailed SSO related Steps for User and Group Creation
Step 5: Assign the Group's Access Level
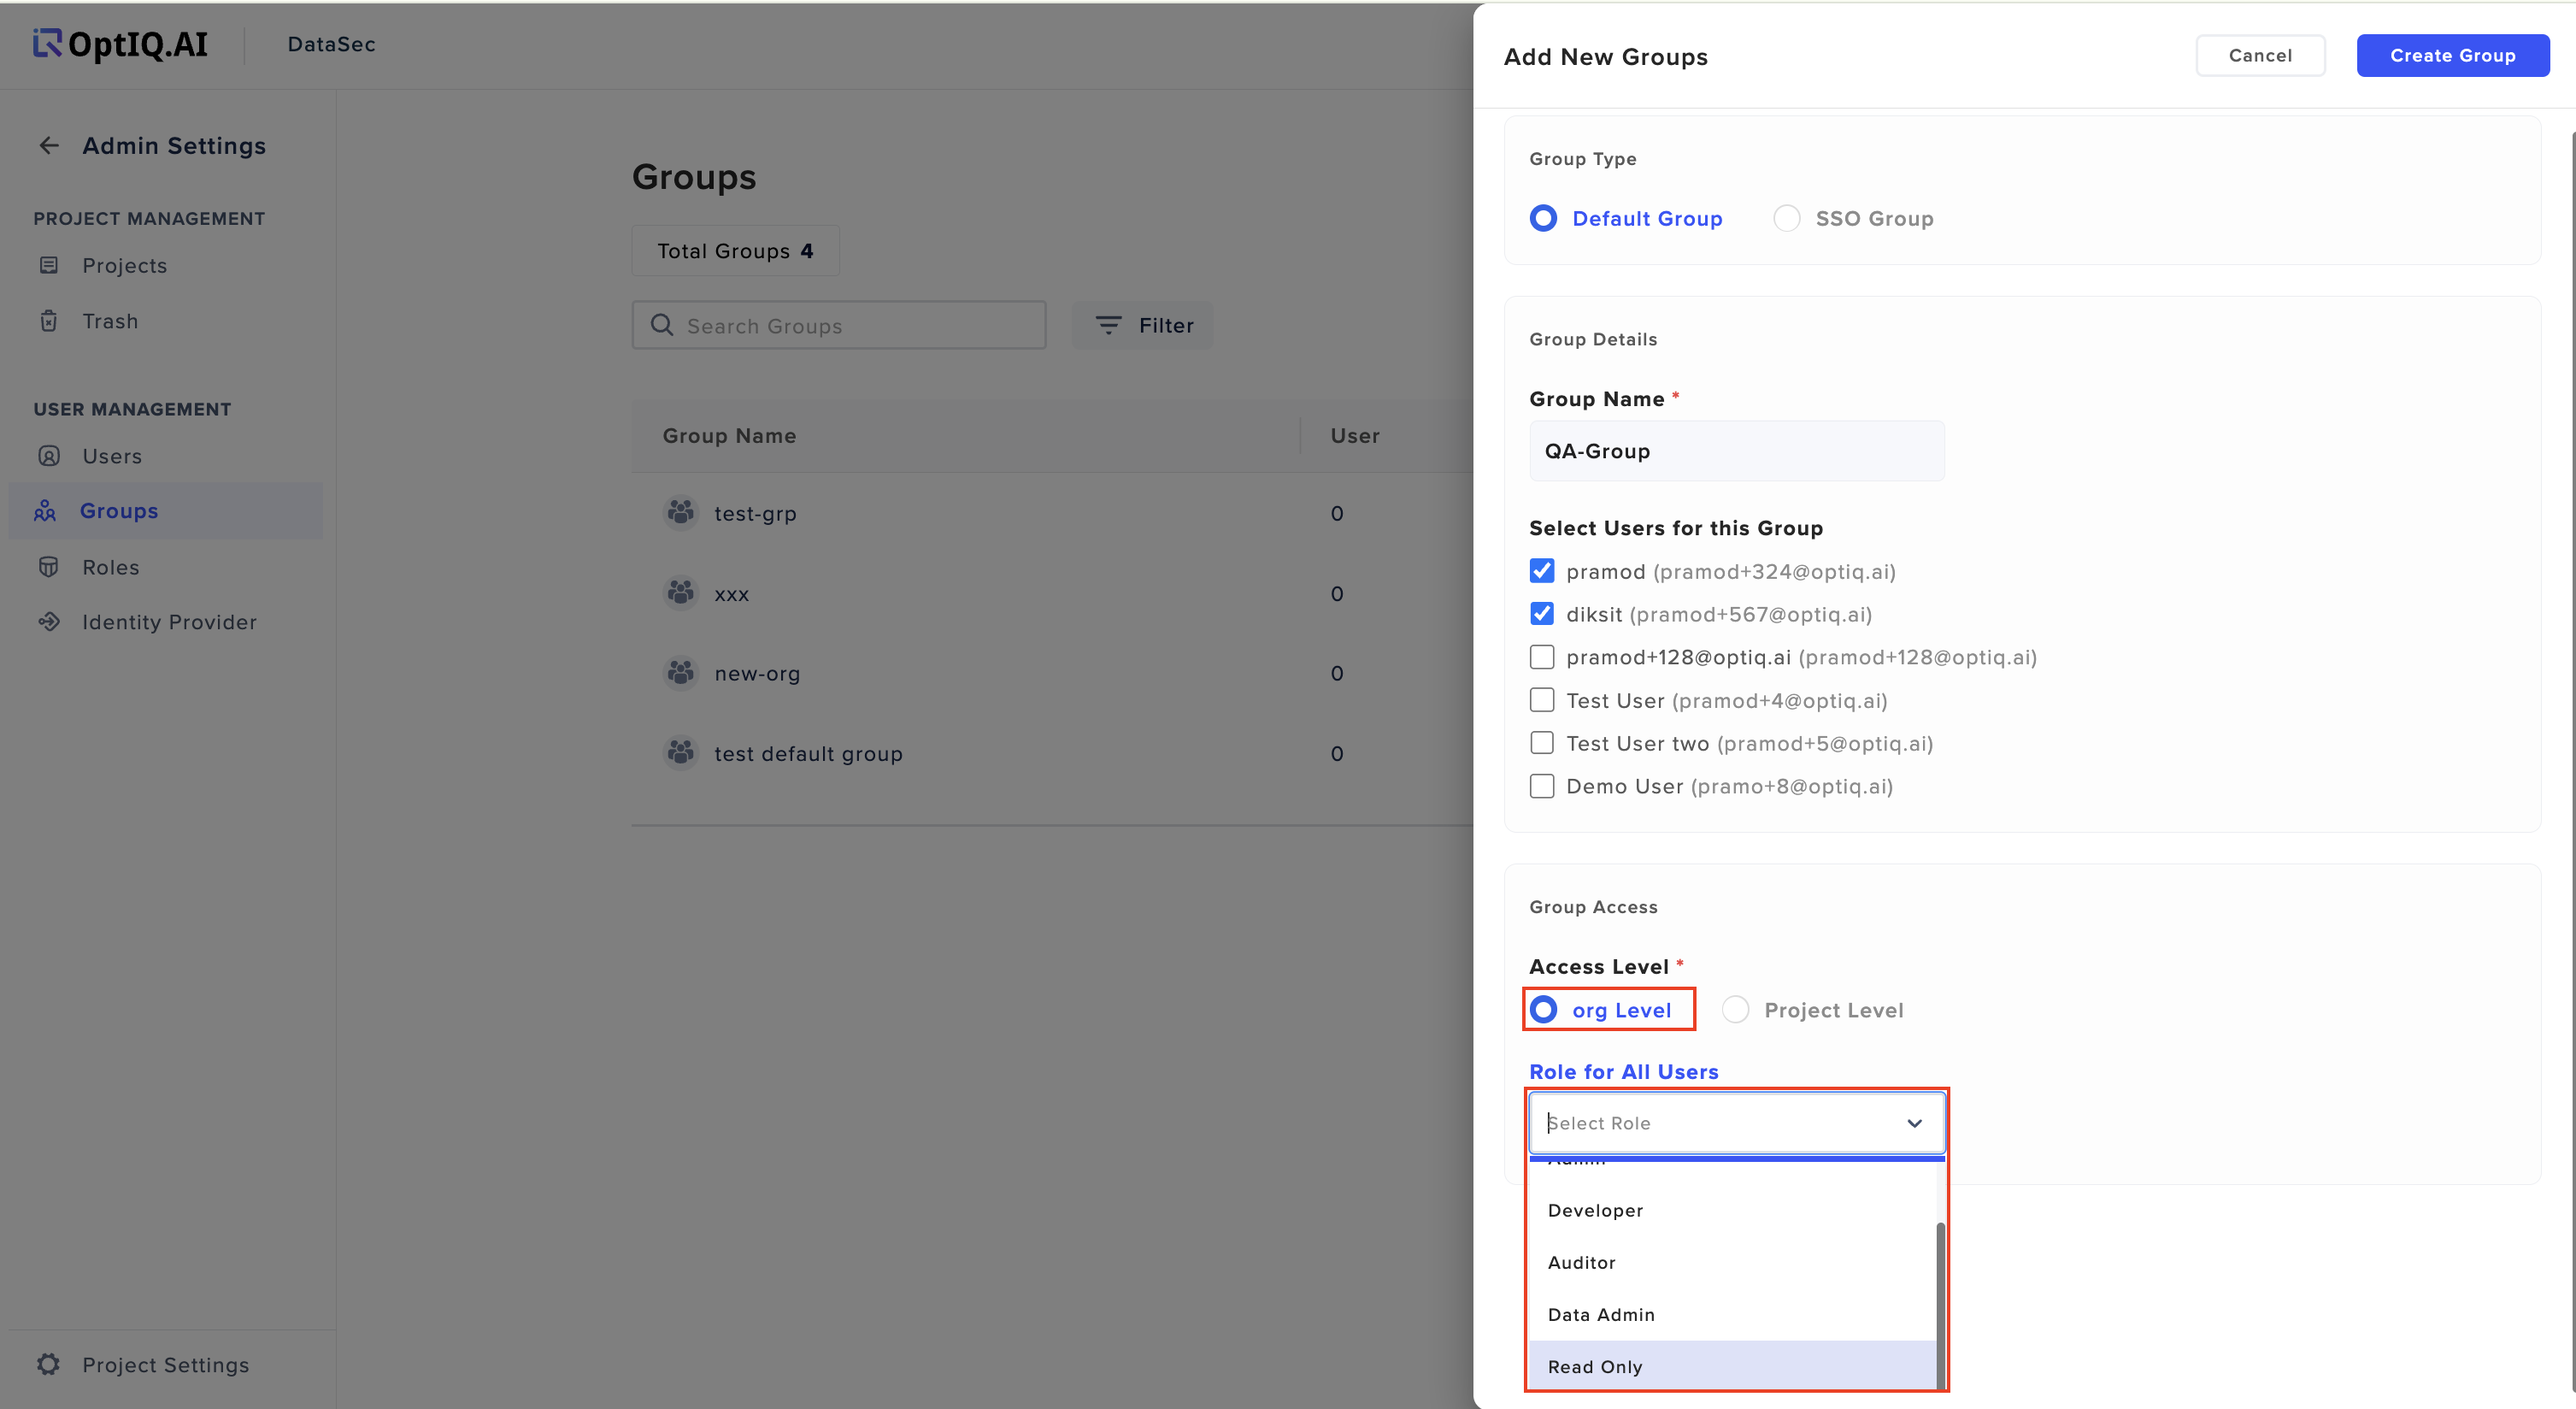
Select the Access Level:
Now, you will need to assign an Access Level for the group:
Organization Level: If you want the group to have access at the organization level, select the Organization Level radio button. You will then need to select the corresponding roles for the group from the dropdown menu.
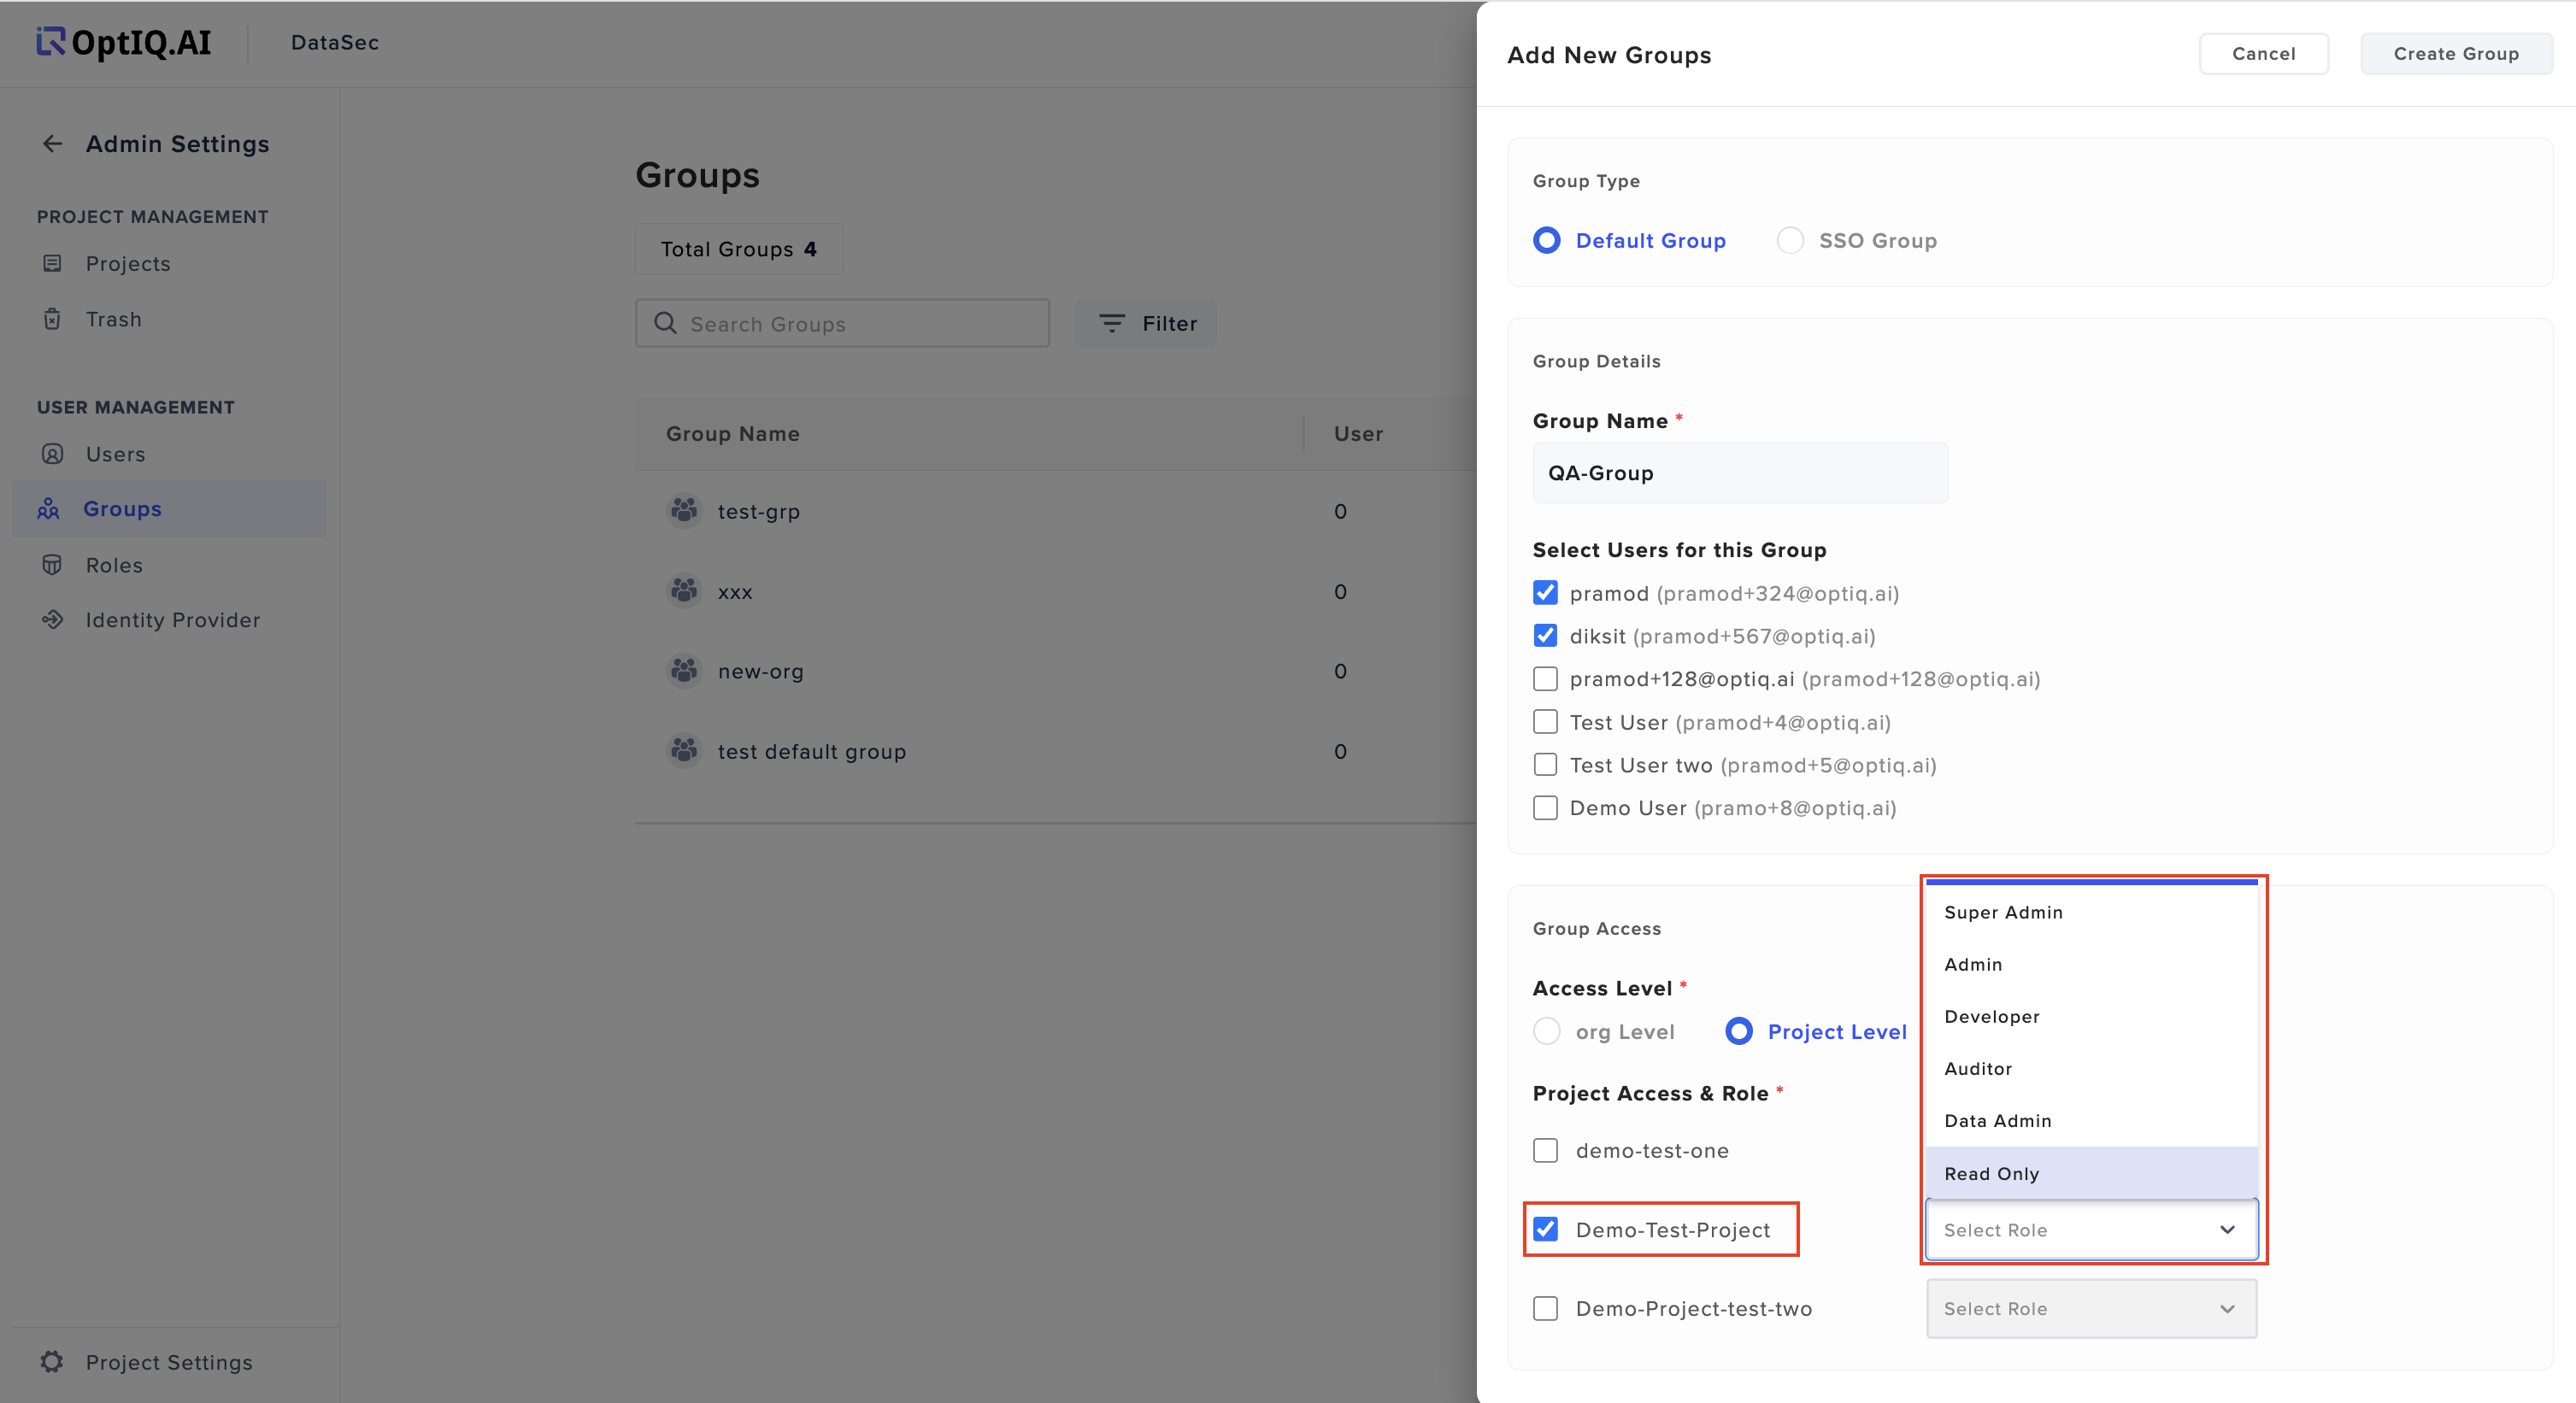
Project Level: If you want the group to have access at the project level, select the Project Level radio button. A list of available projects within the organization will be displayed. Select the required project(s) and assign appropriate roles for groups
Step 6: Finalizing the Group Creation
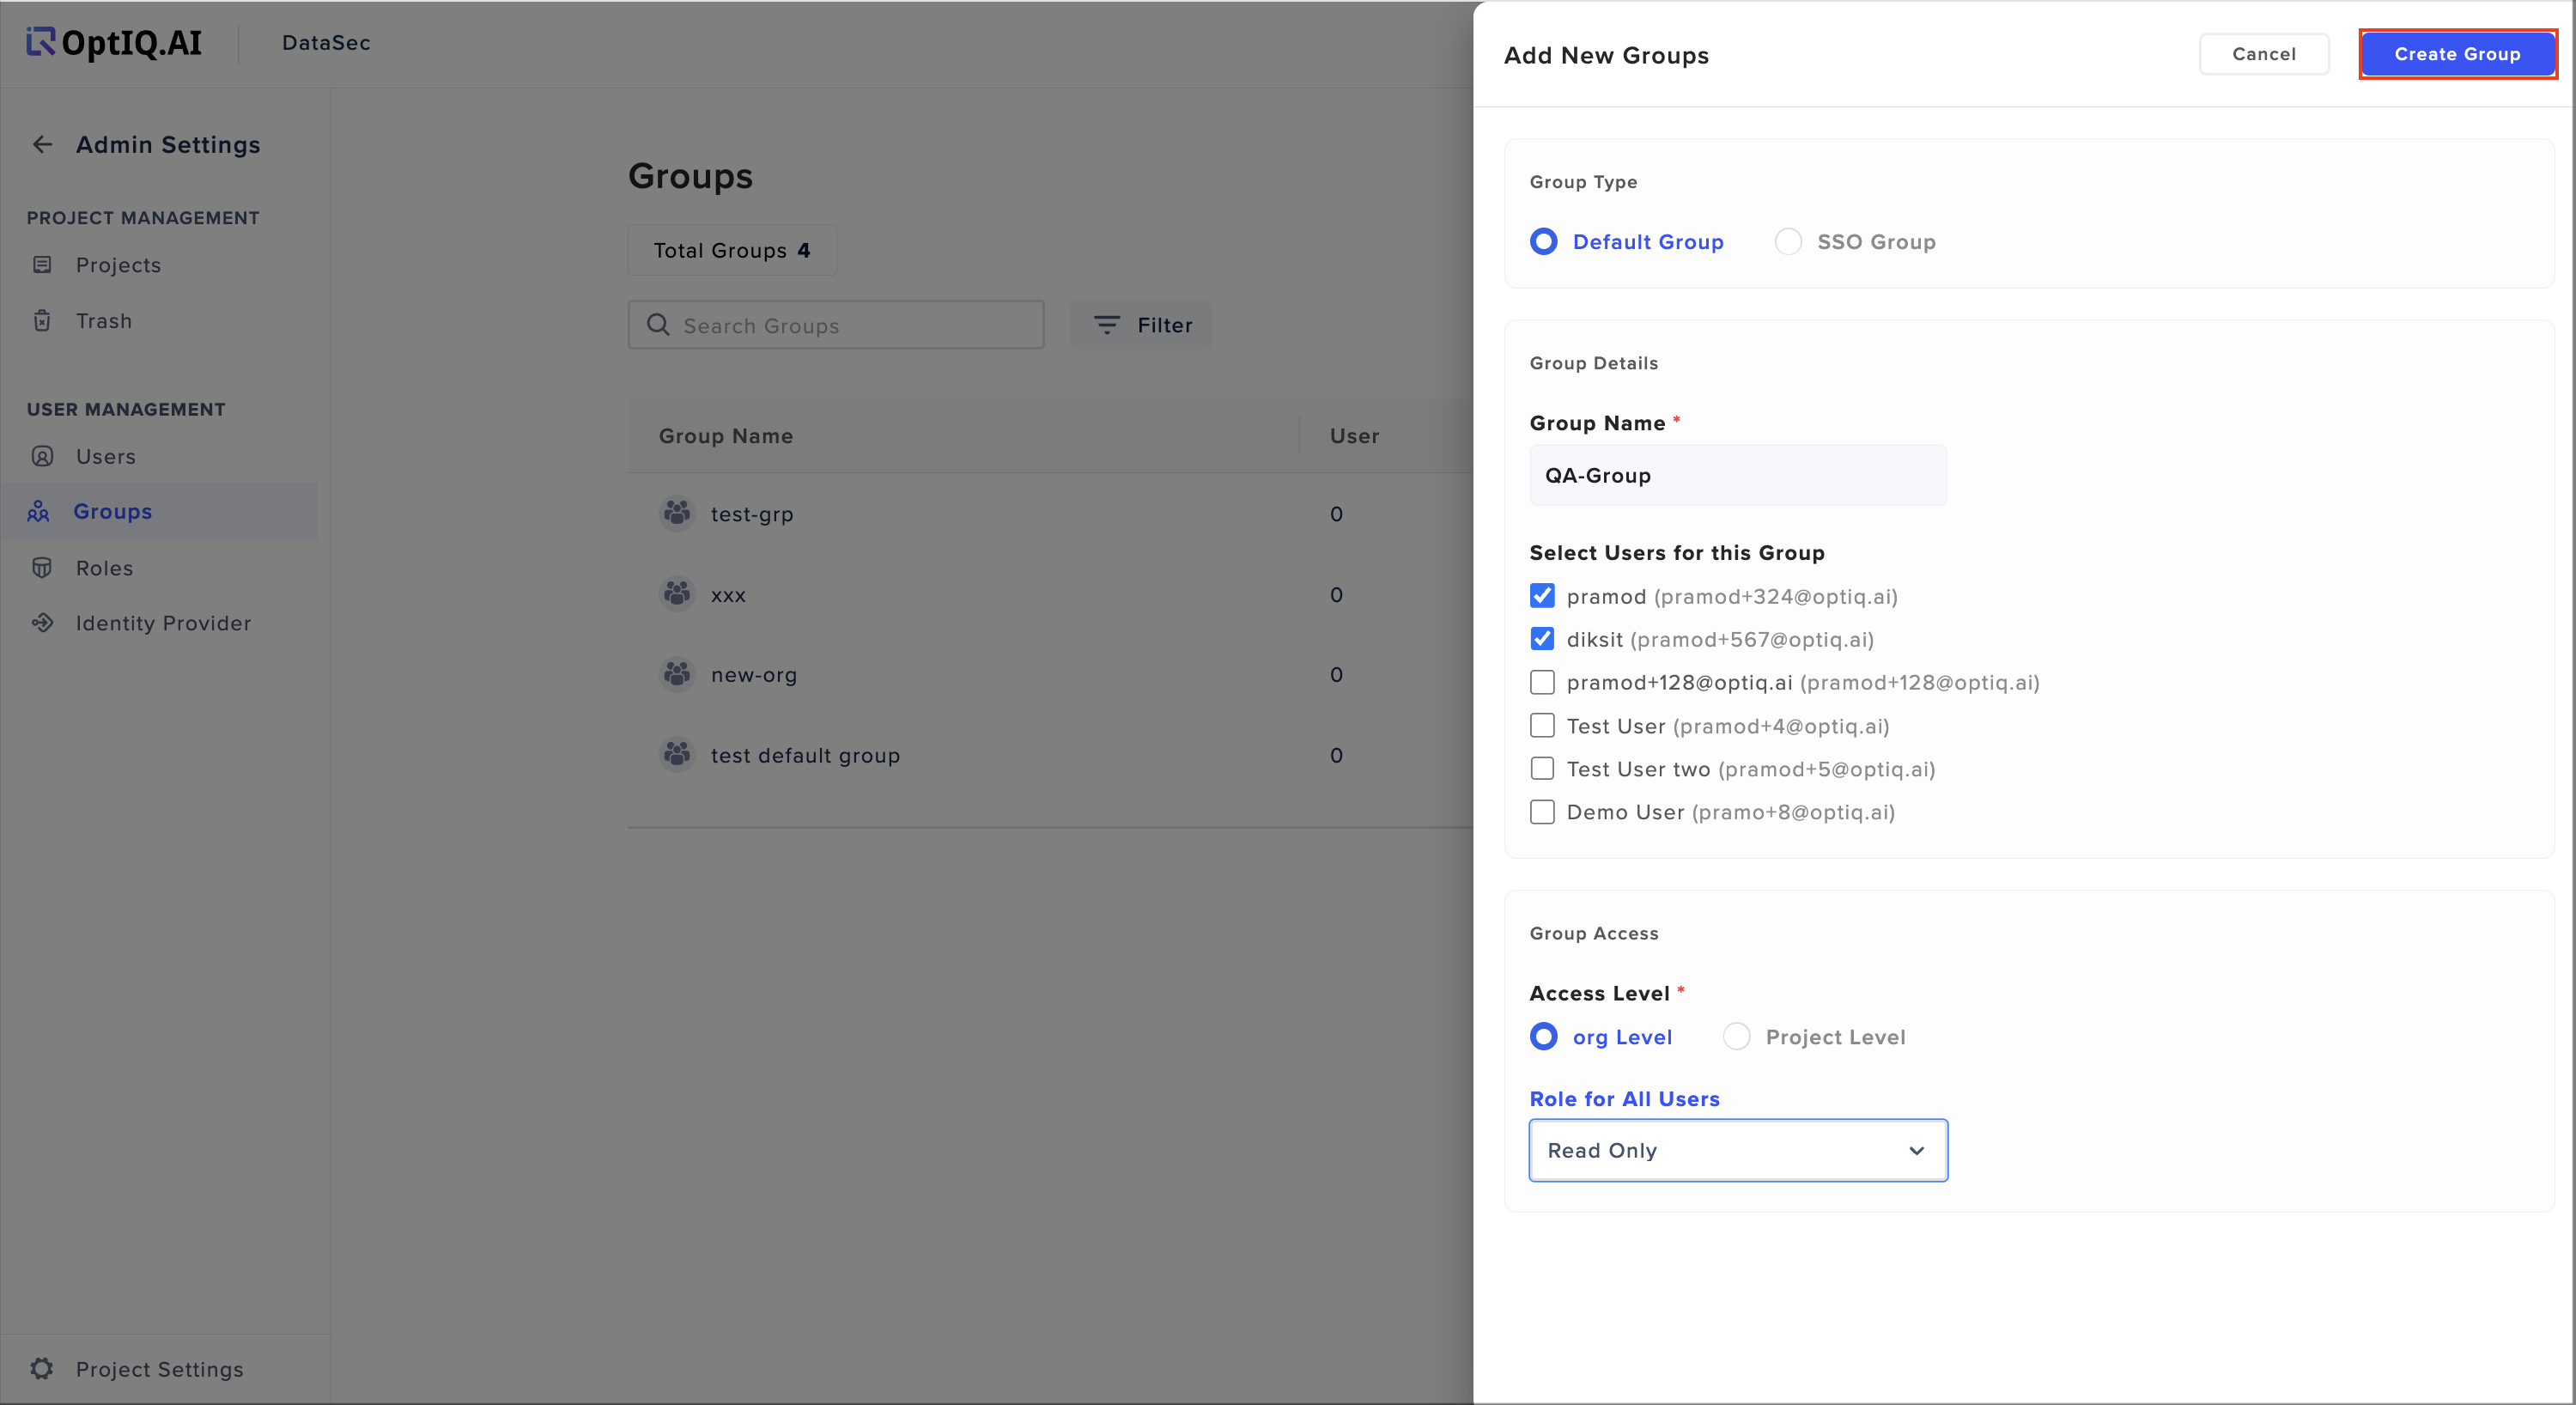
Click on 'Create Group':
After filling in the necessary details, click on the Create Group button to finalize the creation process.
Step 7: Group Creation Confirmation
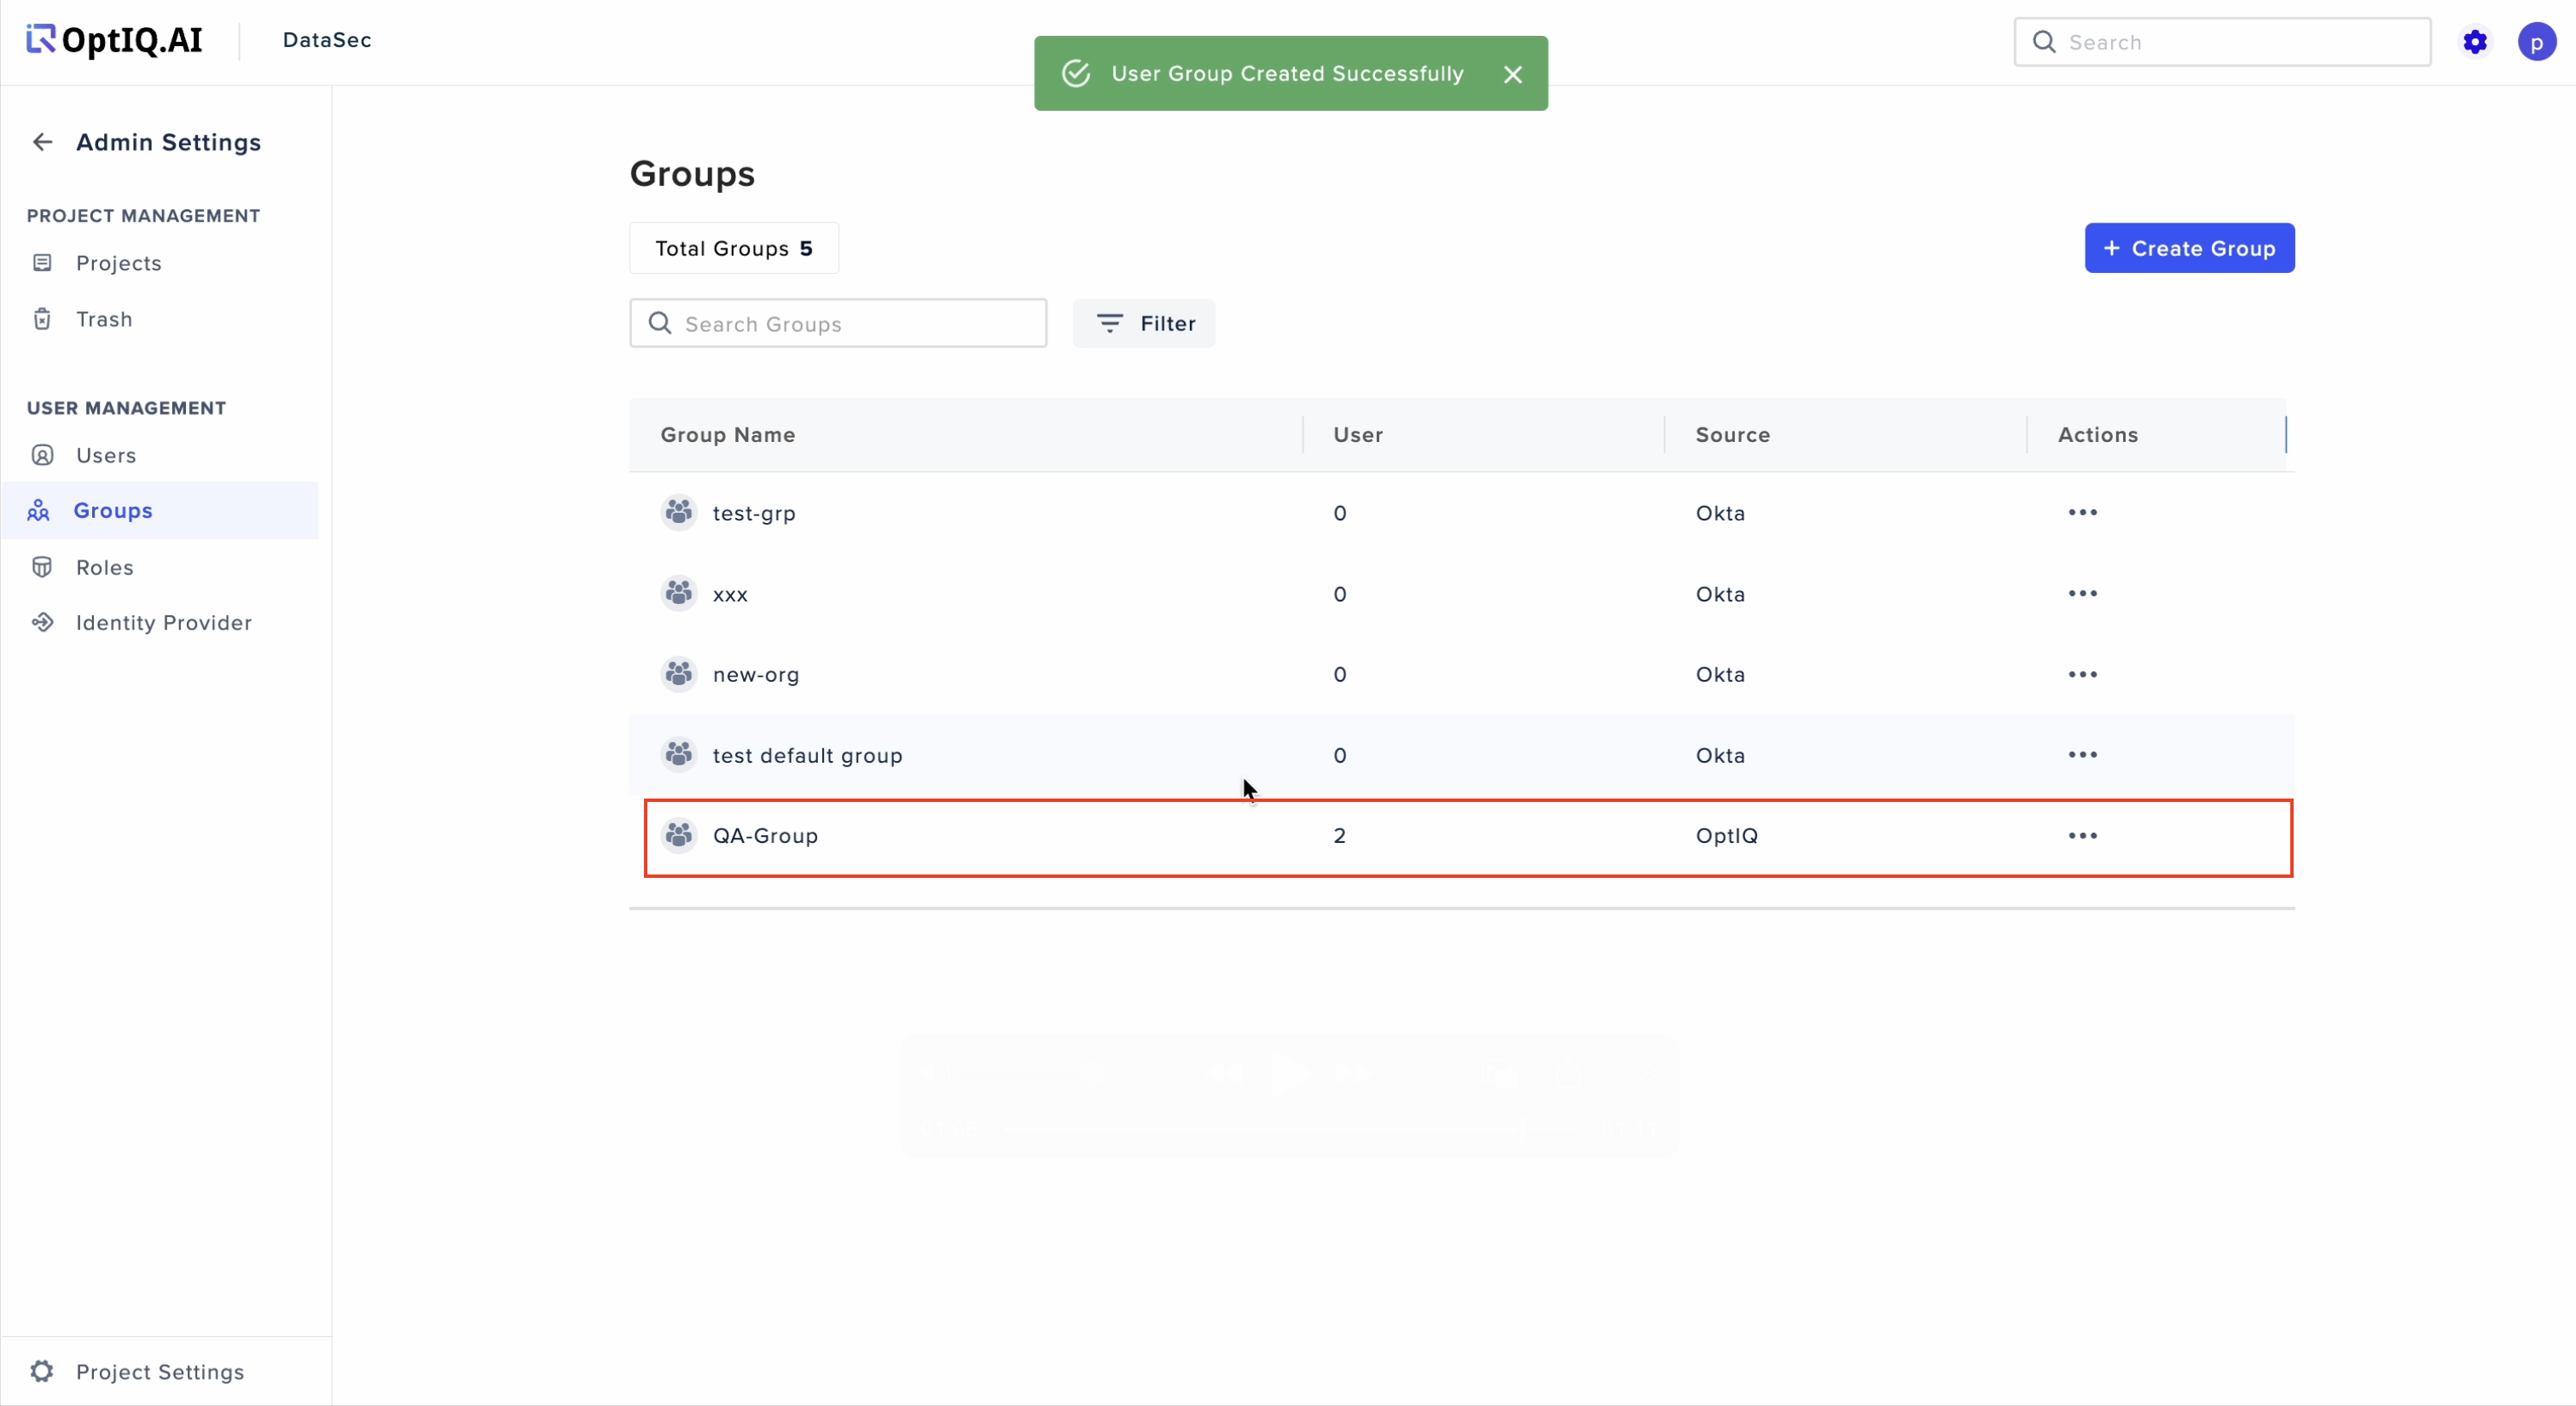
Success Notification:
Once the group is successfully created, a confirmation message will appear. The newly created group will now be listed in the groups section.
Step 8: Managing the Group
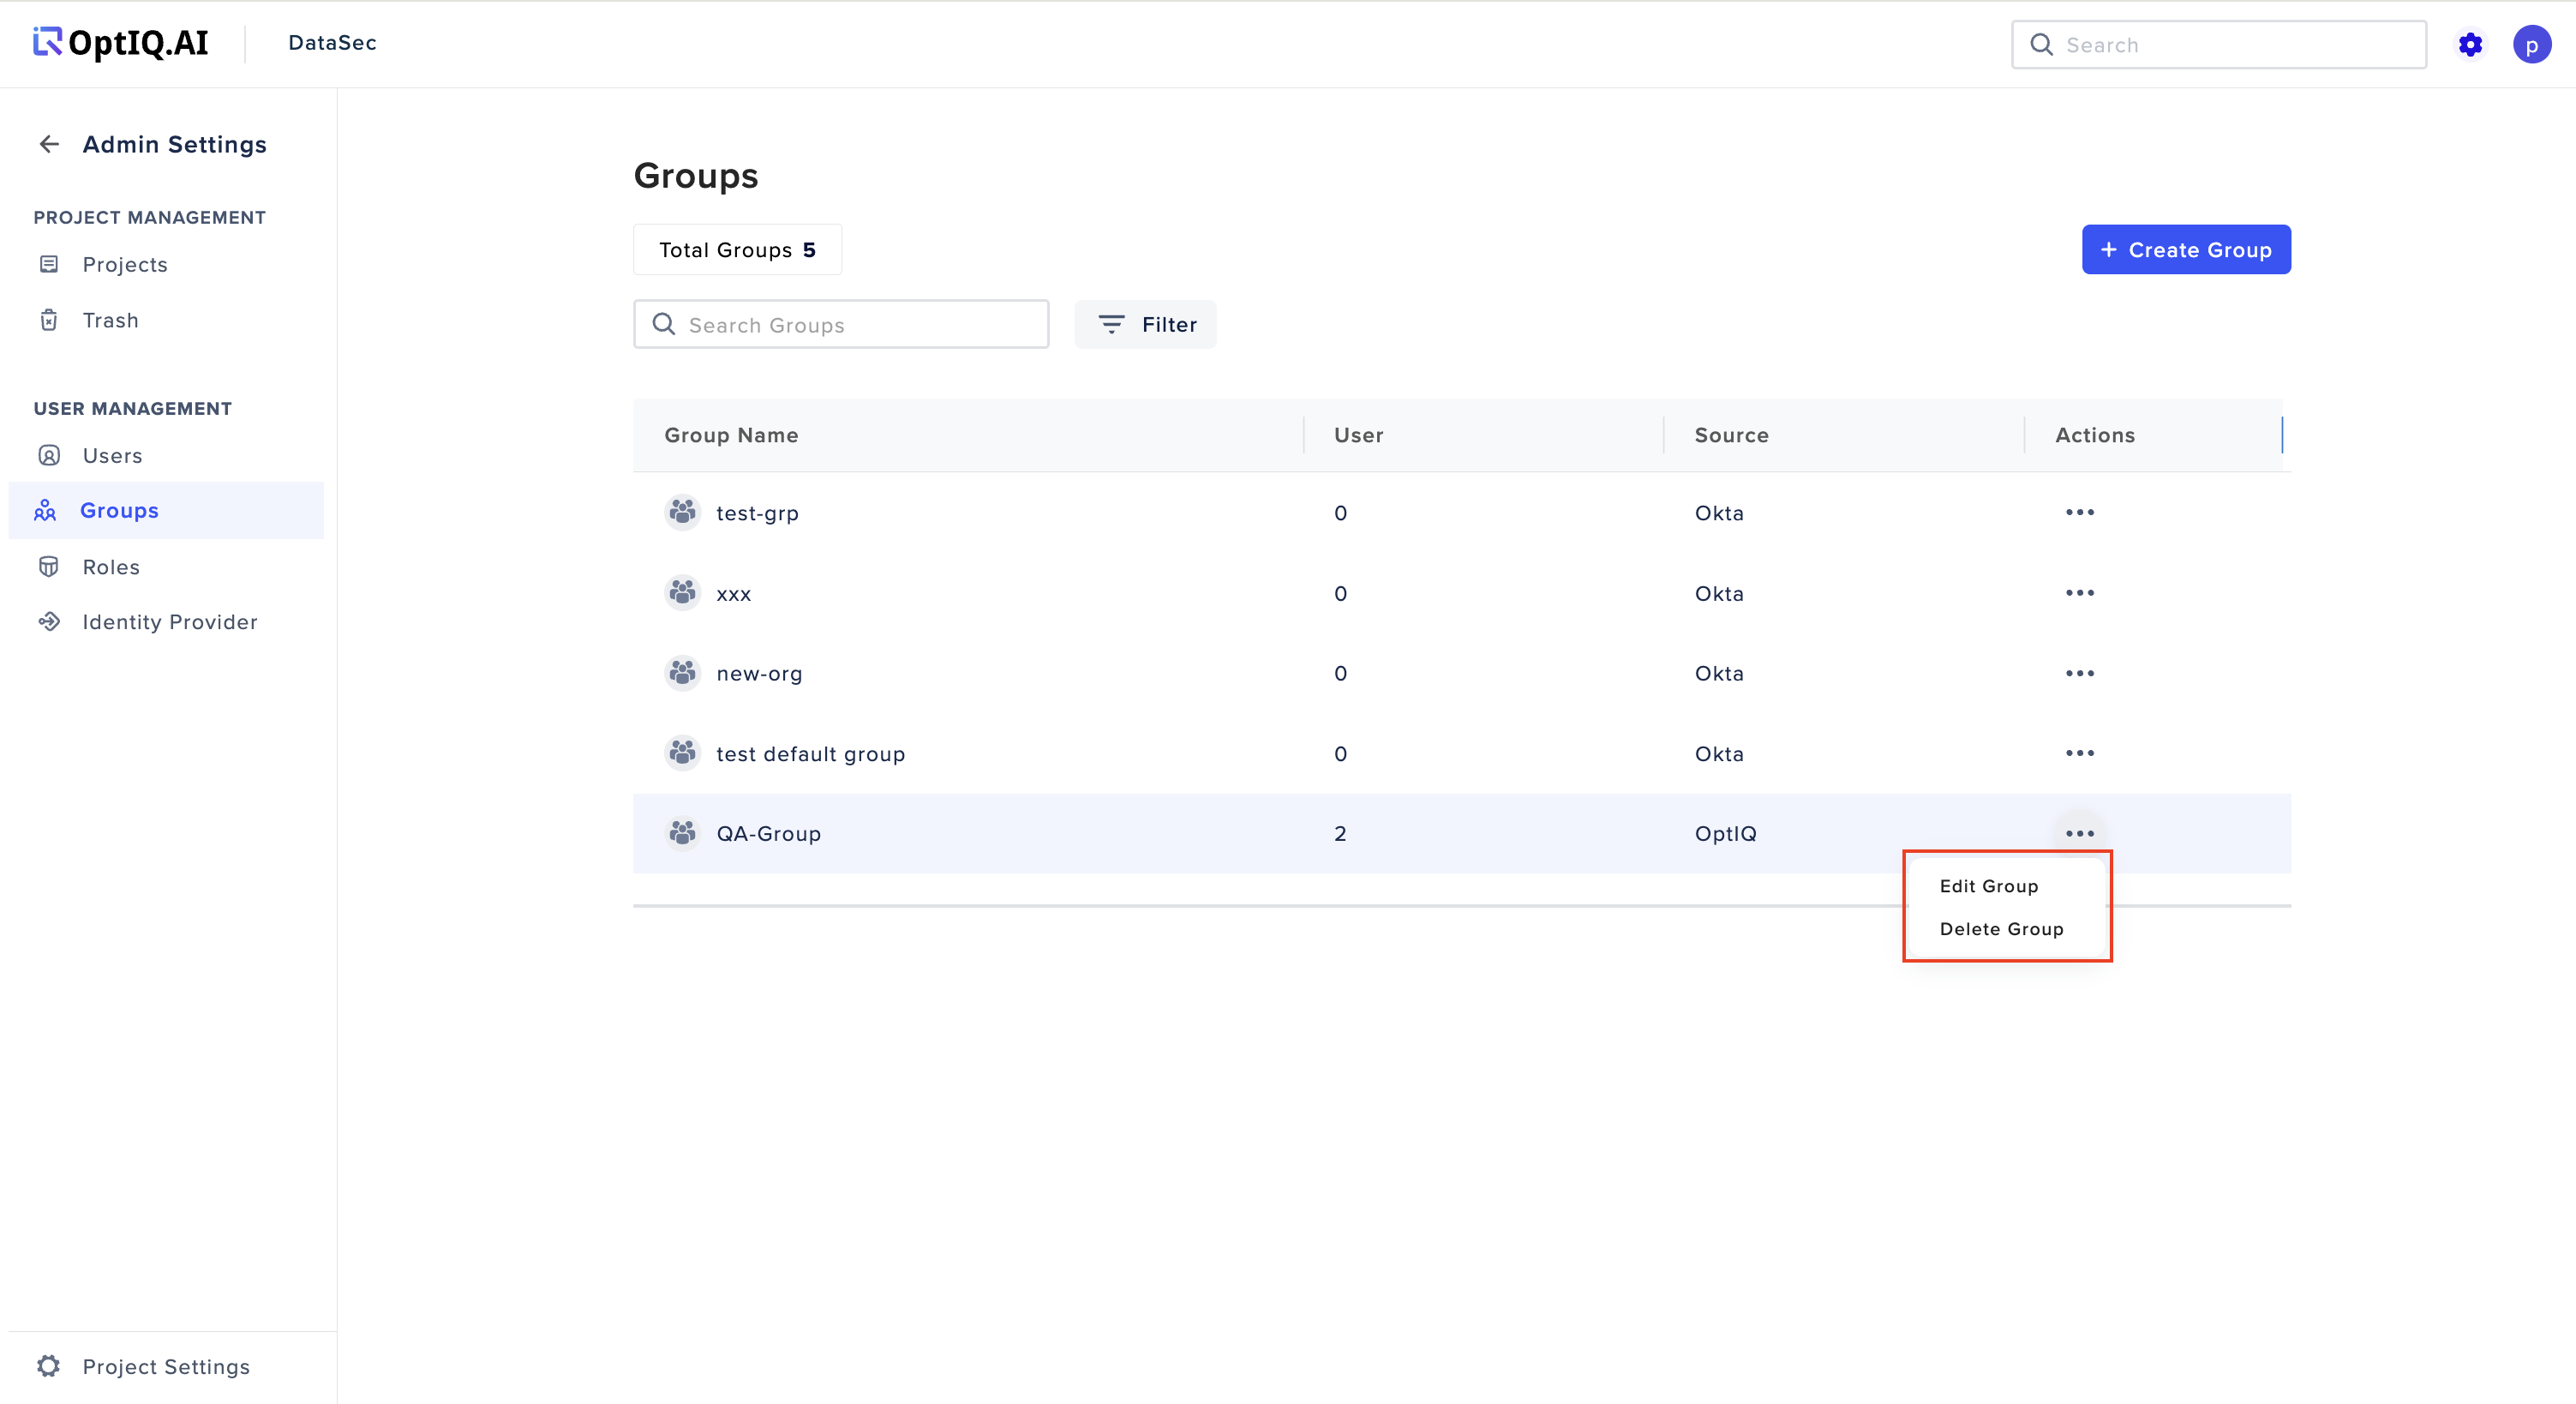
Edit or Delete a Group:
To edit or delete a group, click on the Actions button. From the dropdown menu, select either Edit or Delete to make the necessary changes.
Step 9: User Access Confirmation
User Access to Projects:
Once the group is created and users are assigned to it, the users will gain access to the corresponding project with the specified access level.
Notes:
Group-level Users: Users within a group can only access the project assigned to that group. They cannot access any other groups.
Super Admin Control: Only super admins have the authority to create, edit, or delete users and groups.
Role Assignments: Be sure to assign appropriate roles for Groups, either at the Organization level or Project level, to ensure proper access control.