Azure AD Integration
Last updated: May 15, 2026
This guide provides step-by-step instructions for seamlessly integrating your Azure account with Matters platform. Follow the instructions carefully to ensure successful integration.
Step 1: Setup Application & generate client secret
Go to
Microsoft Entra ID→ App Registrations → Click on New Registration
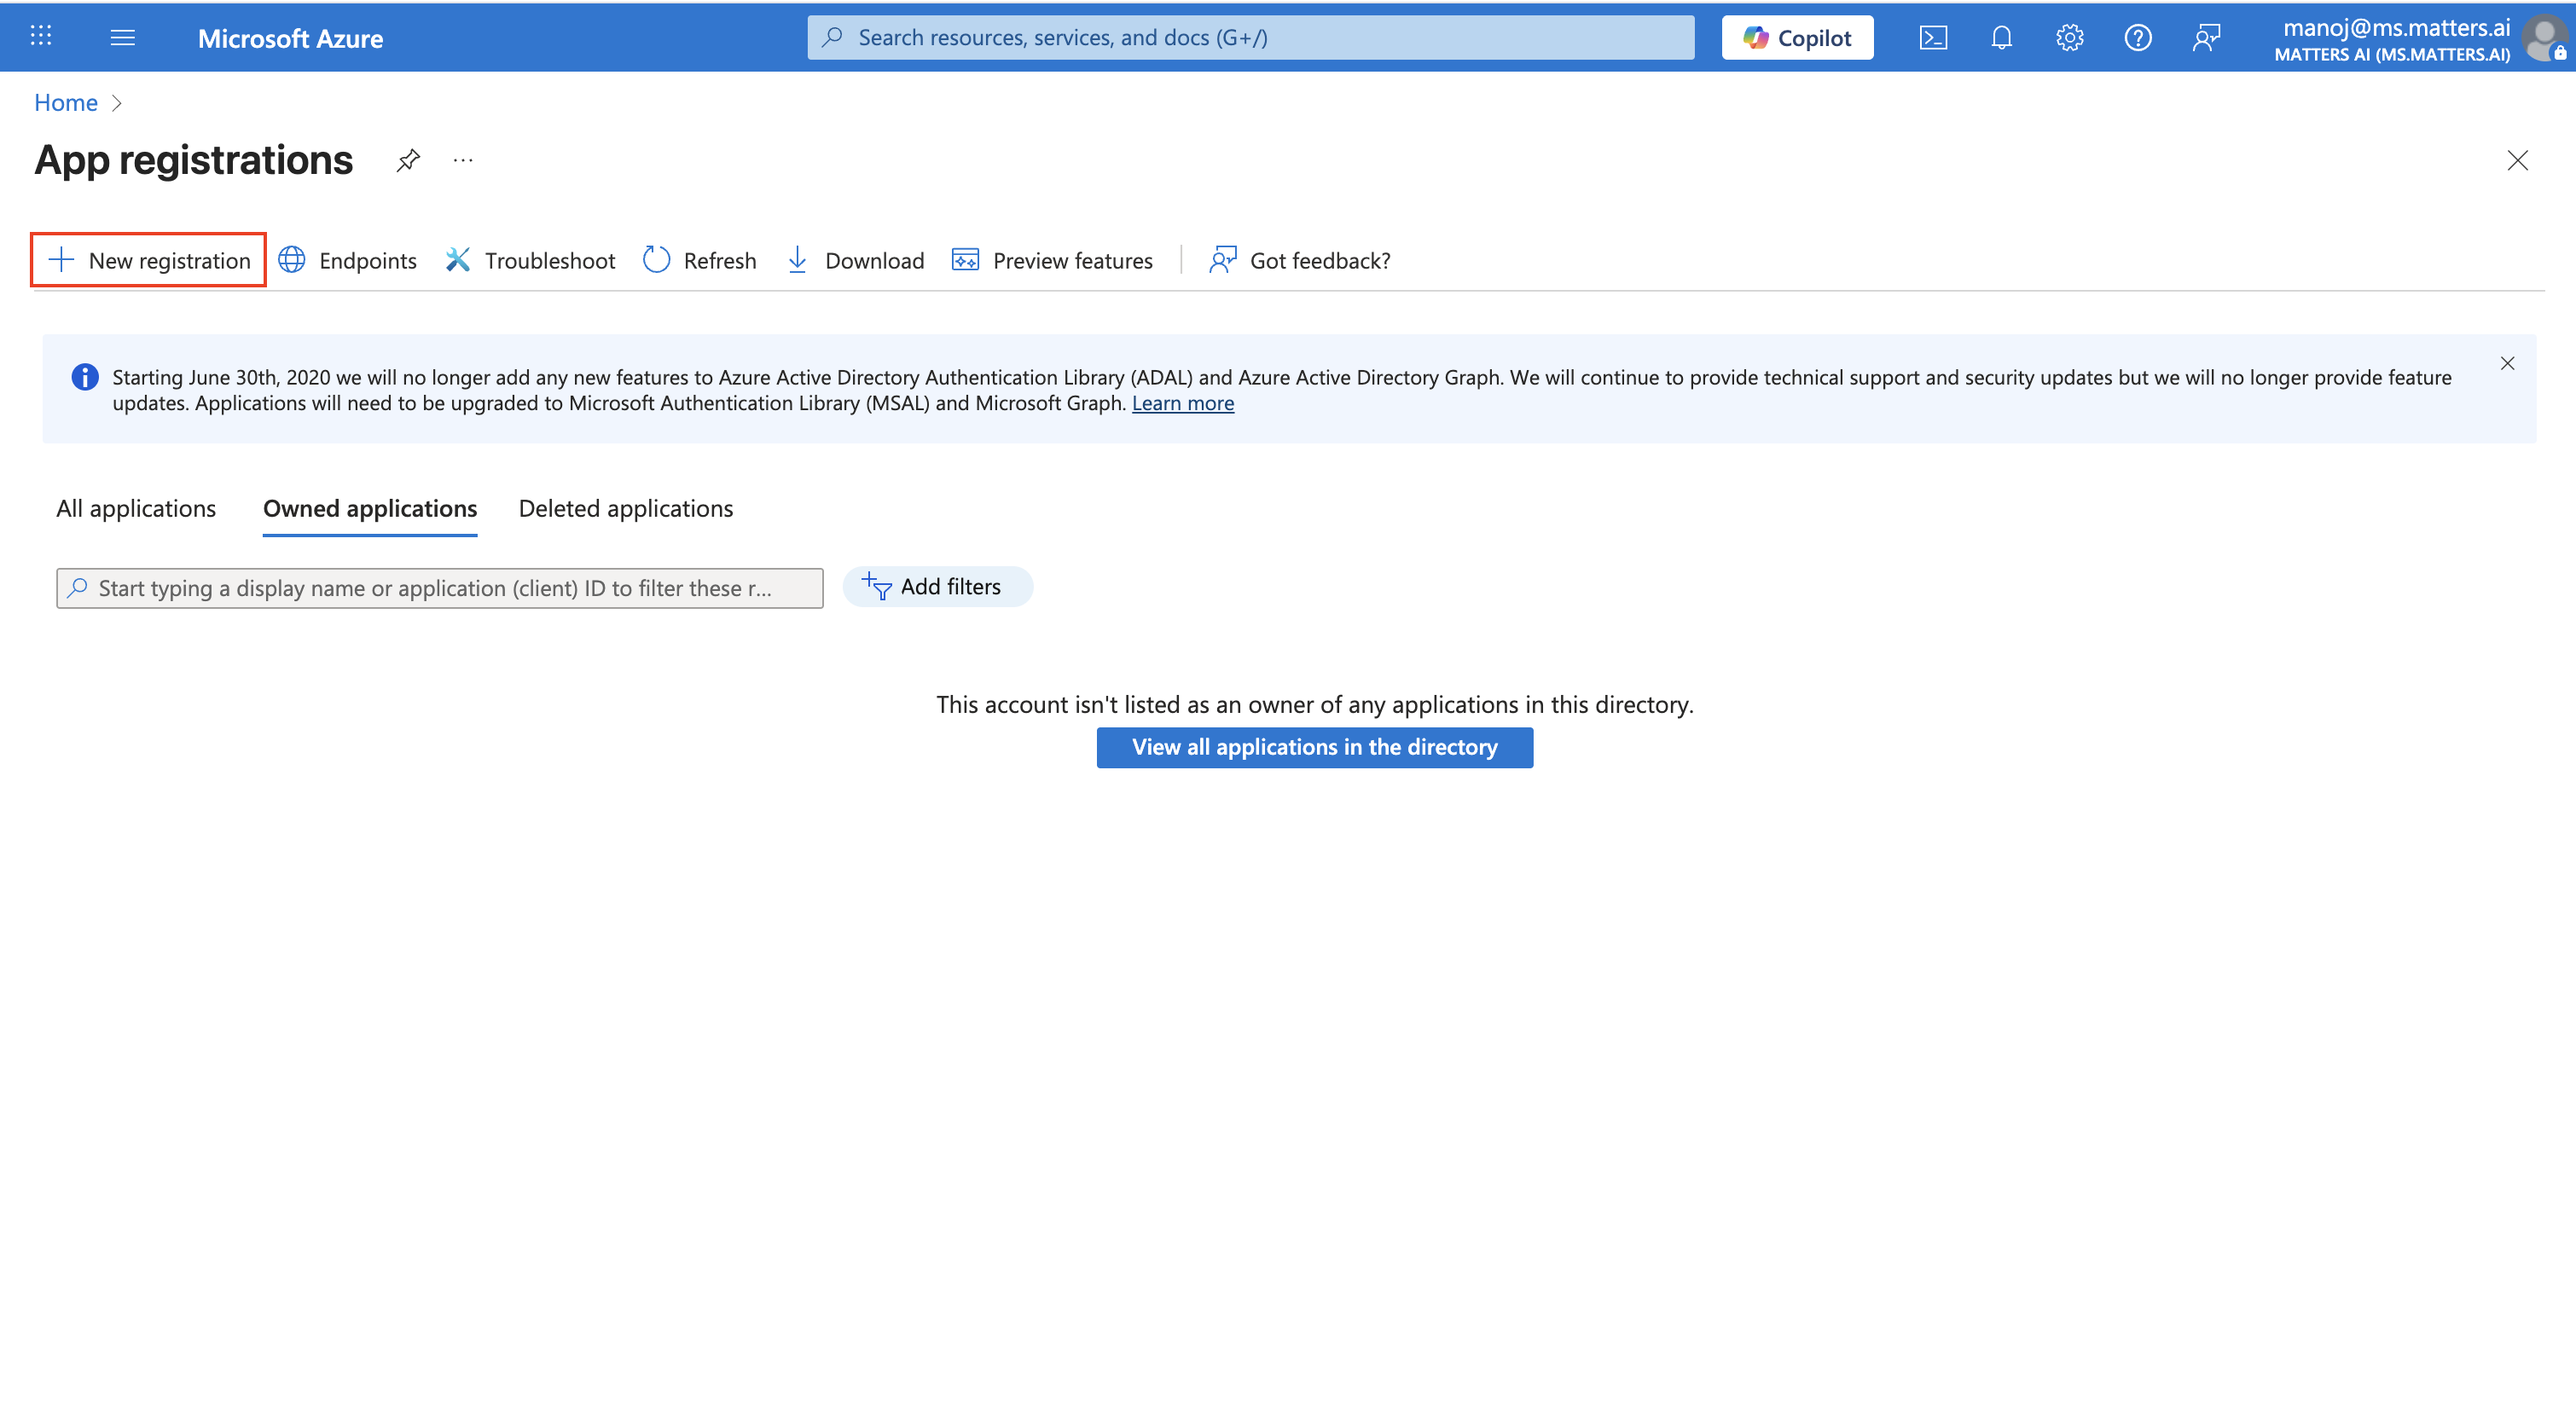
Now, register the application:
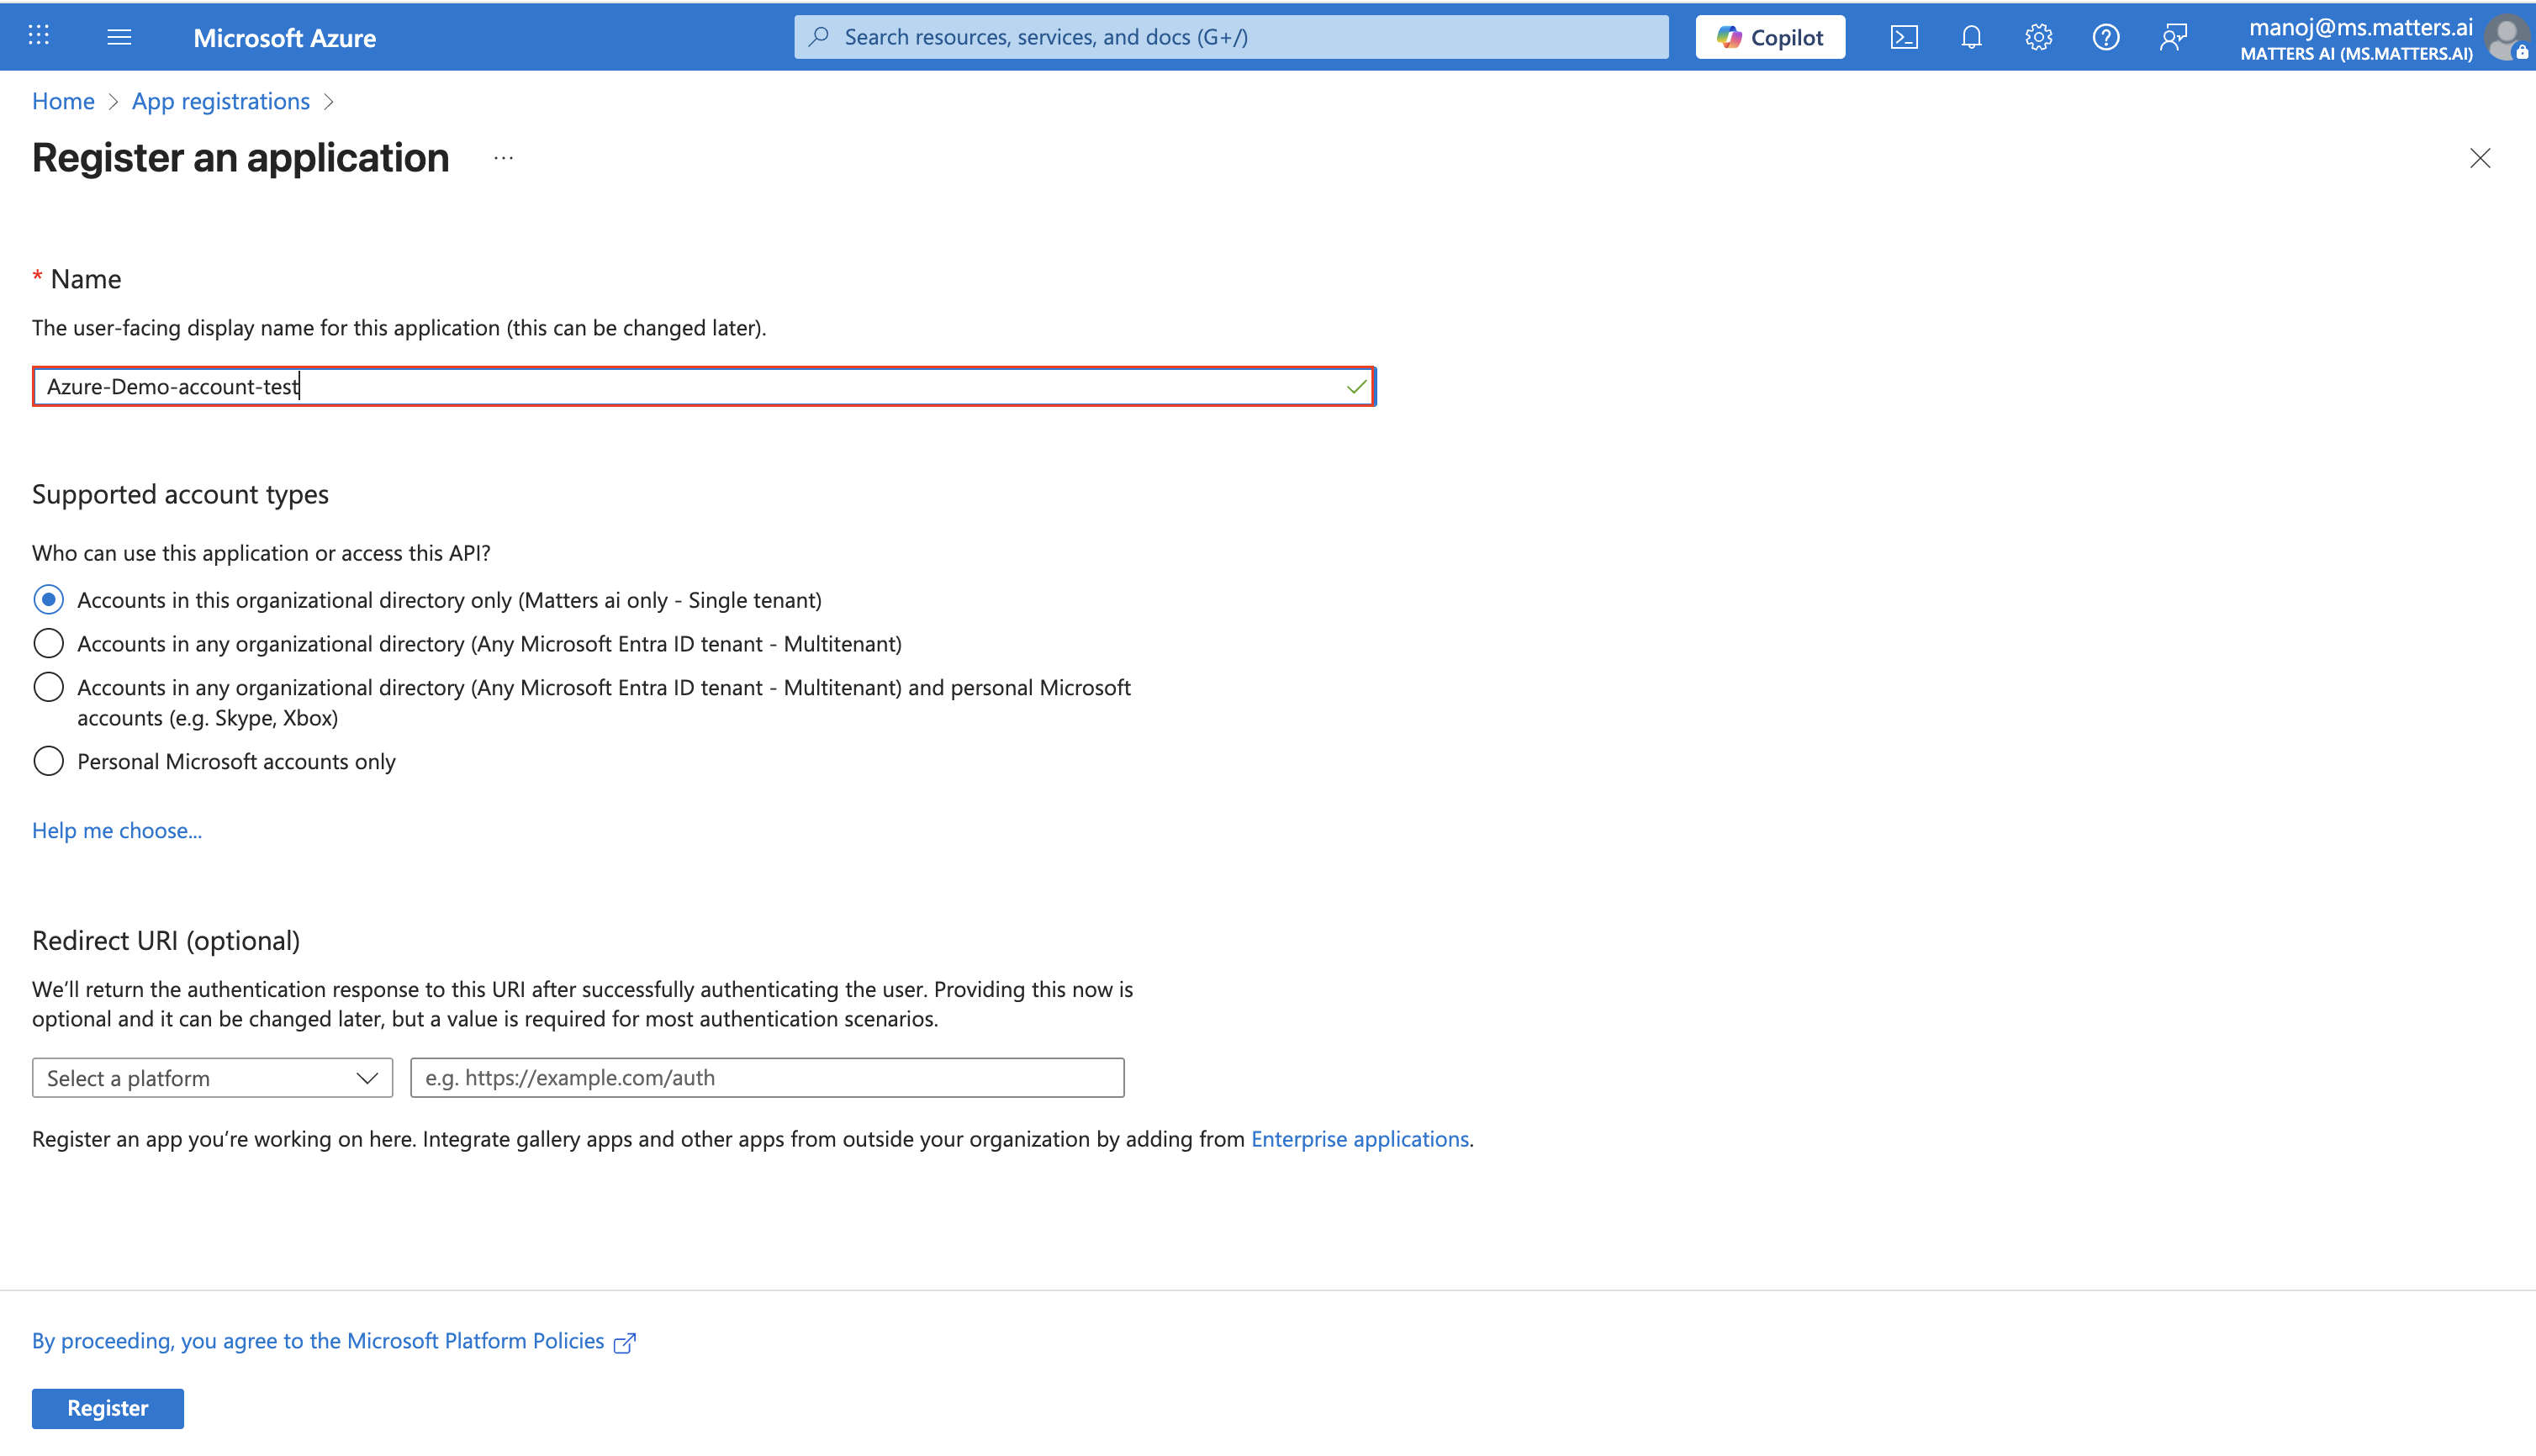
Step 2: Give Resource Discovery Permissions on a subscription level
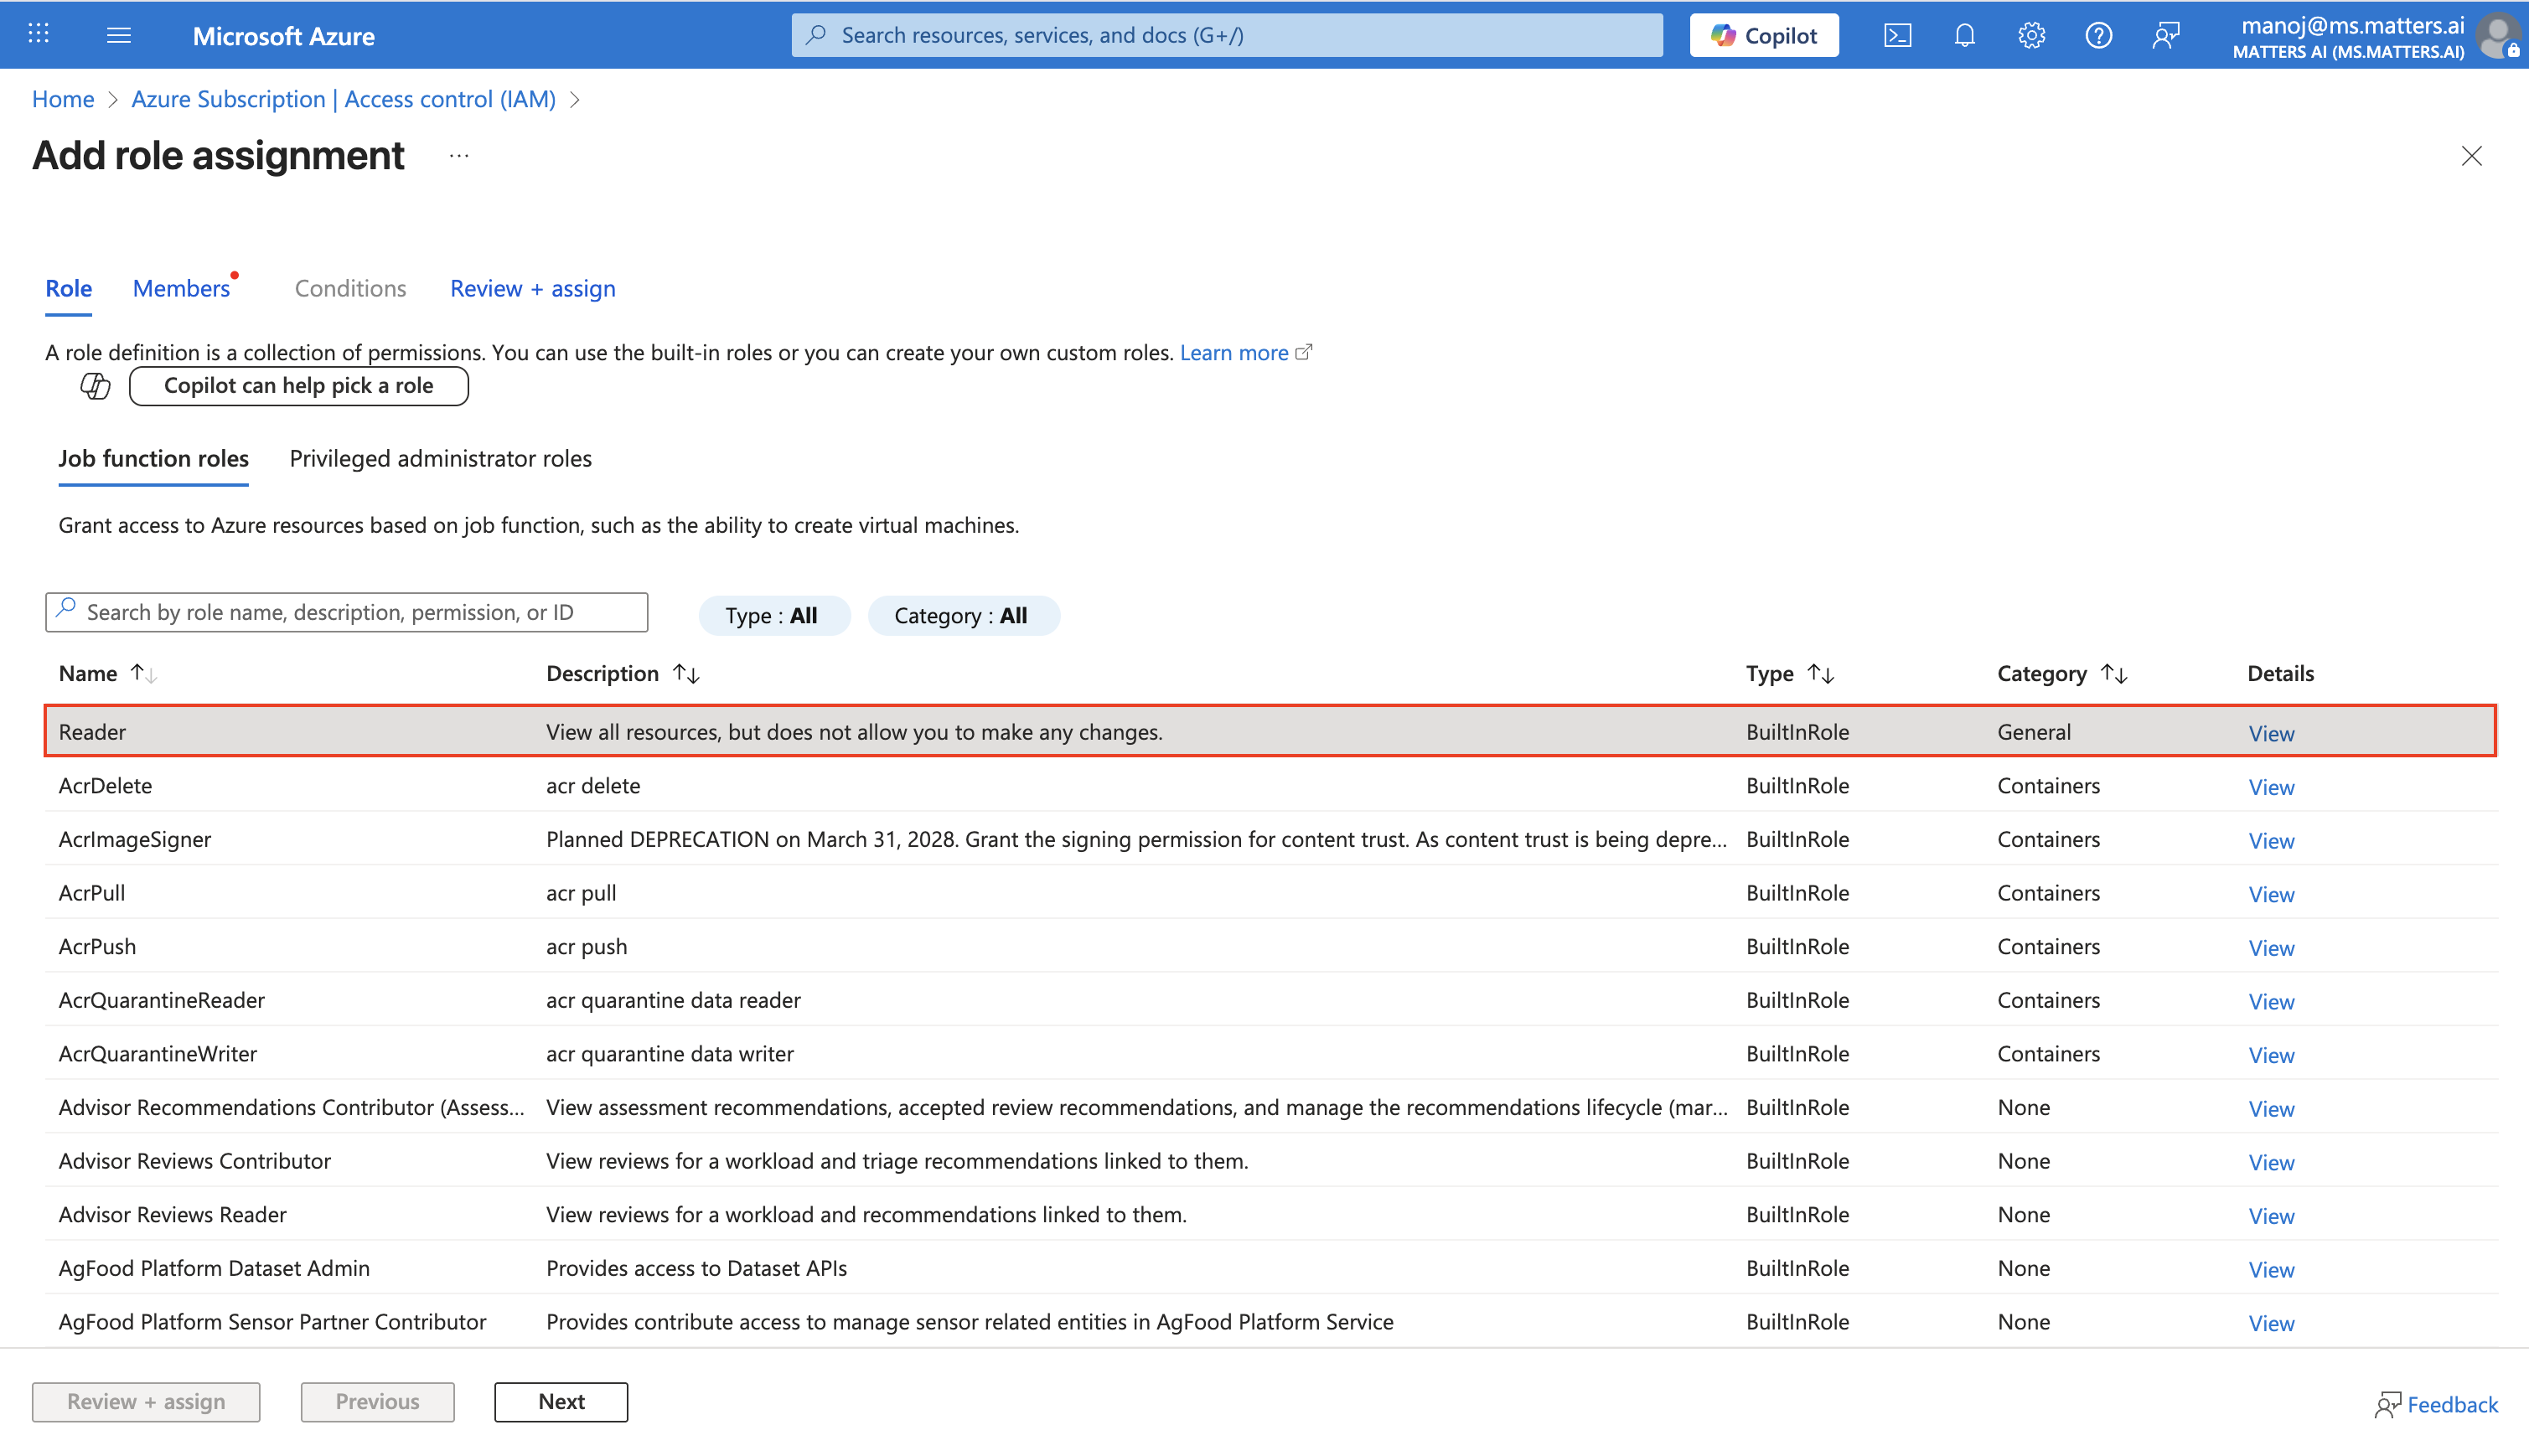
For Matters to discover all relevant assets across your Azure Cloud, We require Reader permission a Subscription Level to the created Application.
💡
Reader Permission → Listing Permission for Discovery of Assets
Scope: Management Plane (Azure Resource Manager - ARM).
What It Covers:
Provides read-only access to Azure resource configurations and metadata.
Allows you to see the properties, settings, and monitoring data of resources (like storage accounts, virtual machines, etc.).
You can list containers in a storage account but cannot access the actual blobs within those containers.
These permissions are required on a subscription level so that clients don’t have to manually go through their Azure for discovery of Storage Accounts
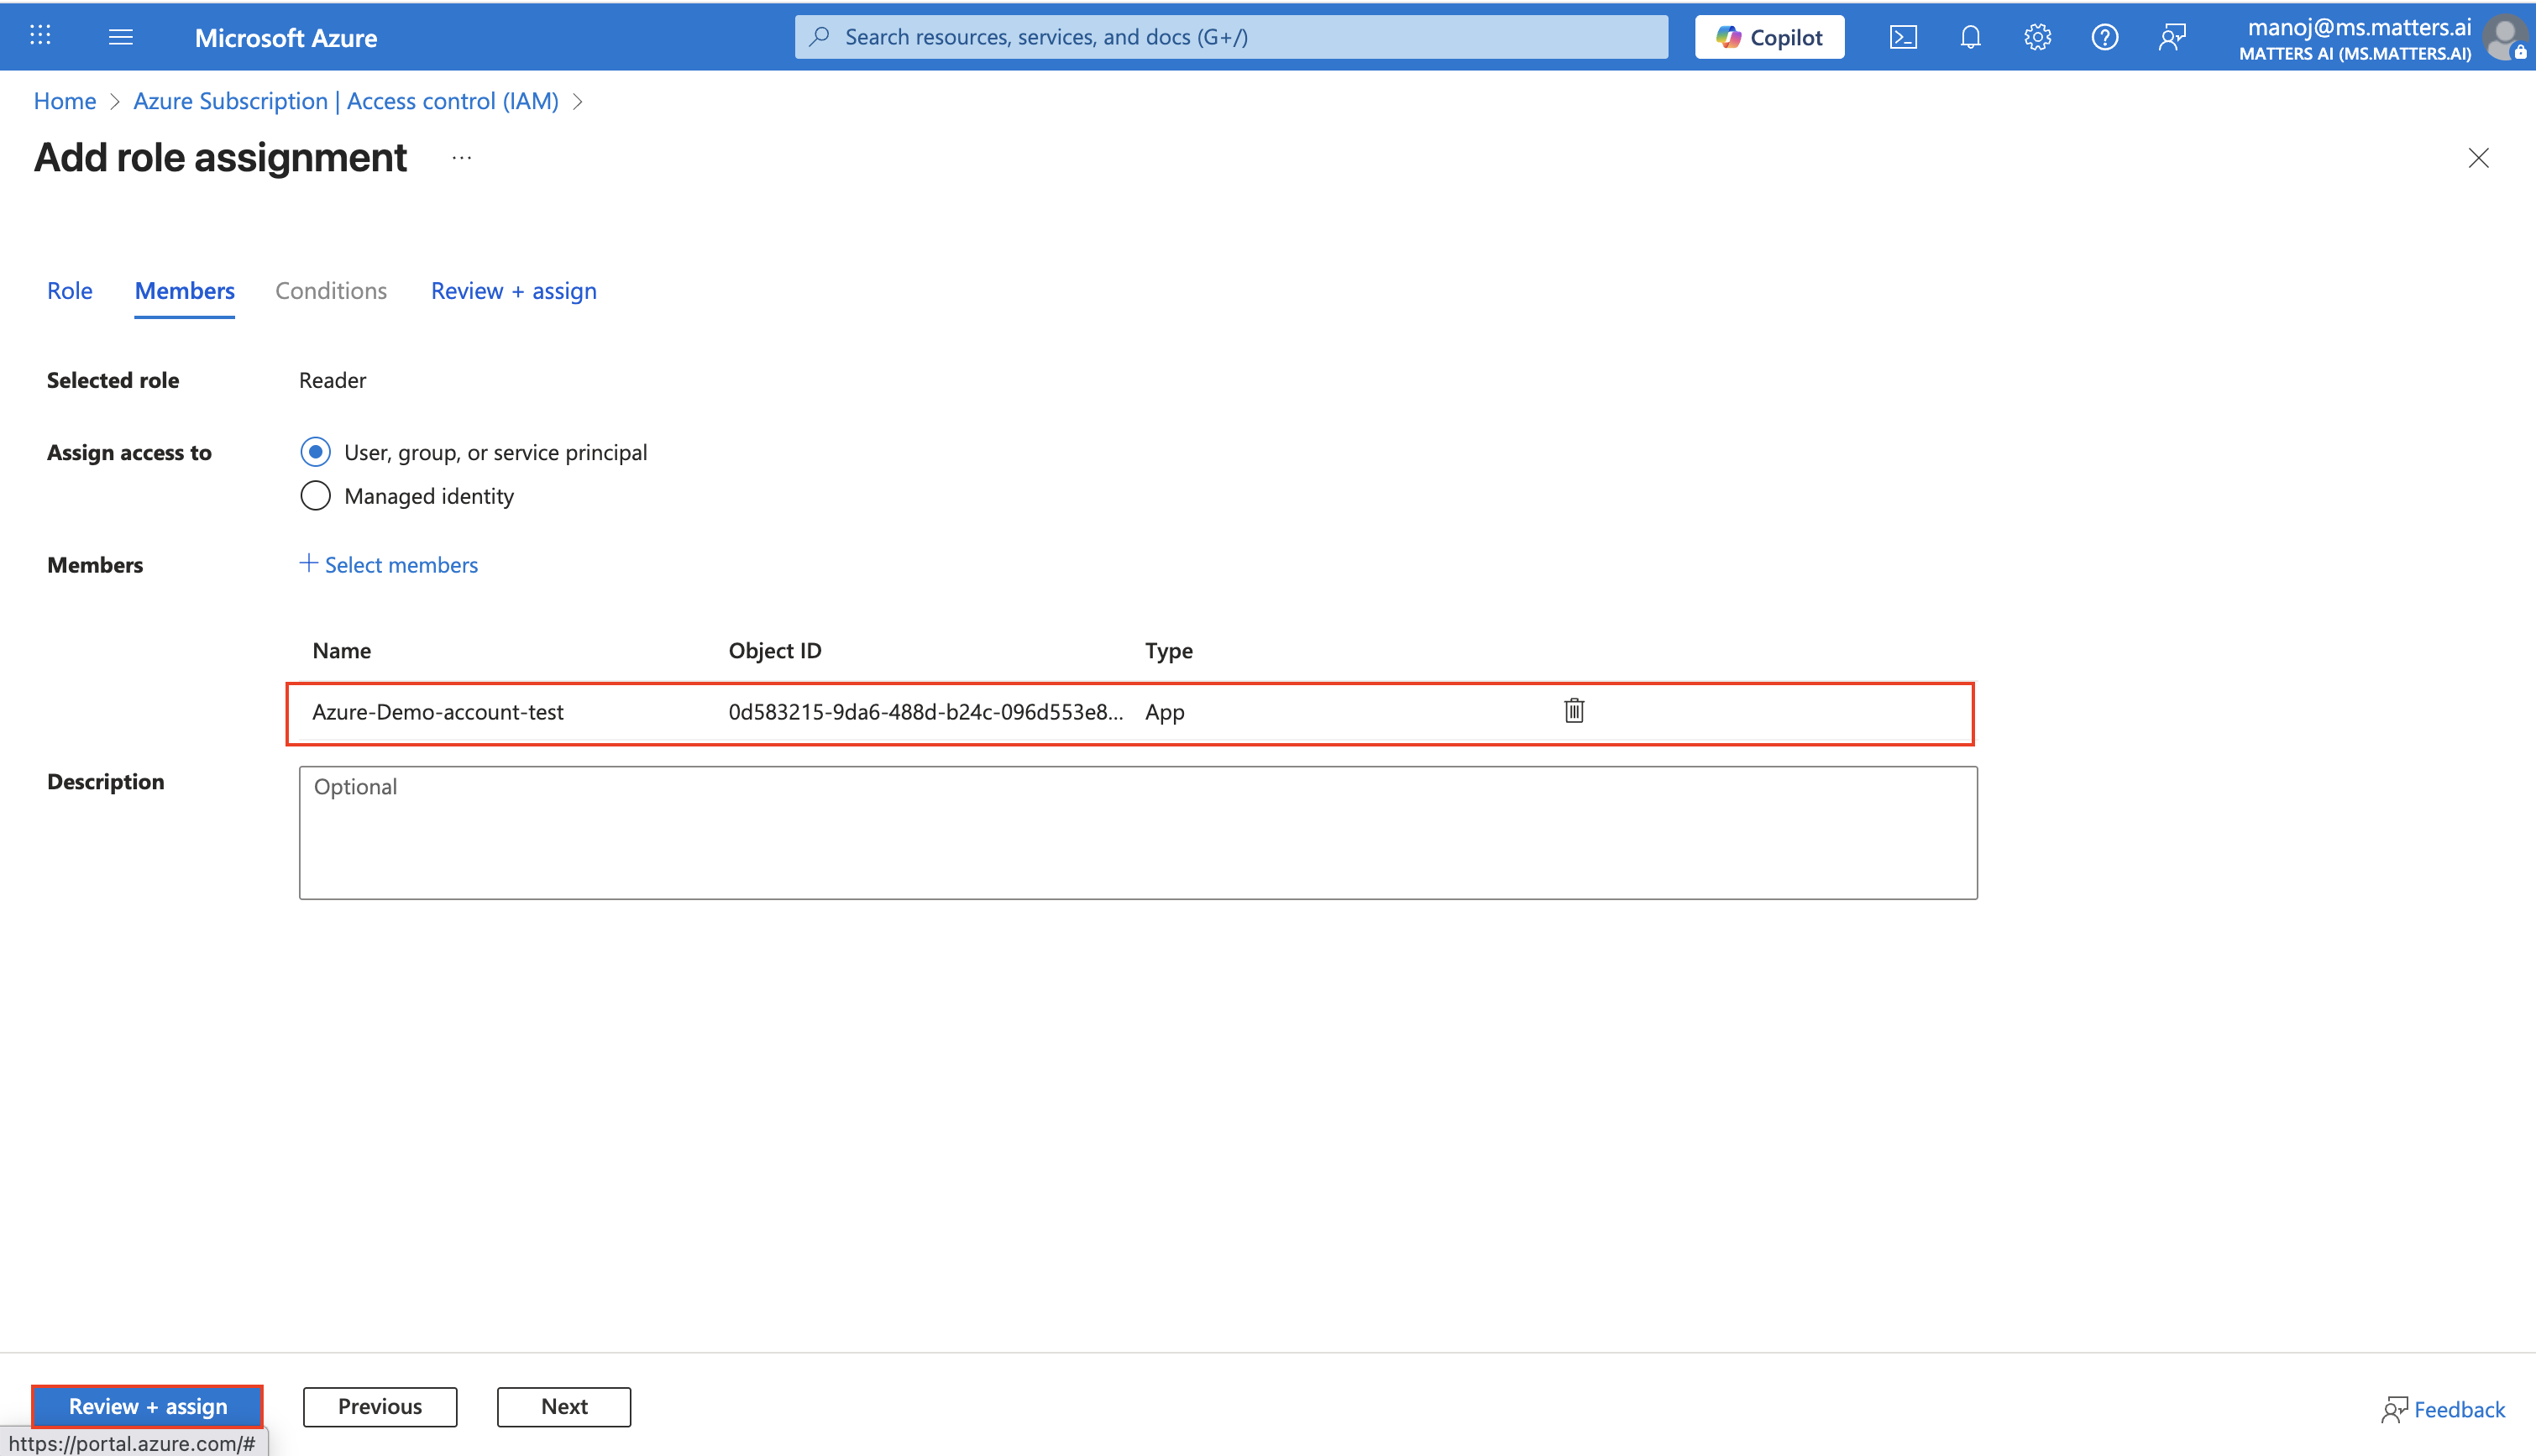
Go to Subscriptions → IAM → Add Role Assignment:
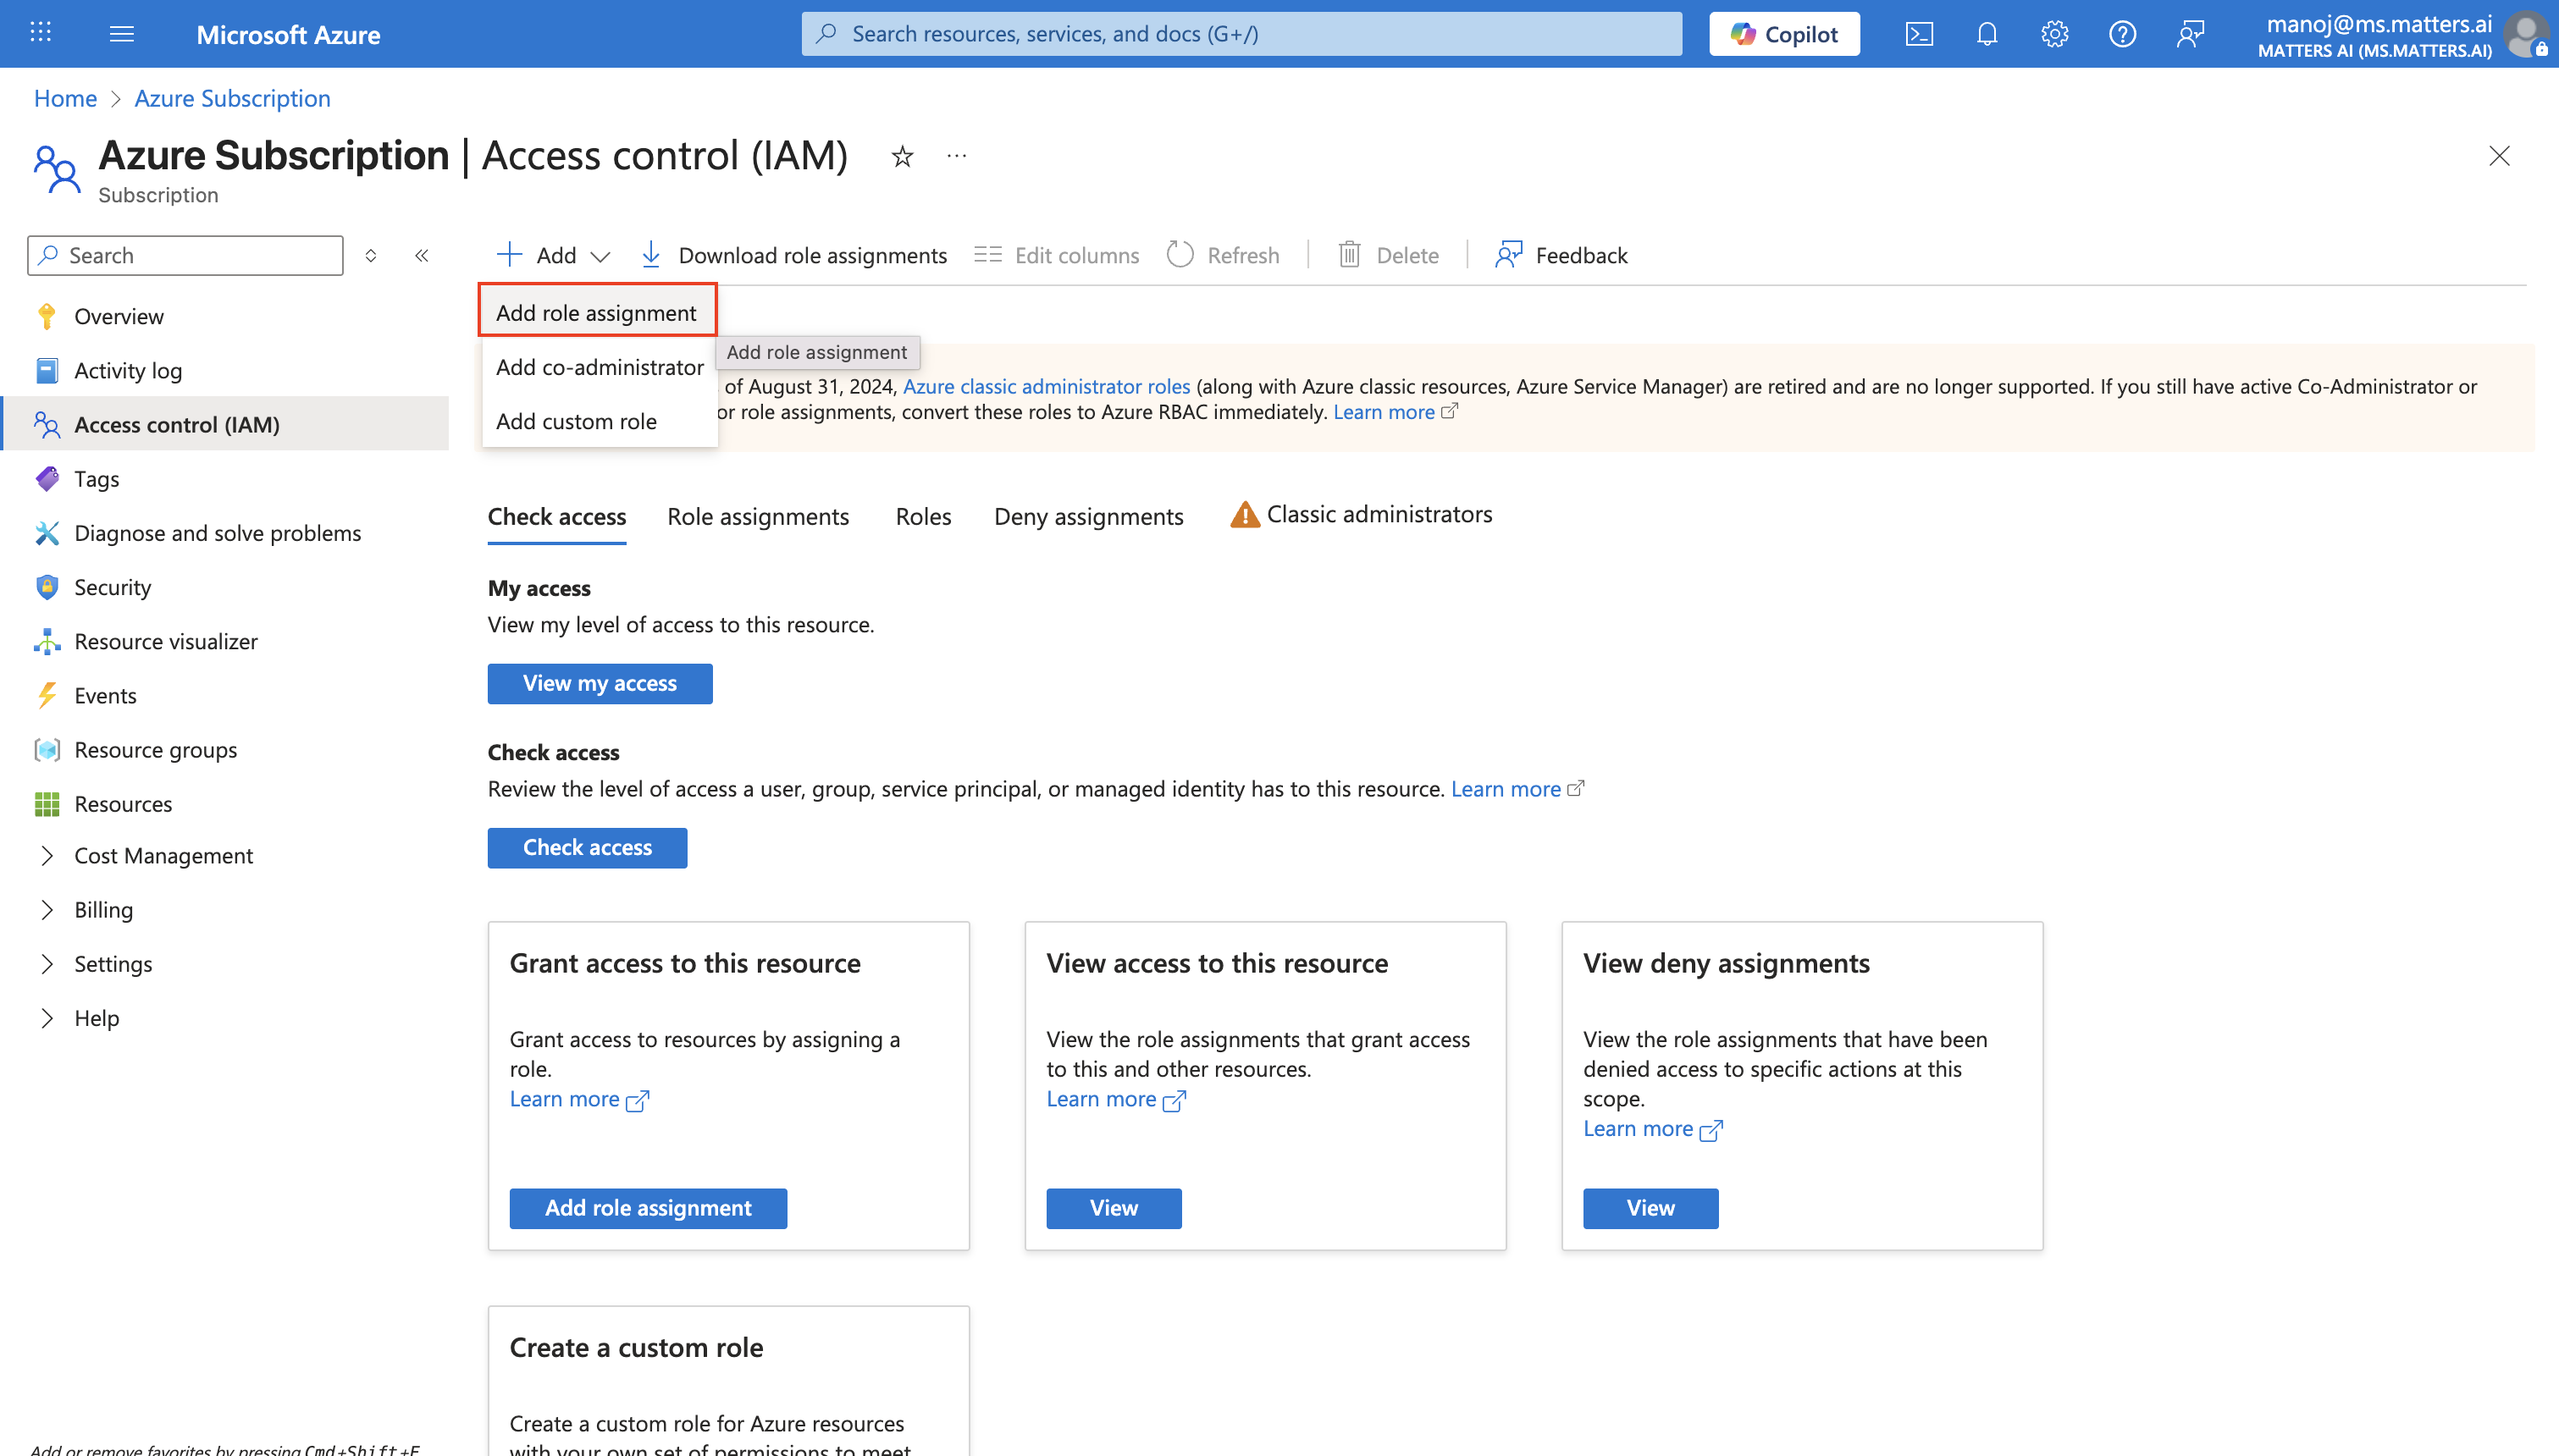
Add Role Assignment
Readerto createdApplication:
Step 3: Give Blob Reader Permissions on a Resource Group Level
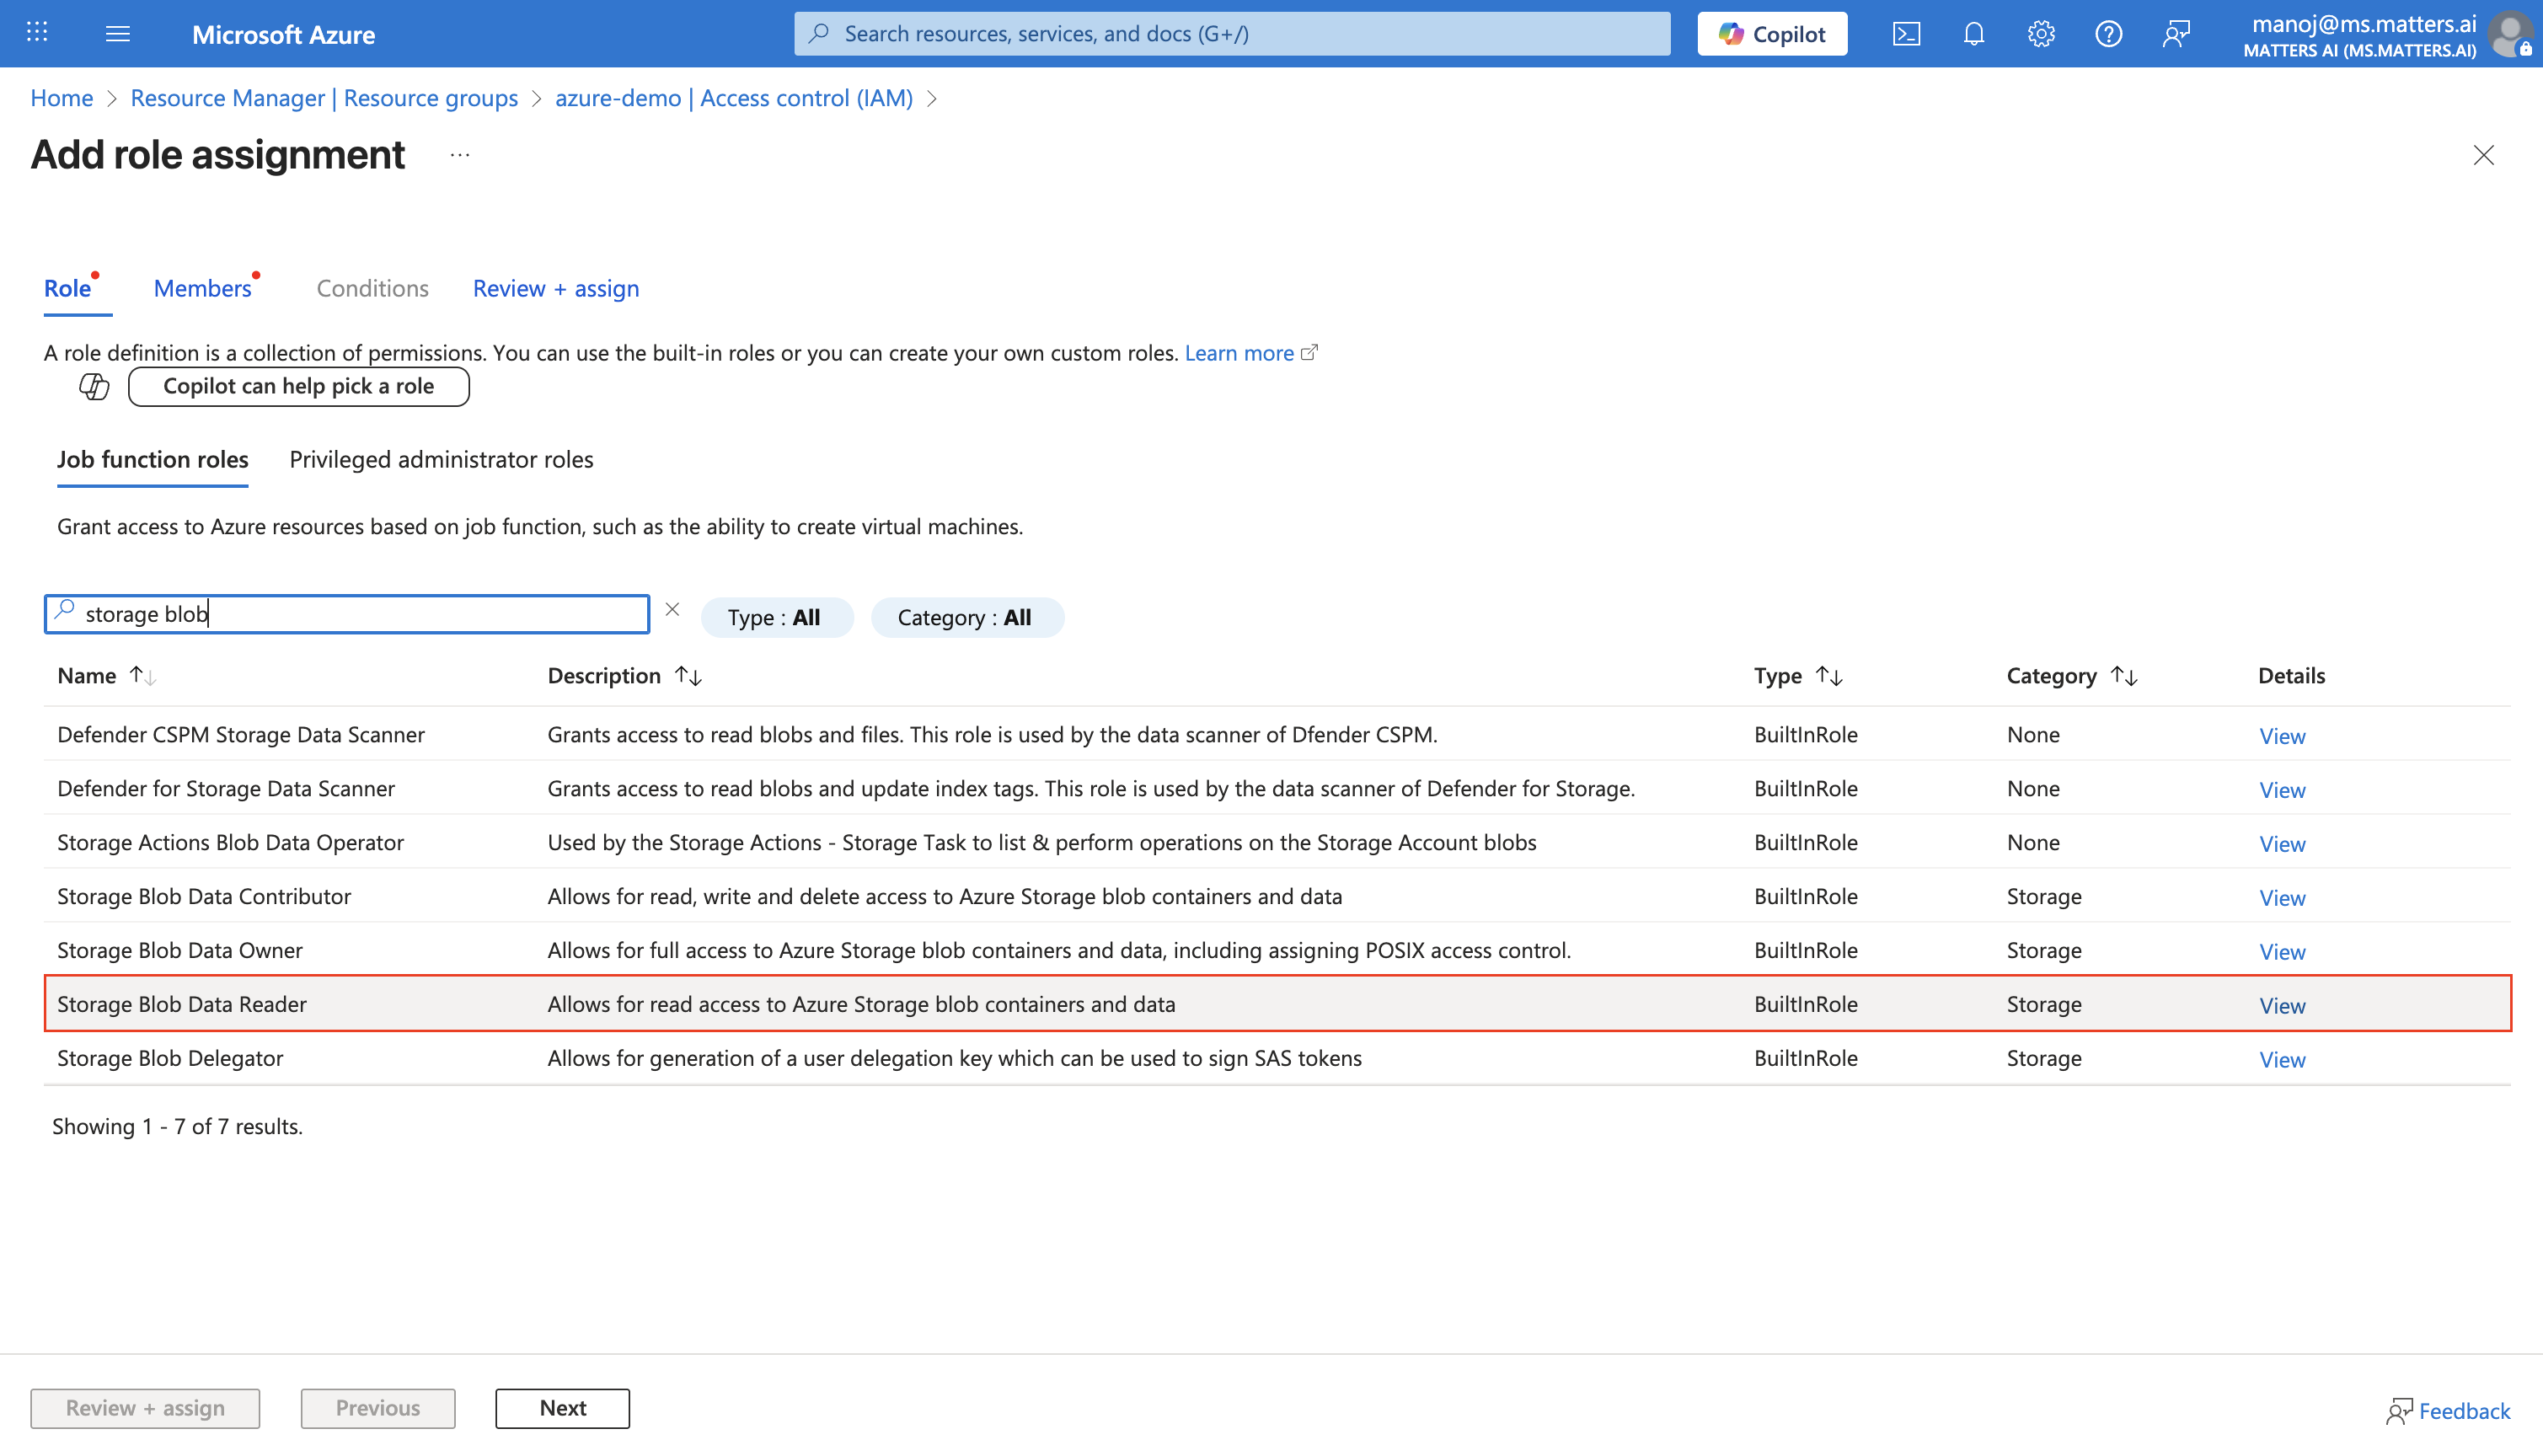
For Matters to scan blobs across your Azure Cloud, We require Storage Blob Data Reader permission a Resource Group Level to the created Application.
Storage Blob Data Reader Permission
Scope: Data Plane (Blob Storage - contents).
What It Covers:
Grants read-only access to the data stored in Azure Blob Storage.
Specifically:
Allows users to read blob contents.
List blobs in a container.
Download blobs.
Does not allow write or delete operations on blobs.
Go to Resource Groups → IAM → Create Role Assignment:
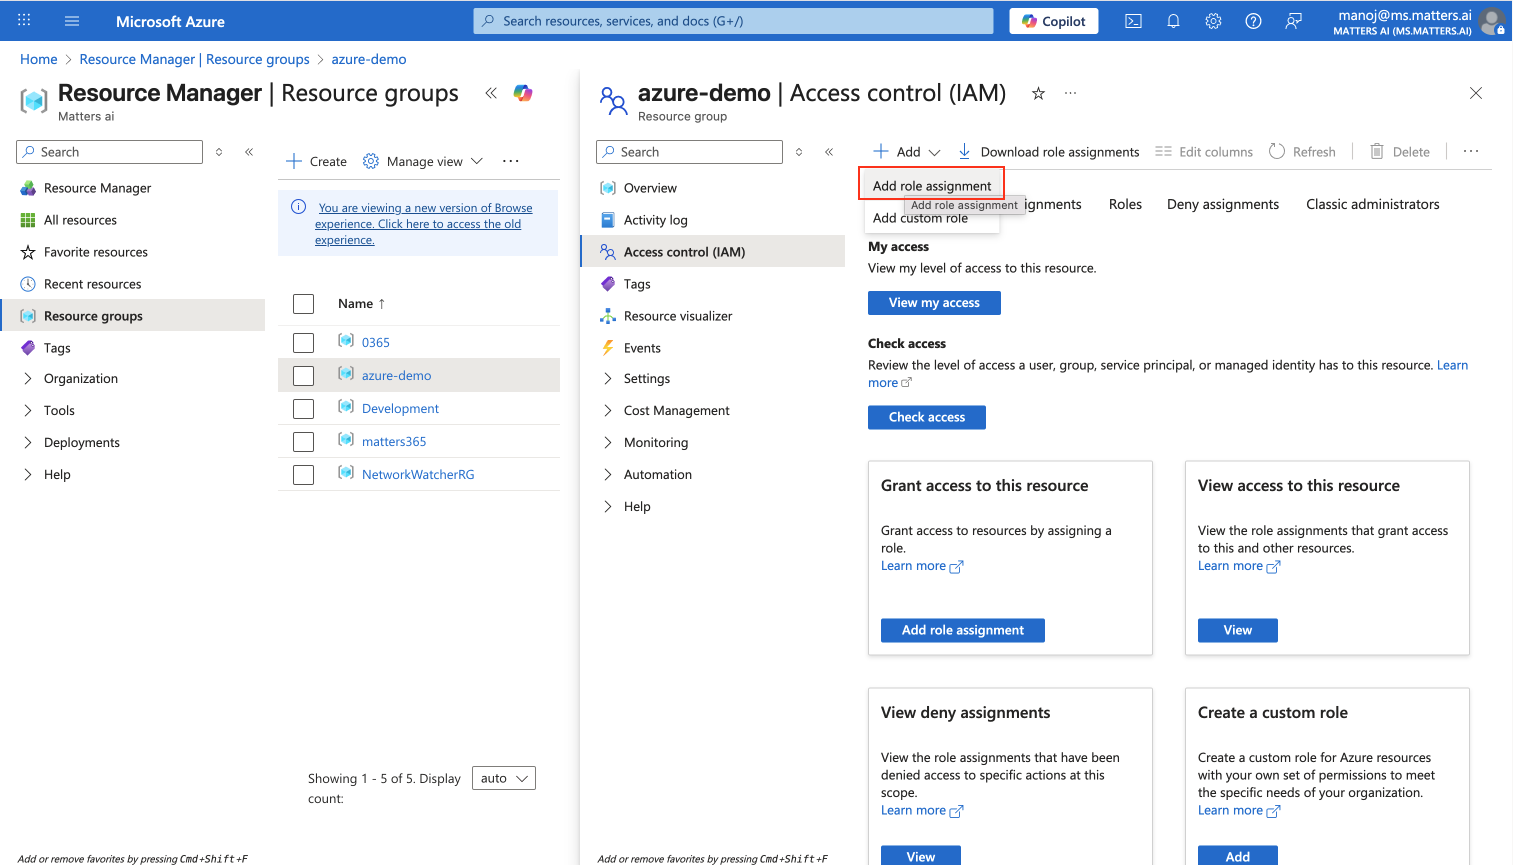
Assign the
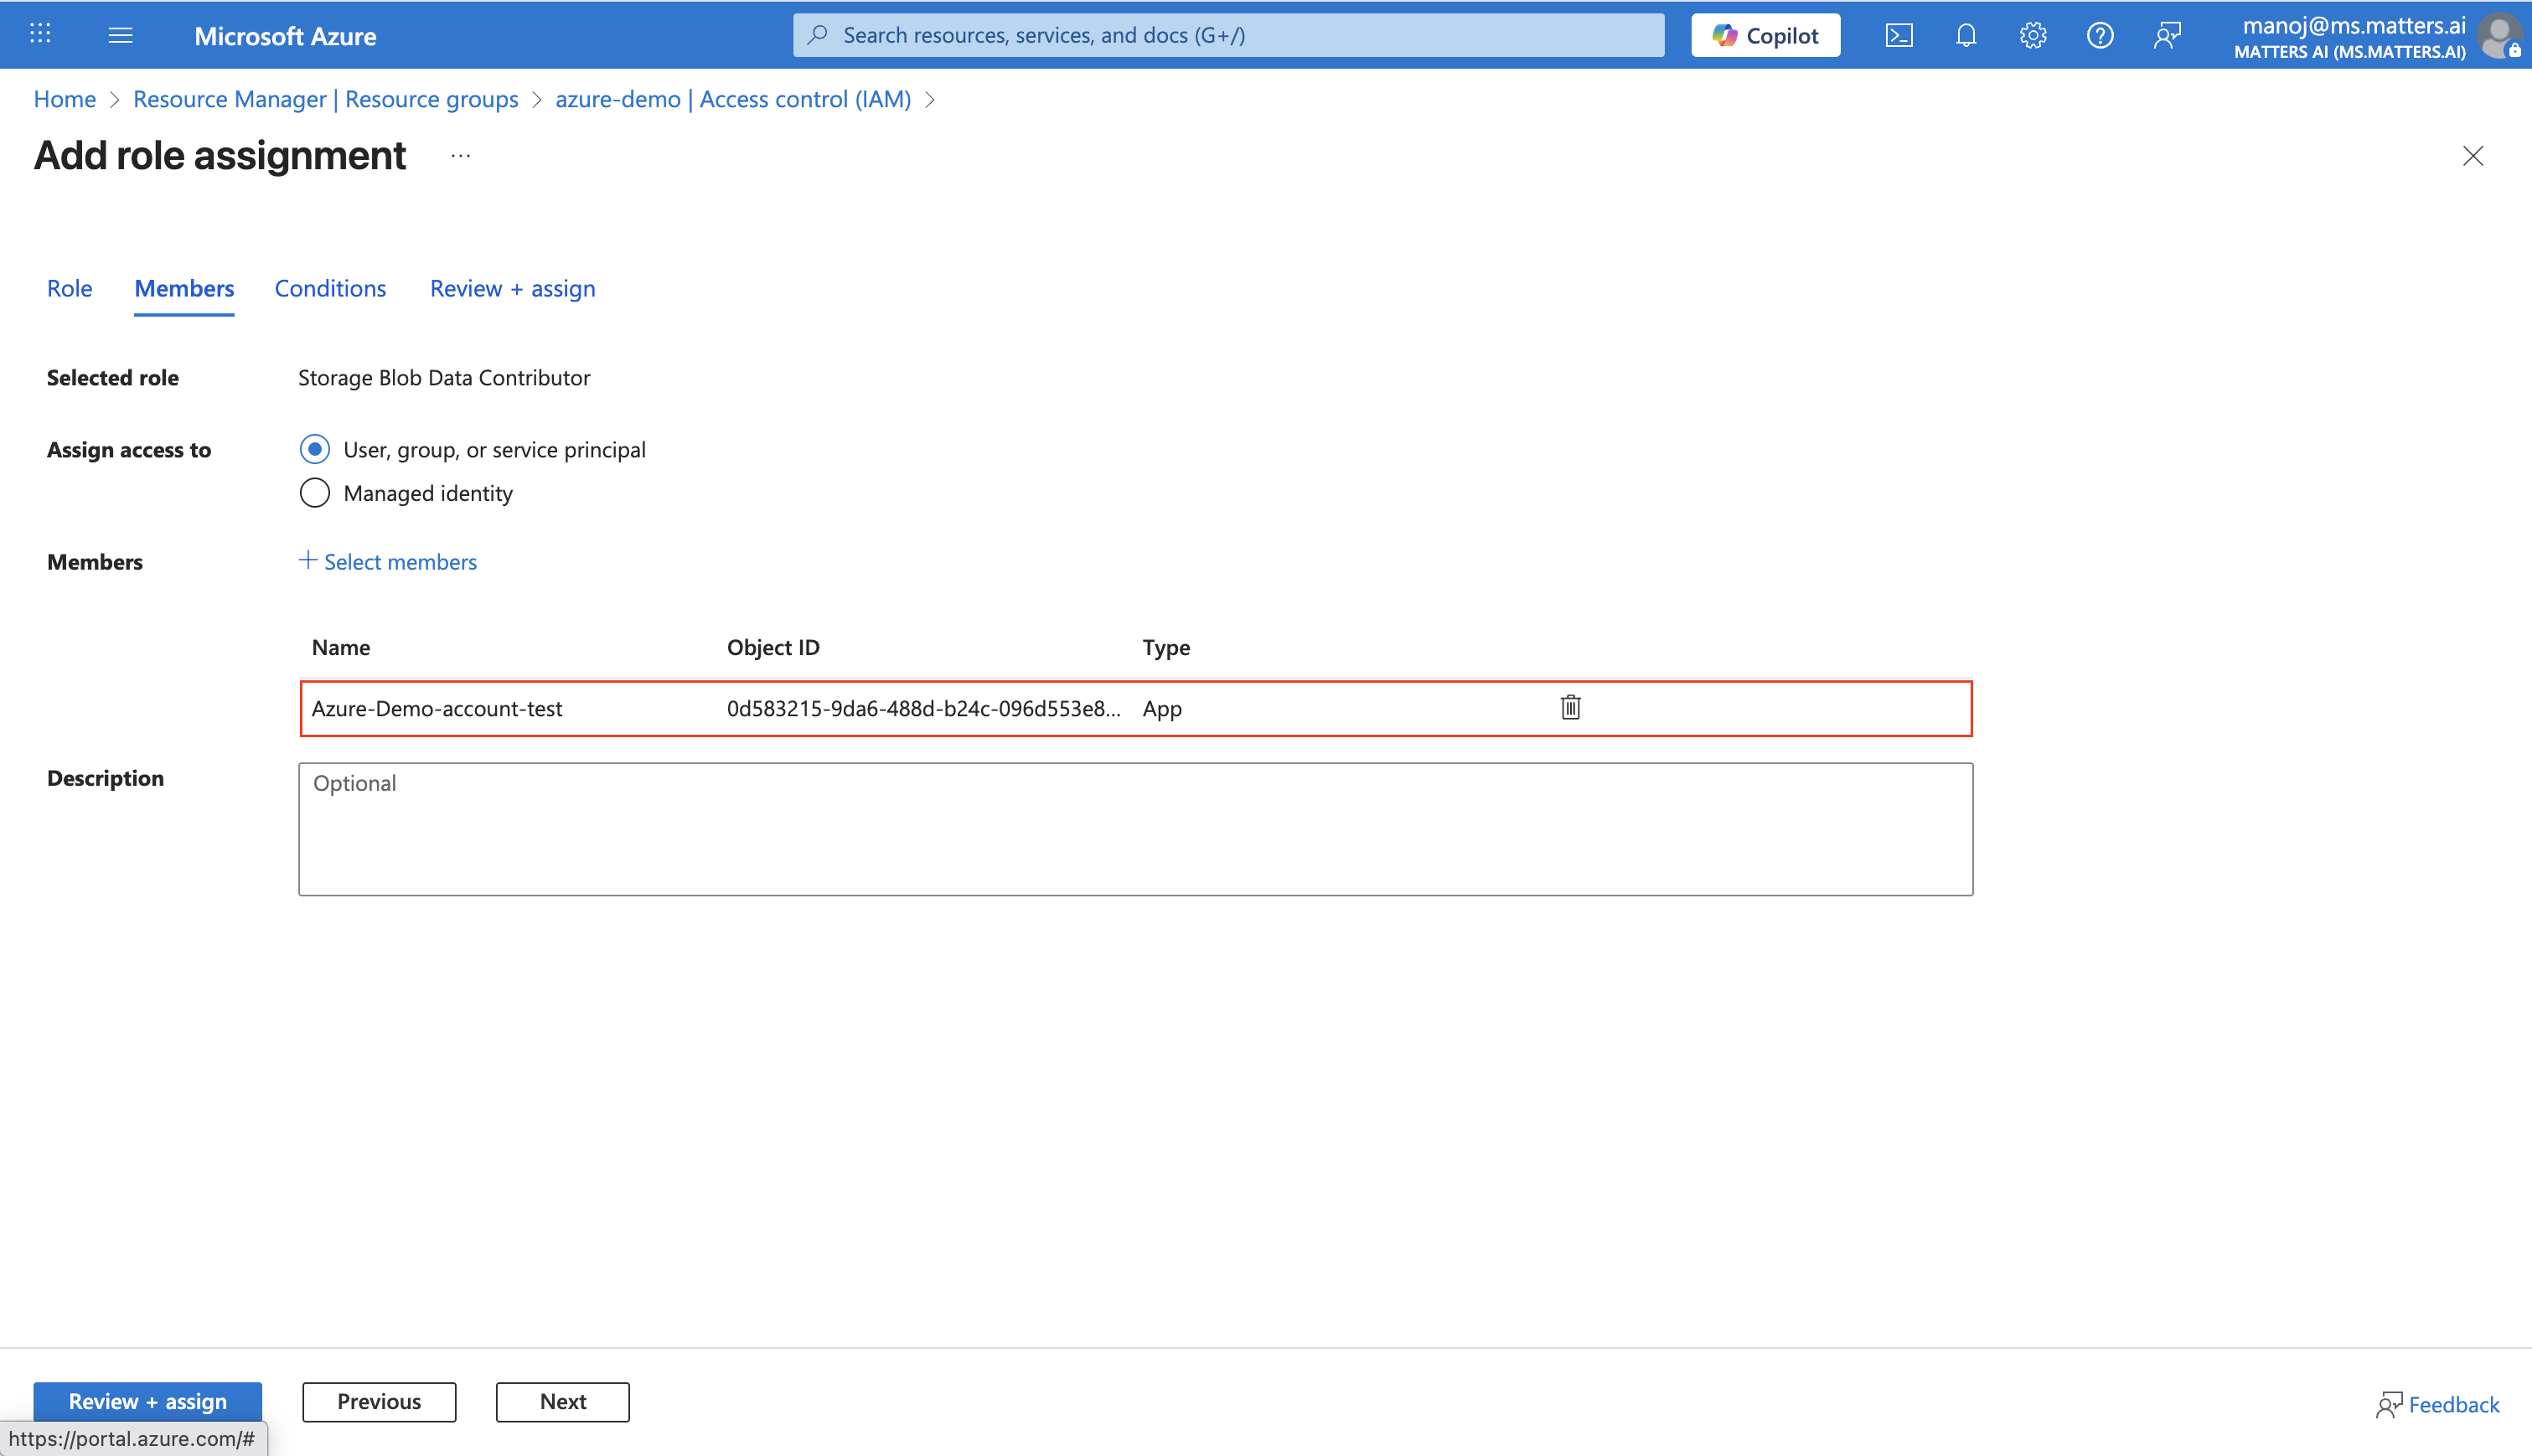
Storage Blob Data ReaderRole to the created Application:
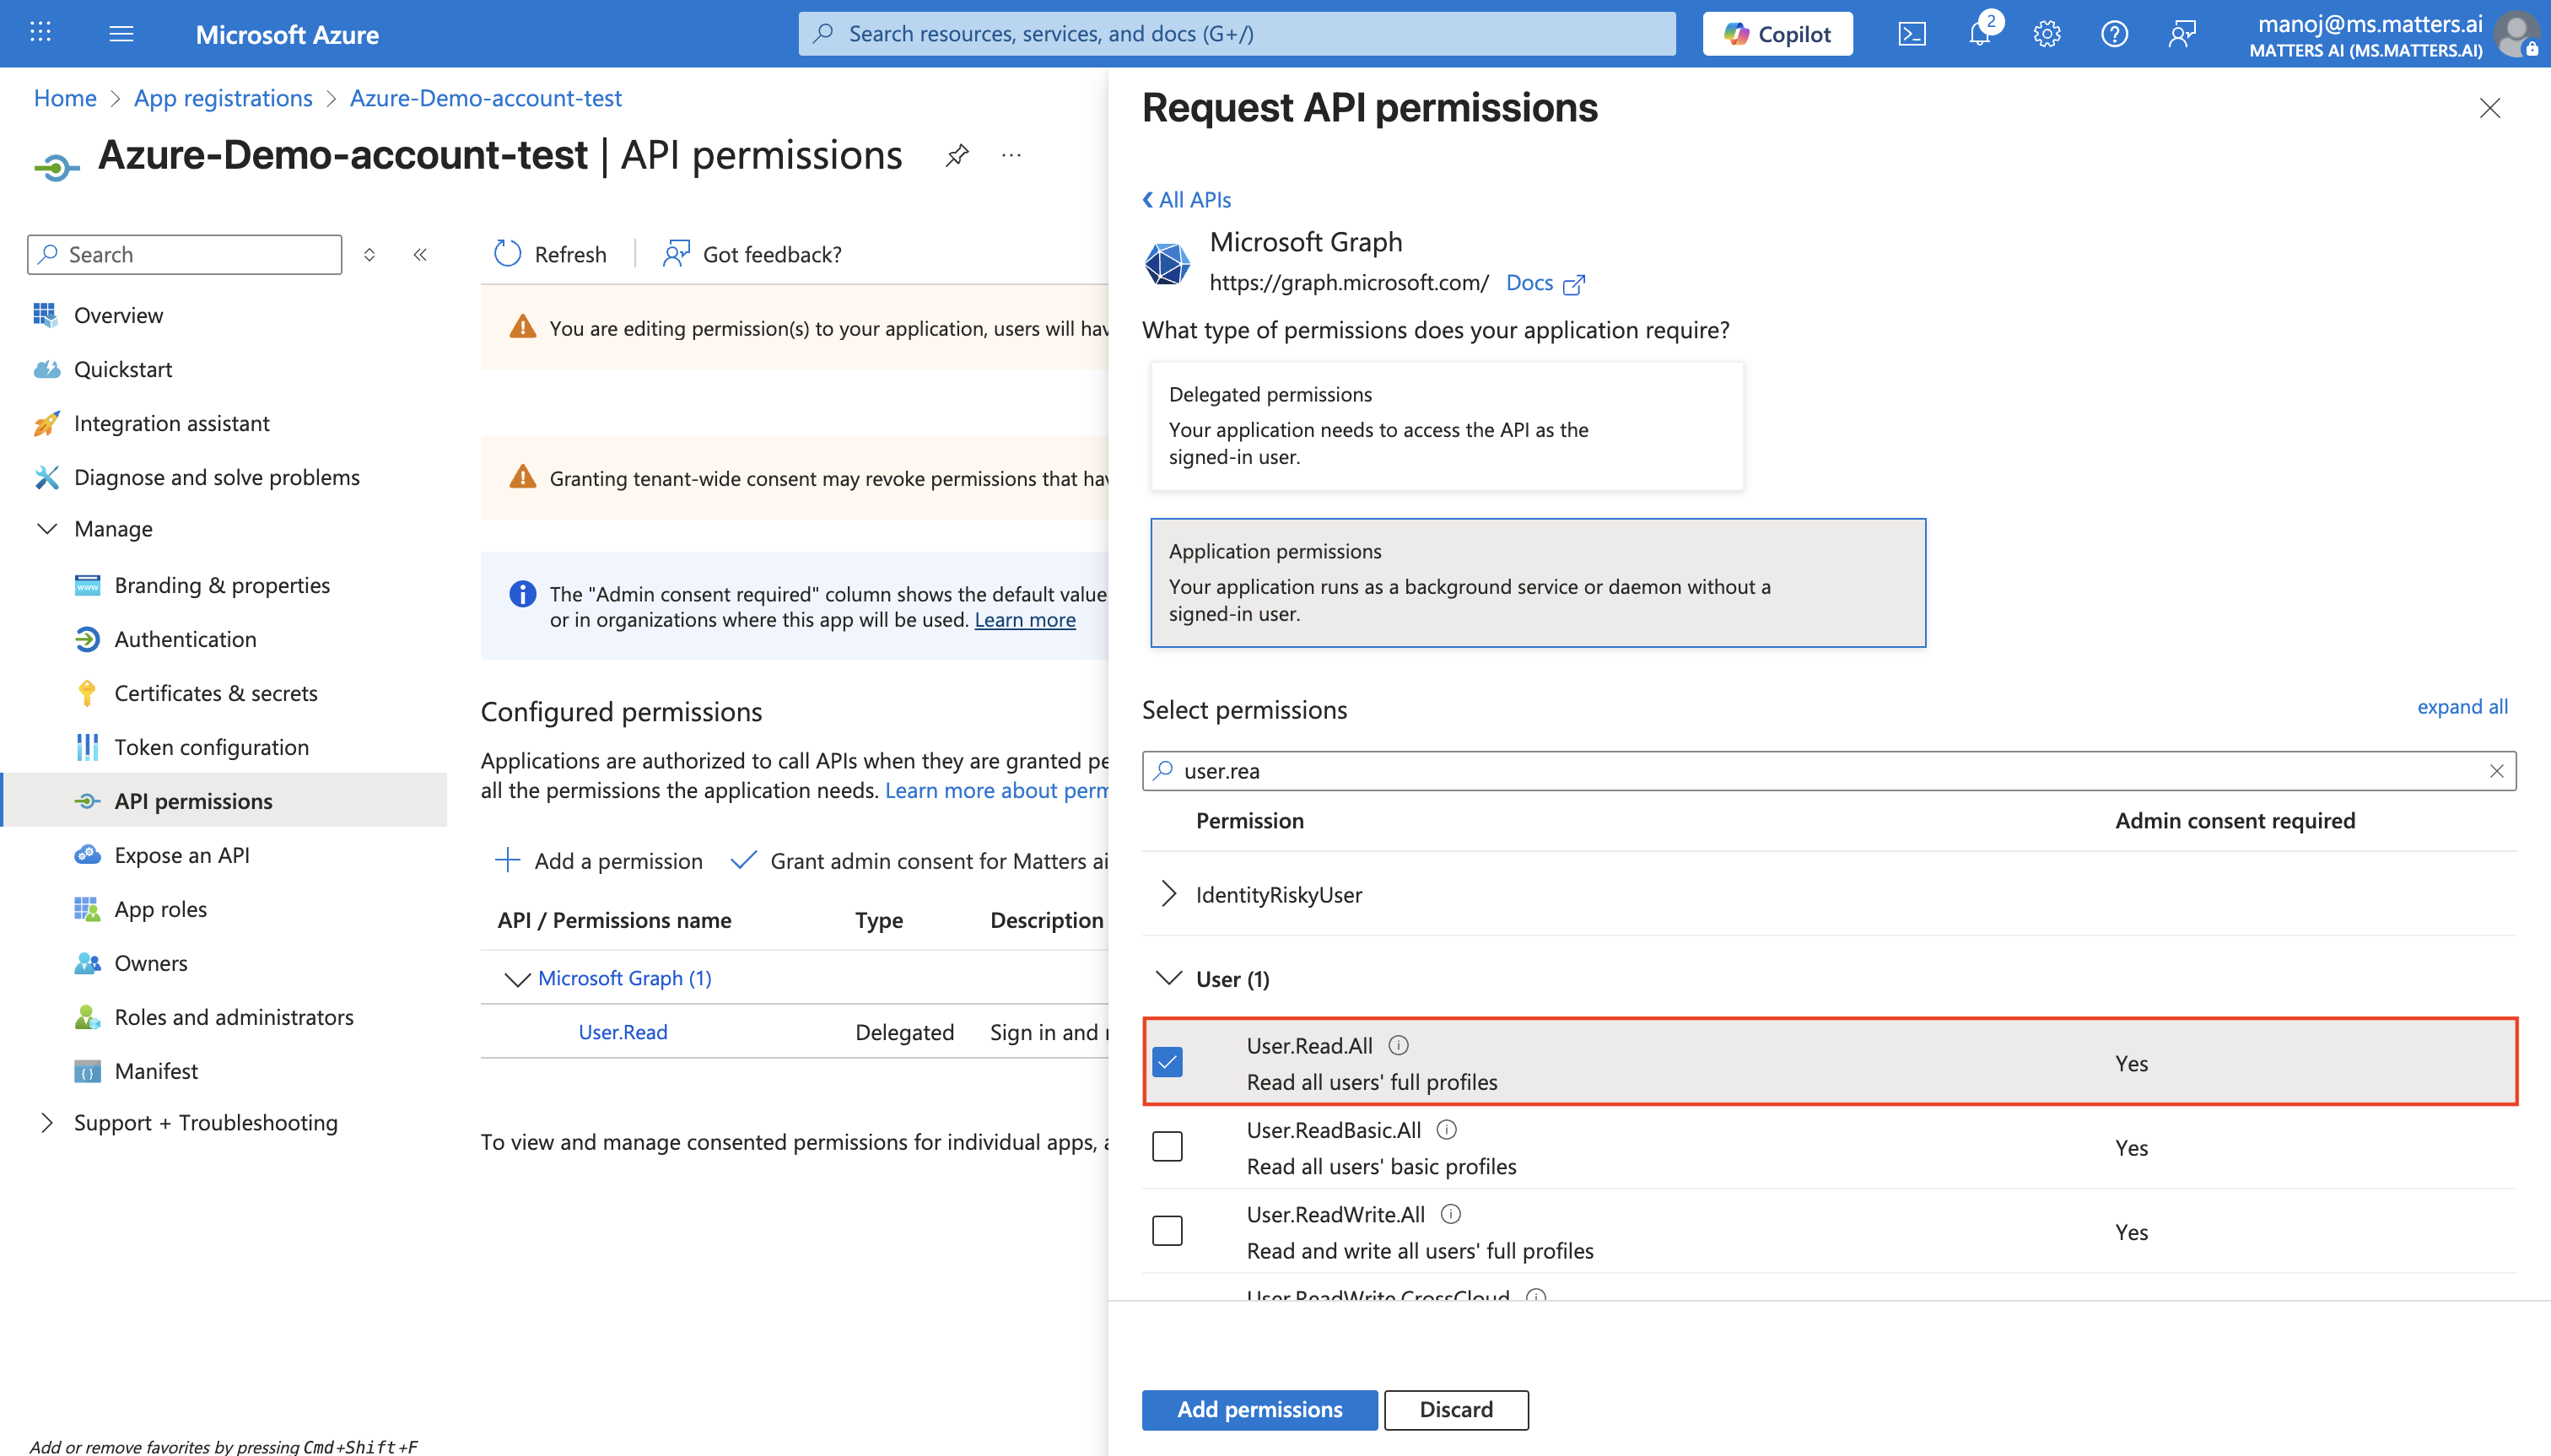
Step 4: Assign User.Read.All (Application Permission) to Enable Full Access Graph Visibility on the Dashboard
Navigate to Azure Active Directory > App registrations in the Azure Portal, and select the application you created earlier.
From the left-hand Manage menu, click API permissions.
Click Add a permission and choose Microsoft Graph.
Select Application permissions.
Search for and select User.Read.All.
Click Add permissions.
Click Grant admin consent and confirm.
Step 5: Integrate with the Matters.ai Dashboard
Before integrating, ensure that you copy and save the required Azure credentials for future use.
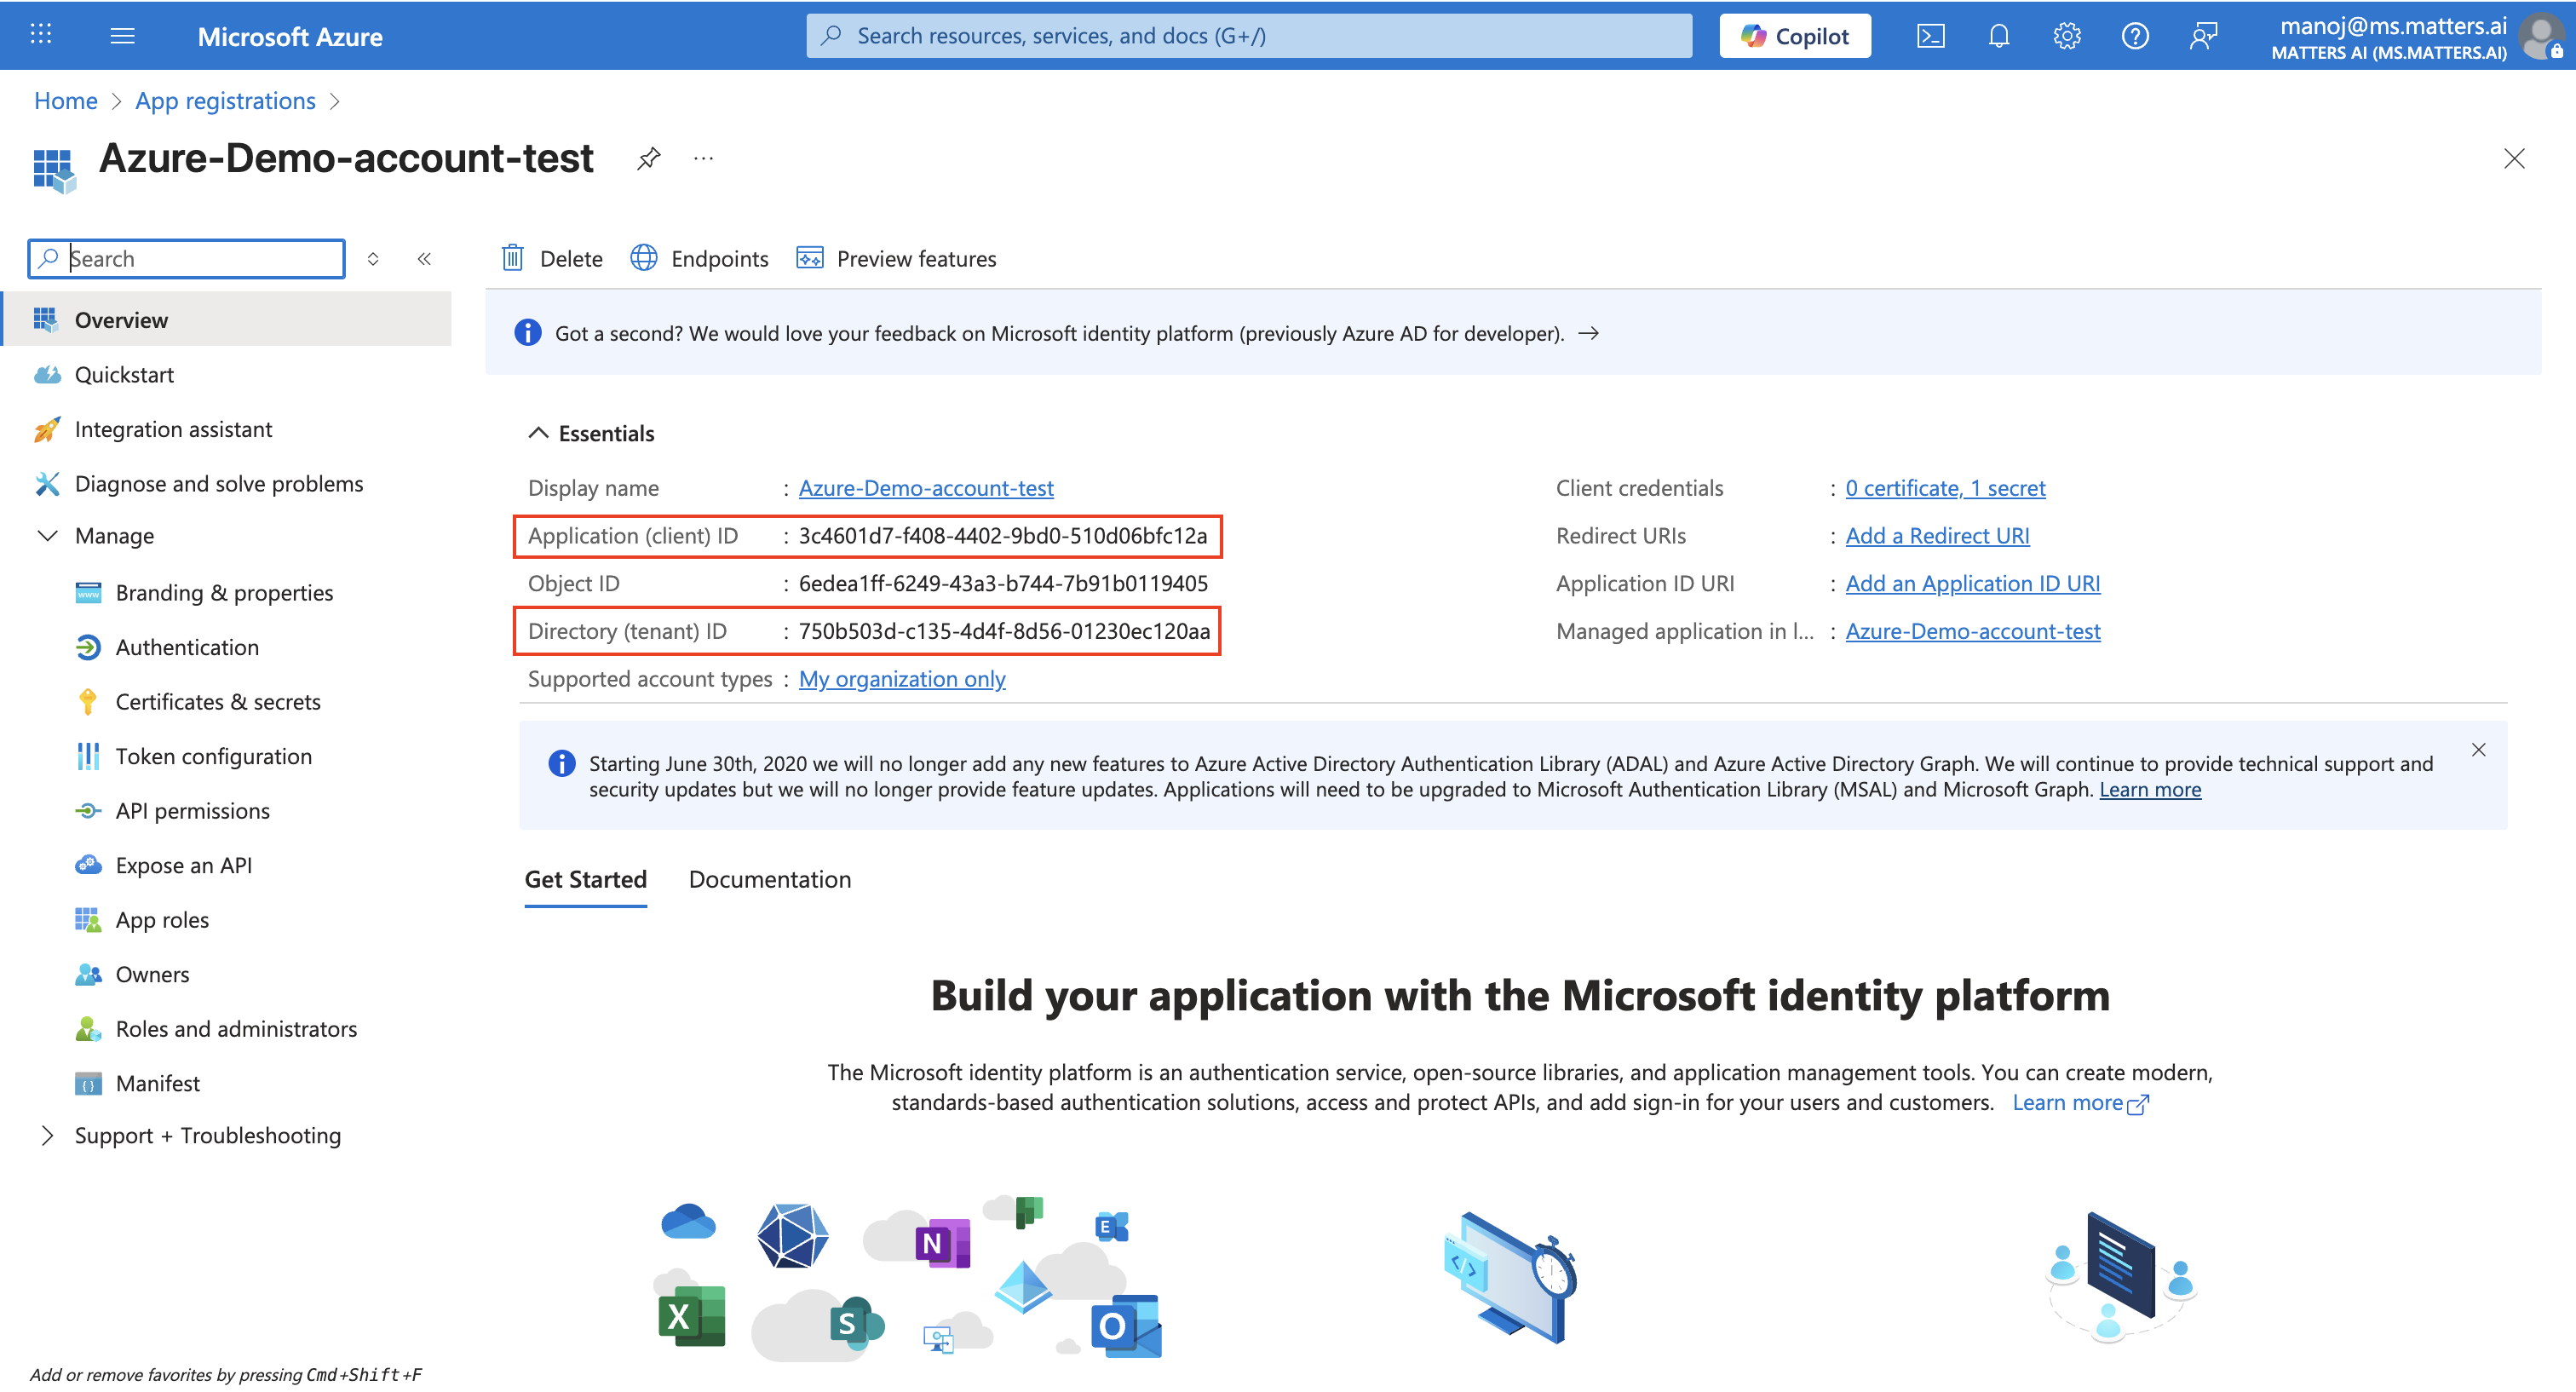
1. Retrieve Azure Credentials
Navigate to Azure Portal → App Registrations → Your Application.
From the Overview page, copy and save the following information:
Tenant ID: The Azure Active Directory (AAD) tenant associated with your organization.
Client ID: The Application (Service Principal) ID used for authentication with Azure.
2. Generate and Save the Client Secret
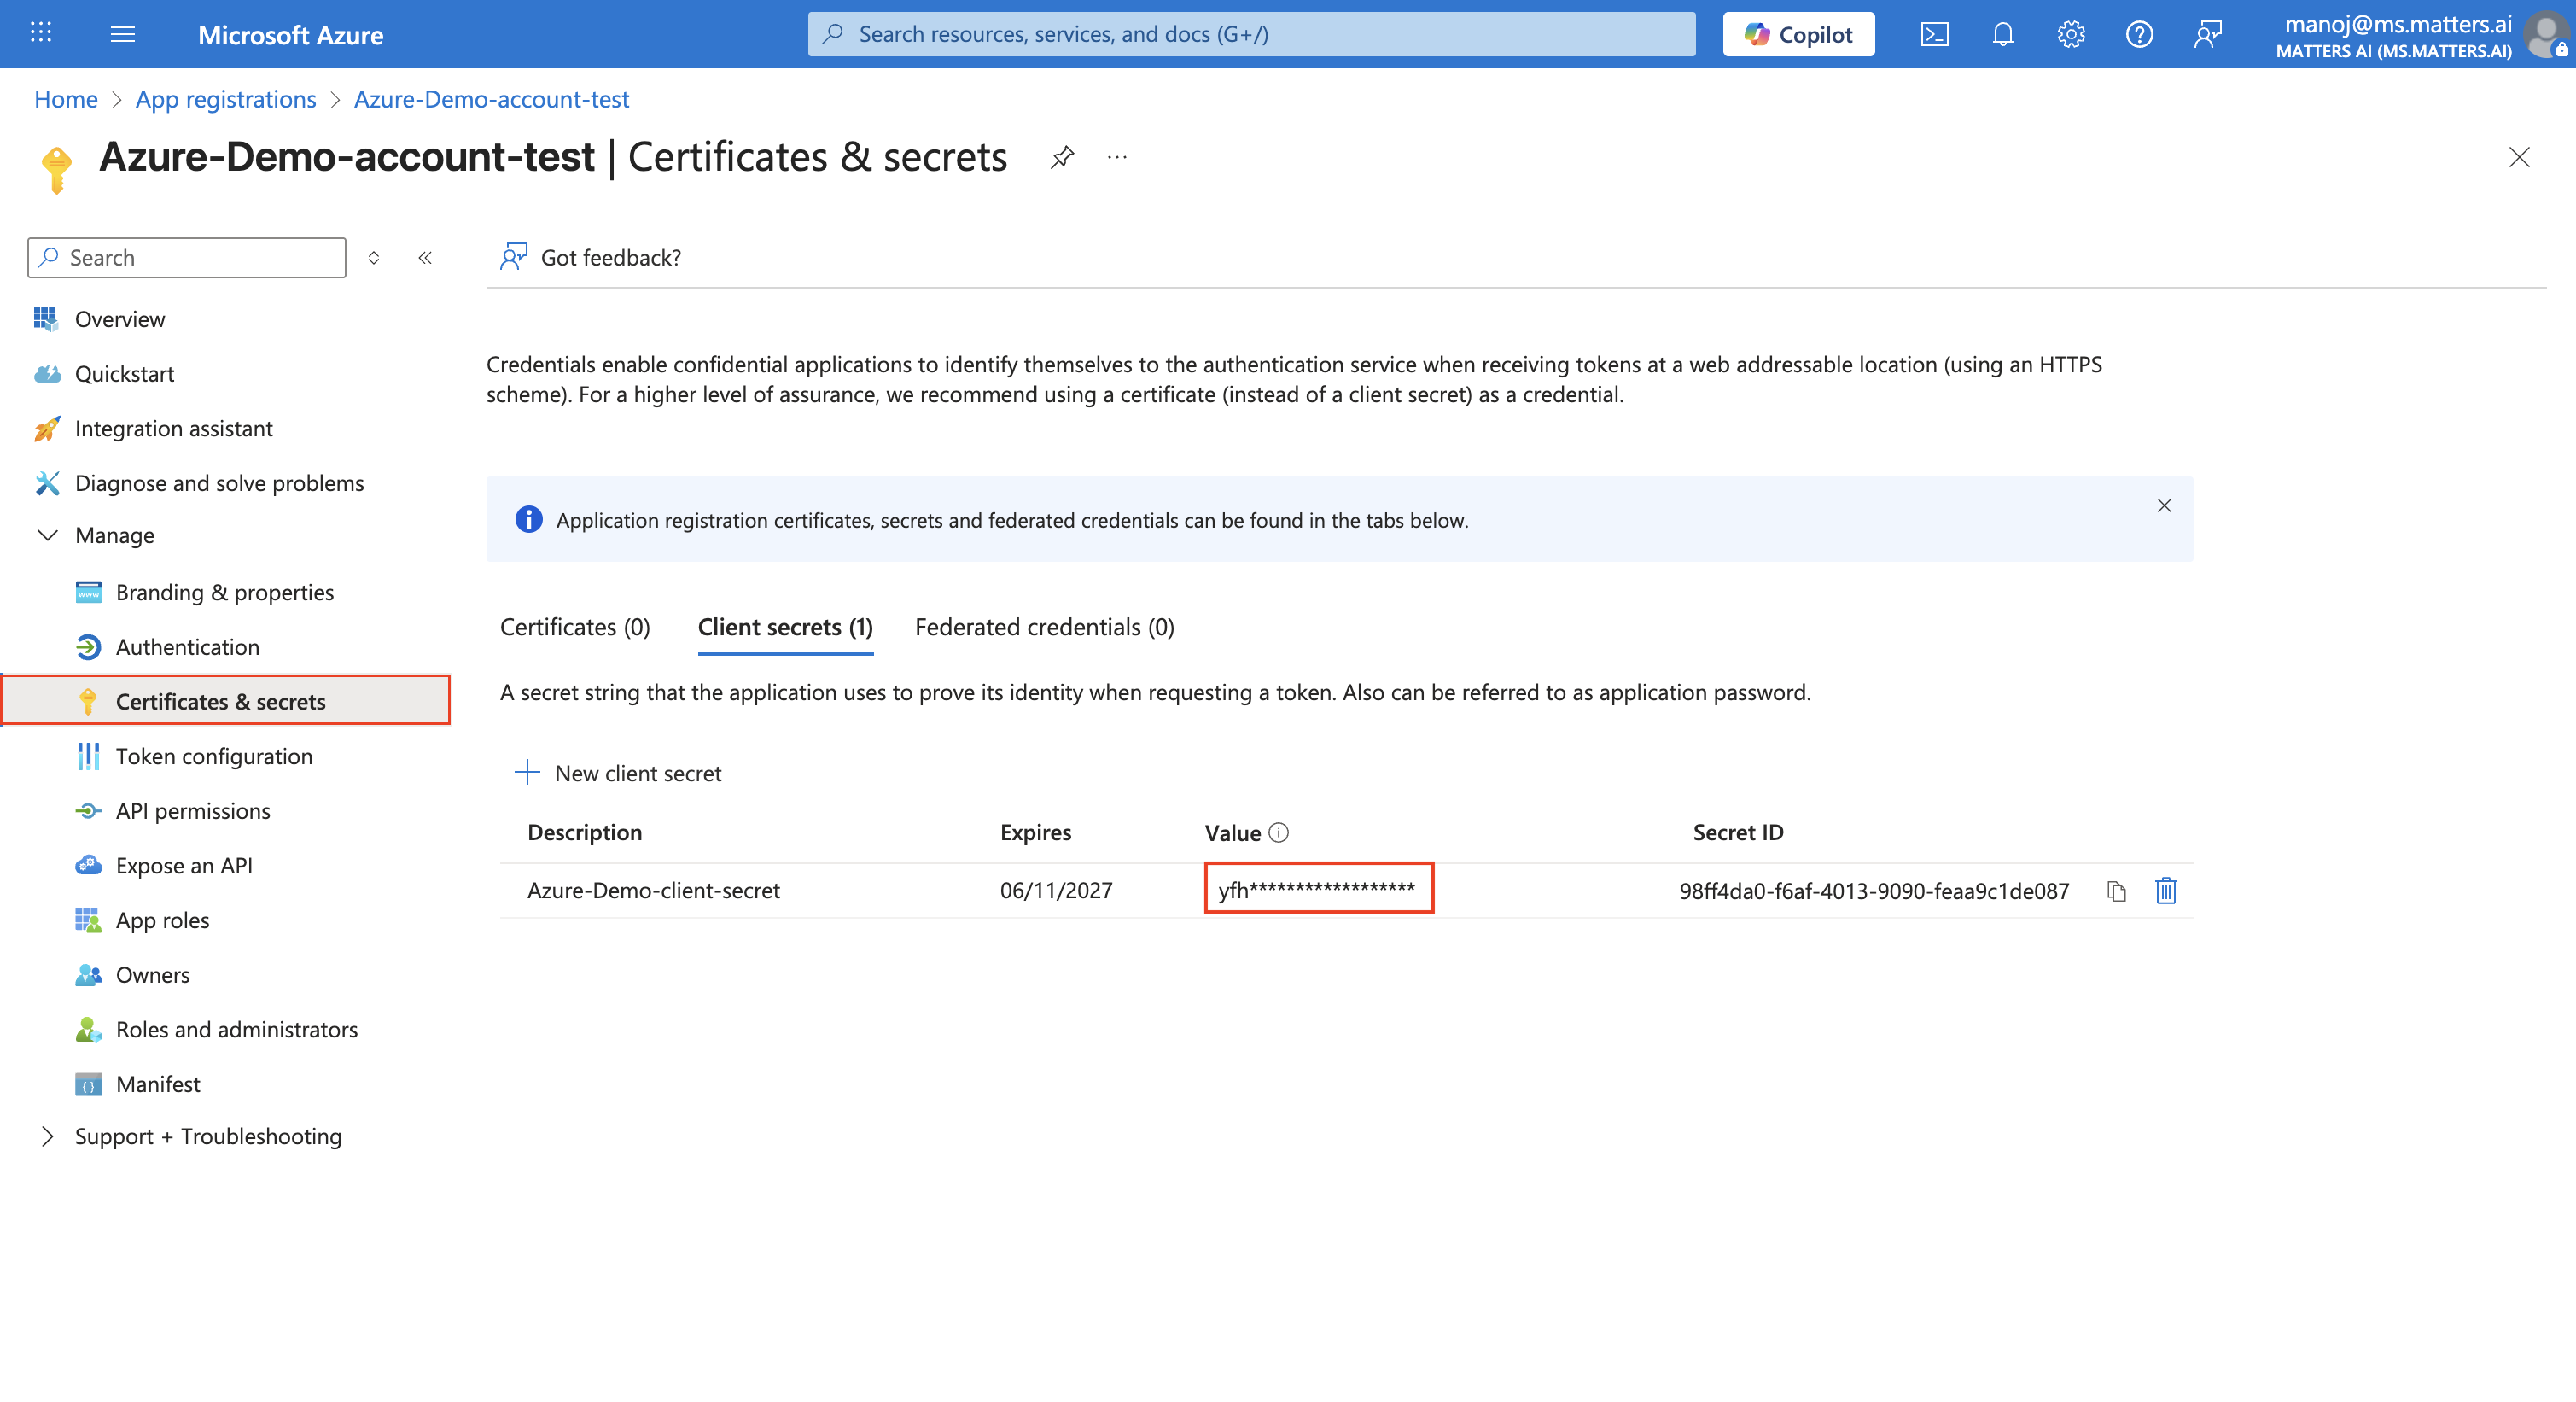
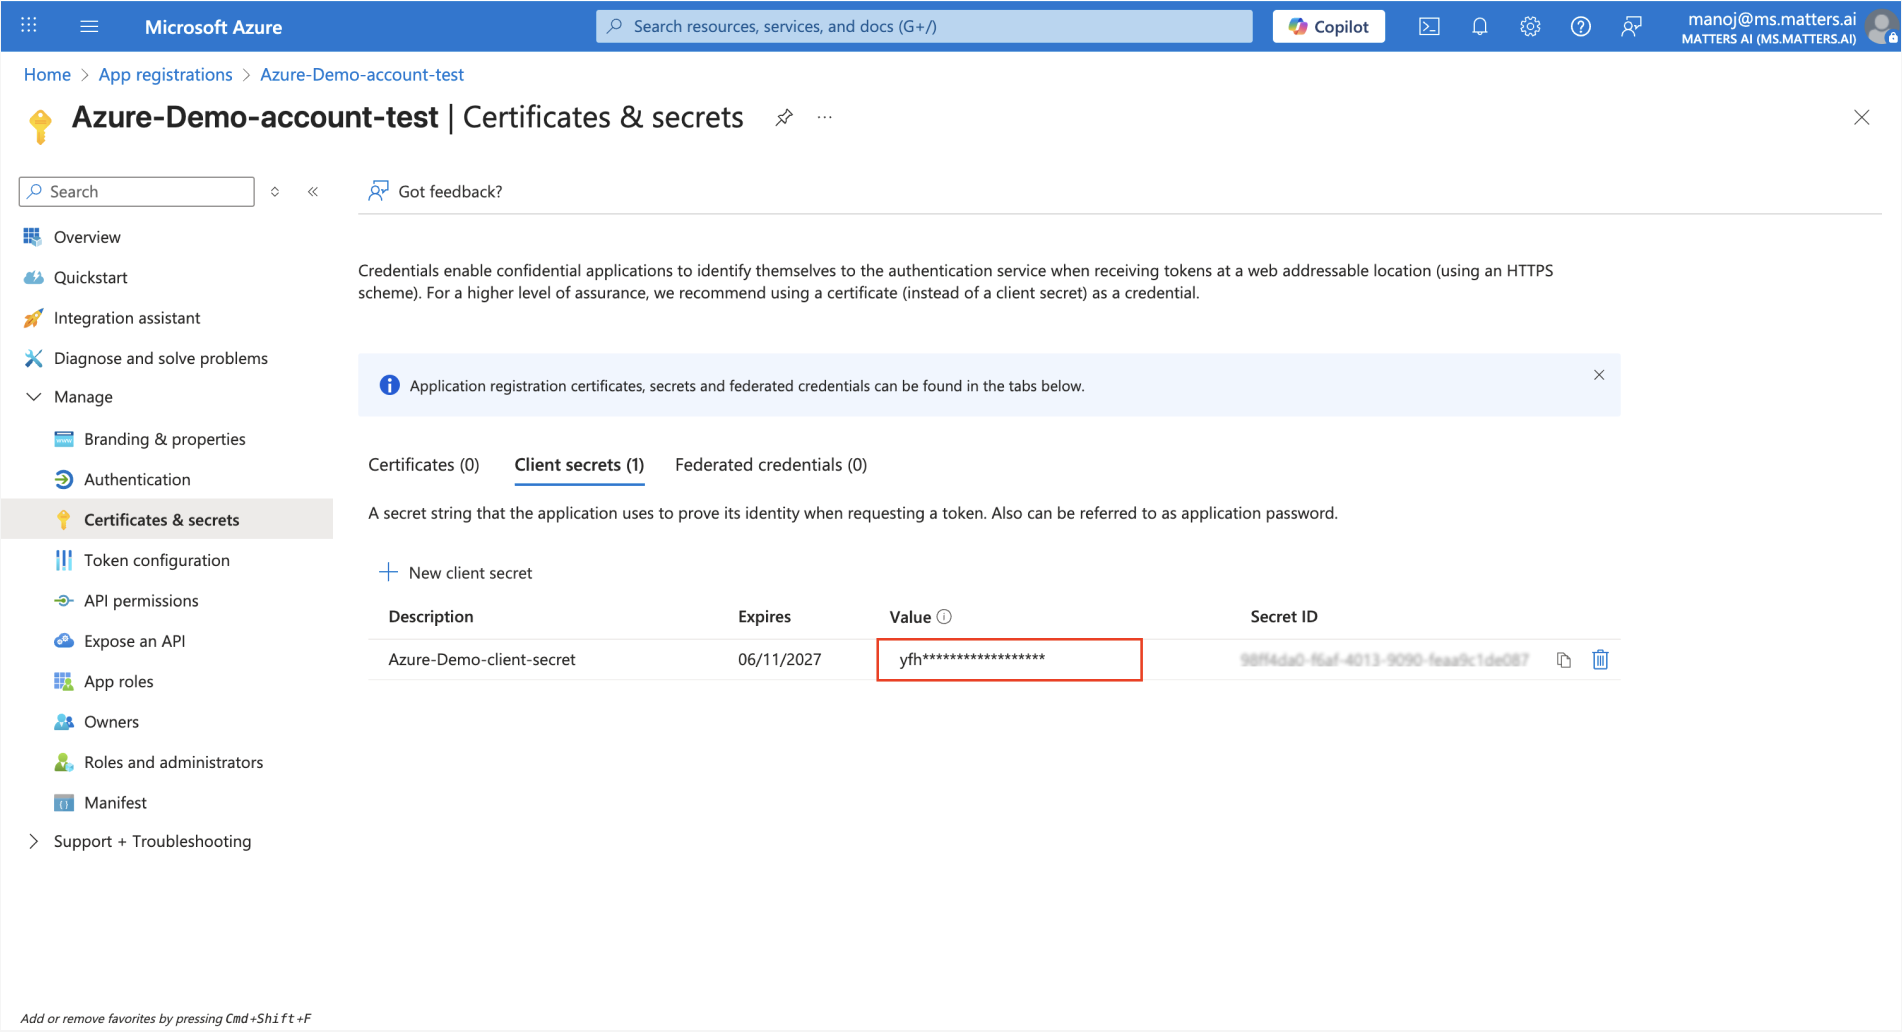
Go to App Registrations → Your Application → Certificates & secrets.
Create a New Client Secret.
Once created, copy and securely store the Client Secret Value.
Note: The Client Secret Value is displayed only once. Ensure it is saved in a secure location for future use.
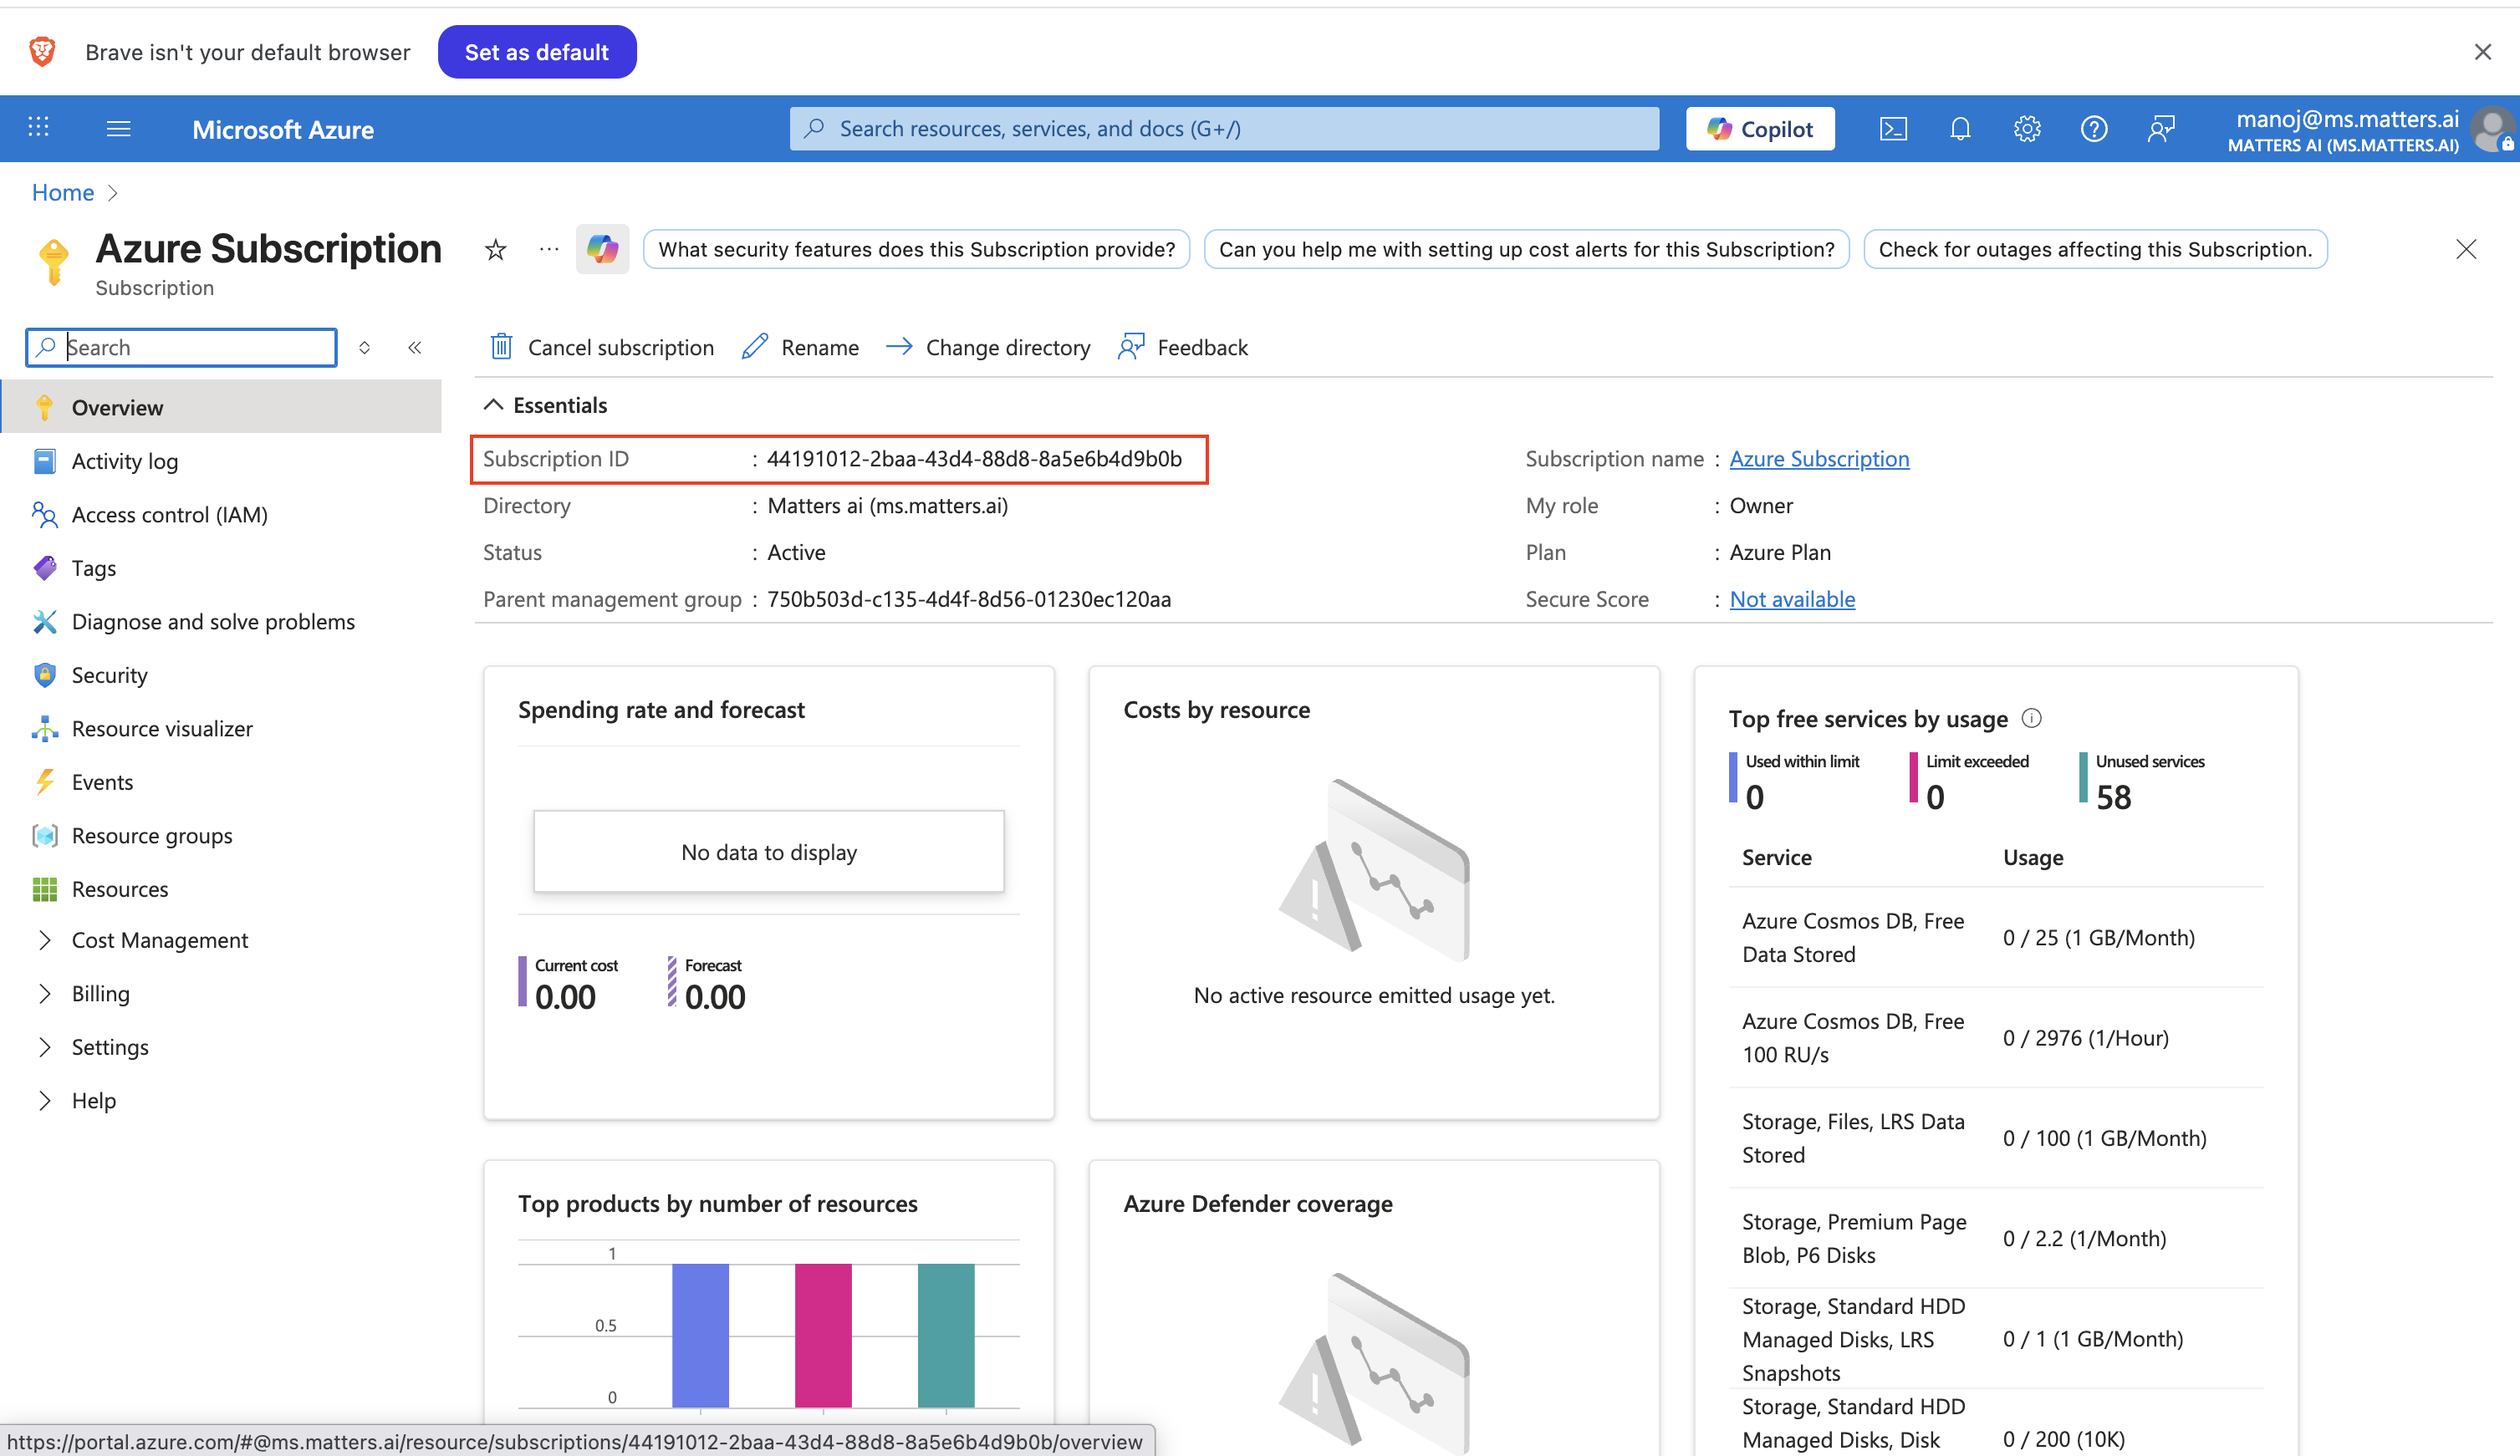
3. Retrieve Subscription ID
Navigate to Azure Portal → Subscriptions, select the appropriate subscription, and copy the Subscription ID.
This represents the Azure subscription under which resources will be managed.
Integrating with Matters.ai
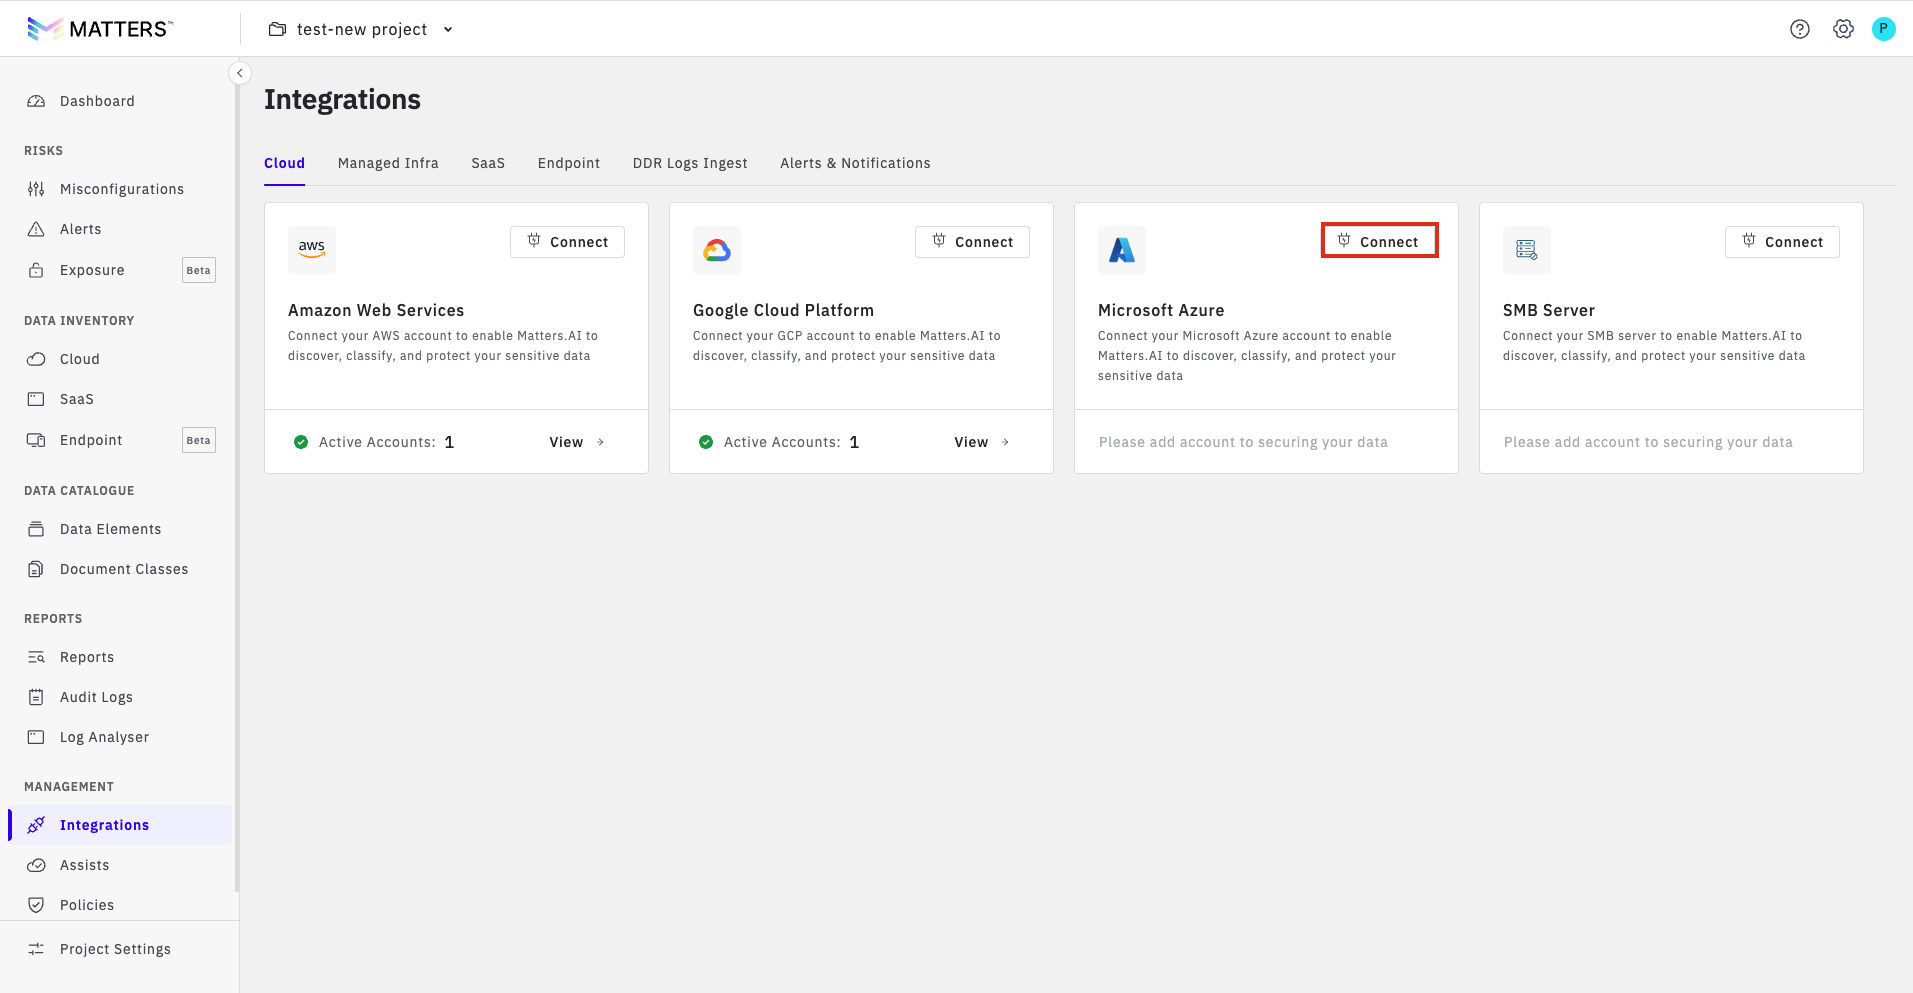
Log in to the Matters.ai Dashboard.
Navigate to Integrations. Click connect for the corresponding Microsoft Azure
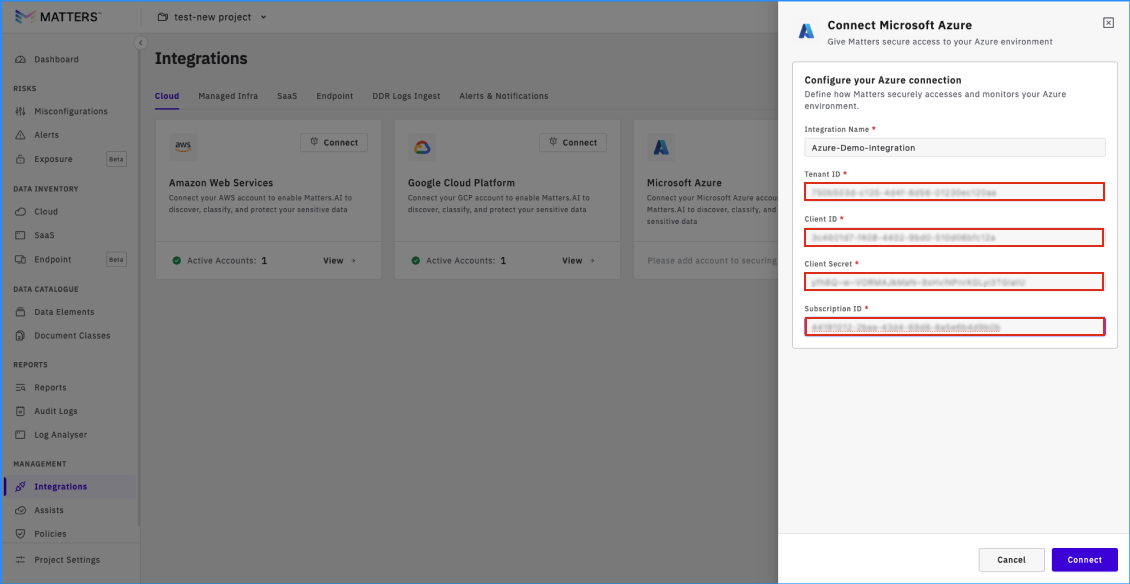
Enter the following details you saved earlier:
Integration Name
Tenant ID
Client ID
Client Secret
Subscription ID
Click Connect to complete the integration.
App Registration also requires
Contributor permissionon the created AKS Cluster
Step 6: Discover Data Stores
On successful integration of Azure AD, all the data stores will be automatically discovered and listed under Cloud Inventory.
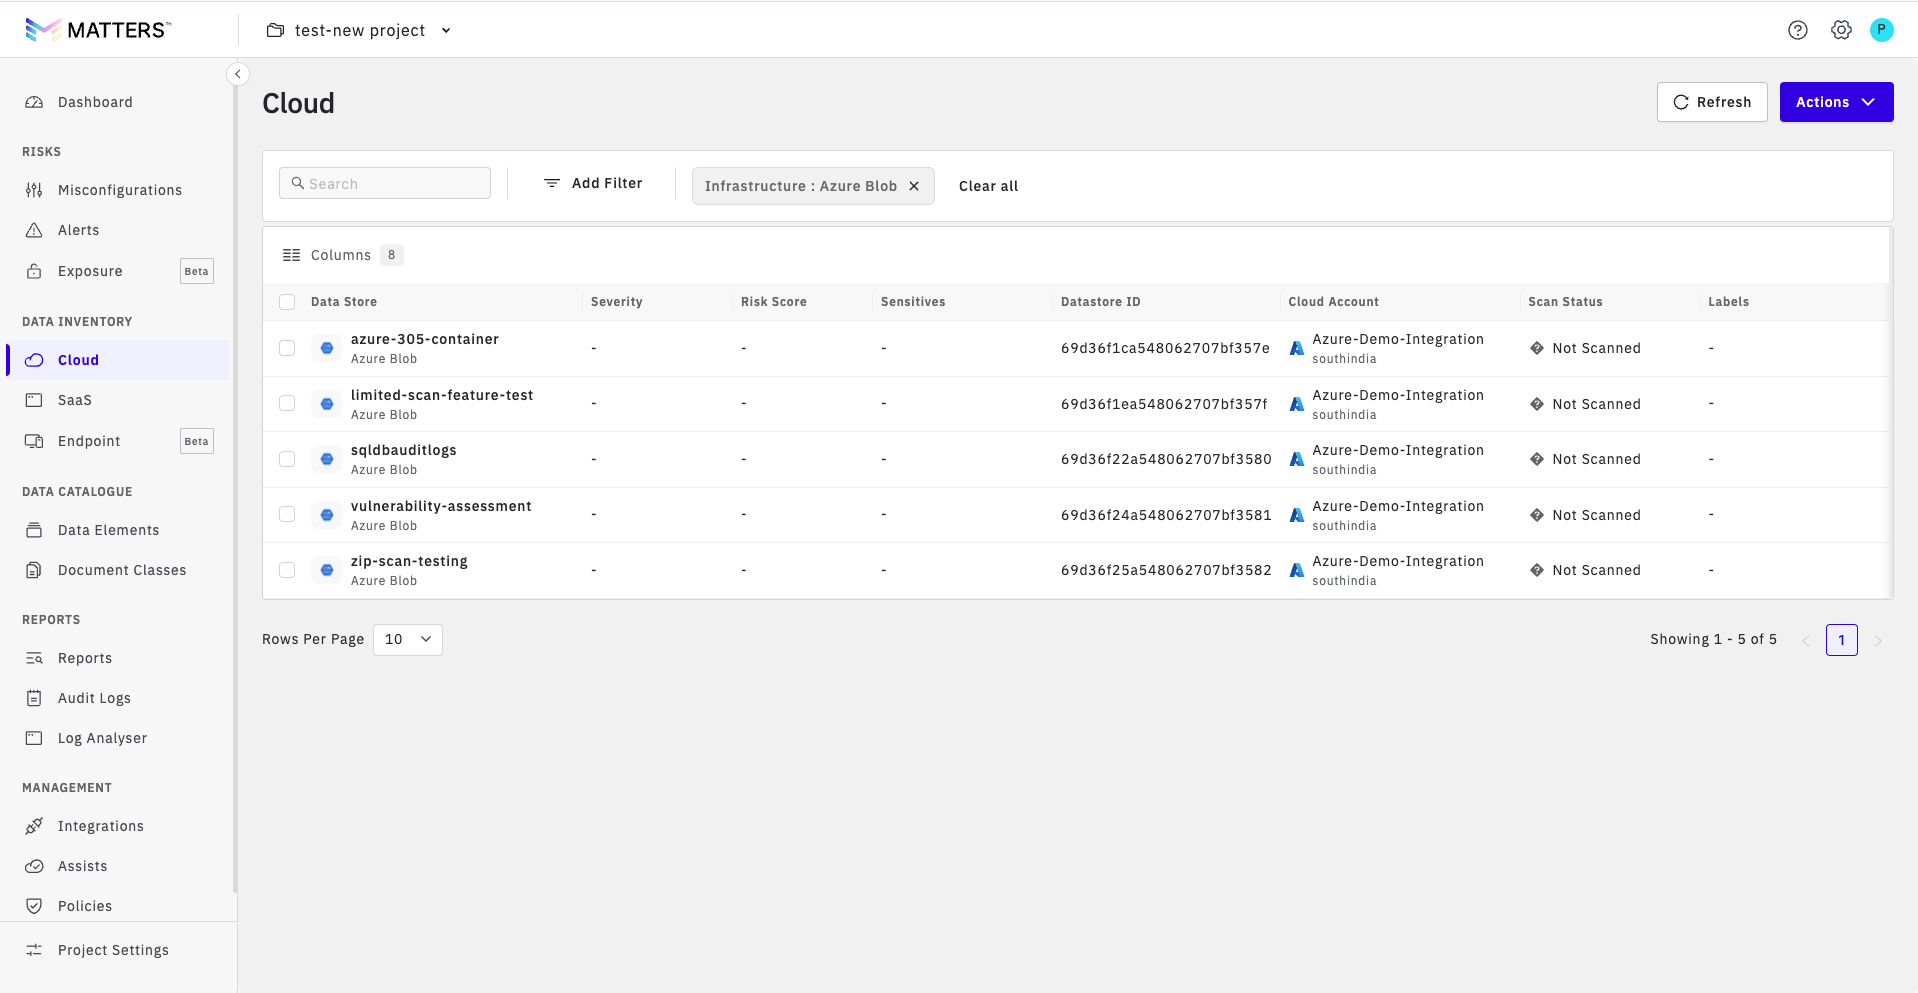
If the user wants to trigger discovery again manually:
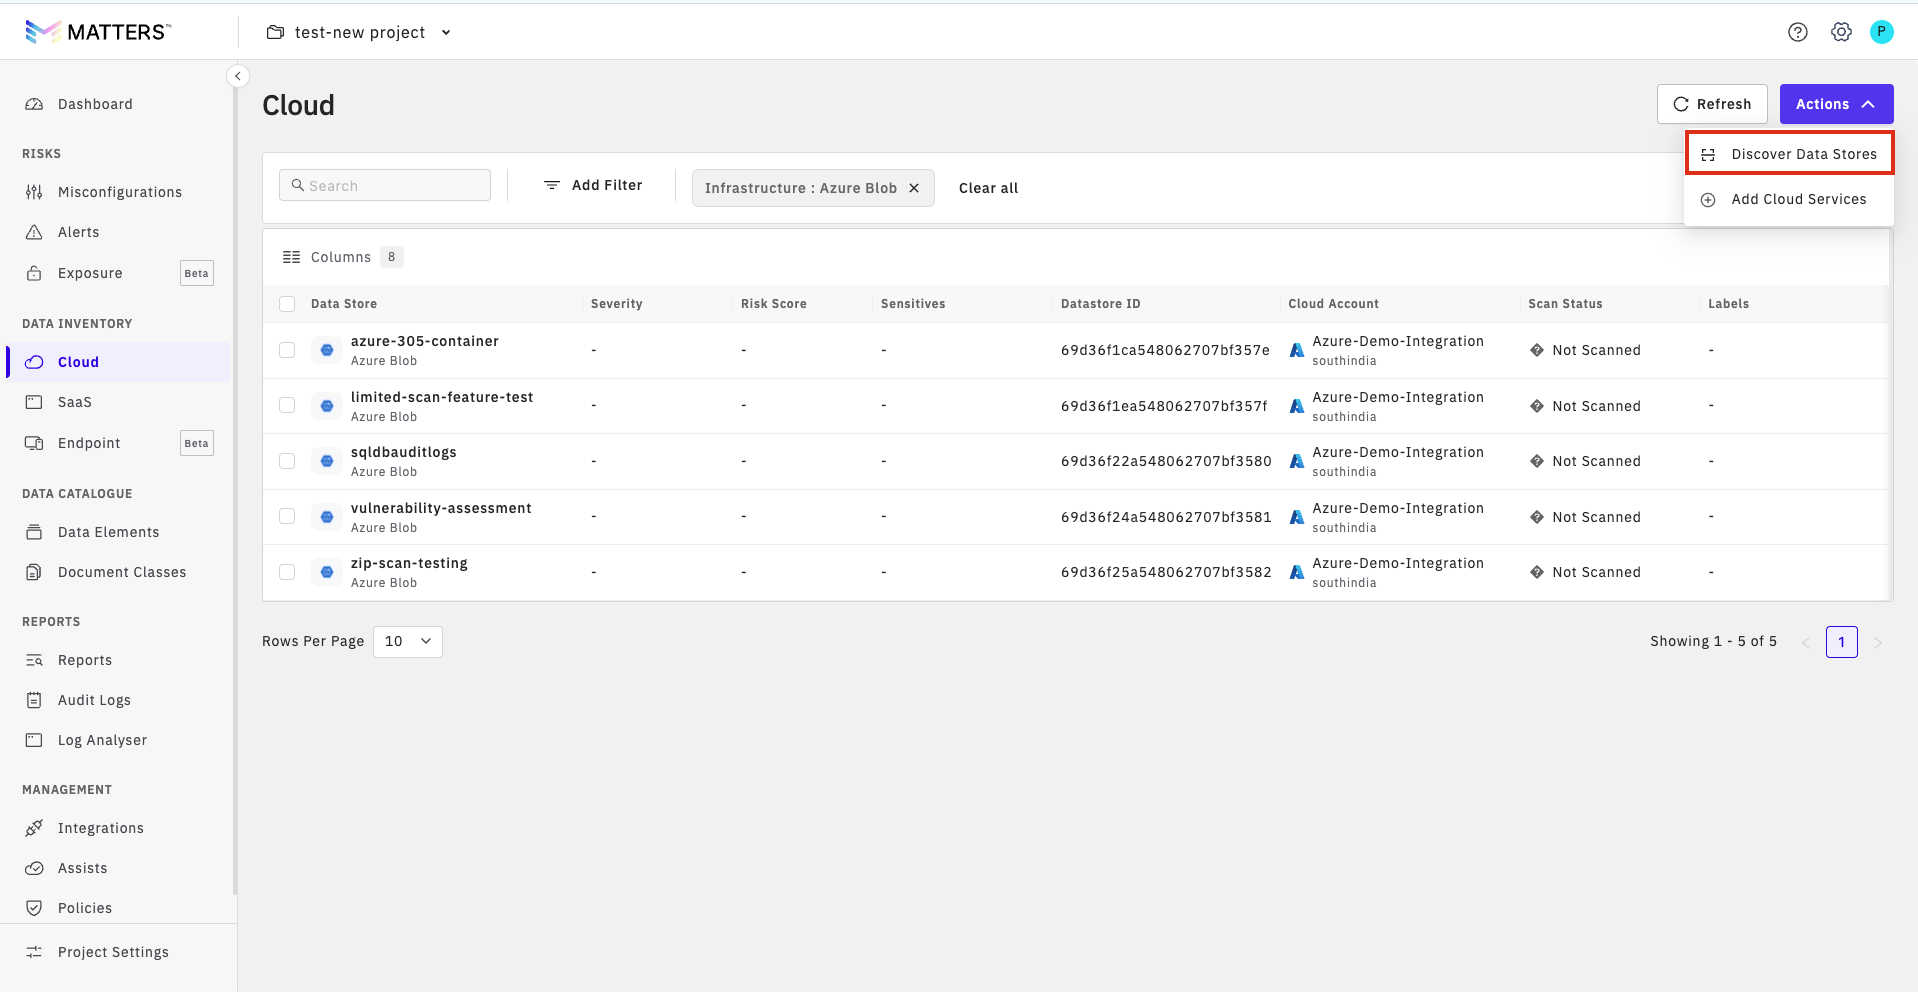
Navigate to Data Inventory → Cloud.
Click Actions
Click Discover Data Stores to initiate the process.
All the data stores will start listing down once the discovery completes.
Step 7: Run Classification Scan
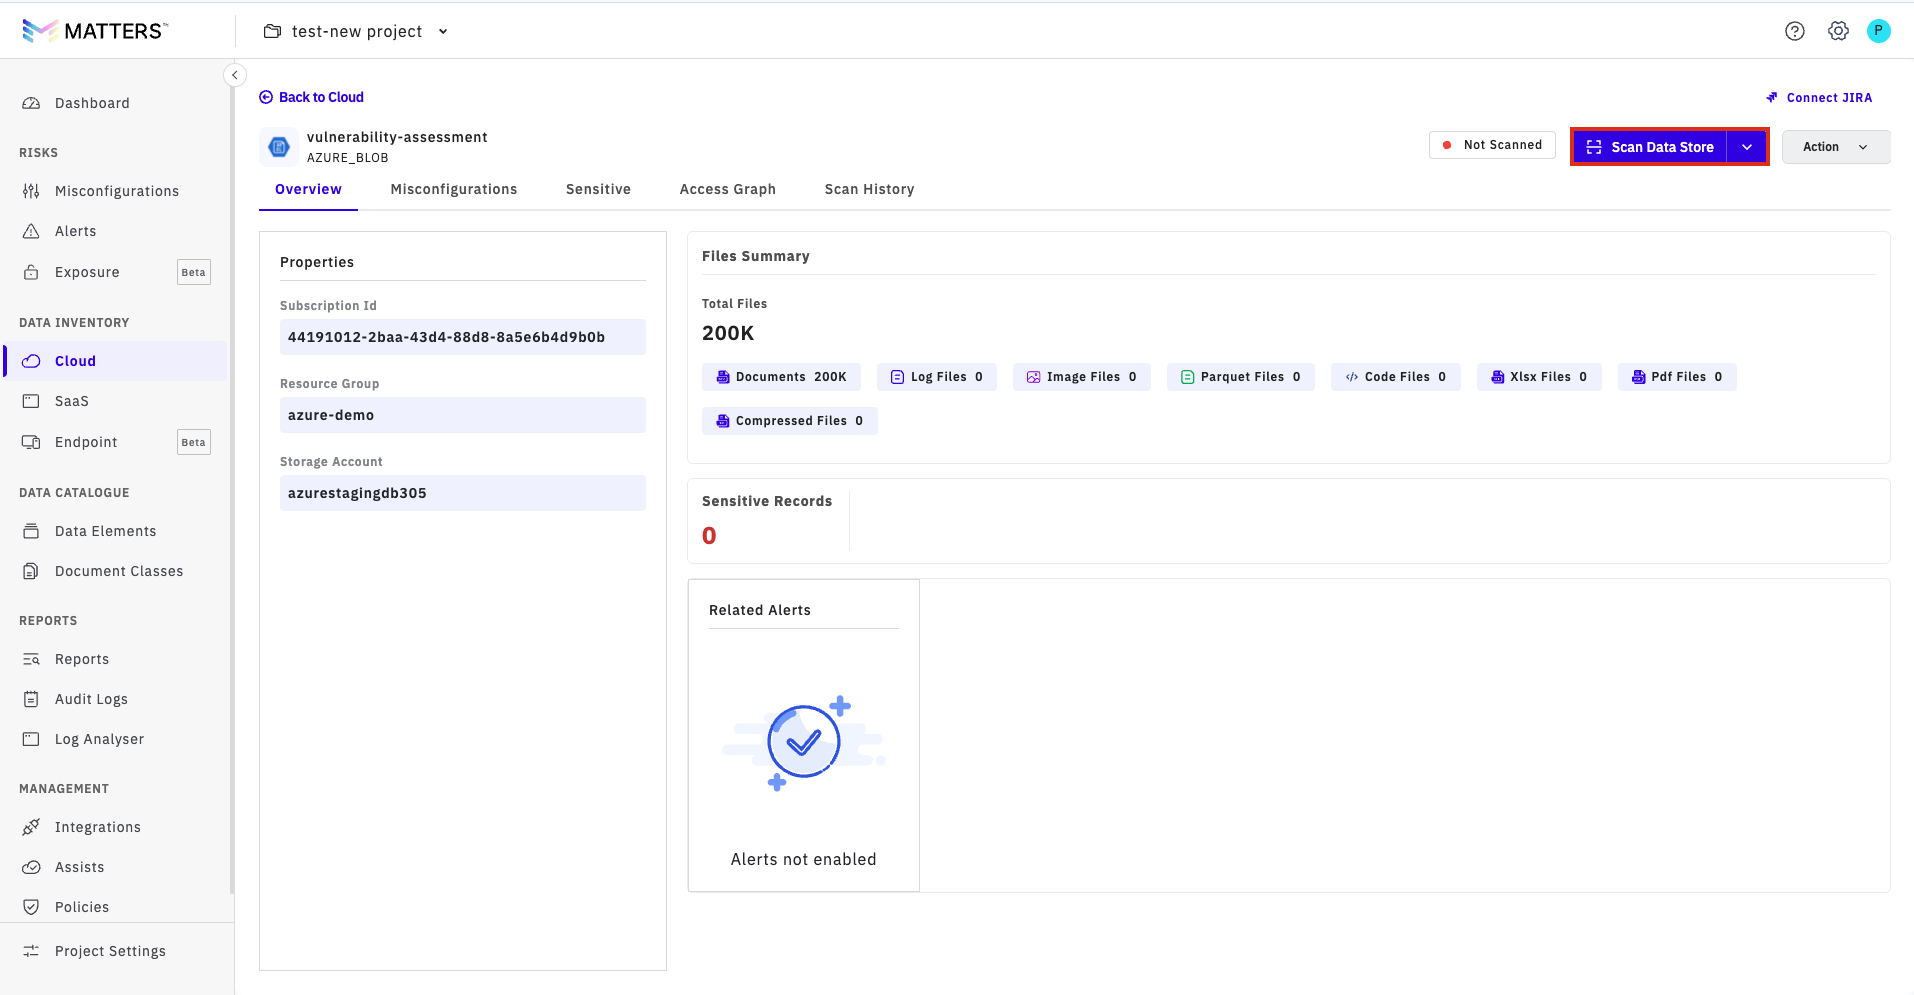
Click on the Snowflake data store which you want to run classification scan.
Click Scan Data Store to initiate a classification scan.
Monitor progress
Step 8: Review Scan Results
After the scan is completed, navigate to the Overview page.
You will see detailed information on:
Account Properties
Sensitive Records Data
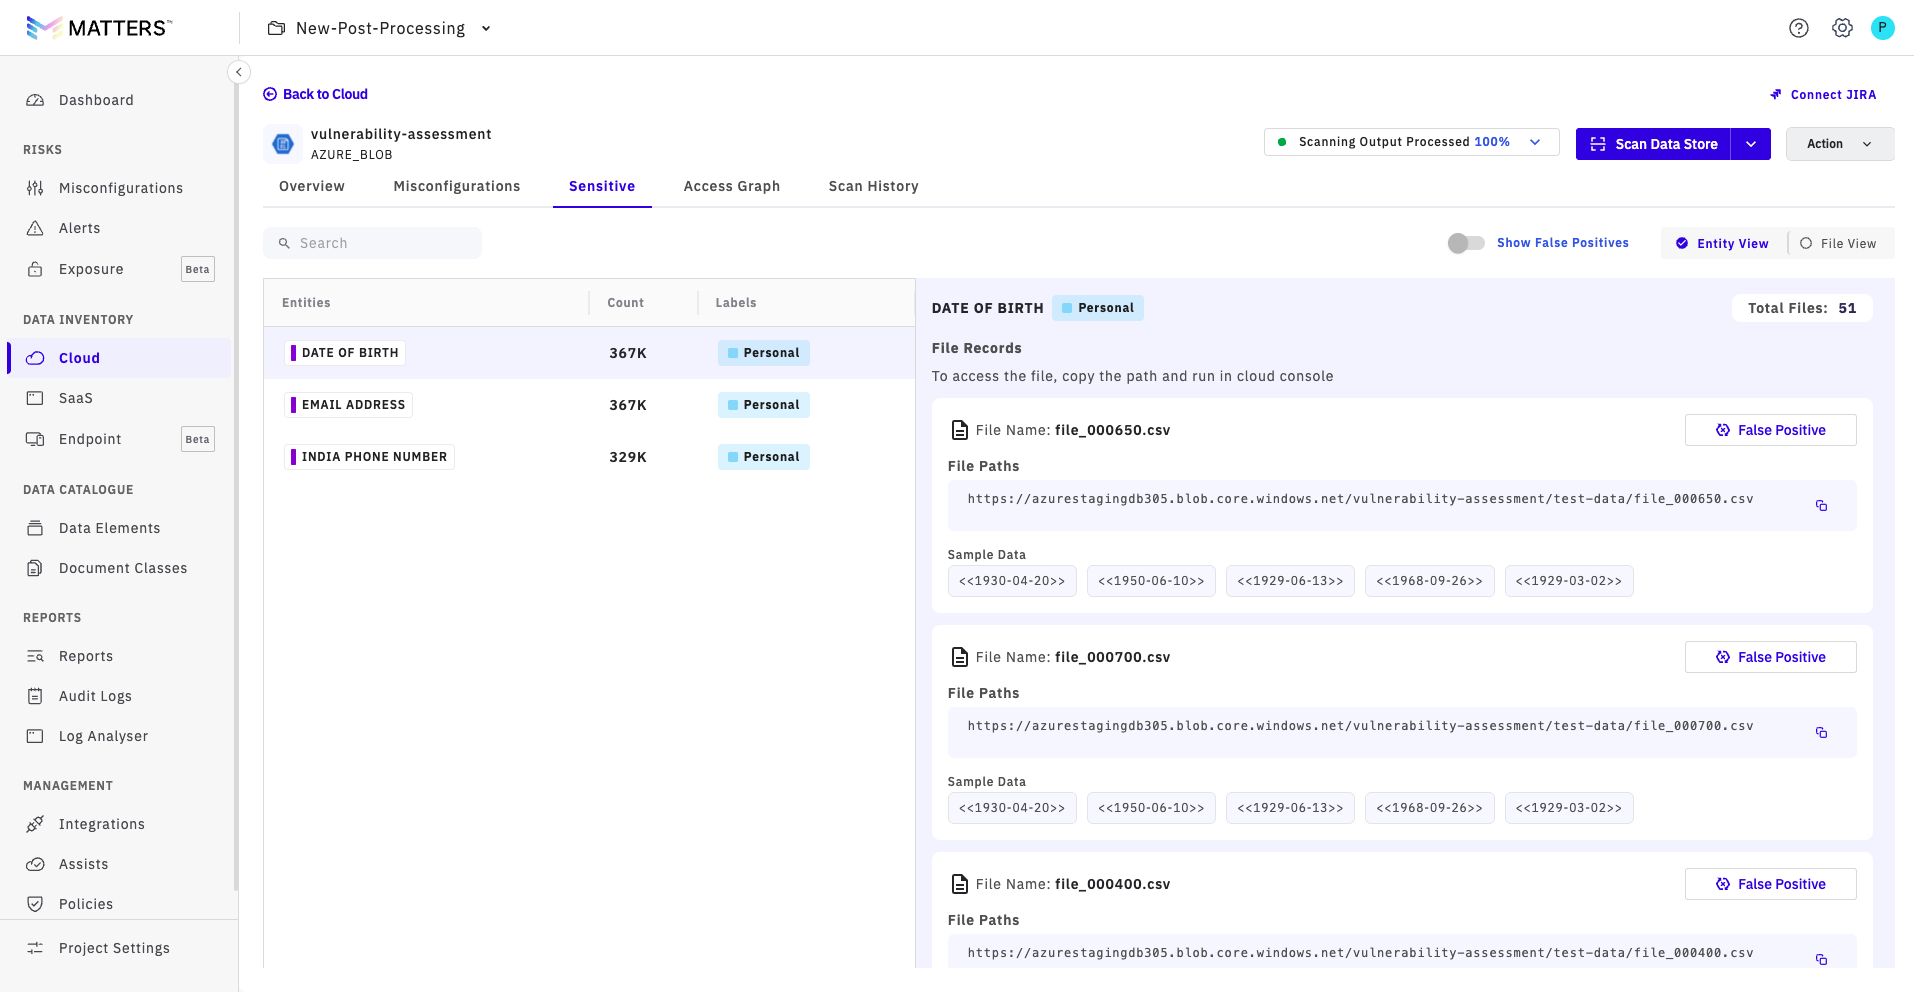
You can also view additional sensitivity details in the File View and Table View formats.
If any entities are found to be false positives, mark them by clicking on the False Positive button. This action allows you to manage the accuracy of the scan results.
You can view the false positives by toggling the “Show False Positive” Button at the top of the page.
Additionally, the Scan History section provides a detailed log of all previous scans, allowing for easy reference.
Additional Features:
Stop Scan:
At any stage of the scan, you can trigger the Stop Scan option if you wish to halt the process prematurely. This option can be useful for managing resources or stopping an incomplete scan.
Export Sensitivity Data to CSV:
After the scan is completed, you can download the sensitivity details in CSV format under Actions button. This feature allows you to export valuable insights and share them for further analysis or auditing purposes.