Snowflake Integration with the Matters Platform
Last updated: May 18, 2026
This guide provides step-by-step instructions for integrating Snowflake with the Matters Platform. As part of this process, a Snowflake administrator has to create a read-only service user, generate a Programmatic Access Token through the script shared by Matters Team and use the generated details to complete the integration in Matters.
The integration enables Matters to discover Snowflake data stores and run classification scans to identify sensitive data.
Prerequisite
Before starting the setup, the Matters team will provide a Snowflake SQL script.
This script is designed to create the required Snowflake objects for a secure read-only integration, including:
Service role
Warehouse
Service user
Network policy
Read-only database access
Programmatic Access Token
The script must be executed by a Snowflake administrator using the ACCOUNTADMIN role.
Before running the script, confirm the list of Snowflake databases that should be integrated with Matters. The database names inside the script should be updated as needed.
Step 1: Retrieve the Snowflake Account Identifier
Log in to the Snowflake console and copy the Snowflake account identifier. This value will be required later while configuring the integration in the Matters Dashboard.
To retrieve it:
Open the Snowflake console.
Click the profile icon.
Go to Account → View Account Details.
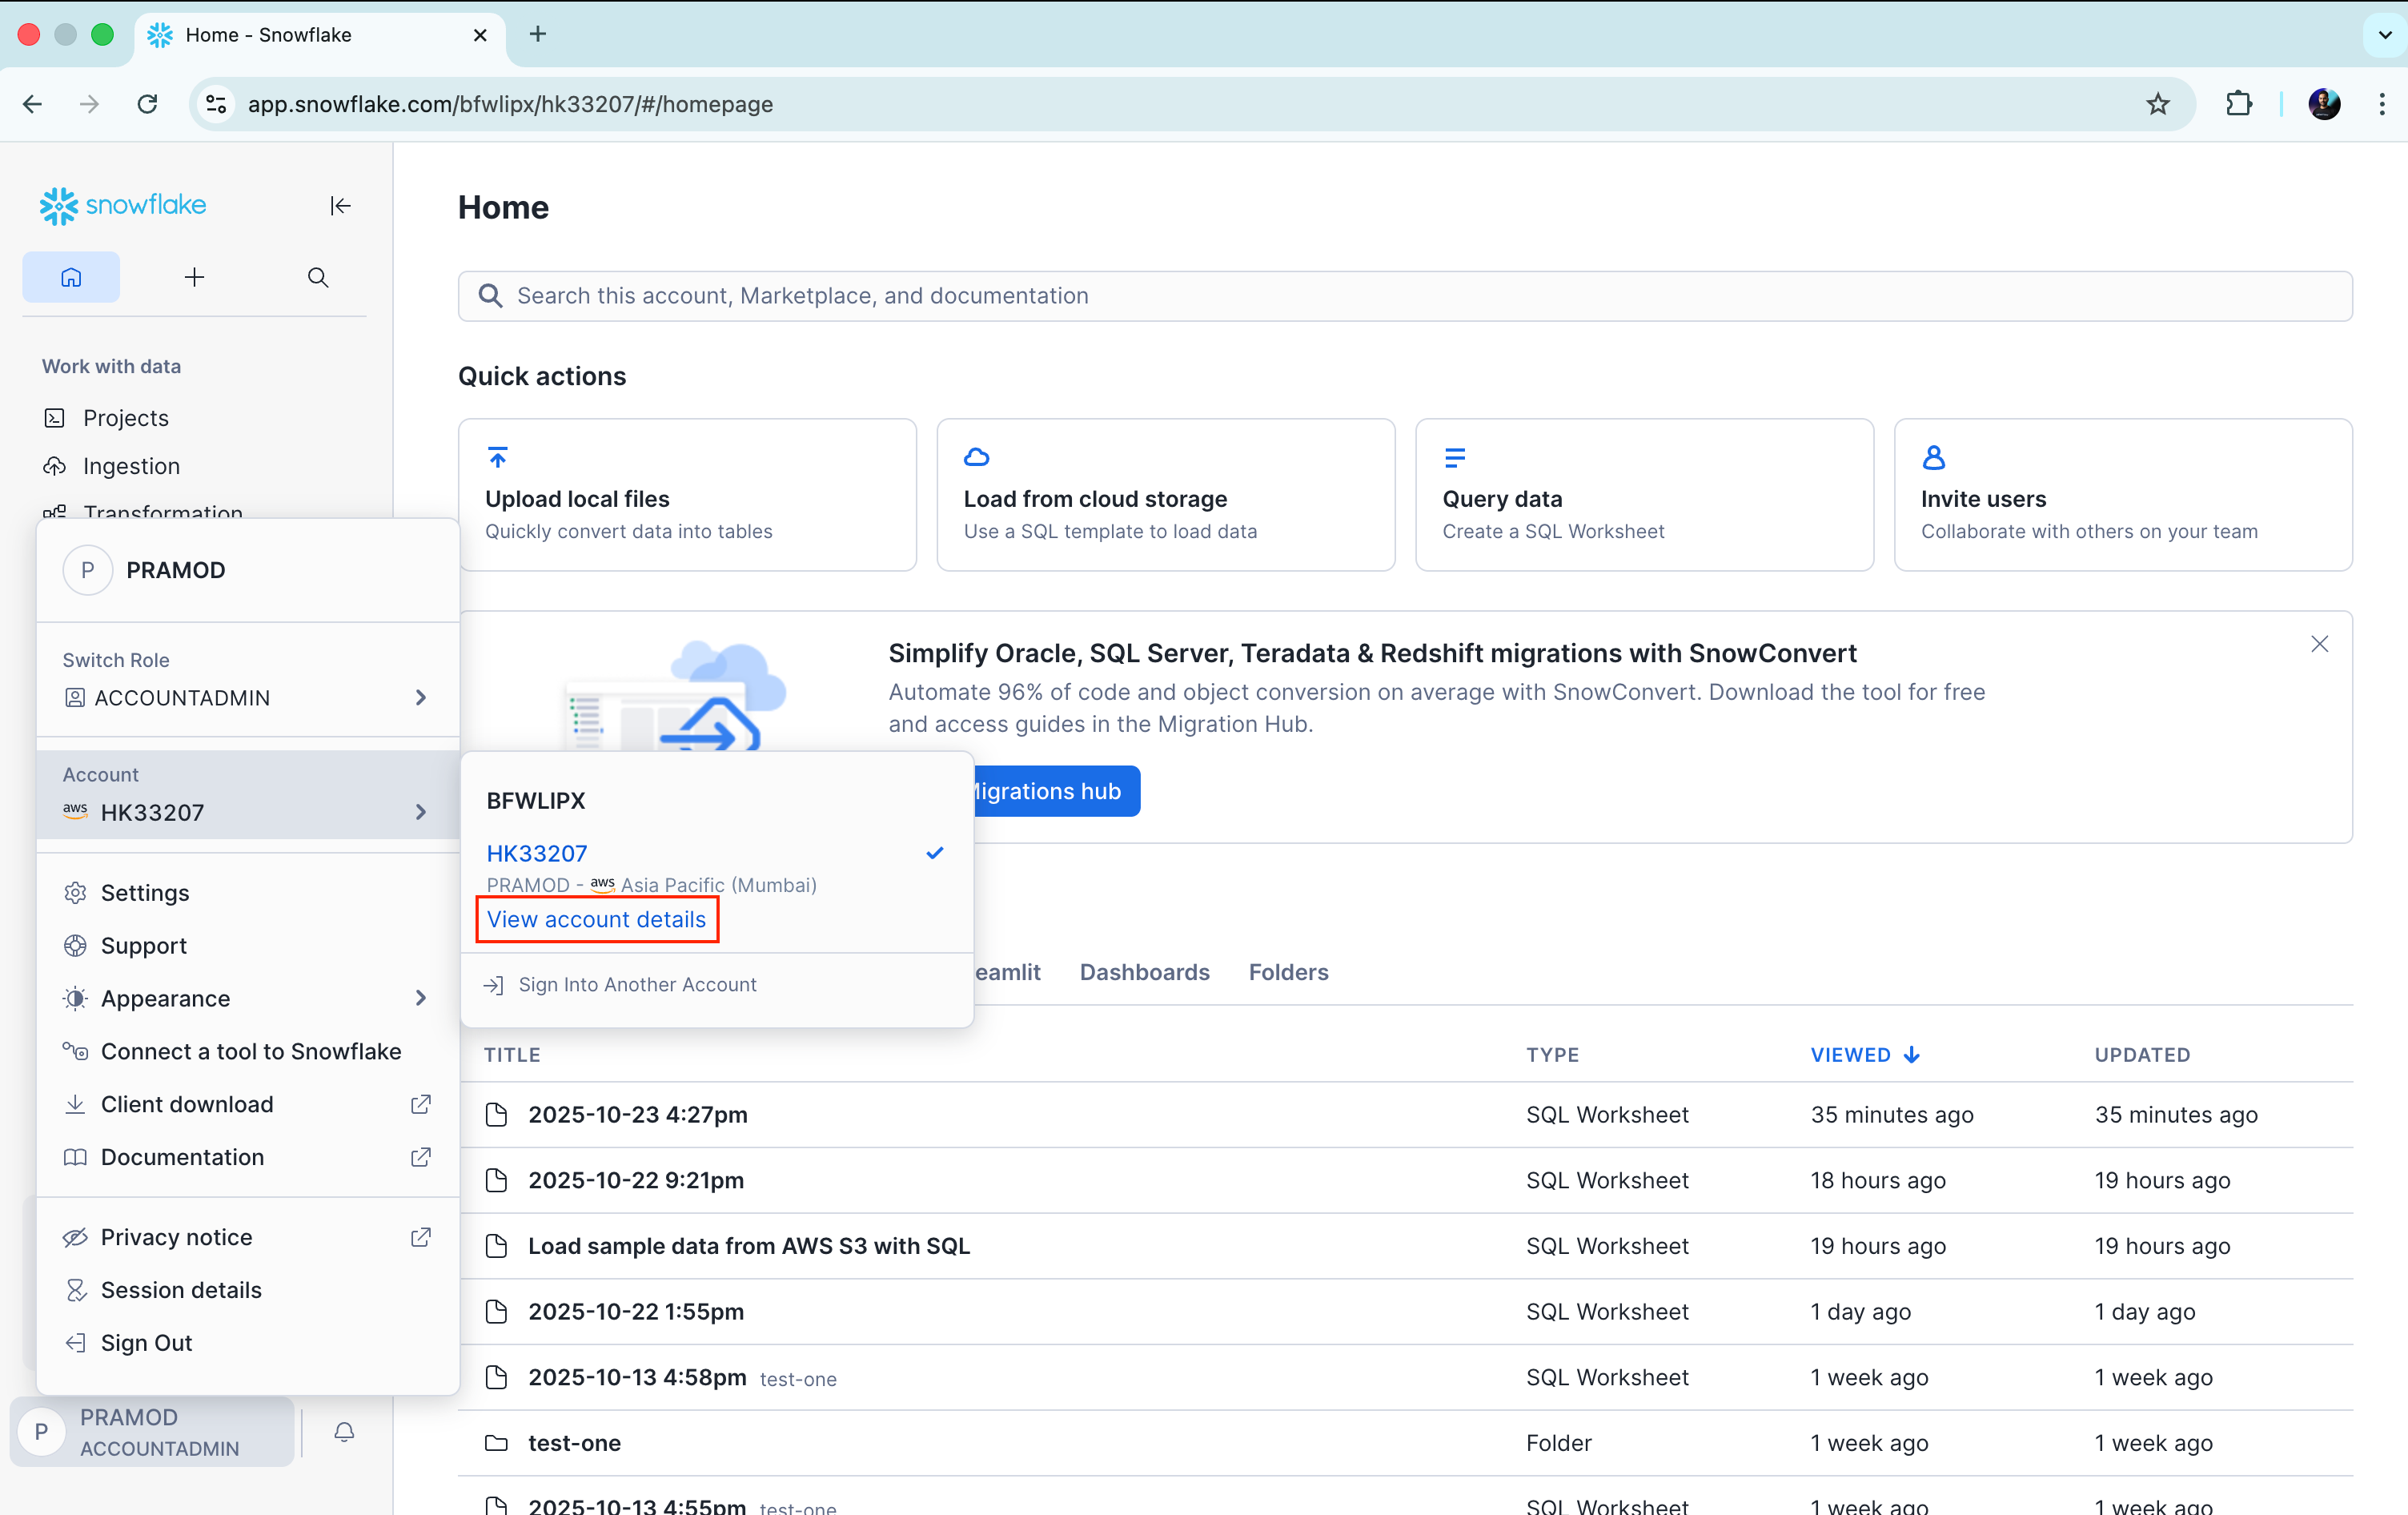
Copy the Account Identifier and keep it available for the integration setup.
Step 2: Run the Snowflake Script and Generate the PAT Token
The Matters team will provide a Snowflake SQL script for the integration setup.
The Snowflake administrator should log in to Snowflake and open a new SQL worksheet.
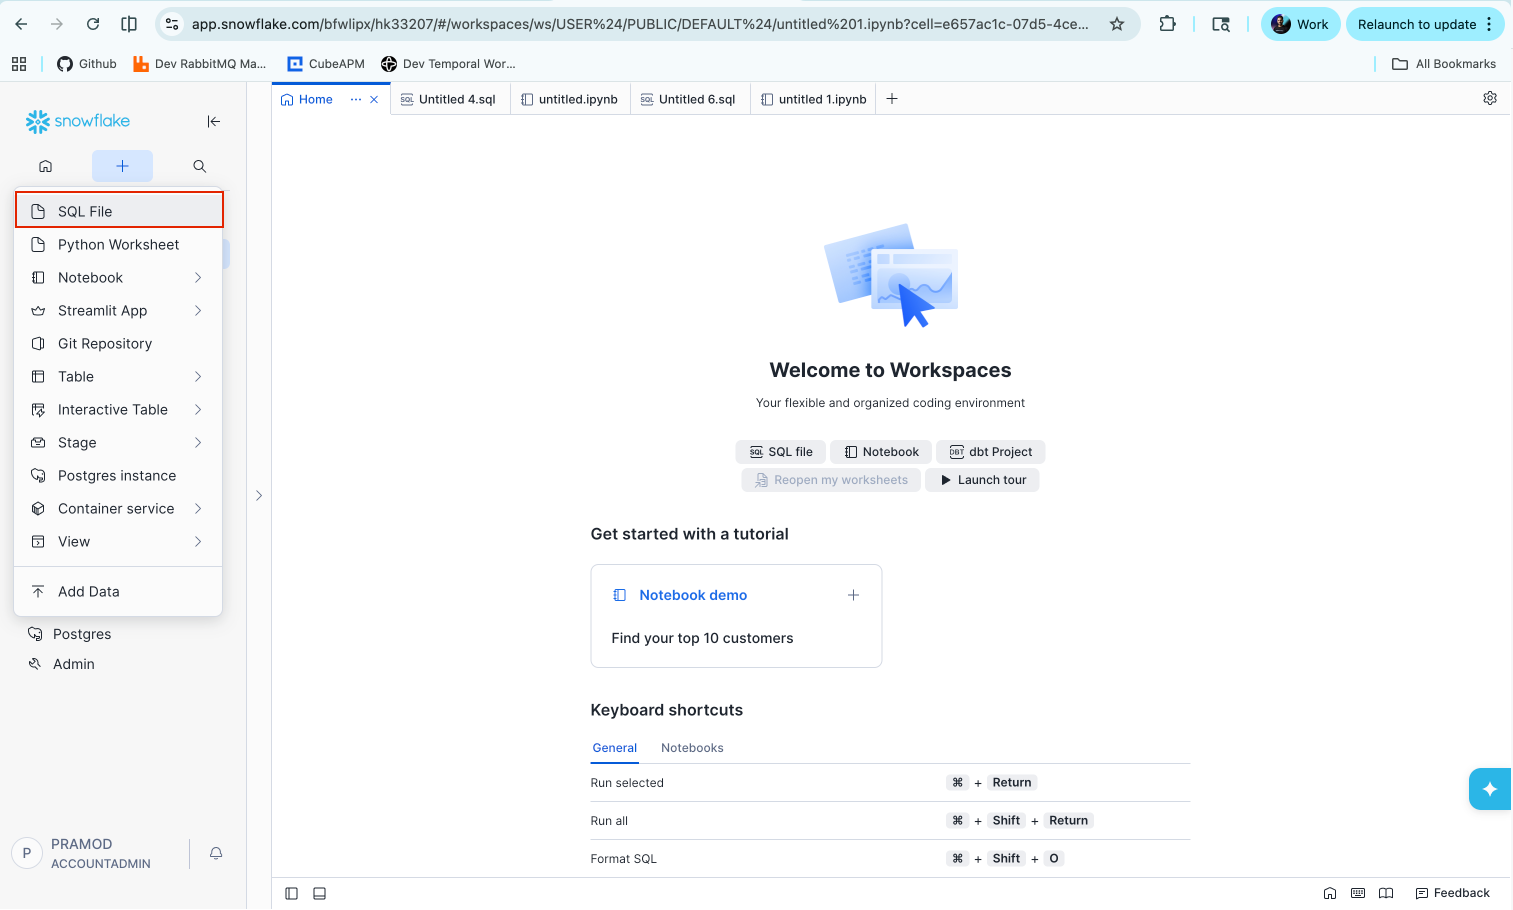
Paste the script provided by the Matters team into the worksheet.
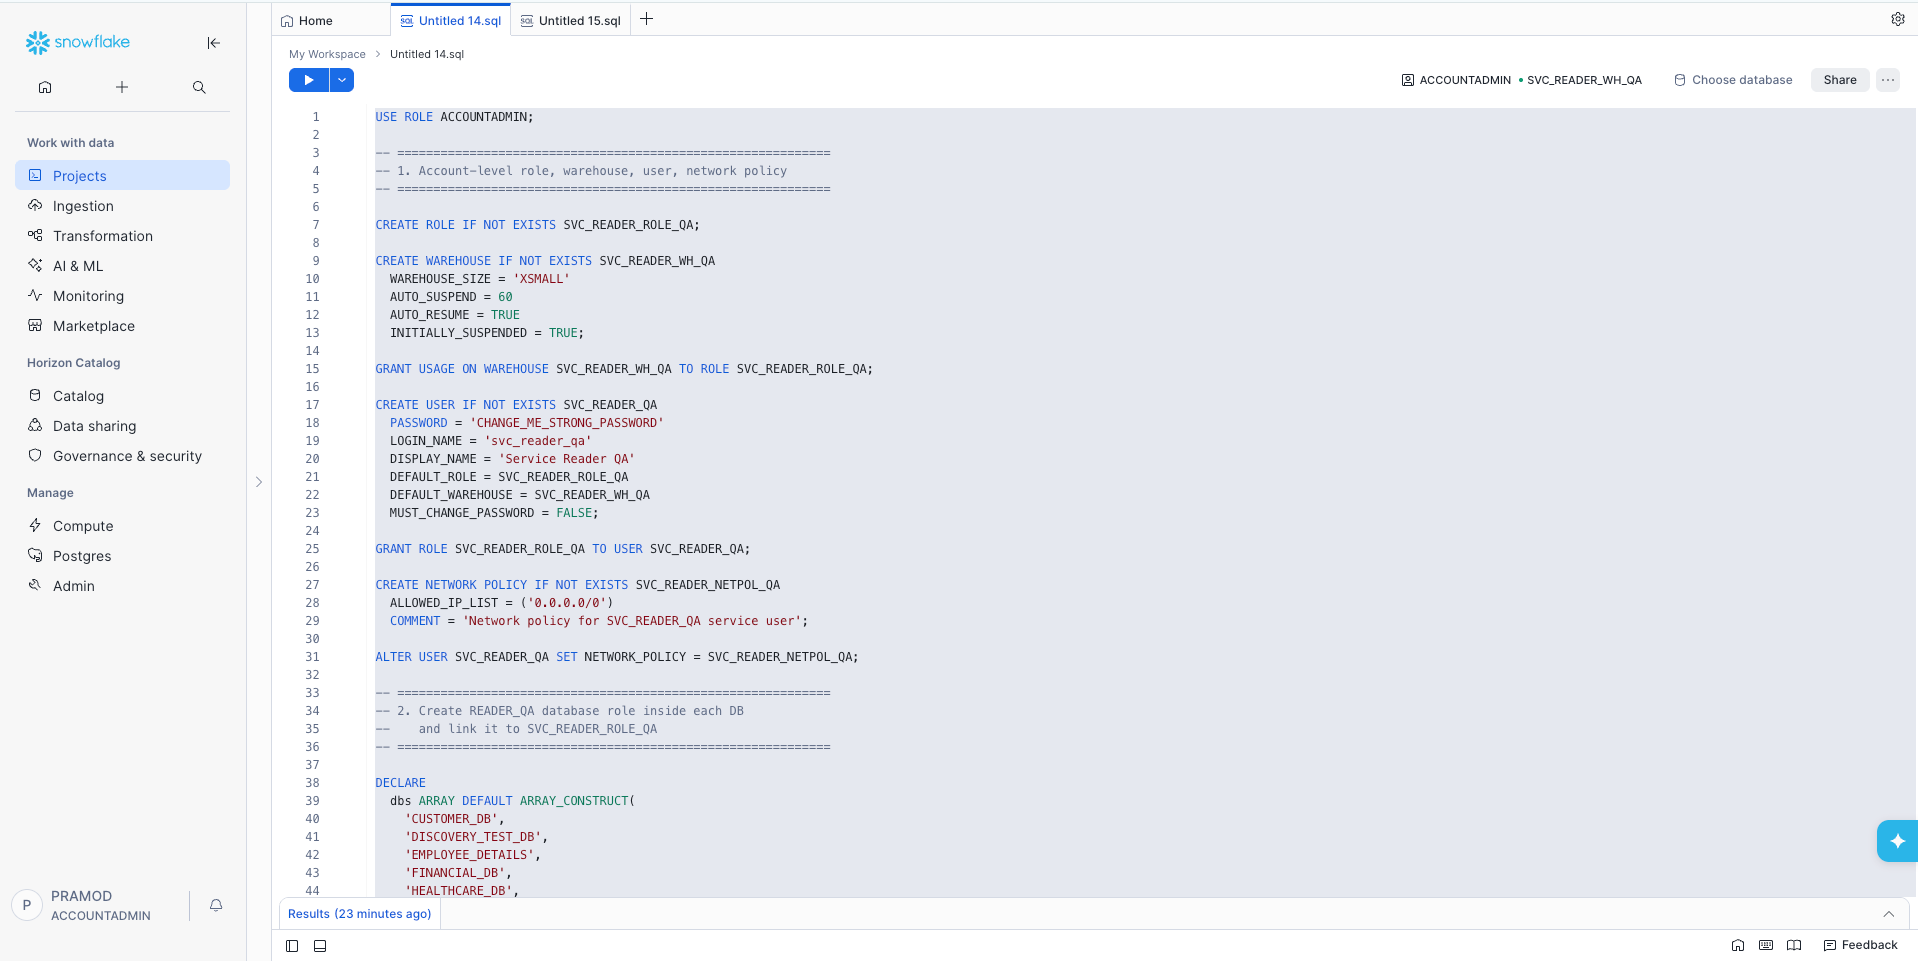
Before running the script, review and update the object names properly. The script creates the following Snowflake objects:
Service Role
Warehouse
Service User
Network Policy
Read-only Database Access
Programmatic Access Token
Use clear and environment-specific names for these objects.
Example:
Service Role: SVC_READER_ROLE_QA
Warehouse: SVC_READER_WH_QA
Service User: SVC_READER_QA
Network Policy: SVC_READER_NETPOL_QA
Programmatic Access Token: SVC_READER_PAT_QA
Update the service user password in the script.
PASSWORD='CHANGE_ME_STRONG_PASSWORD' Replace CHANGE_ME_STRONG_PASSWORD with a strong password that follows the organization’s password policy. (Do not use a simple, temporary, or weak password in a production setup.)
Update the database list inside the script with the Snowflake databases that should be integrated with Matters.
dbsARRAYDEFAULT ARRAY_CONSTRUCT(
'CUSTOMER_DB',
'DISCOVERY_TEST_DB',
'EMPLOYEE_DETAILS',
'FINANCIAL_DB',
'HEALTHCARE_DB',
'IMPRINTS',
'SANITY',
'UTIL_DB'
);
Replace the sample database names with the actual database names from the customer’s Snowflake account.
After confirming the object names, password, and database list, select the full script and click Run.
The script will create the required Snowflake setup for Matters, including:
Service role
Warehouse
Service user
Network policy
Read-only access to selected databases
Programmatic Access Token
Once the script runs successfully, Snowflake will display the generated PAT token.
Copy the PAT token immediately and store it securely.
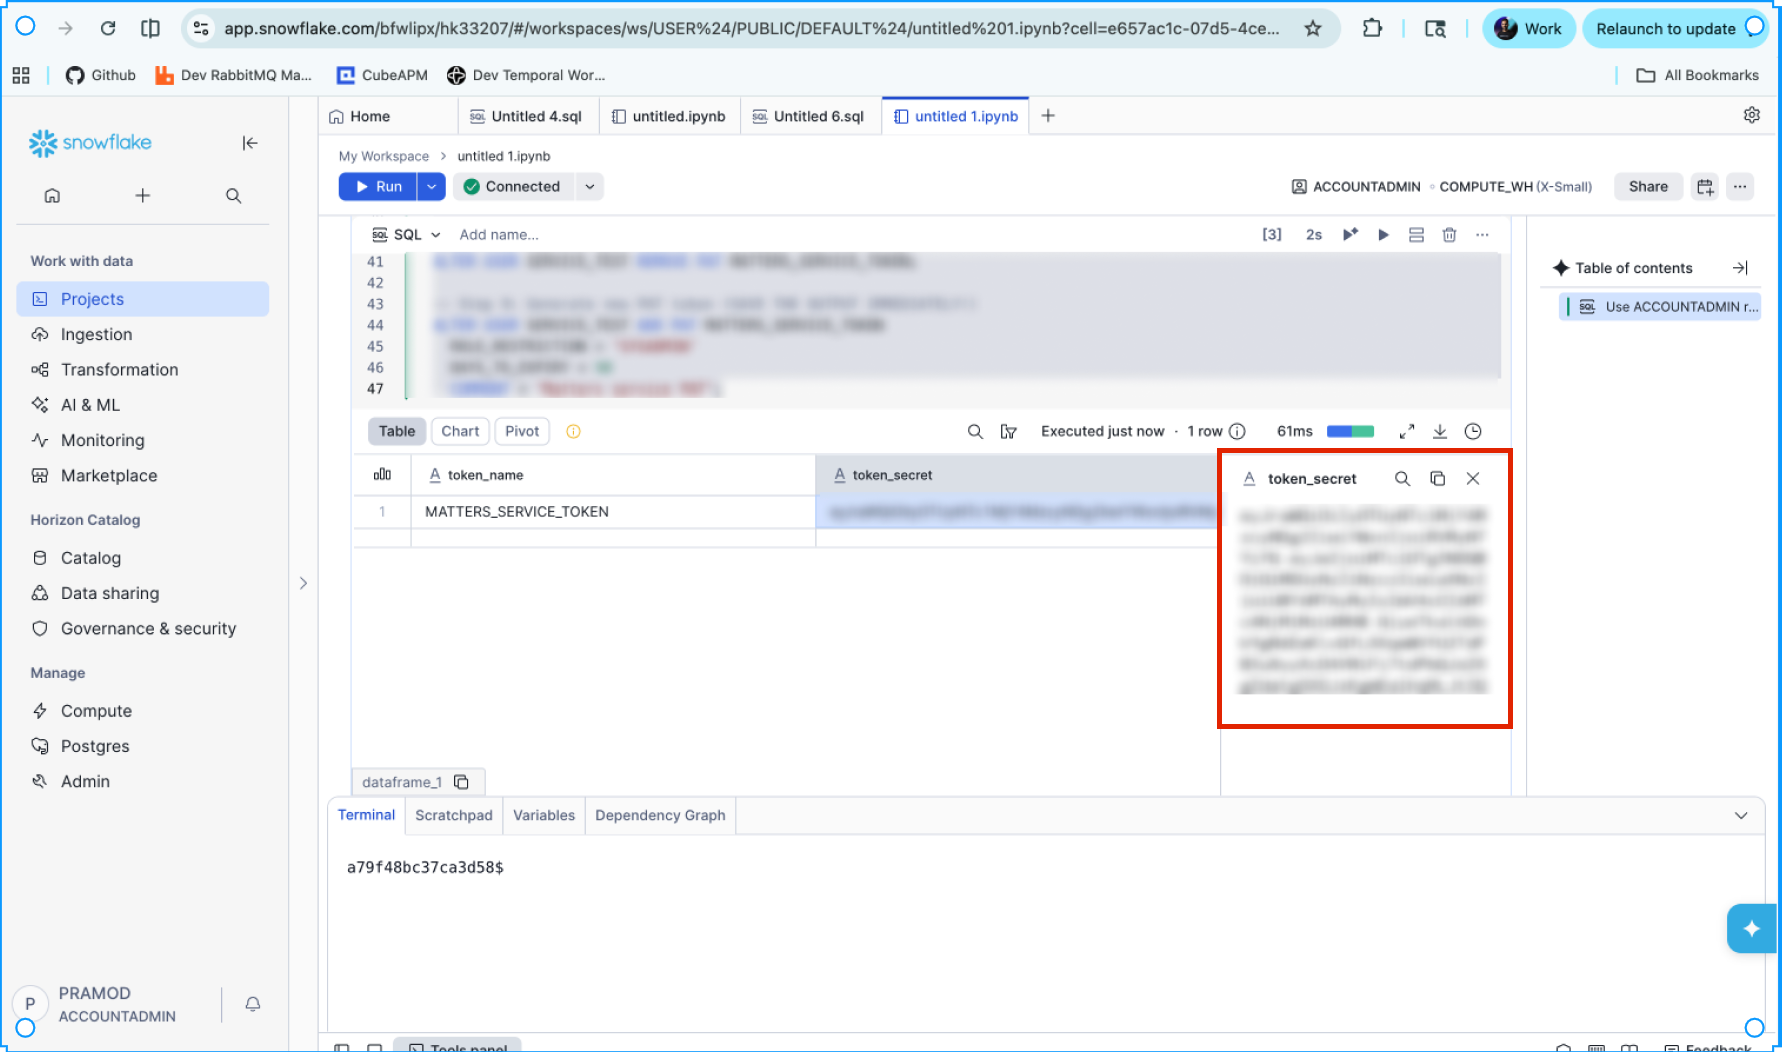
Note: The PAT token is displayed only once. If it is not copied at this stage, it cannot be viewed again and must be recreated.
This PAT token will be used later in the Matters Dashboard to complete the Snowflake integration.
Step 3: Configure Snowflake Integration in Matters
Log in to the Matters Admin Dashboard.
Go to Integrations → Managed Databases.
Locate the Snowflake integration card.
Click Connect.
This will open the Snowflake configuration page.
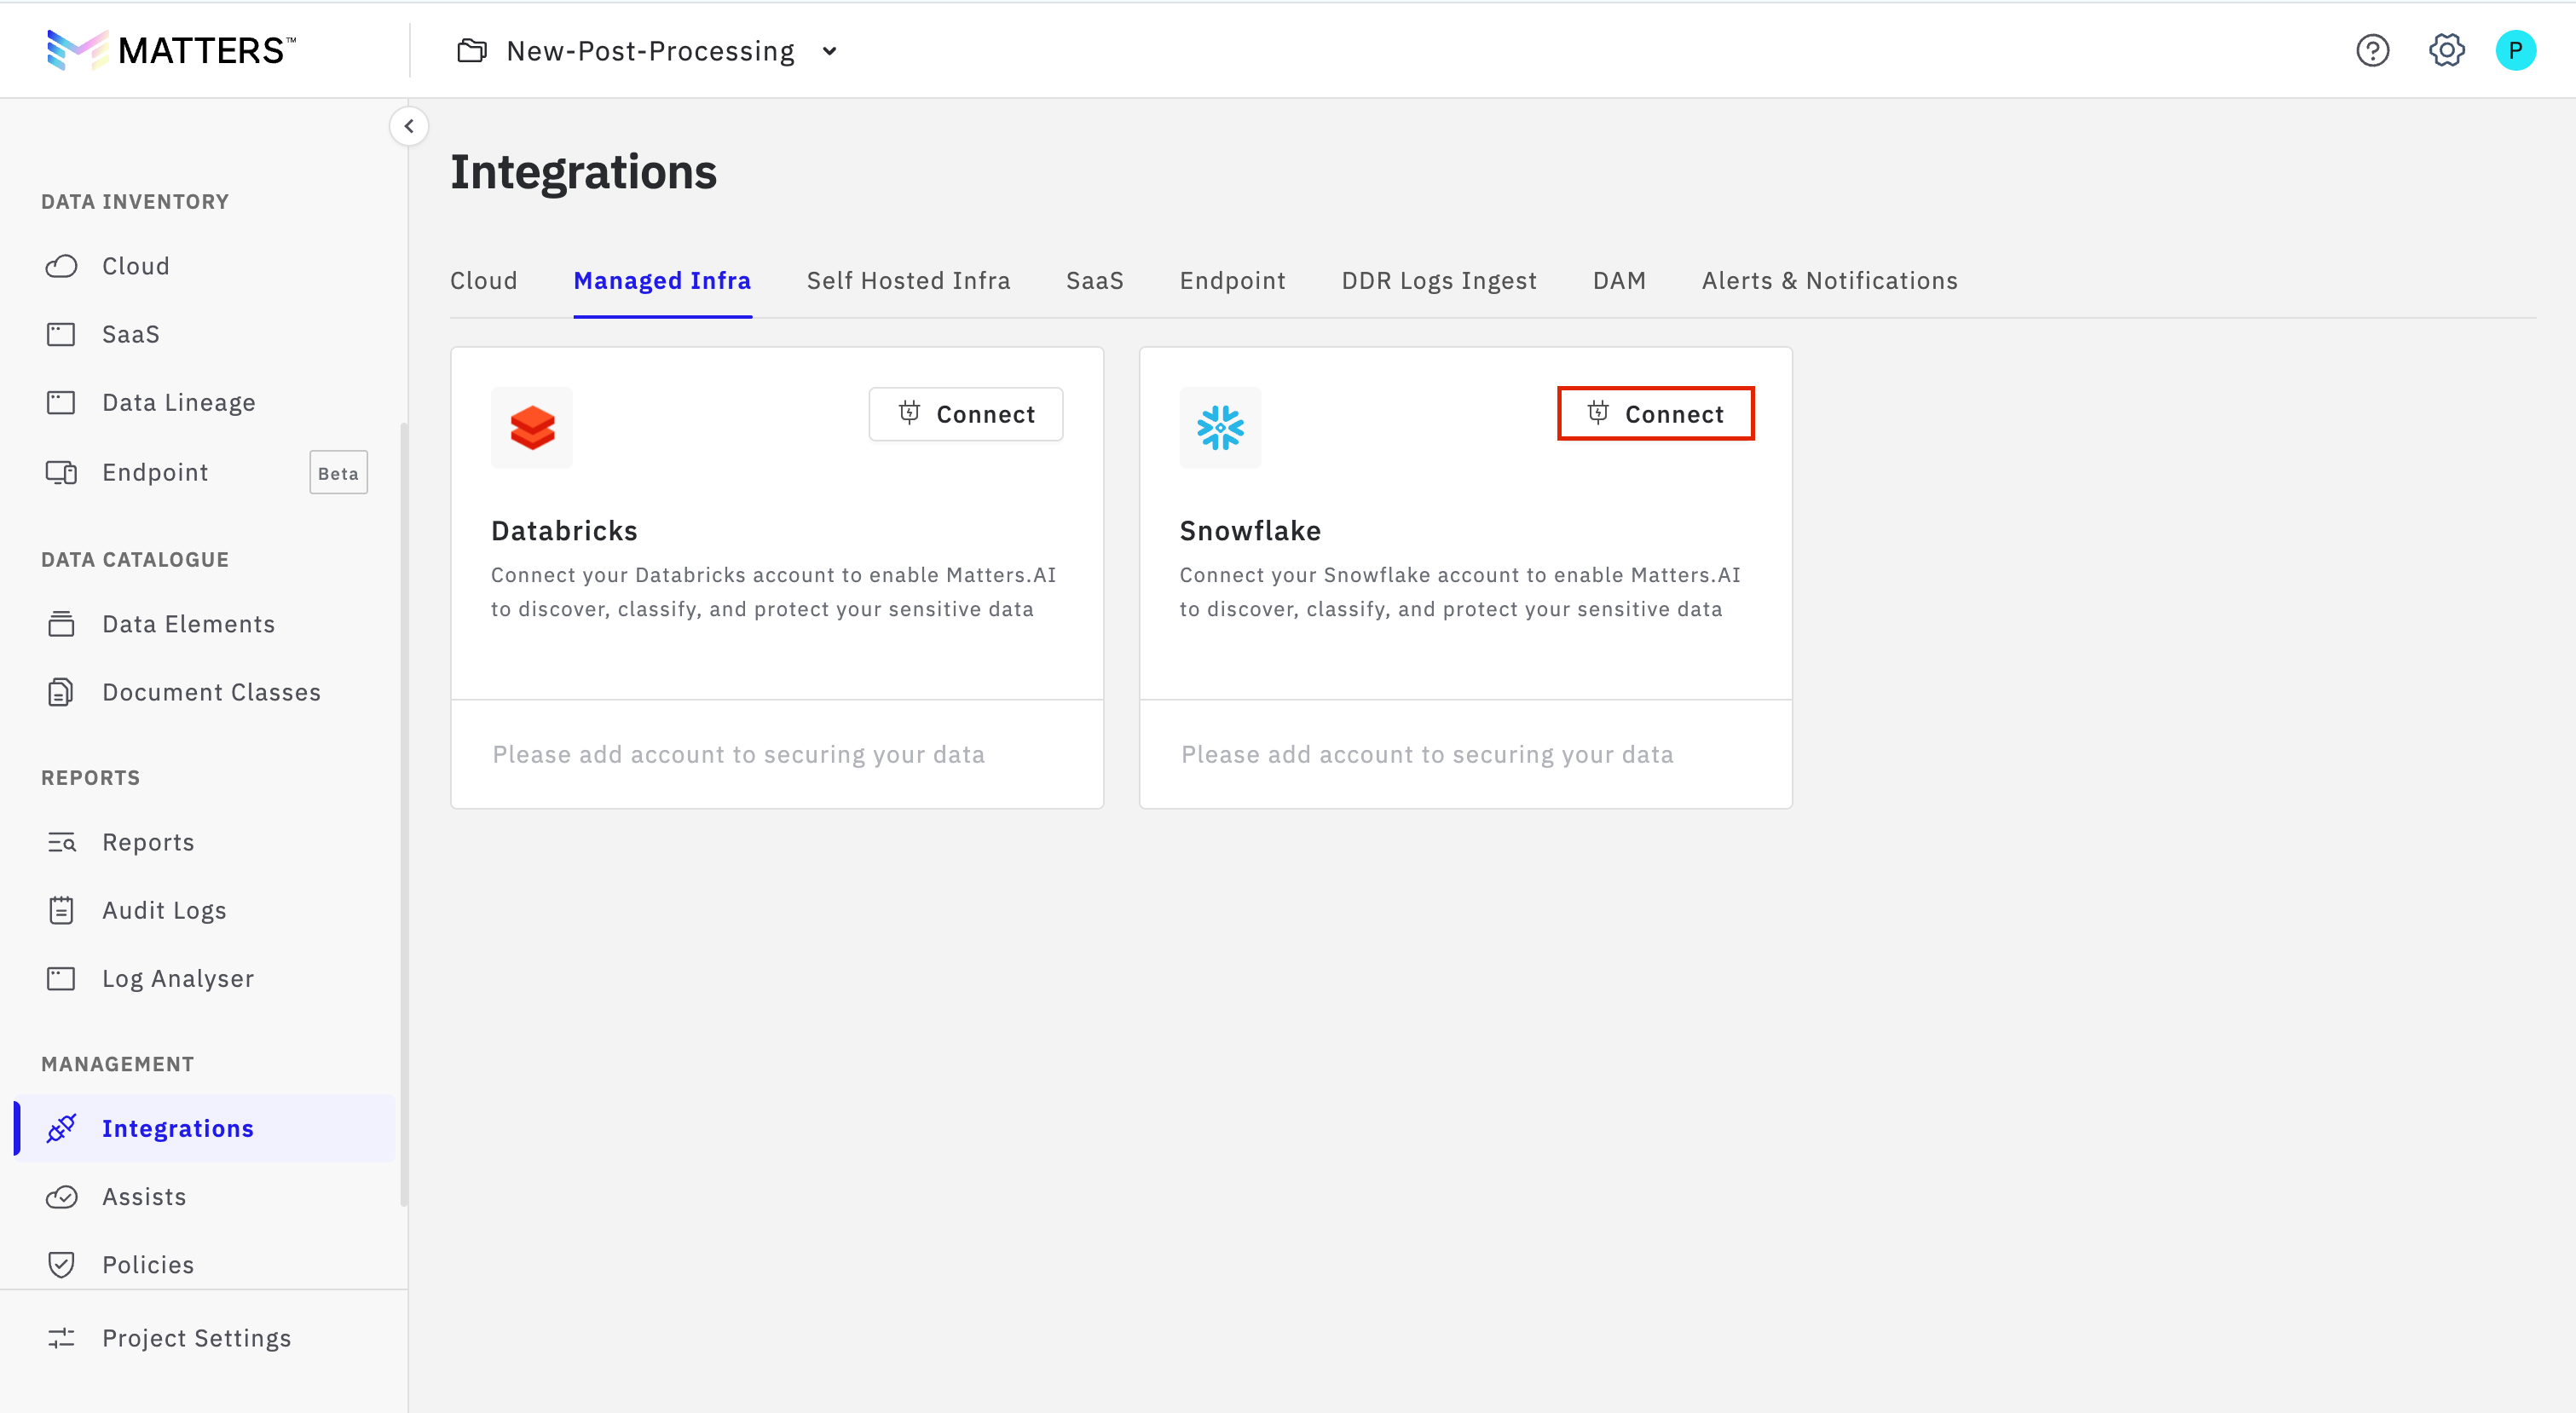
Step 3: Enter Snowflake Configuration Details
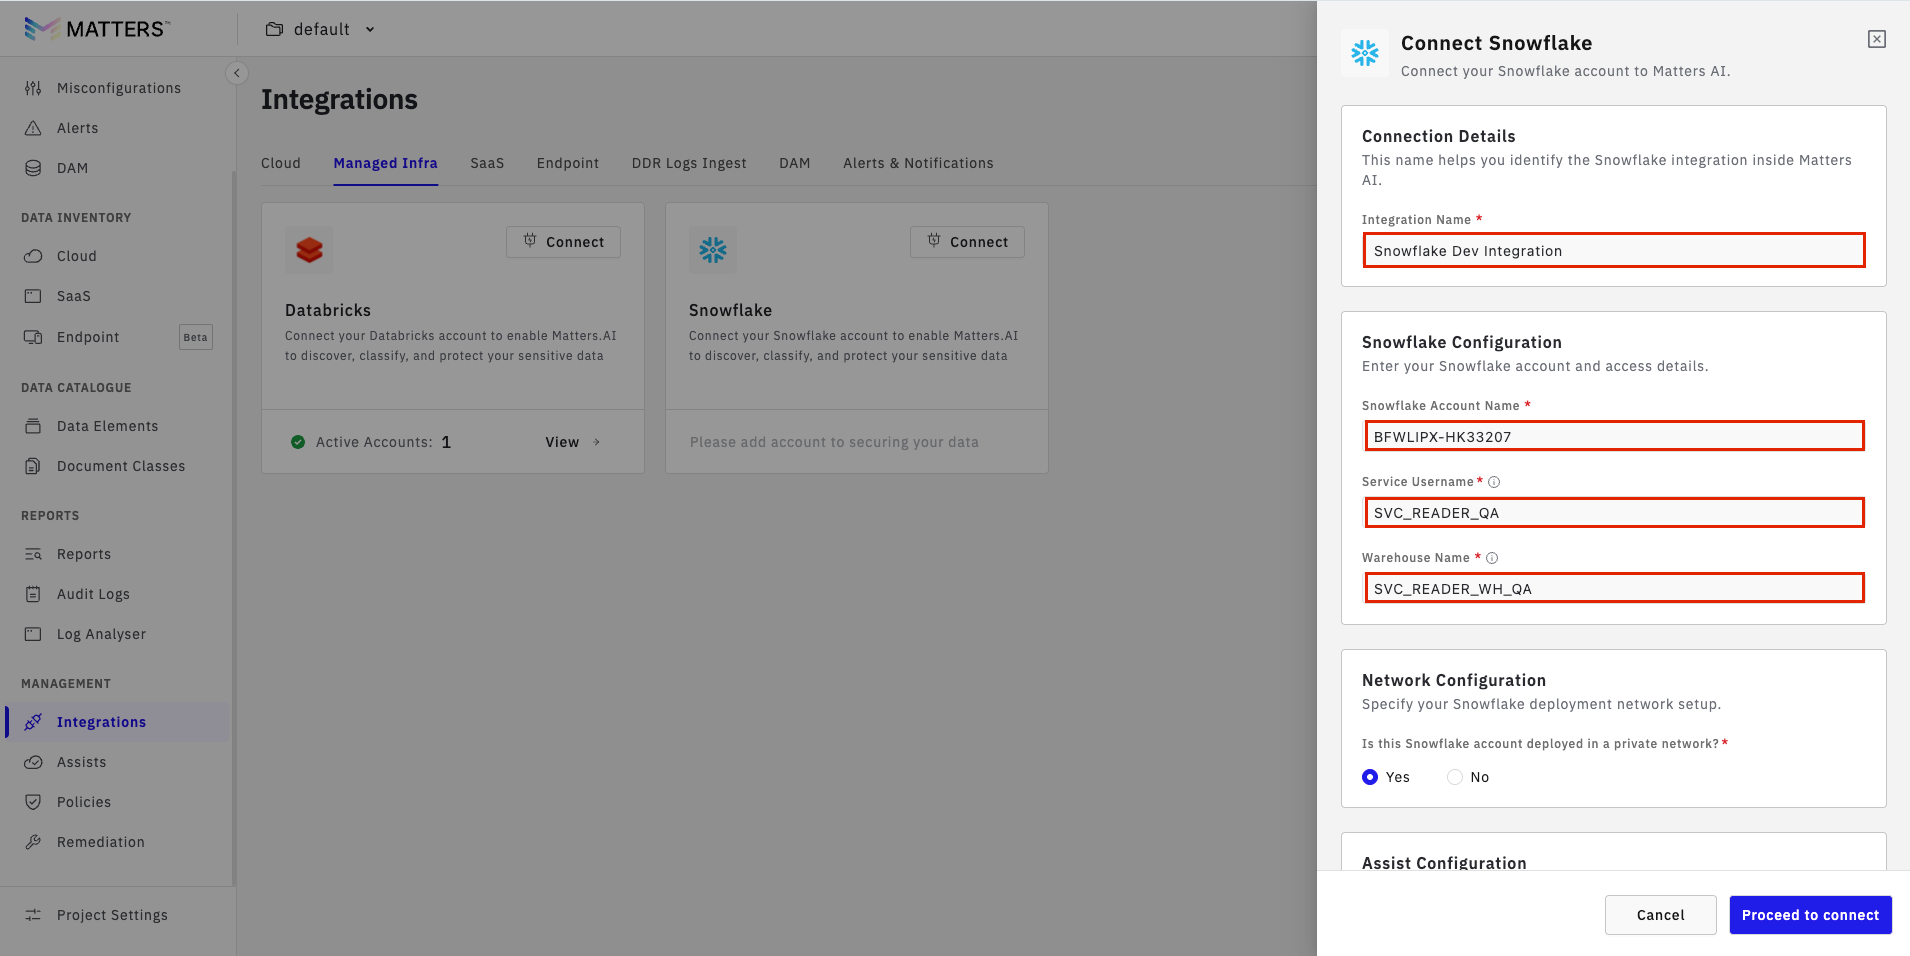
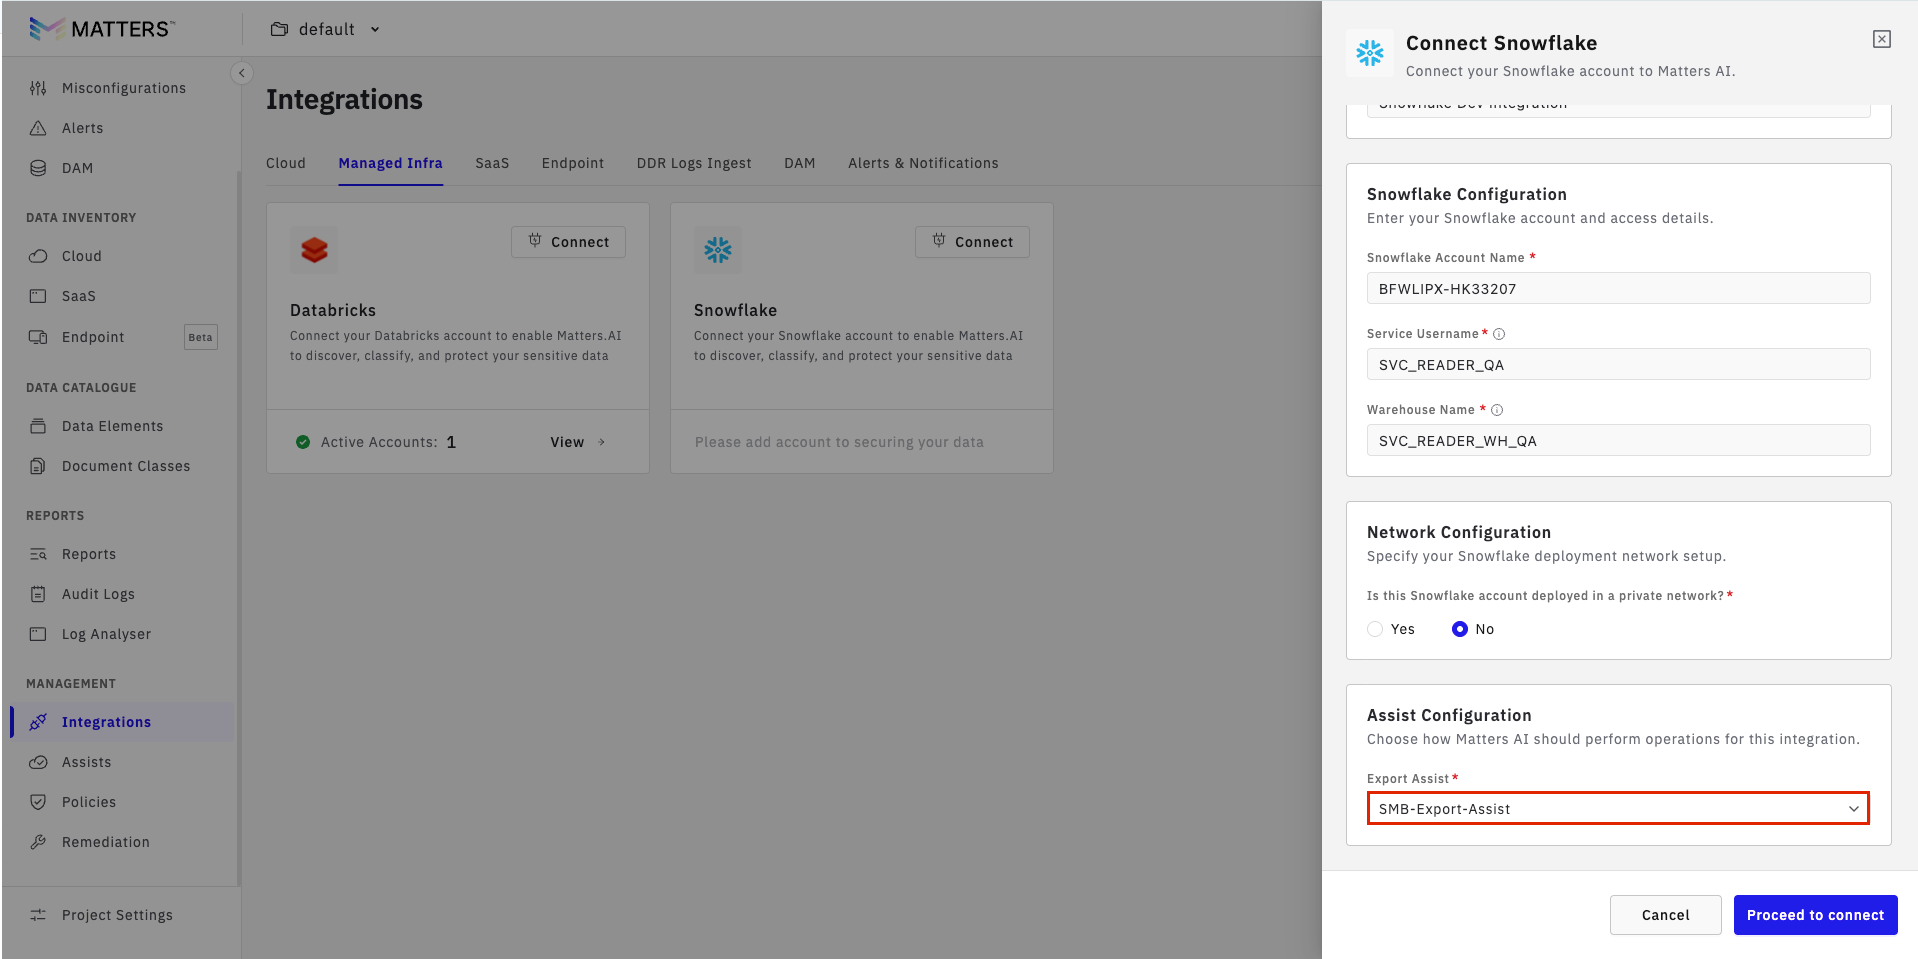
On the Snowflake configuration page, provide the required details(Use the values created from the script executed):
Enter a clear and recognizable Integration Name. Example:
Snowflake_ProdEnter the copied Snowflake Account Name / Account Identifier.
Enter the Service Username. Example:
SNOWFLAKE_MATTERS_SERVICEEnter the Warehouse Name Example:
SVC_READER_WH_QA
Once these details are entered, proceed to the network configuration section.
Step 4: Configure Network Settings
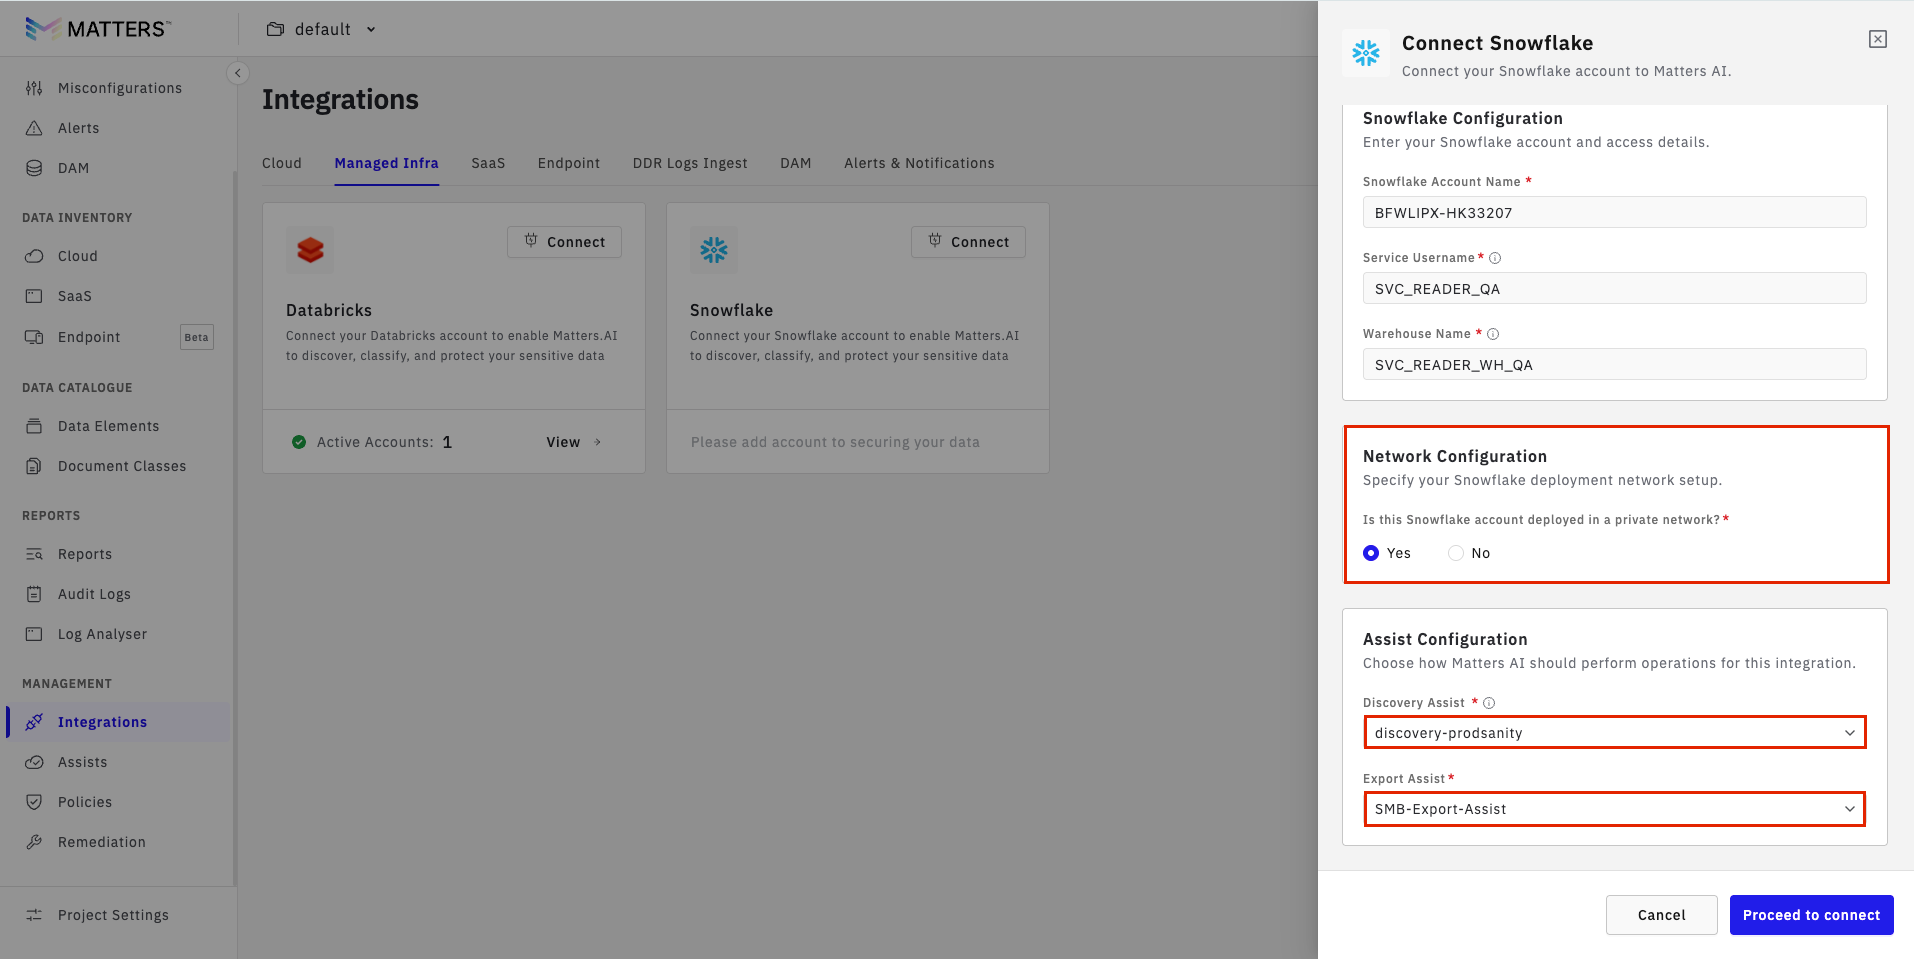
In the Network Configuration section, specify whether your Snowflake account is deployed within a private network.
If Snowflake is deployed in a private network
Select Yes.
Choose the required Export Assist.
Choose the required Discovery Assist.
Click Proceed to Connect.
If Snowflake is not deployed in a private network
Select No.
Choose the required Export Assist from the dropdown.
Click Proceed to Connect.
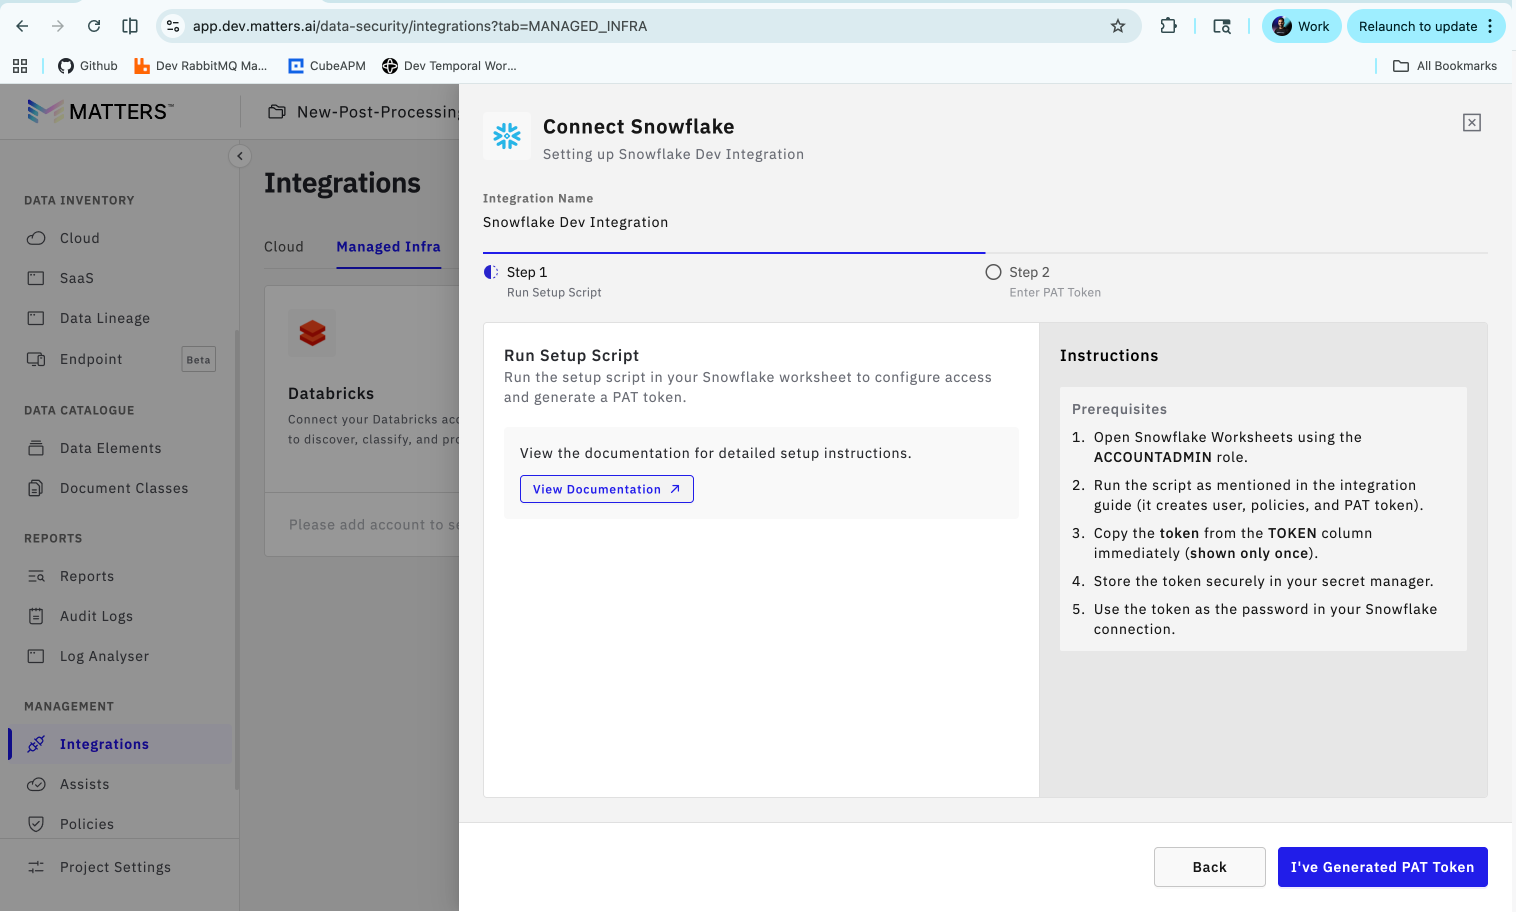
Step 6: Confirm PAT Token Generation in Matters Dashboard
After generating the PAT token in Snowflake:
Click I’ve Generated PAT Token.
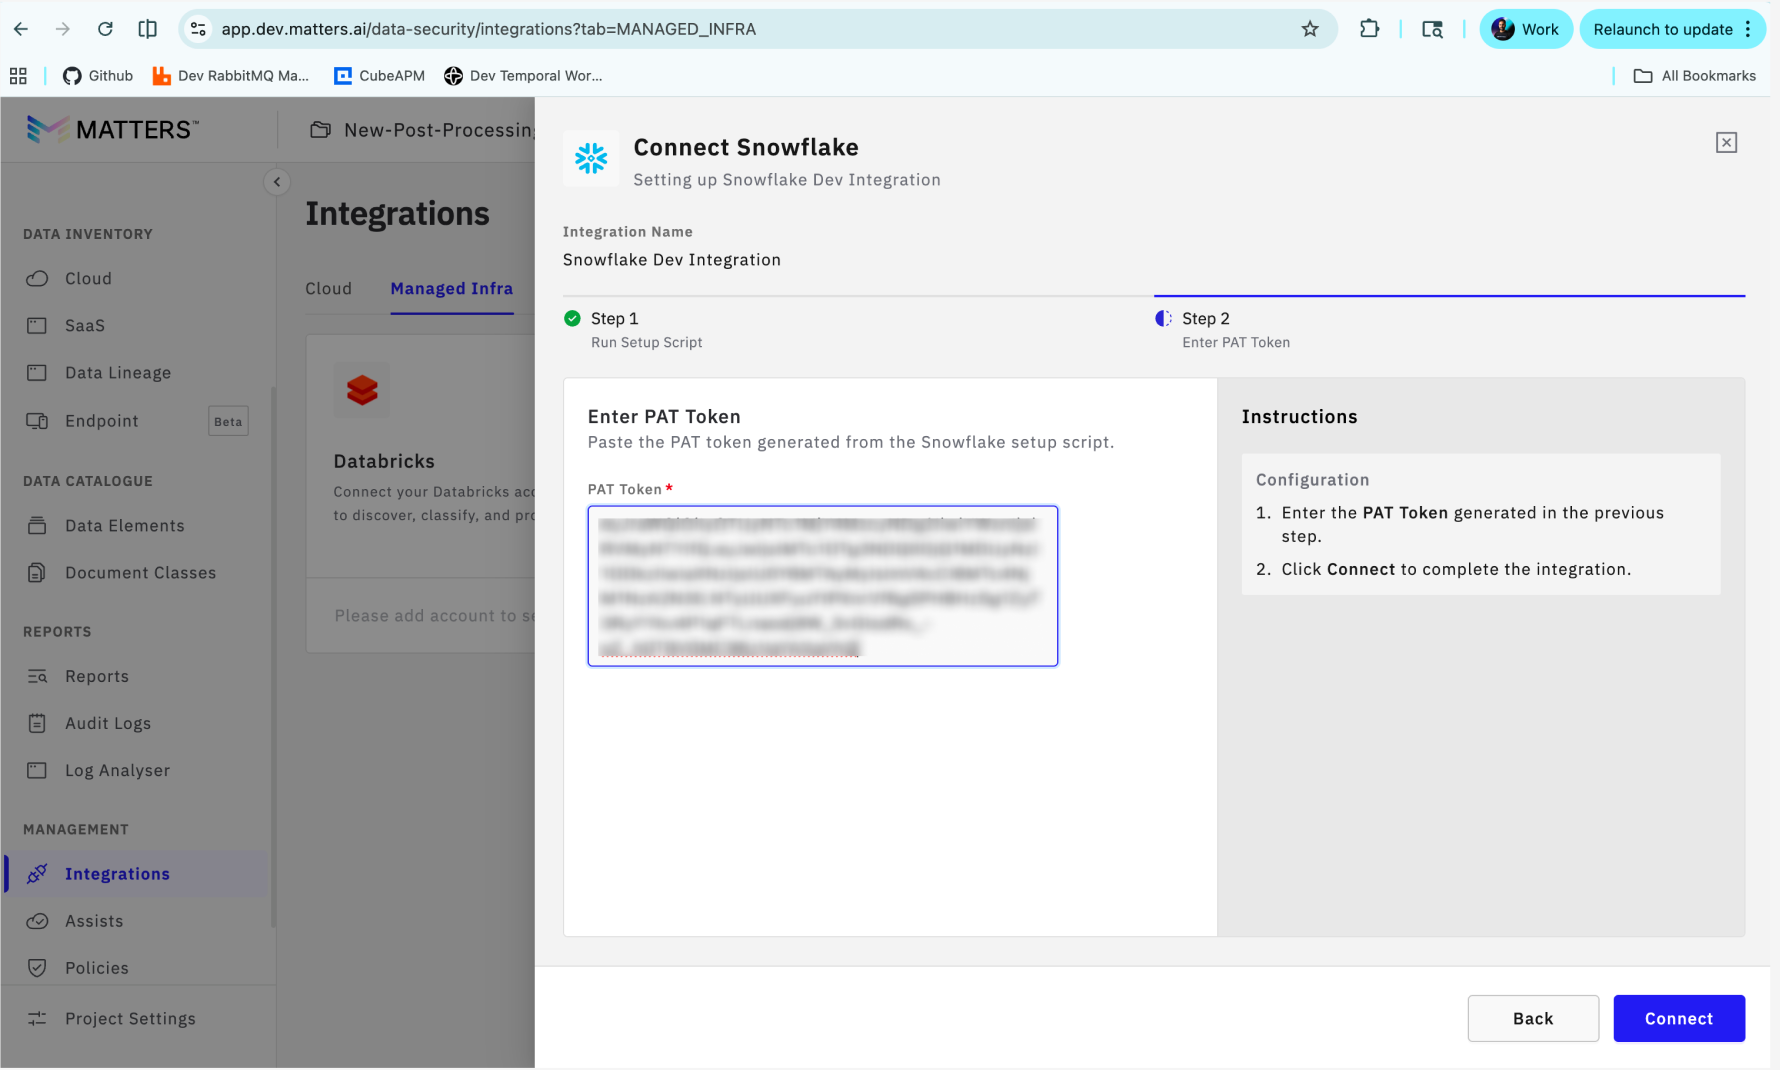
Use the generated PAT token as the password for the Snowflake connection. Click on Connect.
Once the connection is successful, an Integration Successful message will appear. Click Go to Dashboard to continue.
Step 7: Discover Data Stores
After the Snowflake integration is completed, Matters automatically discovers the available data stores. The discovered data stores will be listed under Cloud Inventory.
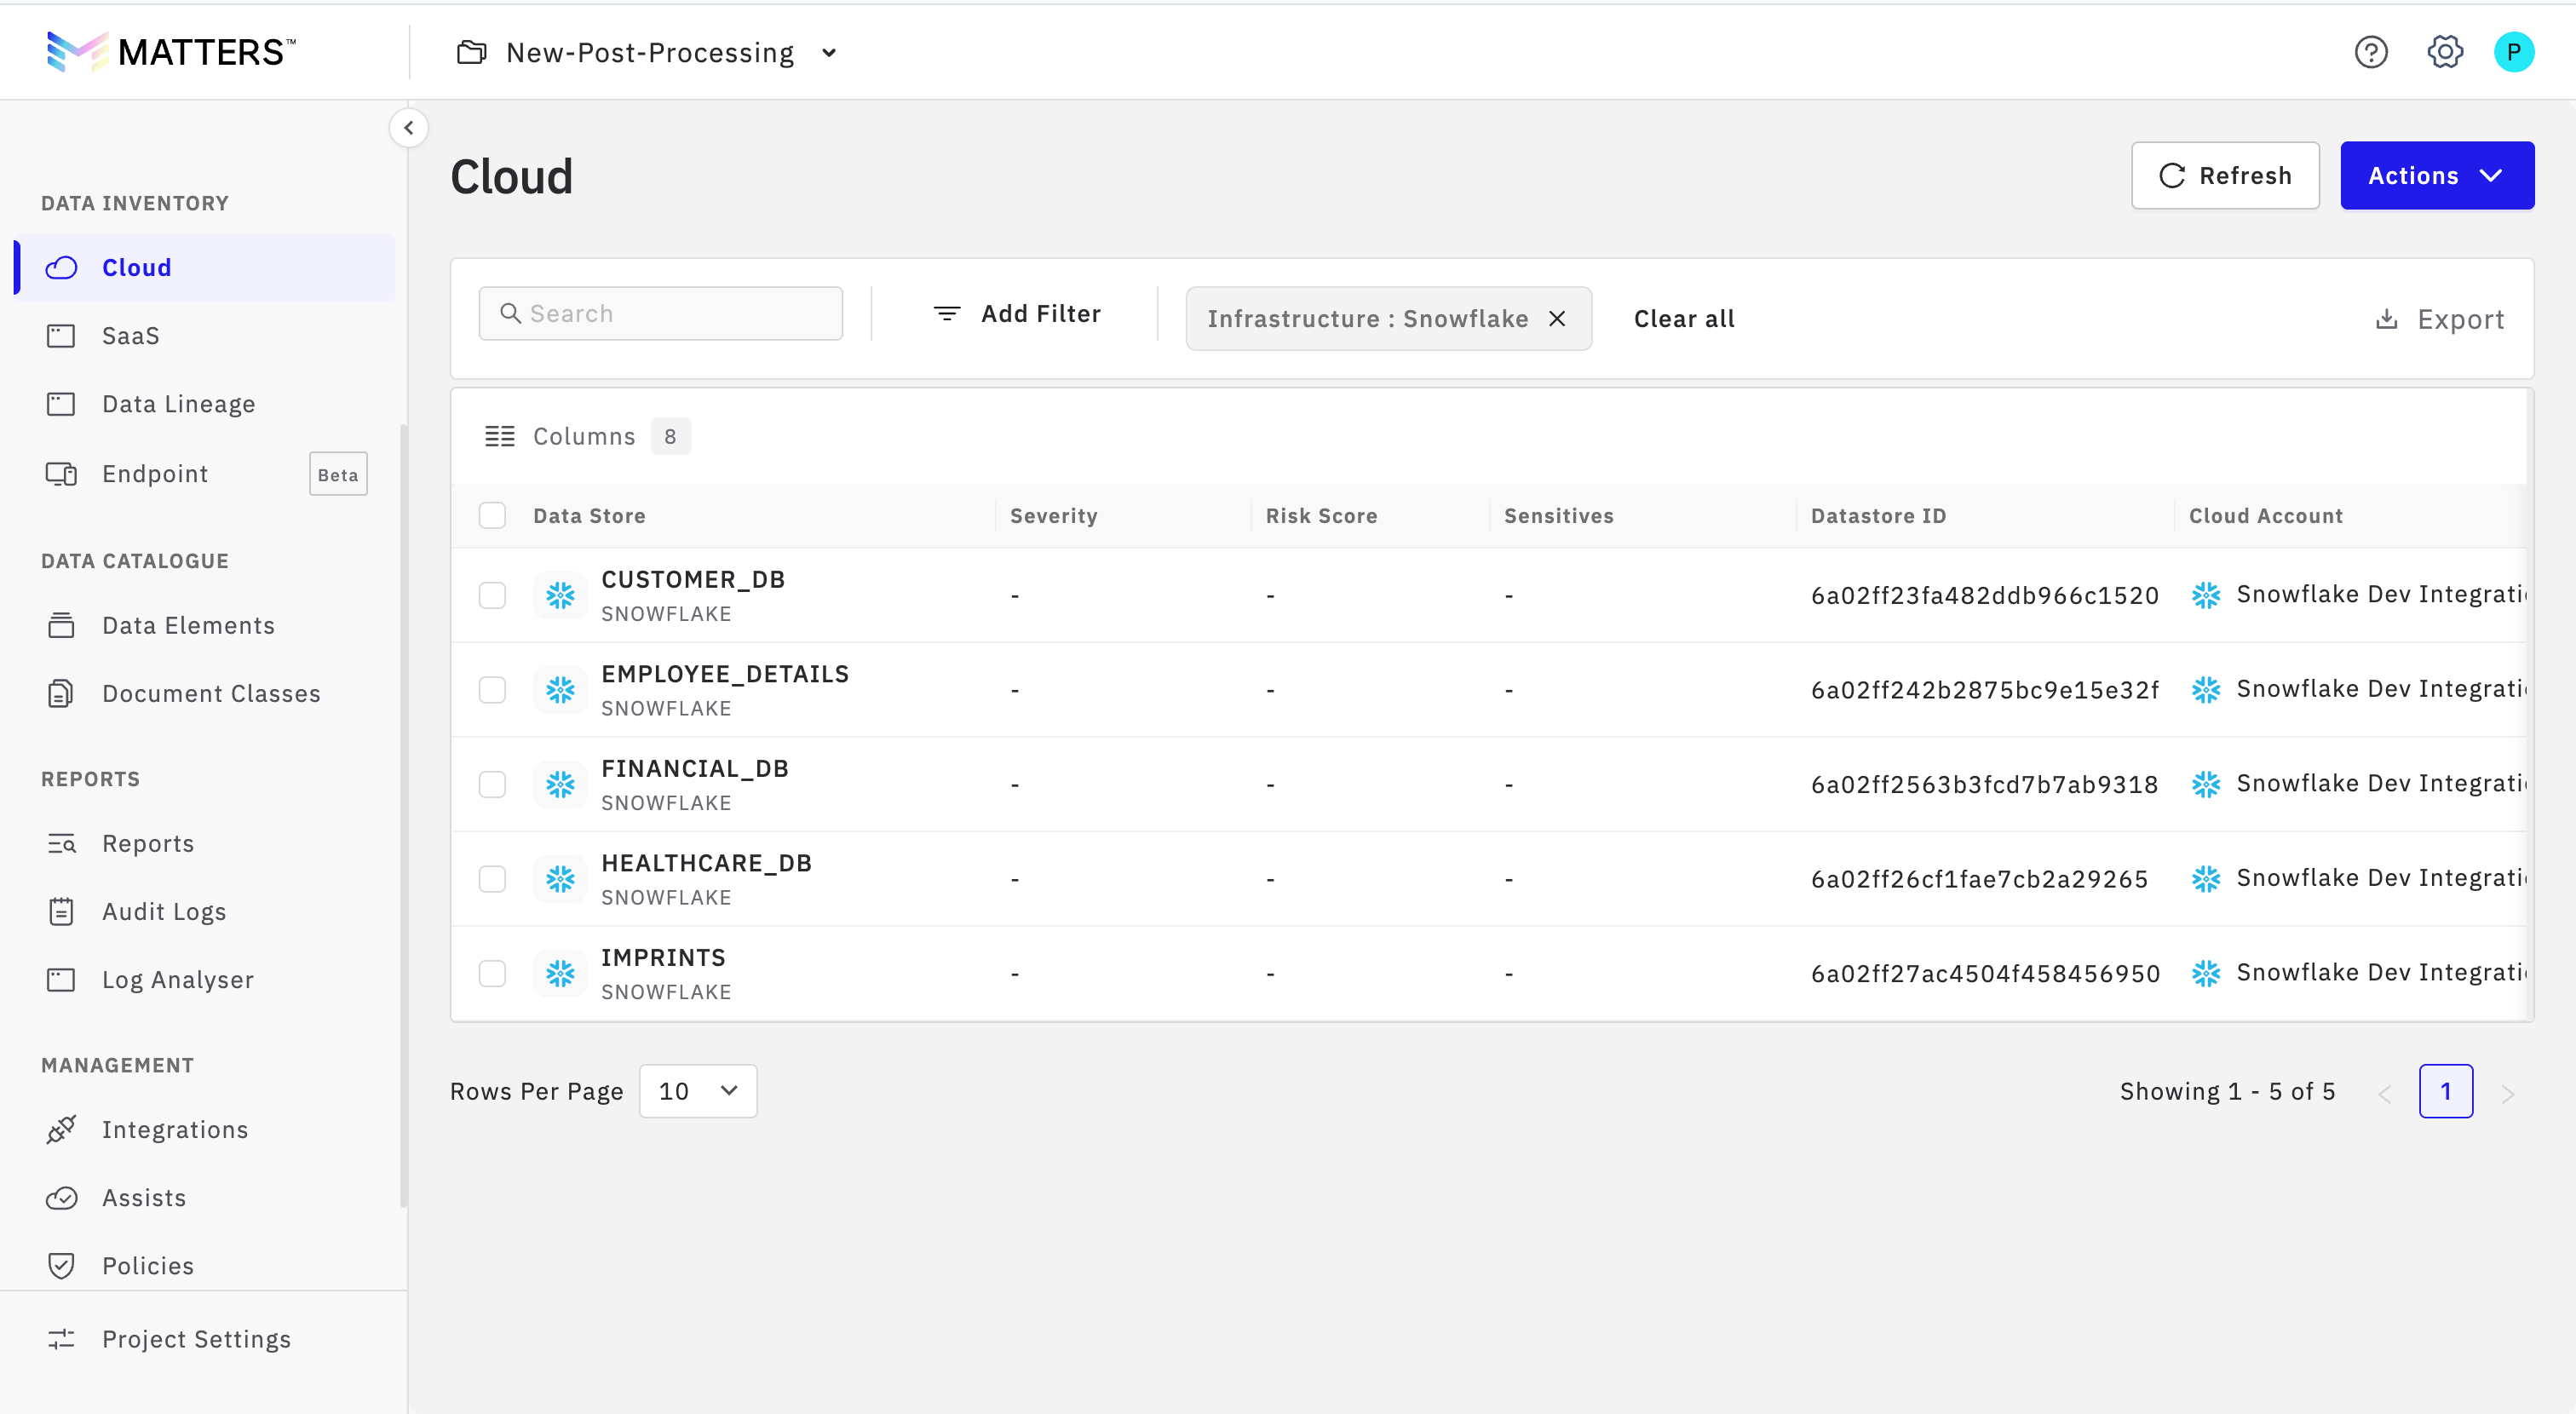
To manually trigger discovery again:
Go to the Snowflake integration.
Click Actions.
Select Discover Data Stores.
Once discovery is complete, the available Snowflake data stores will appear in the inventory list.
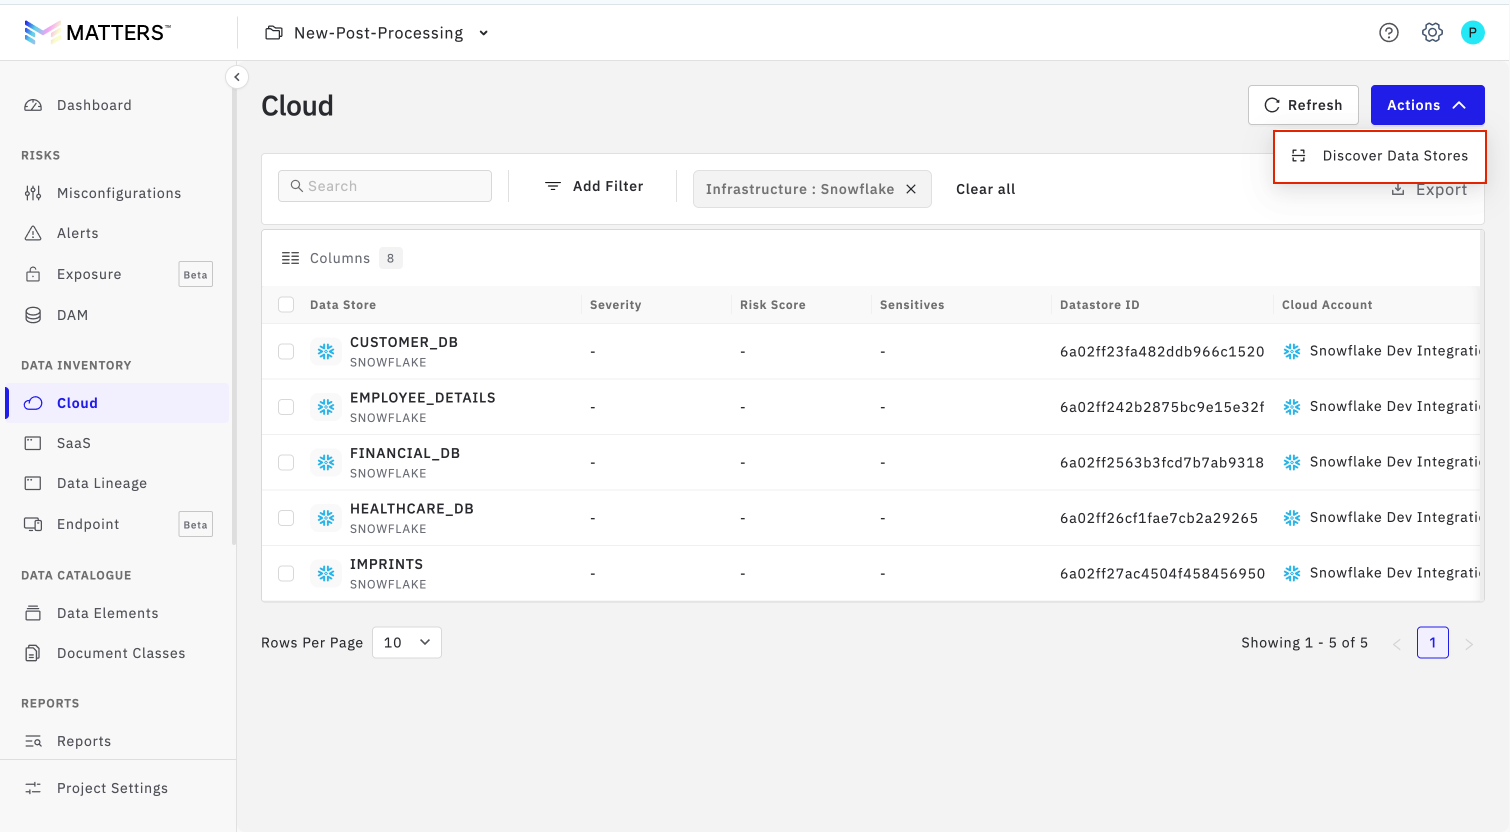
All the data stores will start listing down once the discovery completes.
Step 8: Run a Classification Scan
To run a classification scan:
Open the Snowflake data store that you want to scan.
Click Scan Data Store.
Monitor the scan progress from the dashboard.
The scan checks the selected Snowflake data store for sensitive data.
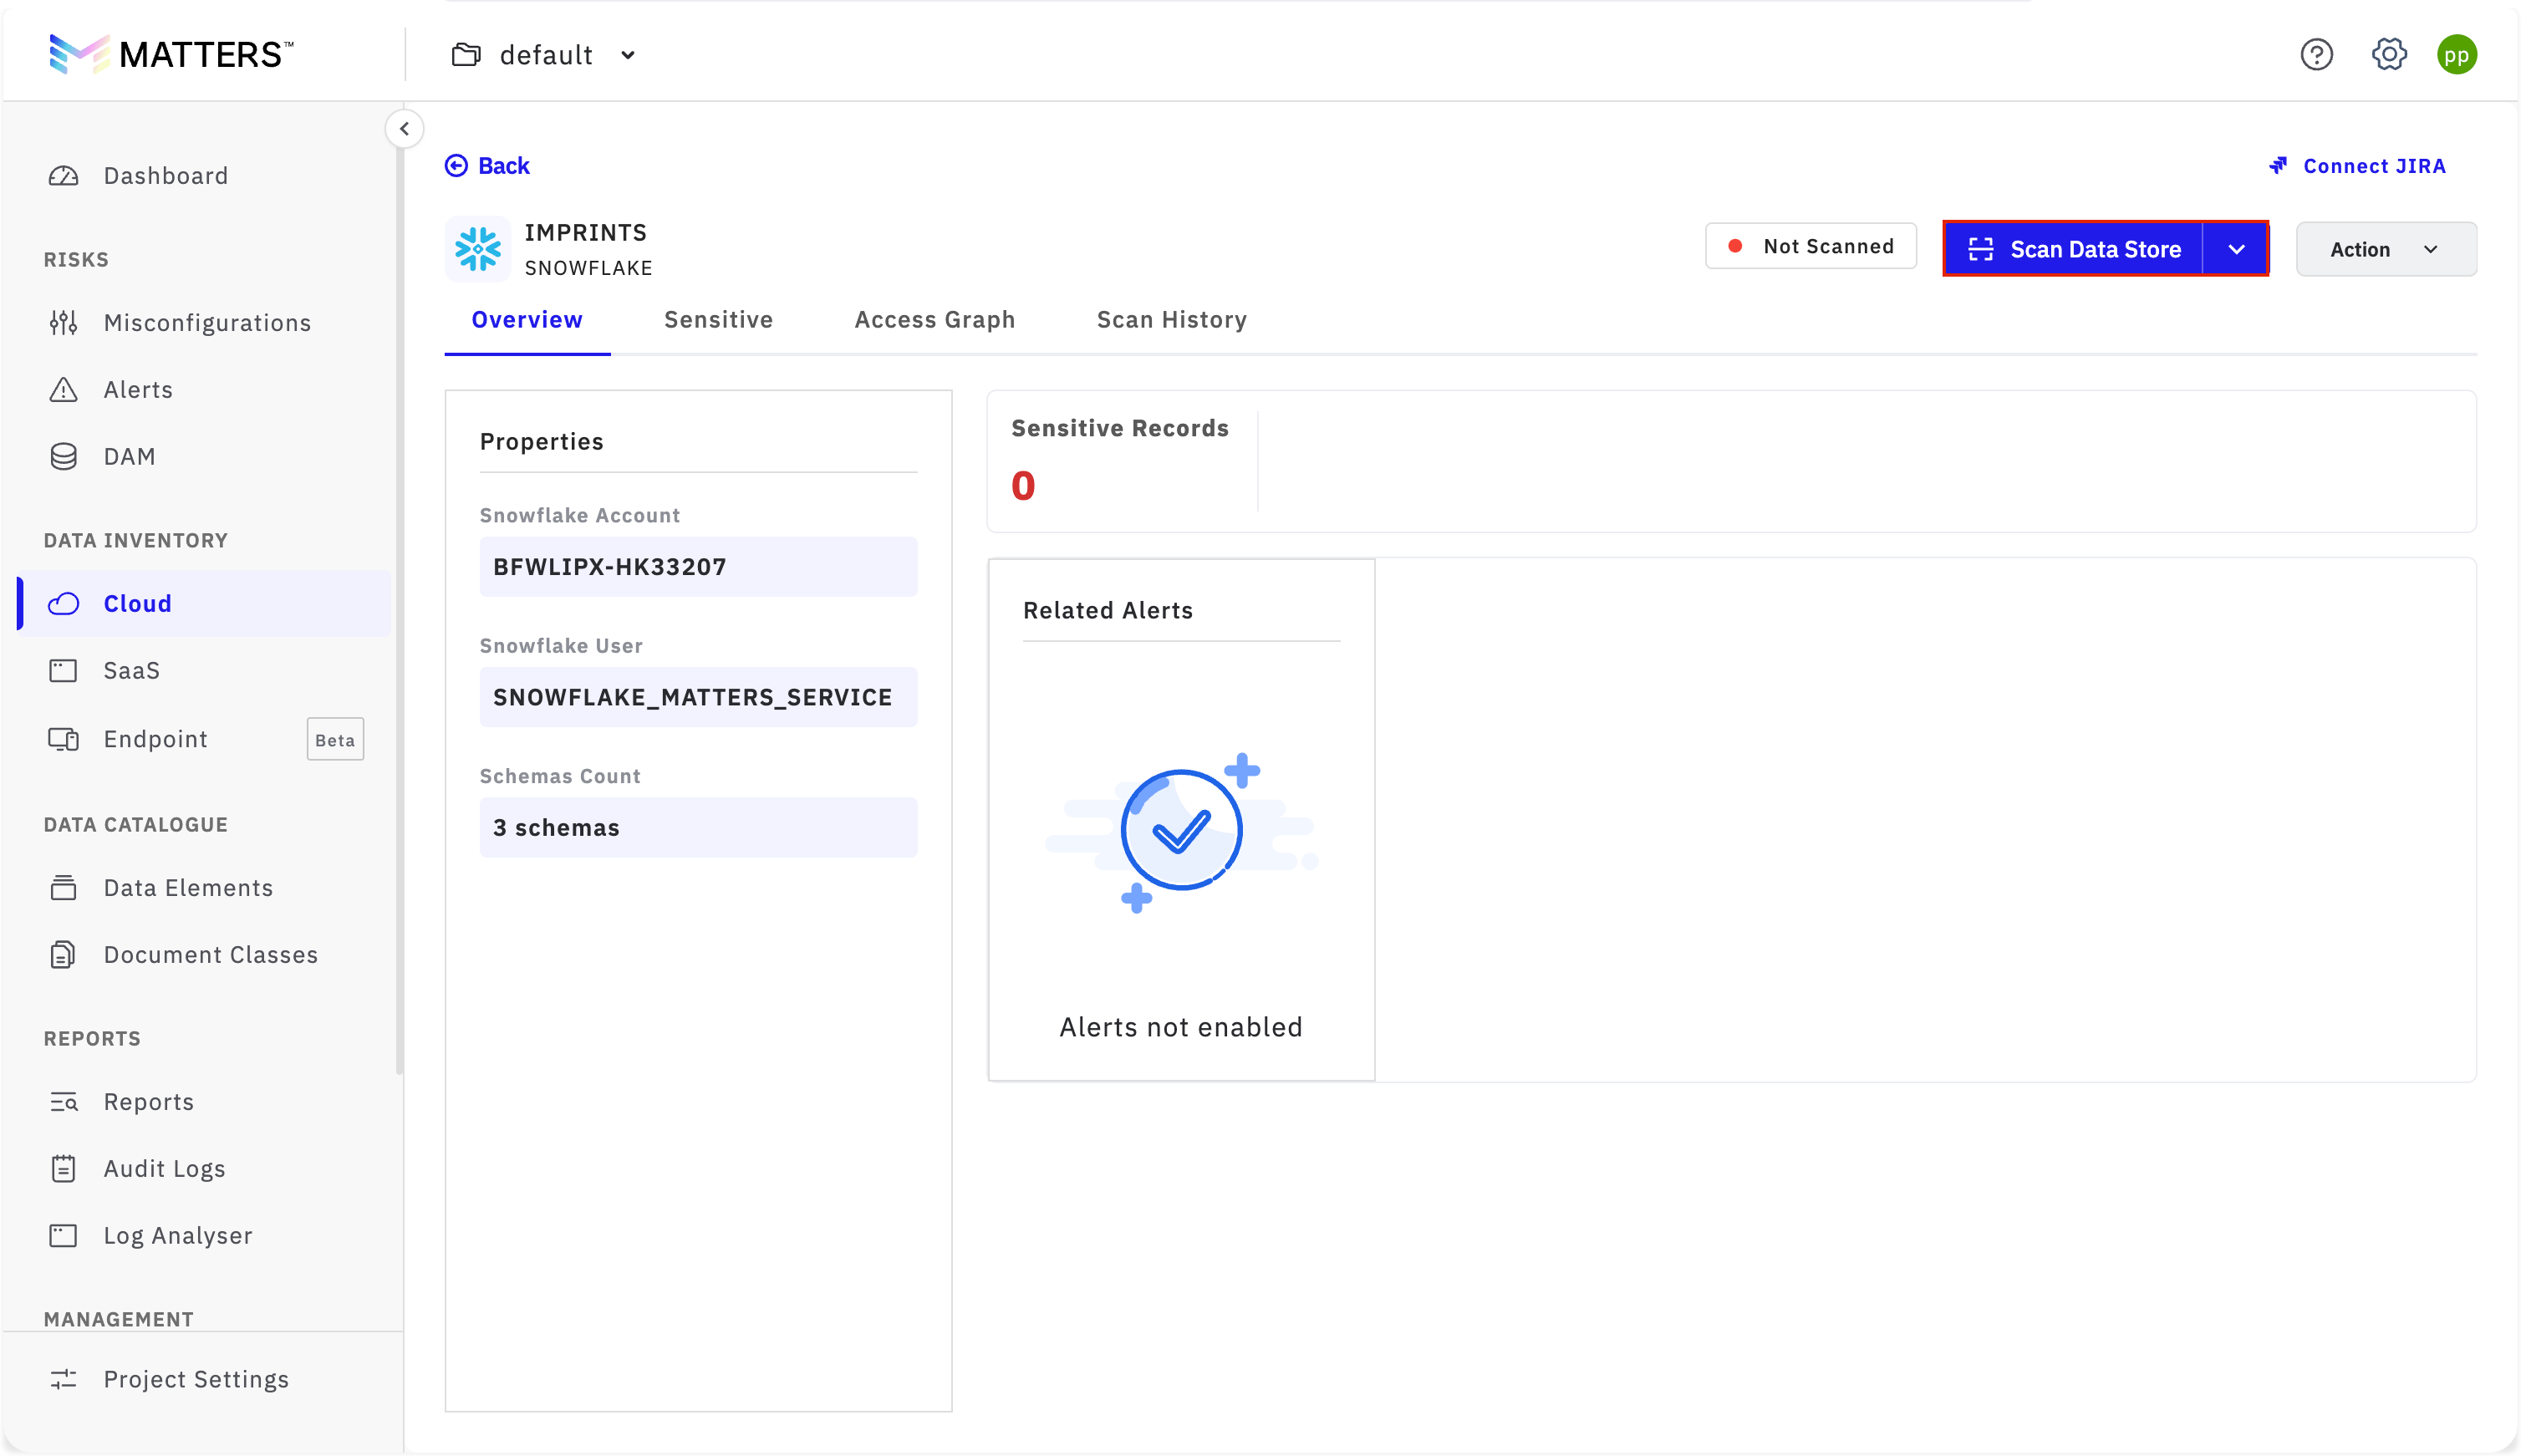
Step 9 : Review Scan Results
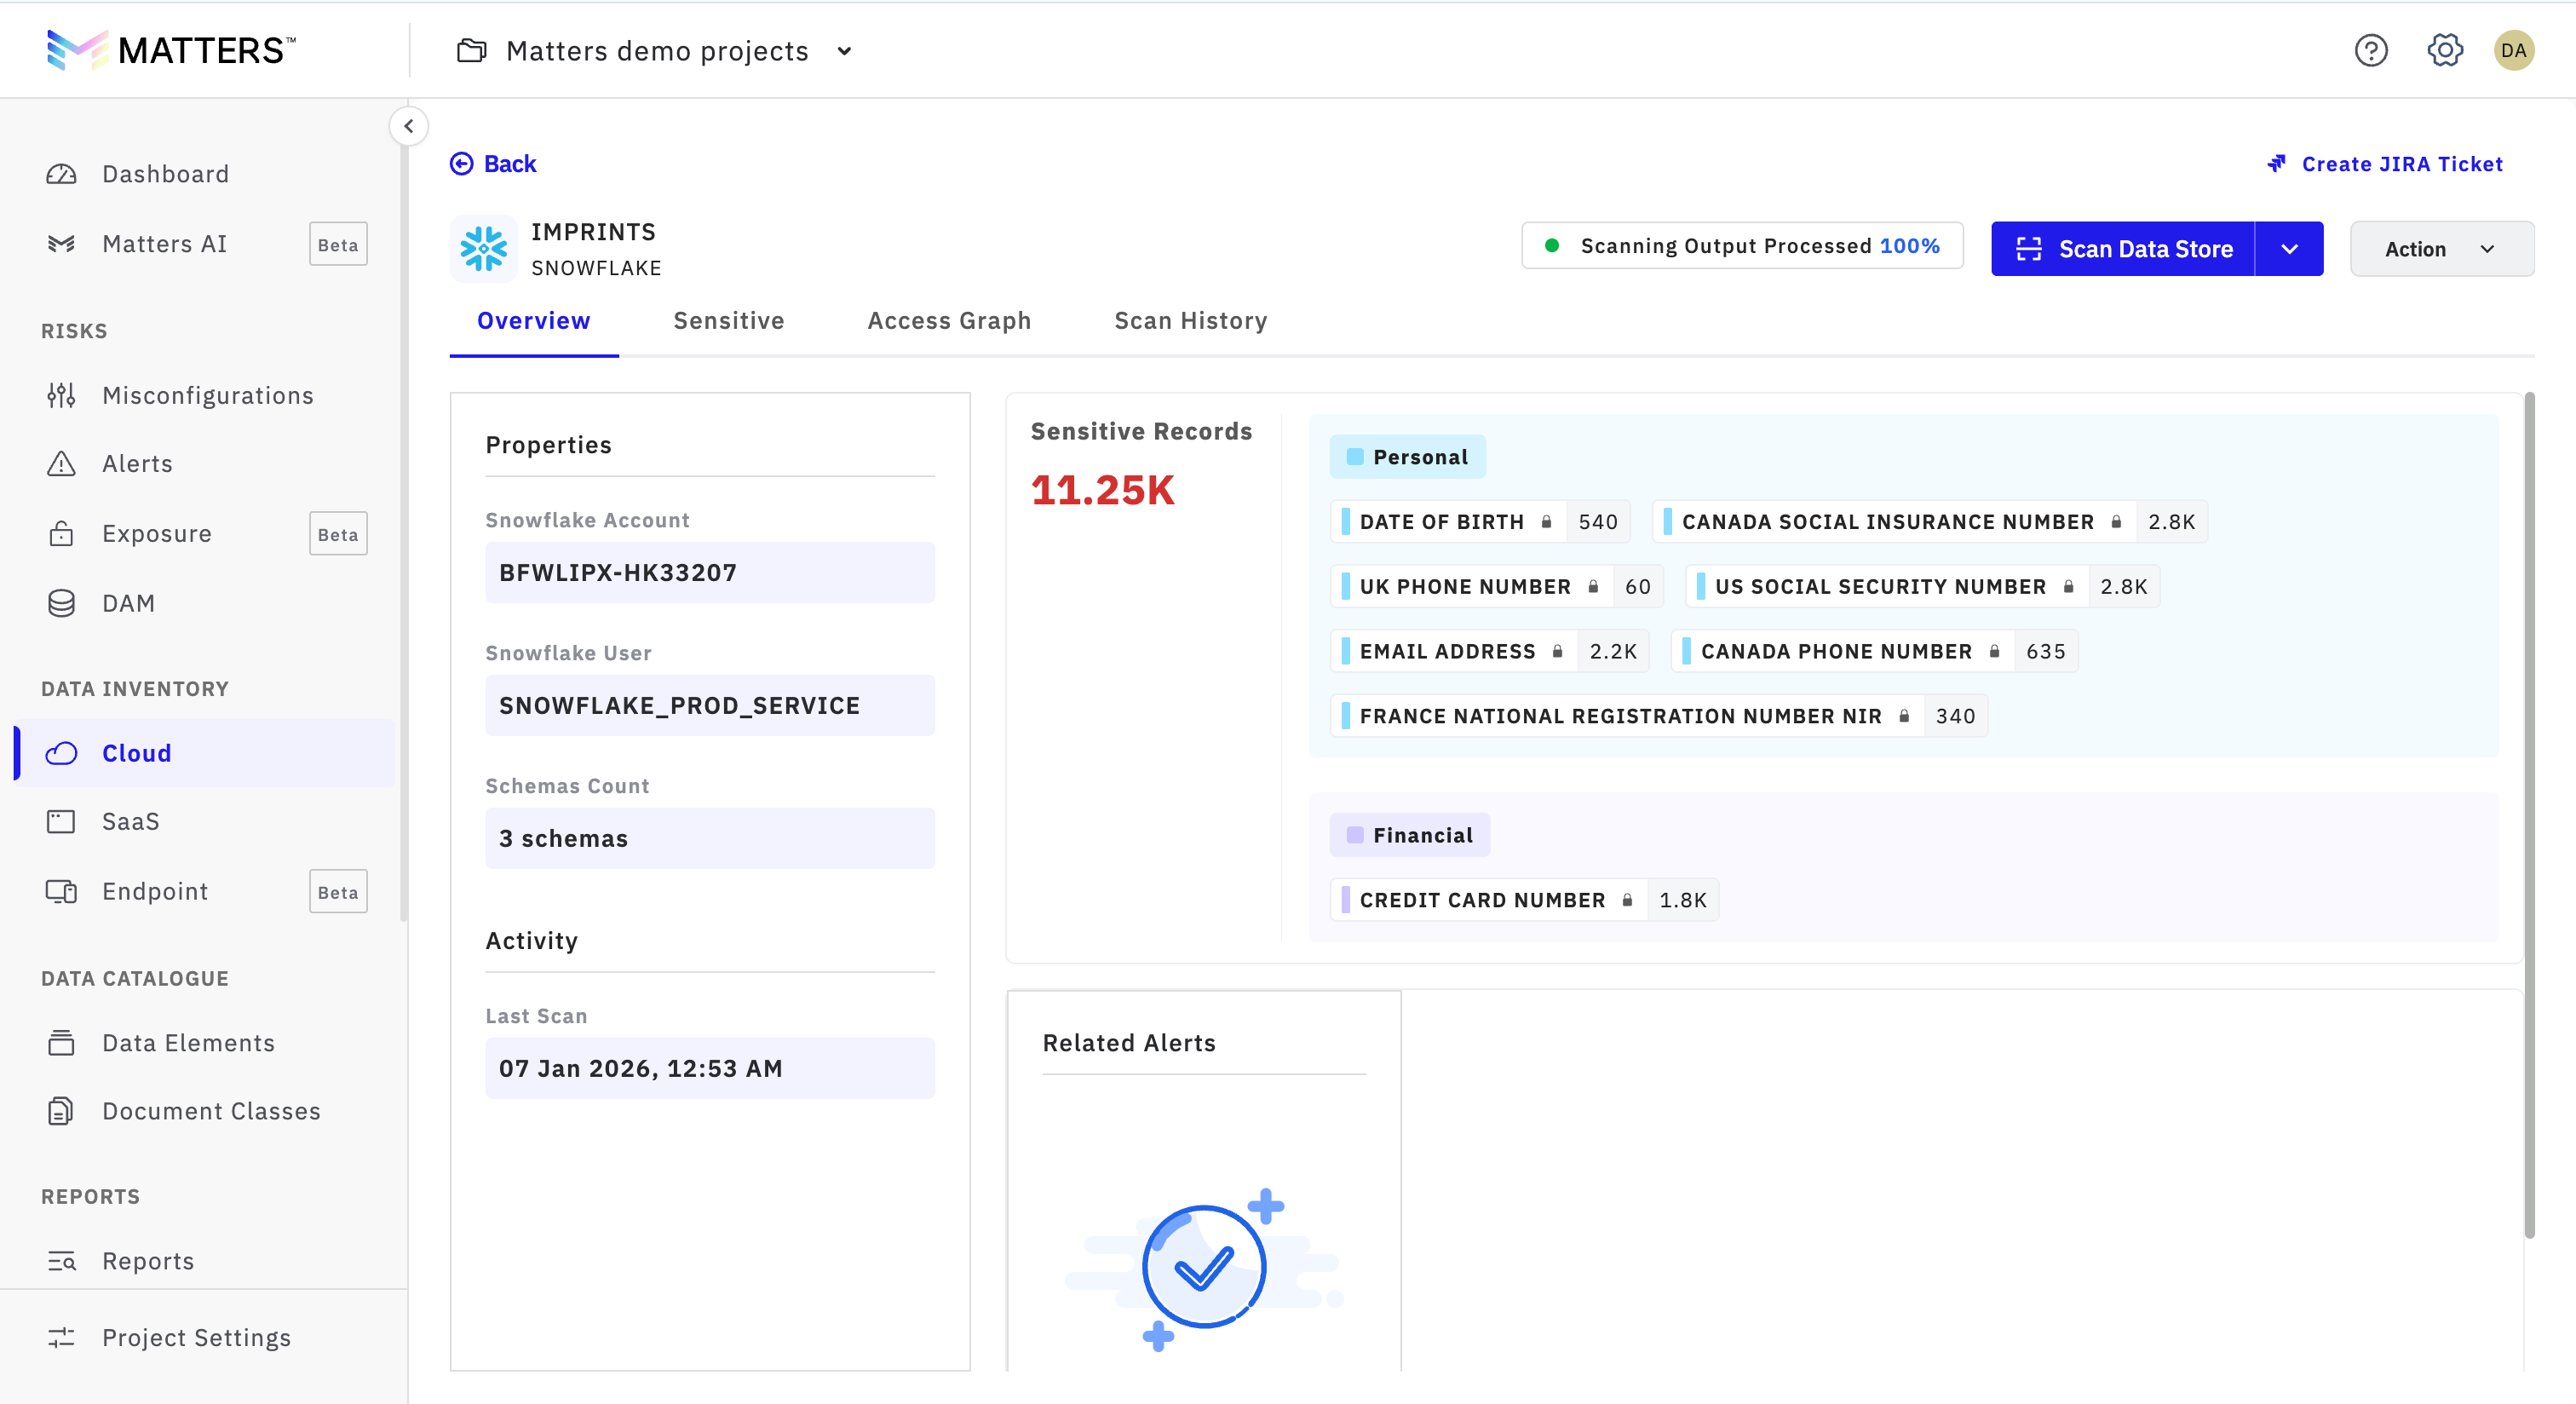
After the scan is completed, navigate to the Overview page.
You will see detailed information on:
Account Properties
Sensitive Records Data
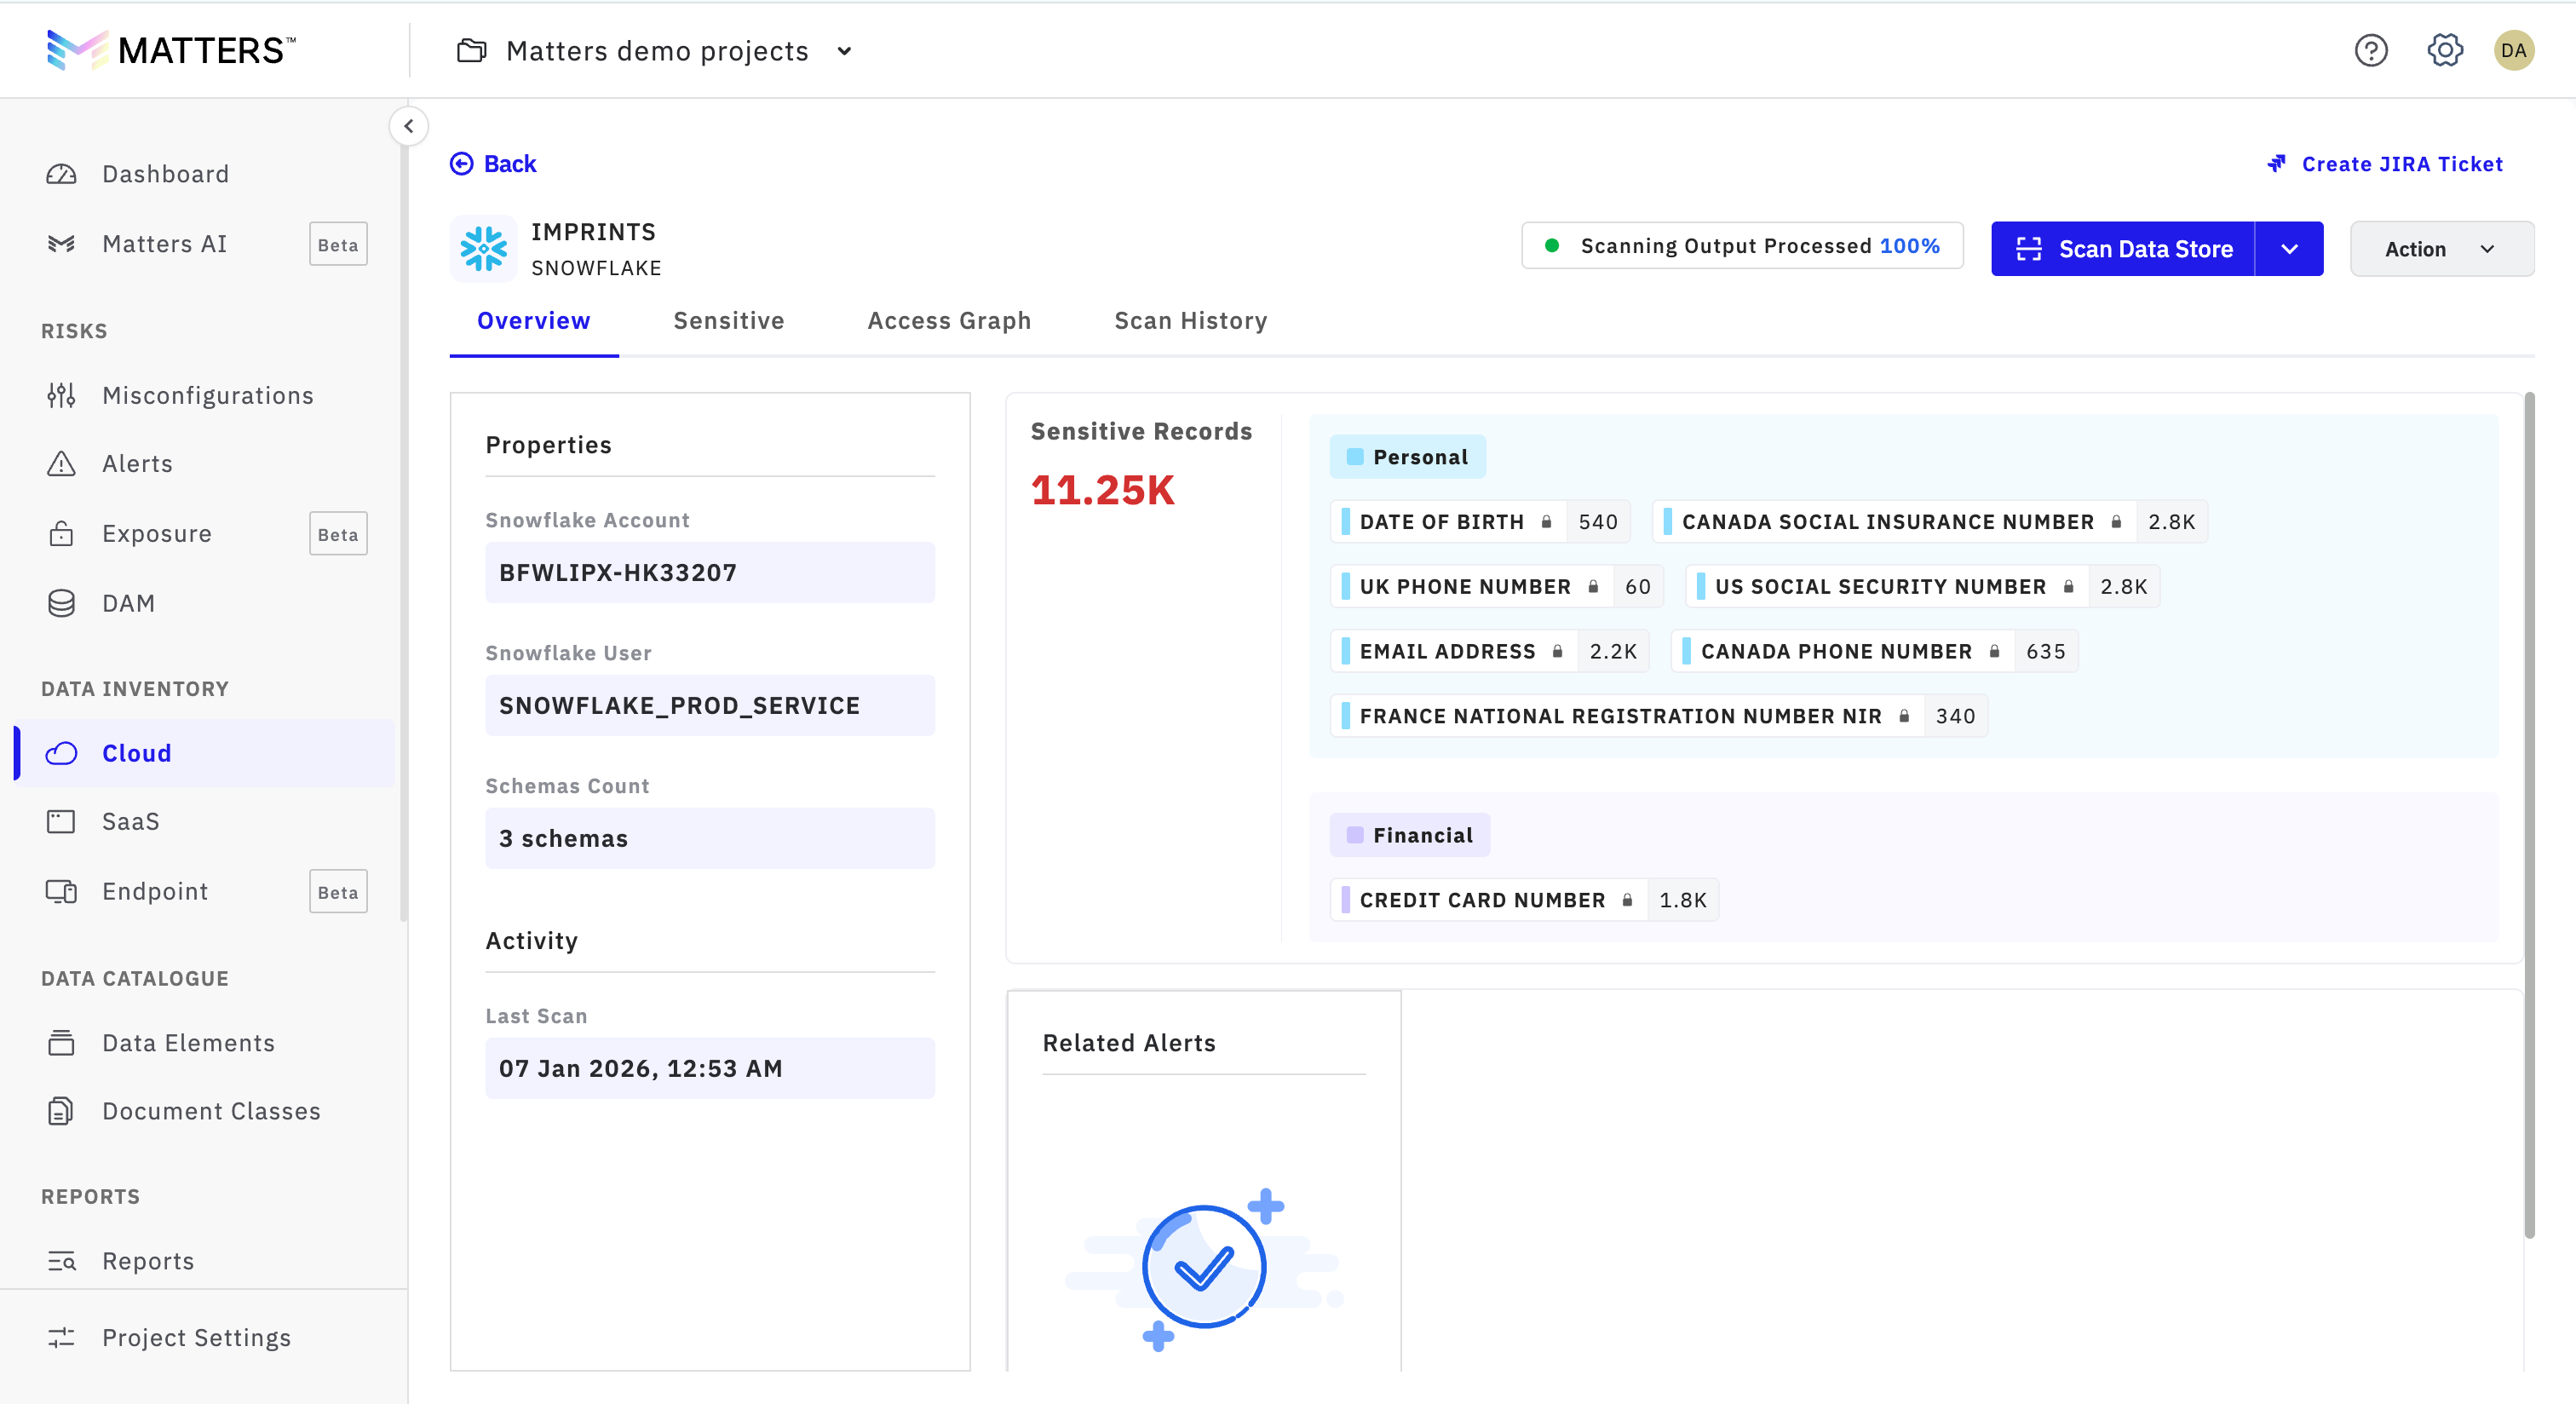
You can also view additional sensitivity details in the Entity View and Table View formats.
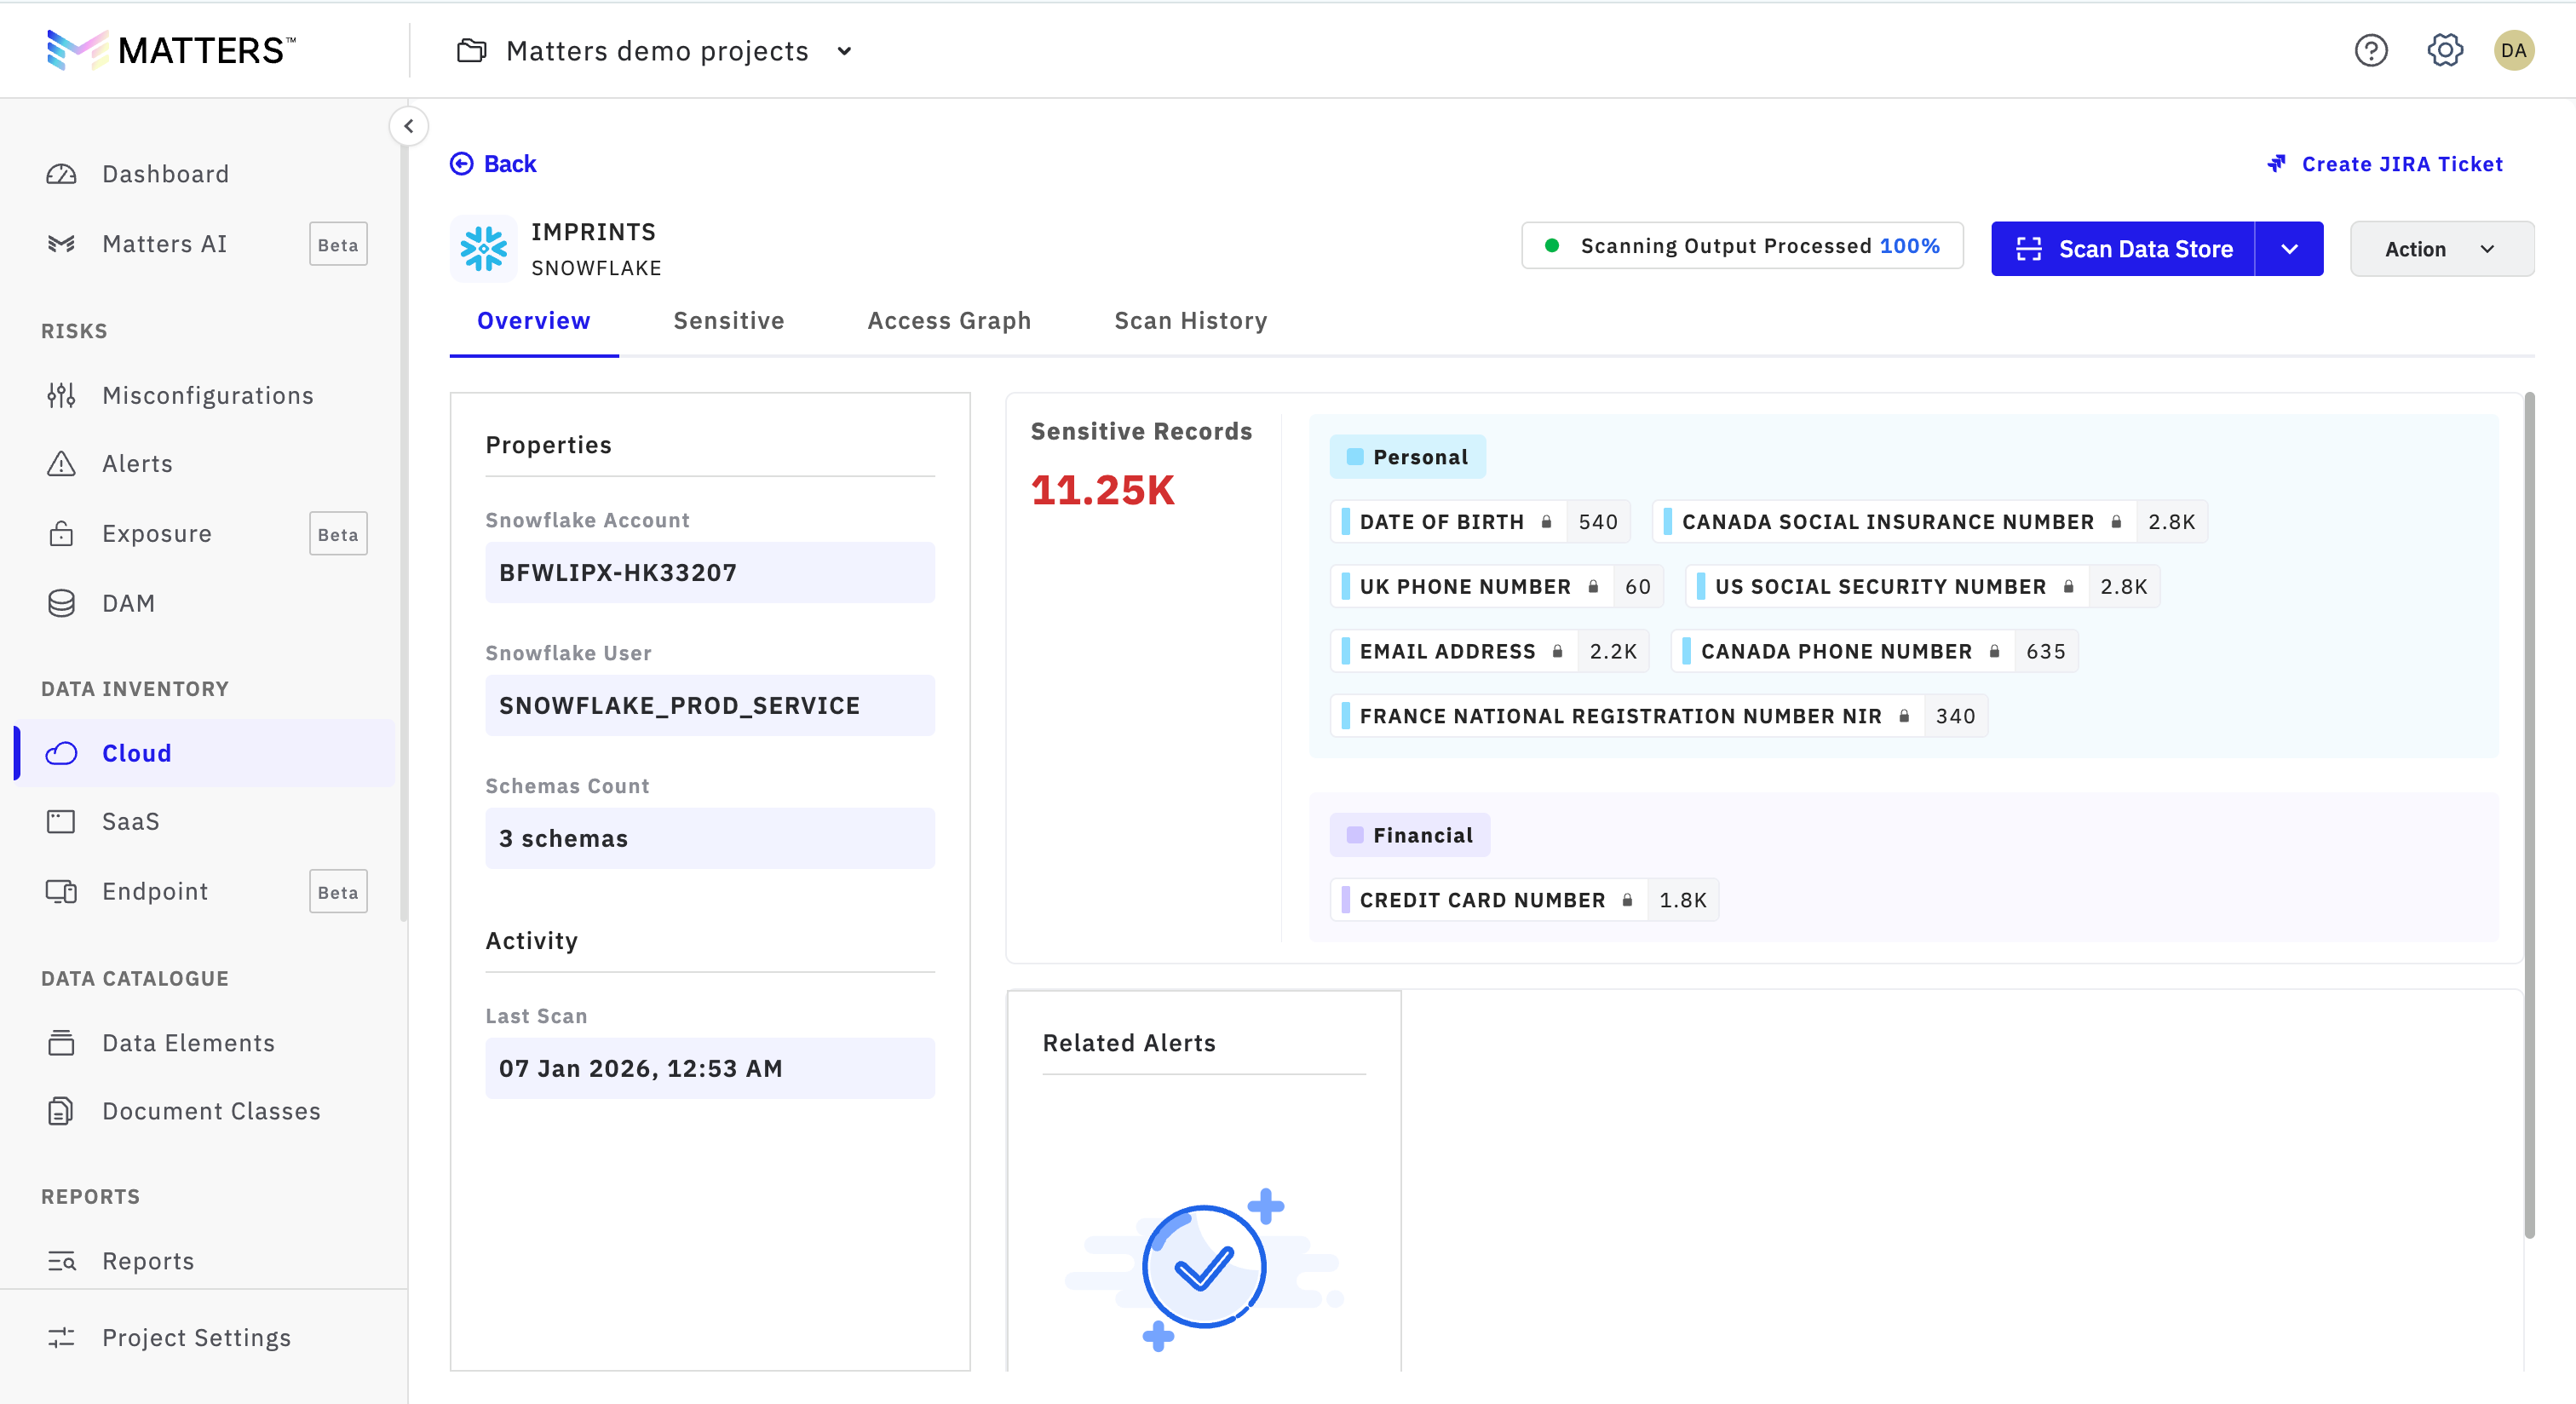
If any entities are found to be false positives, mark them by clicking on the False Positive button. This action allows you to manage the accuracy of the scan results.
You can view the false positives by toggling the button at the top of the page.
Additionally, the Scan History section provides a detailed log of all previous scans, allowing for easy reference.
Additional Features:
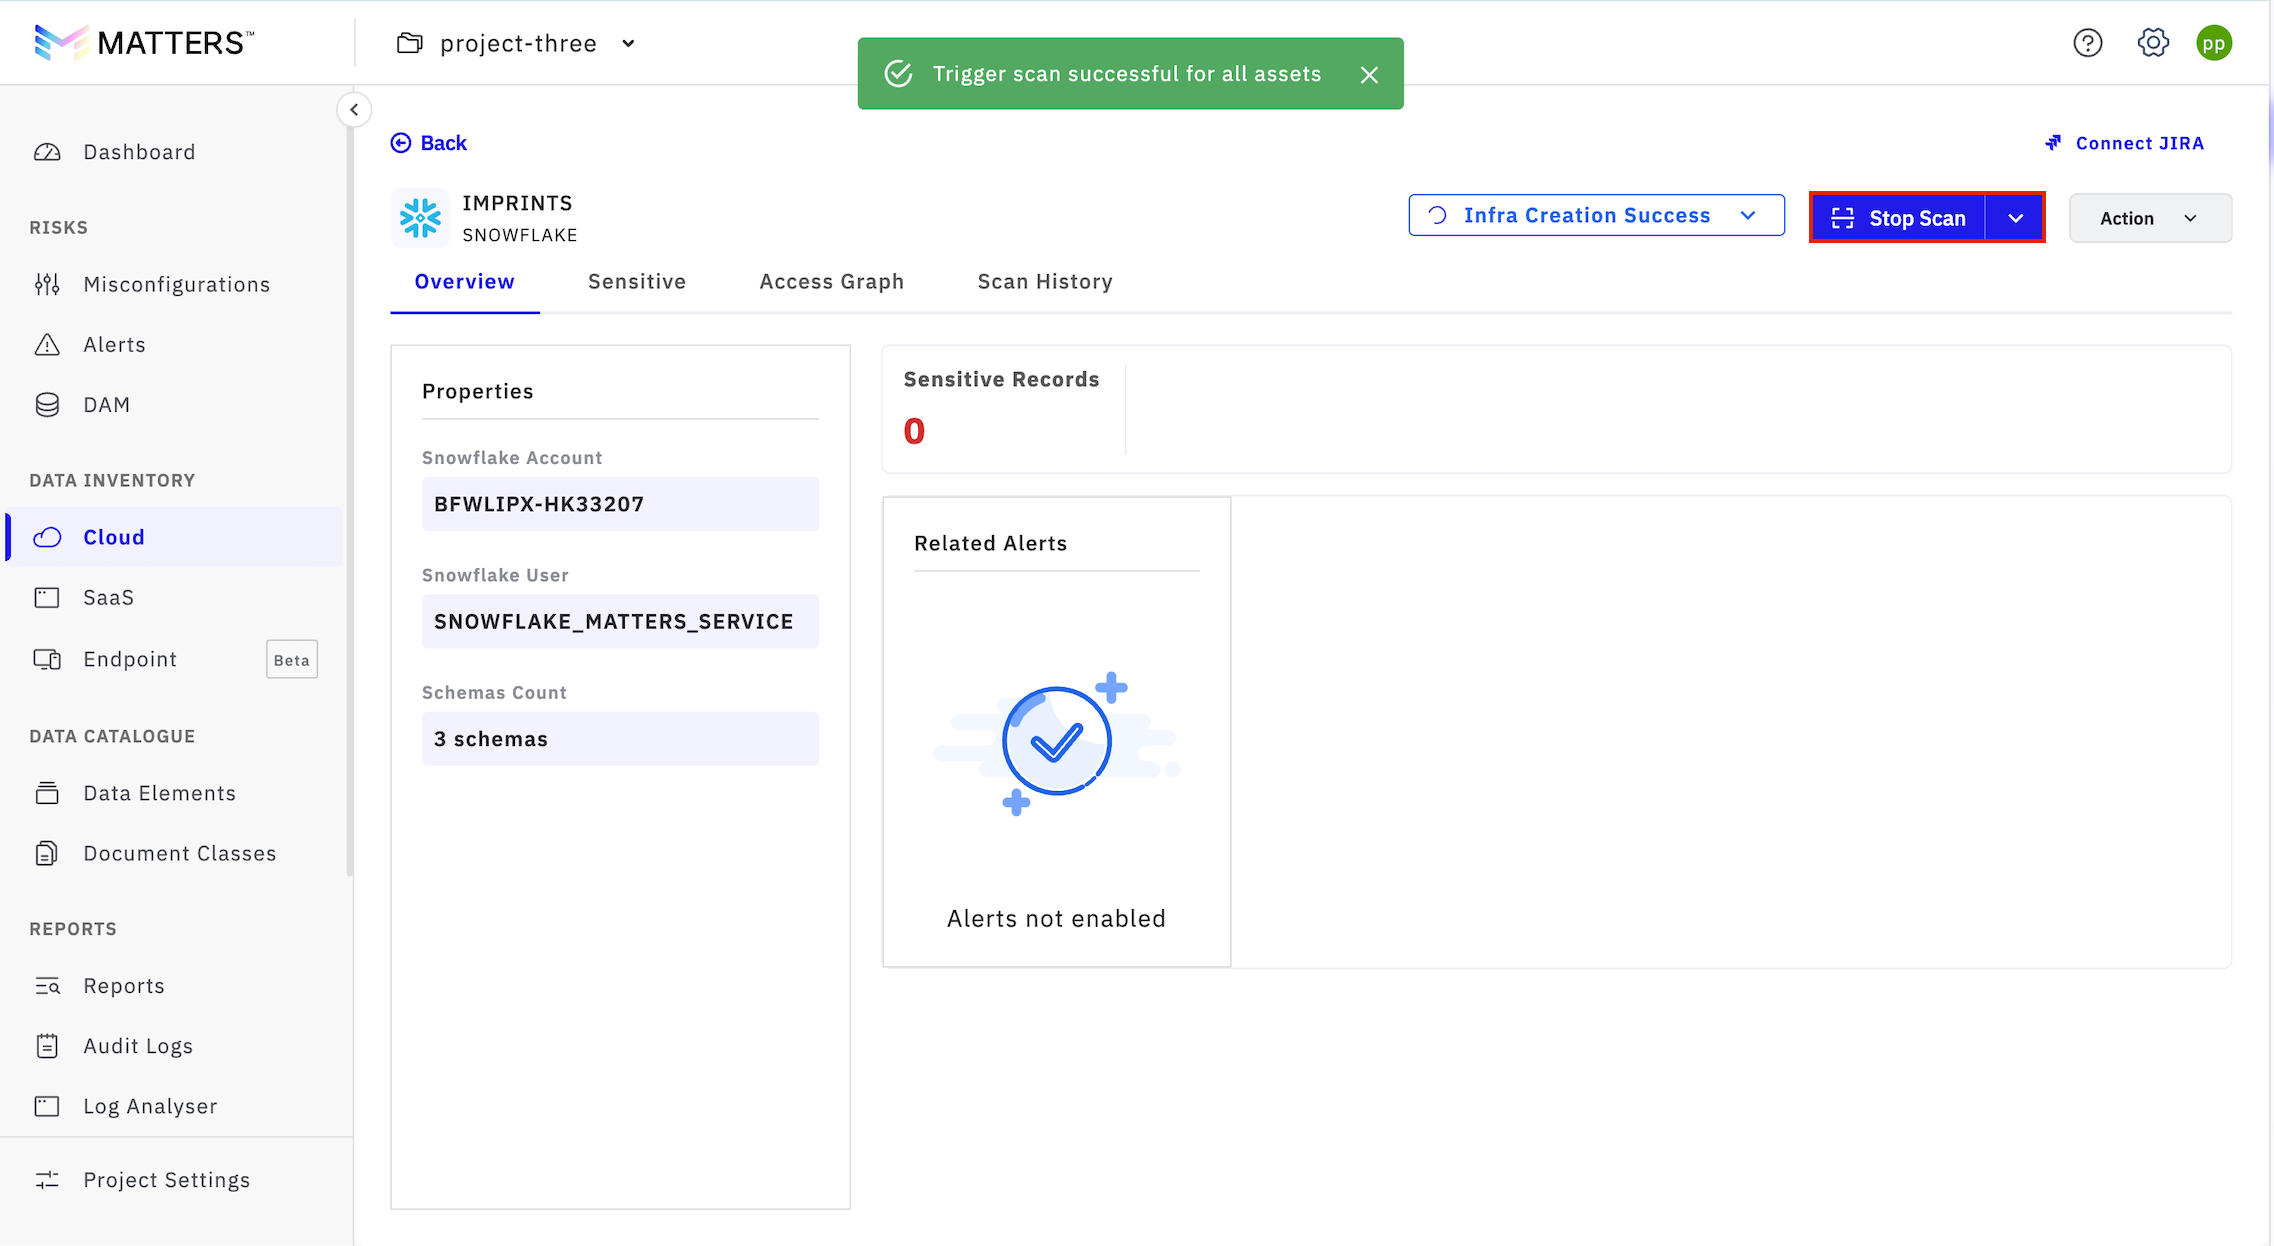
Stop Scan:
At any stage of the scan, you can trigger the Stop Scan option if you wish to halt the process prematurely. This option can be useful for managing resources or stopping an incomplete scan.
Export Sensitivity Data to CSV:
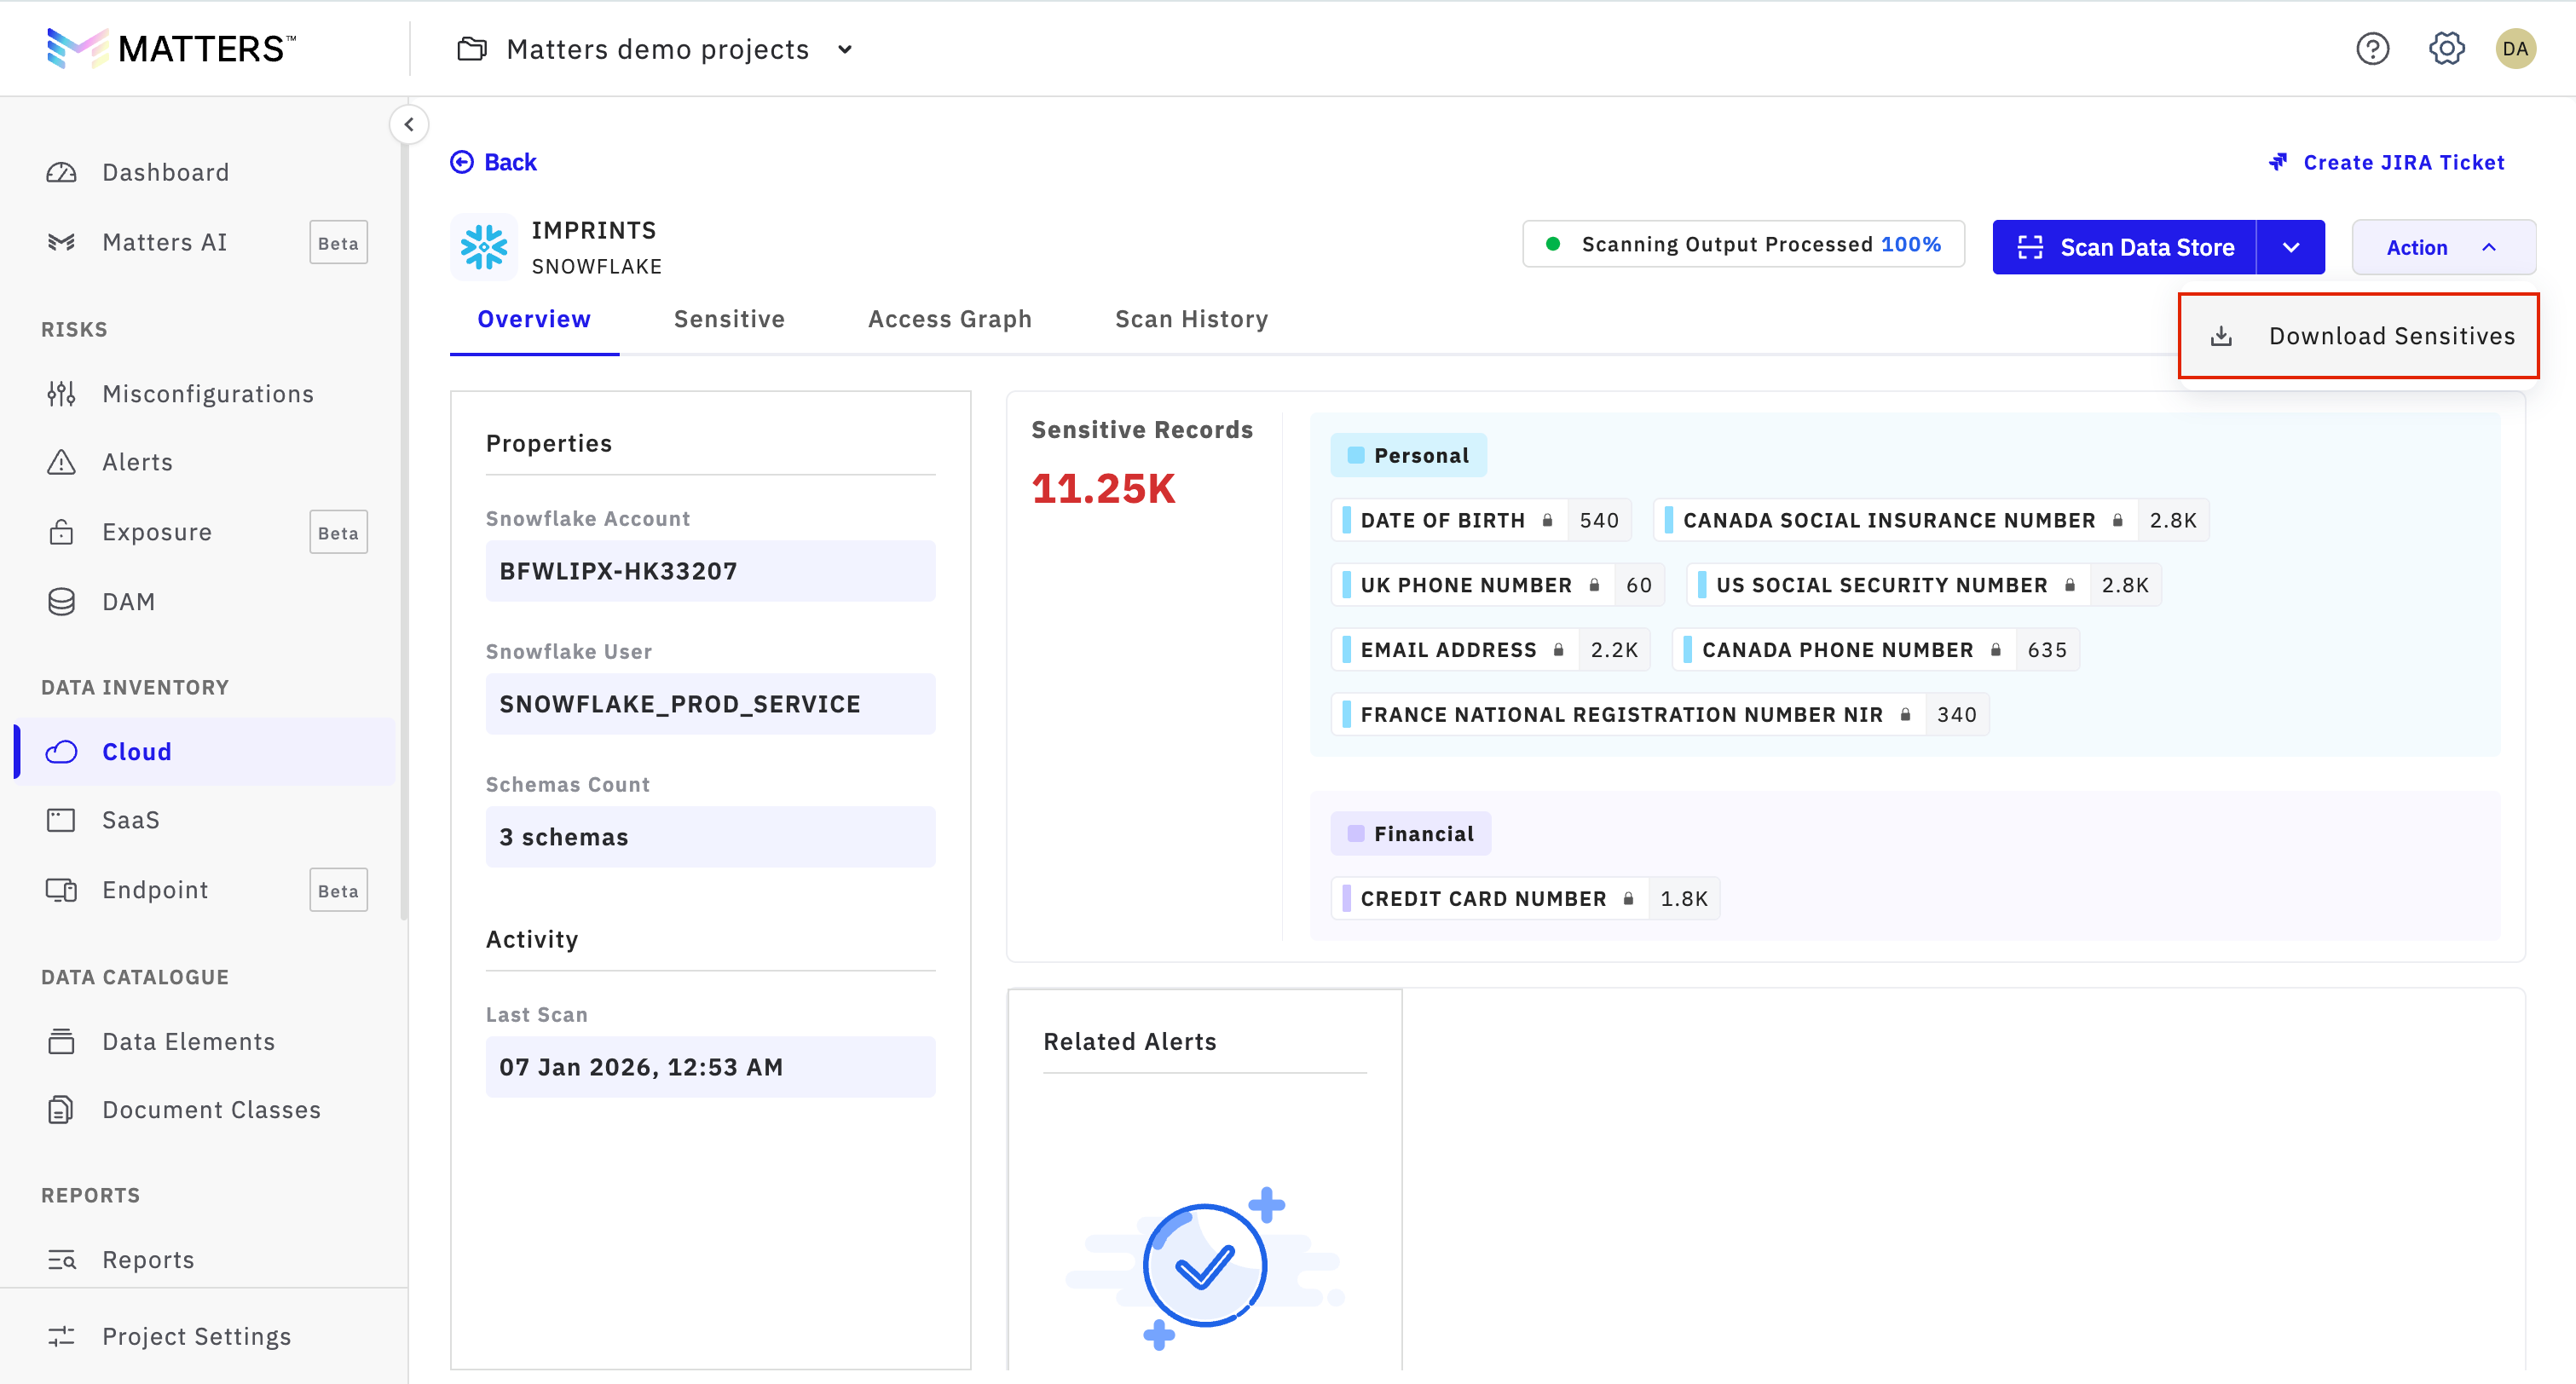
After the scan is completed, you can download the sensitivity details in CSV format under Actions button. This feature allows you to export valuable insights and share them for further analysis or auditing purposes.