Okta Saml
Last updated: April 30, 2026
SAML SSO Configuration Guide
This guide explains how to configure SAML-based Single Sign-On between your Identity Provider, such as Okta, Azure AD, Google Workspace, or another IdP, and Matters.ai.
Overview
To configure SAML SSO, both Matters.ai and your Identity Provider need to exchange a few required details.
Matters.ai will provide the Service Provider details, including:
ACS URL
SP Entity ID
SP Certificate
You need to share your Identity Provider details with Matters.ai, including:
Identity Provider SSO URL
Identity Provider Entity ID
Identity Provider Signing Certificate
Attribute mappings for user details such as email, first name, last name, and groups
Once the configuration is complete, the login flow will work as follows:
The user enters their email address on Matters.ai .
Matters.ai redirects the user to the configured Identity Provider.
The Identity Provider authenticates the user.
After successful authentication, the Identity Provider sends a SAML assertion back to Matters.ai.
Matters.ai validates the SAML response.
Once validation is successful, the user is logged in to Matters.ai.
Step 1: Get Matters.ai Service Provider Details
Matters.ai will provide the following Service Provider information:
Field | Value |
|---|---|
ACS URL |
|
SP Entity ID |
|
SP Certificate | The SP certificate will be shared separately by the Matters.ai team. |
Step 2: Configure Your Identity Provider
Follow the guide below to configure your Identity Provider.
Okta SAML Setup
Step 2.1: Create a SAML App Integration
Log in to the Okta Admin Console.
Go to Applications → Applications.
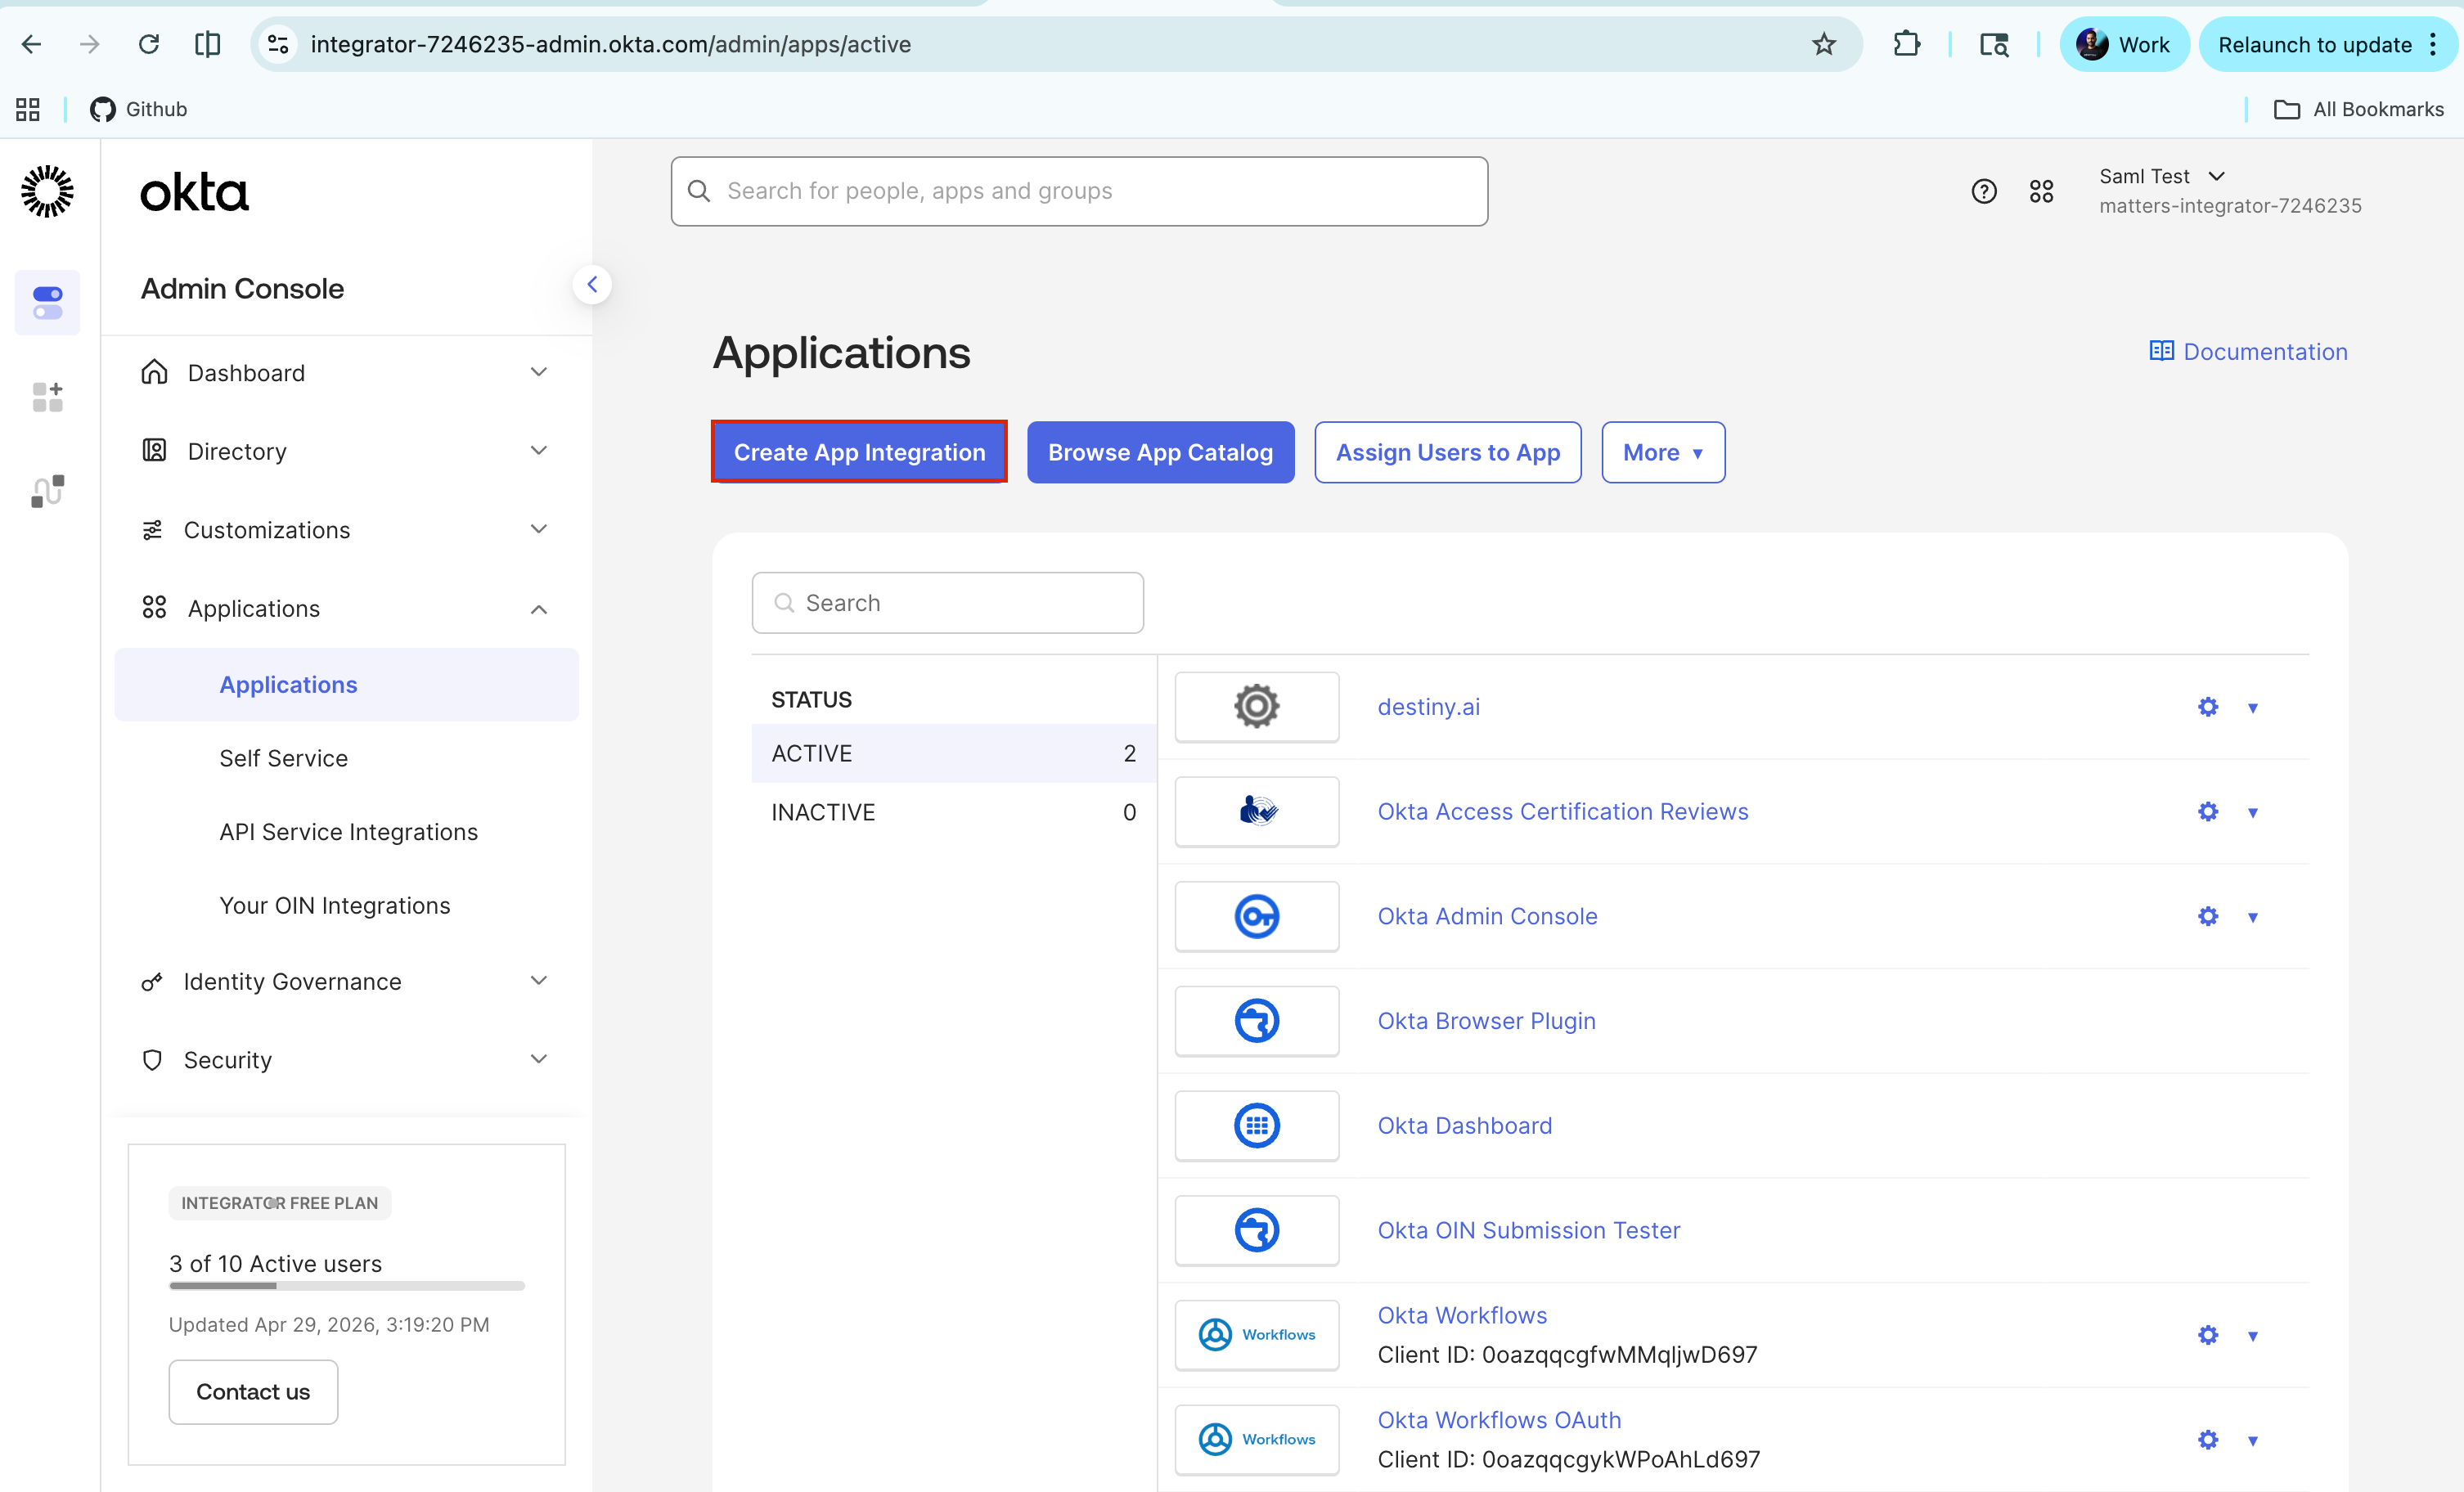
Click Create App Integration.
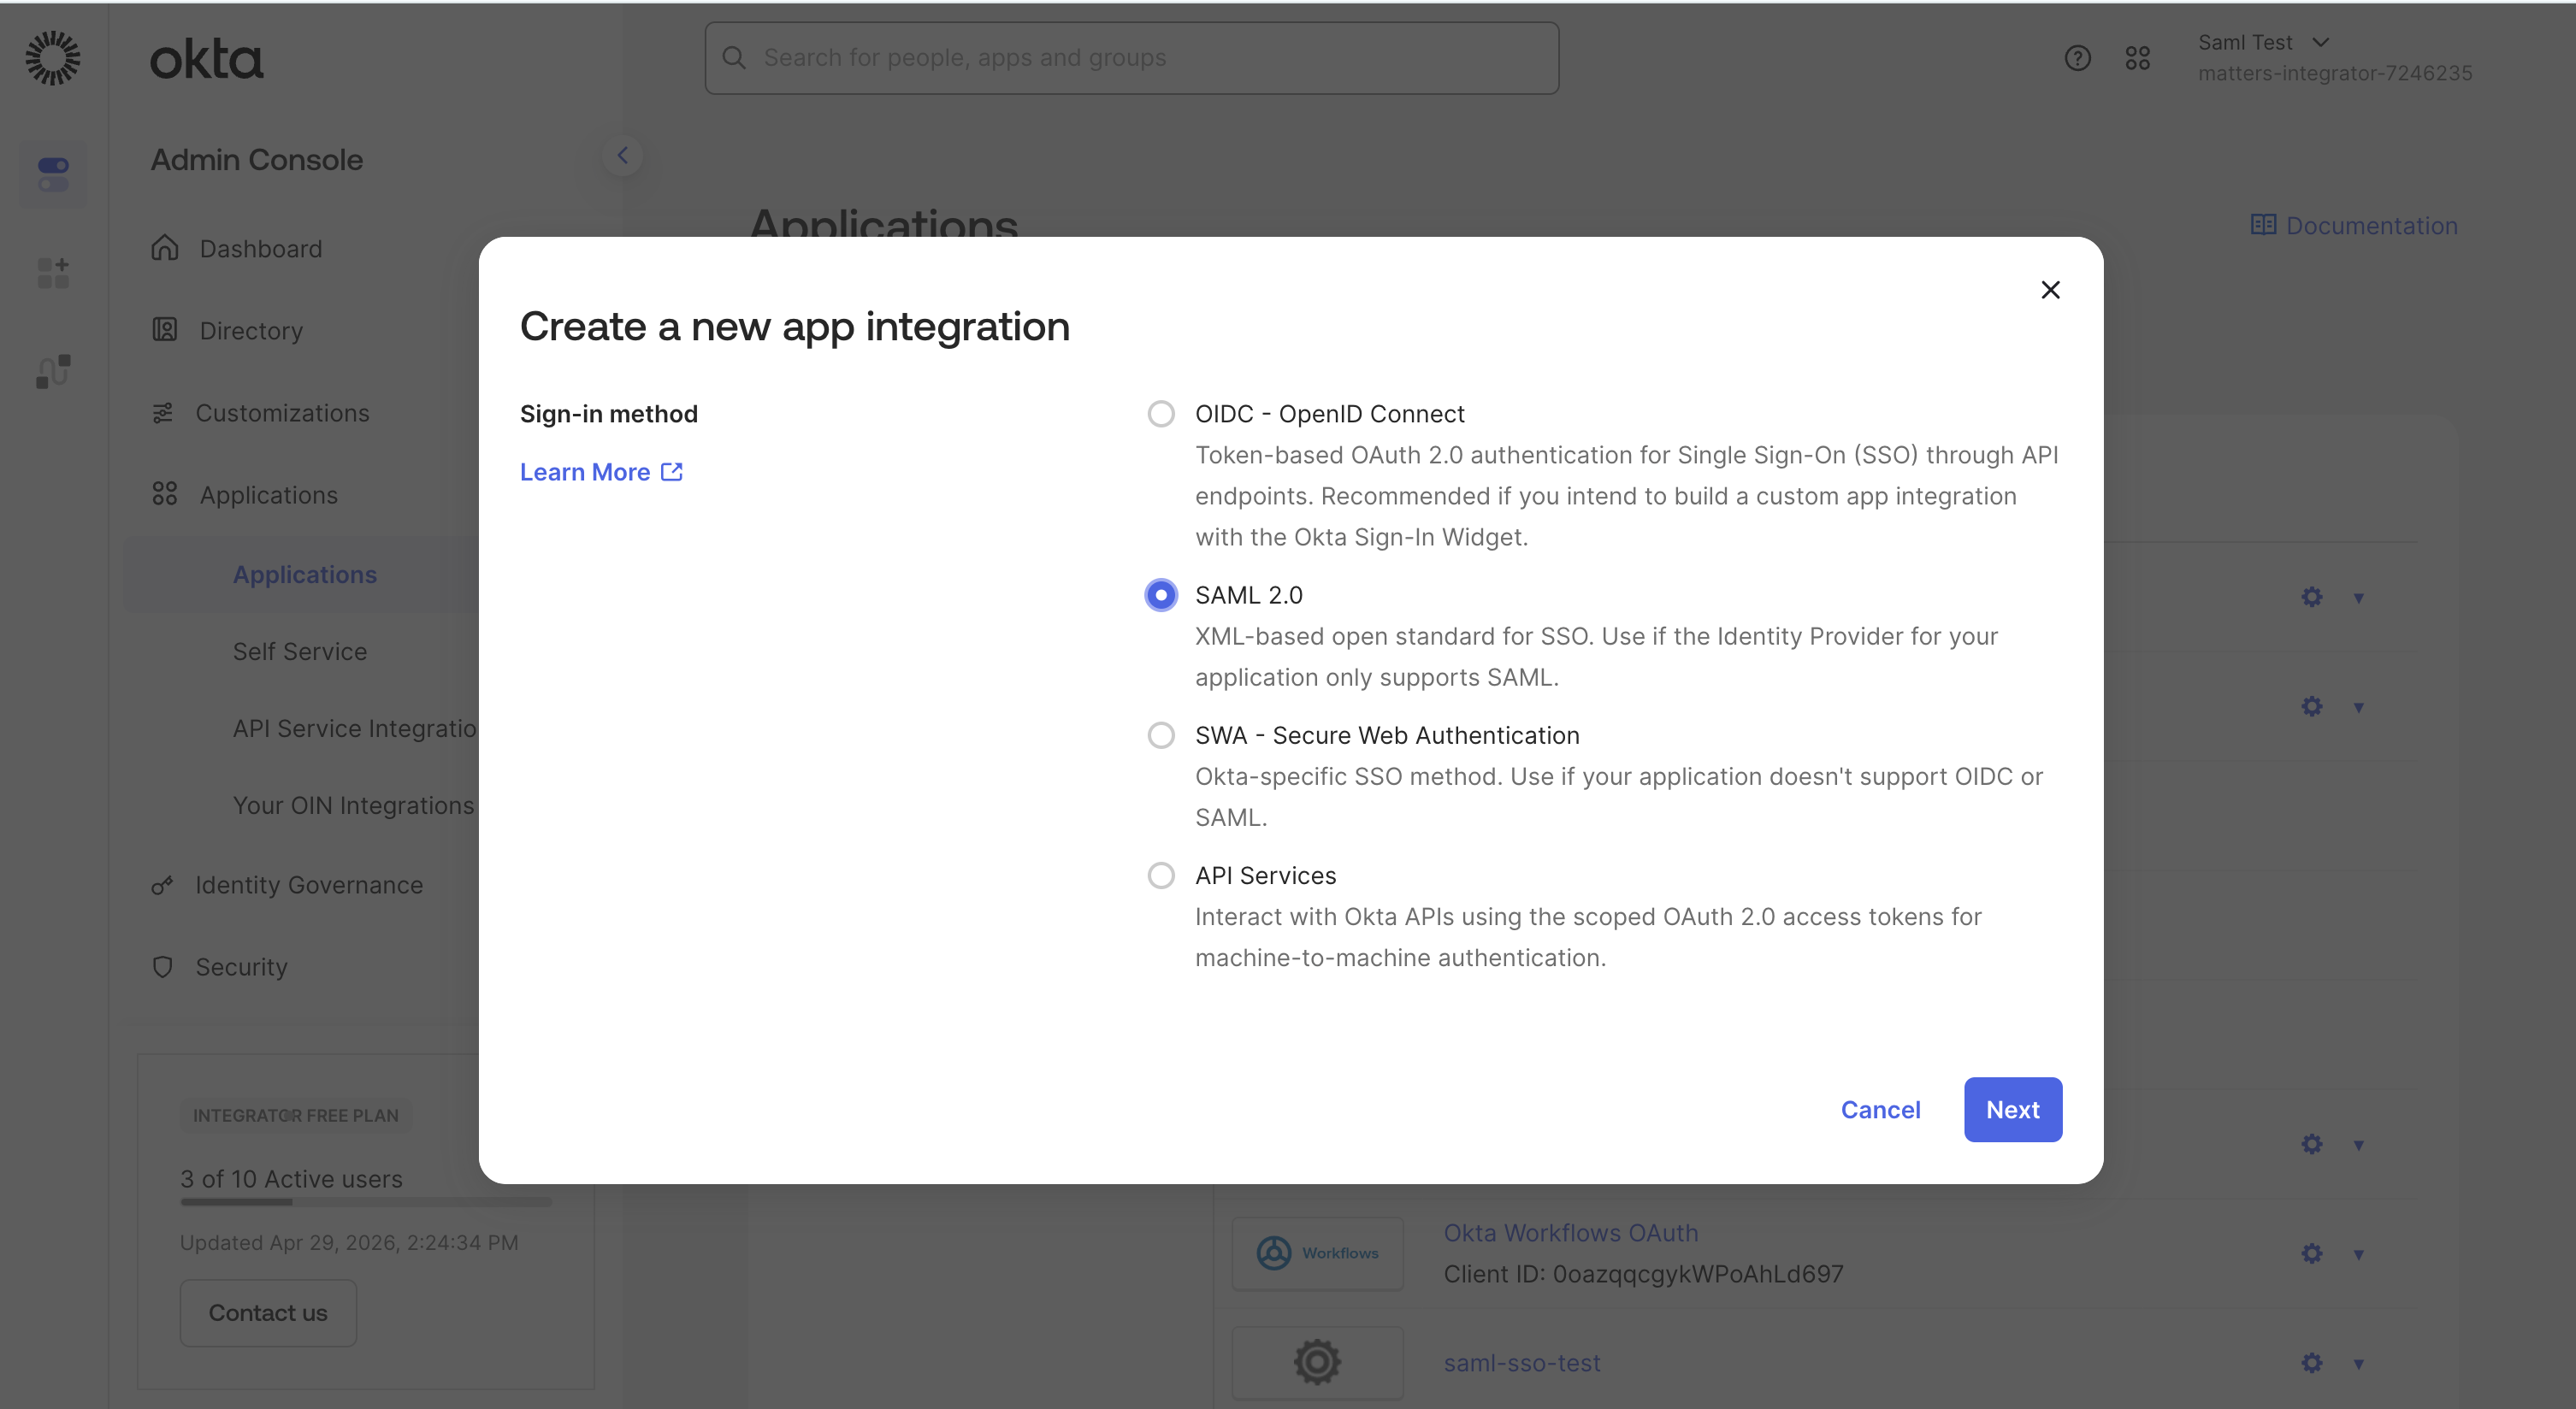
Select SAML 2.0 and Click Next.
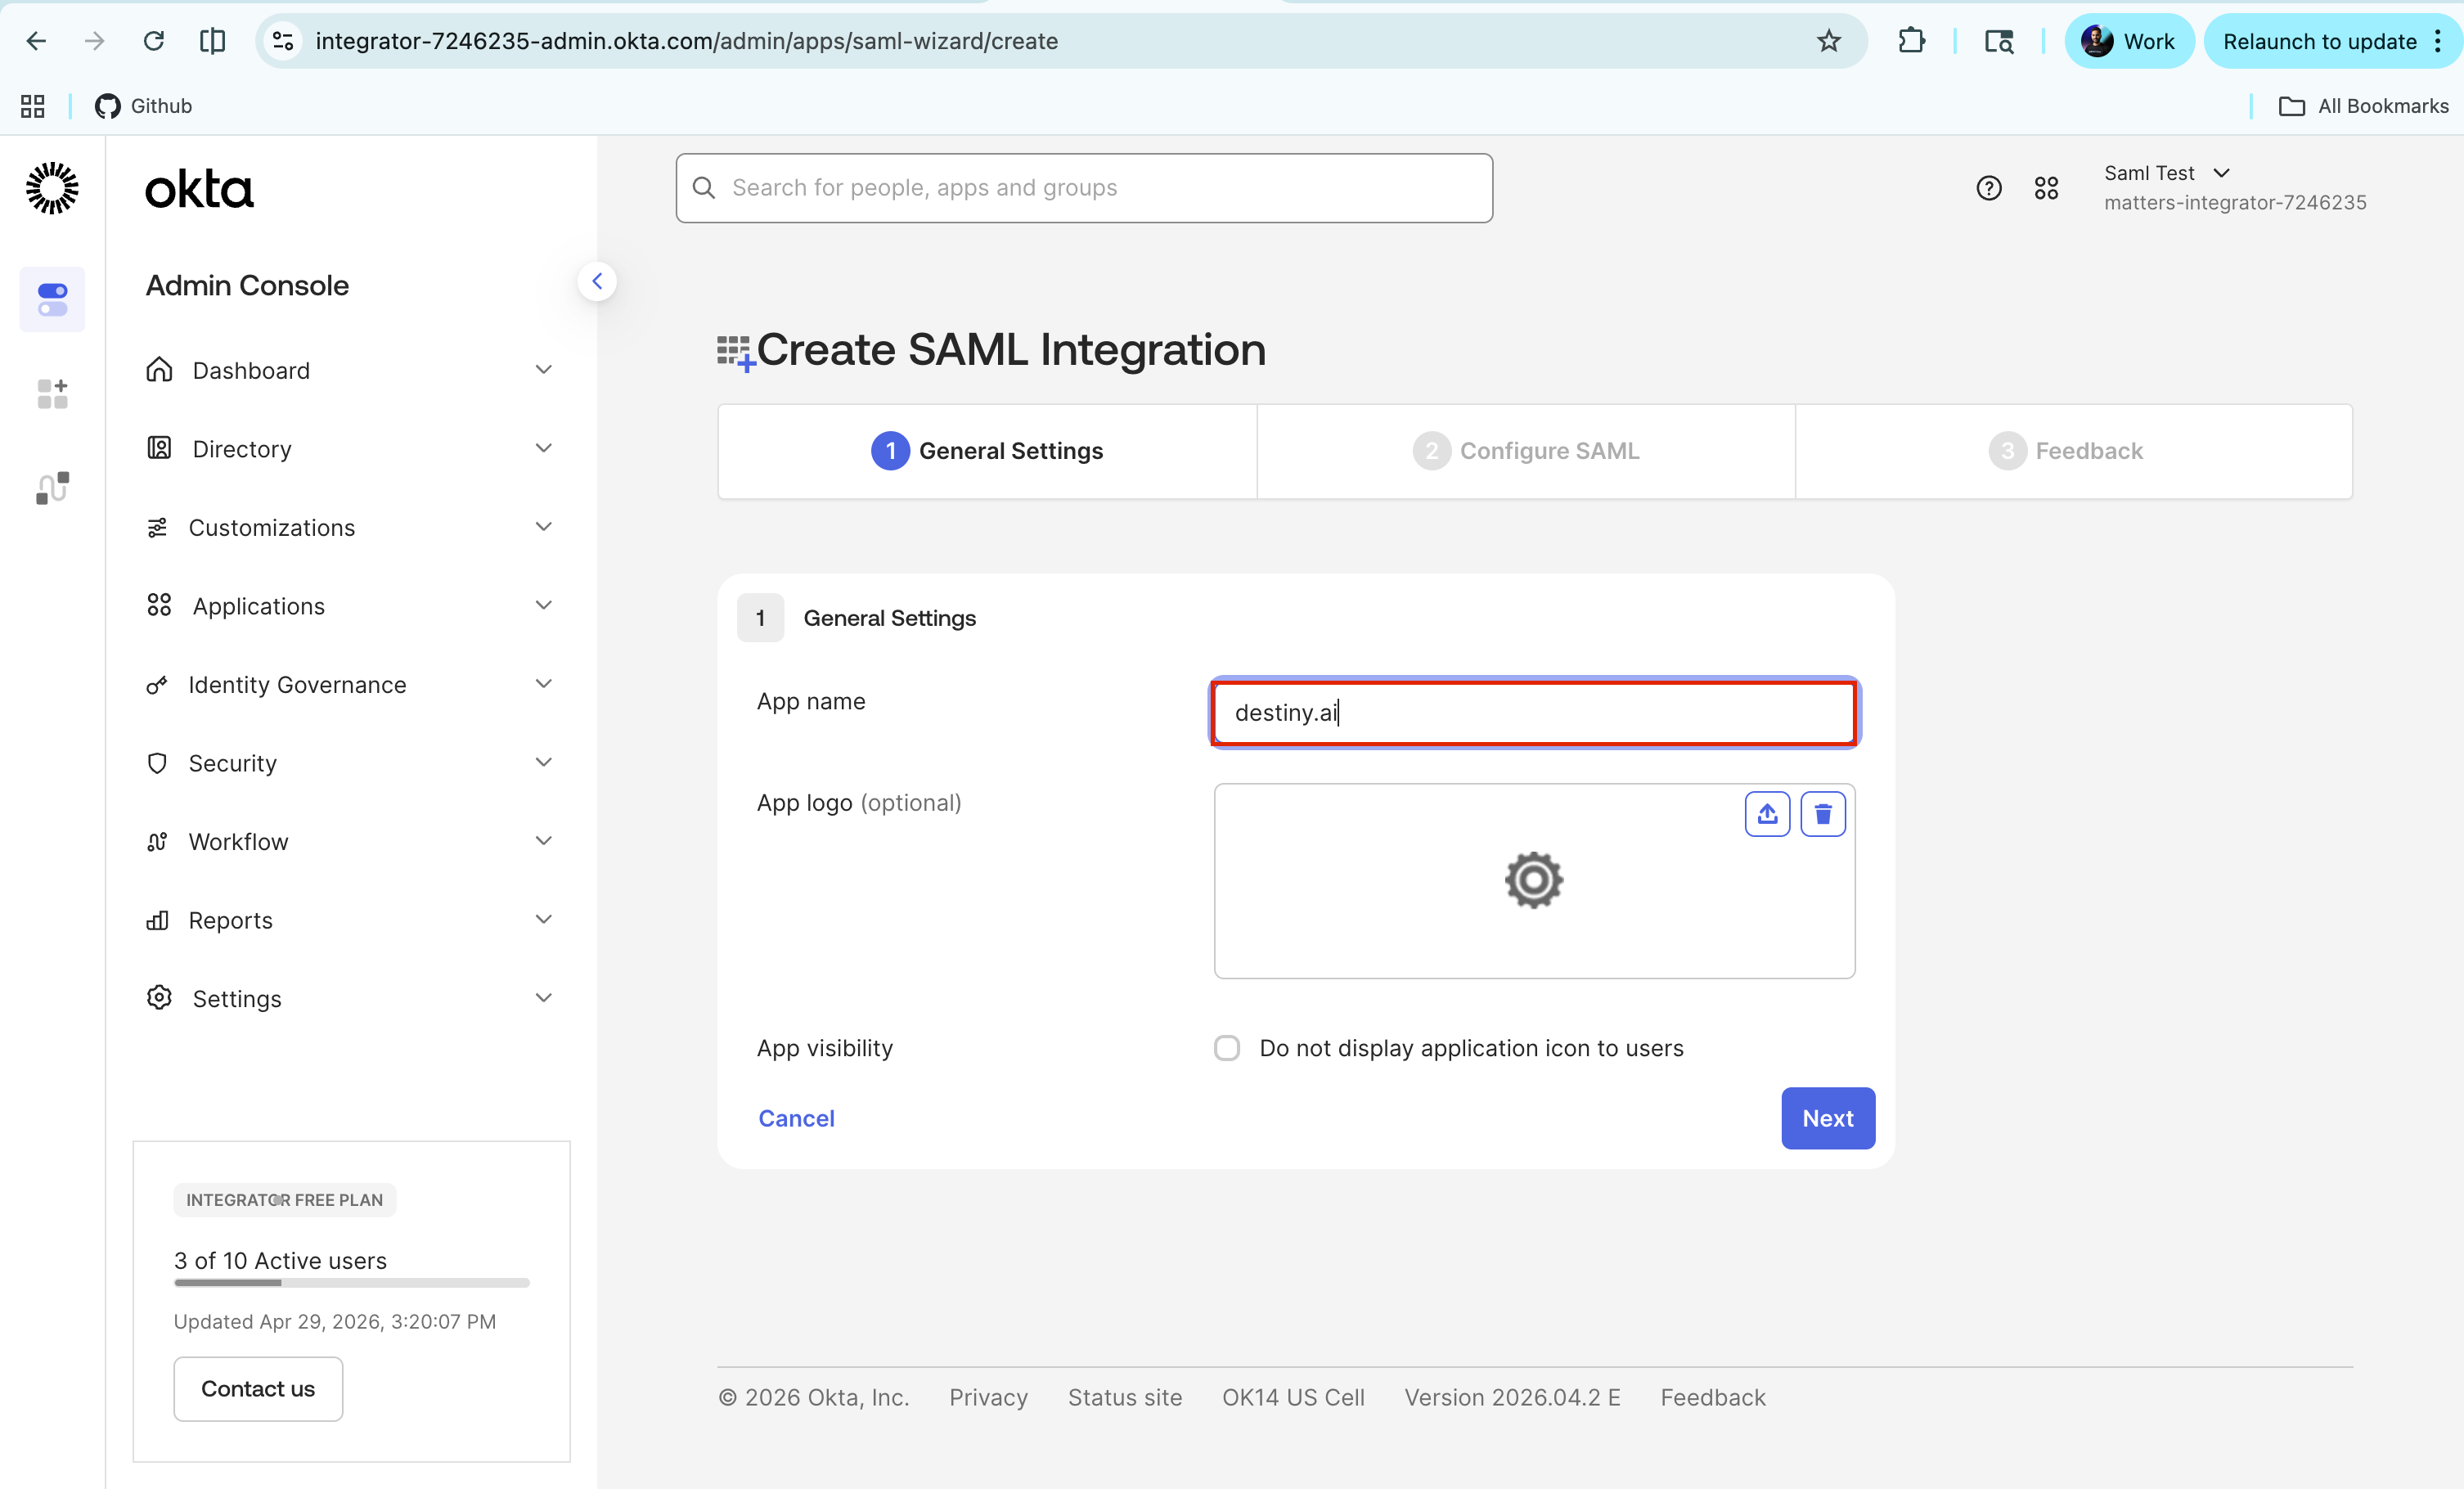
Enter the app name.
Example: destiny.ai
Click Next.
Step 2.2: Configure SAML Settings
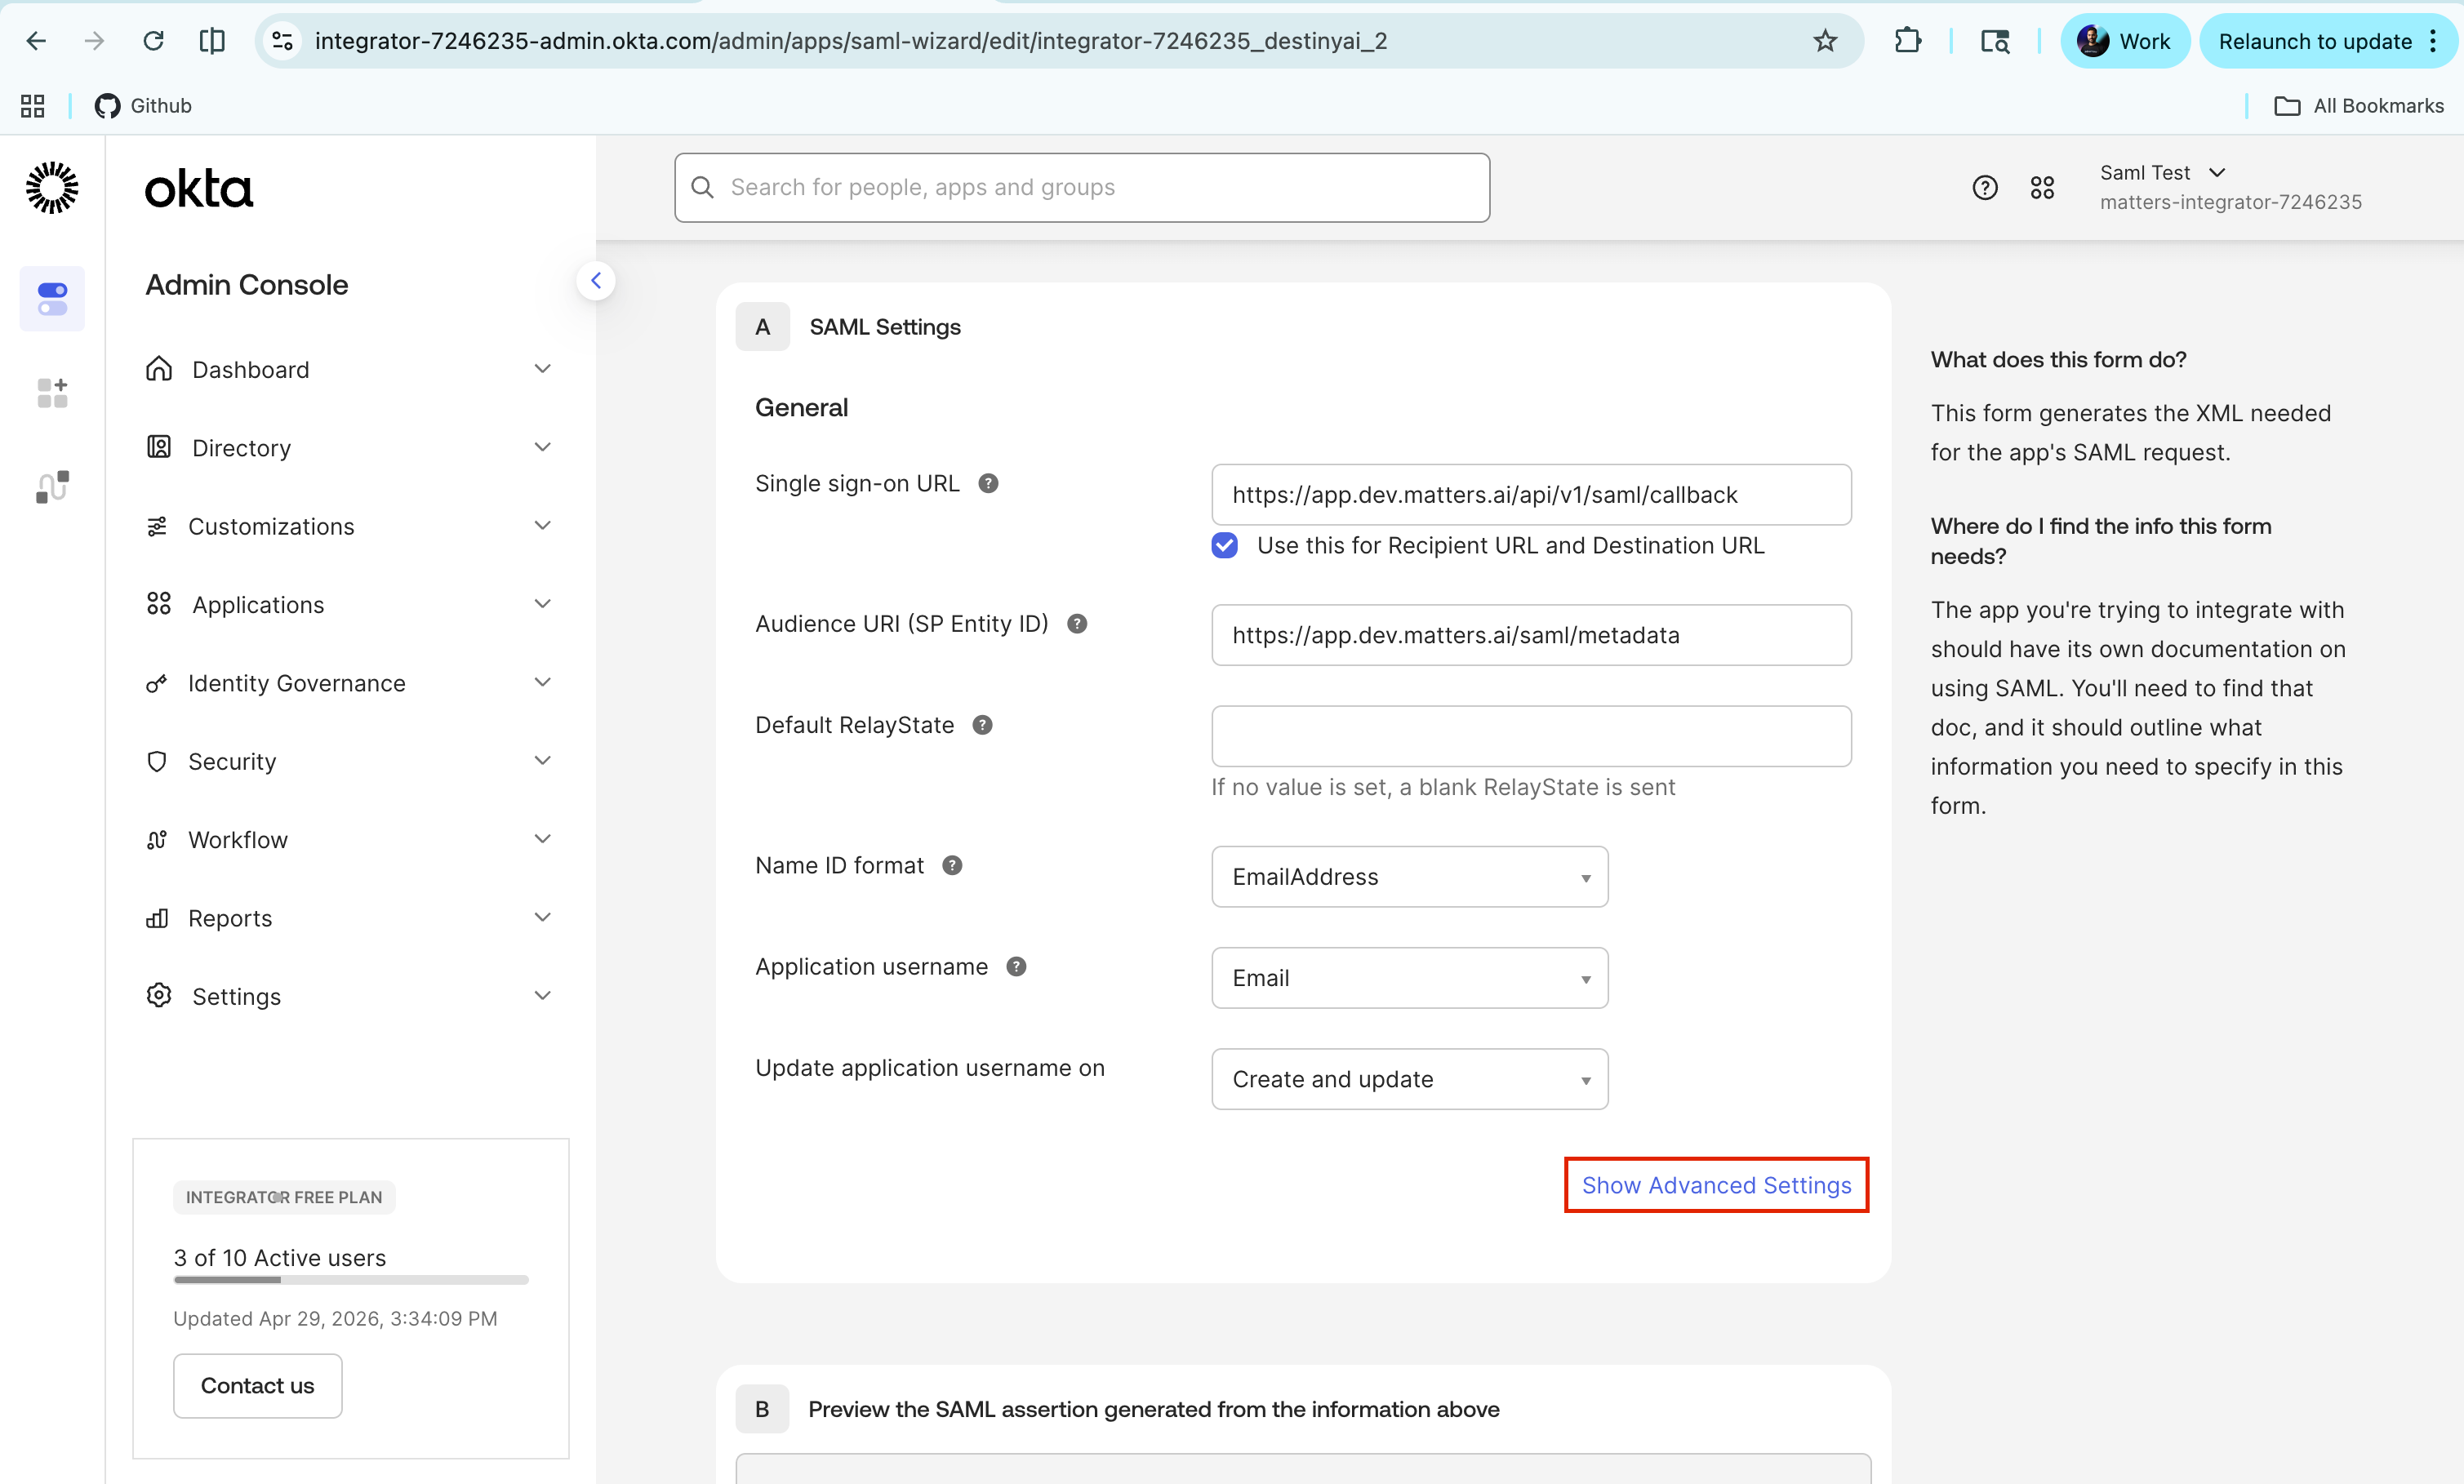
In the Configure SAML section, enter the following values:
Okta Field | Value |
|---|---|
Single Sign-On URL |
|
Audience URI / SP Entity ID |
|
Name ID format |
|
Application username |
|
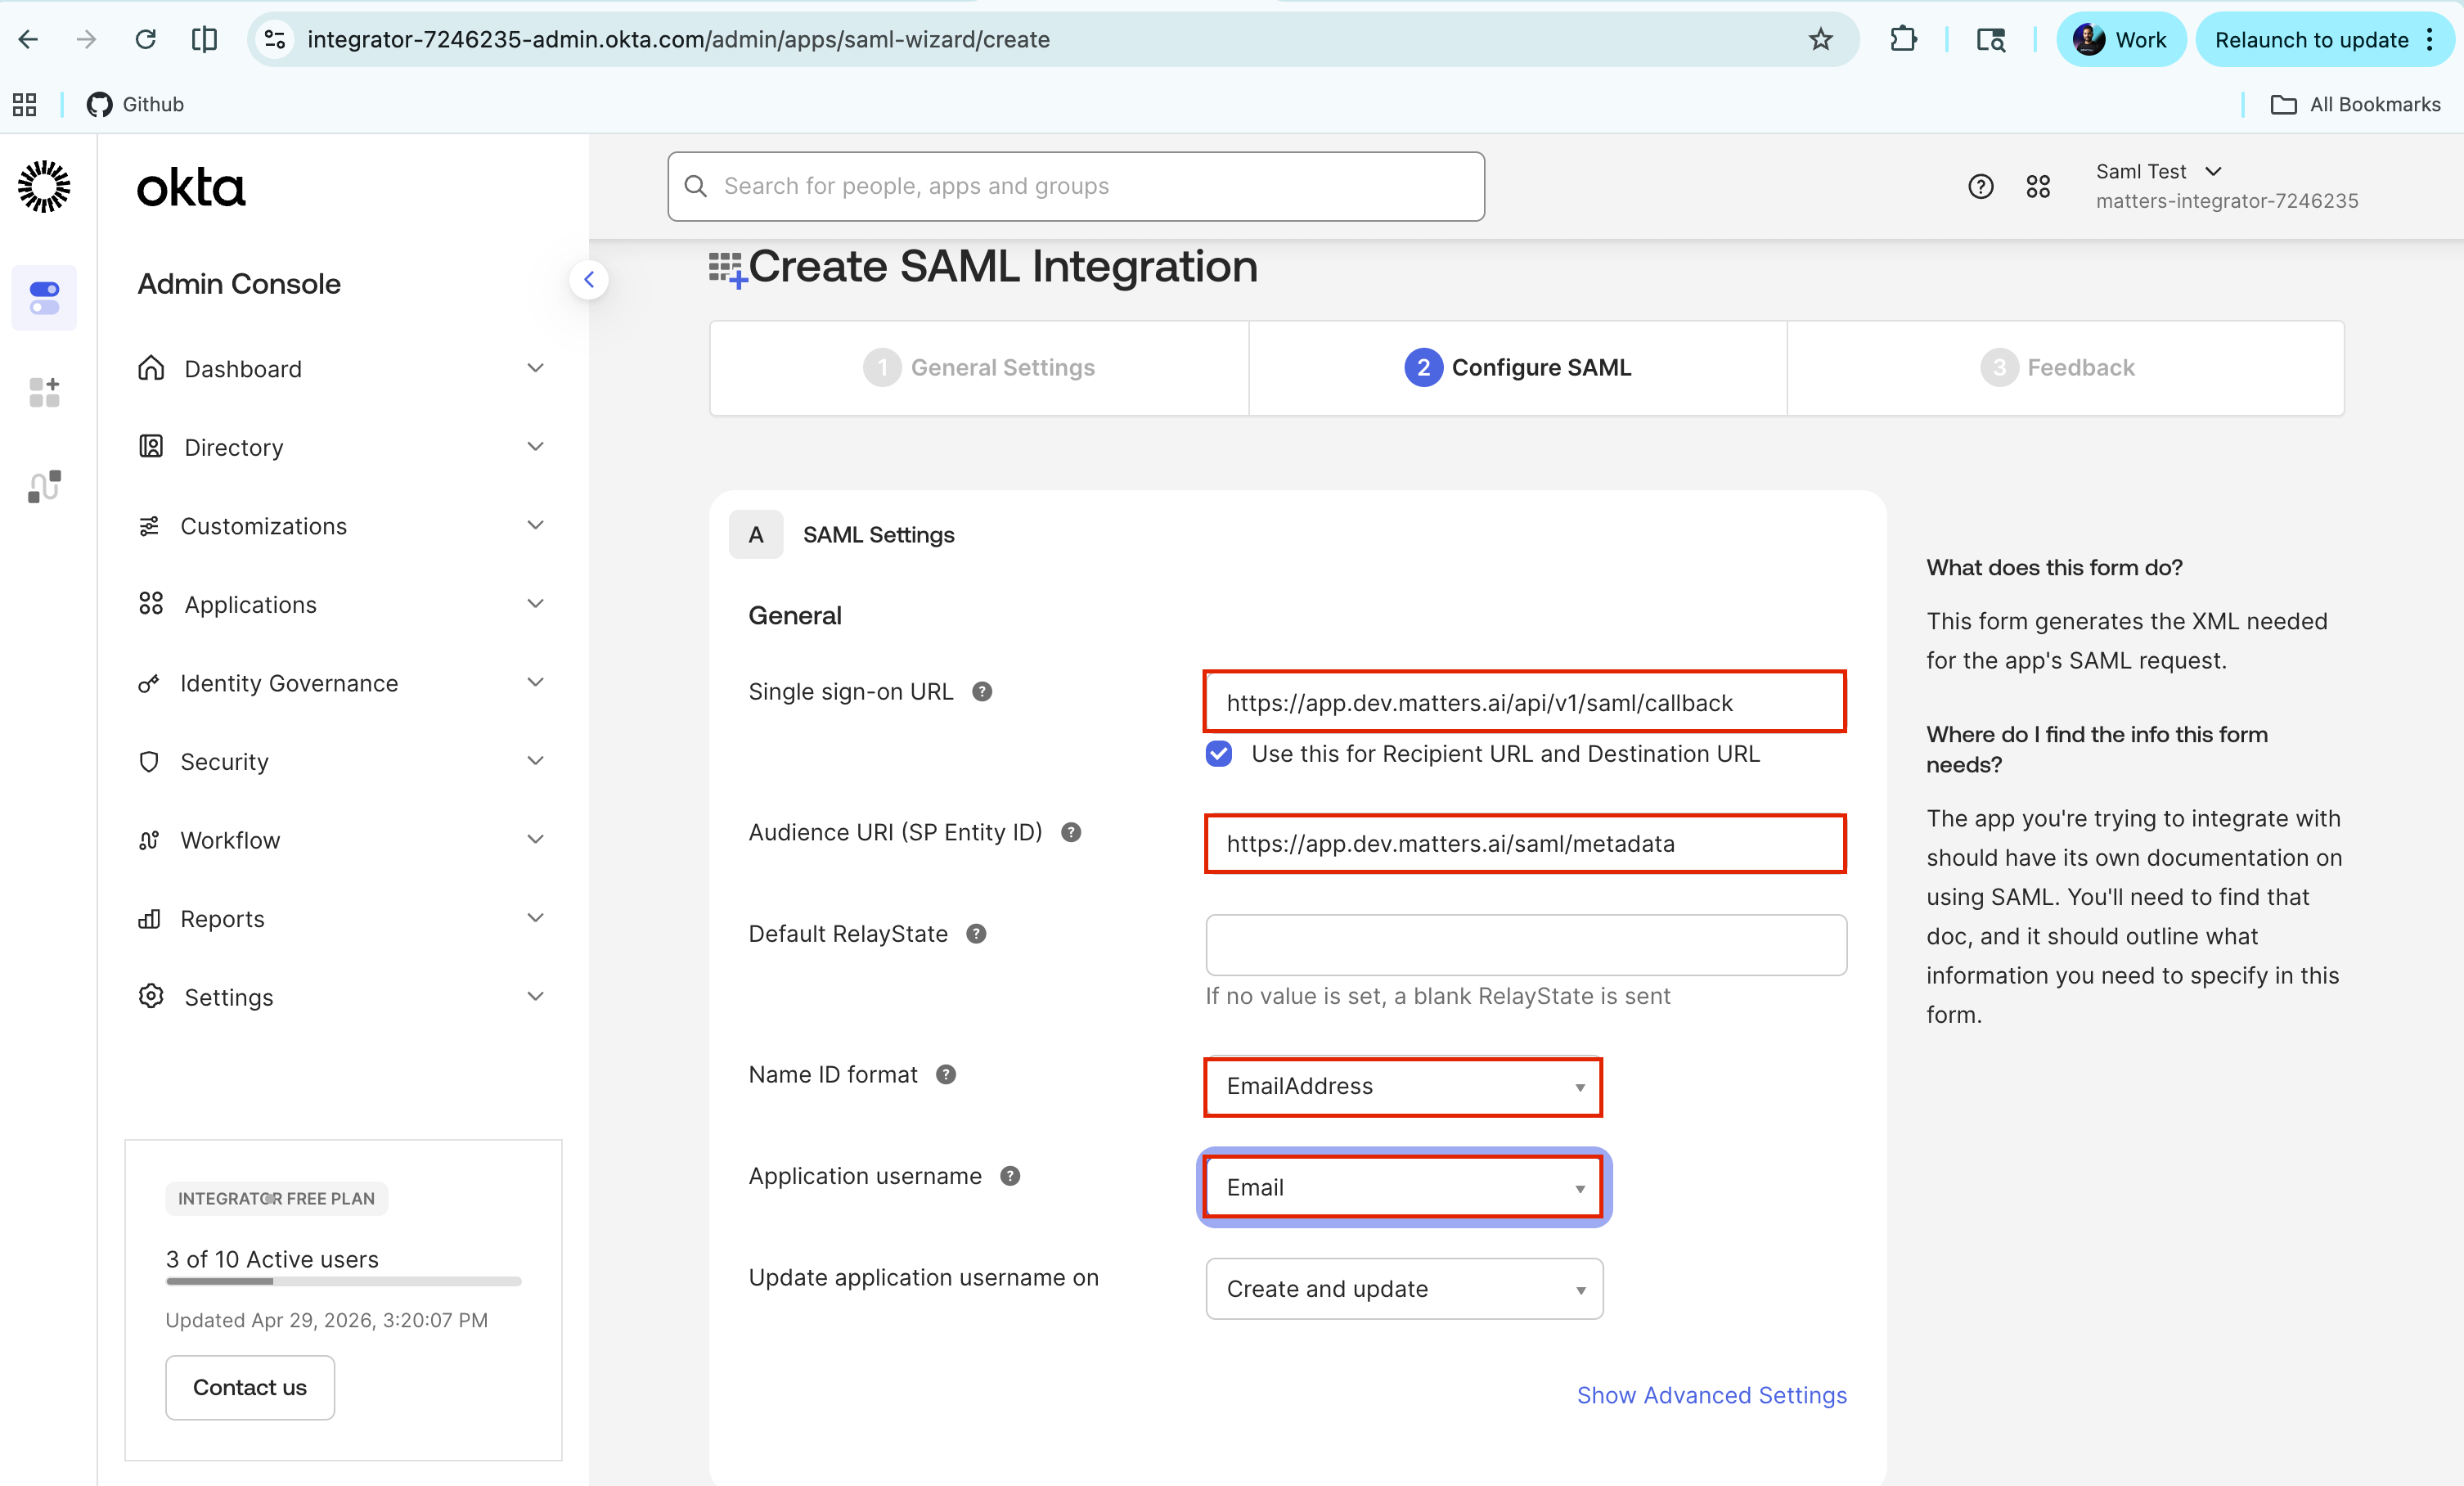
Click Next after entering the values.
Click Show Advanced Settings.
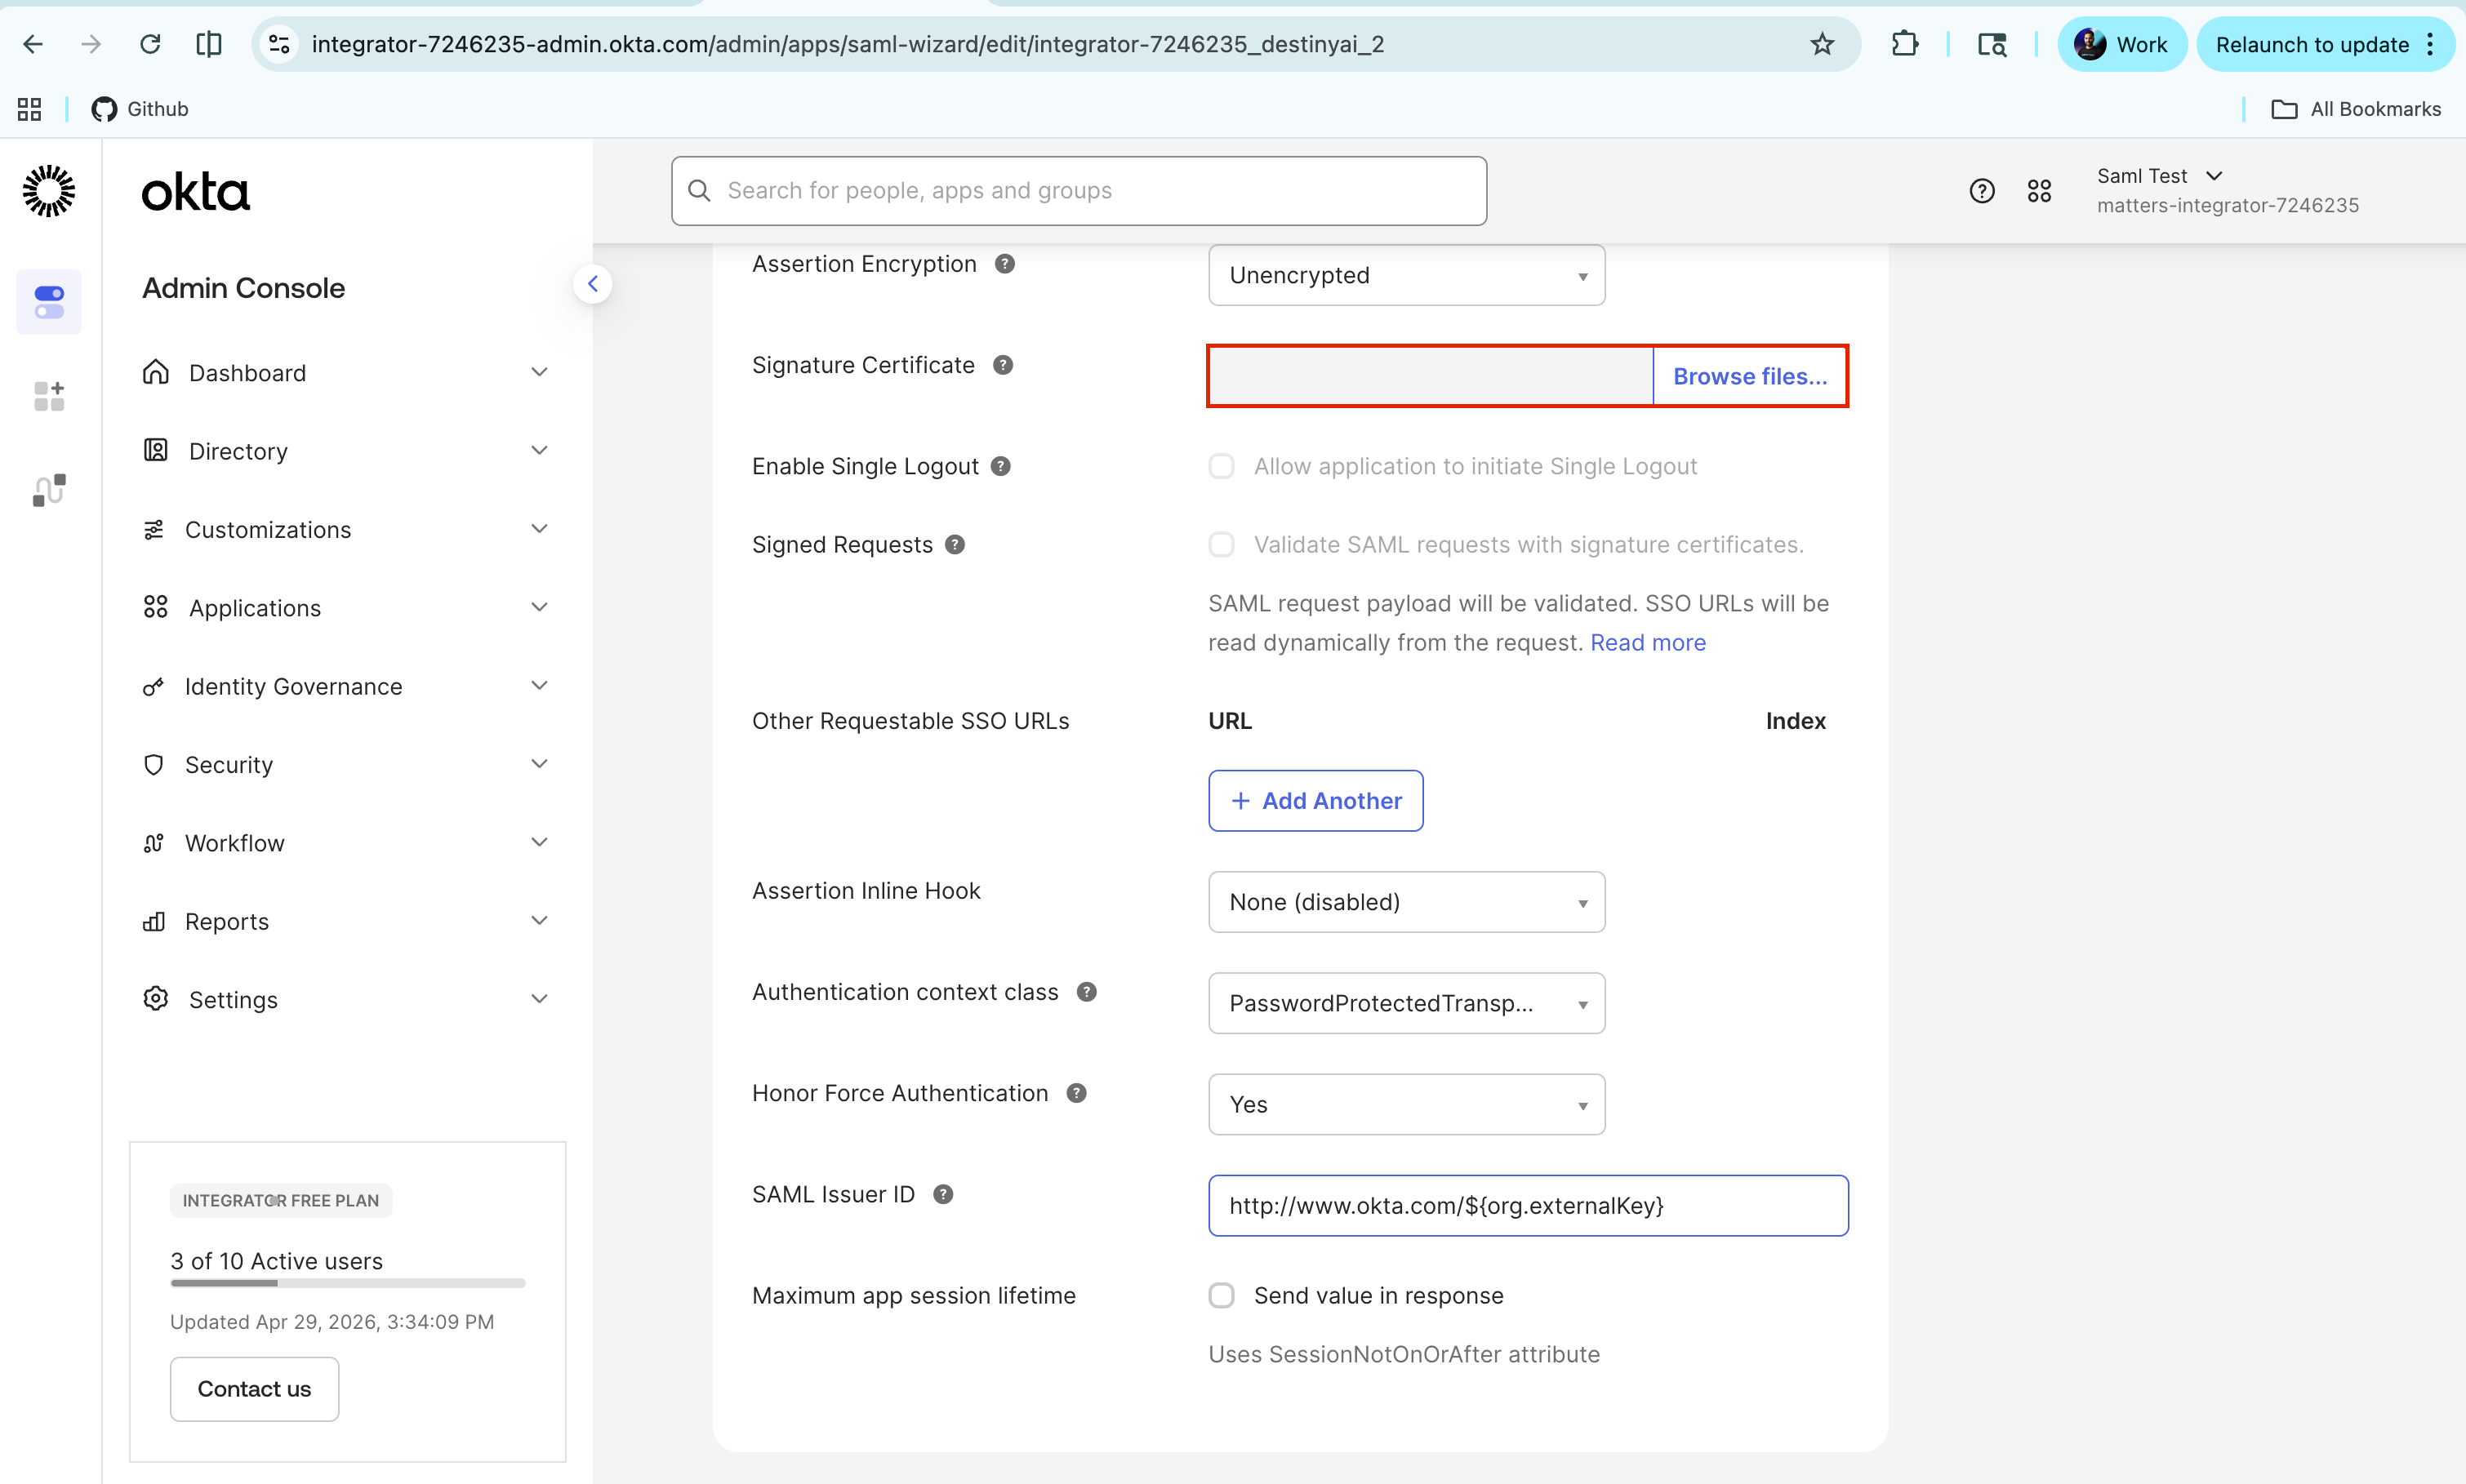
Scroll to the Signature Certificates section.
Upload the SP certificate shared separately by the Matters.ai team.
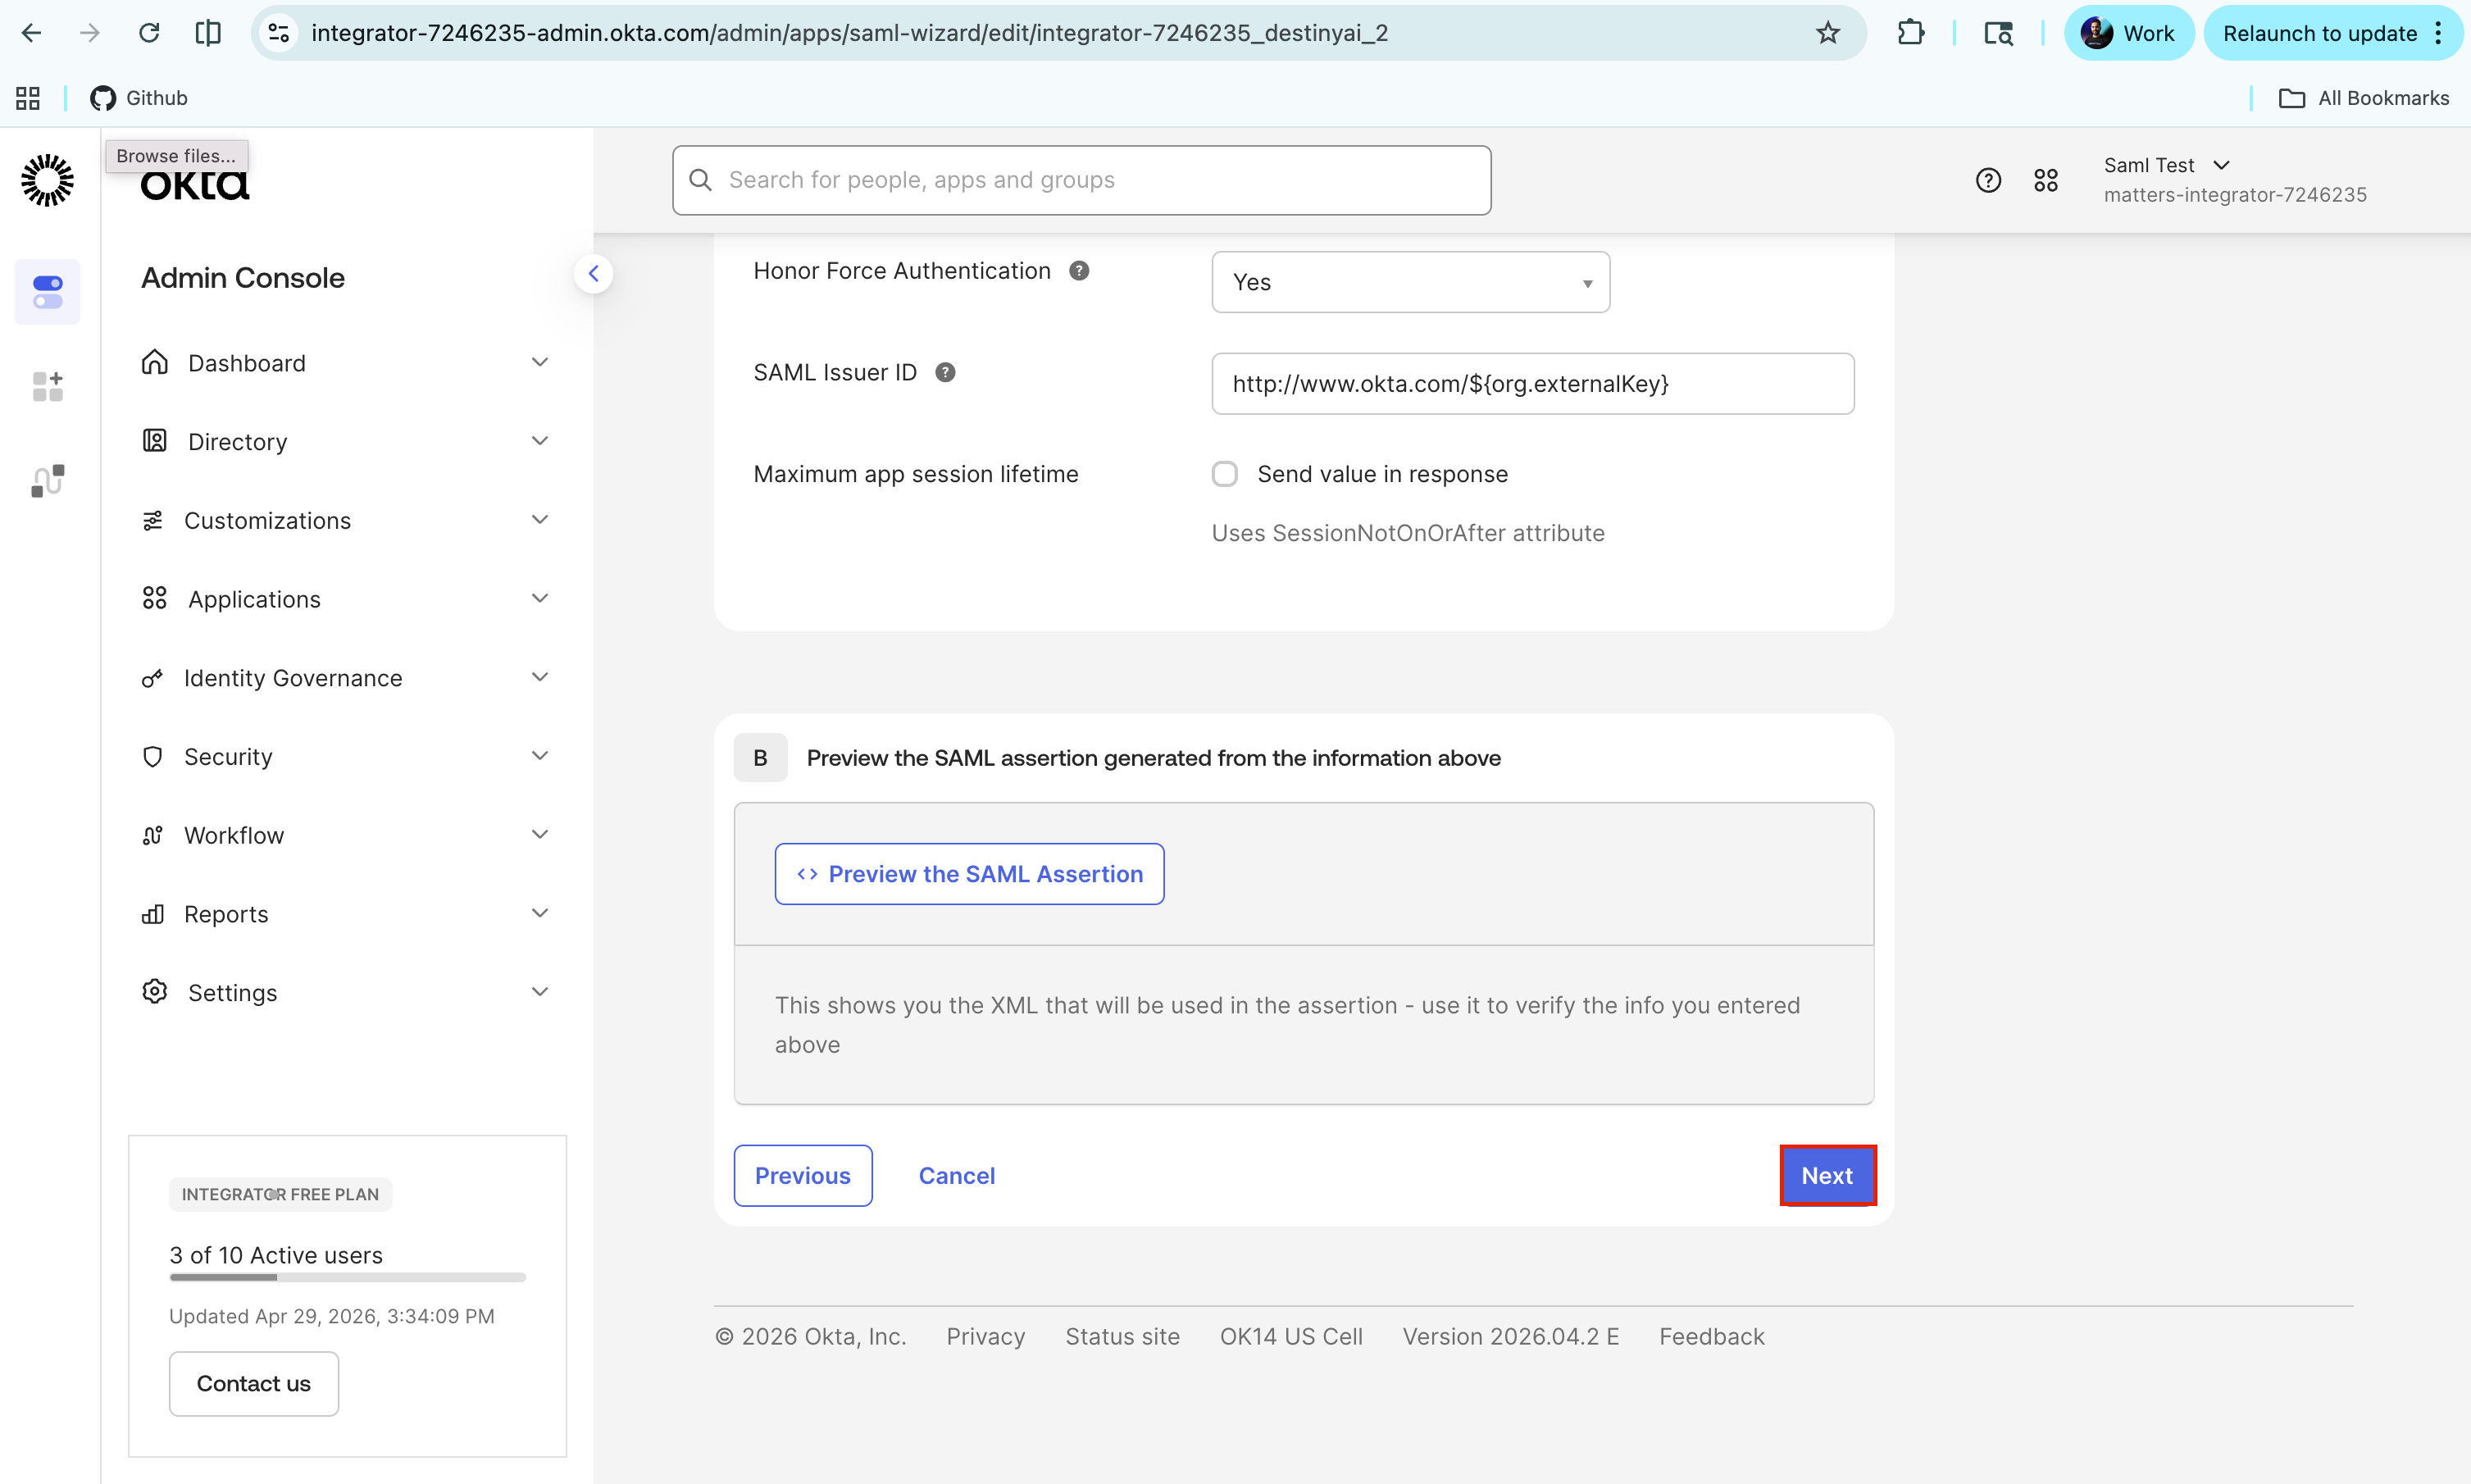
Scroll to the end of the page and click on Next.
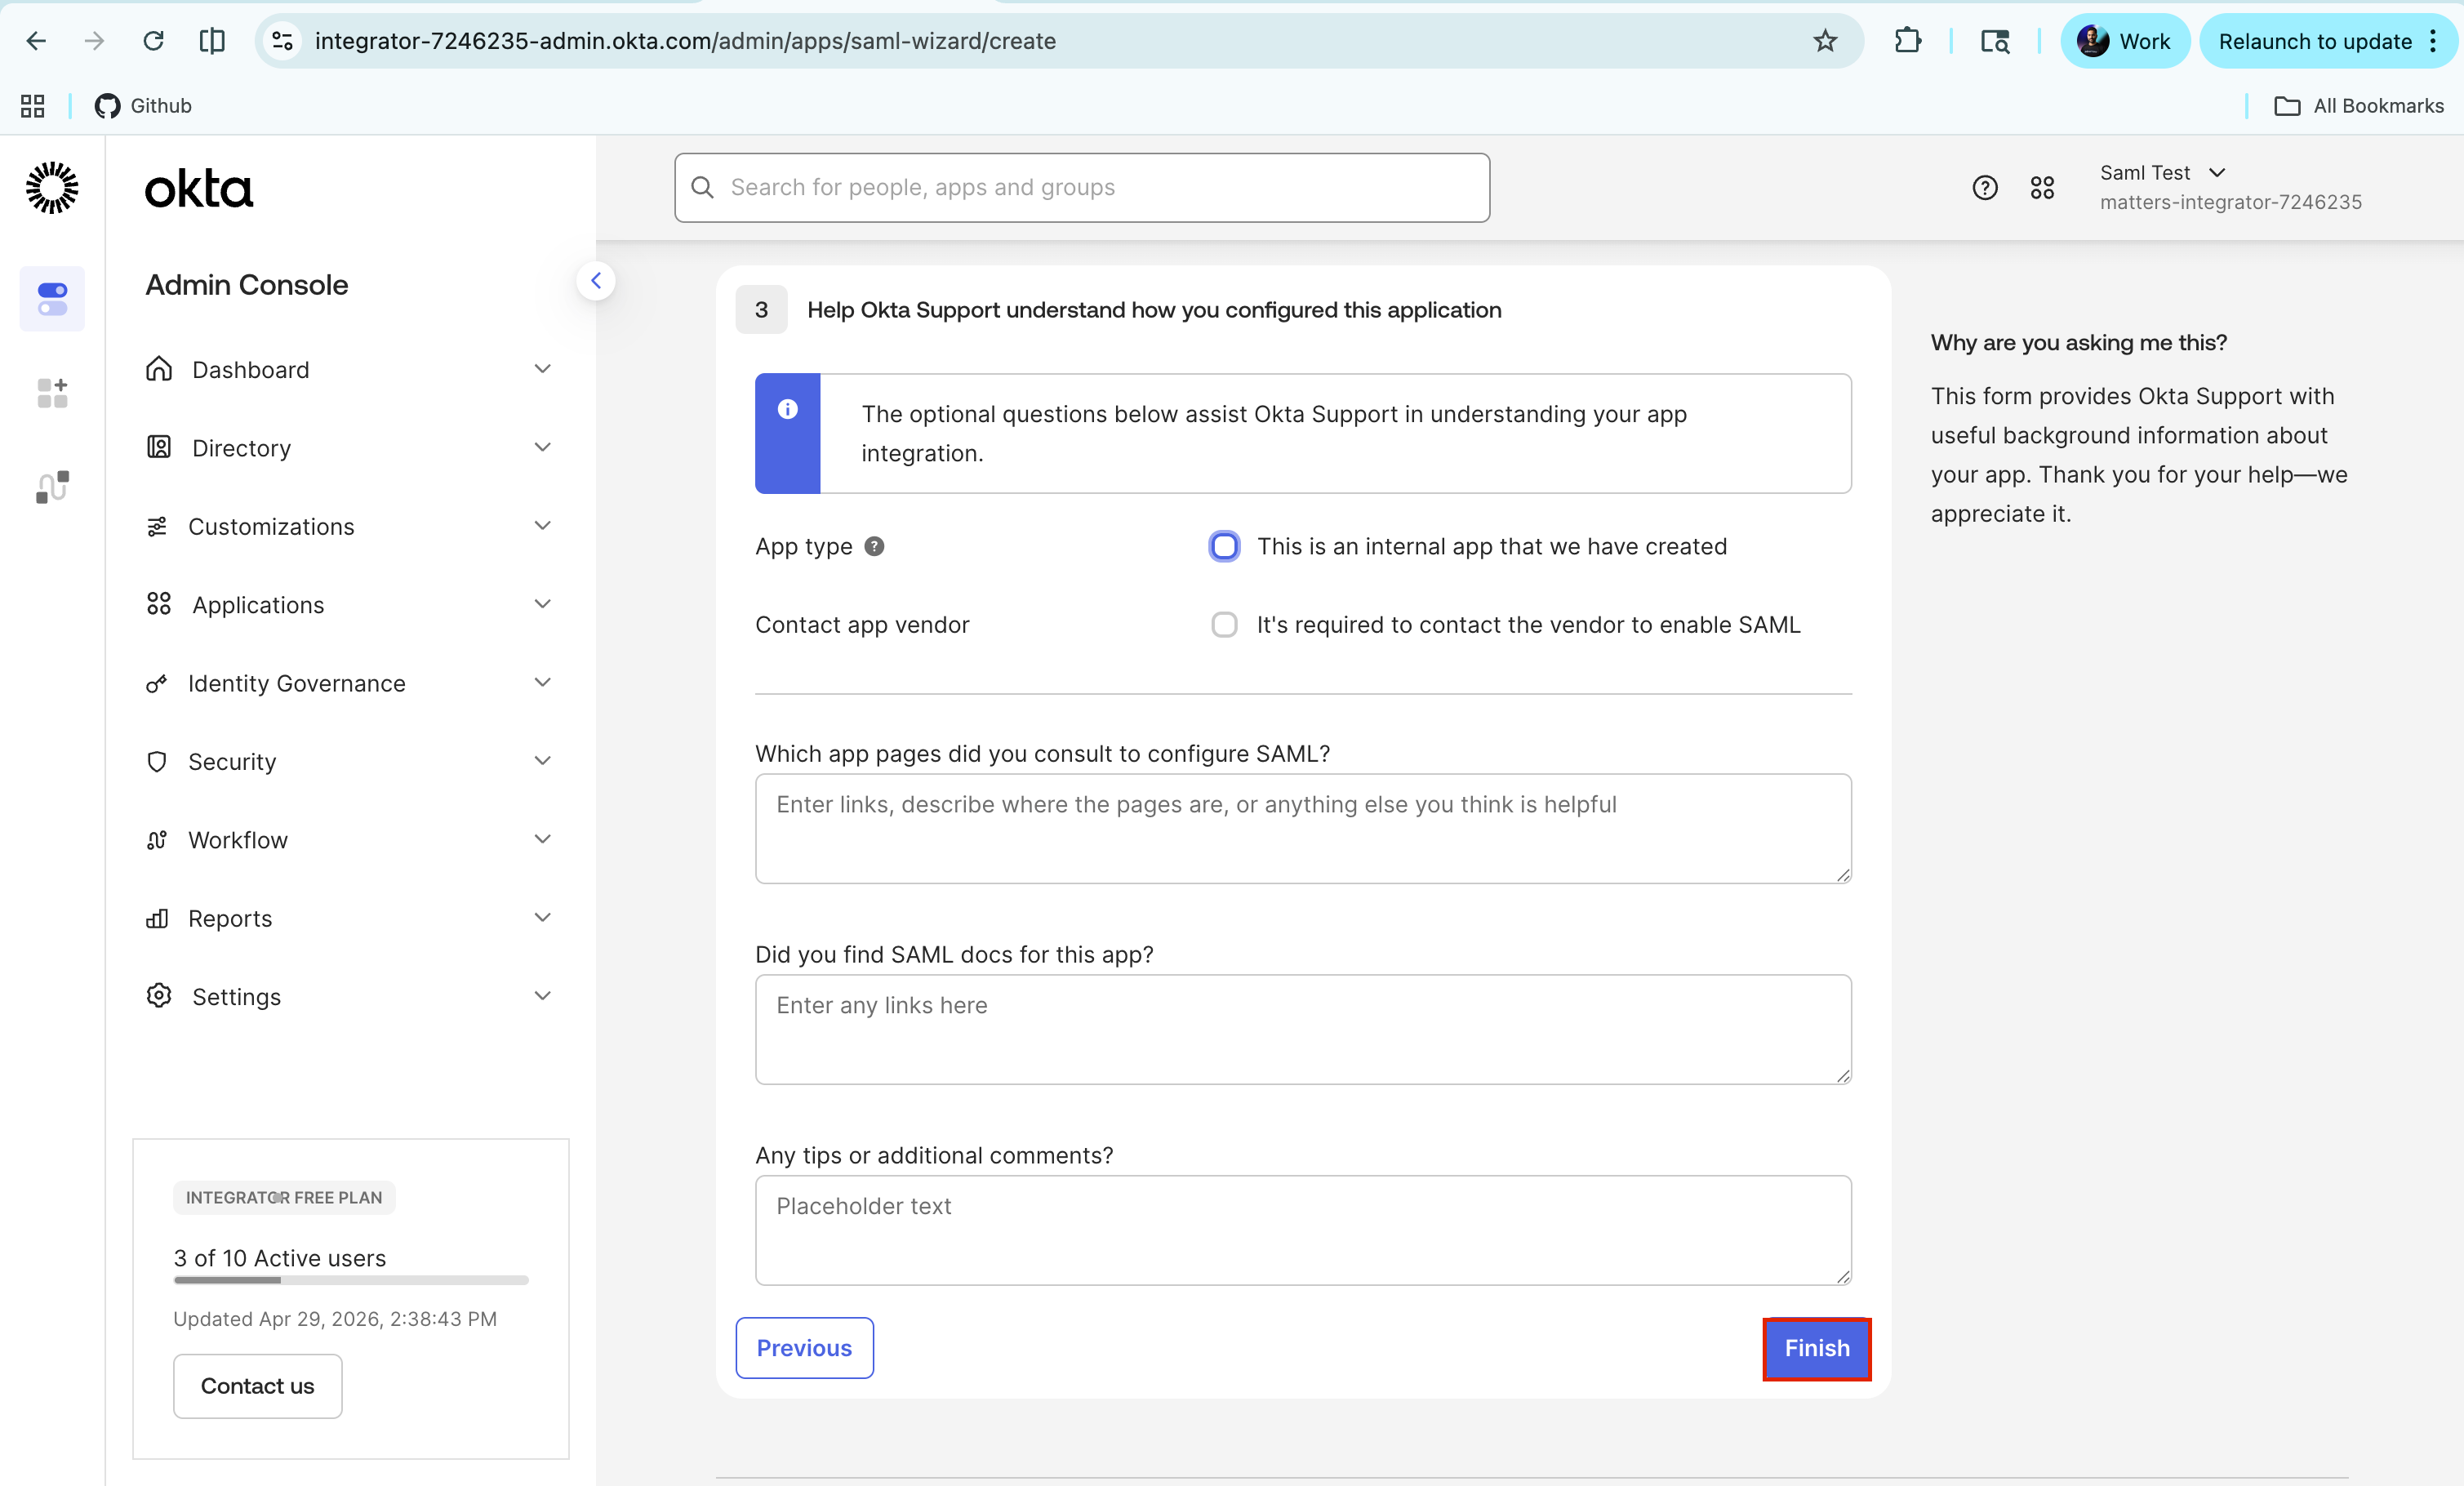
Click Finish.
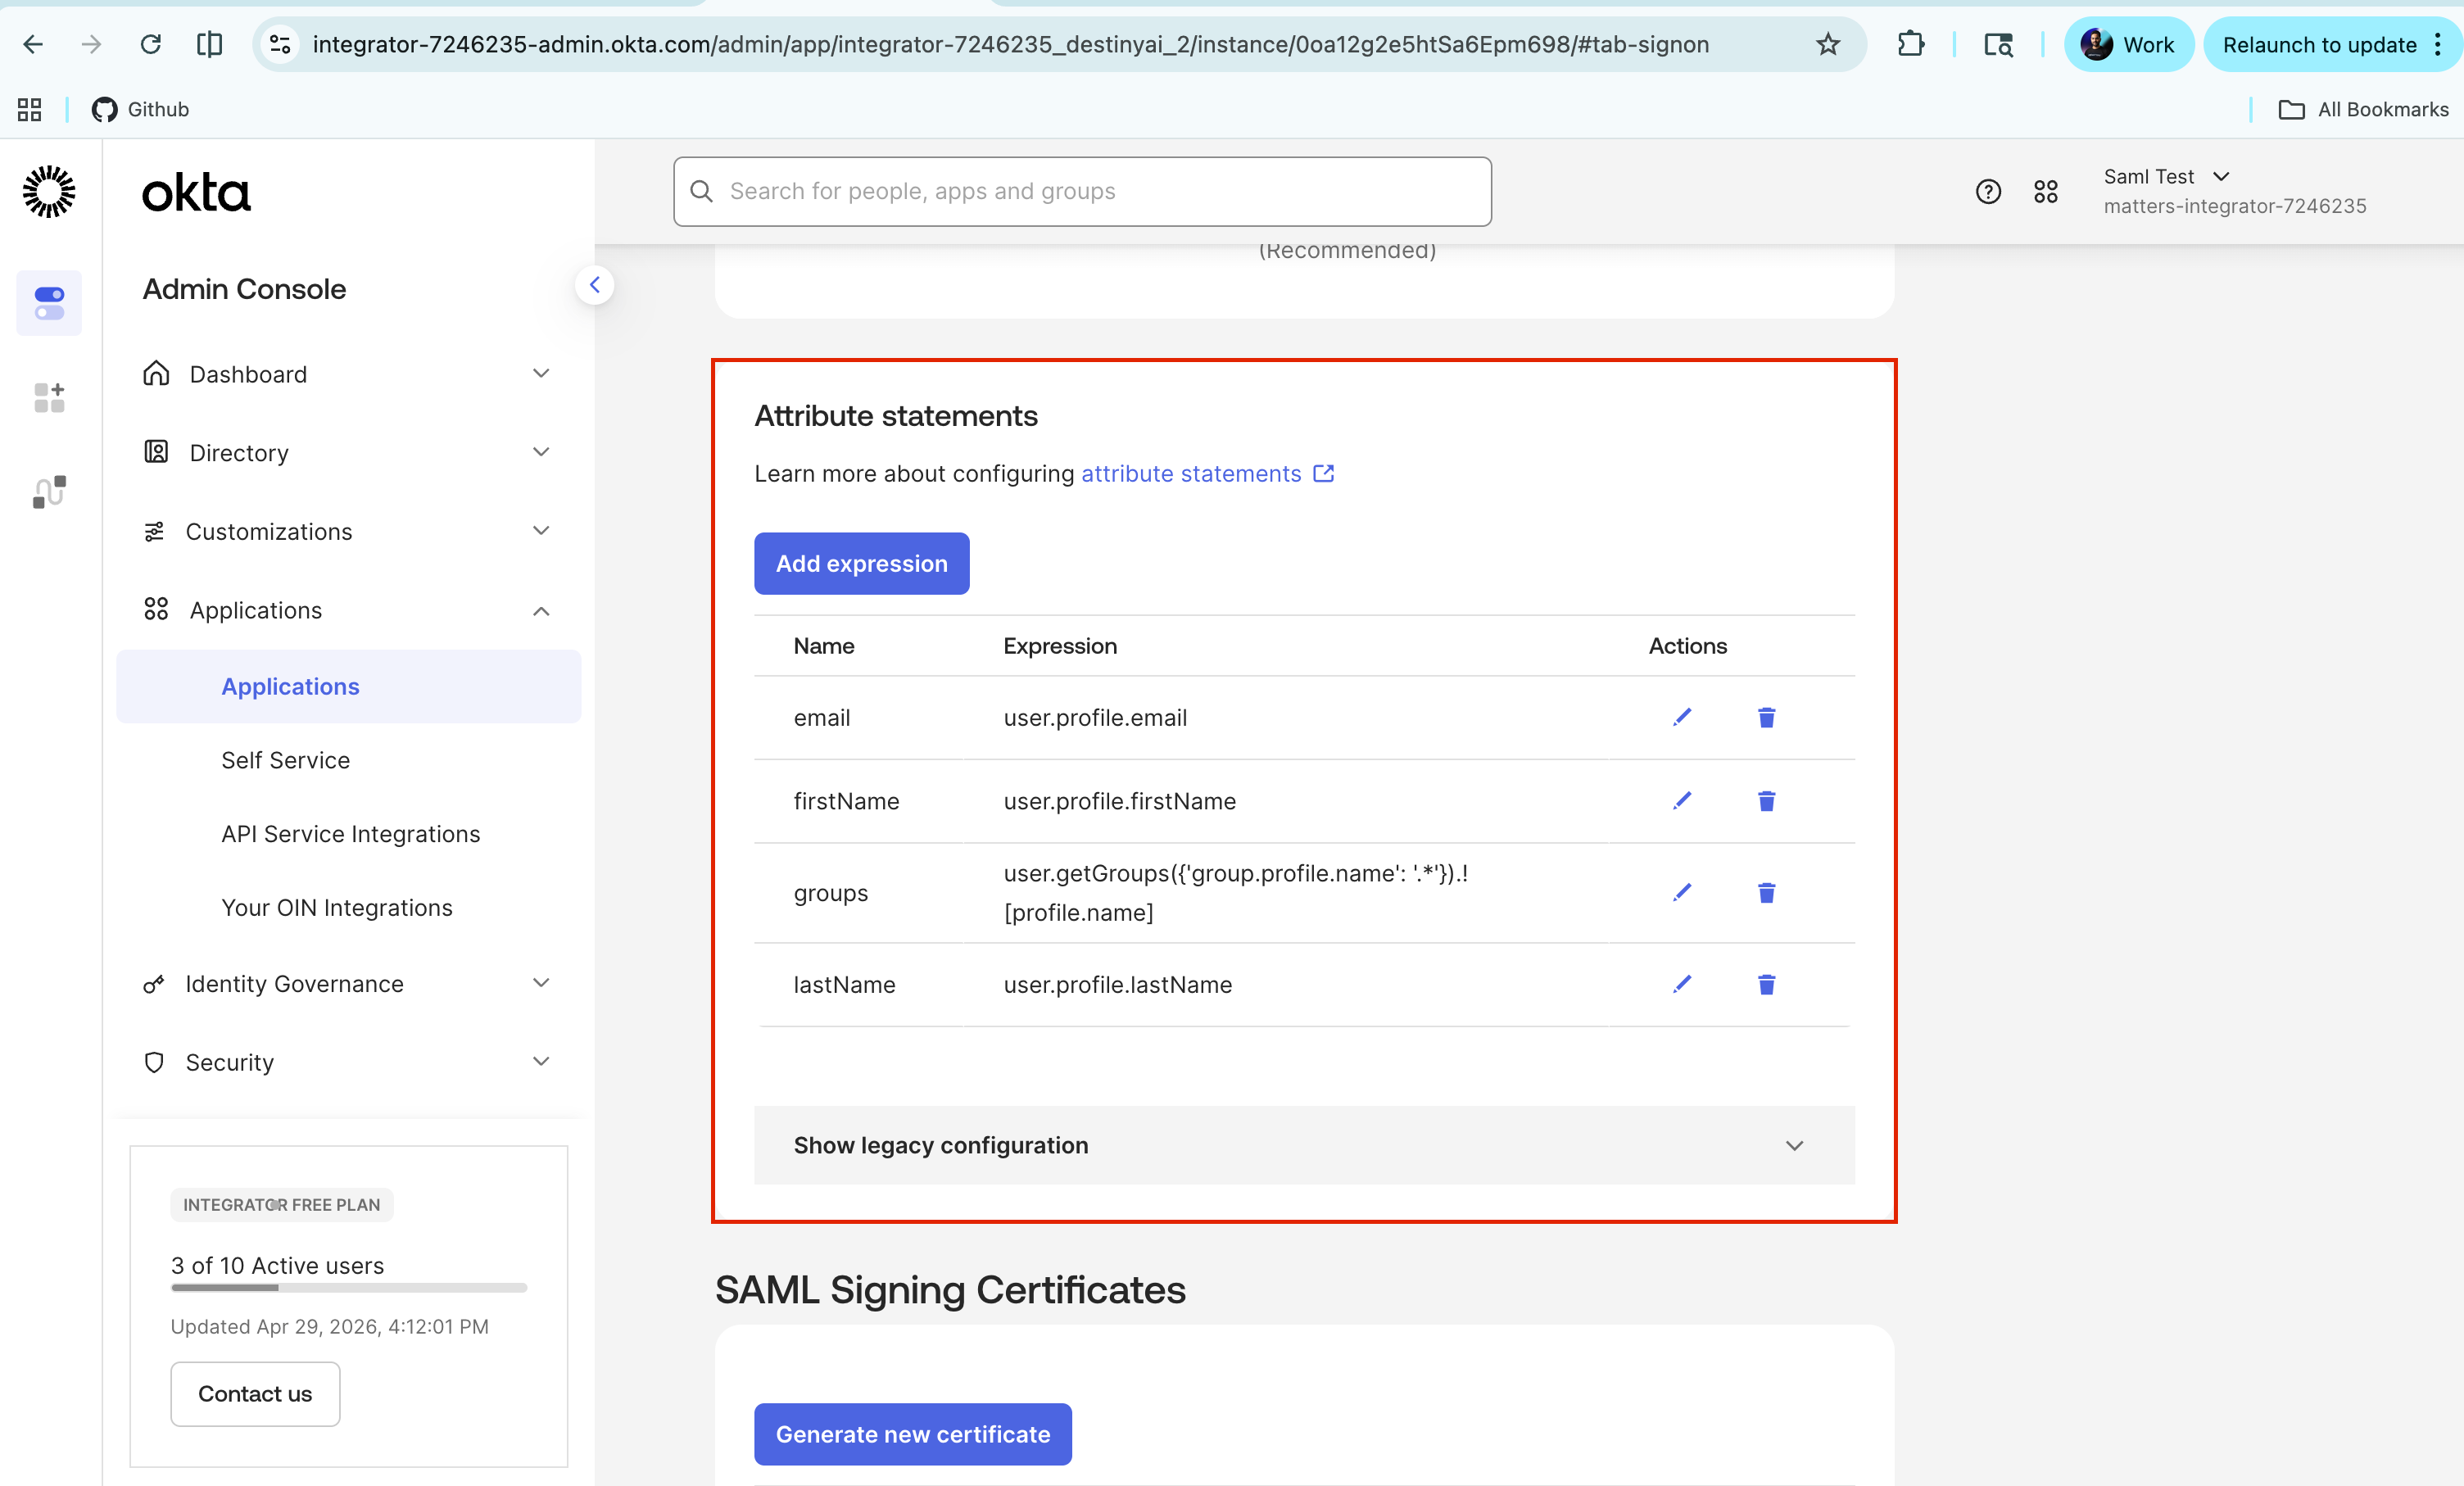
Step 2.3: Configure Attribute Statements
Once the application is created, open the Sign On tab.
Scroll to the Attribute Statements section.
Click Add Expression.
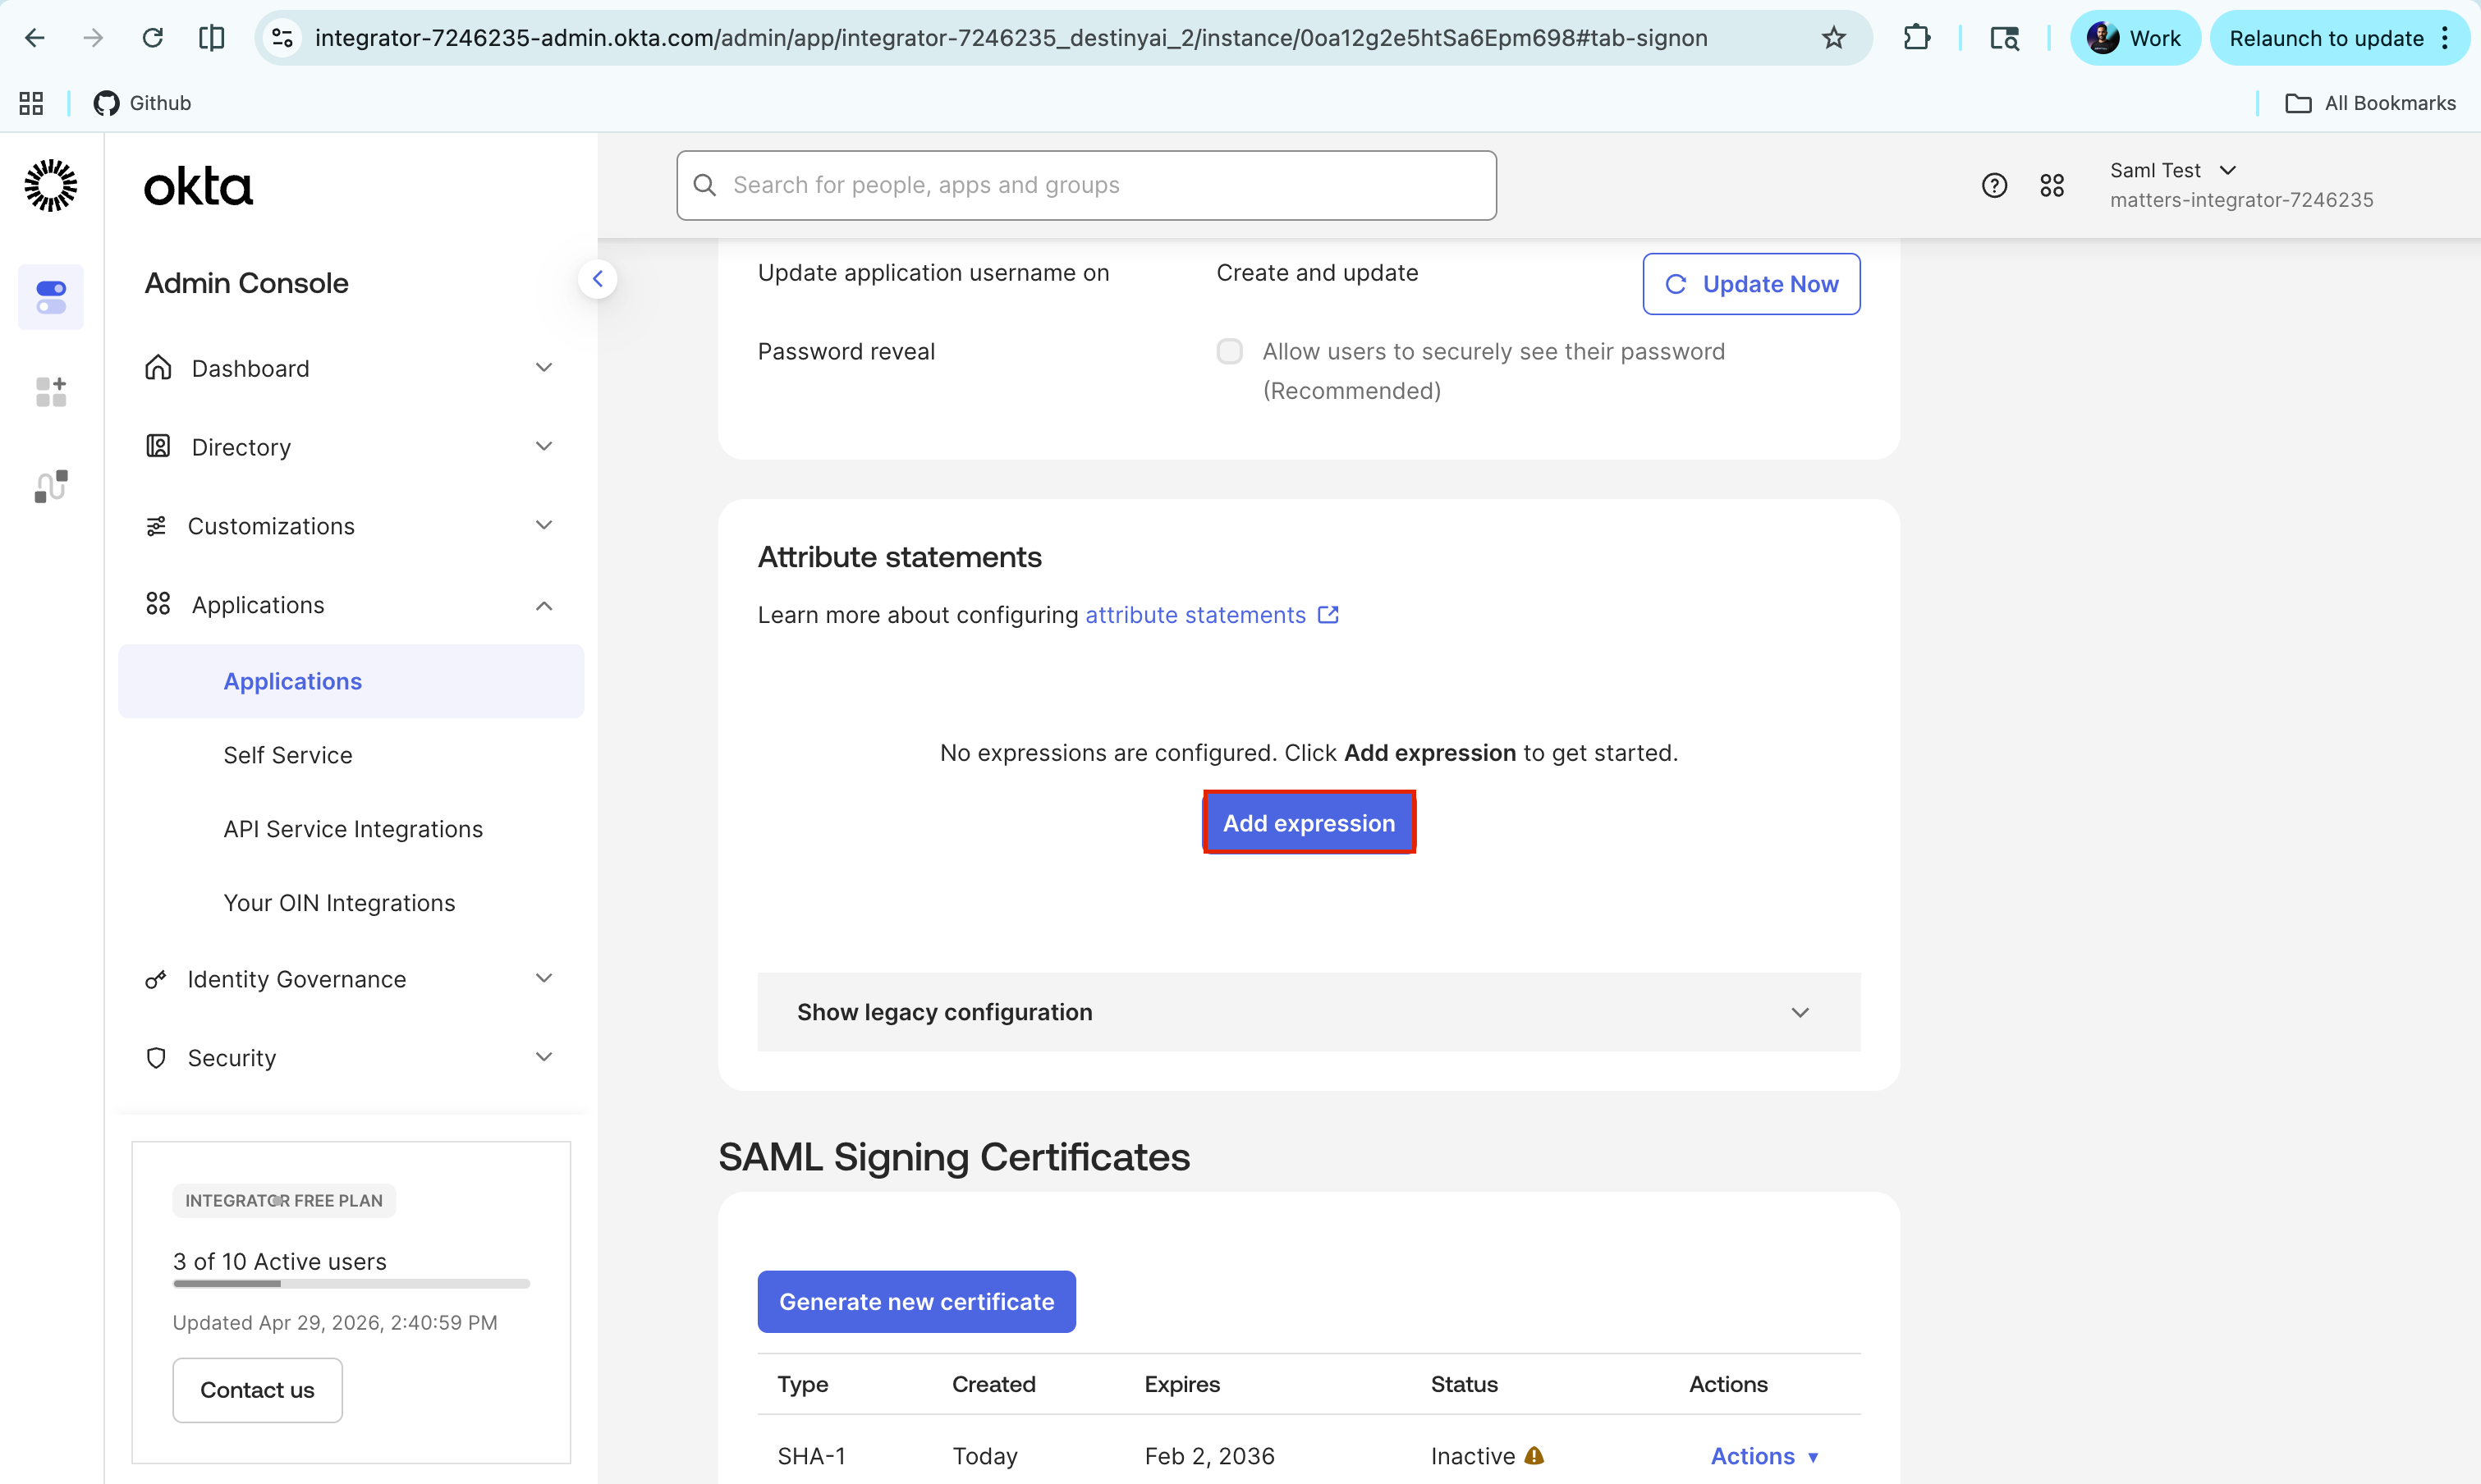
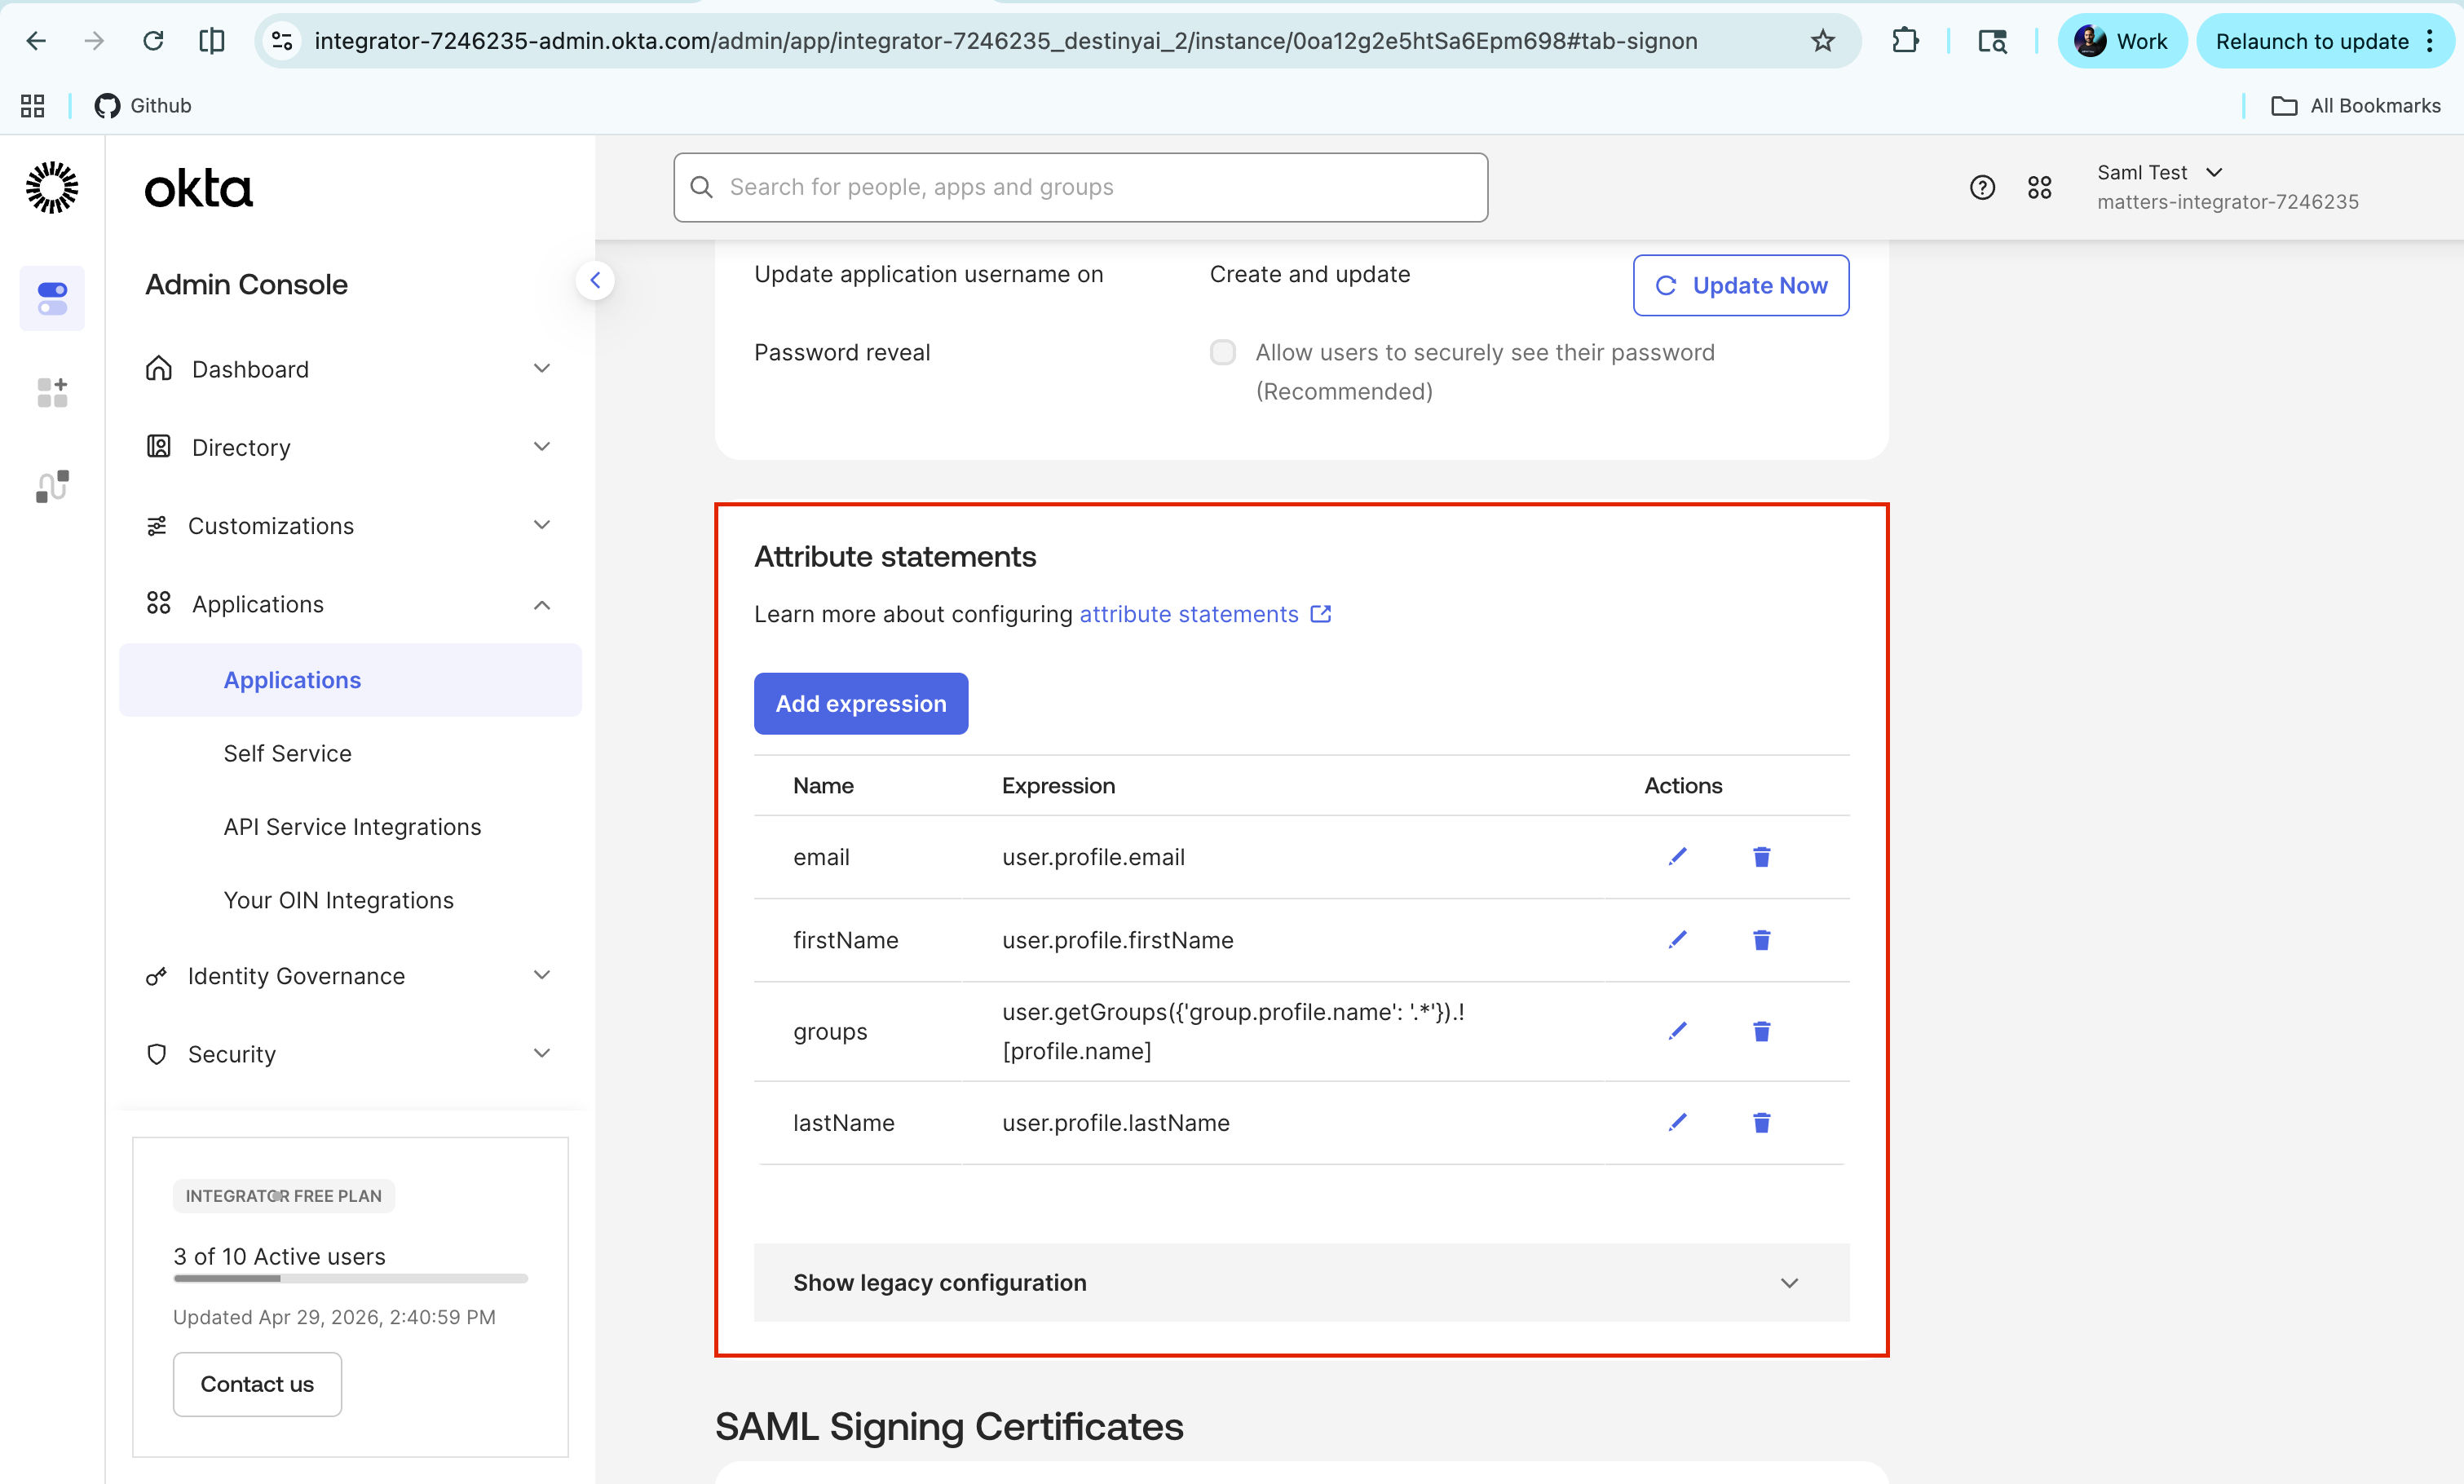
Add the following attributes exactly as shown below.(These attribute names are case-sensitive.)
Attribute Name | Value |
|---|---|
|
|
|
|
|
|
|
|
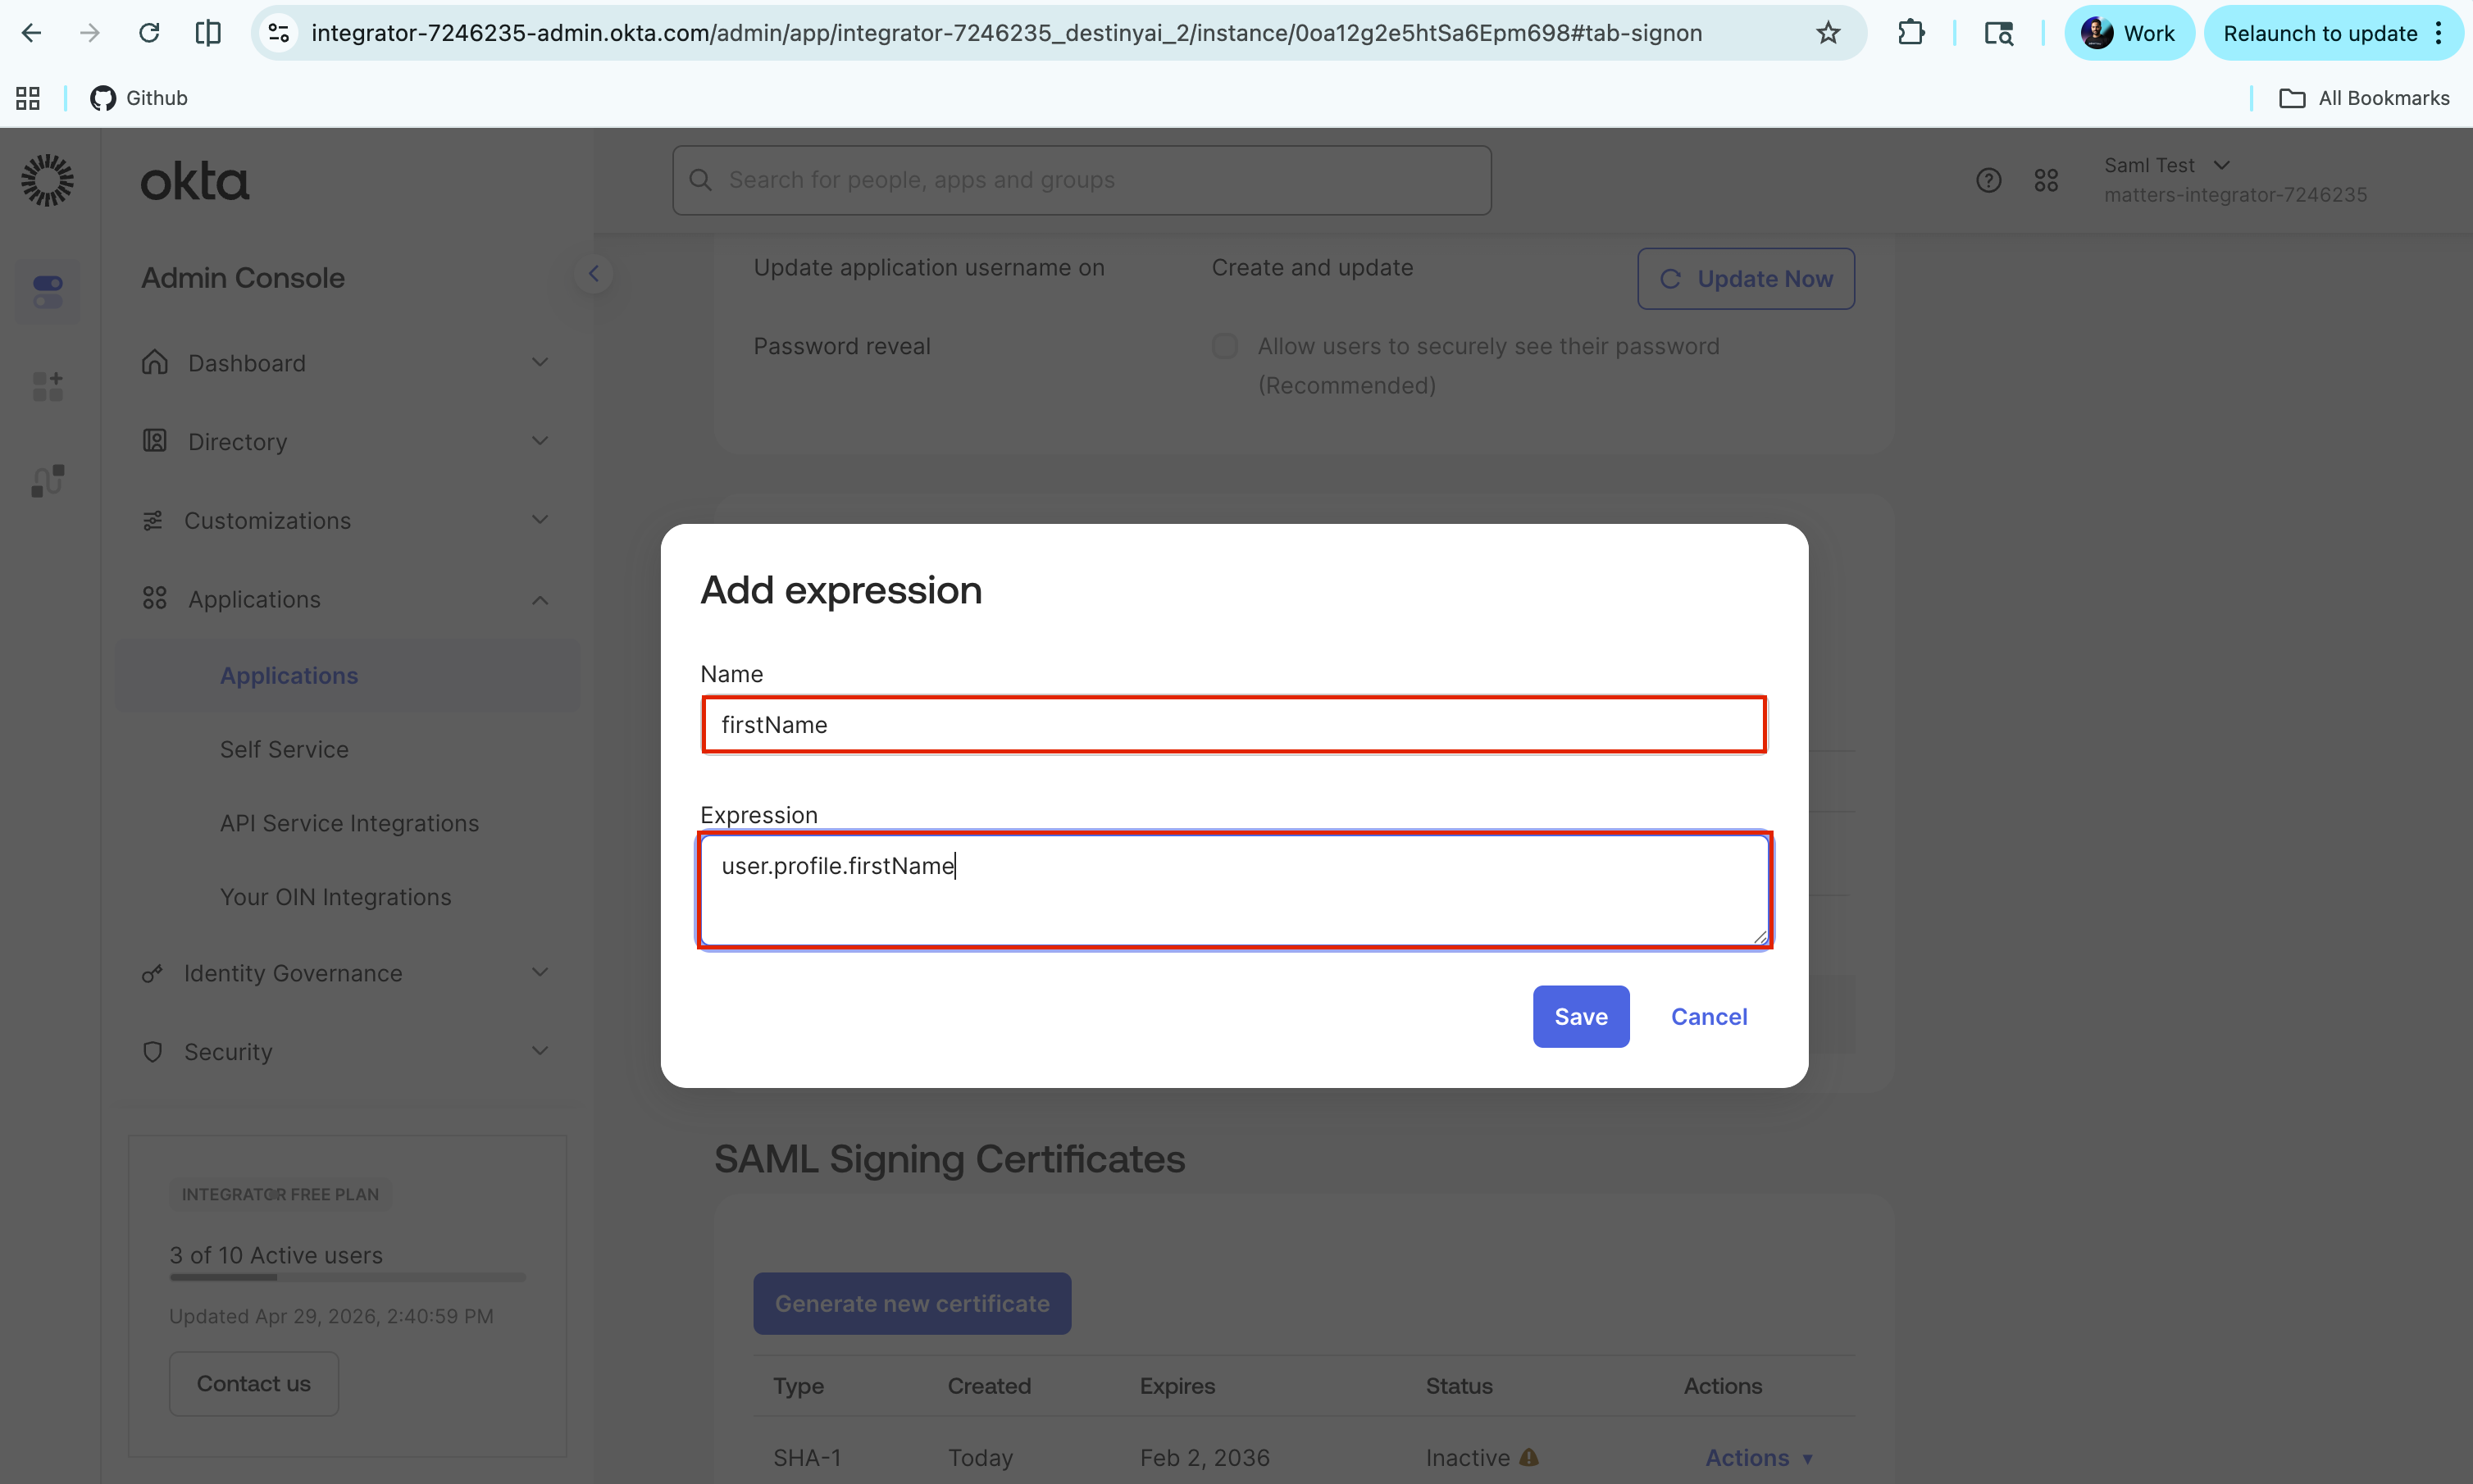
Confirm that all required attributes are added correctly.
Step 3: Create a User in Okta
Go to Directory → People.
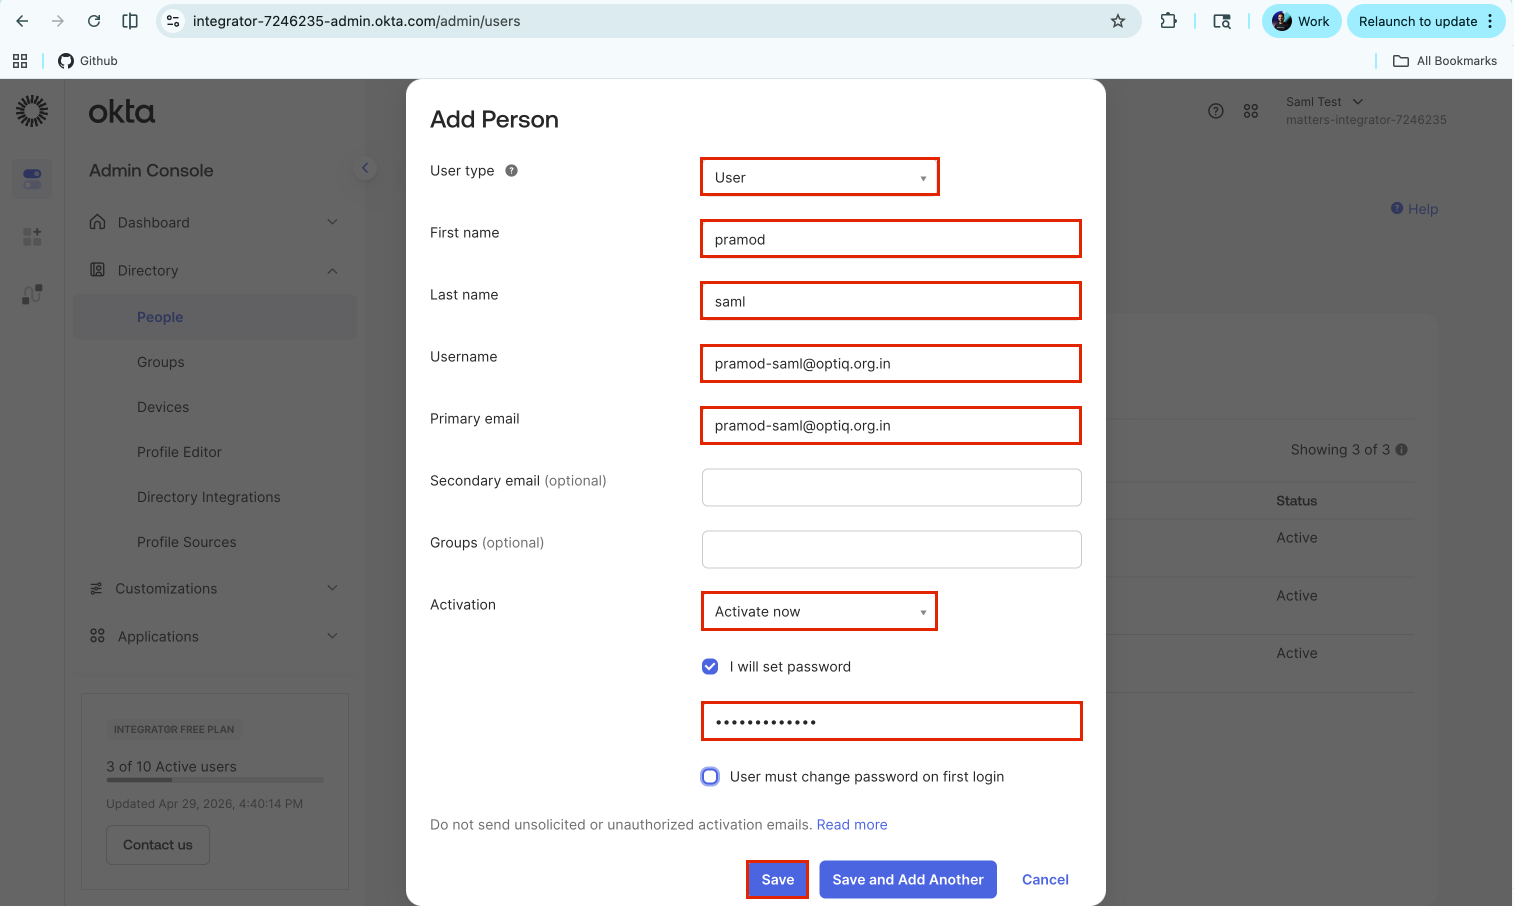
Click Add person.
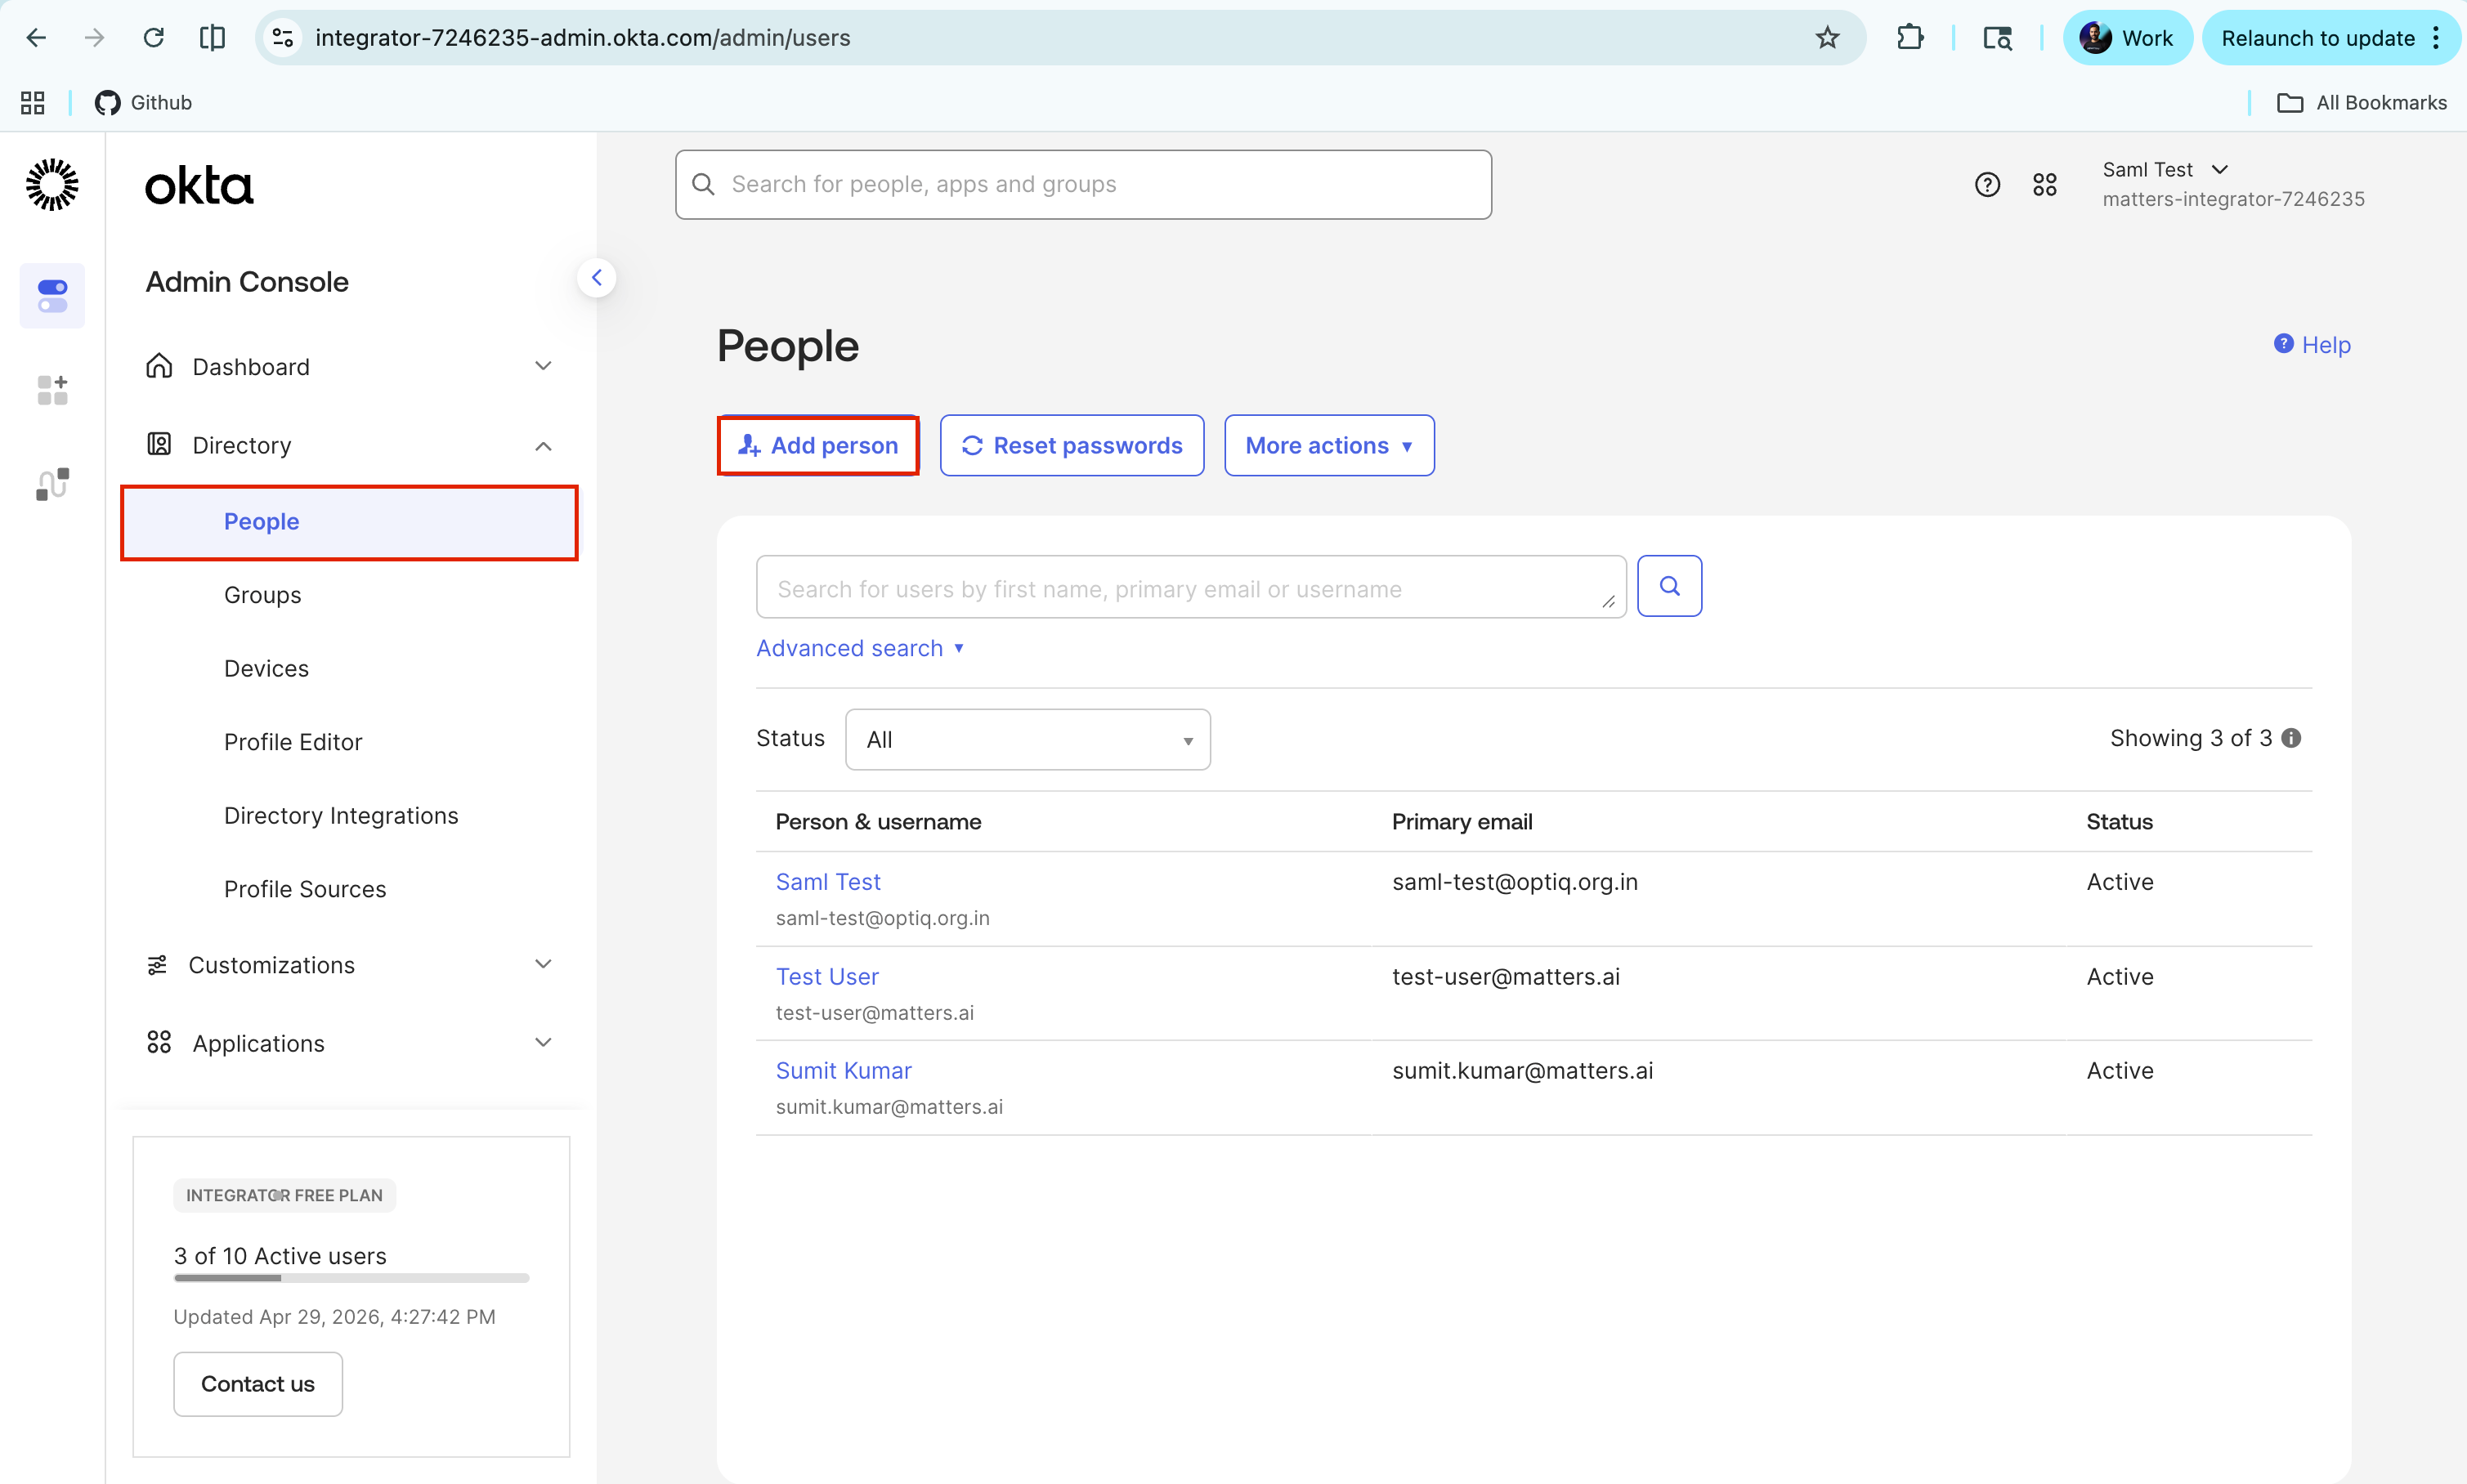
Enter the following details:
First name
Last name
Username, usually the email address
Primary email
Select the activation option:
Choose Activate now if the user should receive login setup immediately.
Or create the user first and activate later.
Click Save.
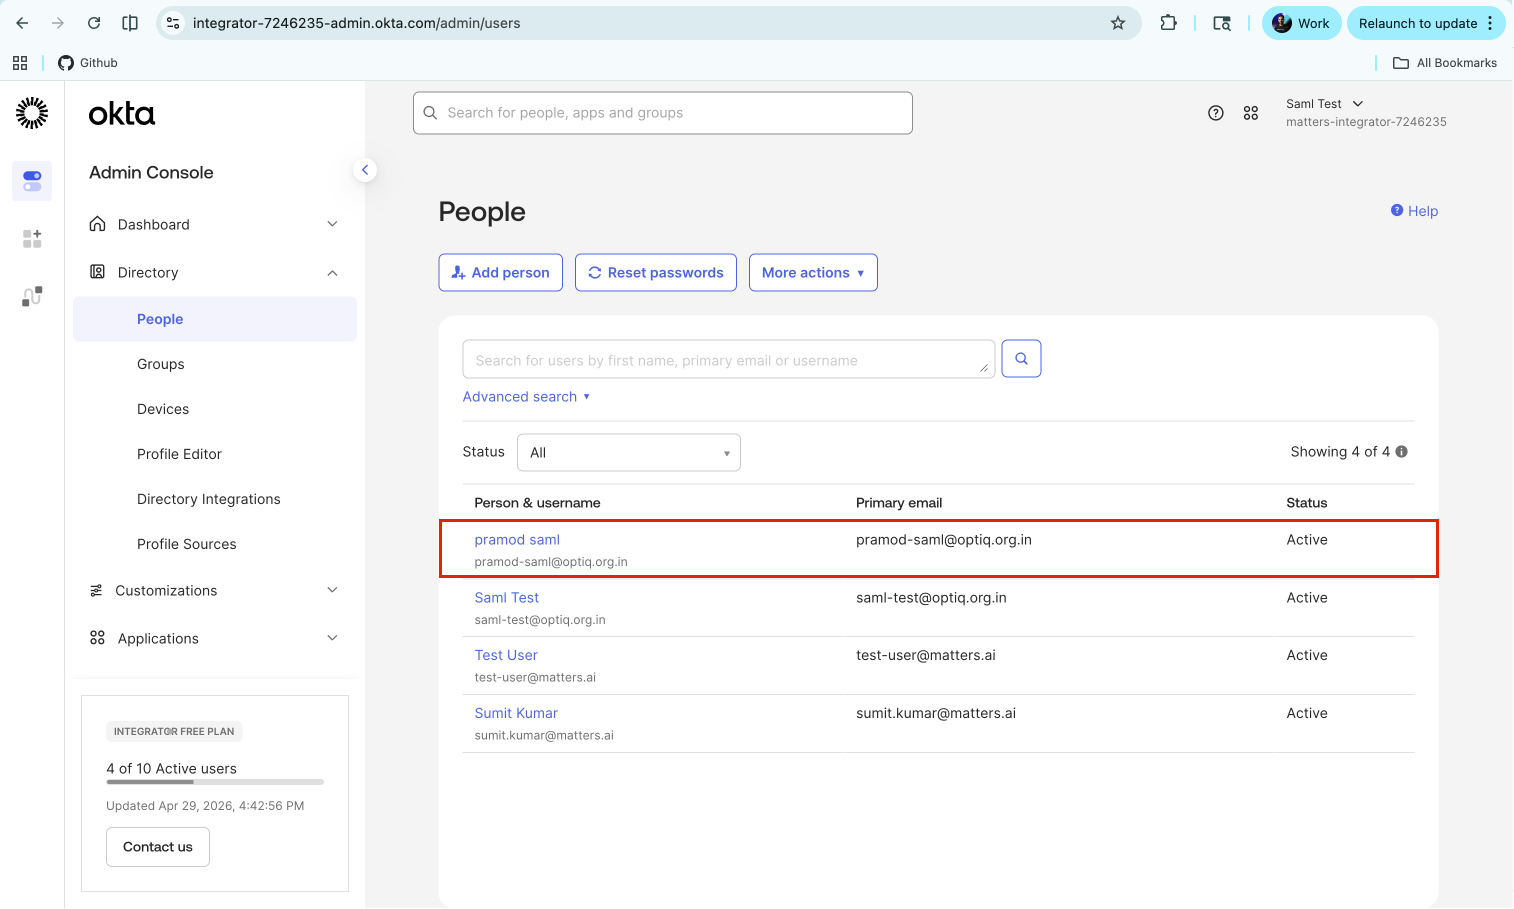
Confirm the user is added
Step 4: Create a Group in Okta
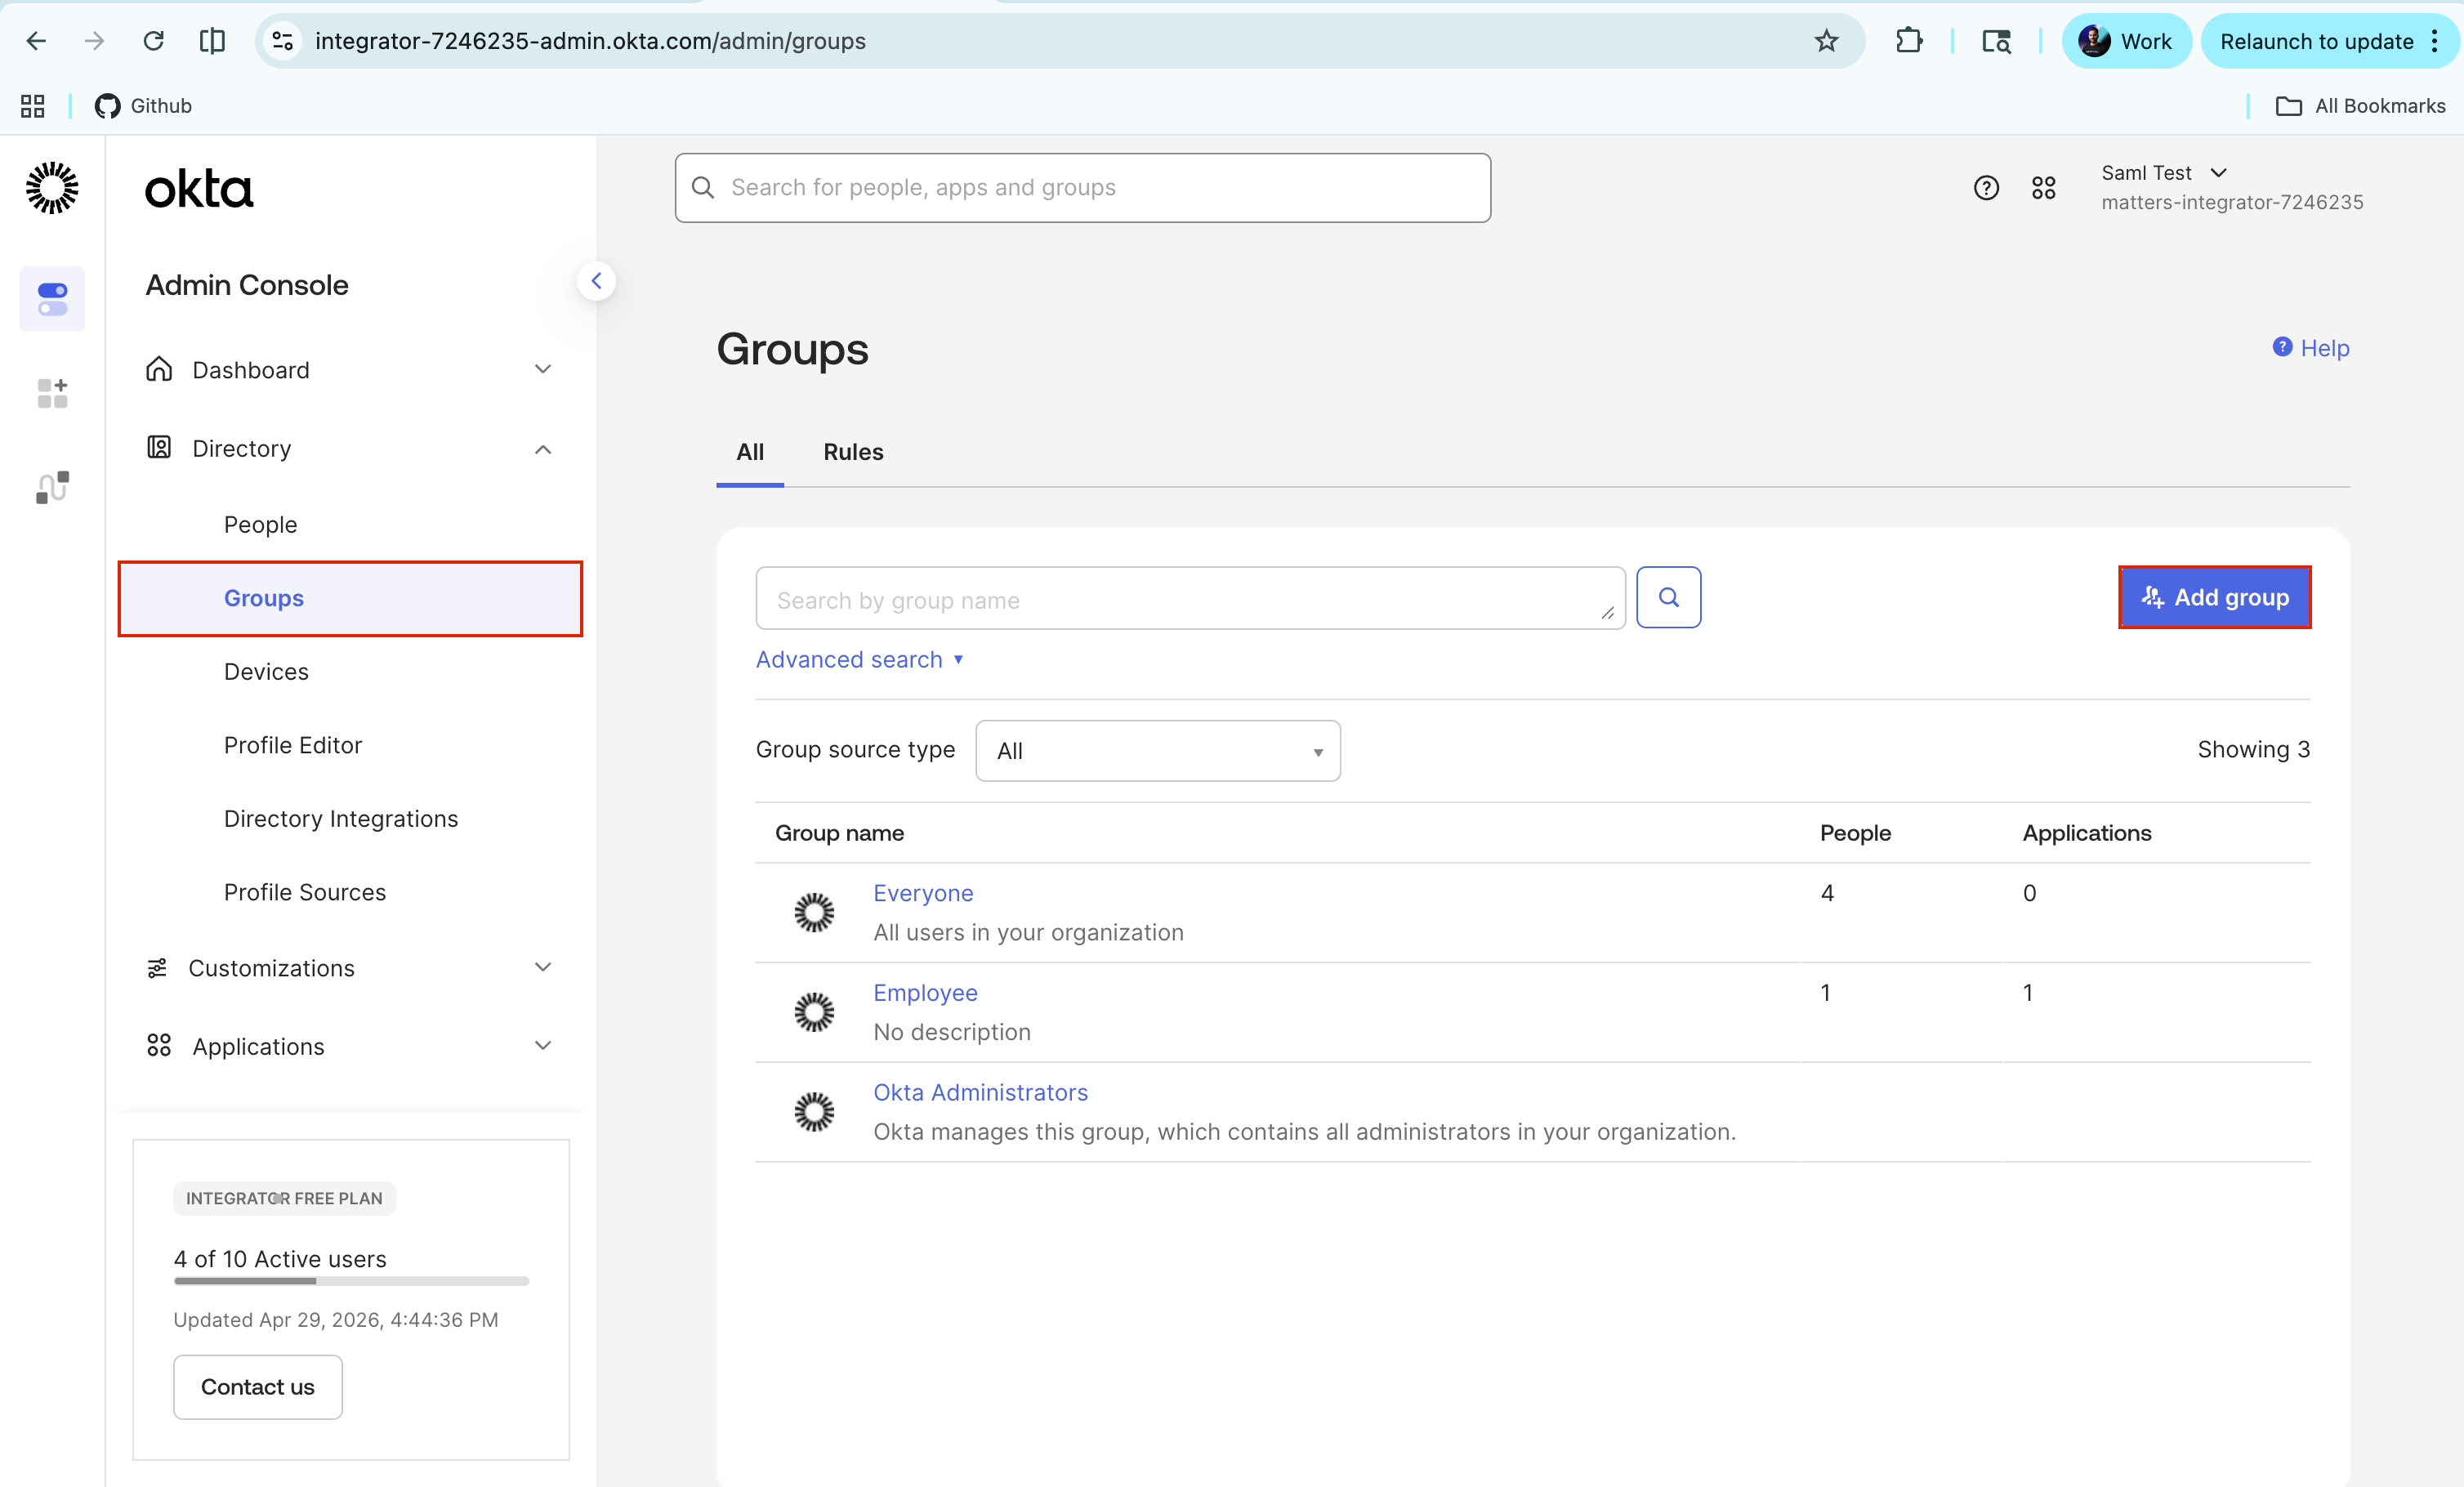
Go to Directory → Groups.
Click Add group.
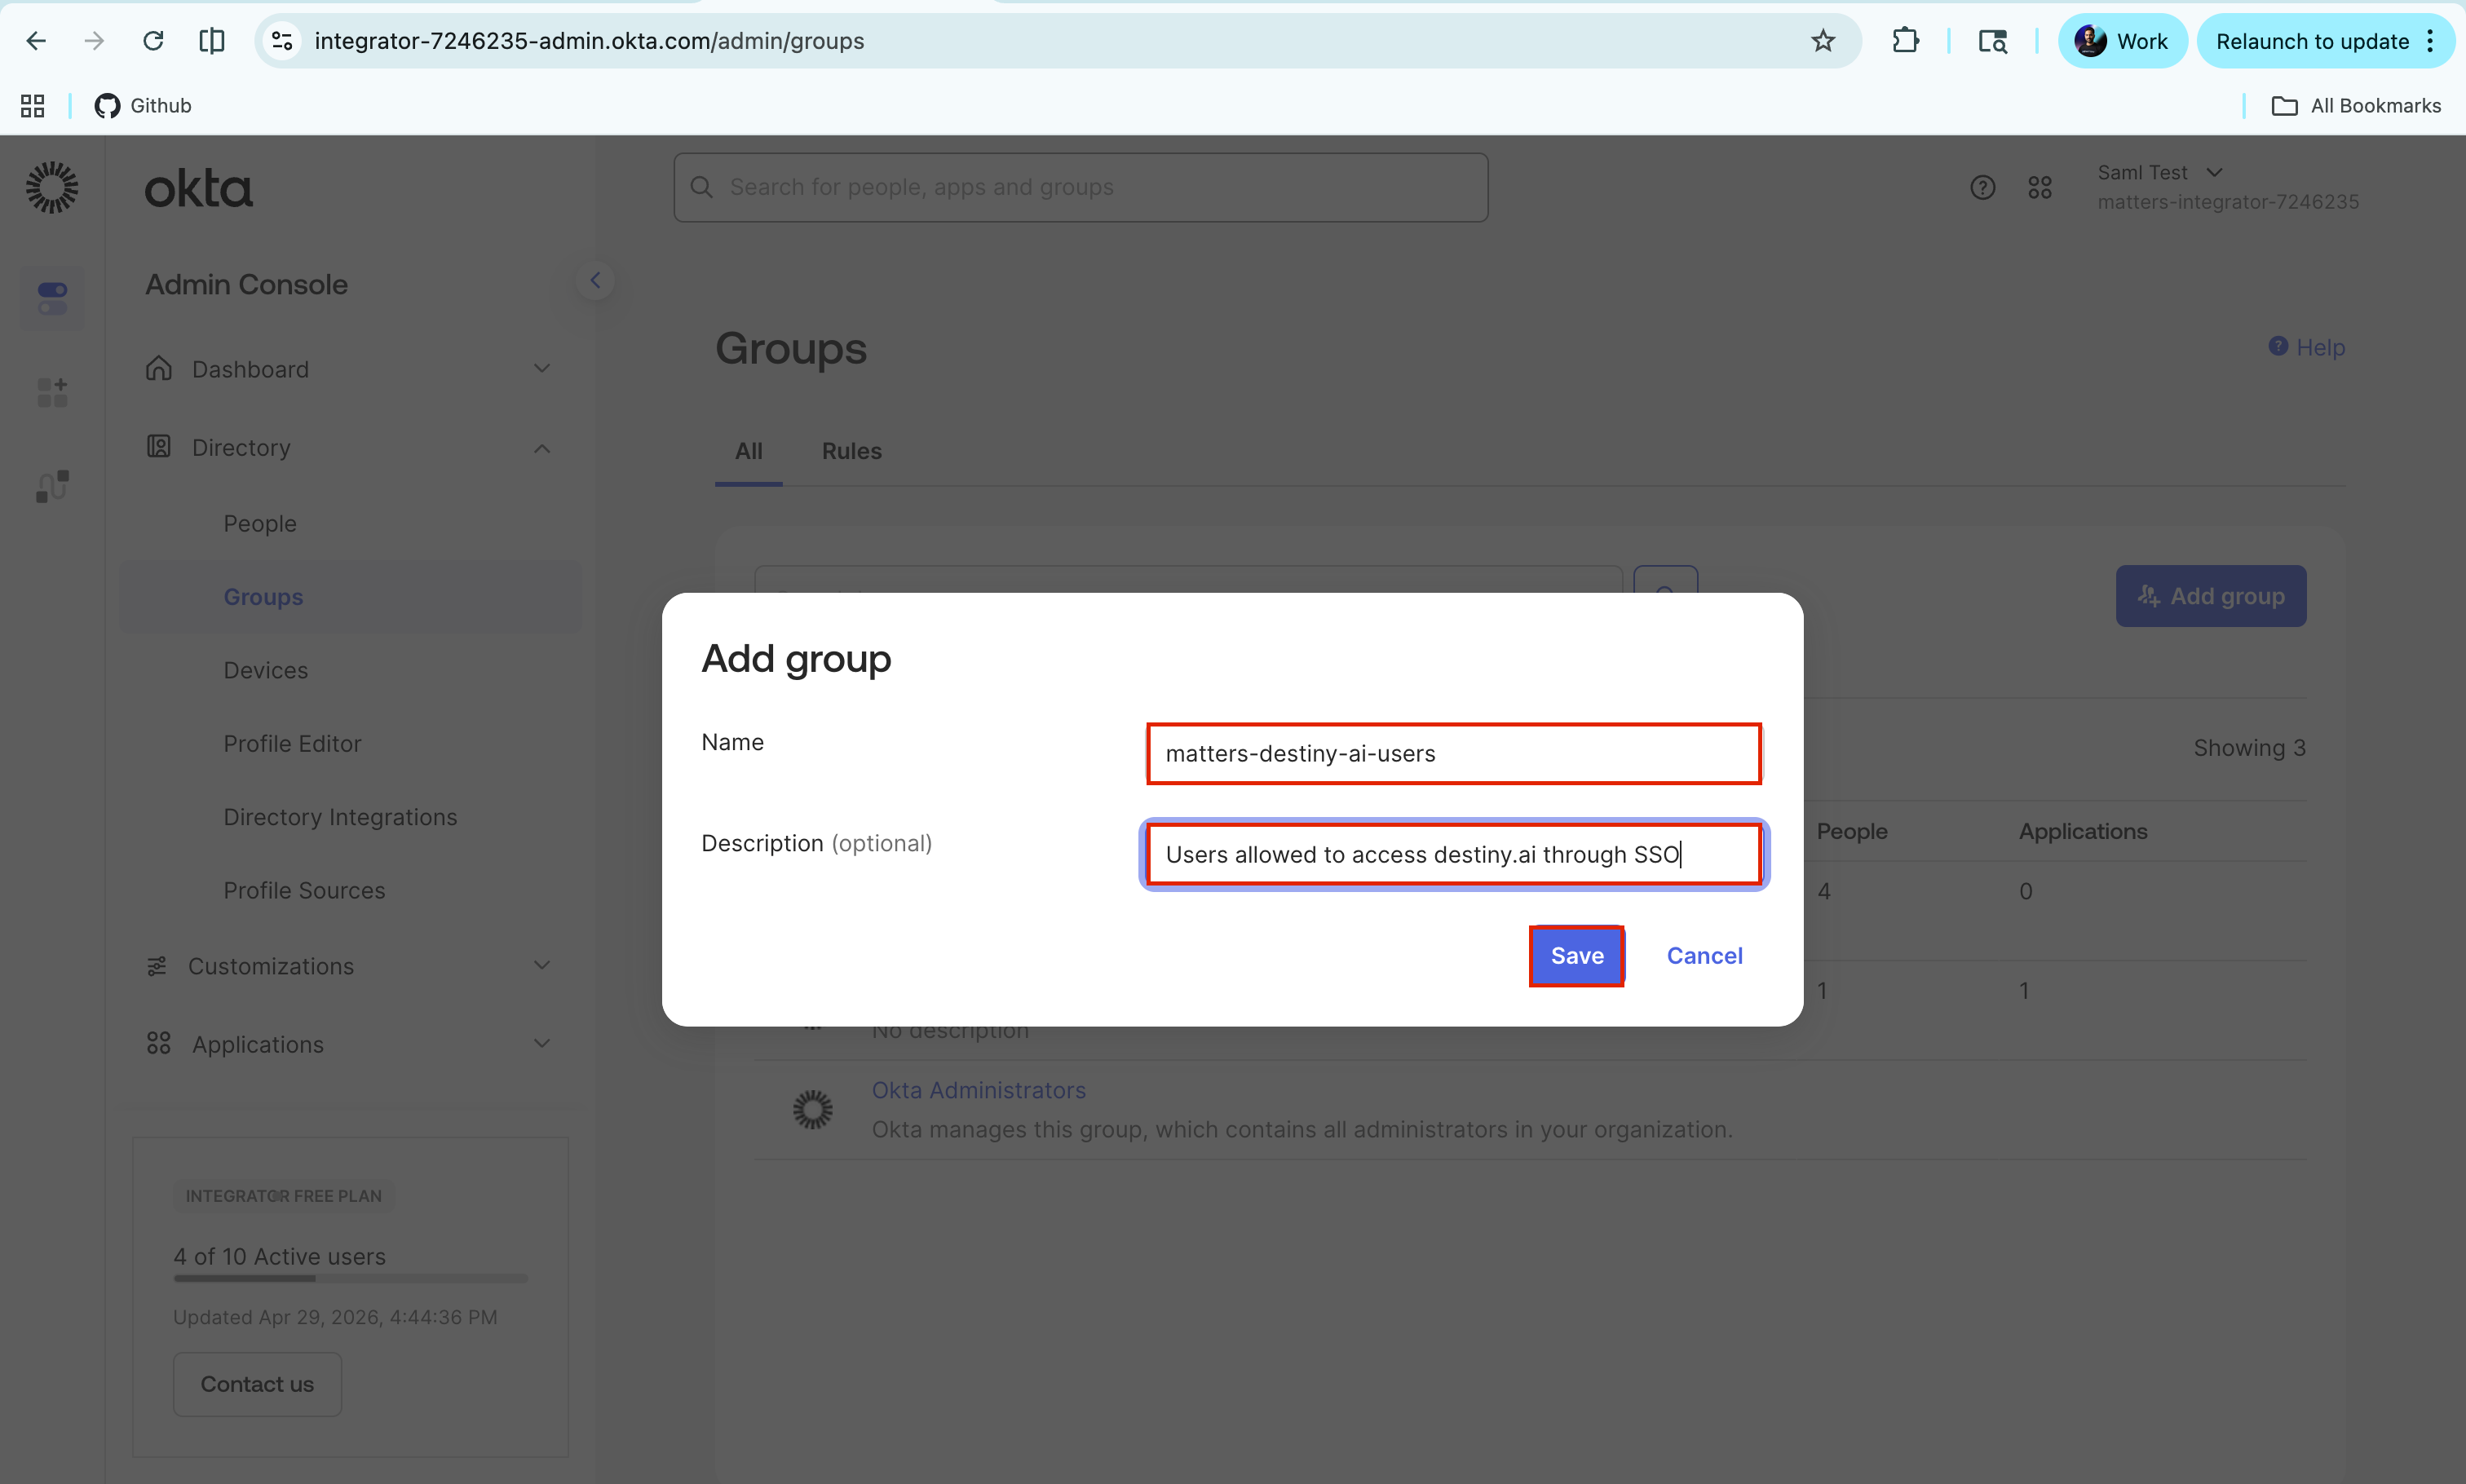
Enter a group name, eg:
matters-destiny-ai-usersAdd a description, eg :
Users allowed to access destiny.ai through SSOClick Save.
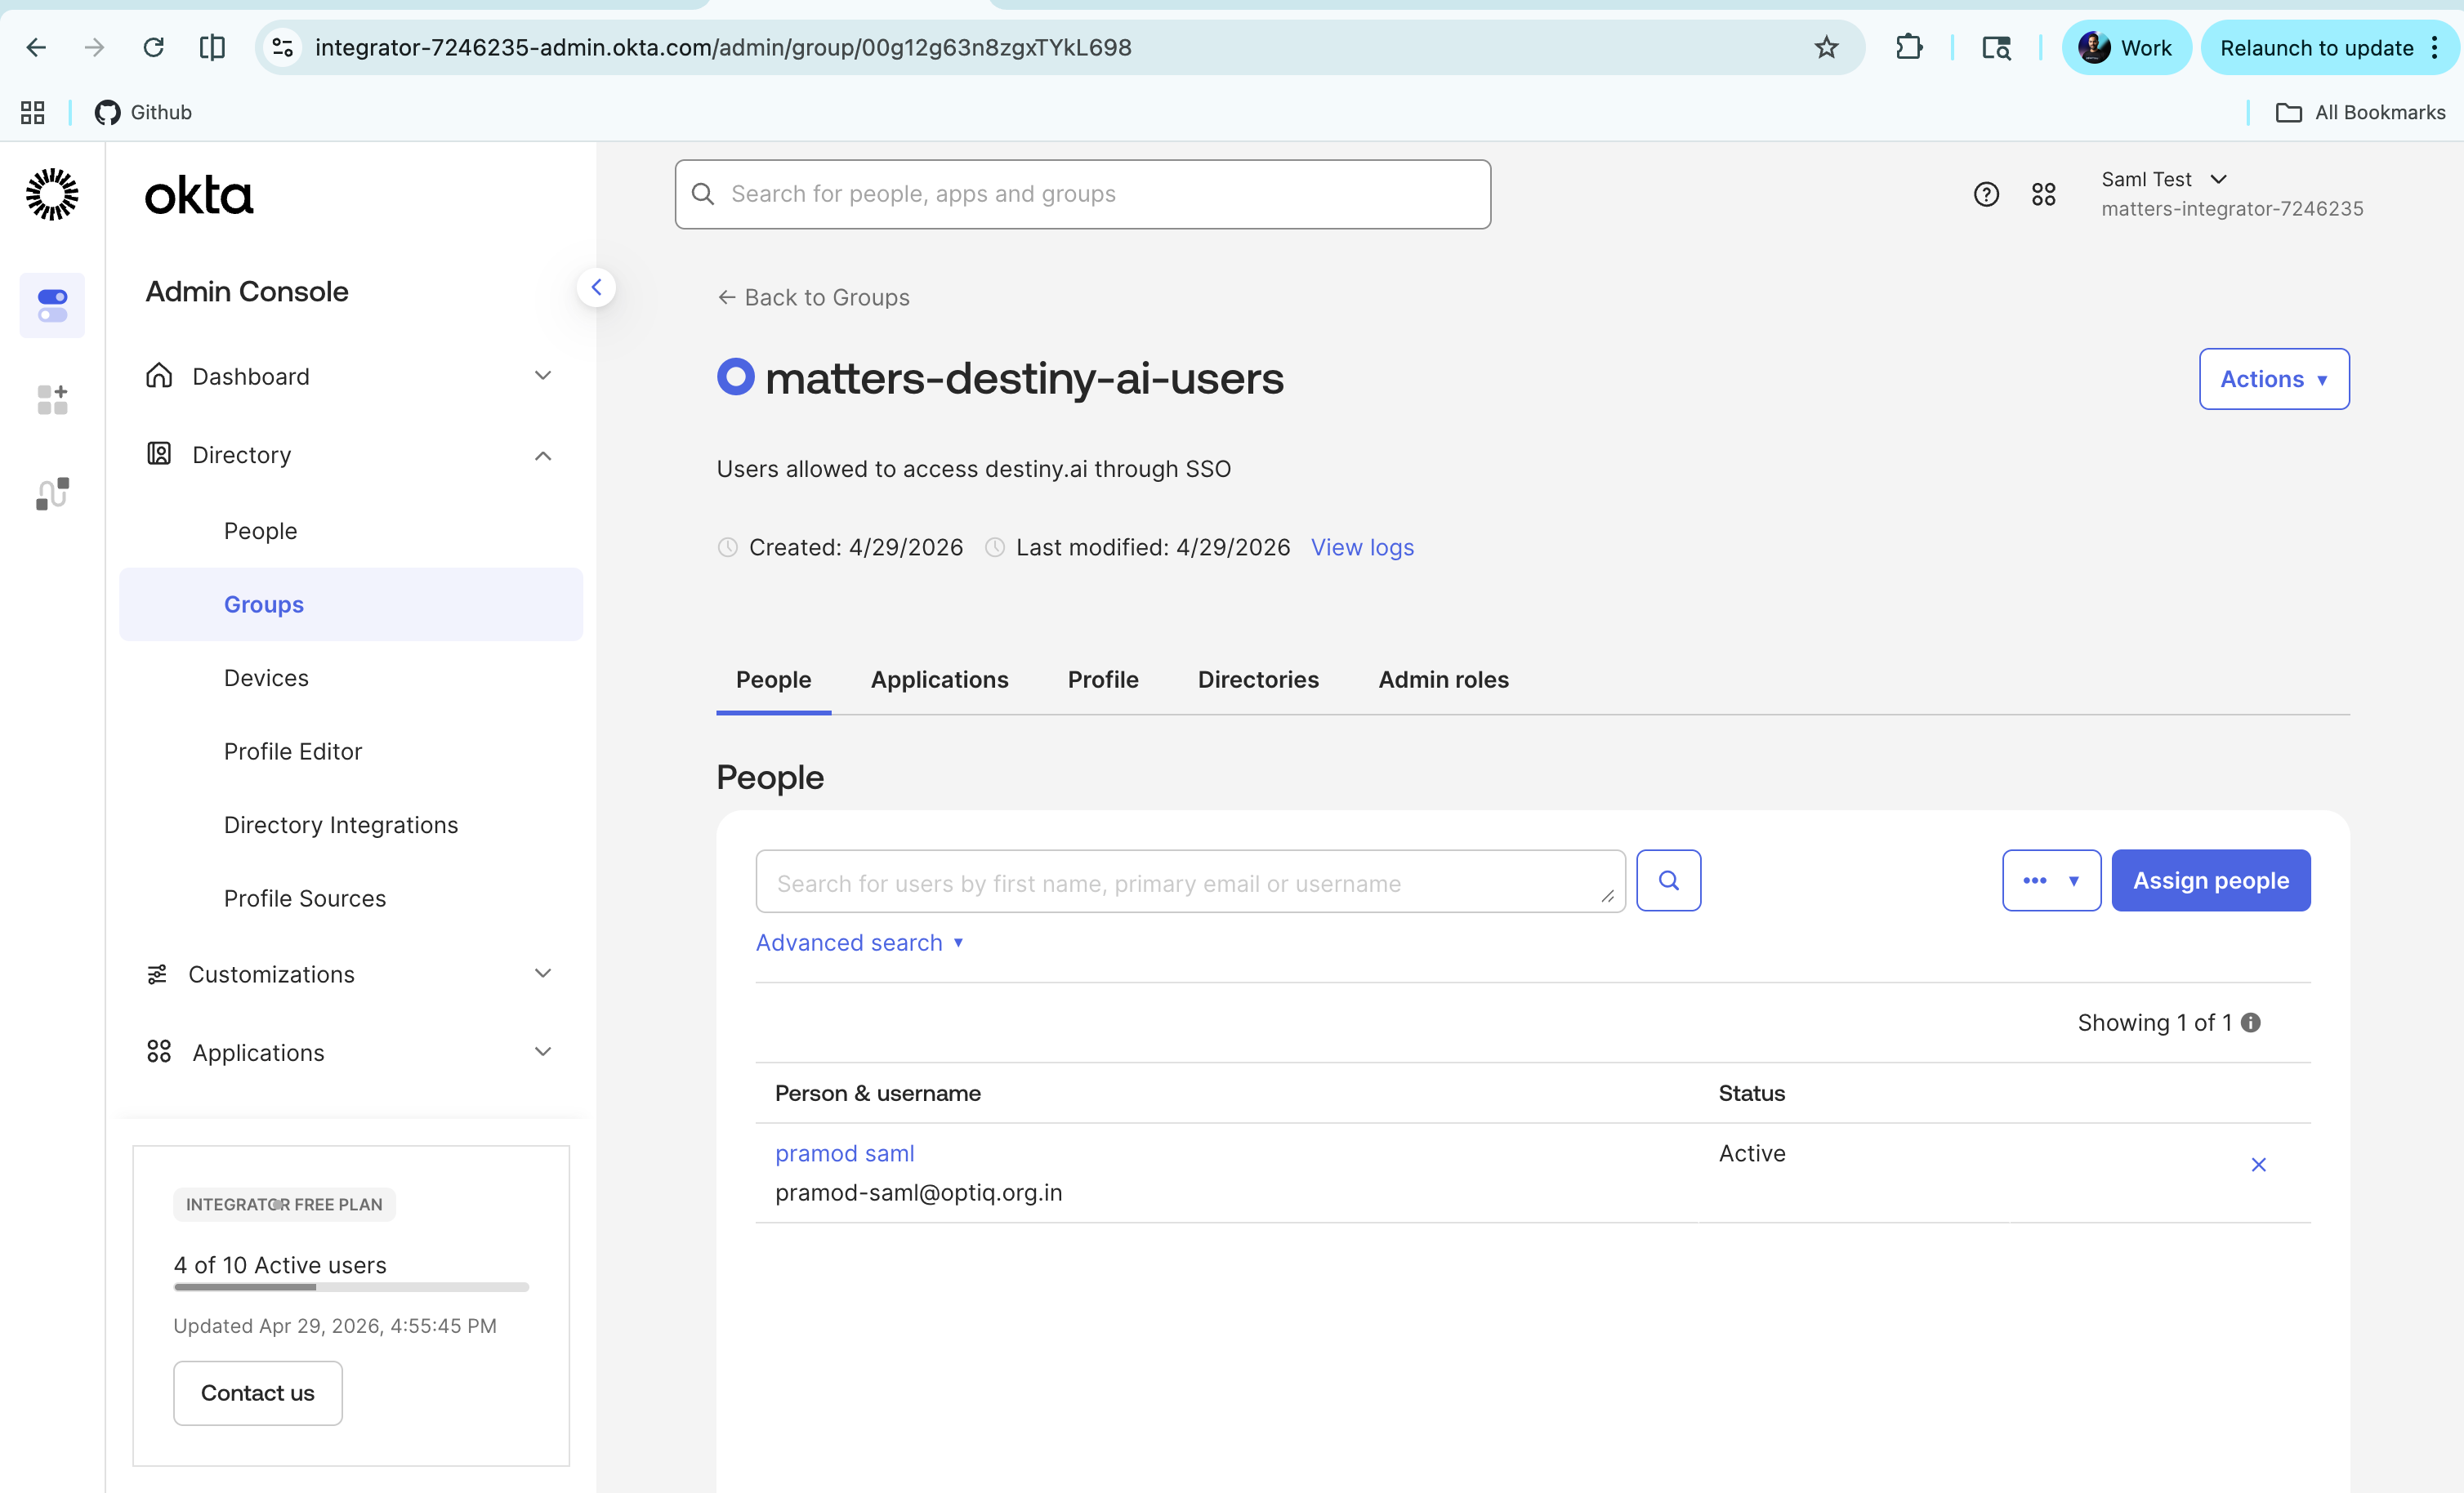
Step 5: Add Users to the Group
Go to Directory → Groups.
Open the group you created.
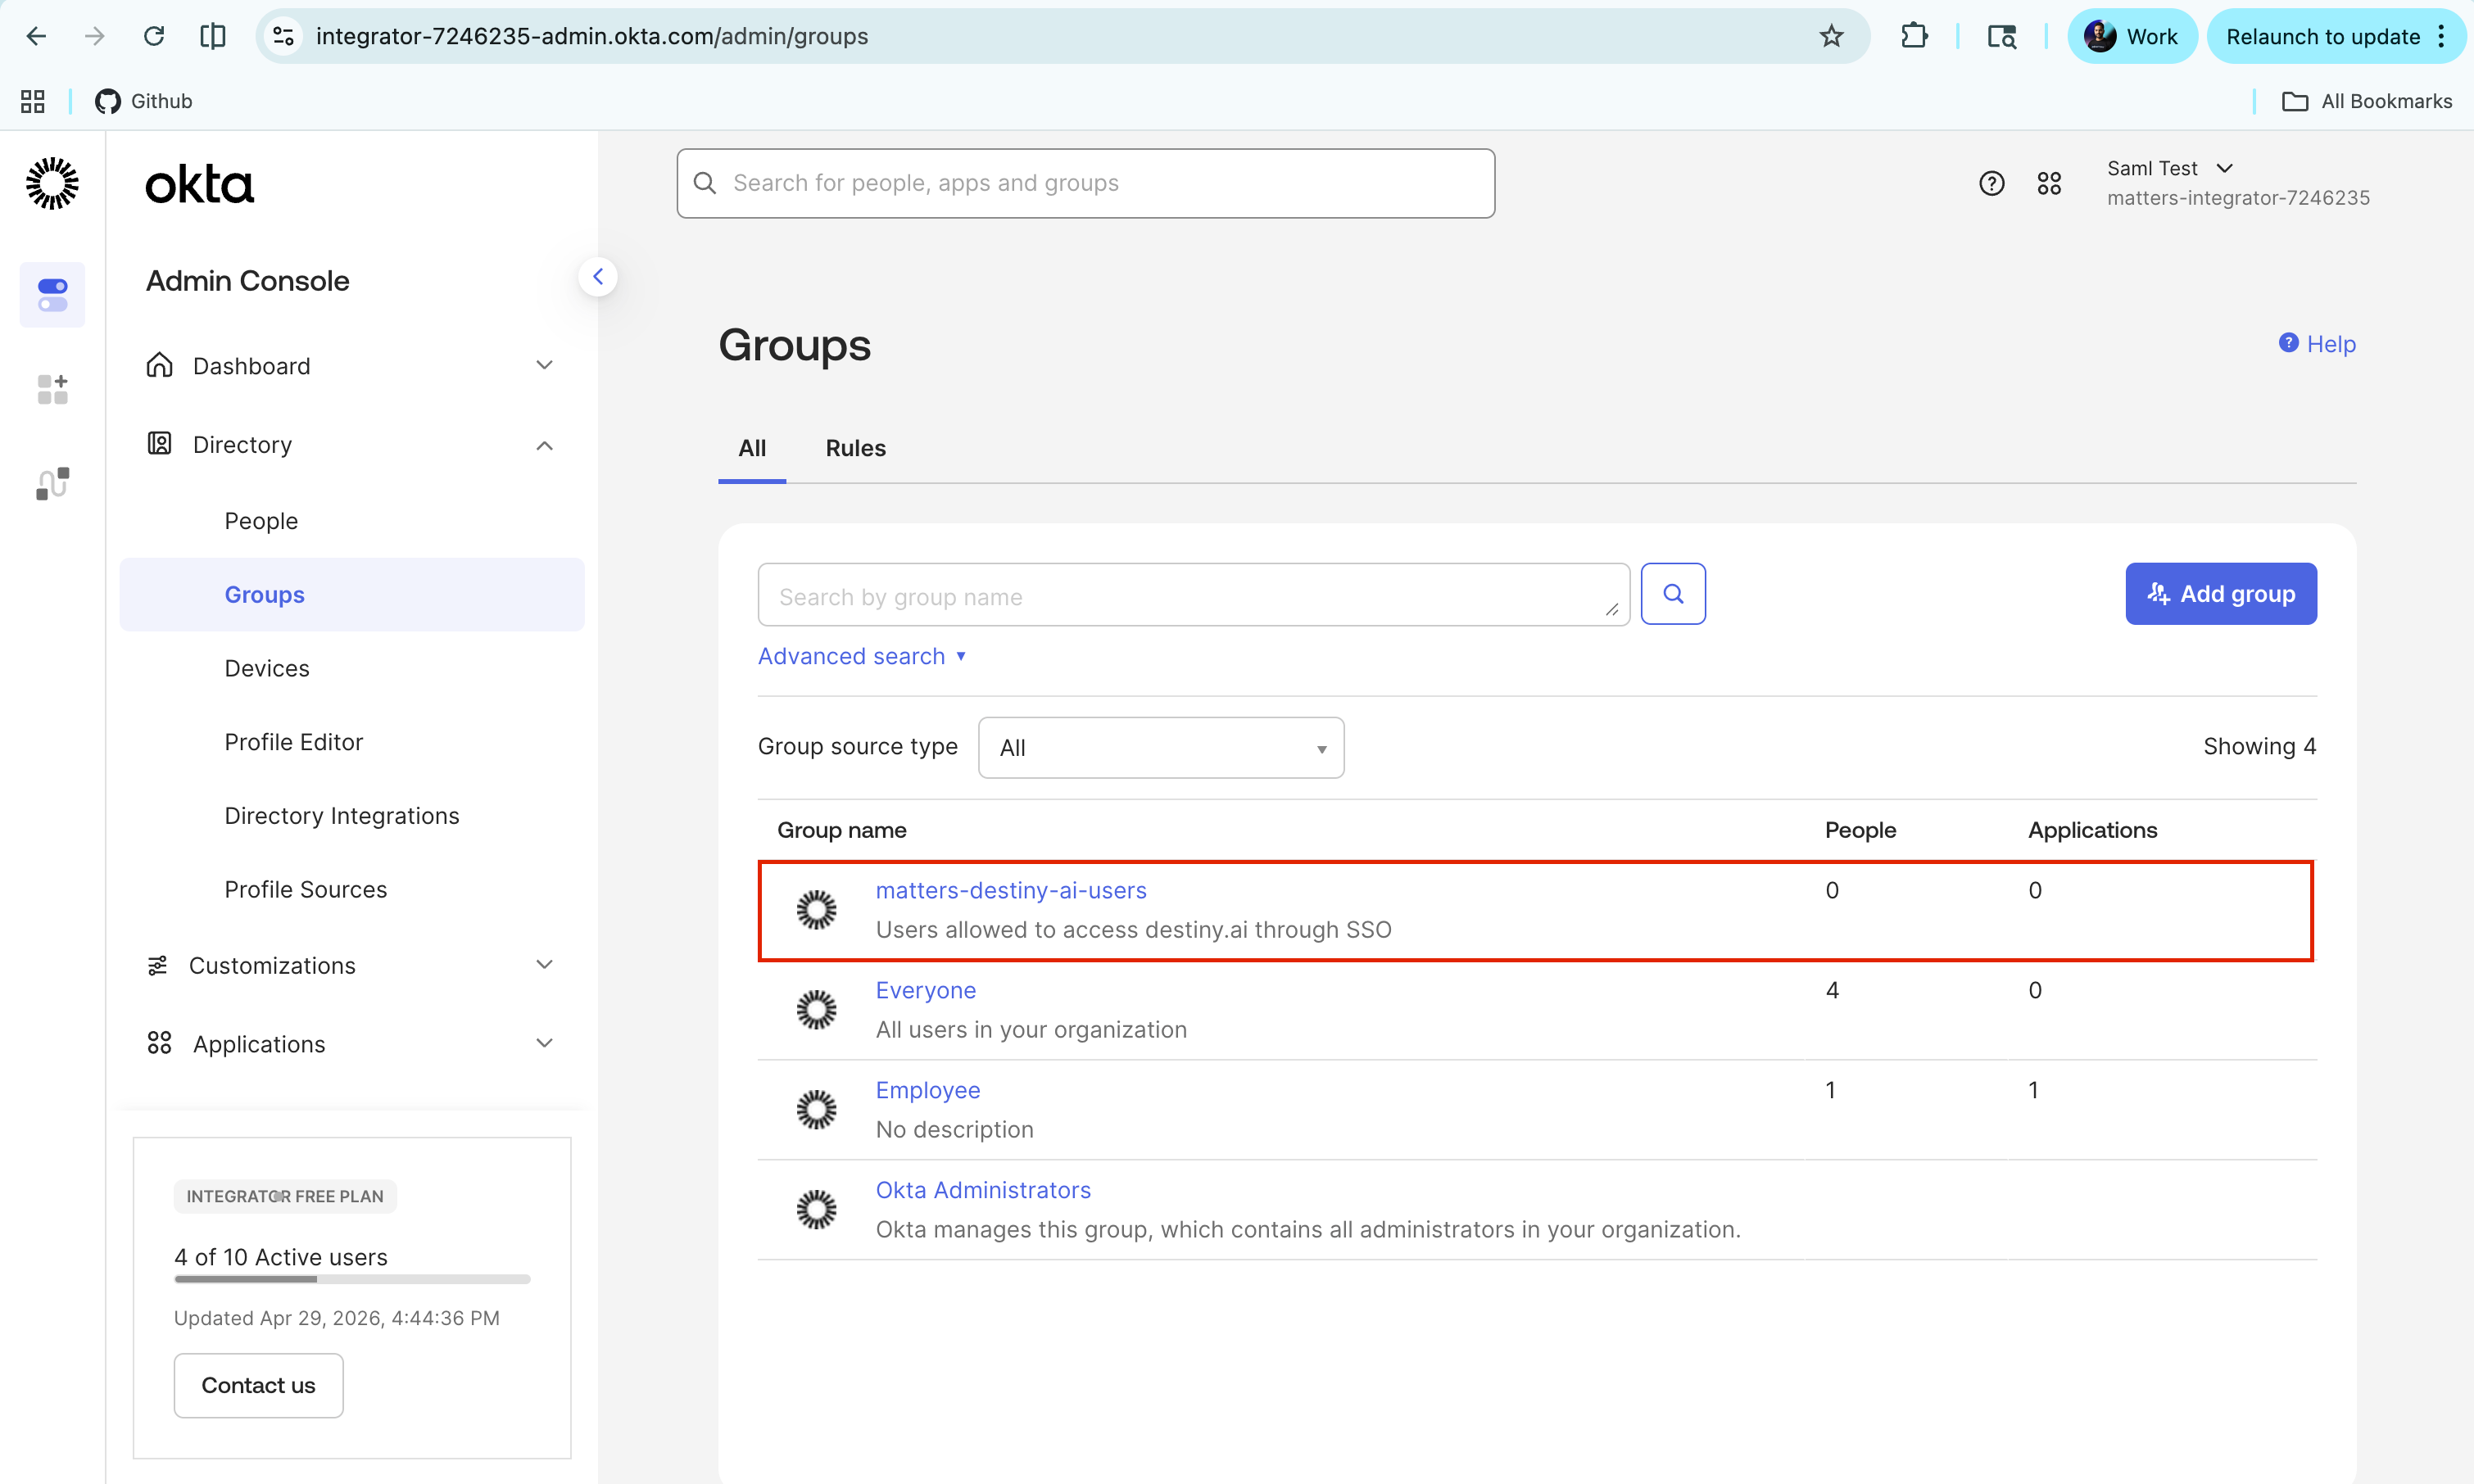
Go to the People tab and click on Assign people
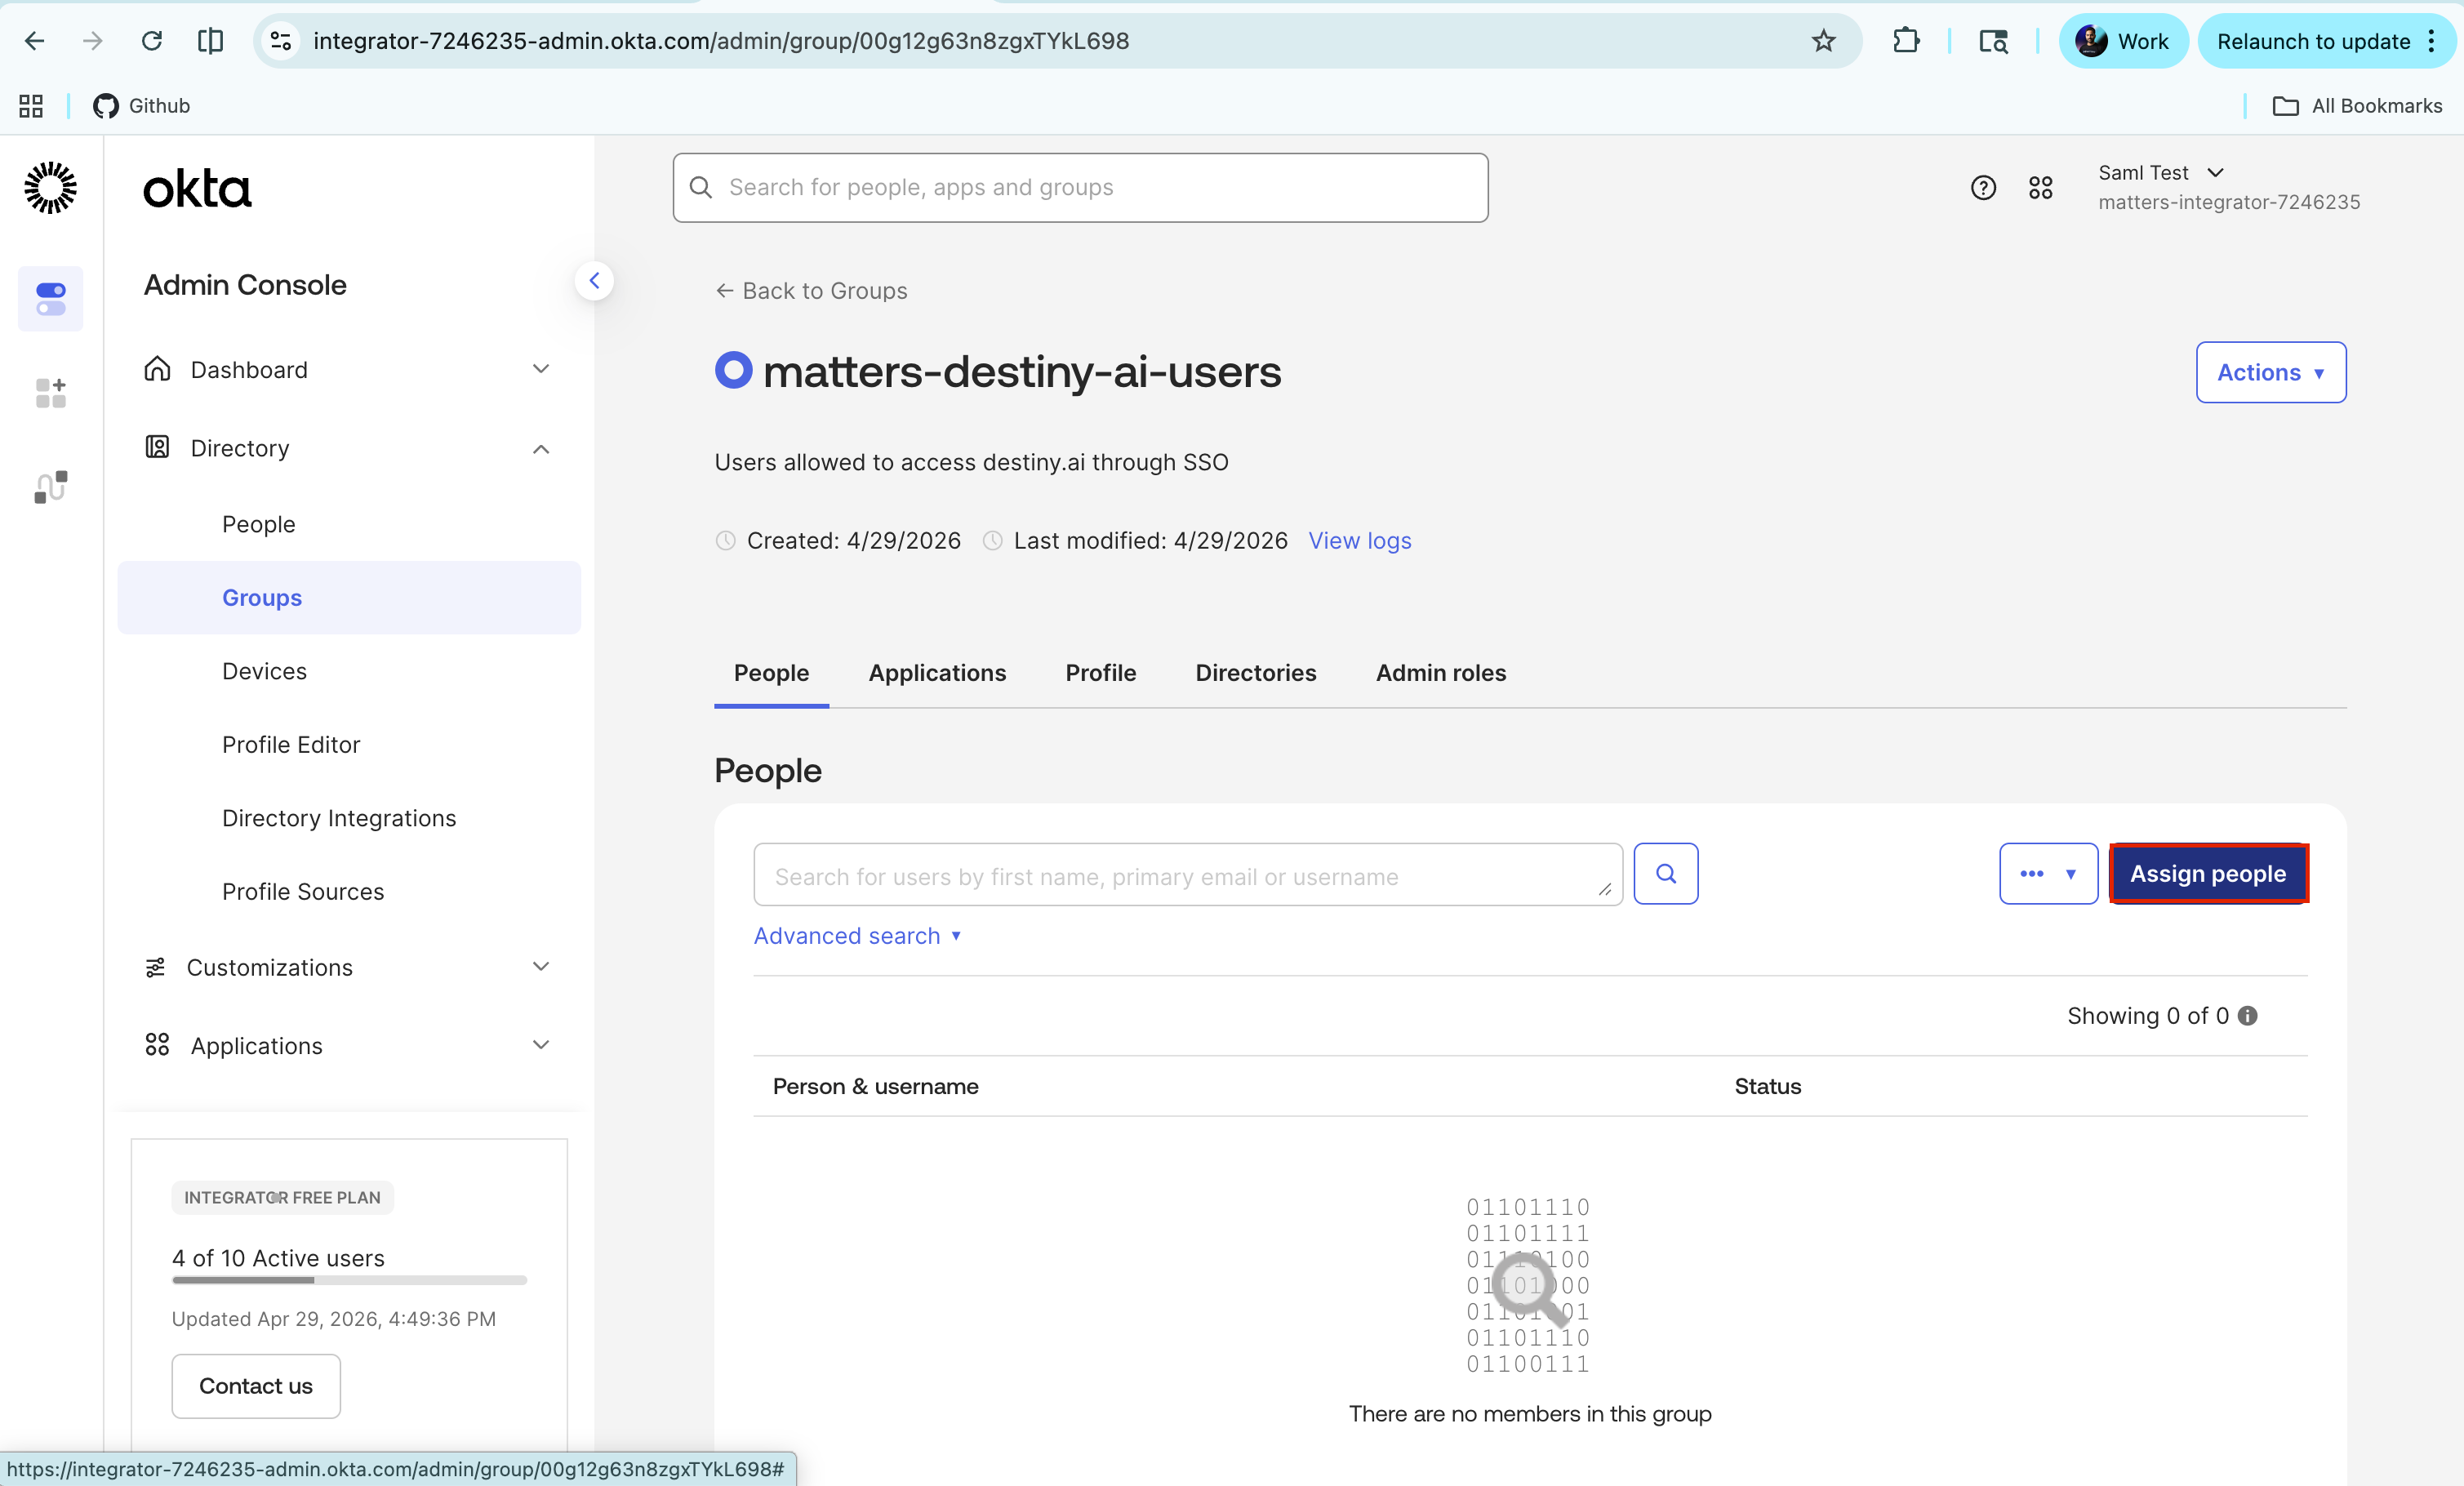
Search for the users who need access.
Add the users to the group.
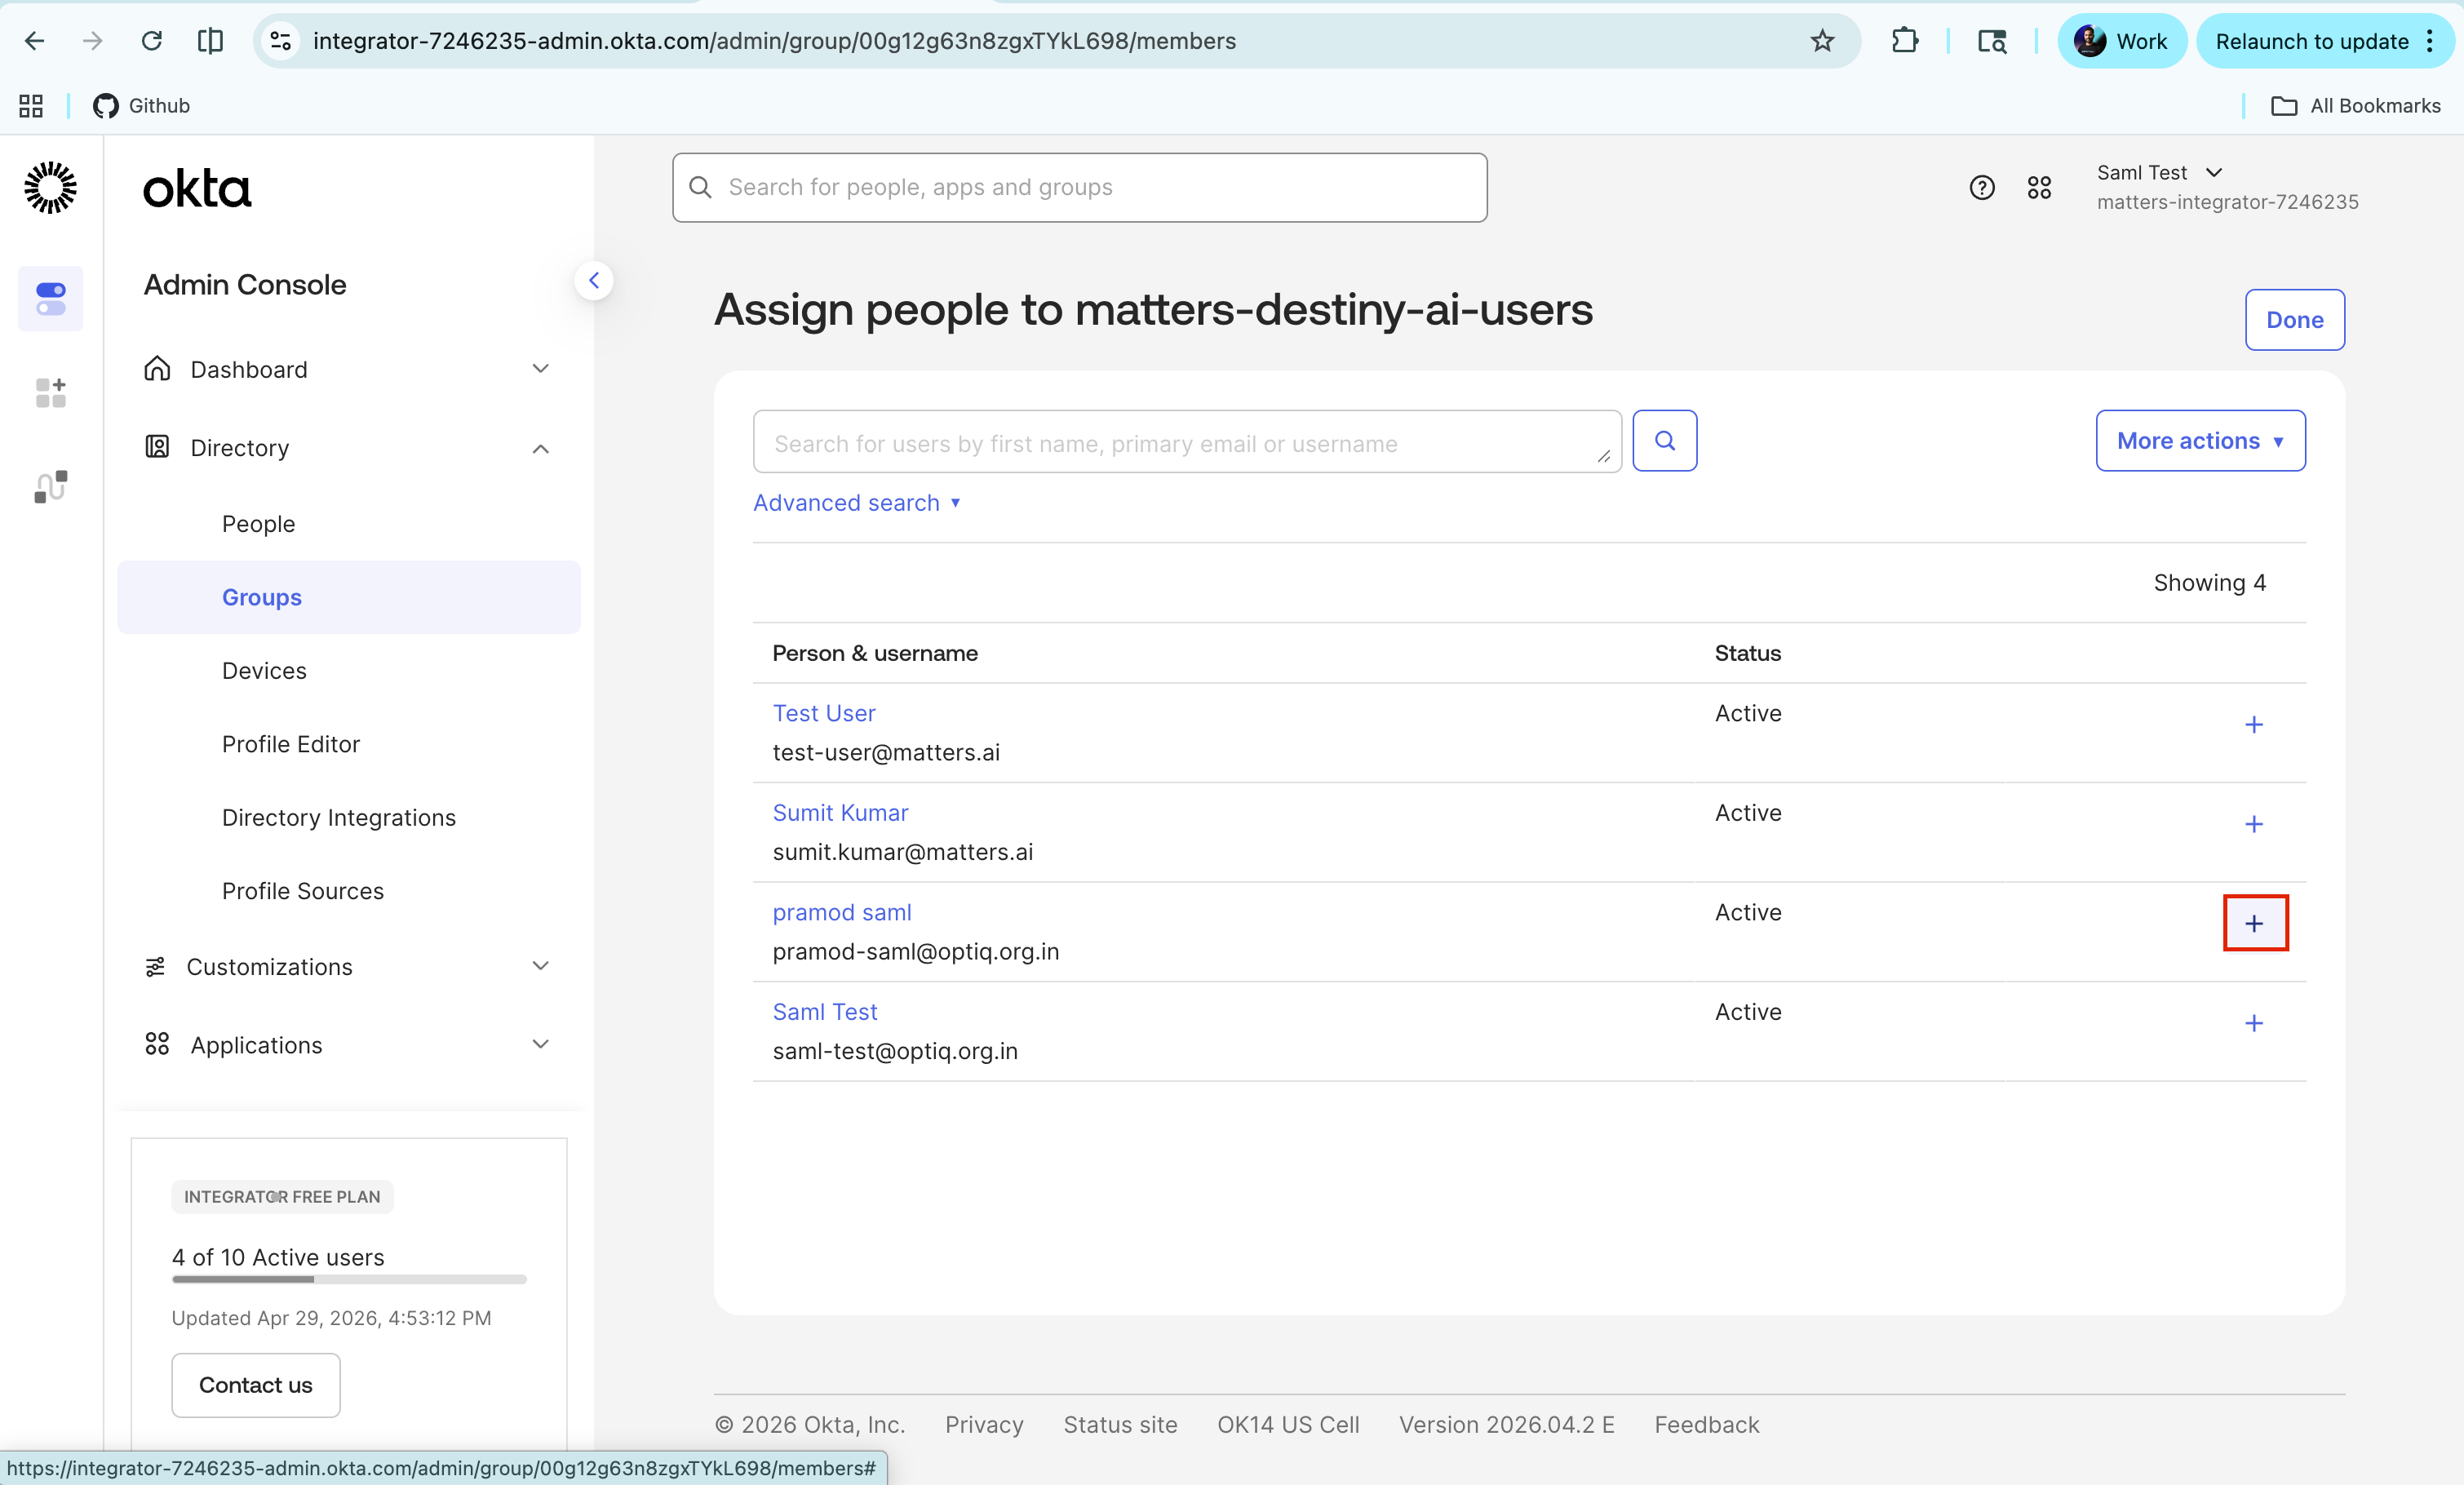
Click Done.
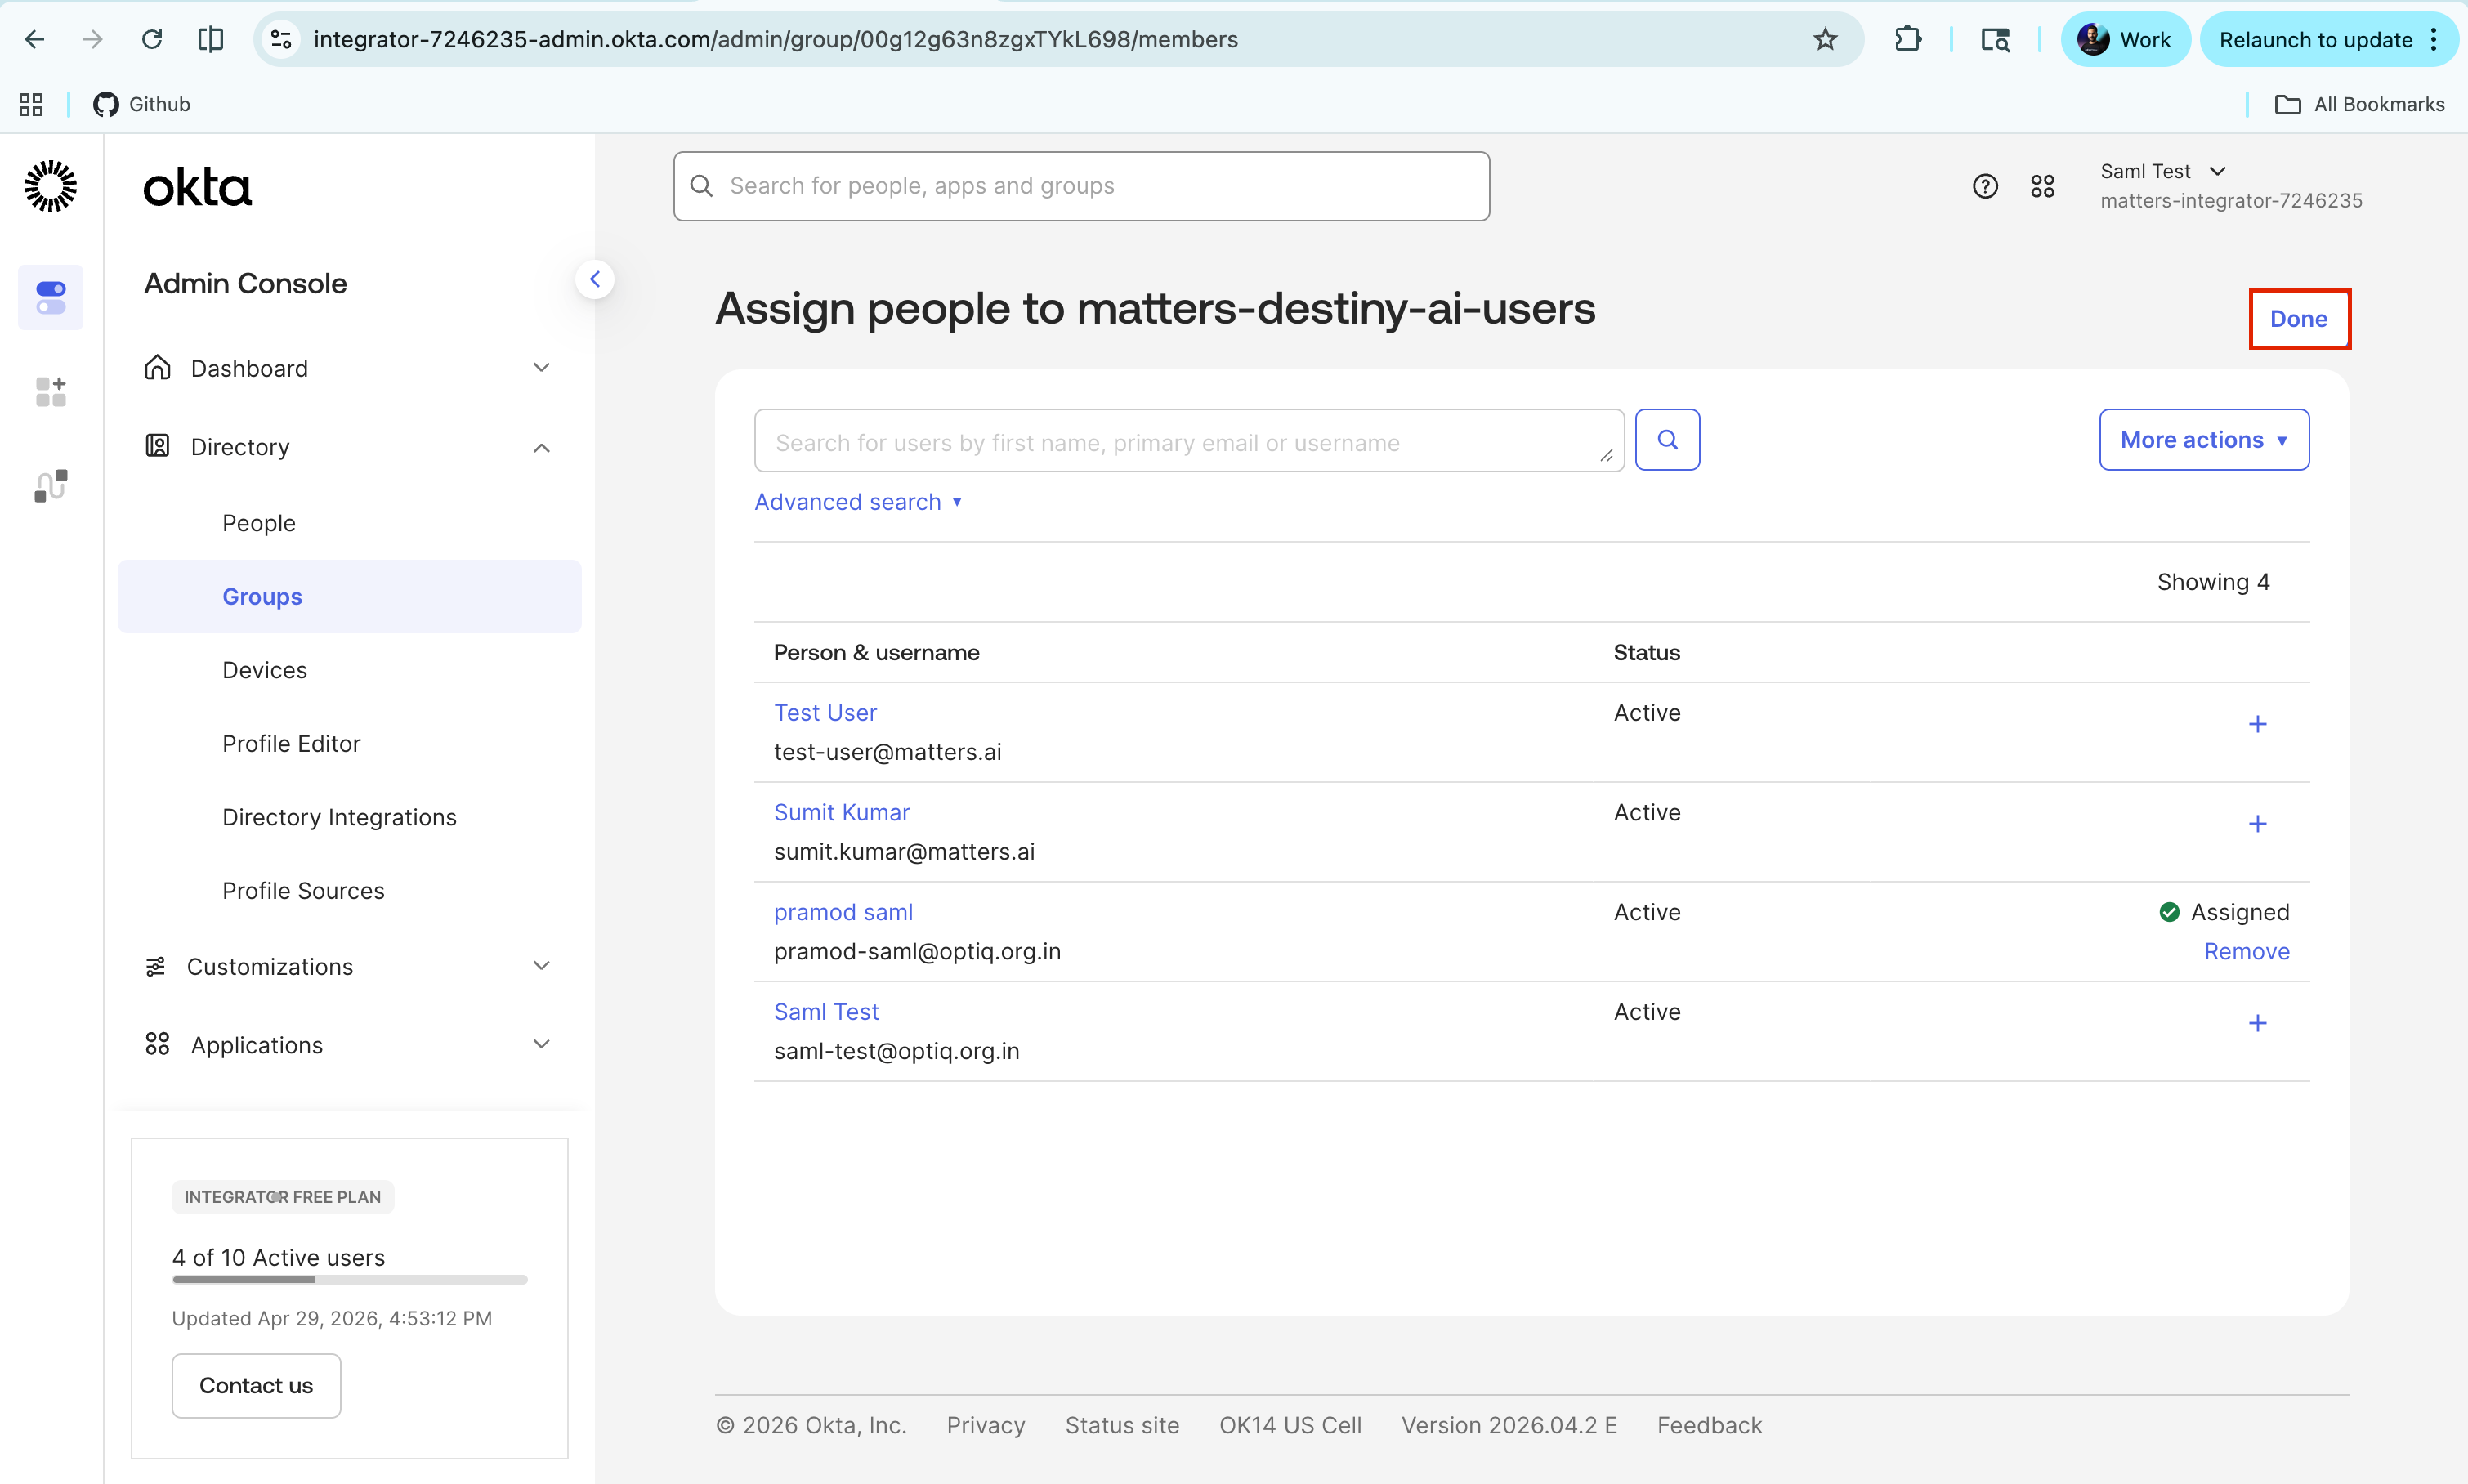
Confirm that the user is added.
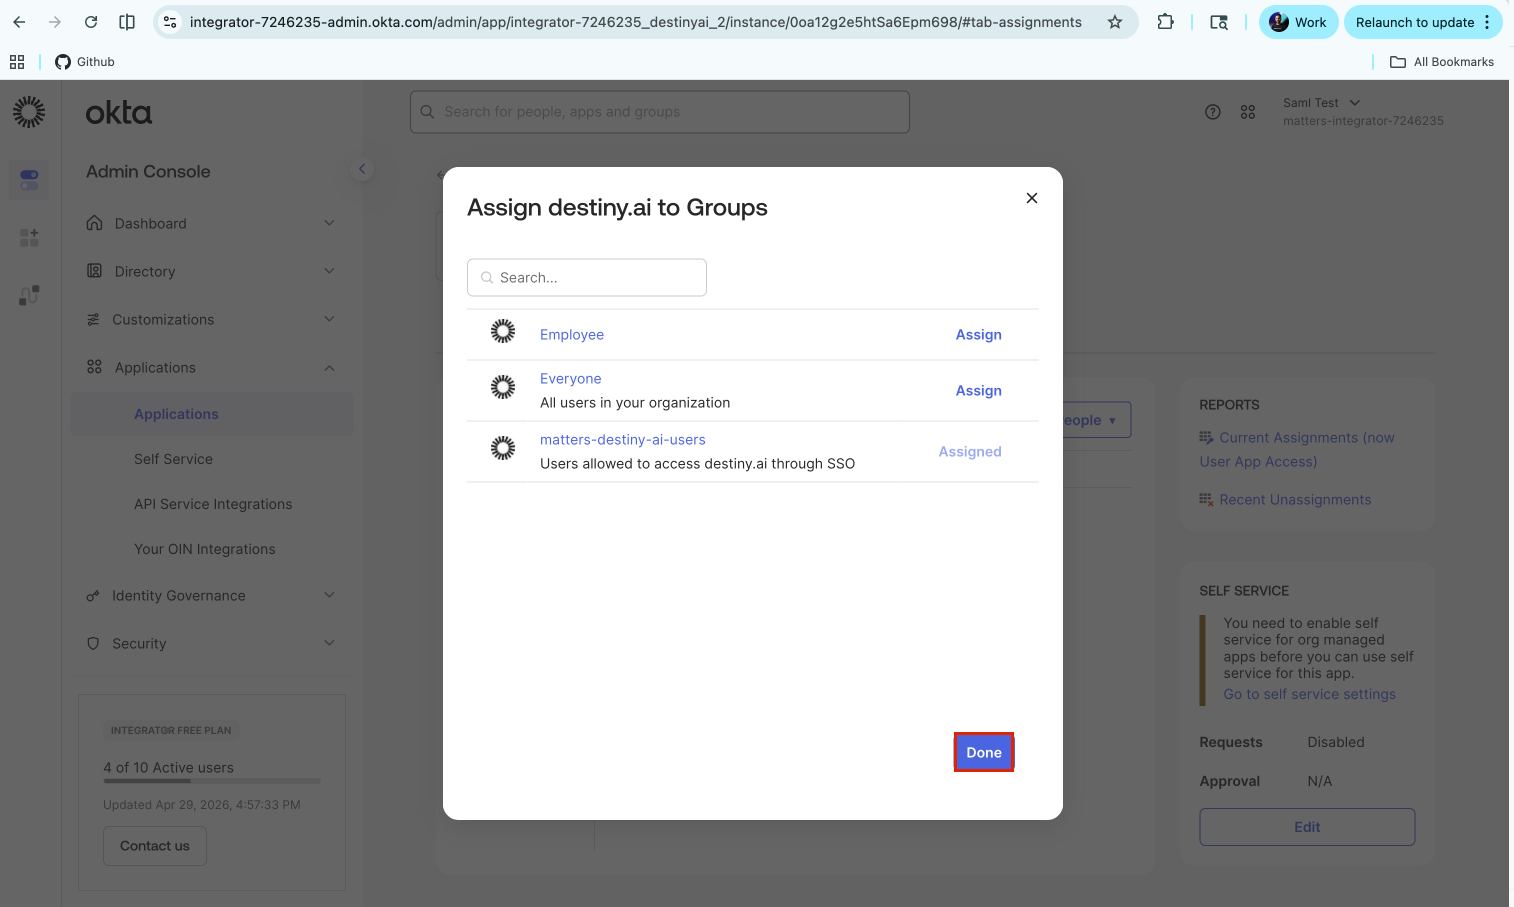
Step 6: Assign the Group to the Previously created Application
Open the previously created application.
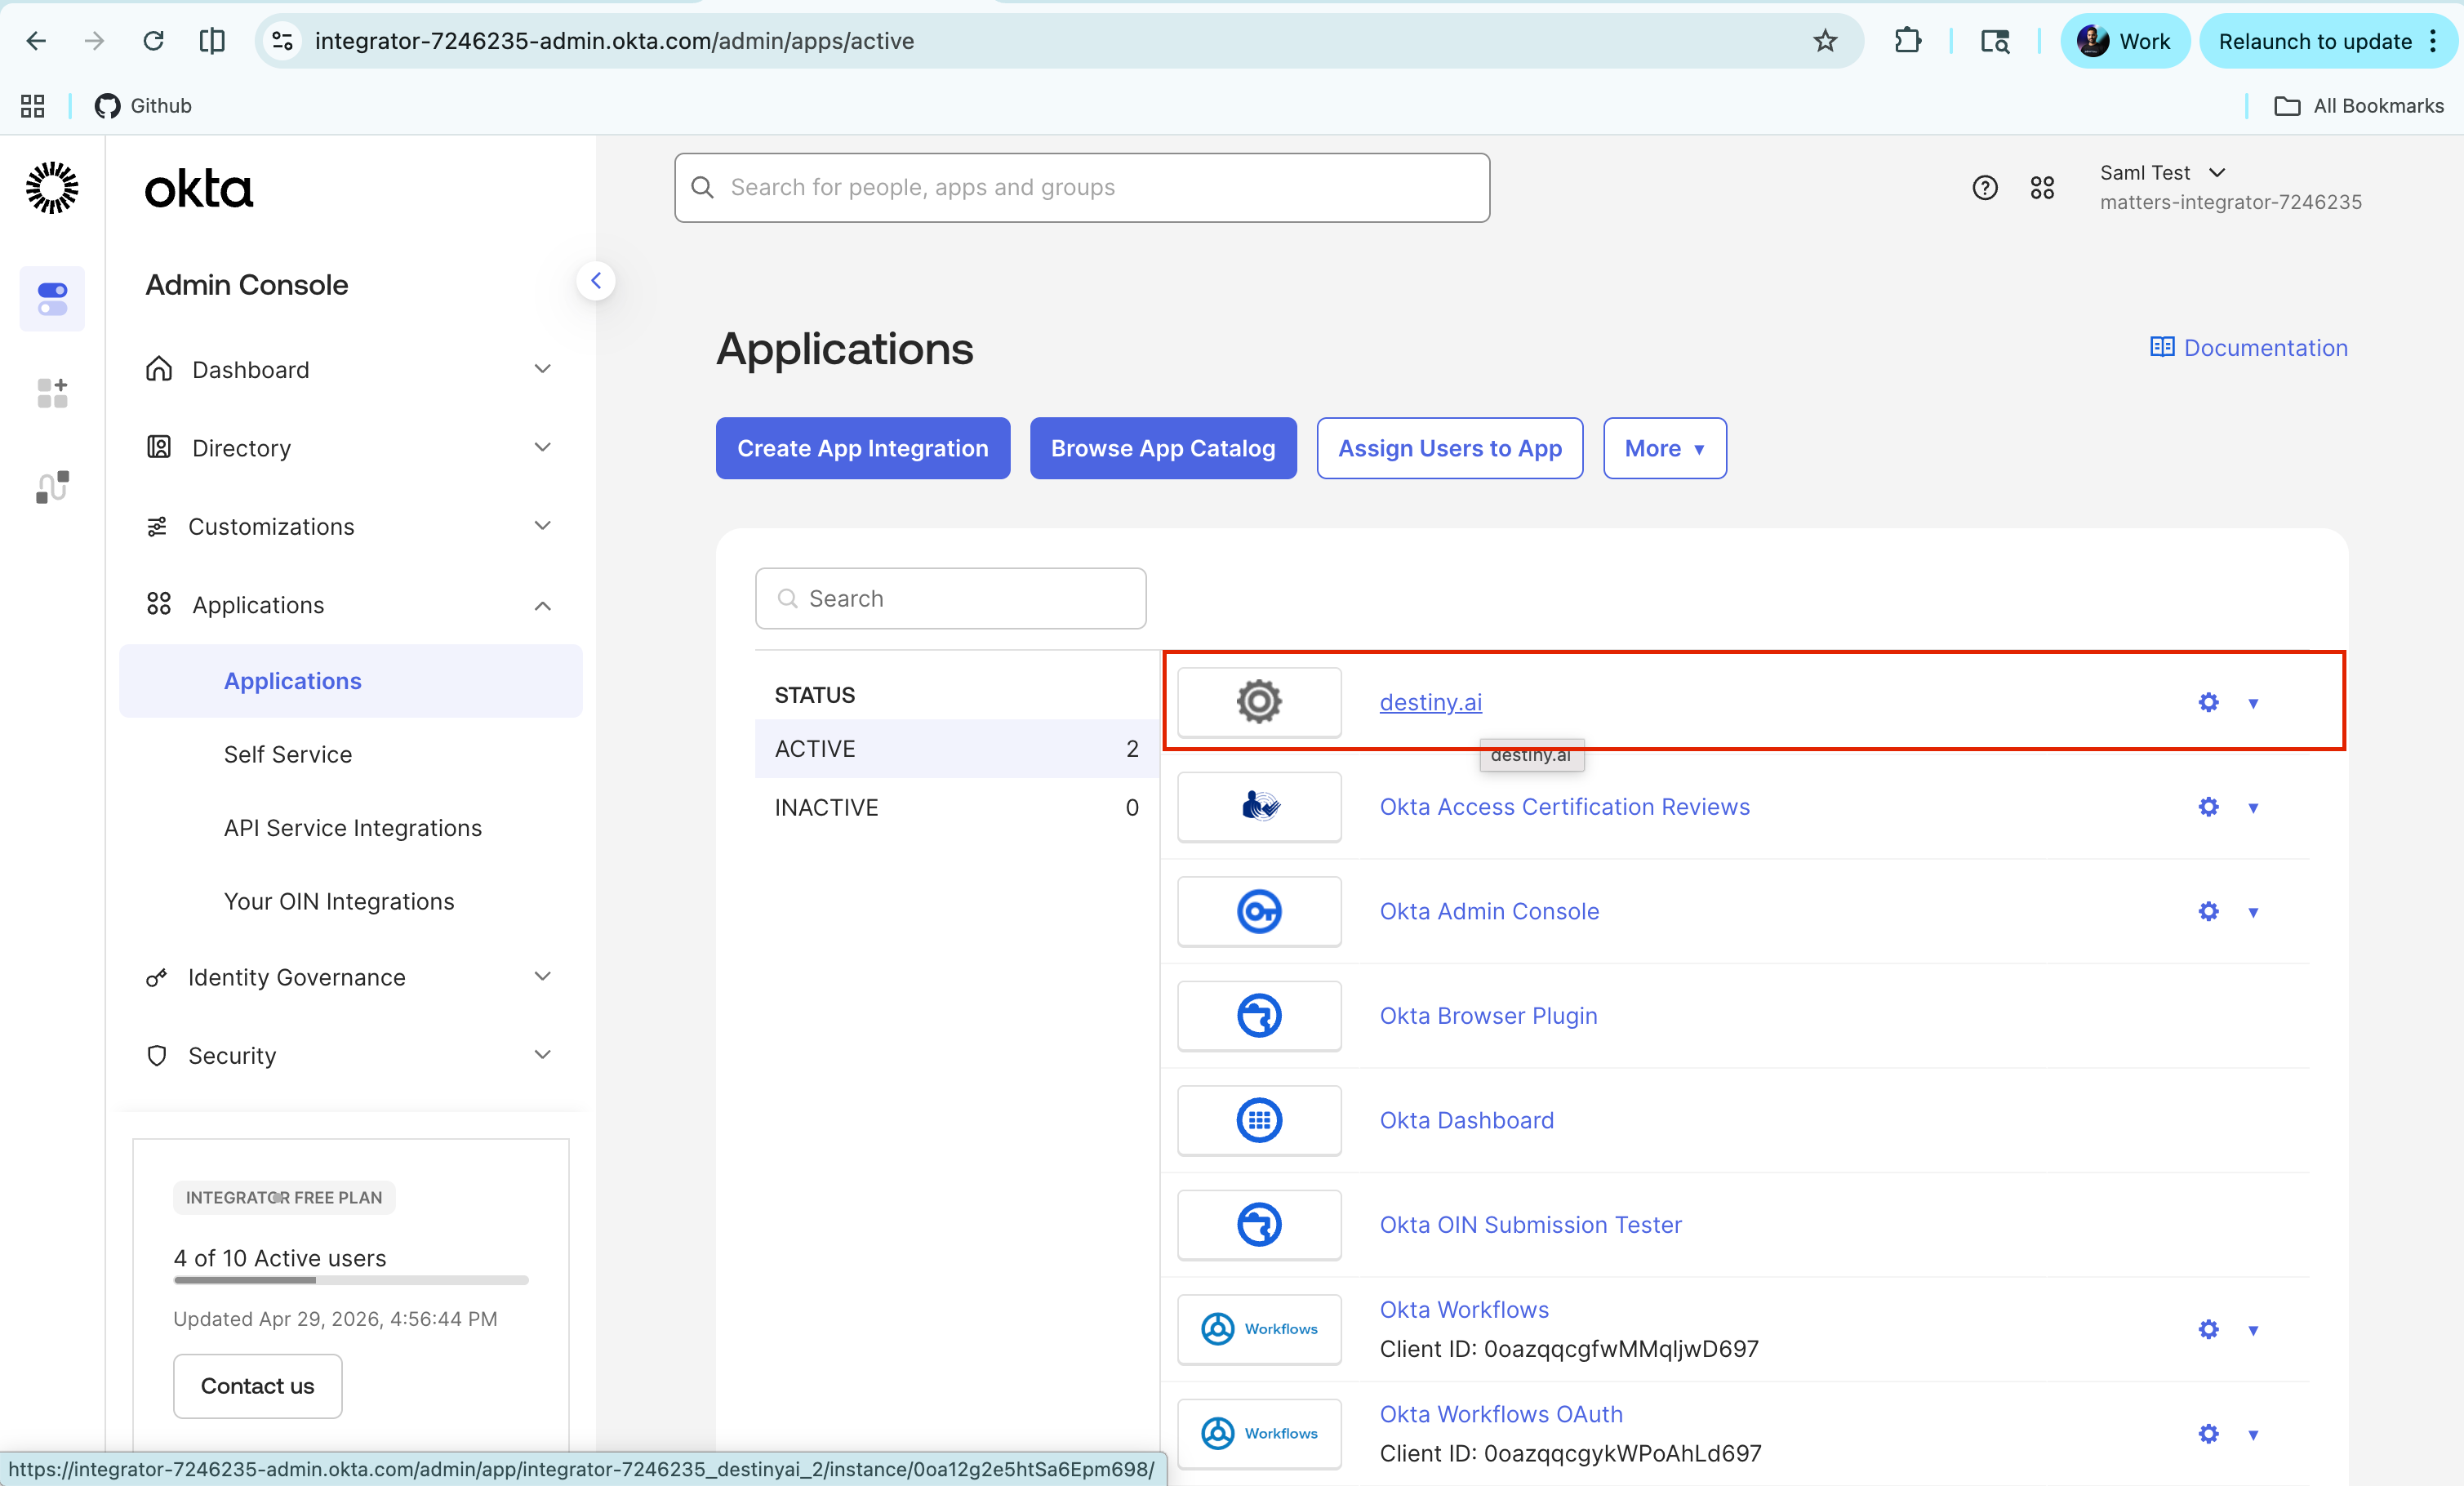
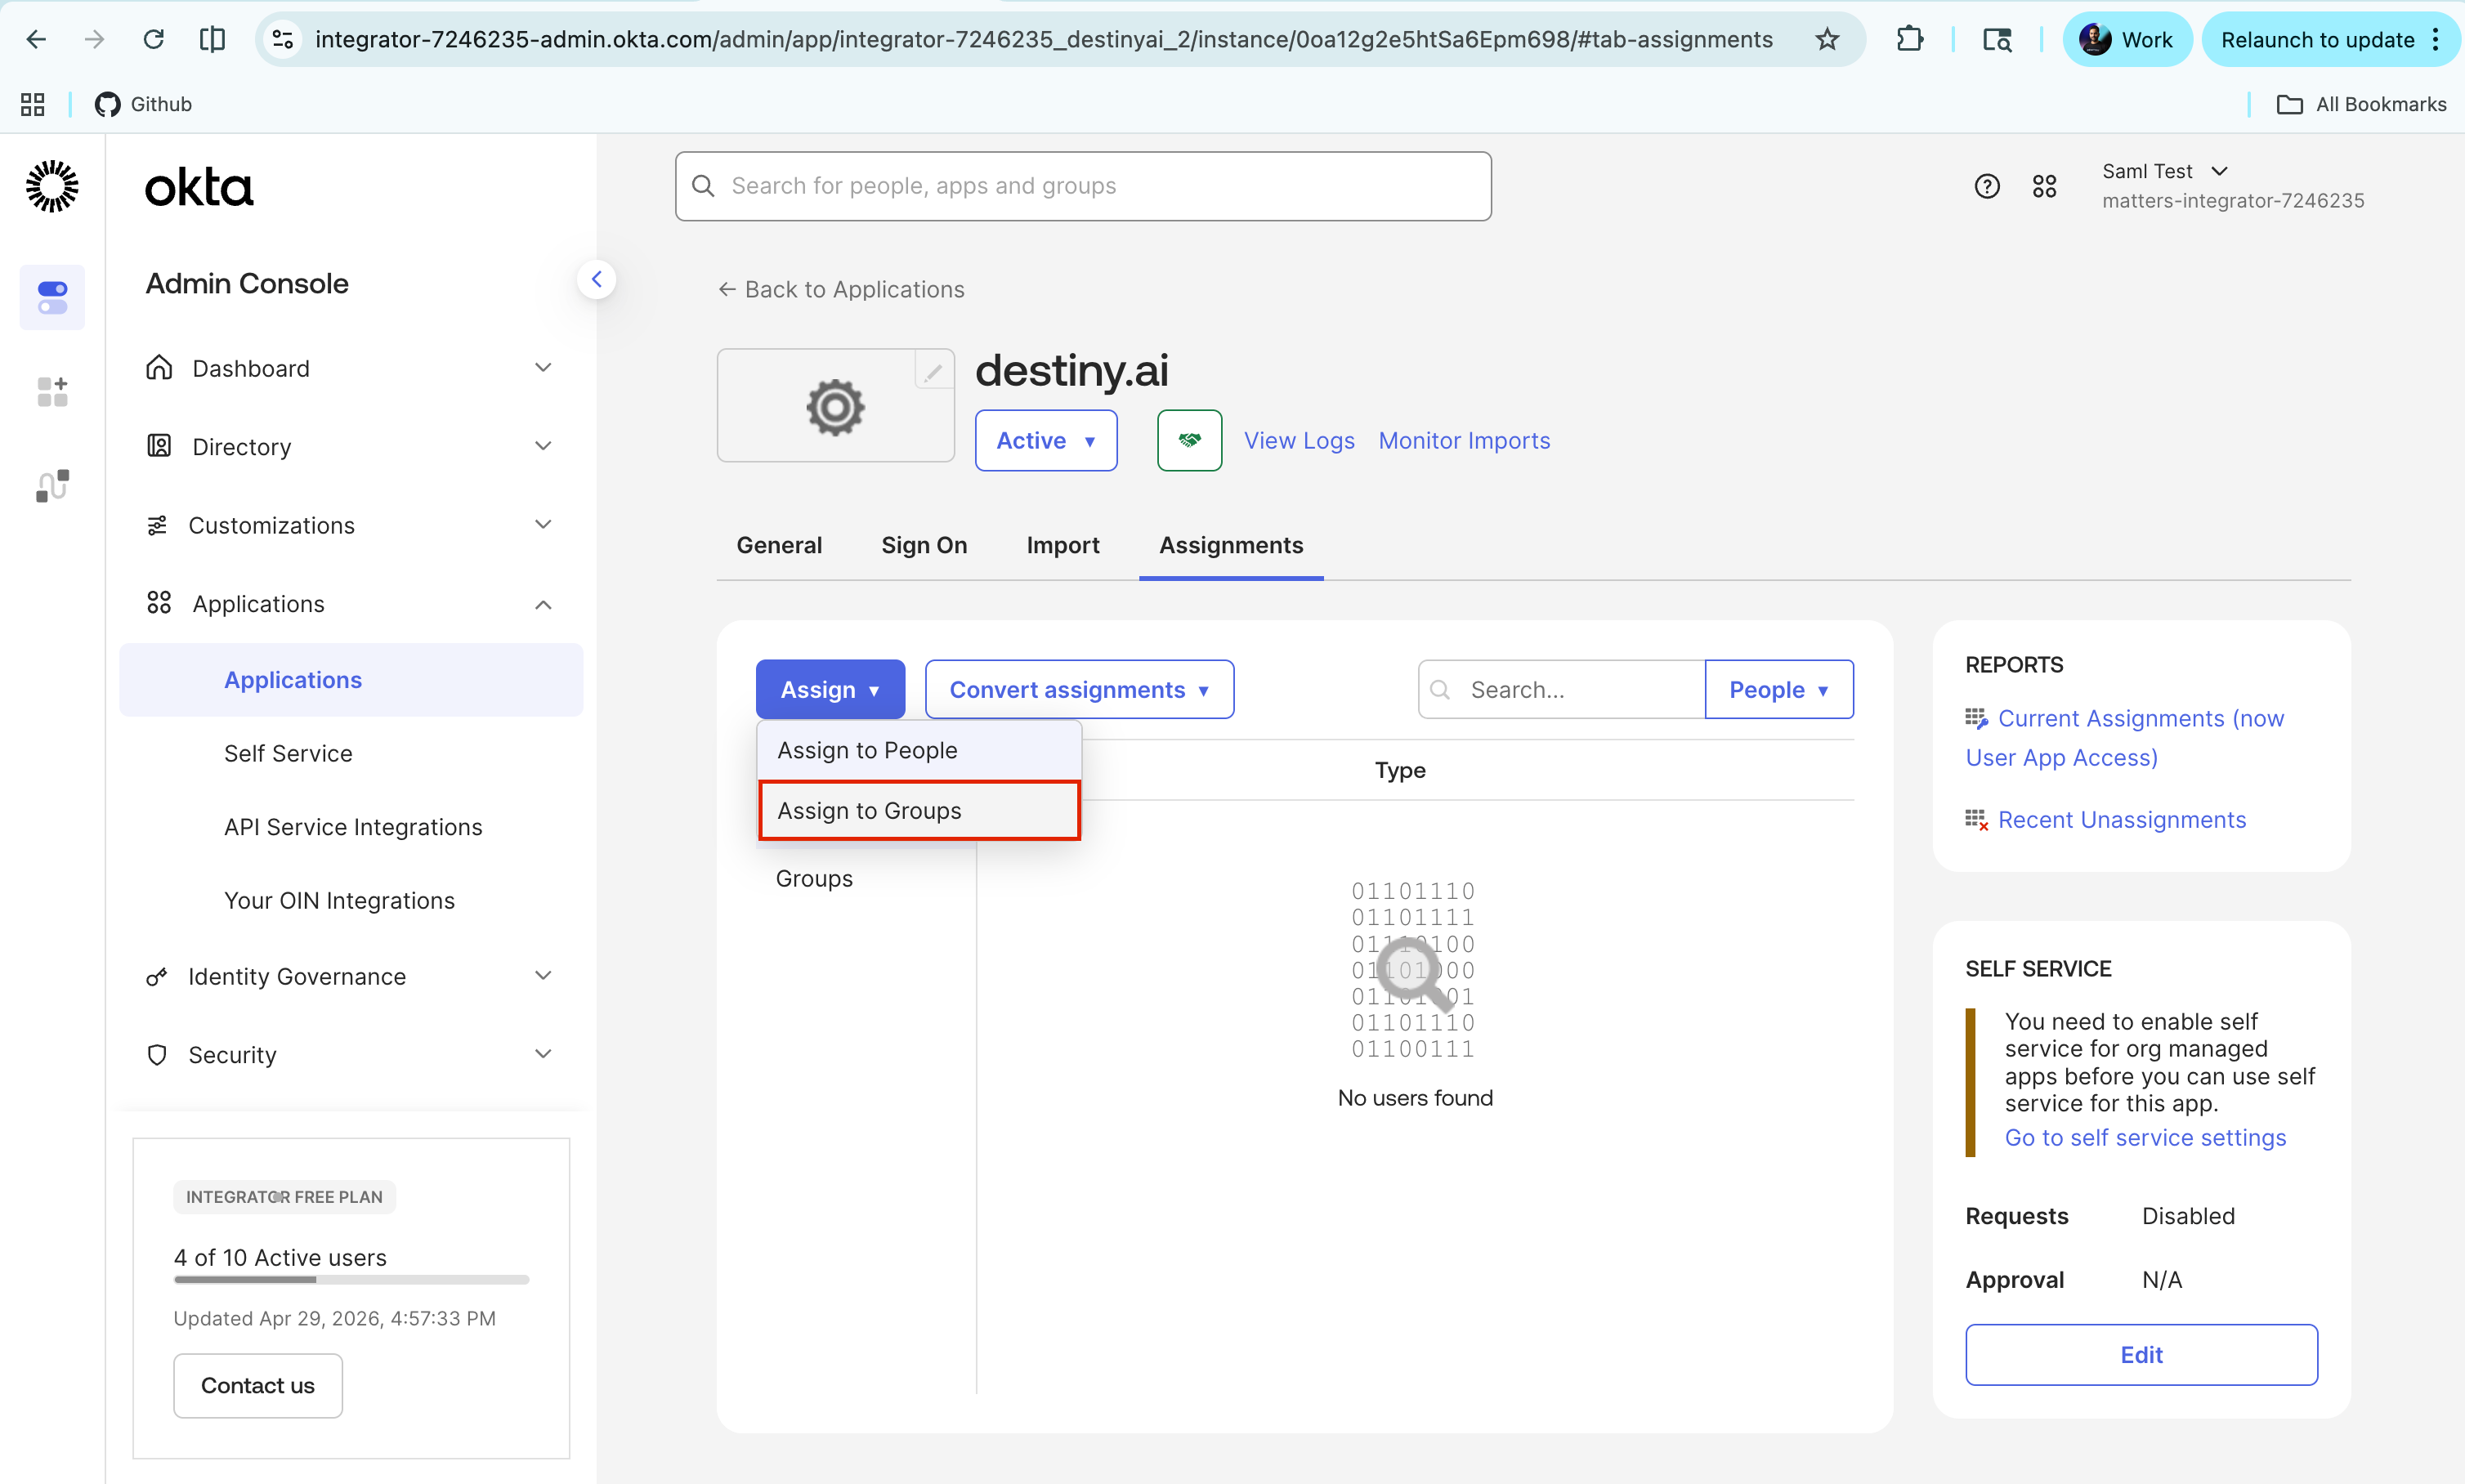
Go to the Assignments tab and click Assign.
Select Assign to Groups.
Search for the group. Example:
matters-destiny-ai-usersClick Assign.
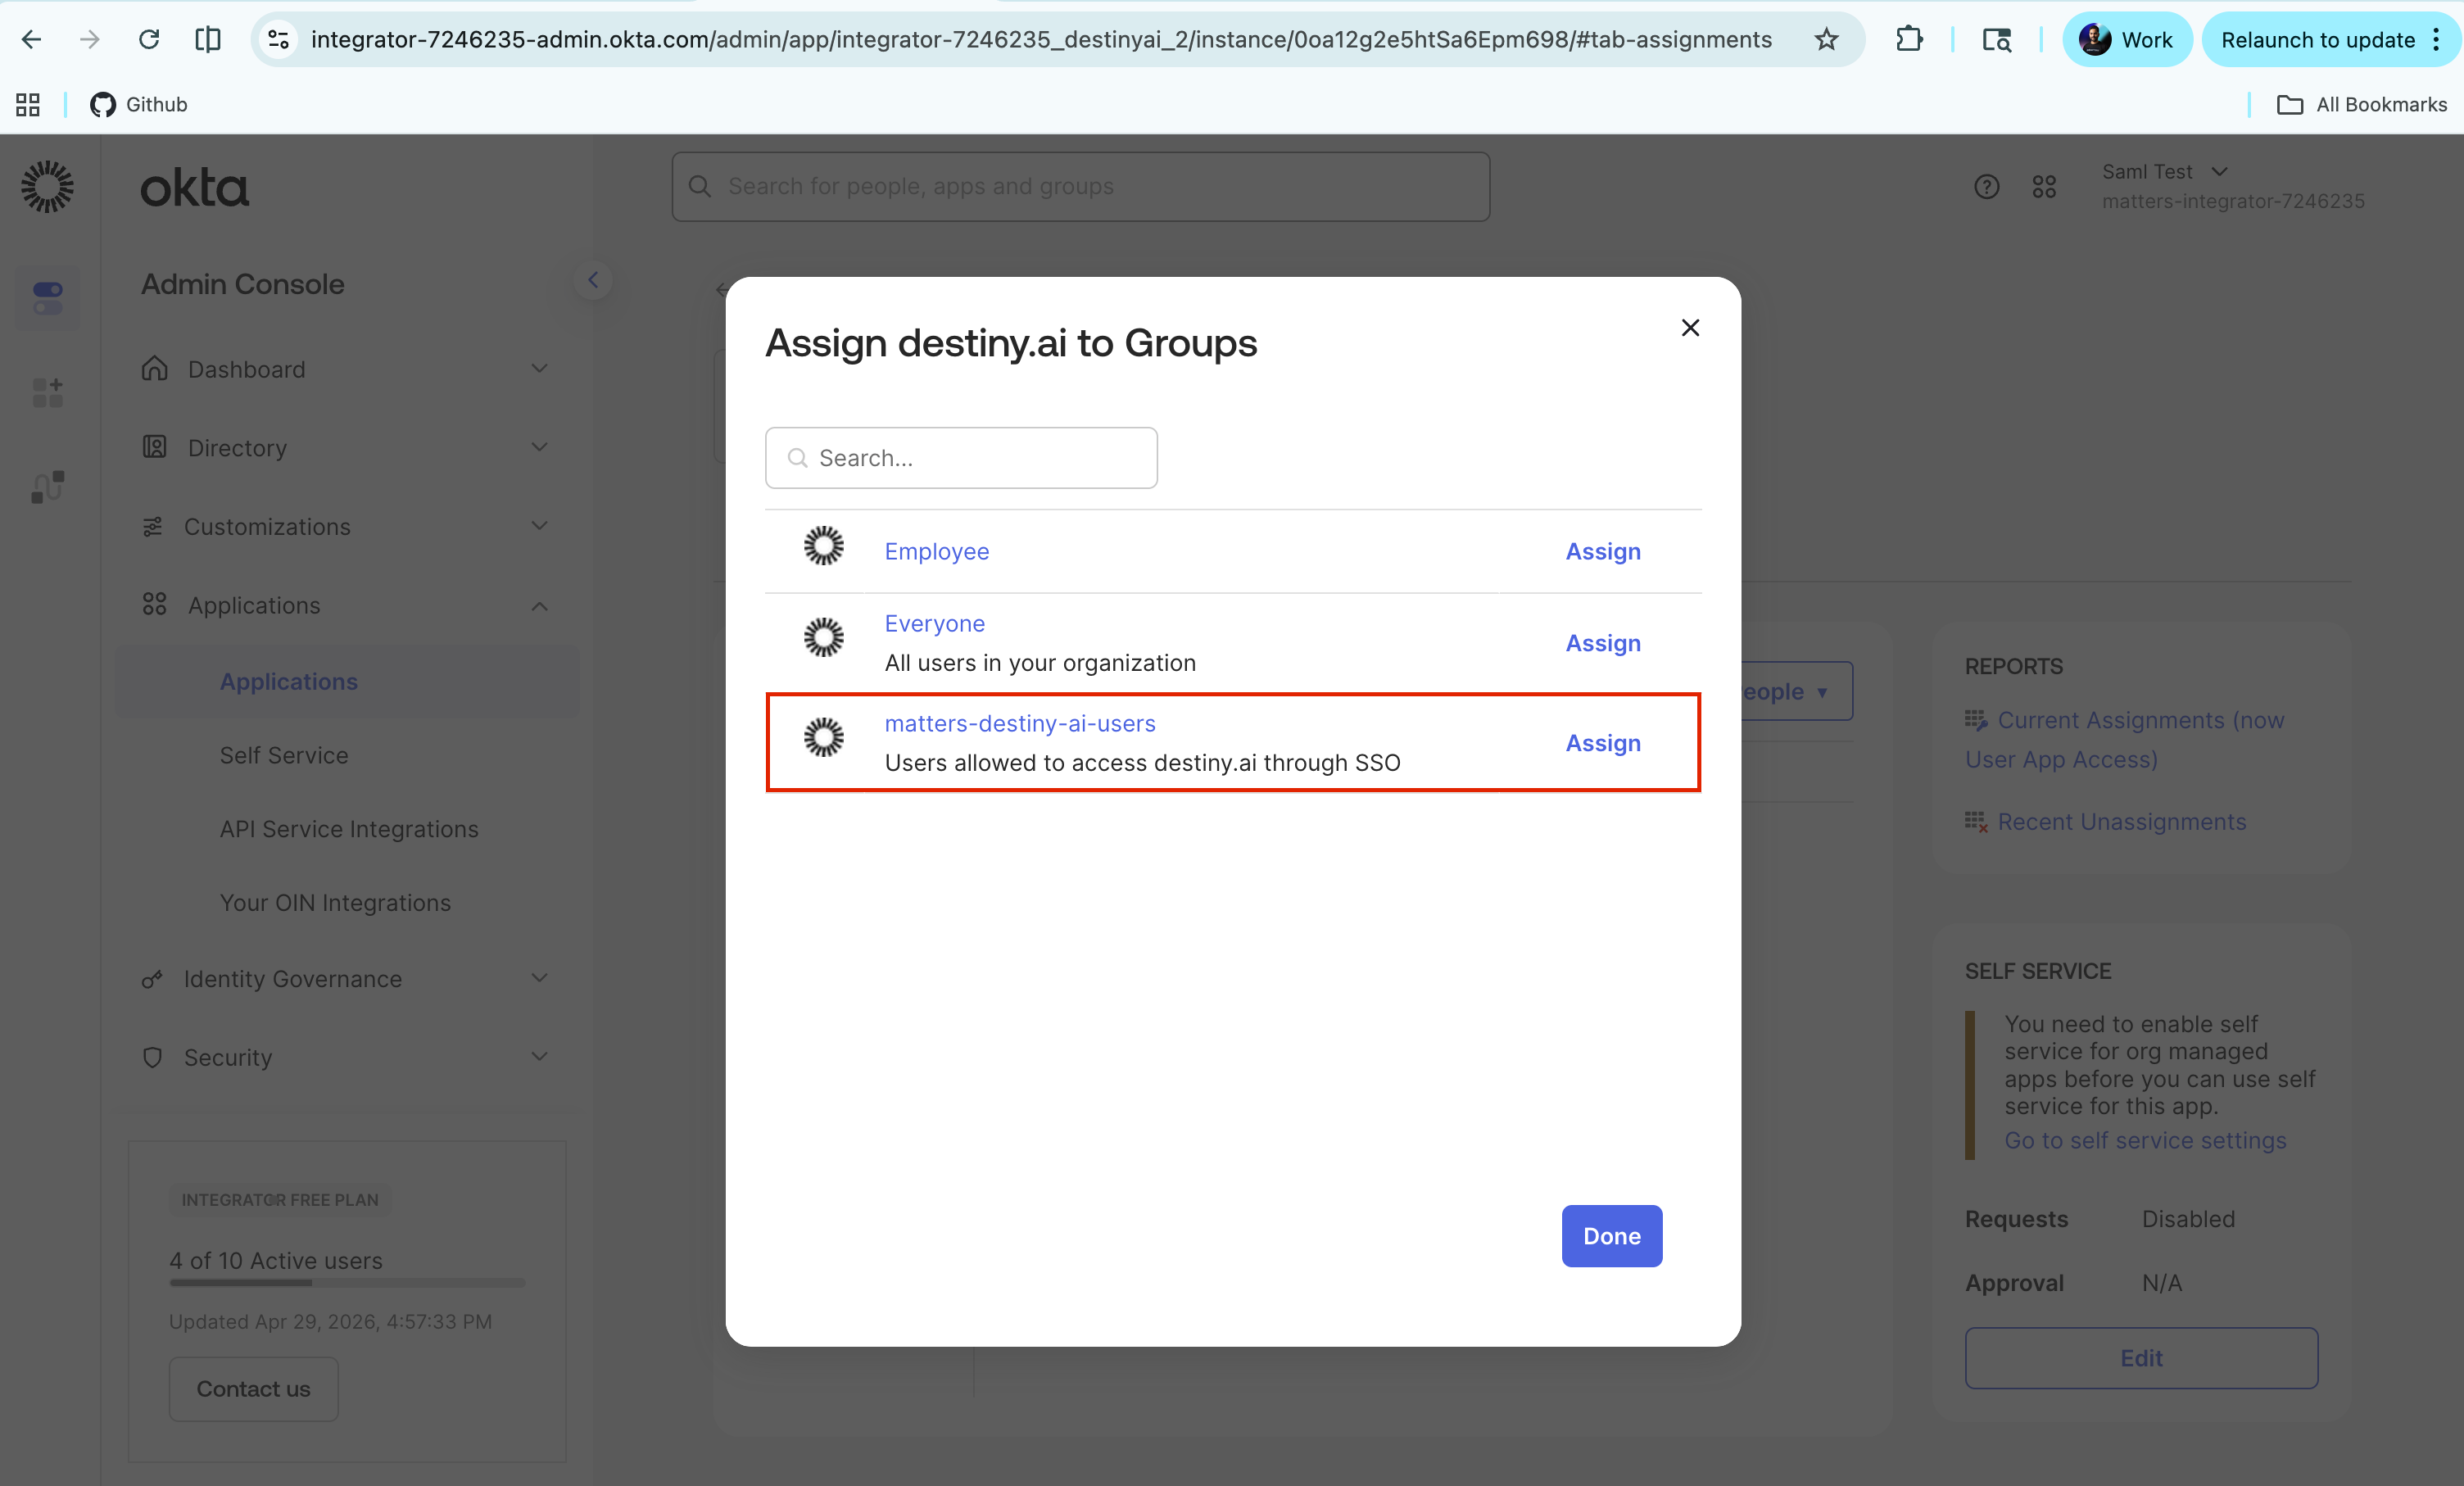
Click Done.
Step 7: Assign an Individual User Directly to the App
Use this option only if you do not want to manage access through groups.
Go to Applications → Applications.
Open the required application.
Go to the Assignments tab.
Click Assign.
Select Assign to People.
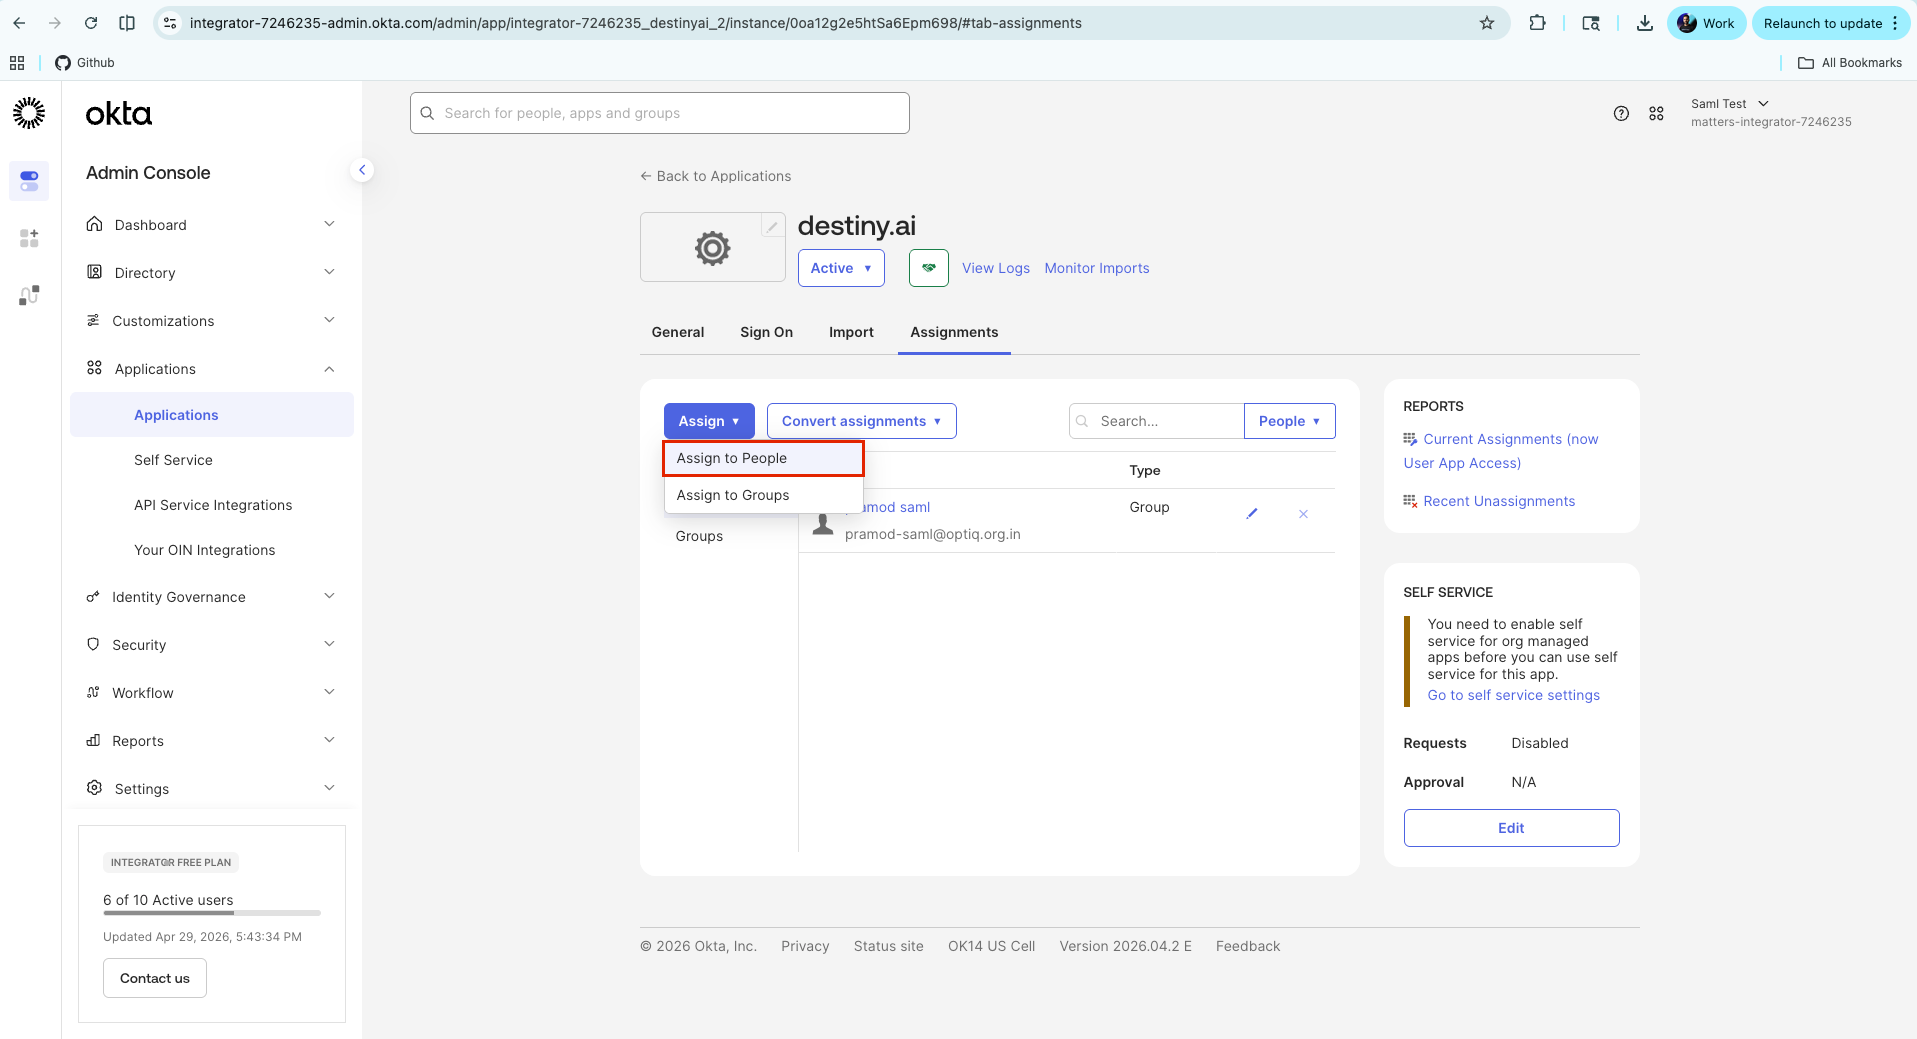
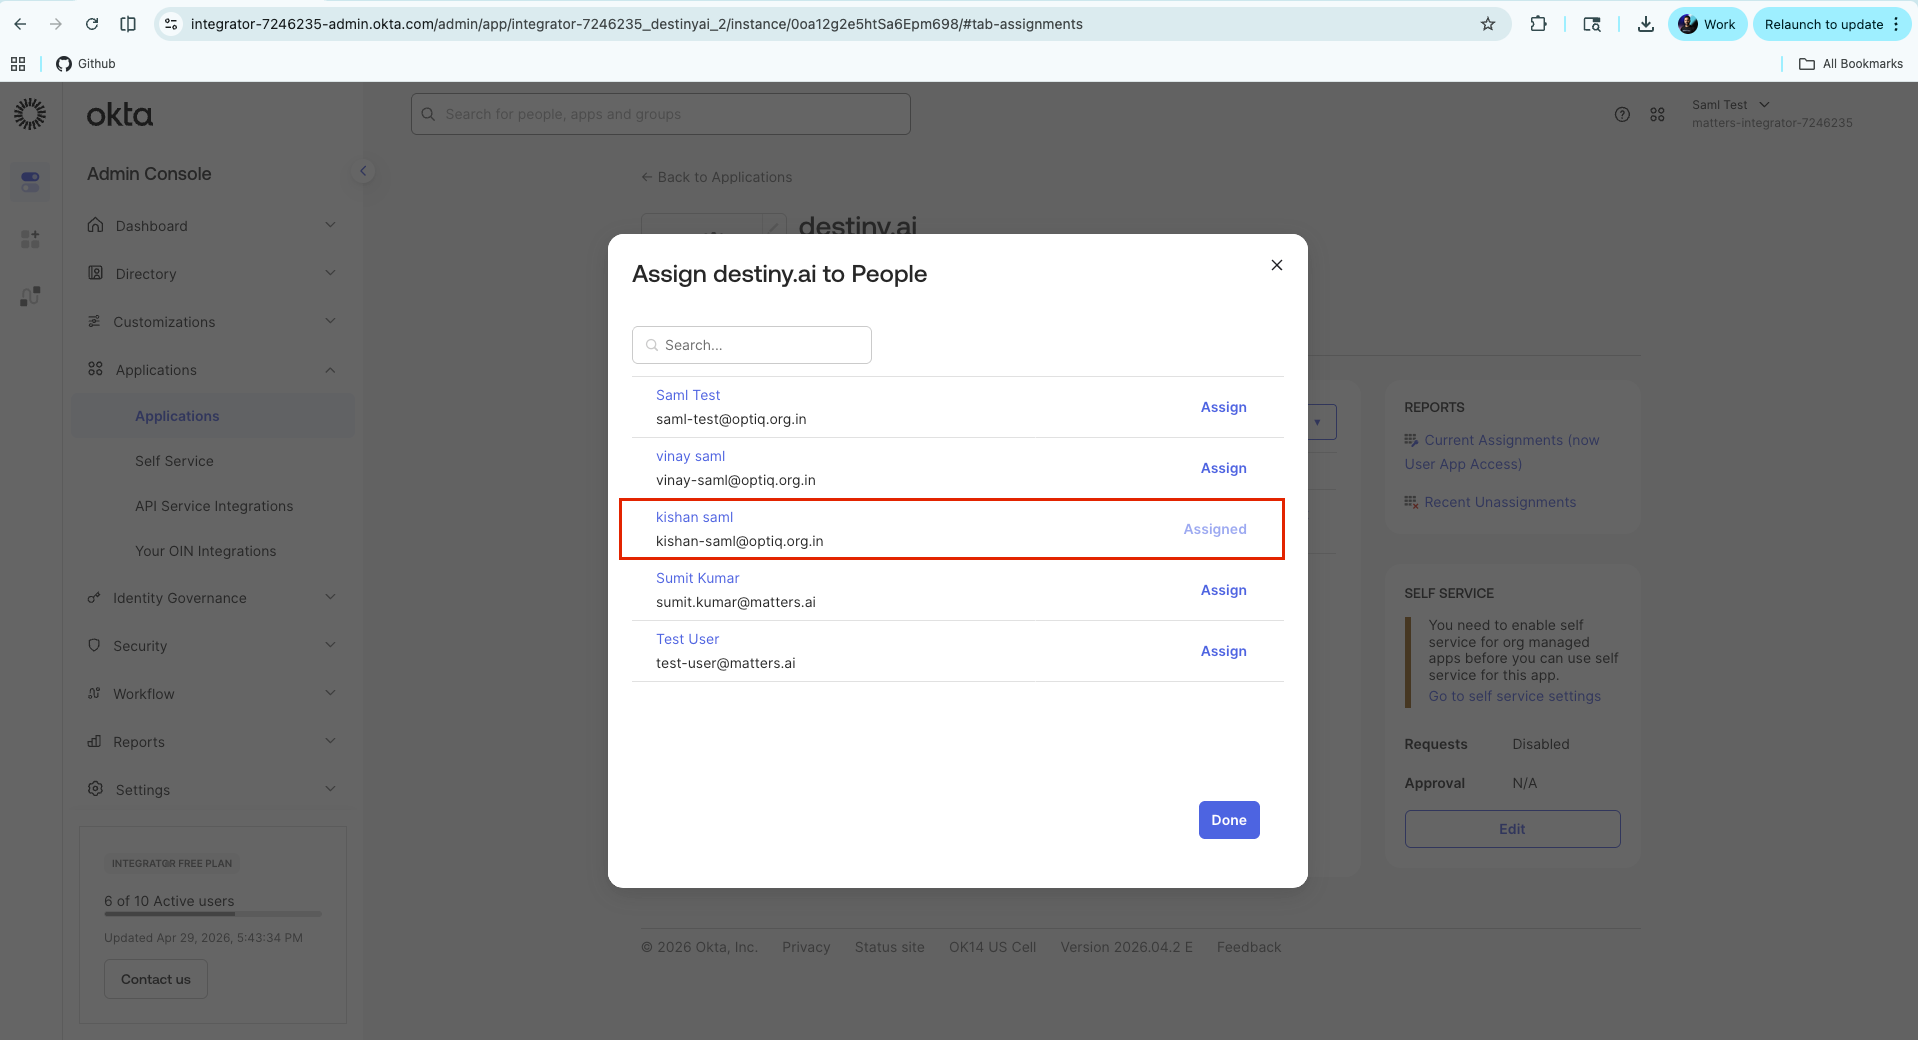
Search for the user.
Click Assign.
Confirm the username and profile values.
Click Save and Go Back.
Click Done.
Recommended Setup for Matters.ai SSO
Matters.ai recommends using group-based access instead of assigning users individually.
Create one group for users who need access to Matters.ai.
Assign this group to the application.
Whenever a new user needs access, add the user to this group.
This approach is easier to manage and scale.
Step 9: Share Your IdP Details with Matters.ai
After configuring your Identity Provider, share the following details with the Matters.ai team.
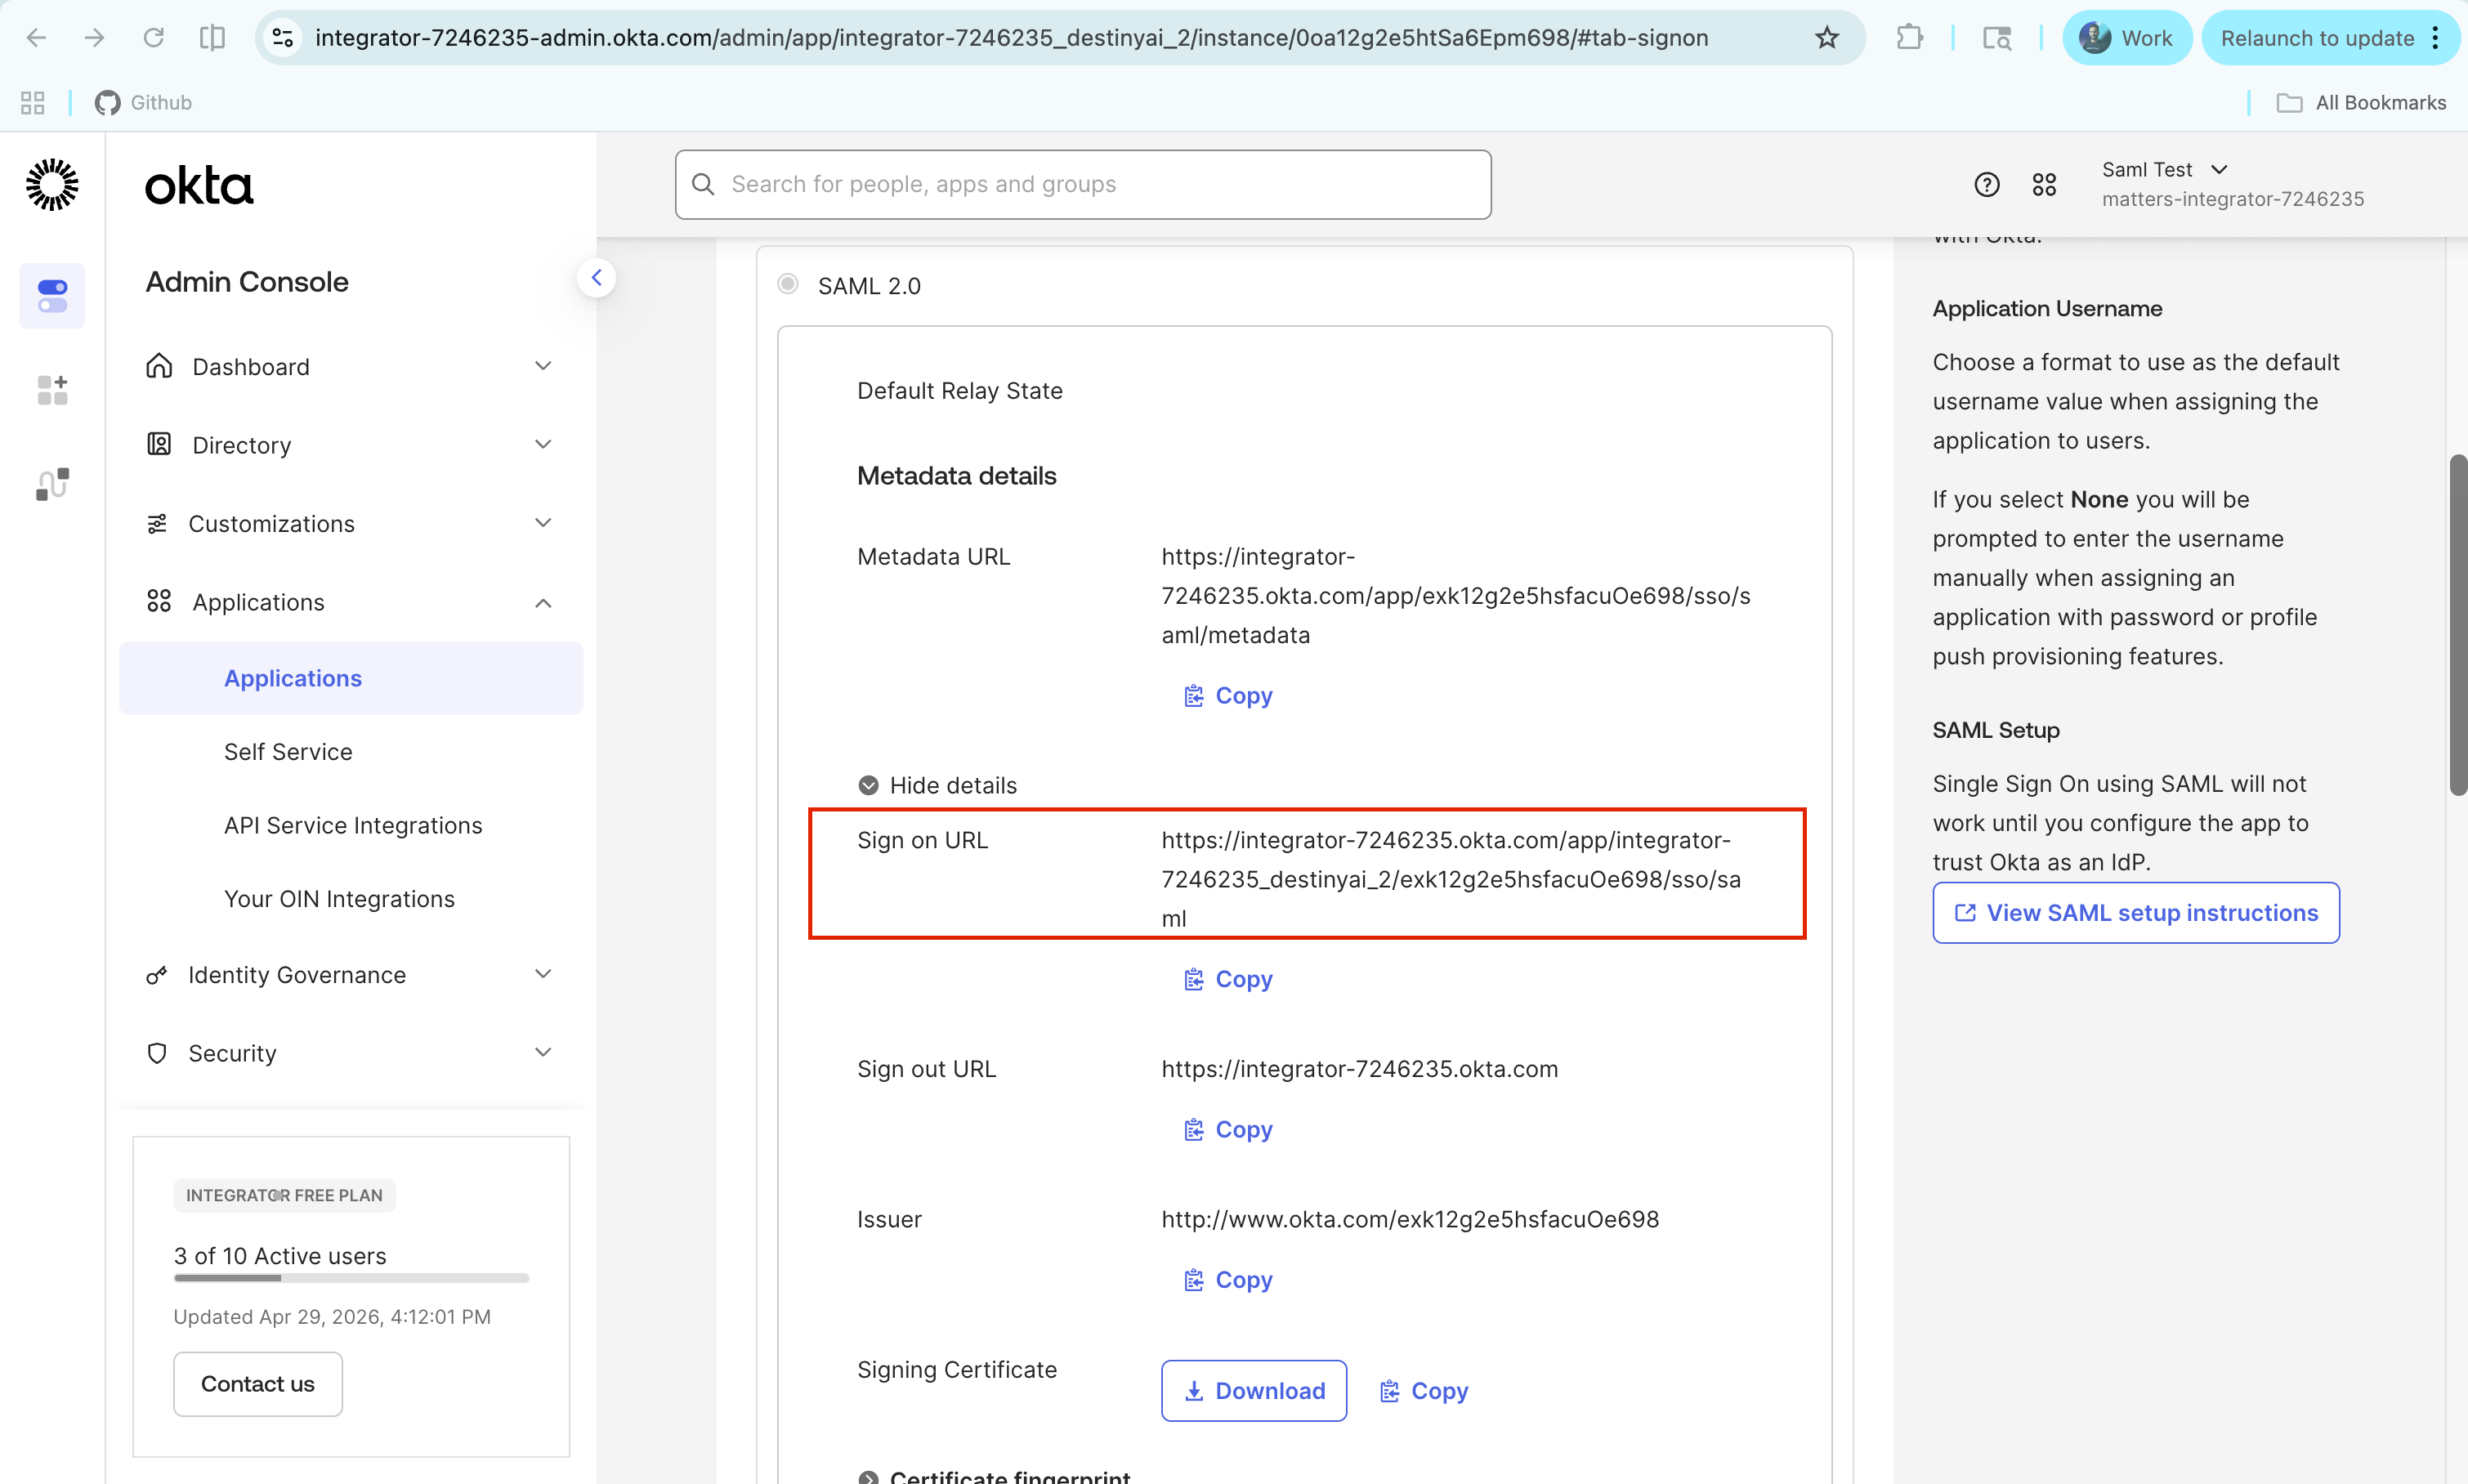
Step 9.1: Share the Identity Provider SSO URL
Share the URL where Matters.ai should redirect users for login.
This is usually available in the Okta SAML application settings.
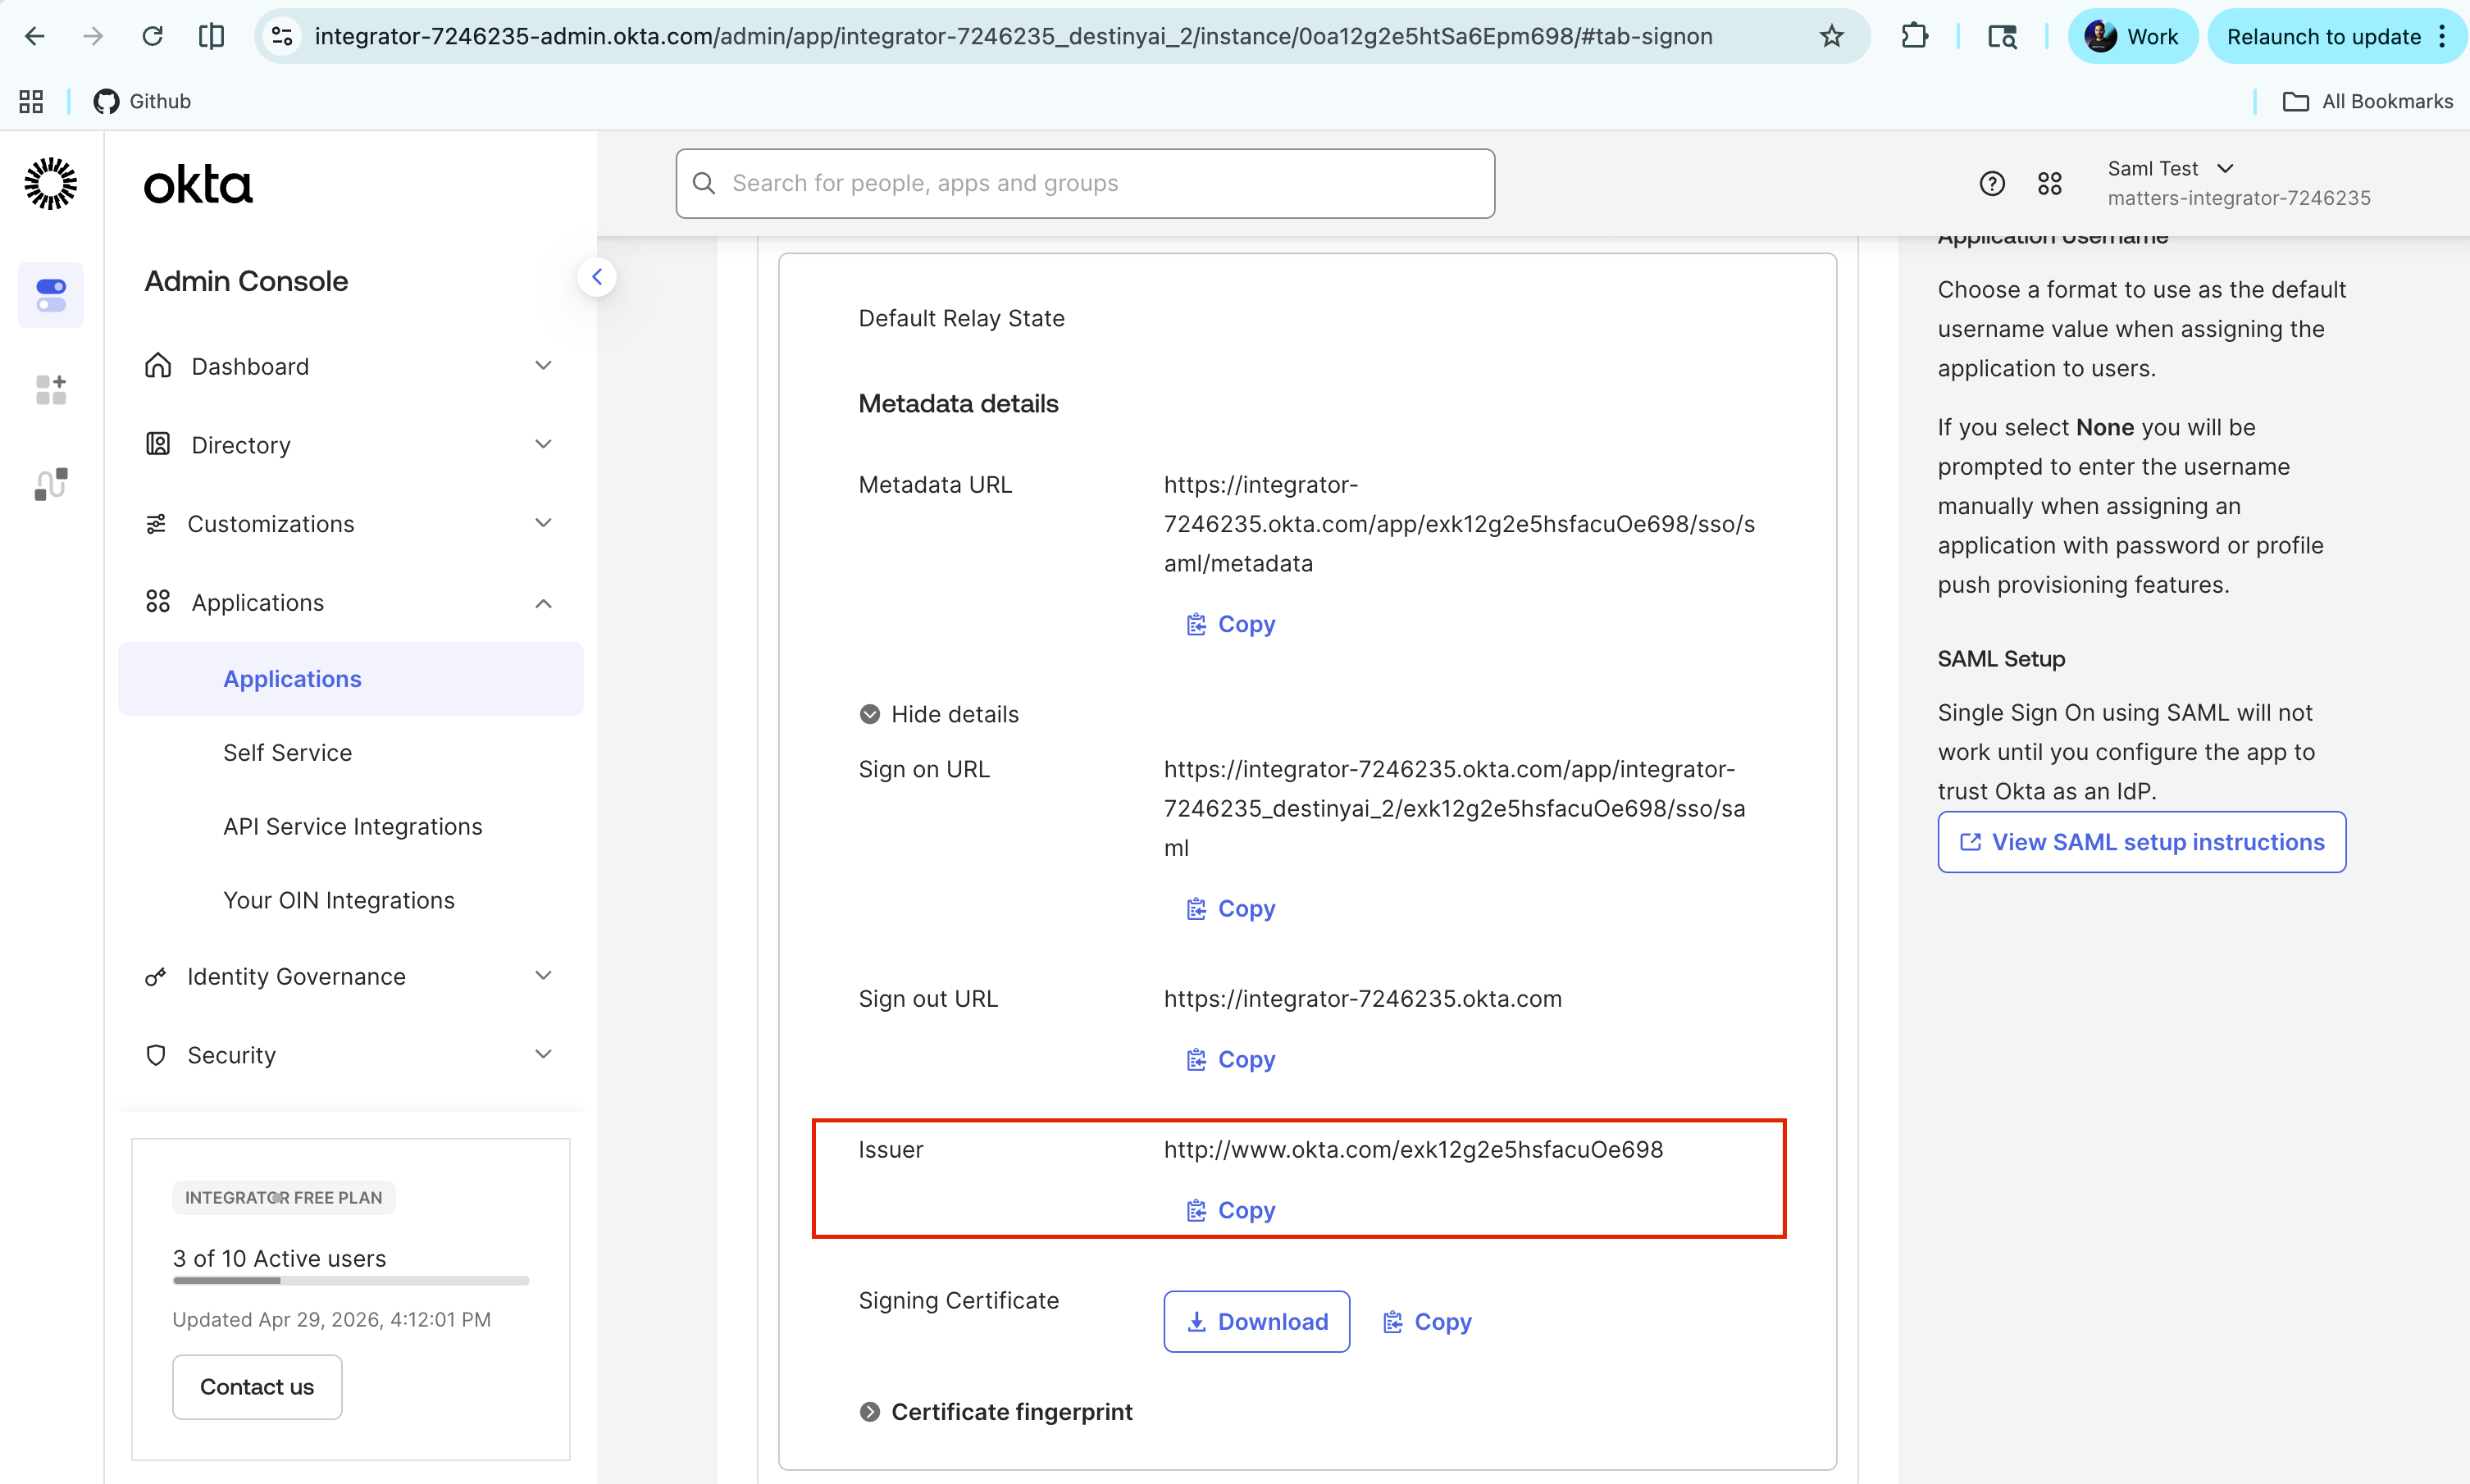
Step 9.2: Share the Identity Provider Entity ID
Share the Identity Provider Entity ID with the Matters.ai team.
This is the issuer identifier of your Identity Provider.
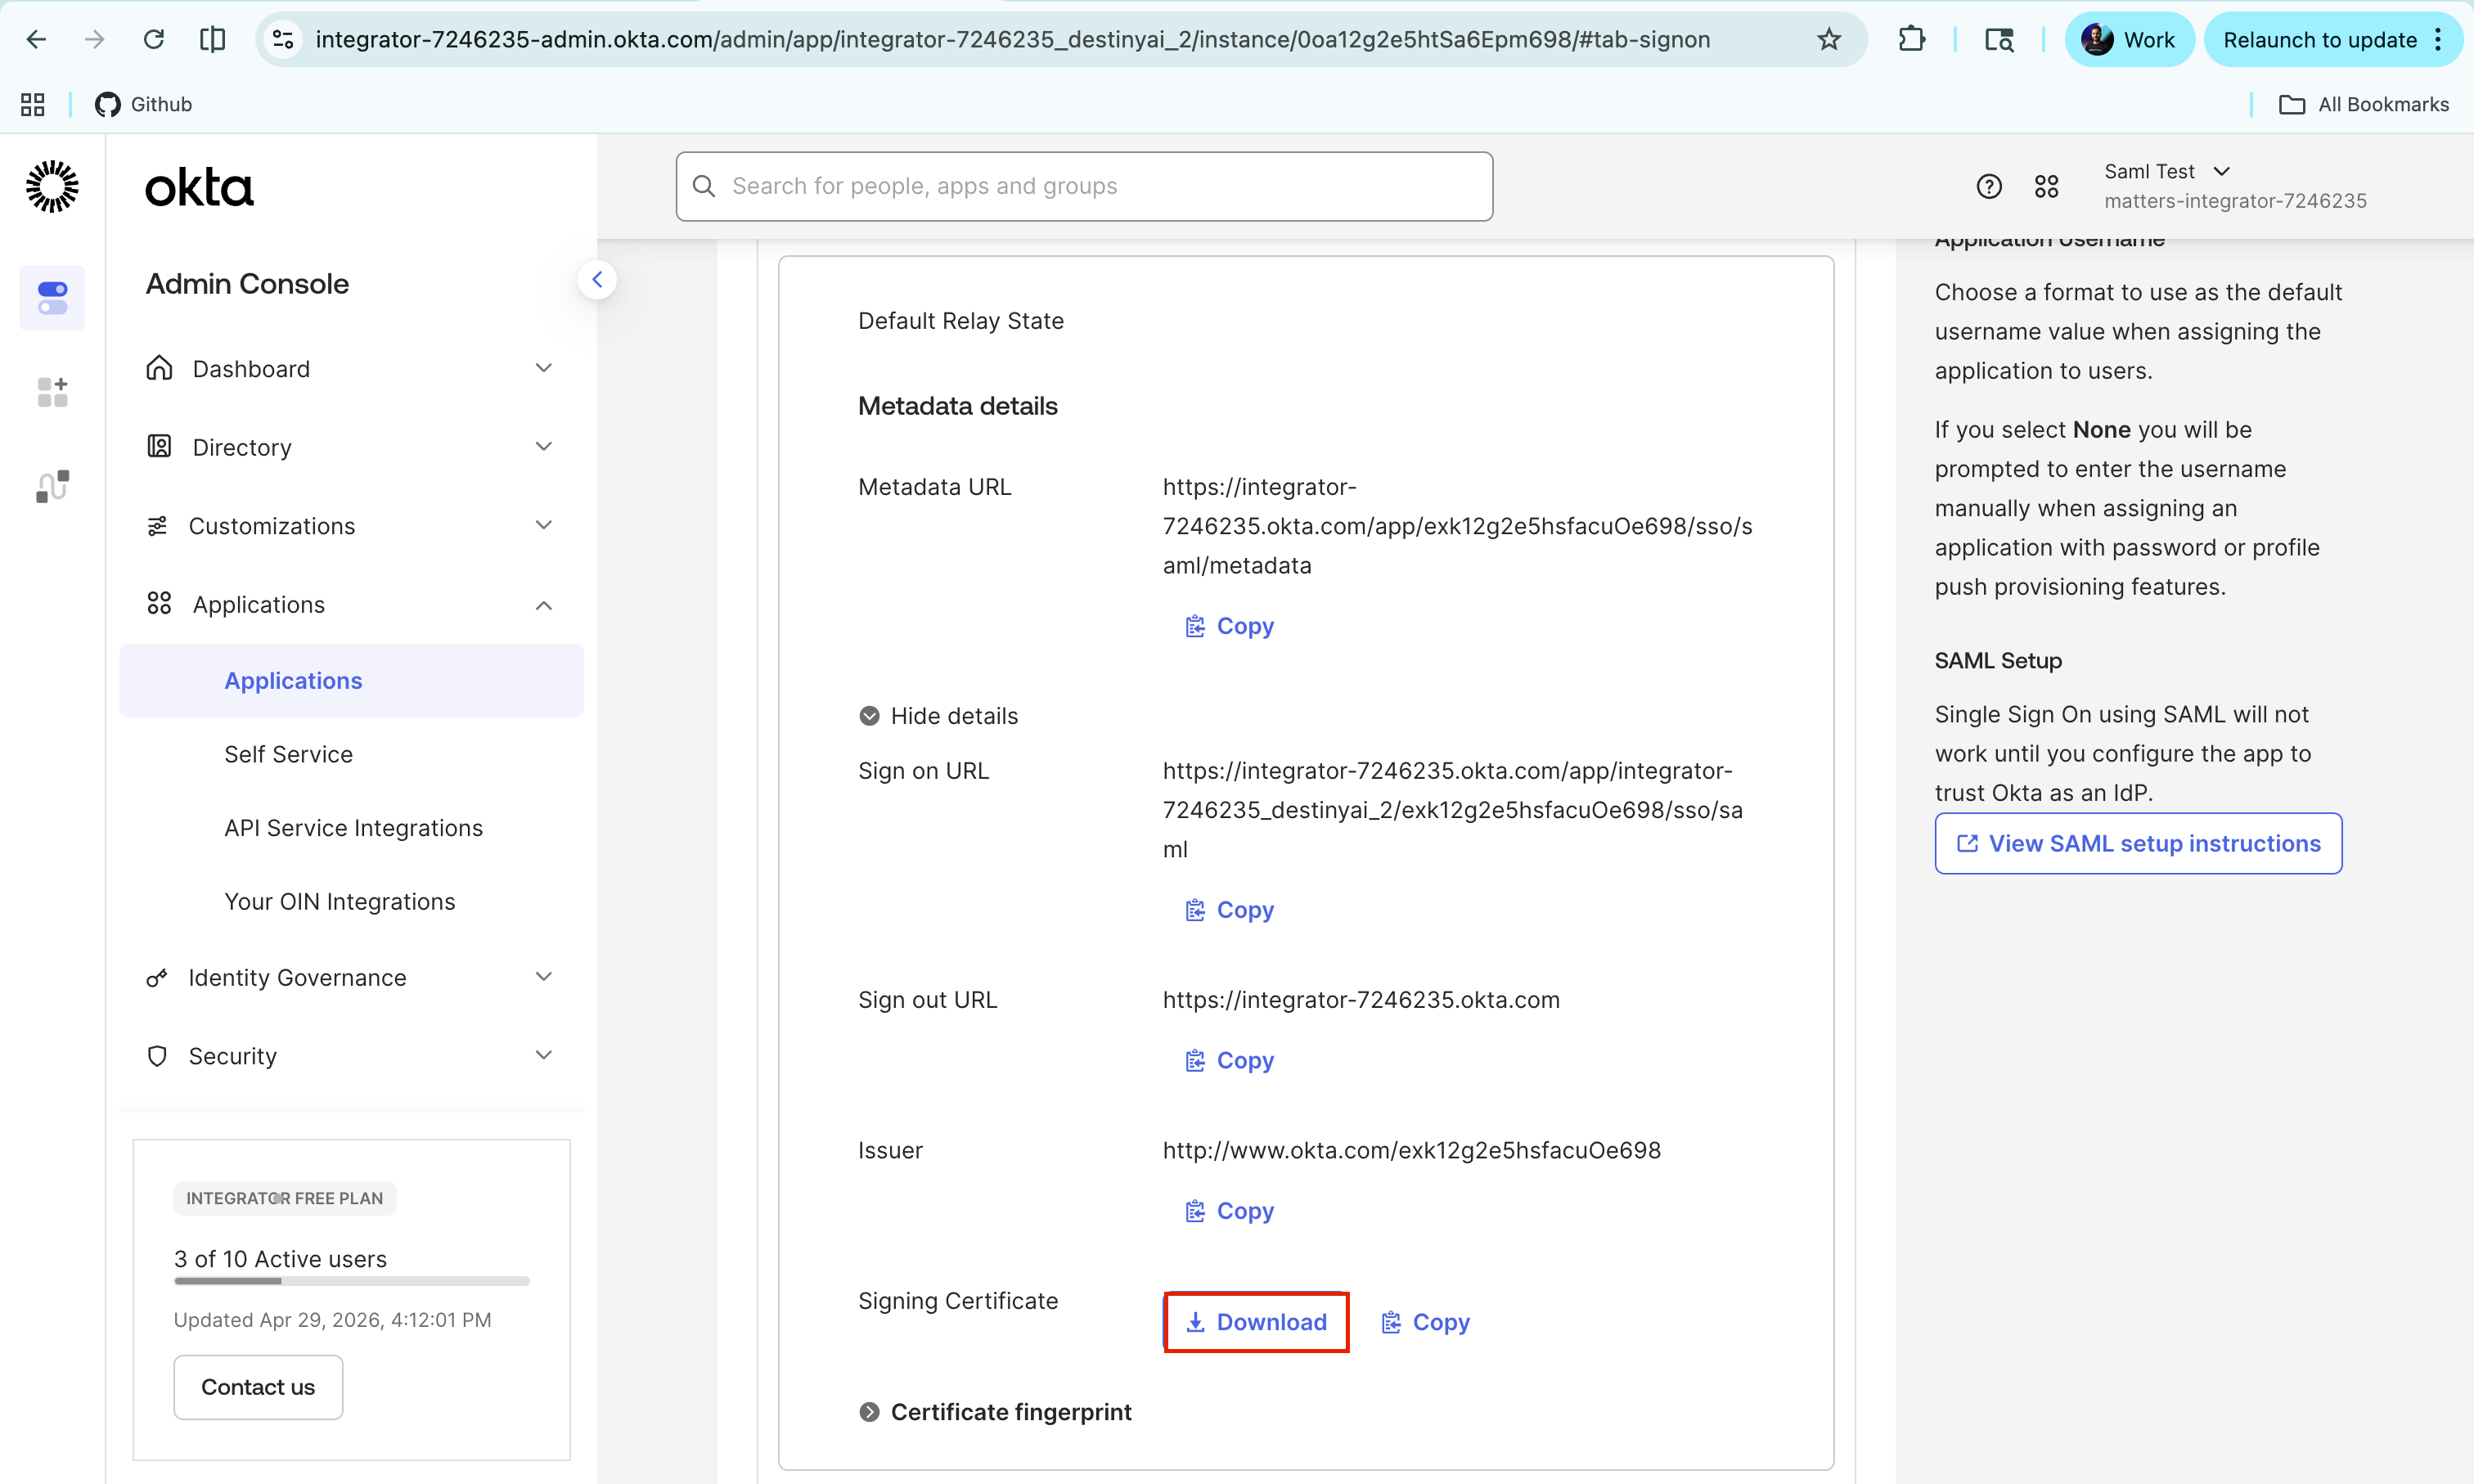
Step 9.3: Share the Identity Provider Signing Certificate
Share the signing certificate used by your Identity Provider.
Matters.ai uses this certificate to verify the SAML response.
Share the certificate in PEM format.
Step 9.4: Share Attribute Names
Share the attribute names configured in your Identity Provider.
Required attributes include:
Email
First name
Last name
Groups, if applicable
Matters.ai will use these details to complete the SSO configuration on their side.
Step 10: Login Using SSO
Once the configuration is complete, users can log in to the Matters.ai dashboard using SSO.
Users should enter their email address on Matters.ai .
They will be redirected to the Identity Provider for authentication.
After successful authentication, they will be redirected back to Matters.ai.
The user will be logged in automatically.