Single Sign-On (SSO) Integration with Azure Active Directory
Last updated: June 25, 2026
This guide provides a step-by-step process for integrating Microsoft Azure Active Directory (Azure AD) with the Matters platform for Single Sign-On (SSO). It covers creating and configuring the application in Azure AD, enabling group claims, assigning users/groups, and finalizing the setup within the Matters Dashboard.
Step 1: Log in to Azure AD Admin Portal
Navigate to the Azure Portal.
Sign in with your Azure AD admin credentials.
Step 2: Create a New Application Registration
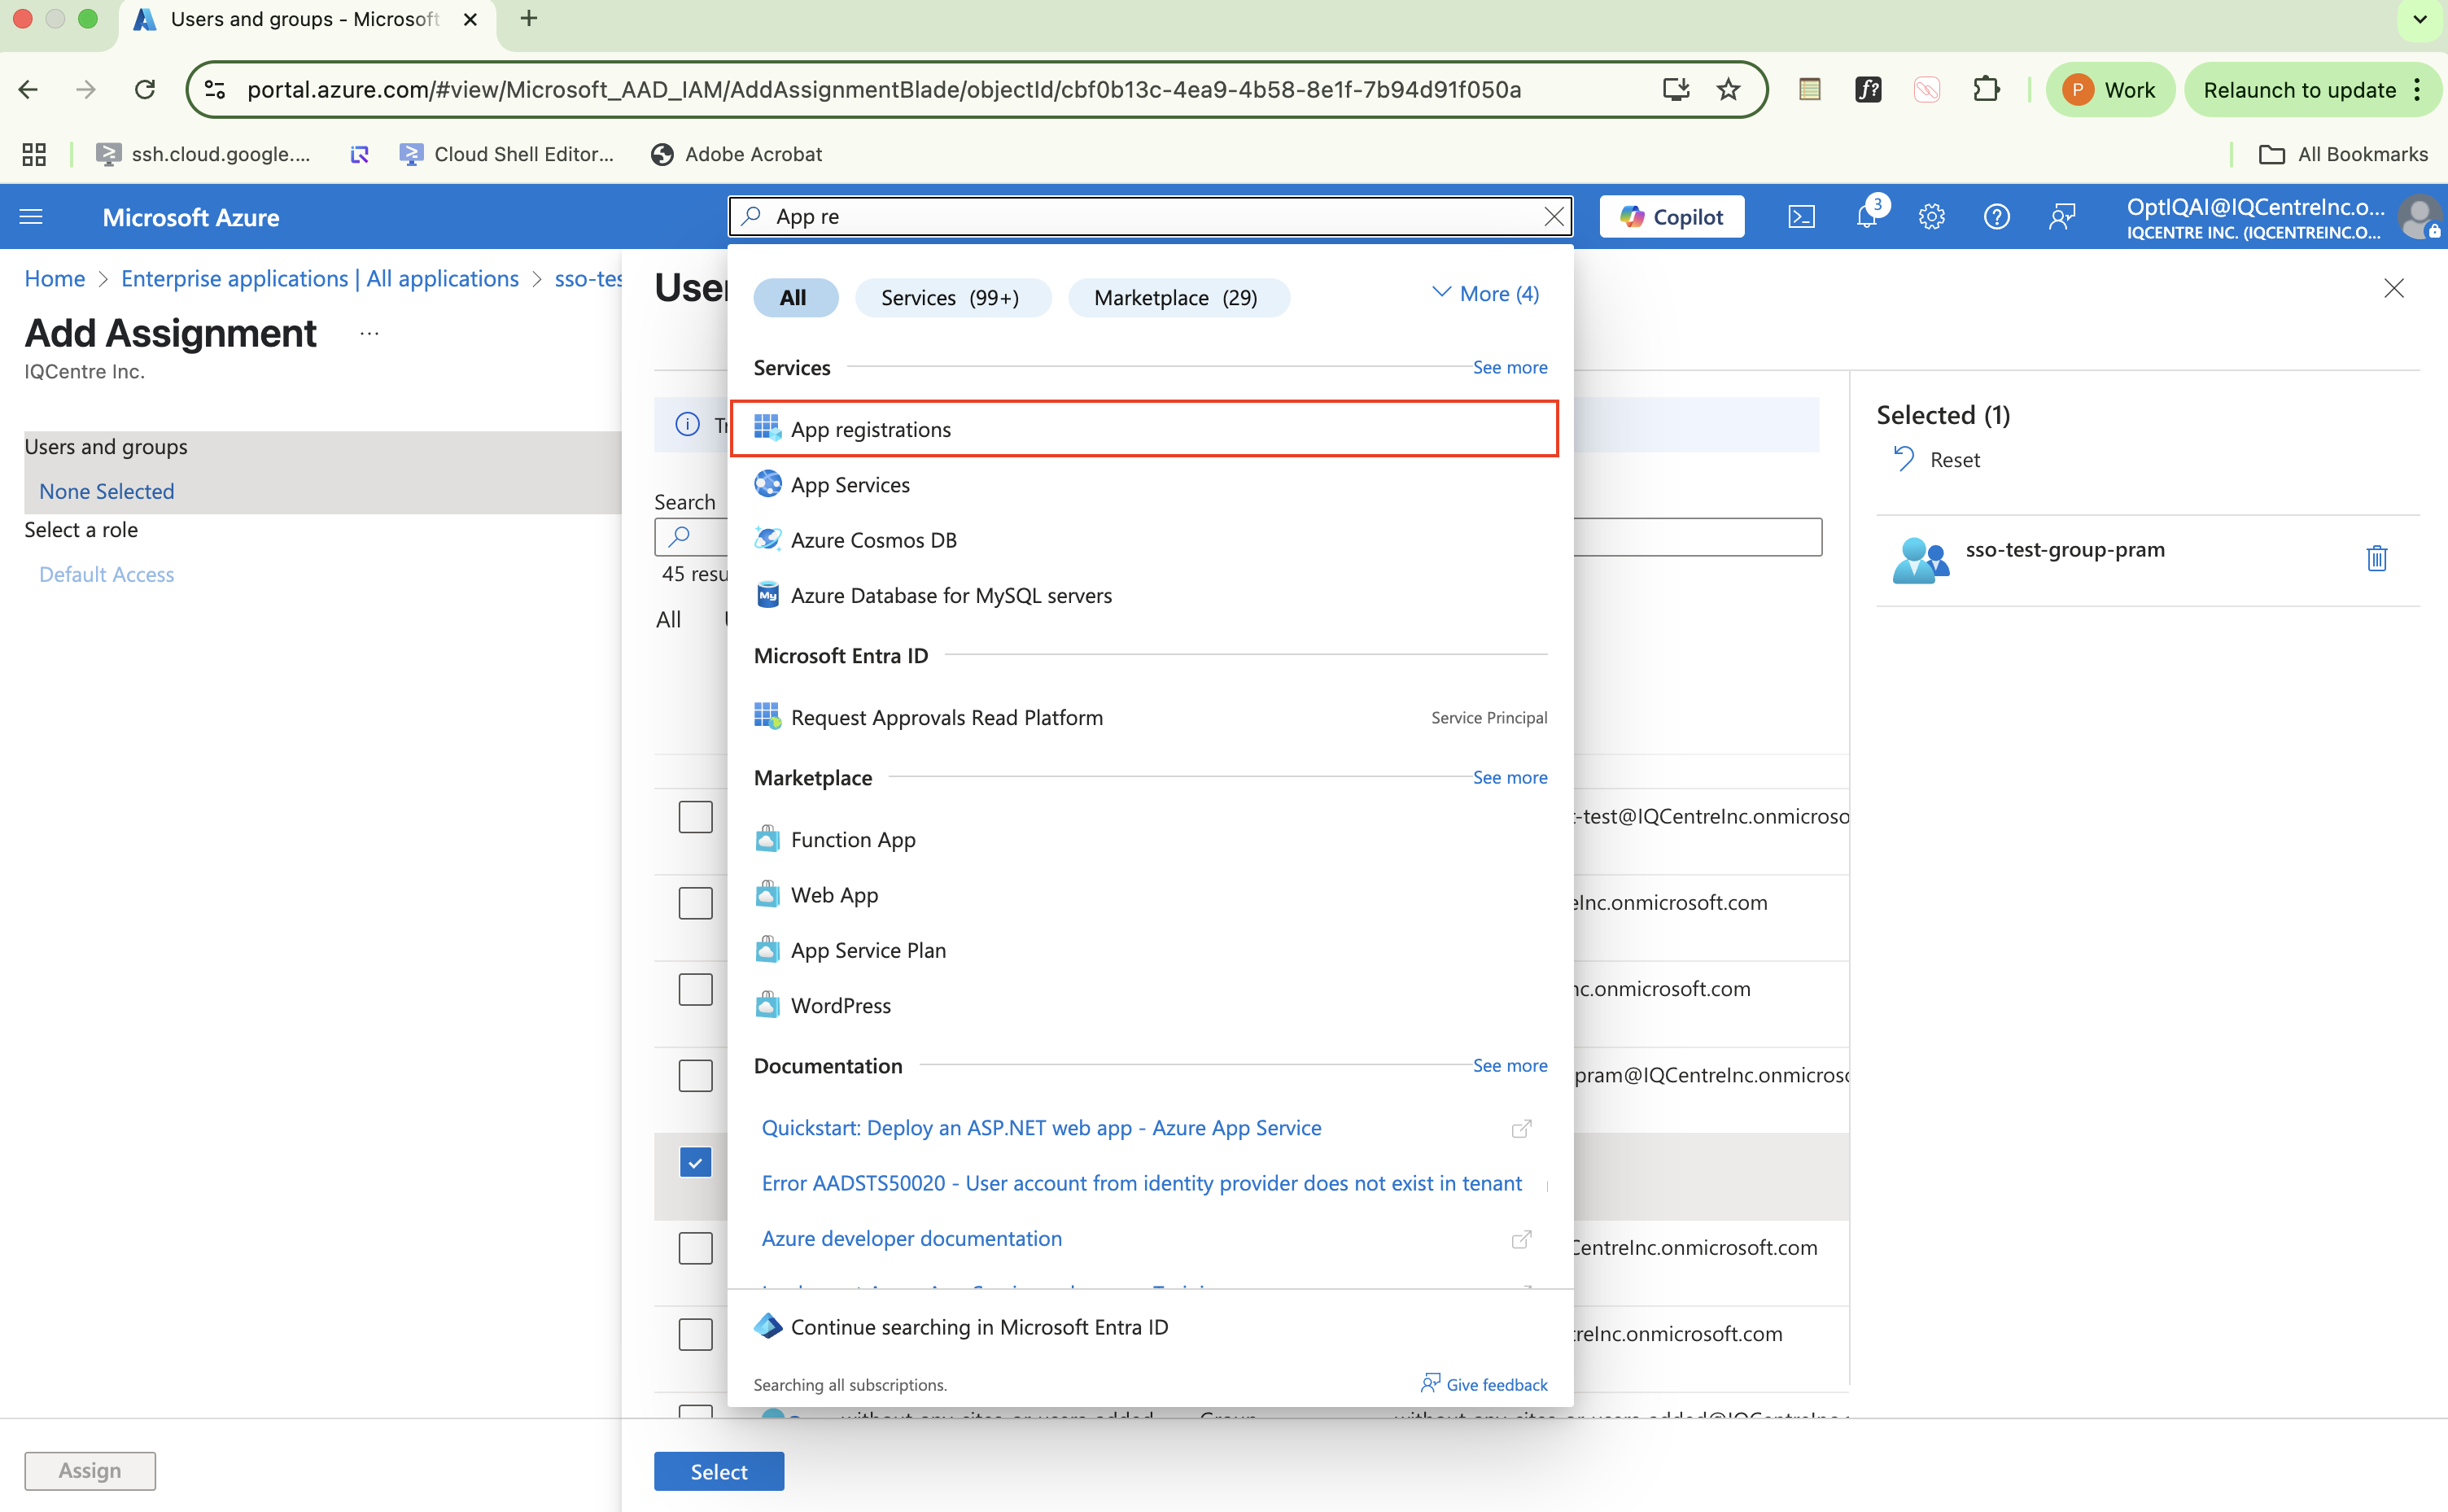
In the Azure AD type App registrations in the search bar at the top.
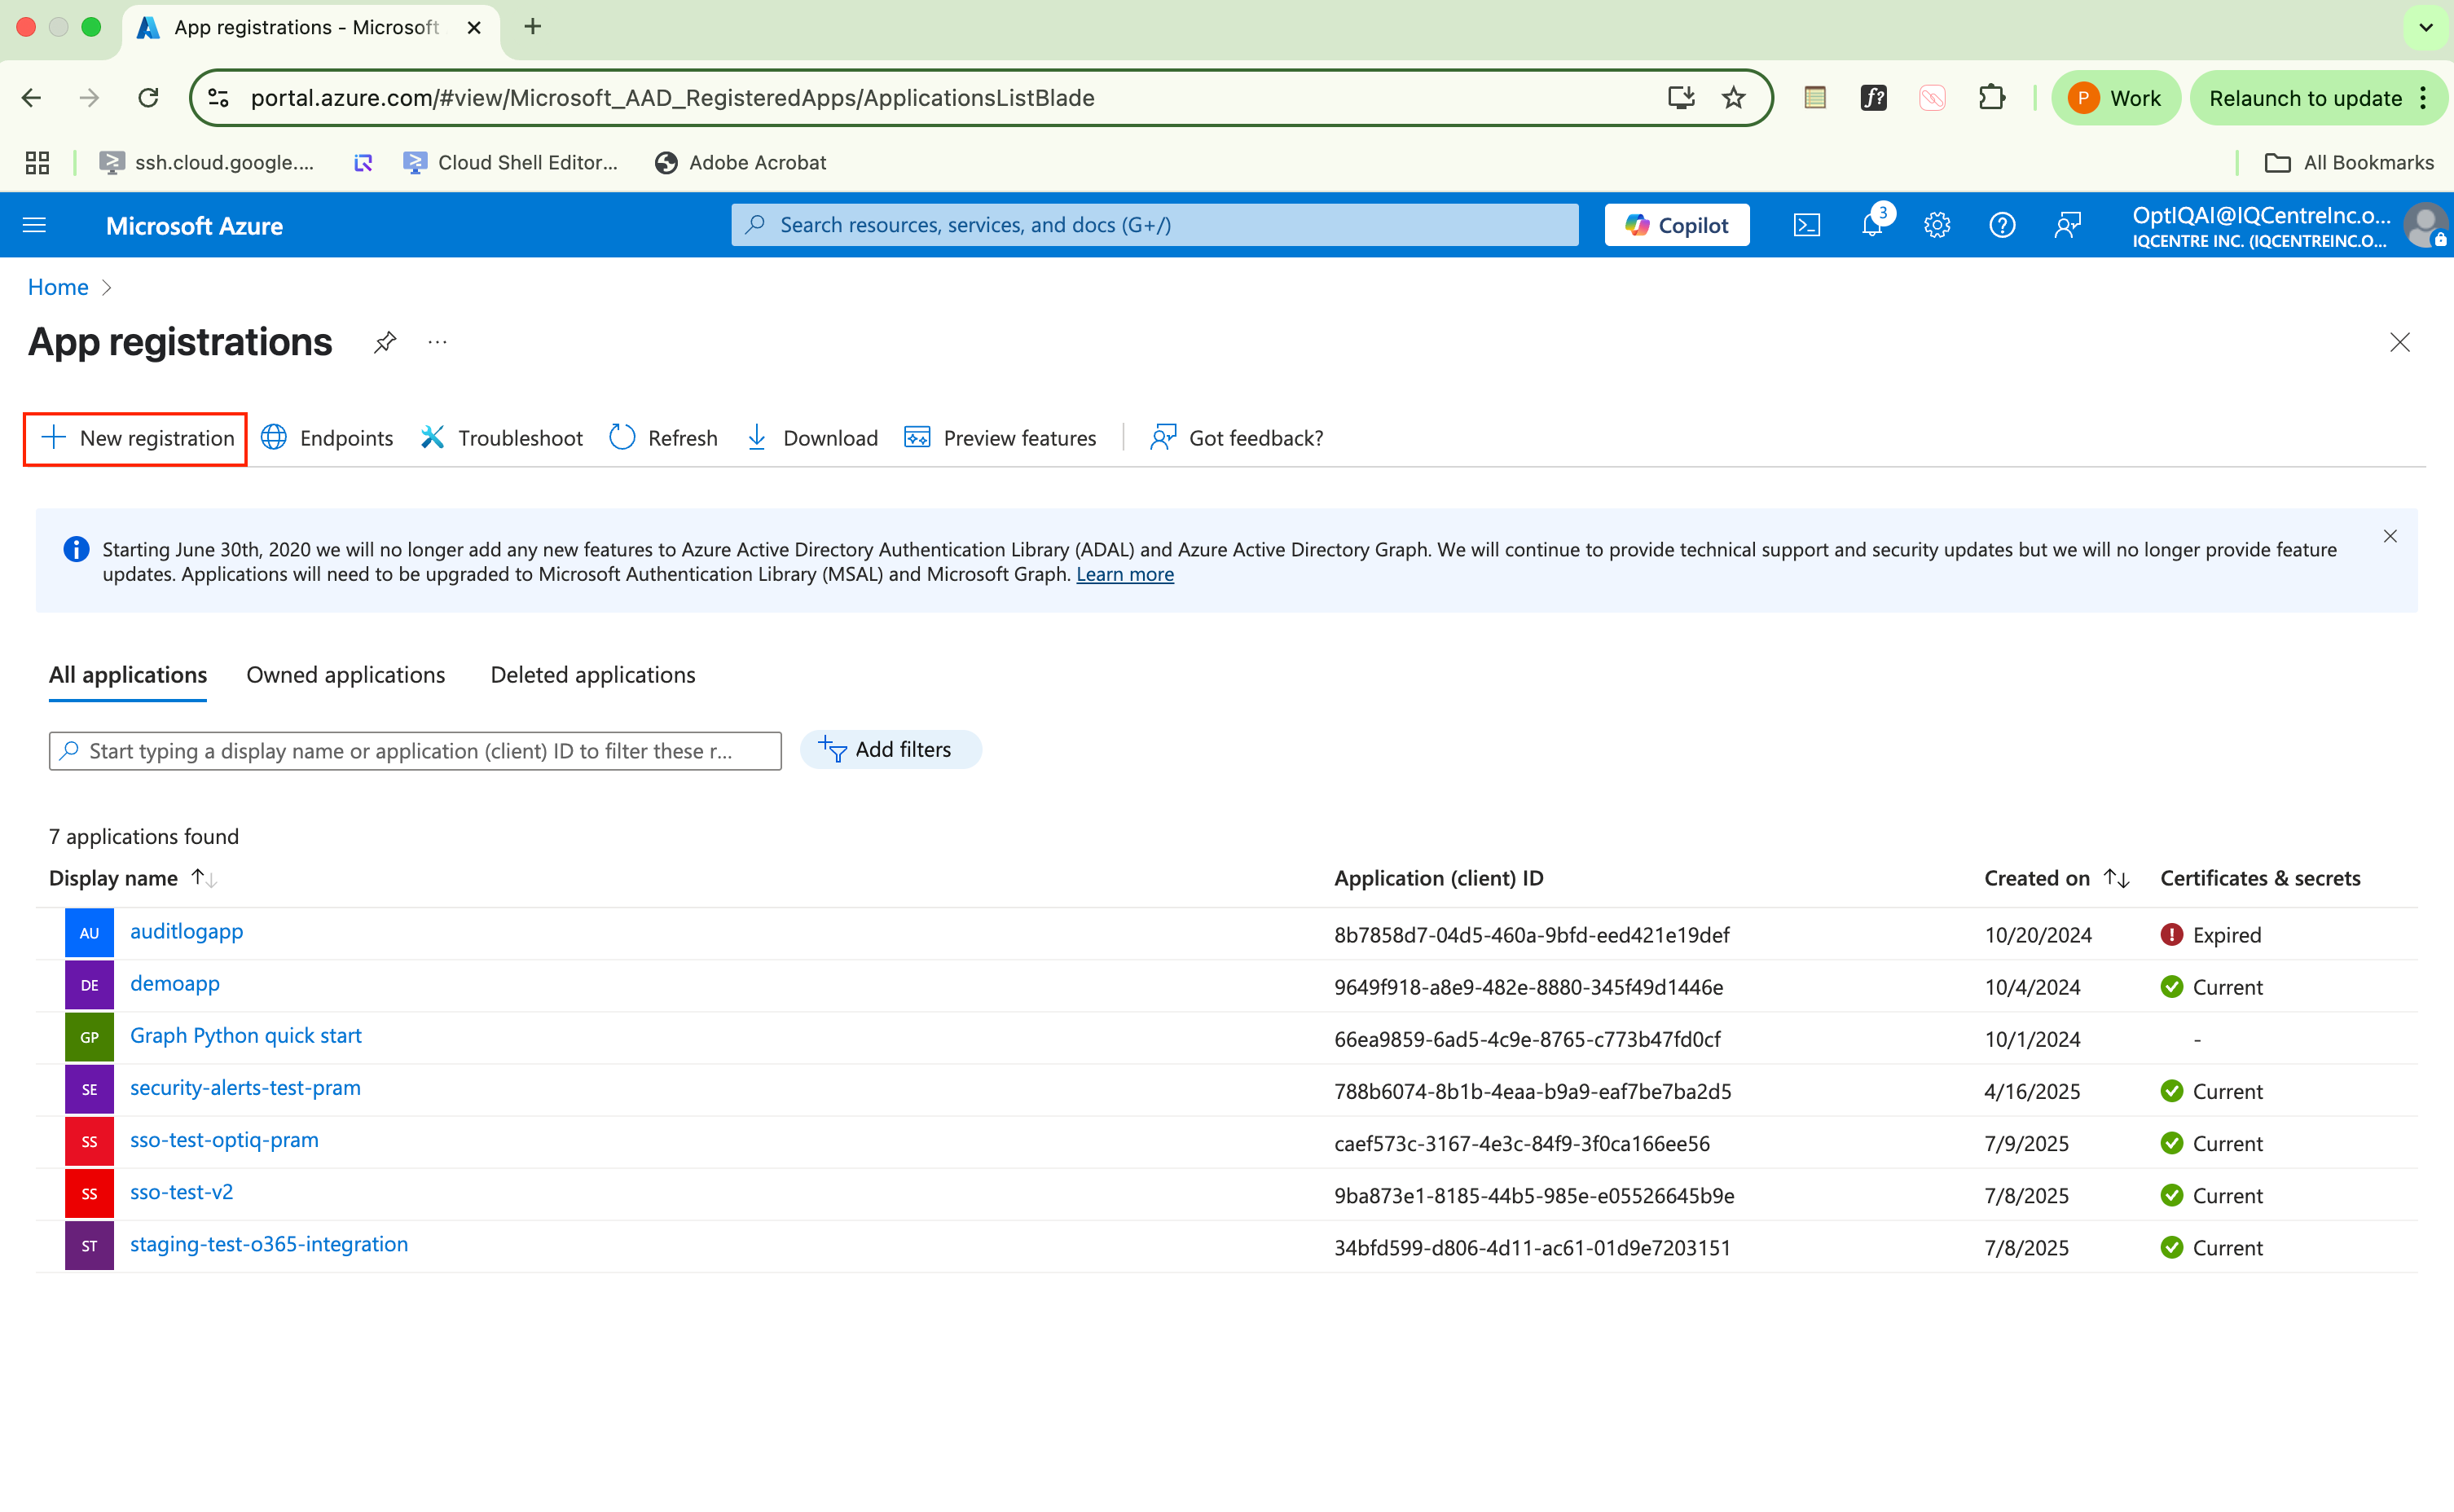
Click the + New registration button at the top.
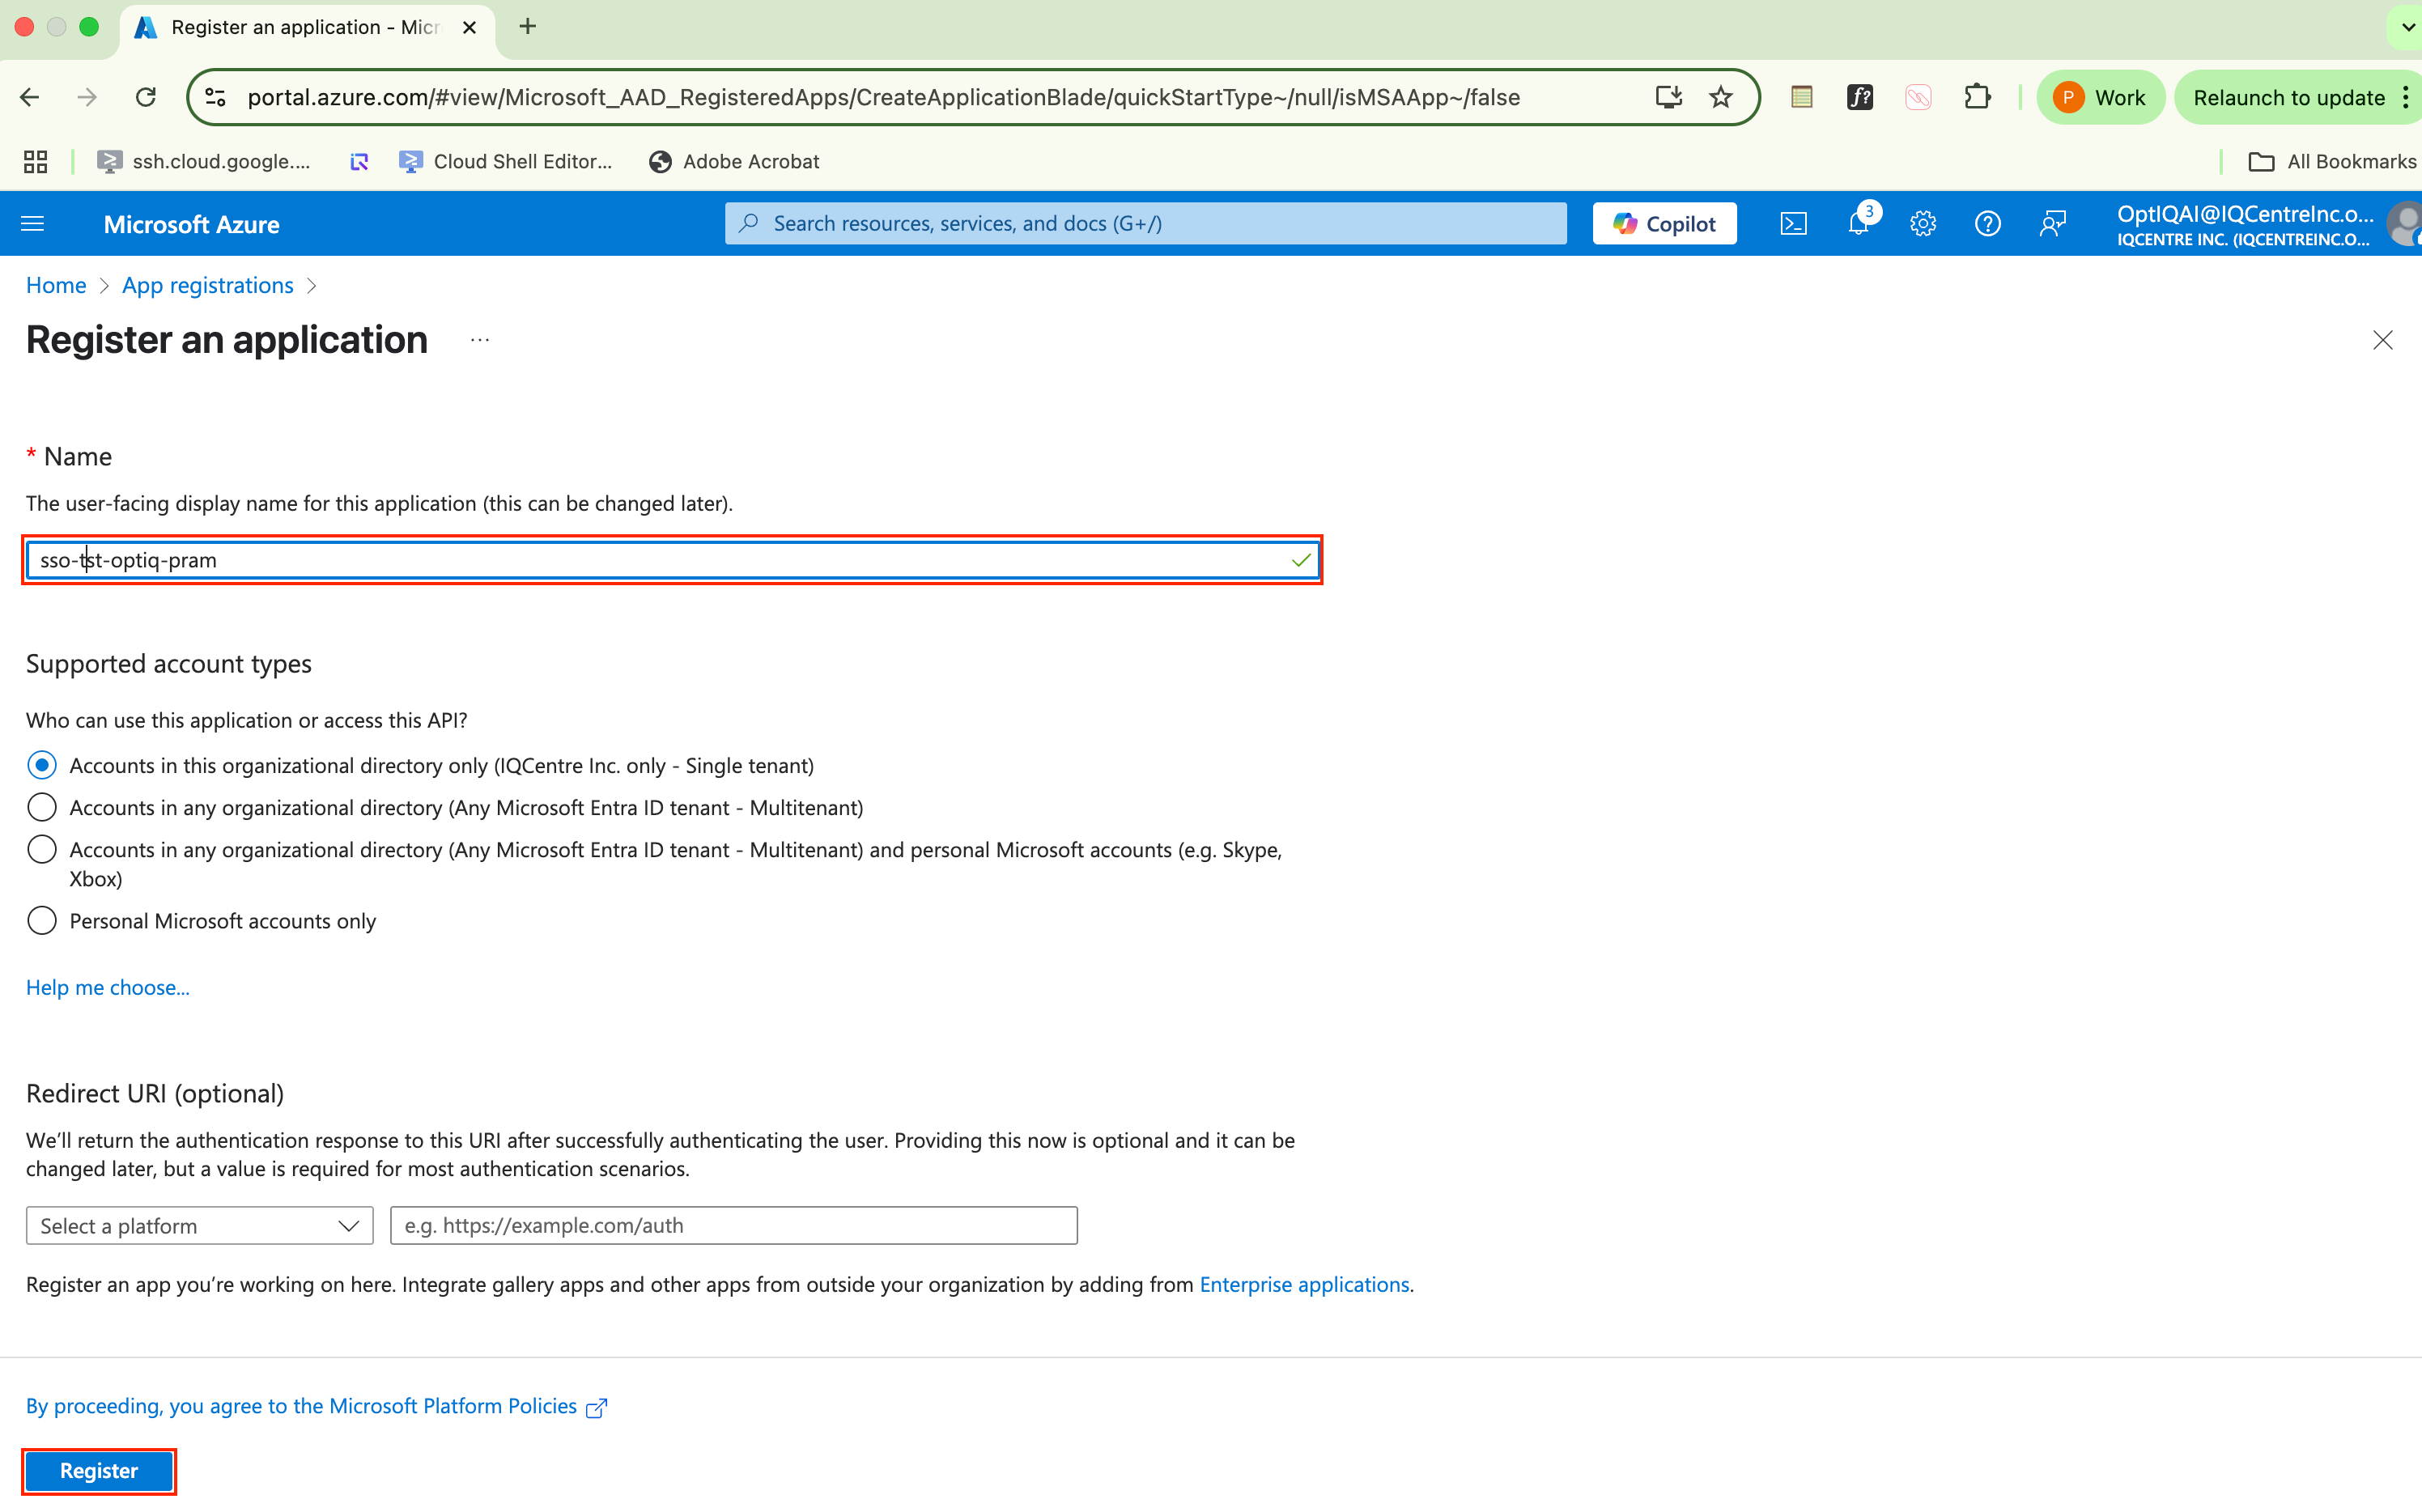
Fill in the following details:
Name: Enter the name for your application (e.g., Matters App).
Supported account types: Choose the appropriate setting for your organization (e.g., Accounts in this organizational directory only).
Redirect URI (skip for now, can be set later): Provide the redirect URI (available in the Identity Provider tab on our website).
Click Register to create the application.
Step 3: Configure API Permissions
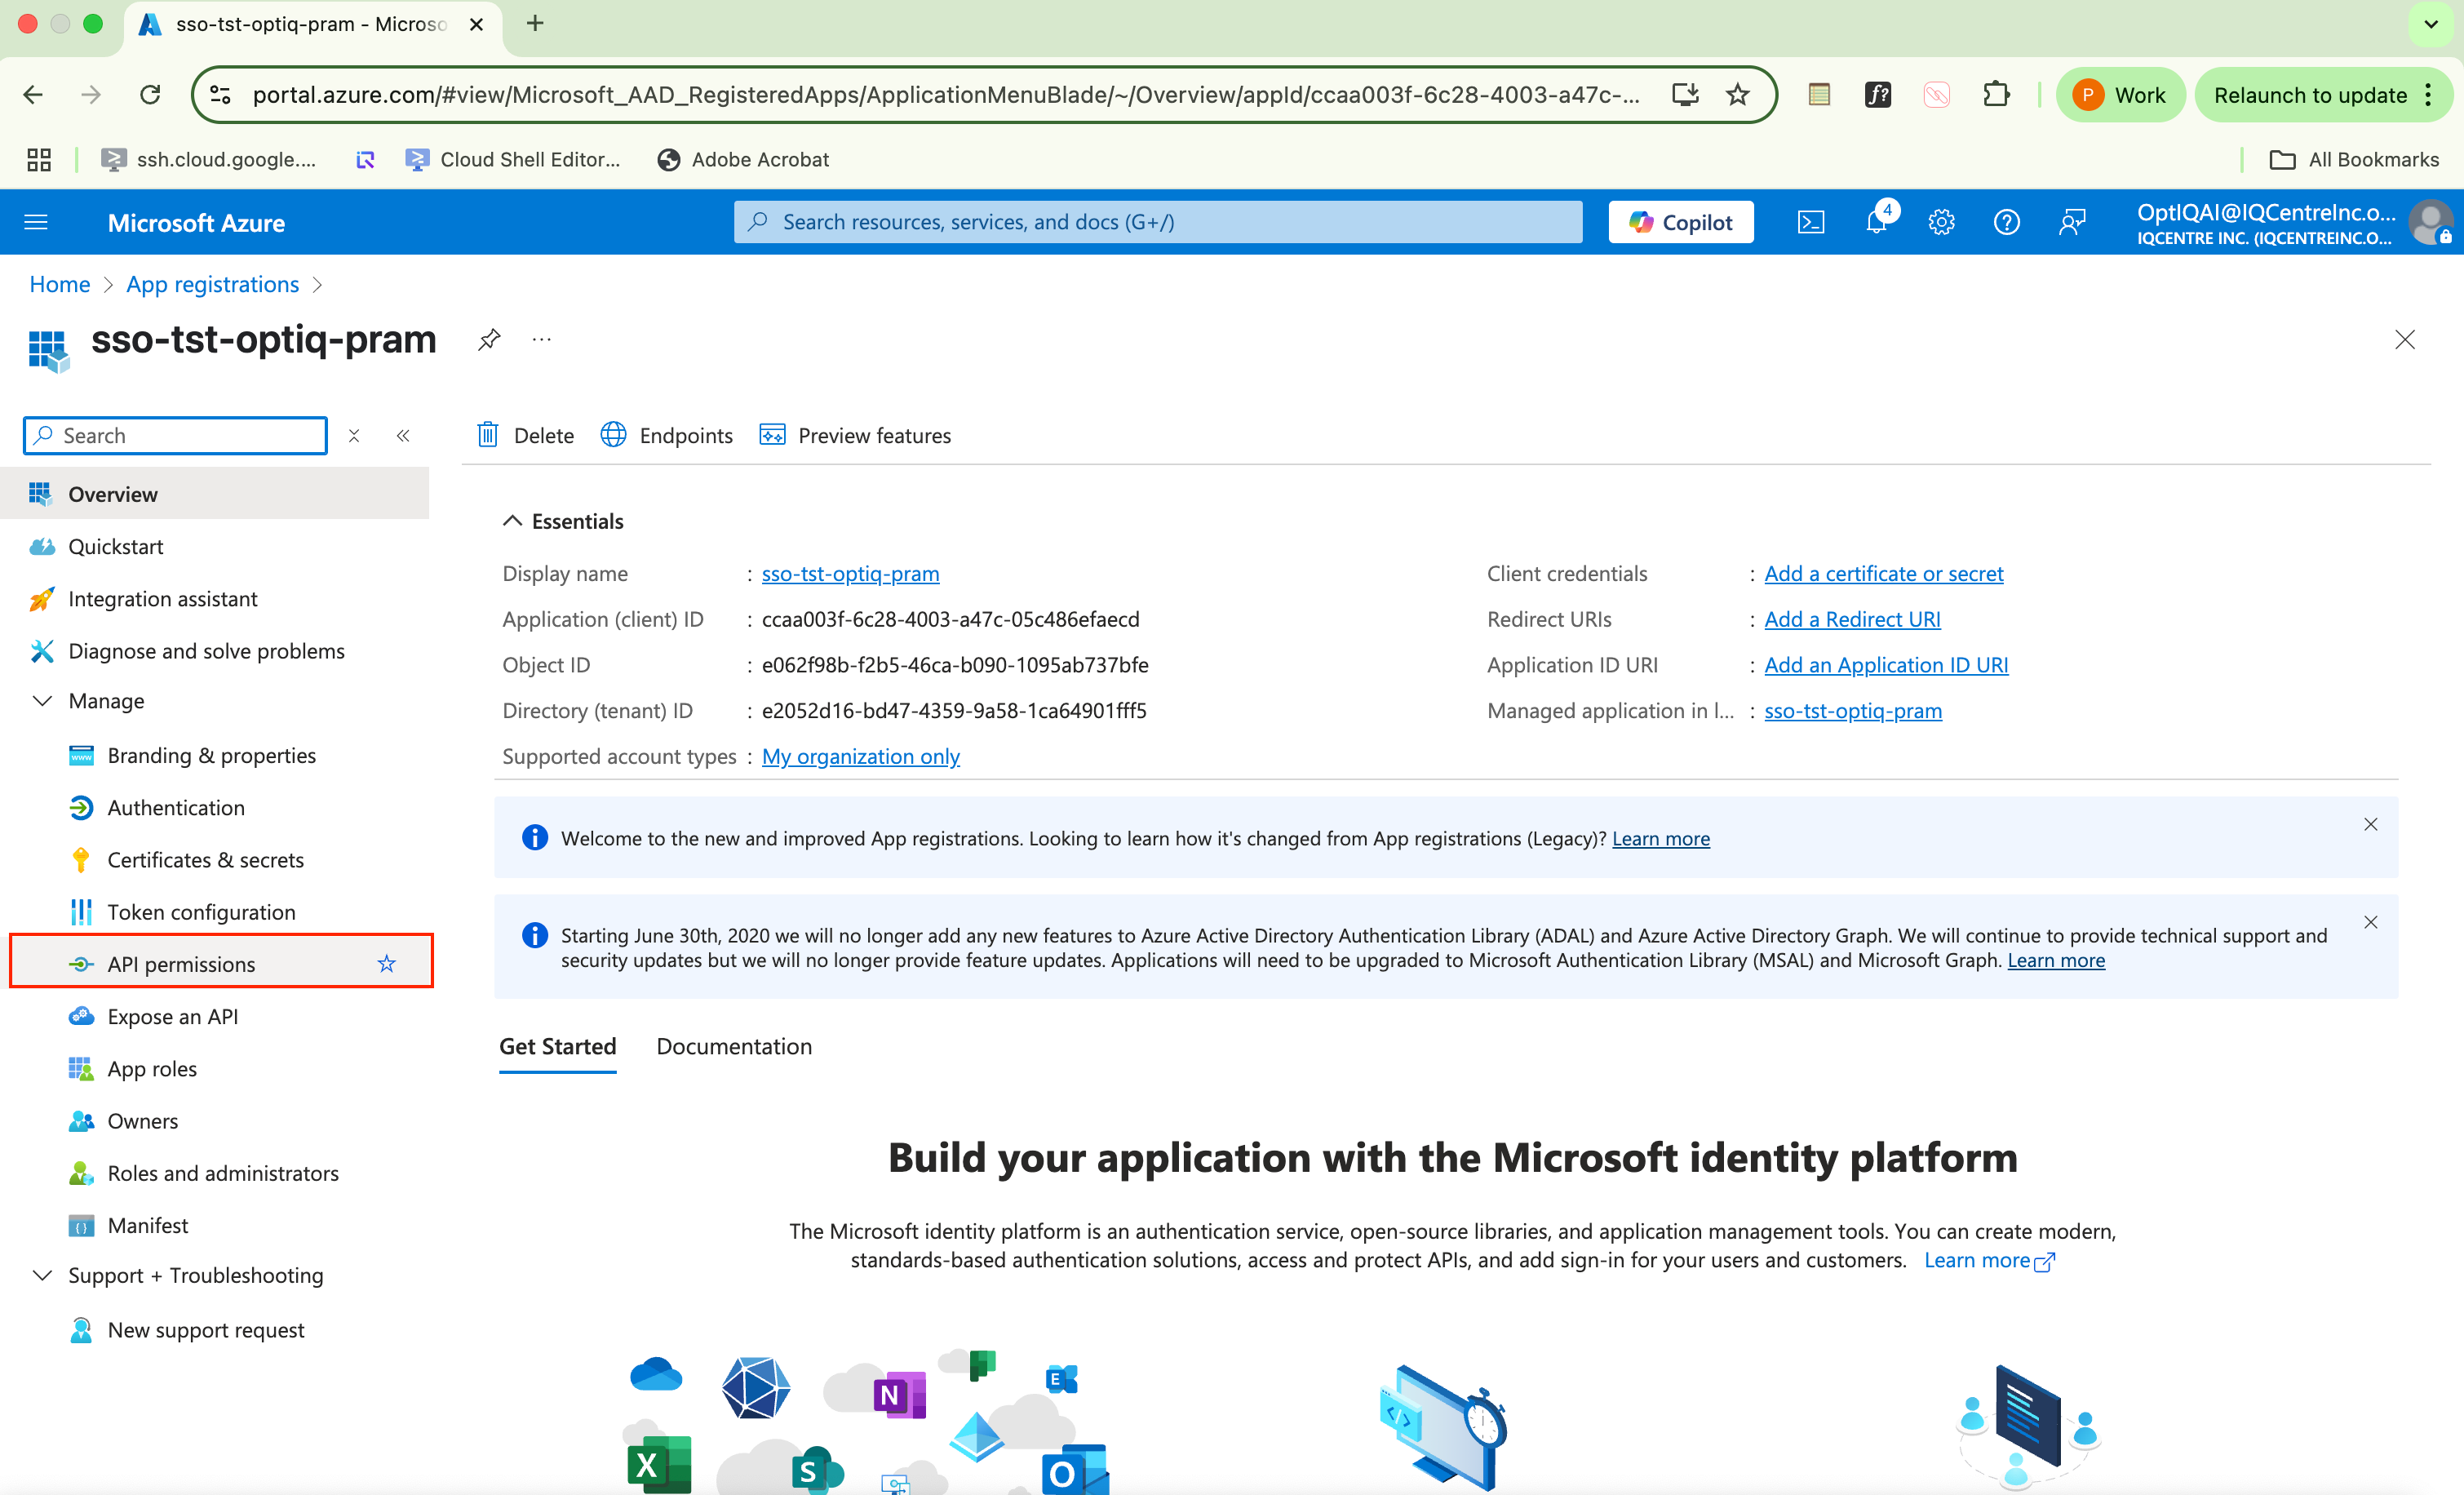
Once the app is registered, go to the API Permissions tab.
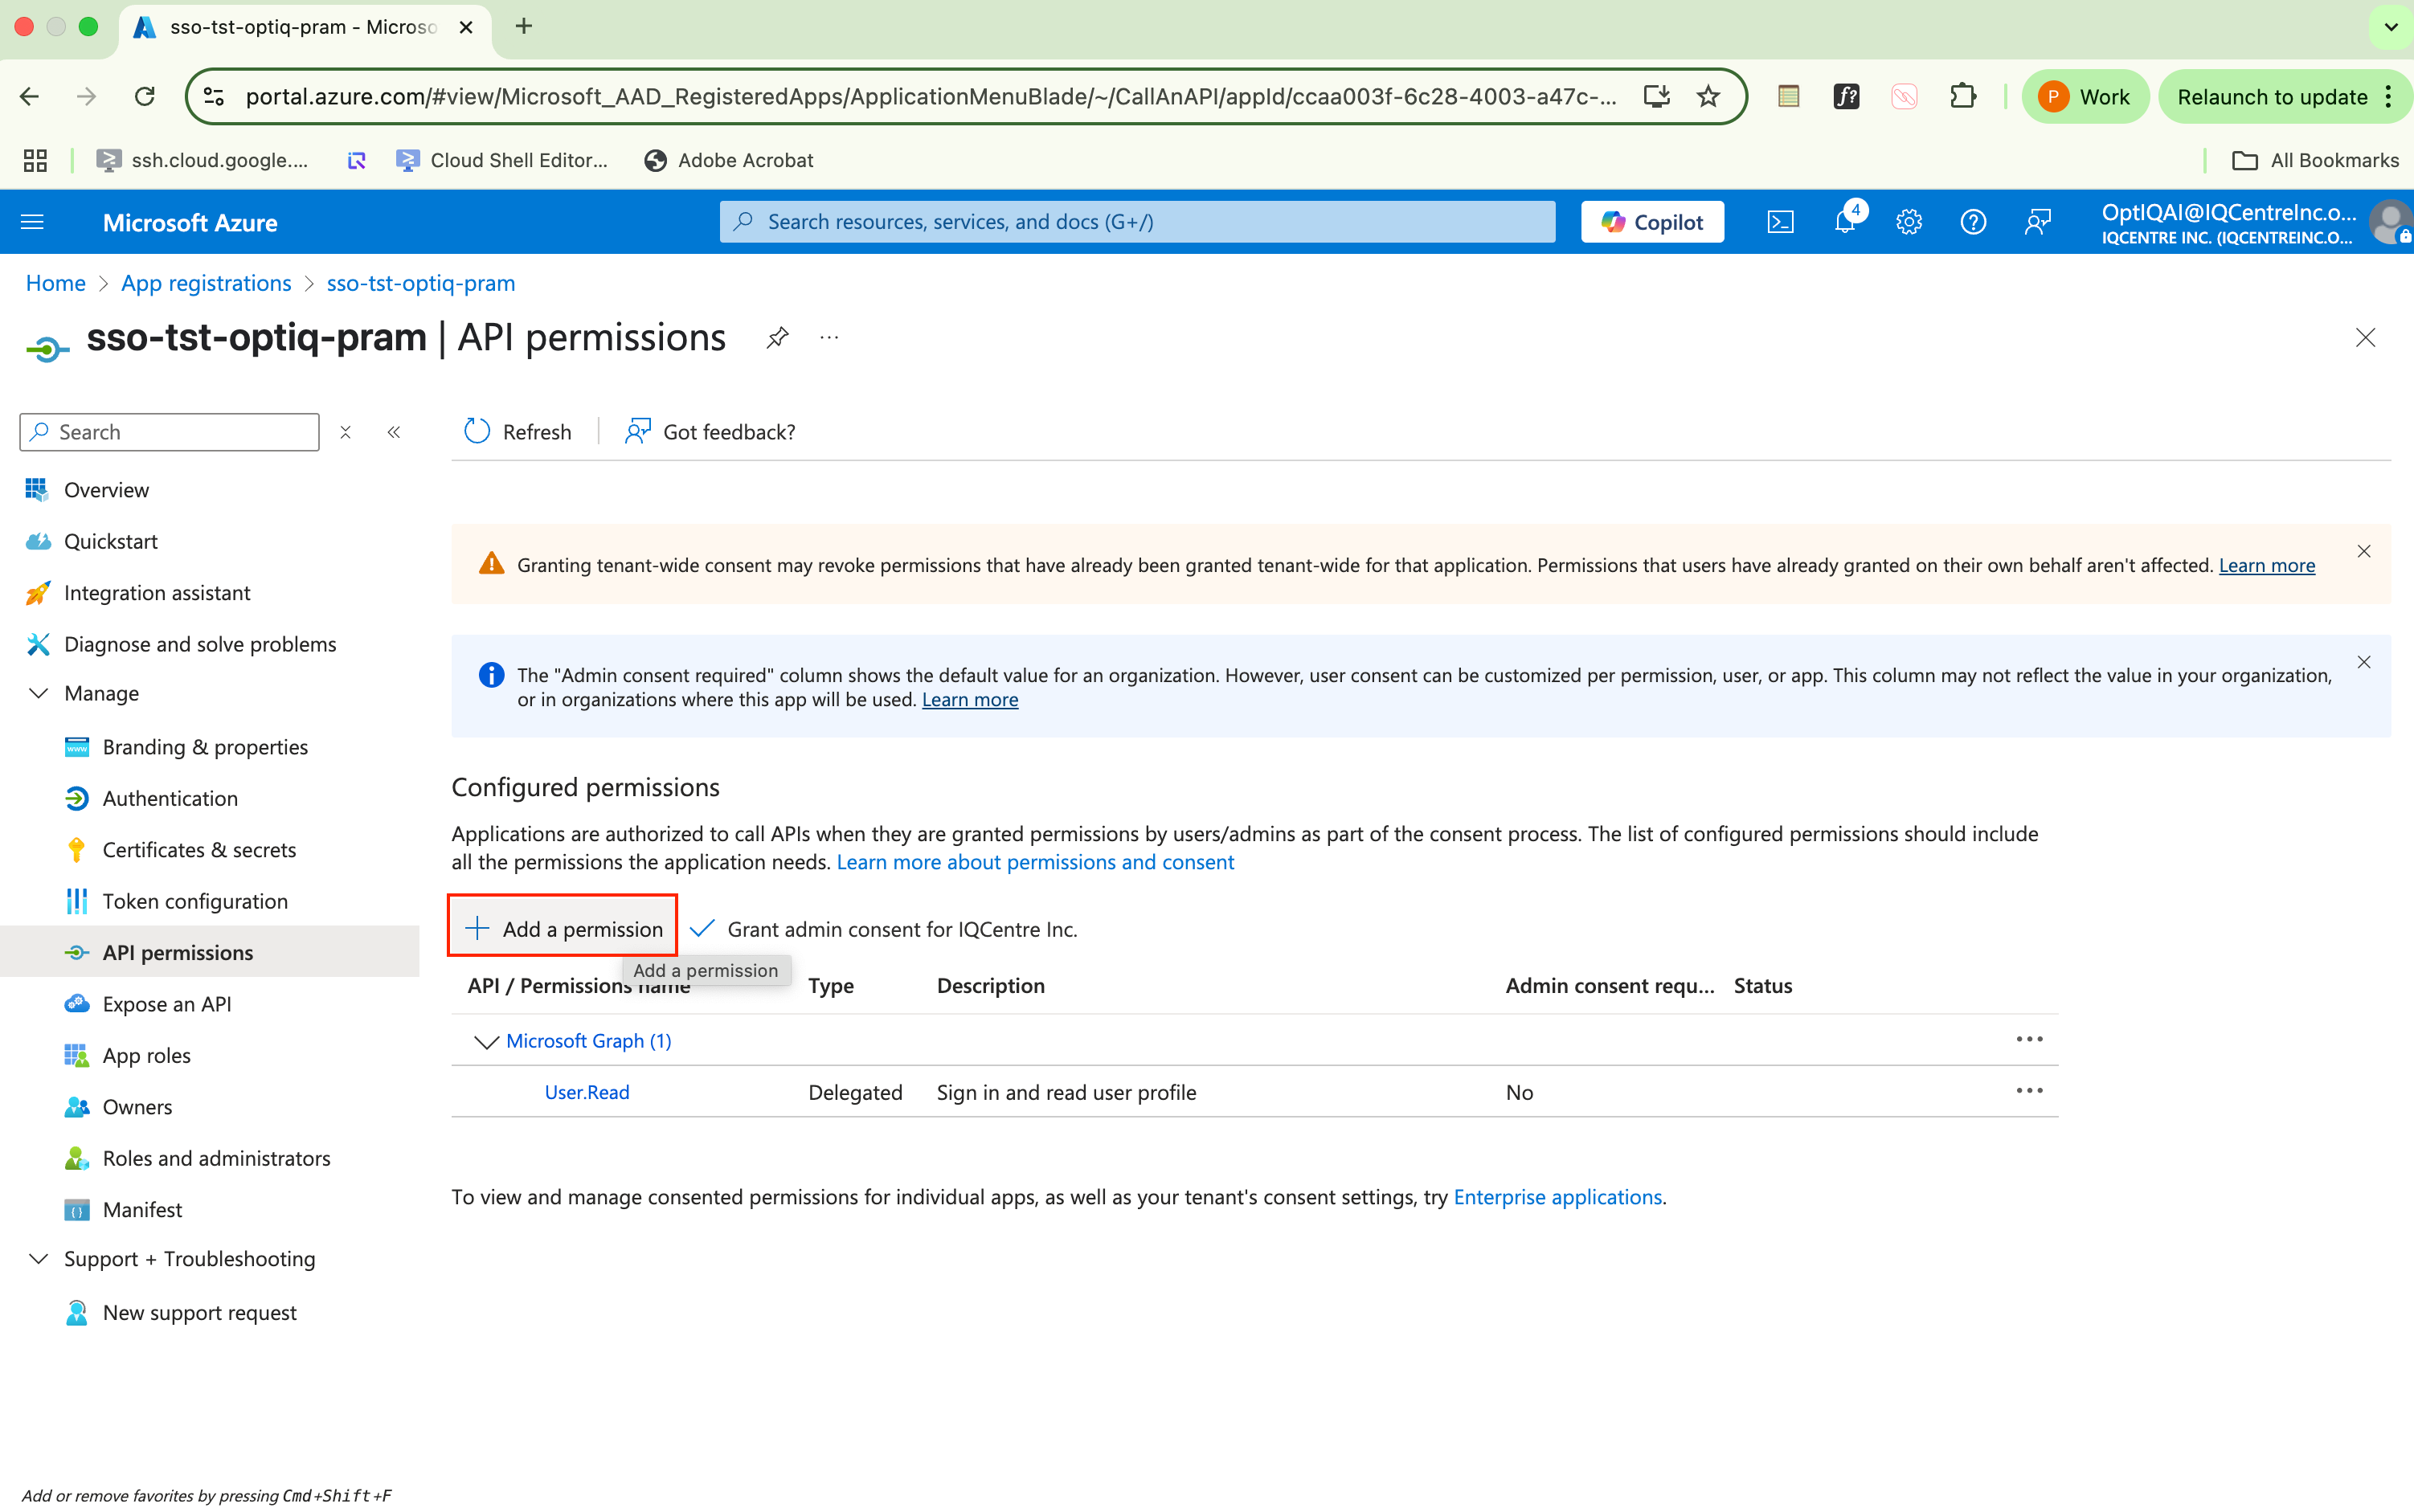
Click Add Permission and select Microsoft Graph.
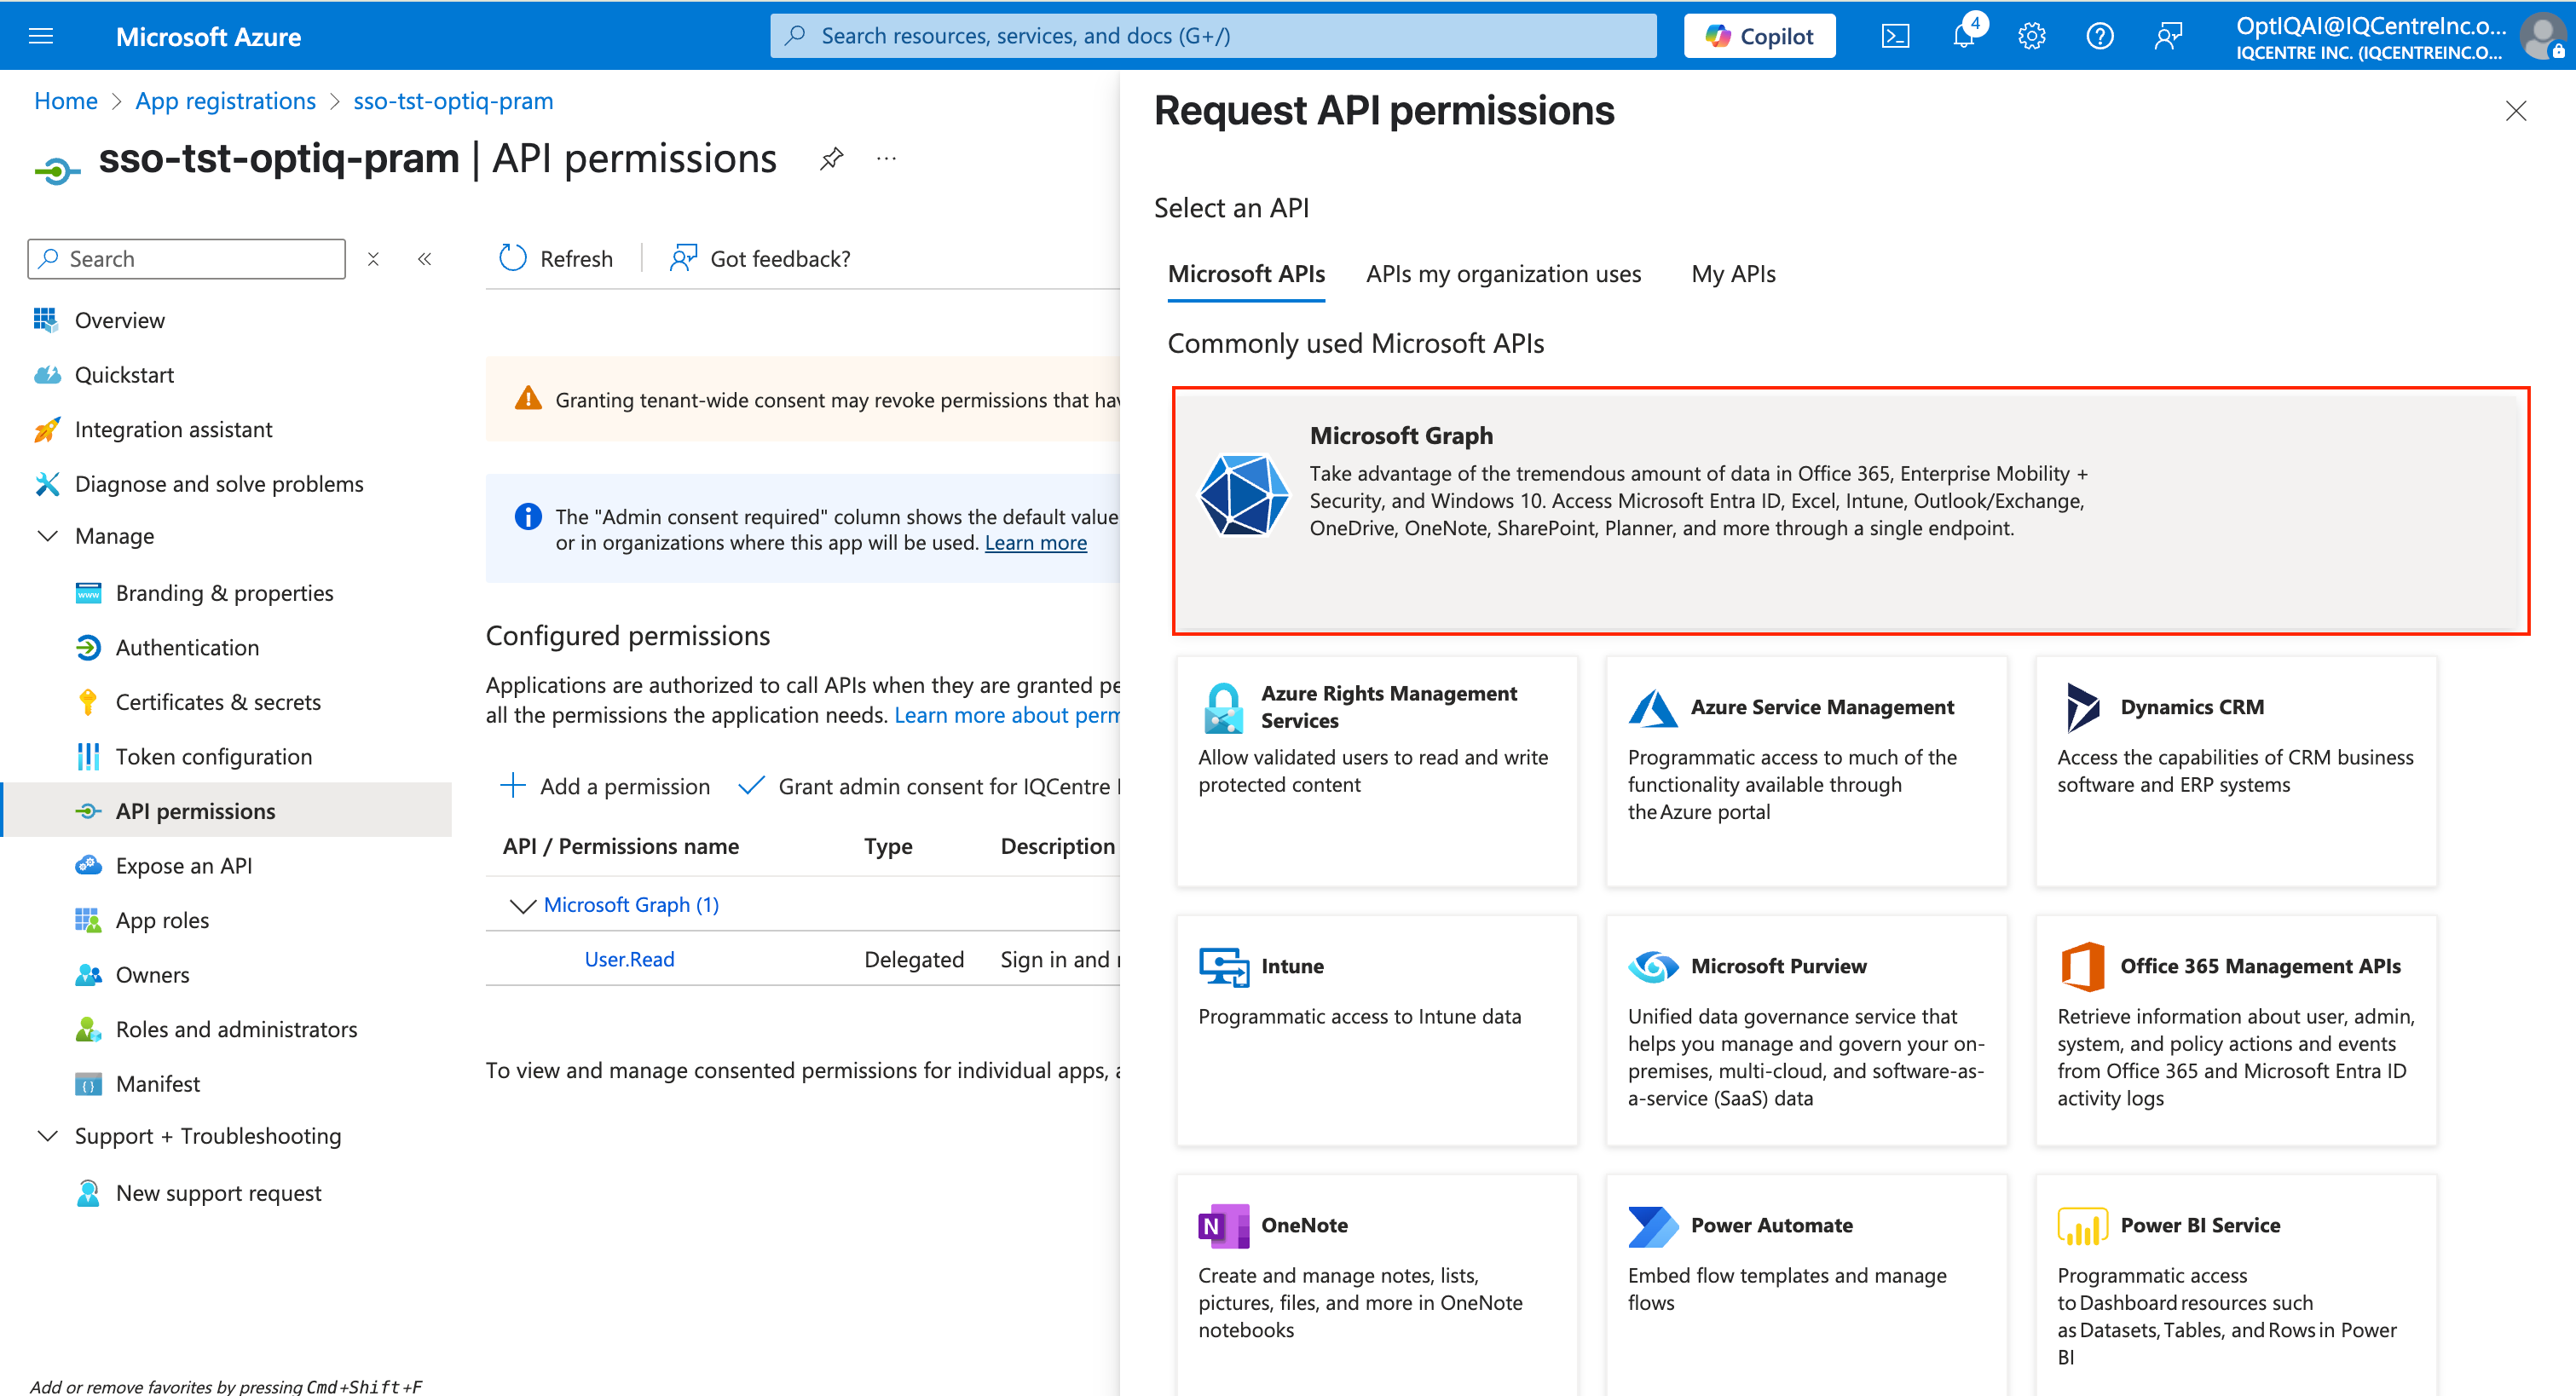
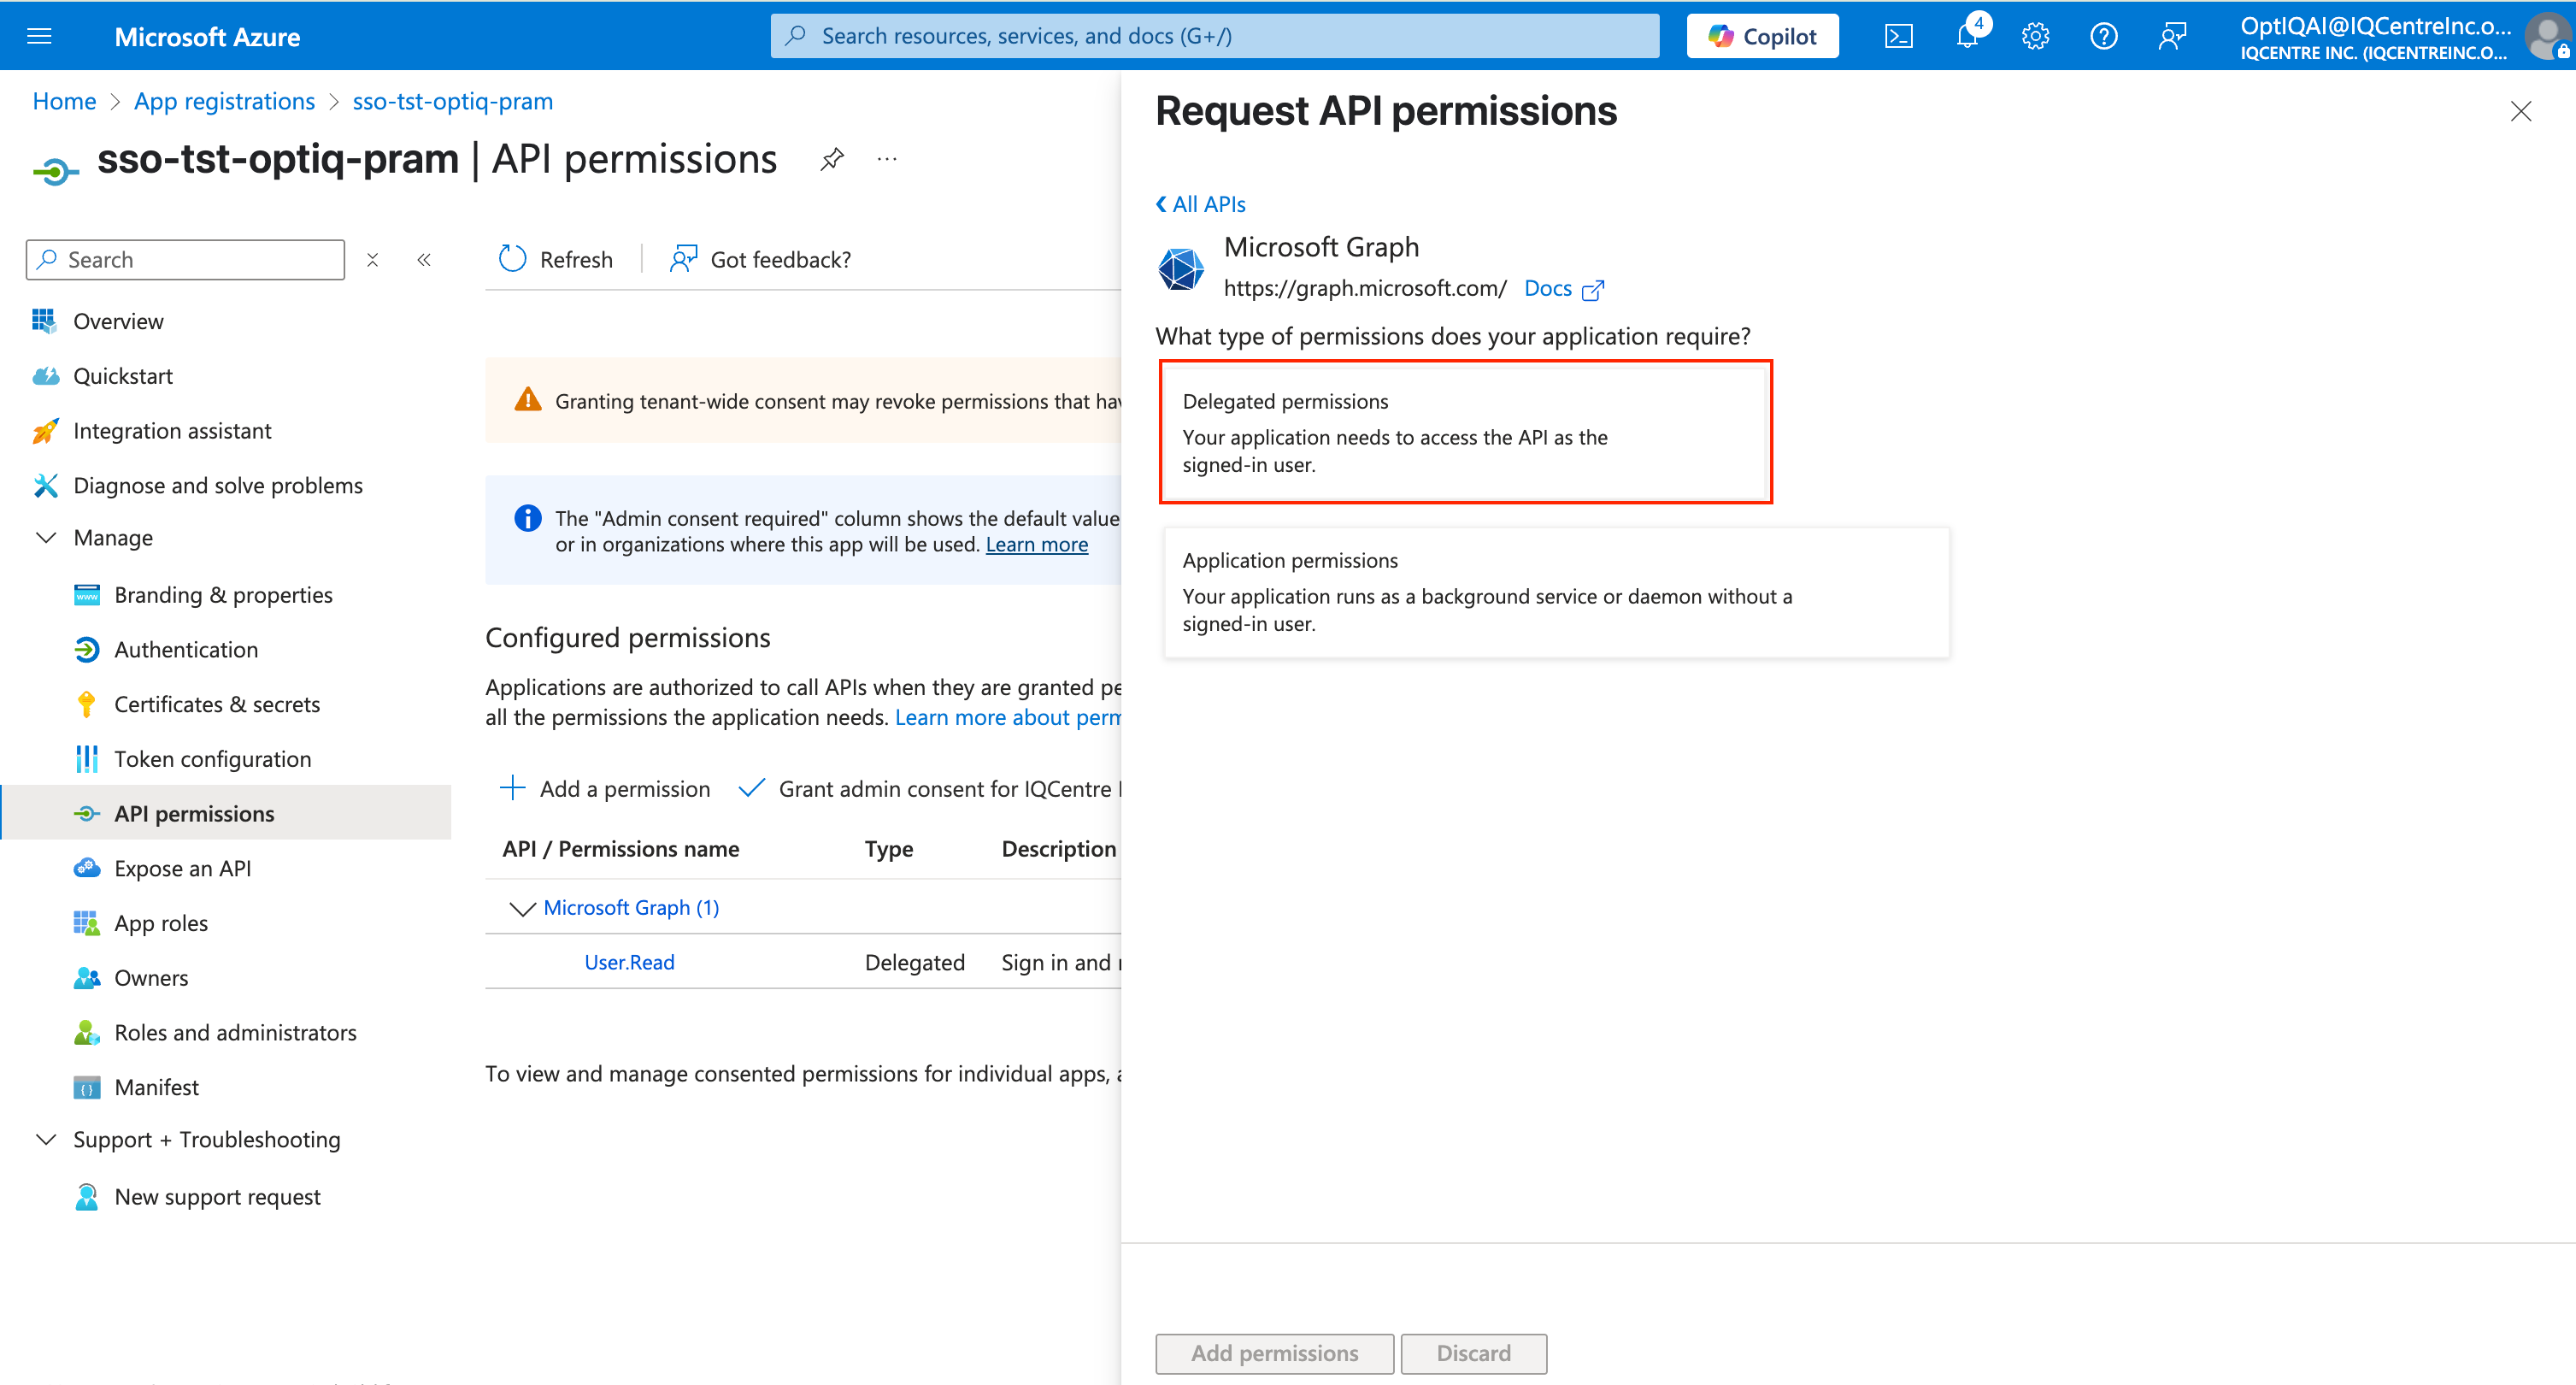
Select the type of permissions needed for your app:
Delegated Permissions: Permissions granted with a signed-in user.
Application Permissions: Permissions granted without a user being signed in.
In our case, Delegated Permissions is apt.
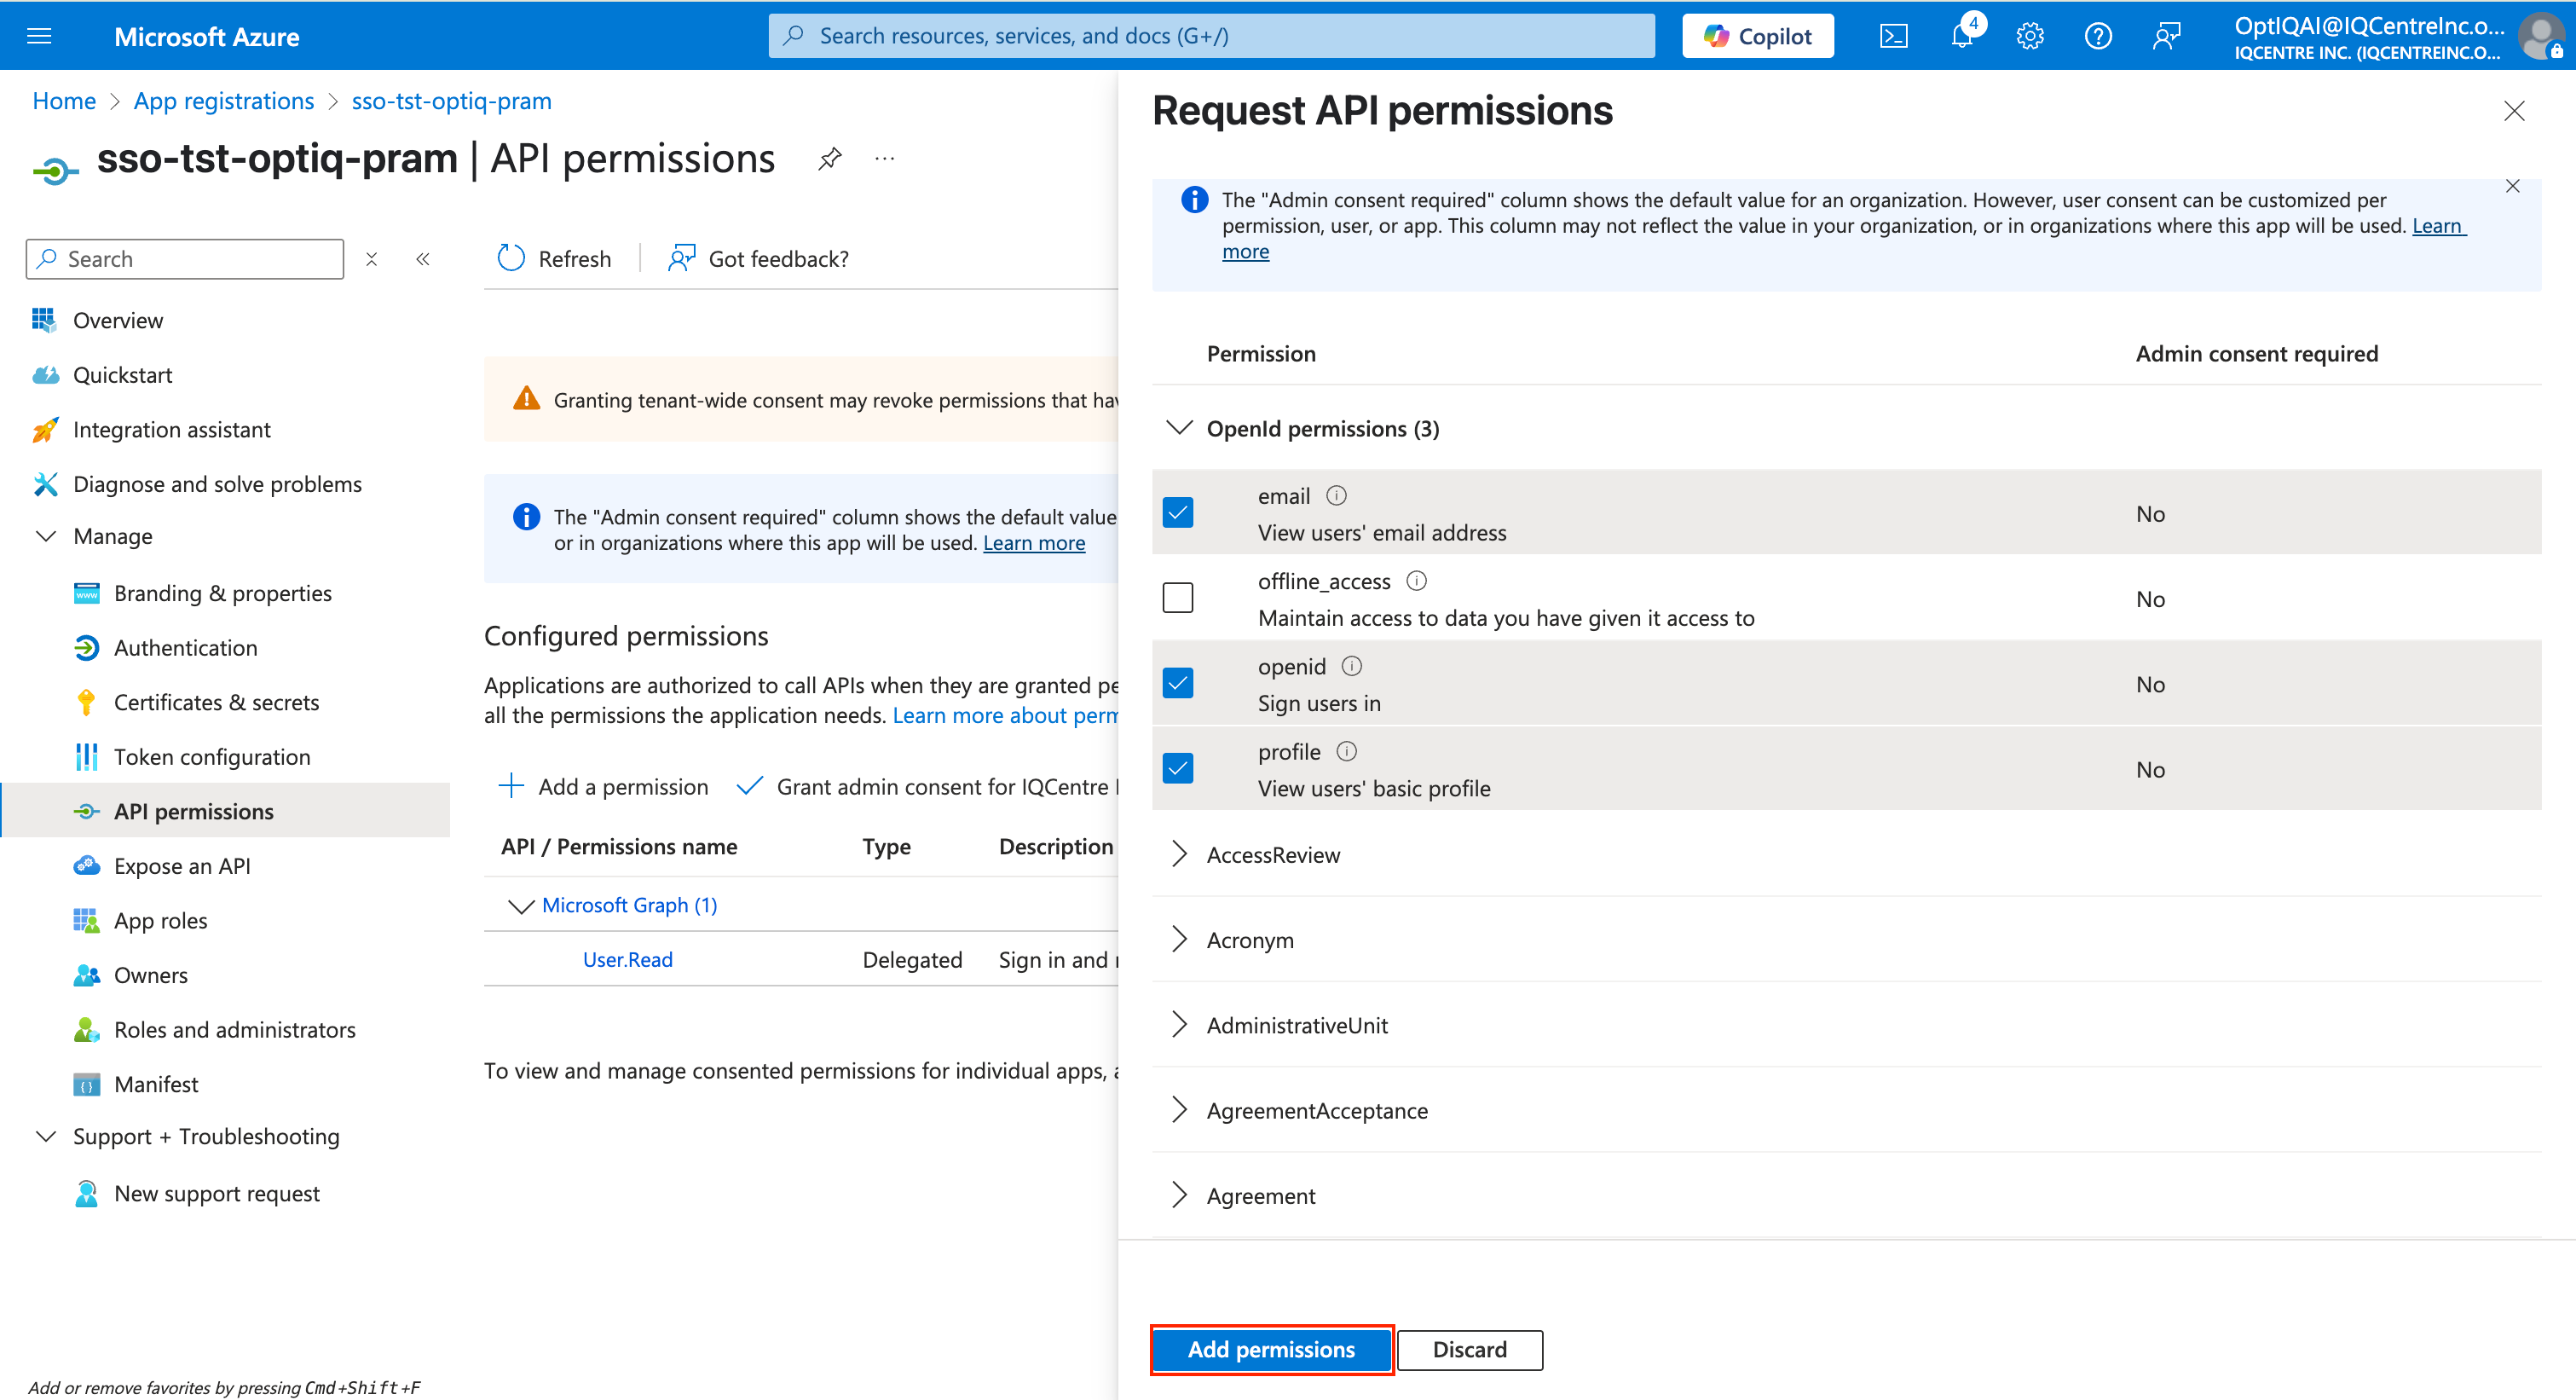
Search for and select the necessary permissions like openid, profile and email, and click Add Permissions.
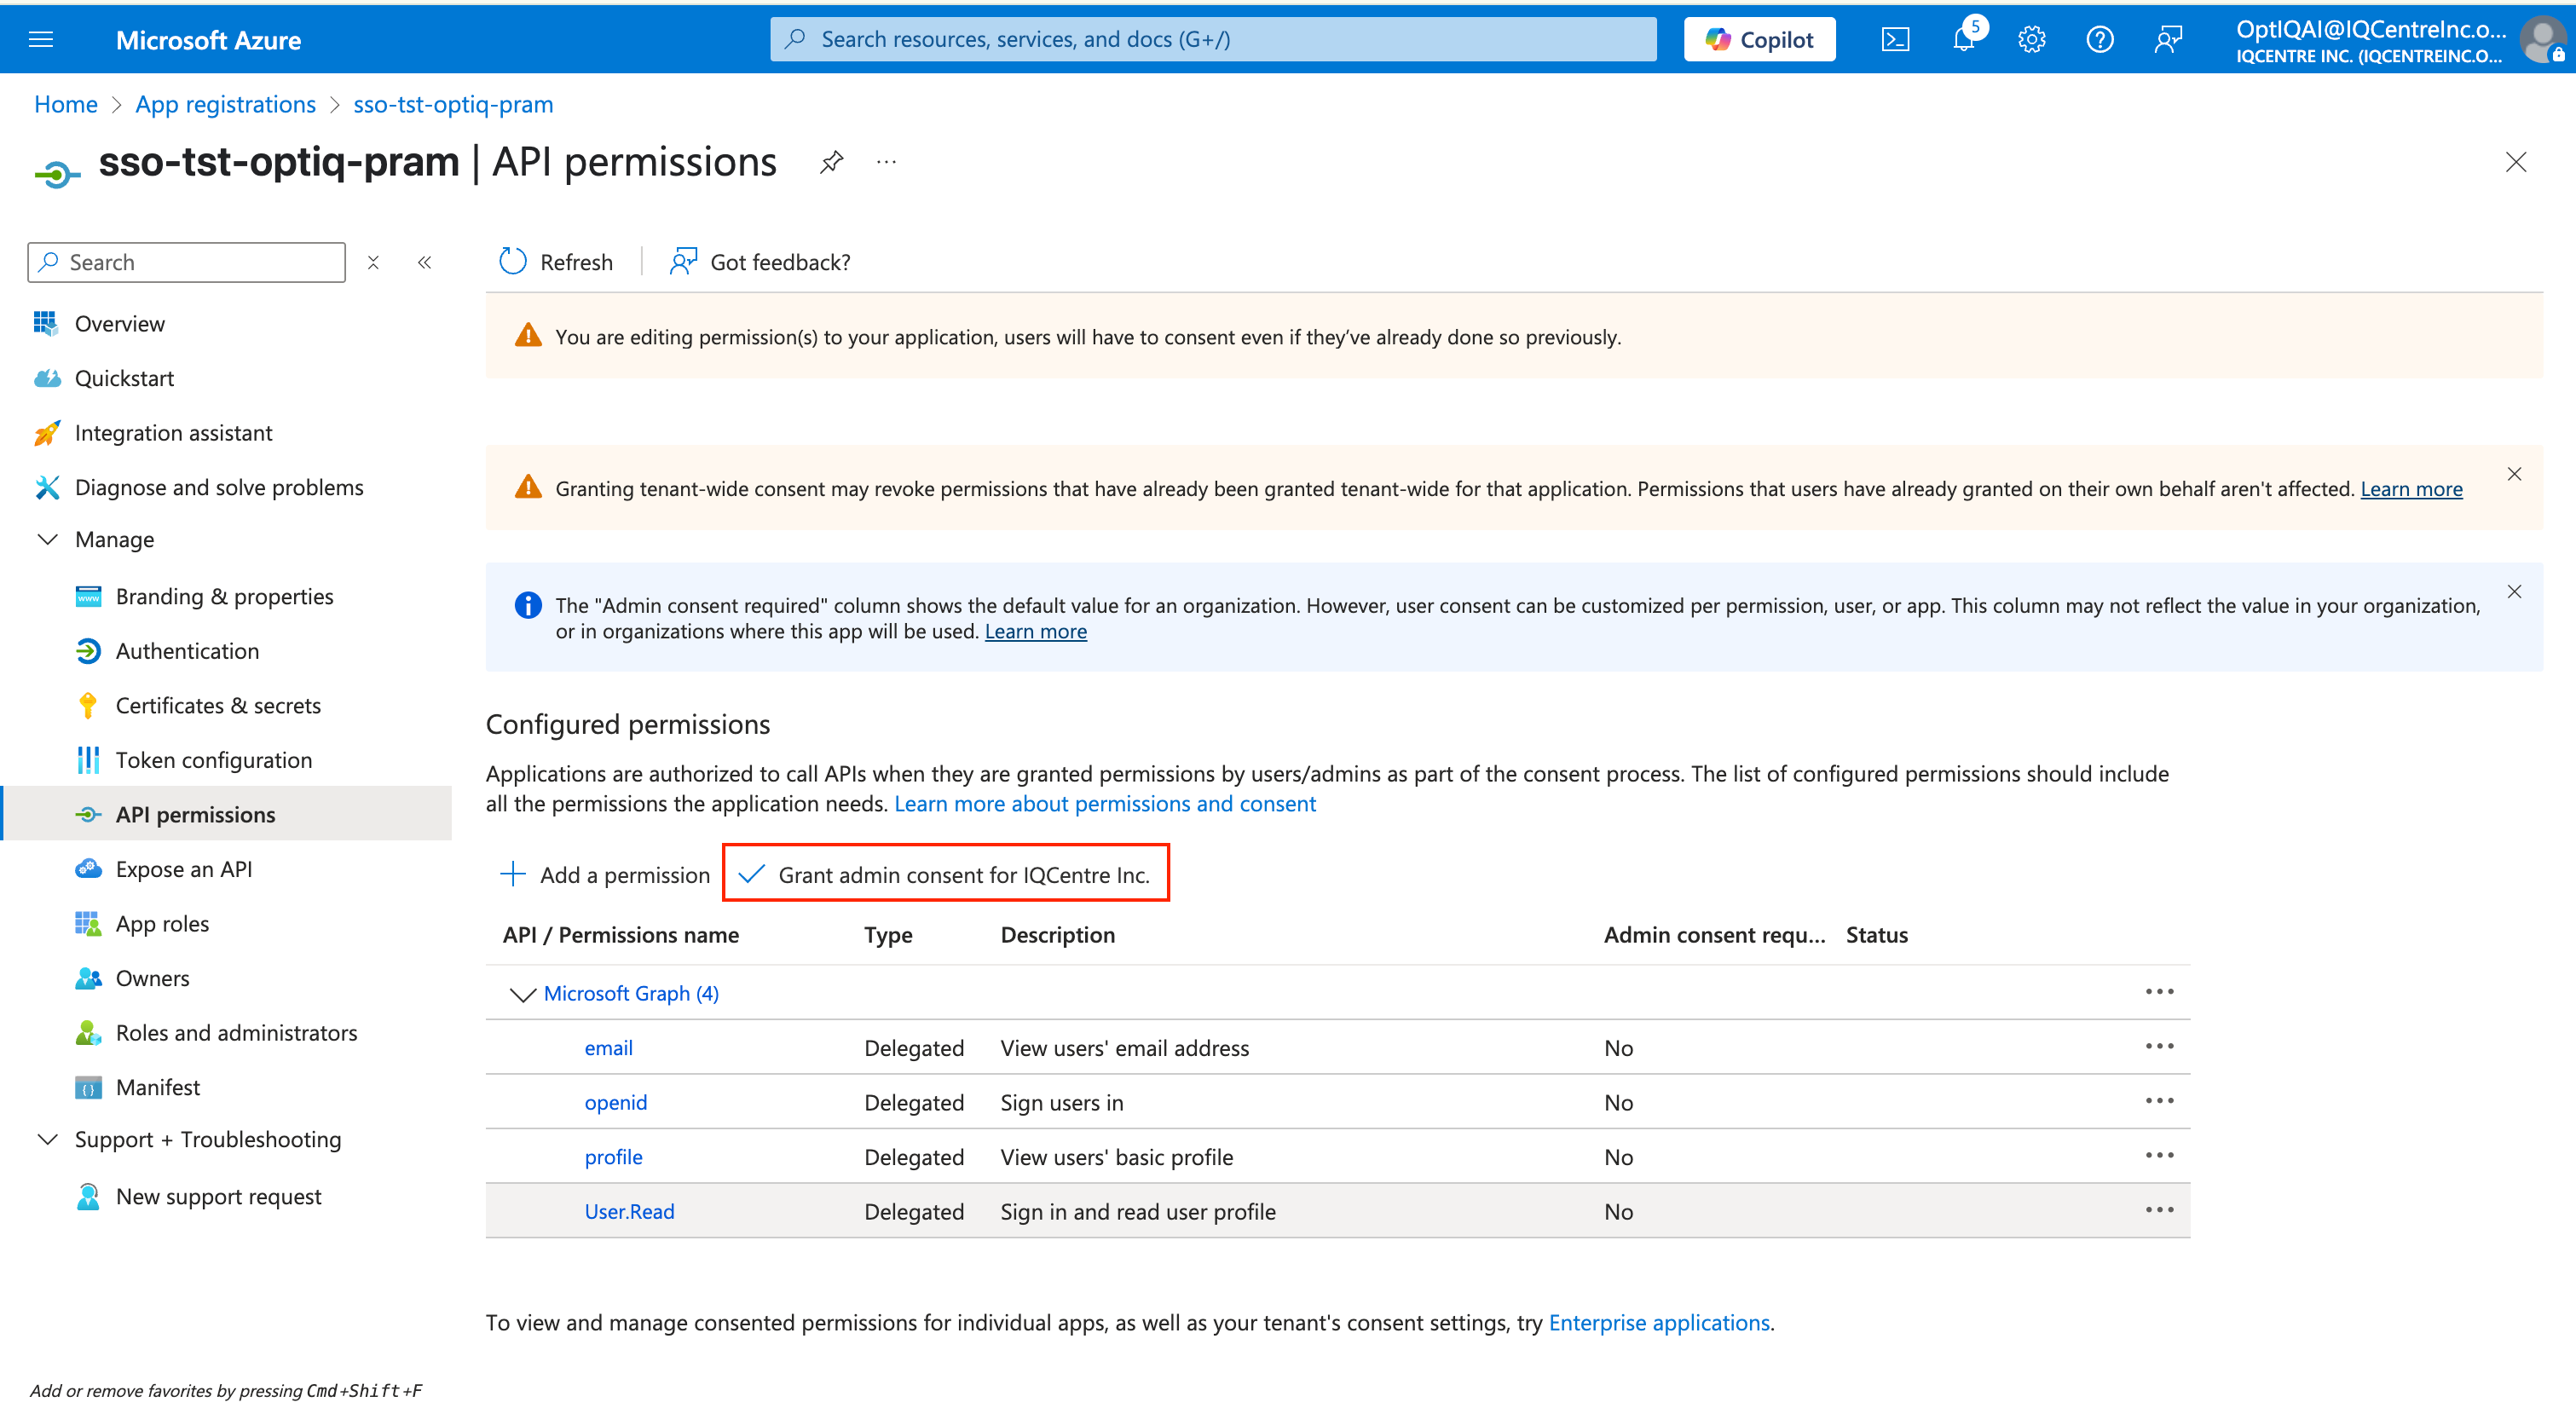
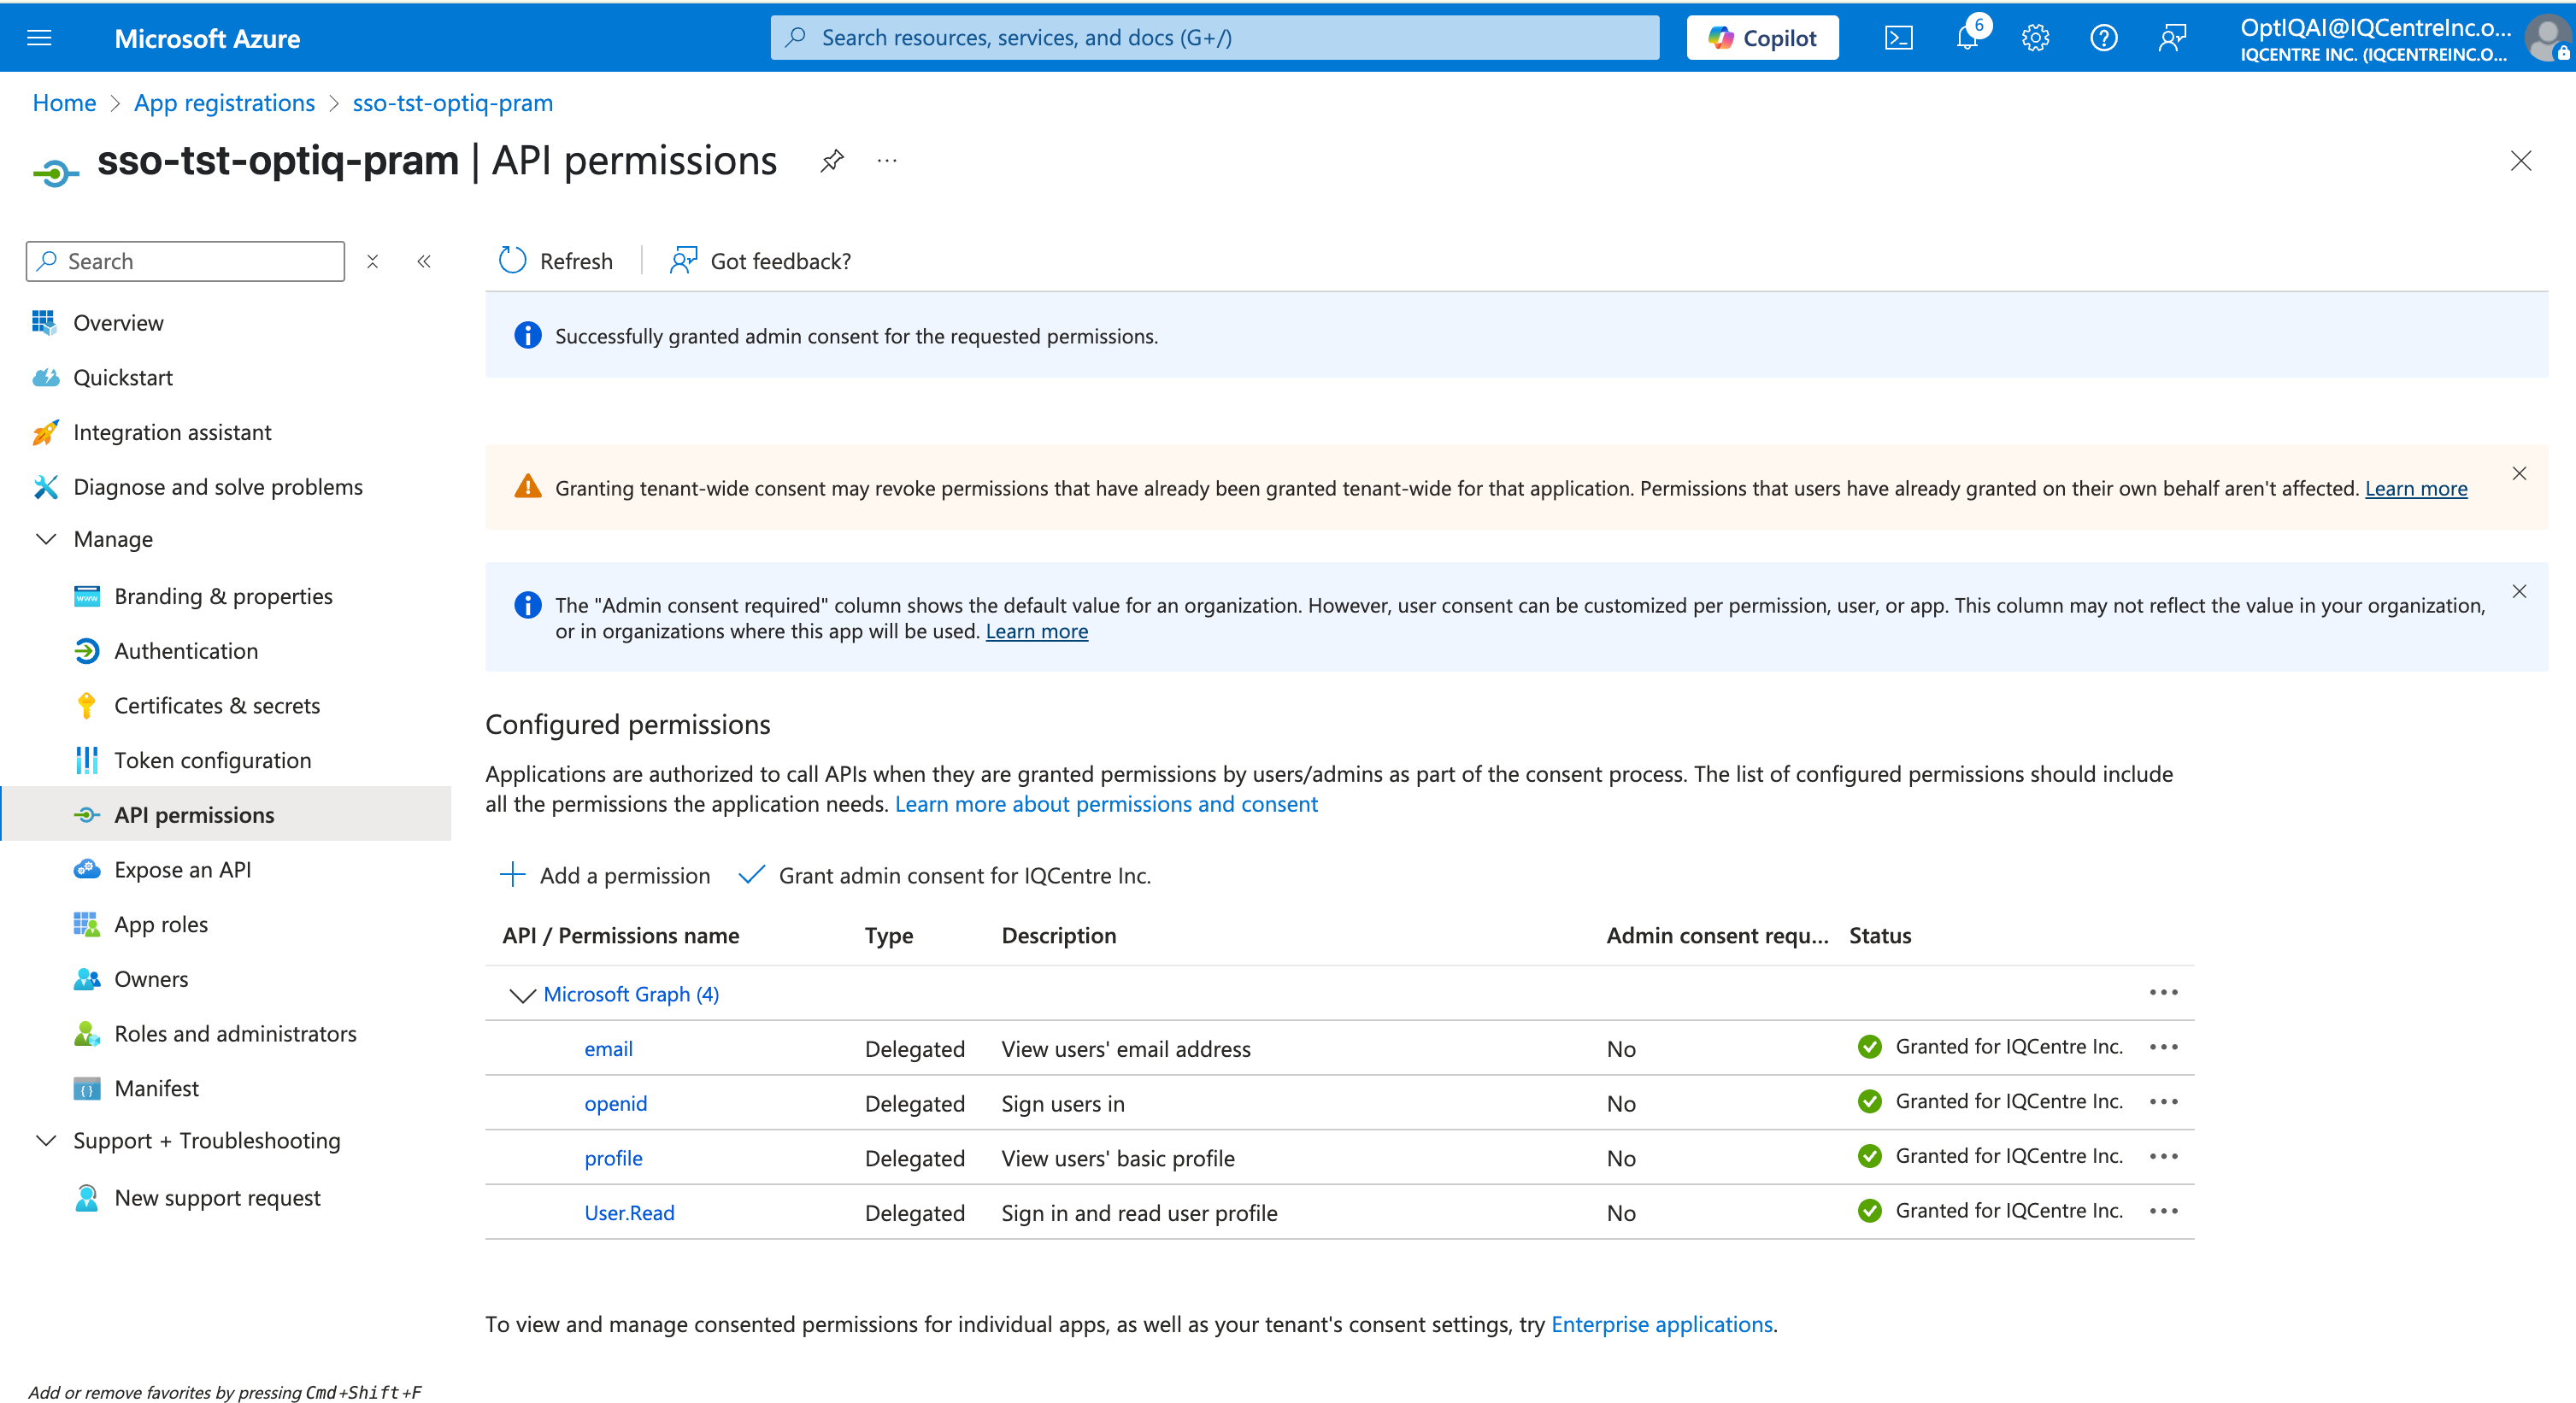
Click on “Grant admin consent for IQCentre Inc”
Step 4: Configure Group Claims in Token
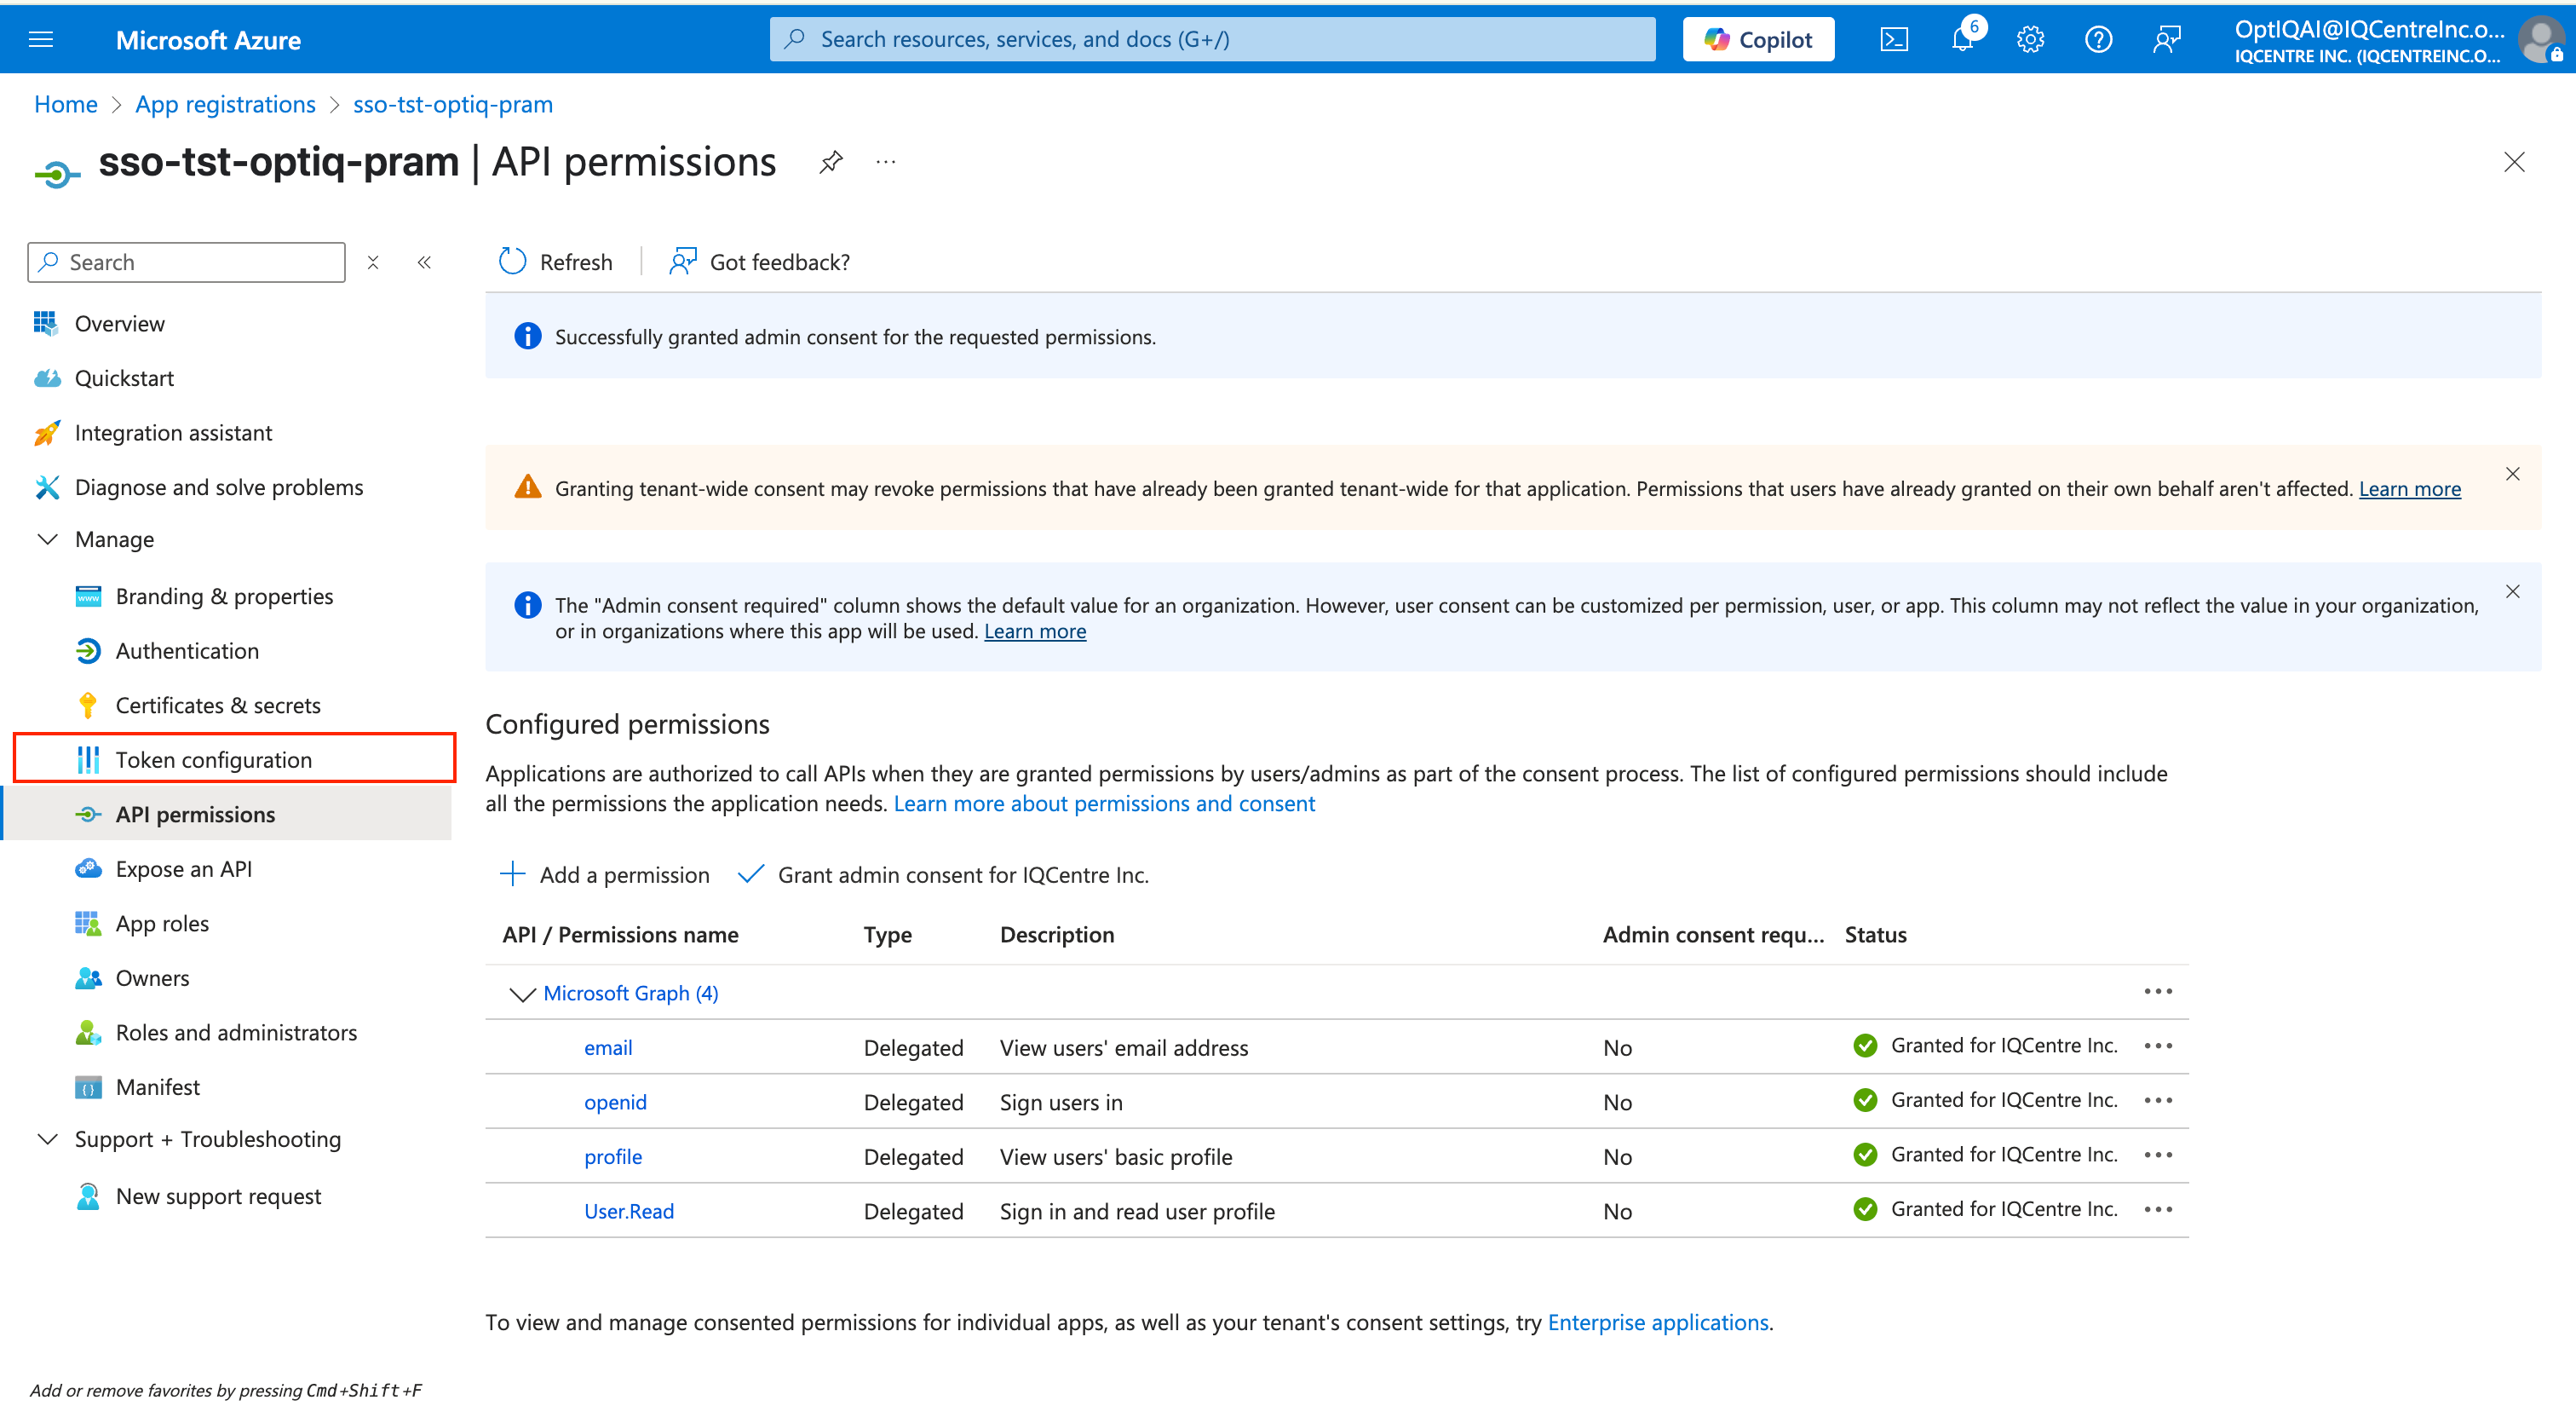
Go to the Token Configuration tab Under Manage for the given Application (still in App Registrations).
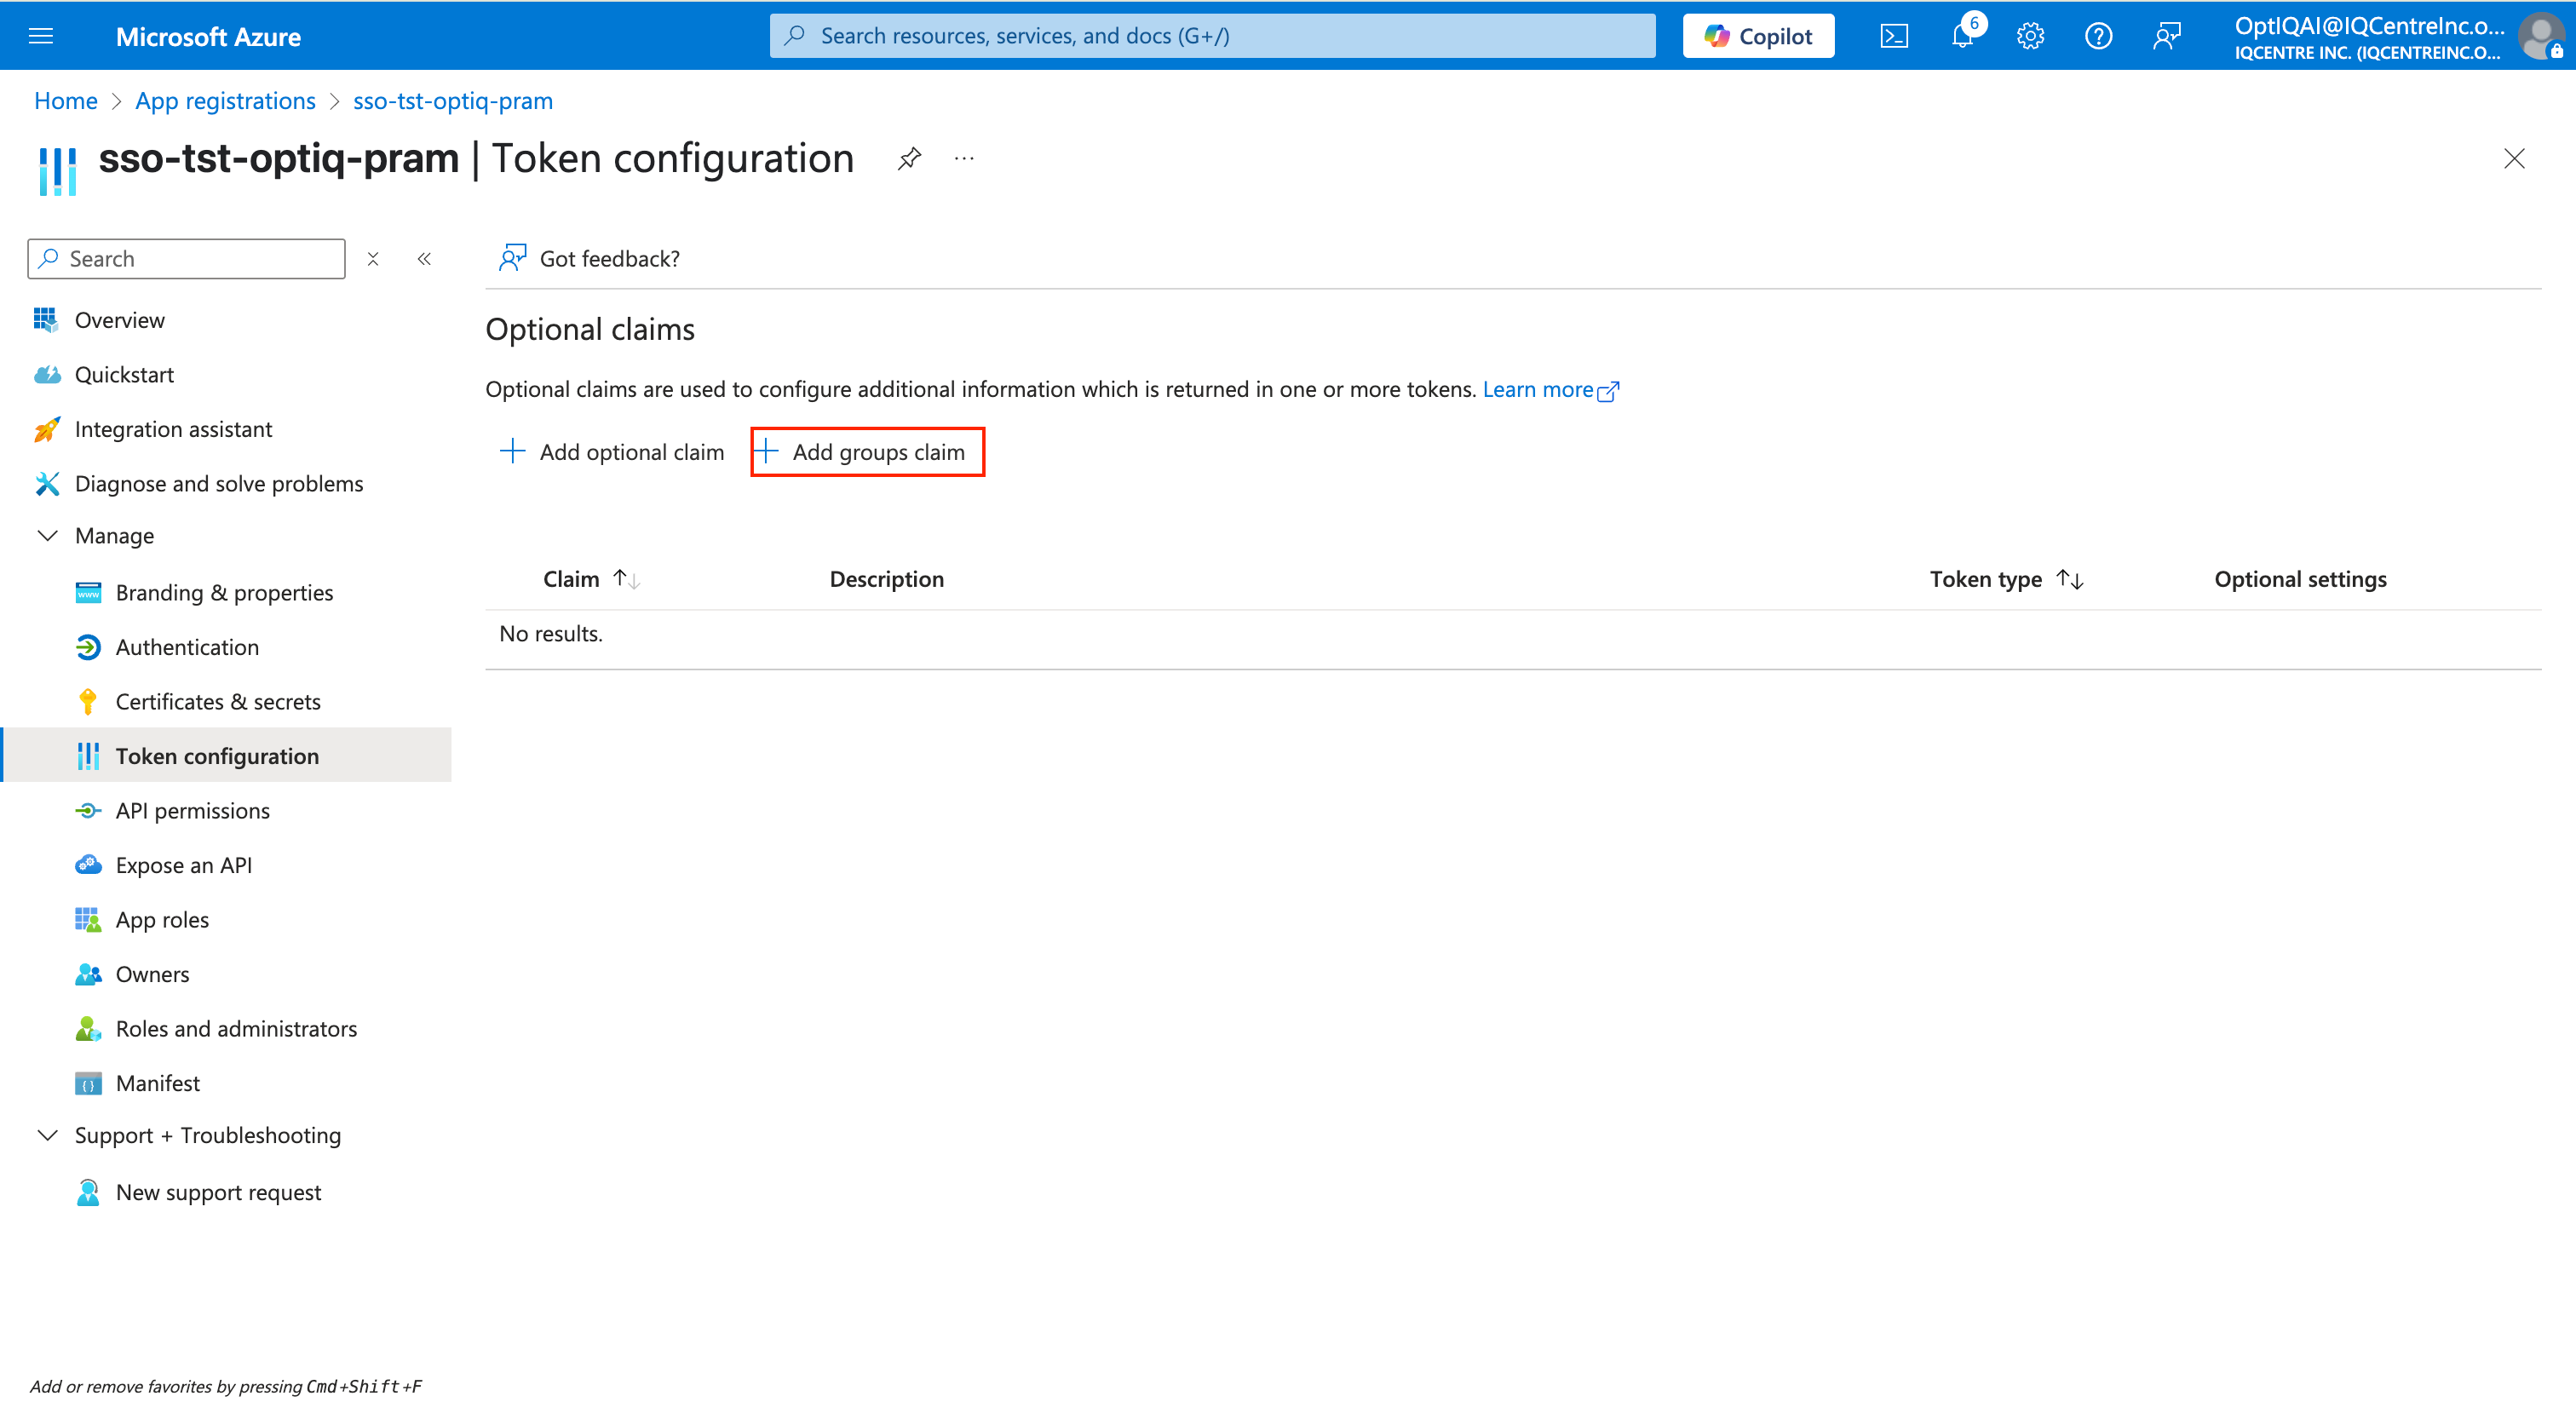
Click + Add group claim to enable group claims in the token.
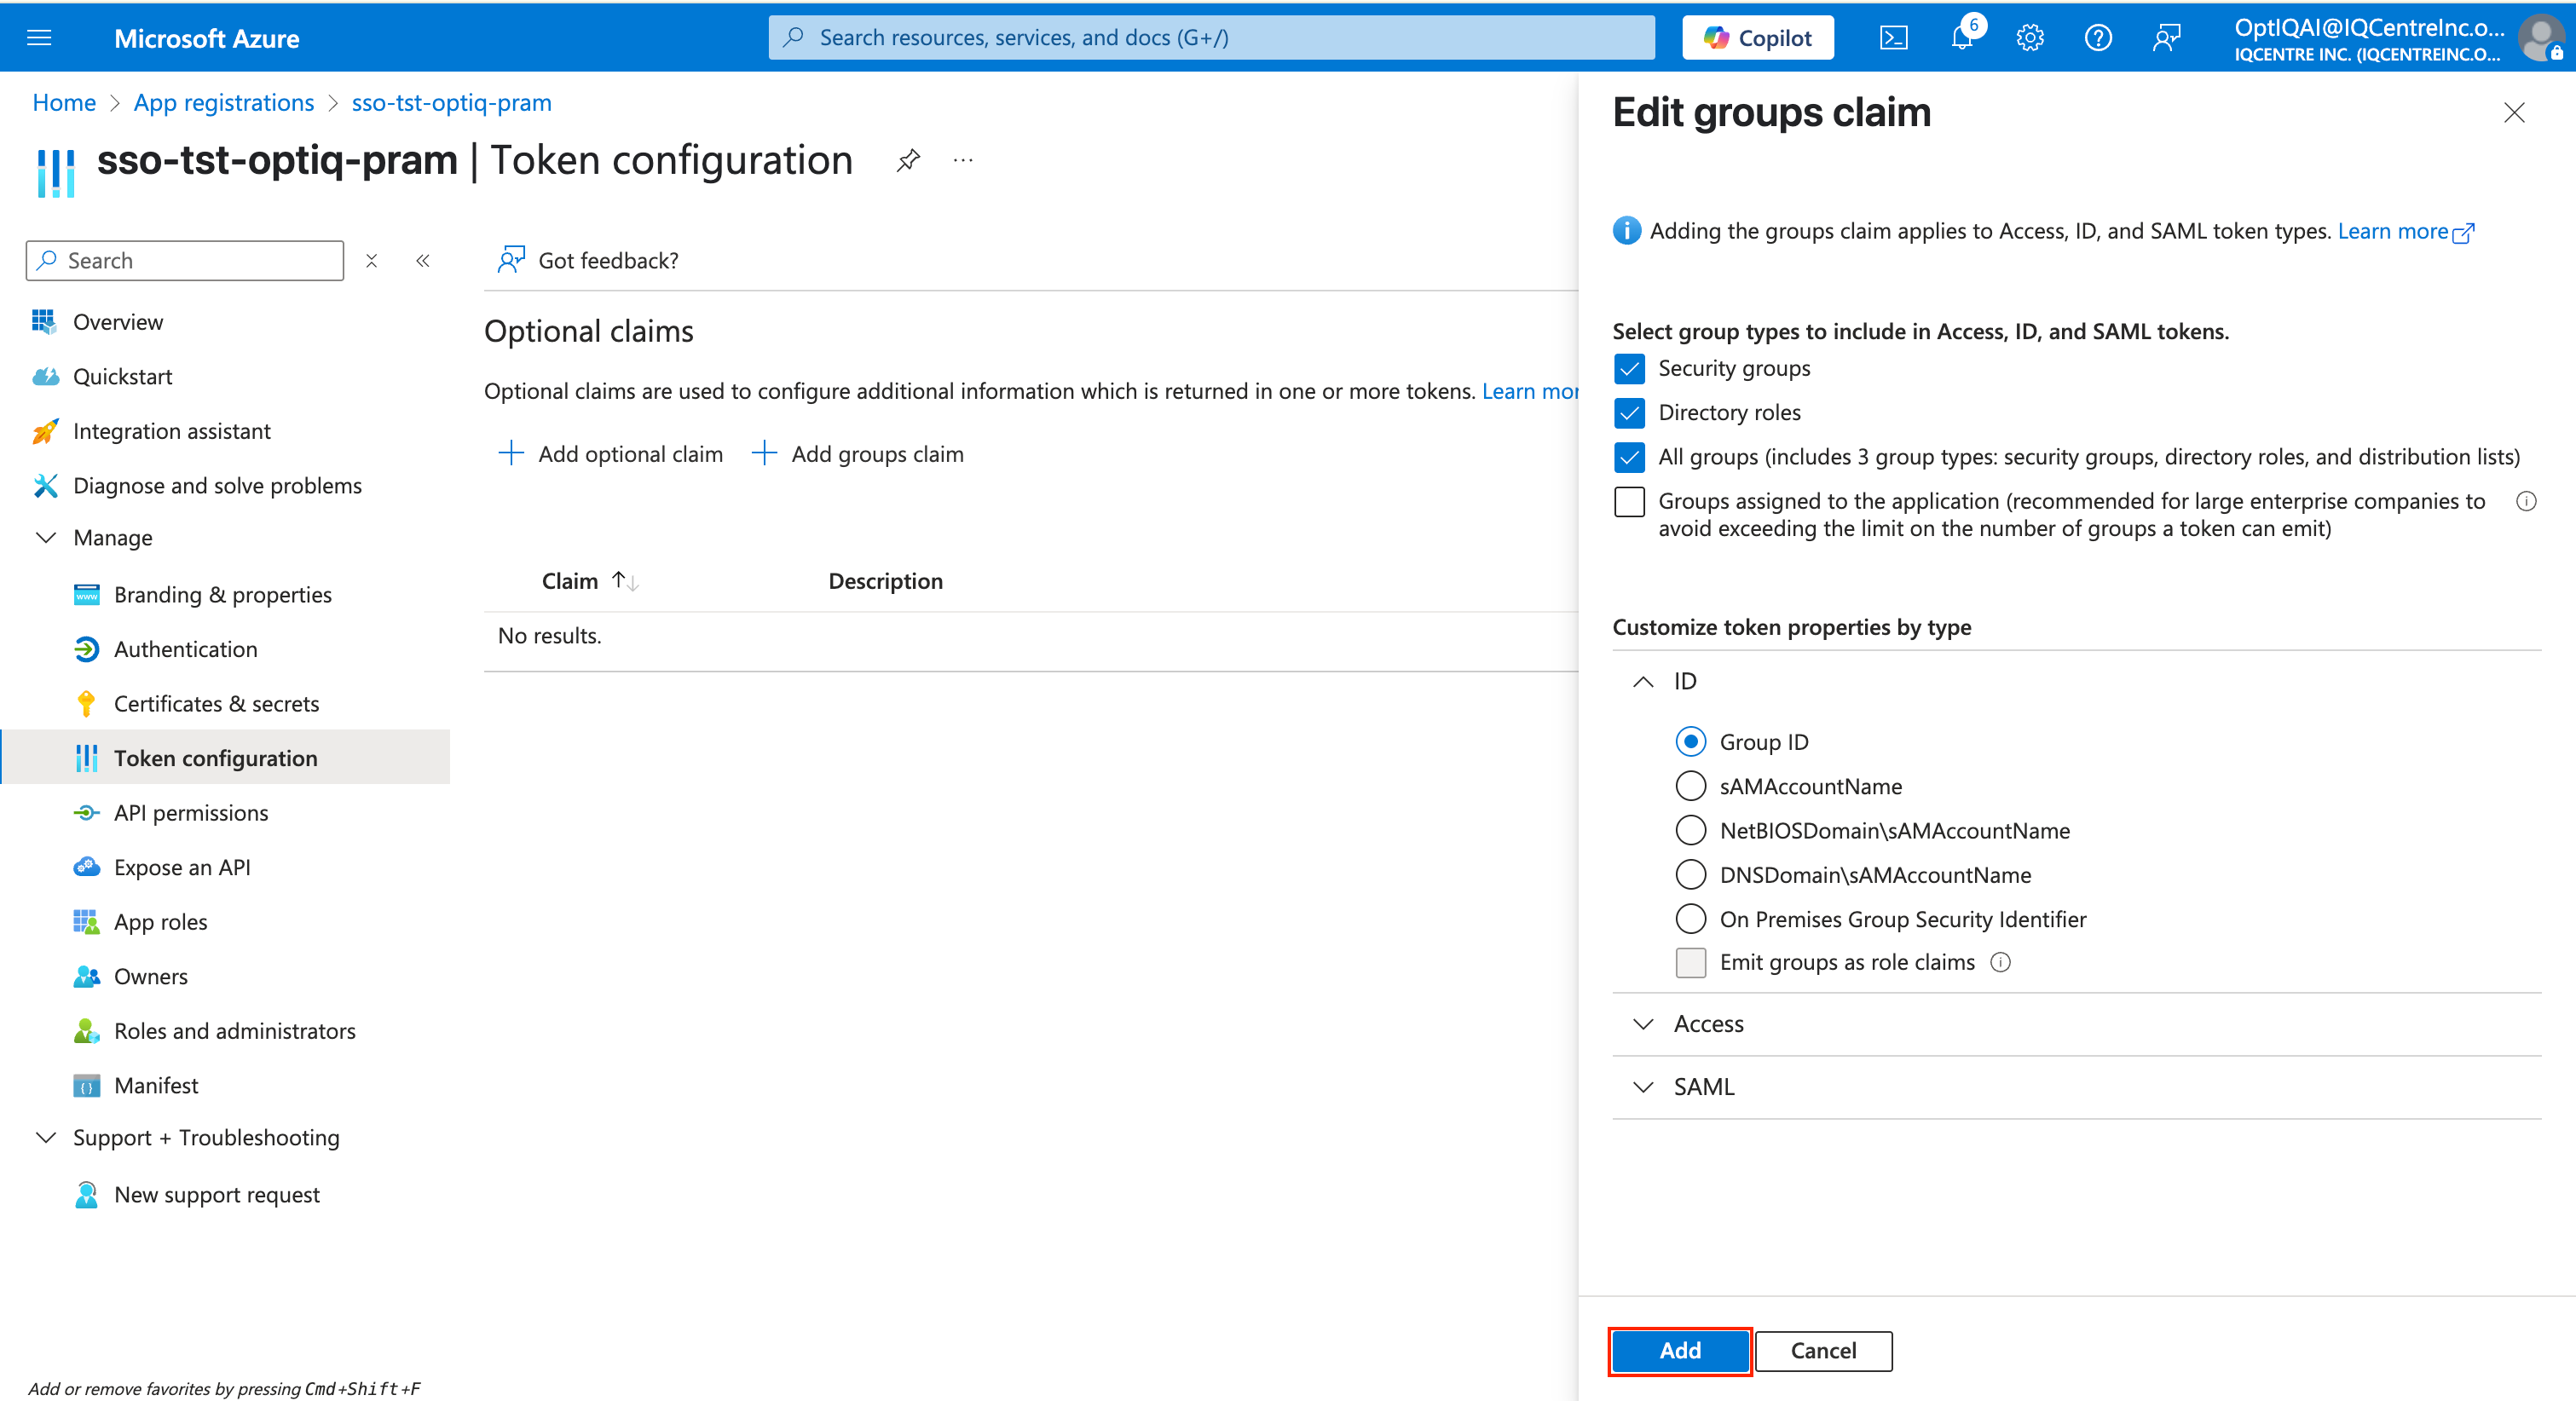
Select the following options based on your needs:
Group types:
You can include Security groups, Microsoft 365 groups or All groups, based on who needs to be allowed access via Groups.
Alternatively, you can include all groups assigned to the application. The assignment can be made by heading over to Enterprise Applications. Detailed instructions in Step: 6
Customize token property by type (ID type): Add the Group ID in the ID token type (already selected).
Click Add to save the group claims configuration.
Step 5: Add Client ID and Secret
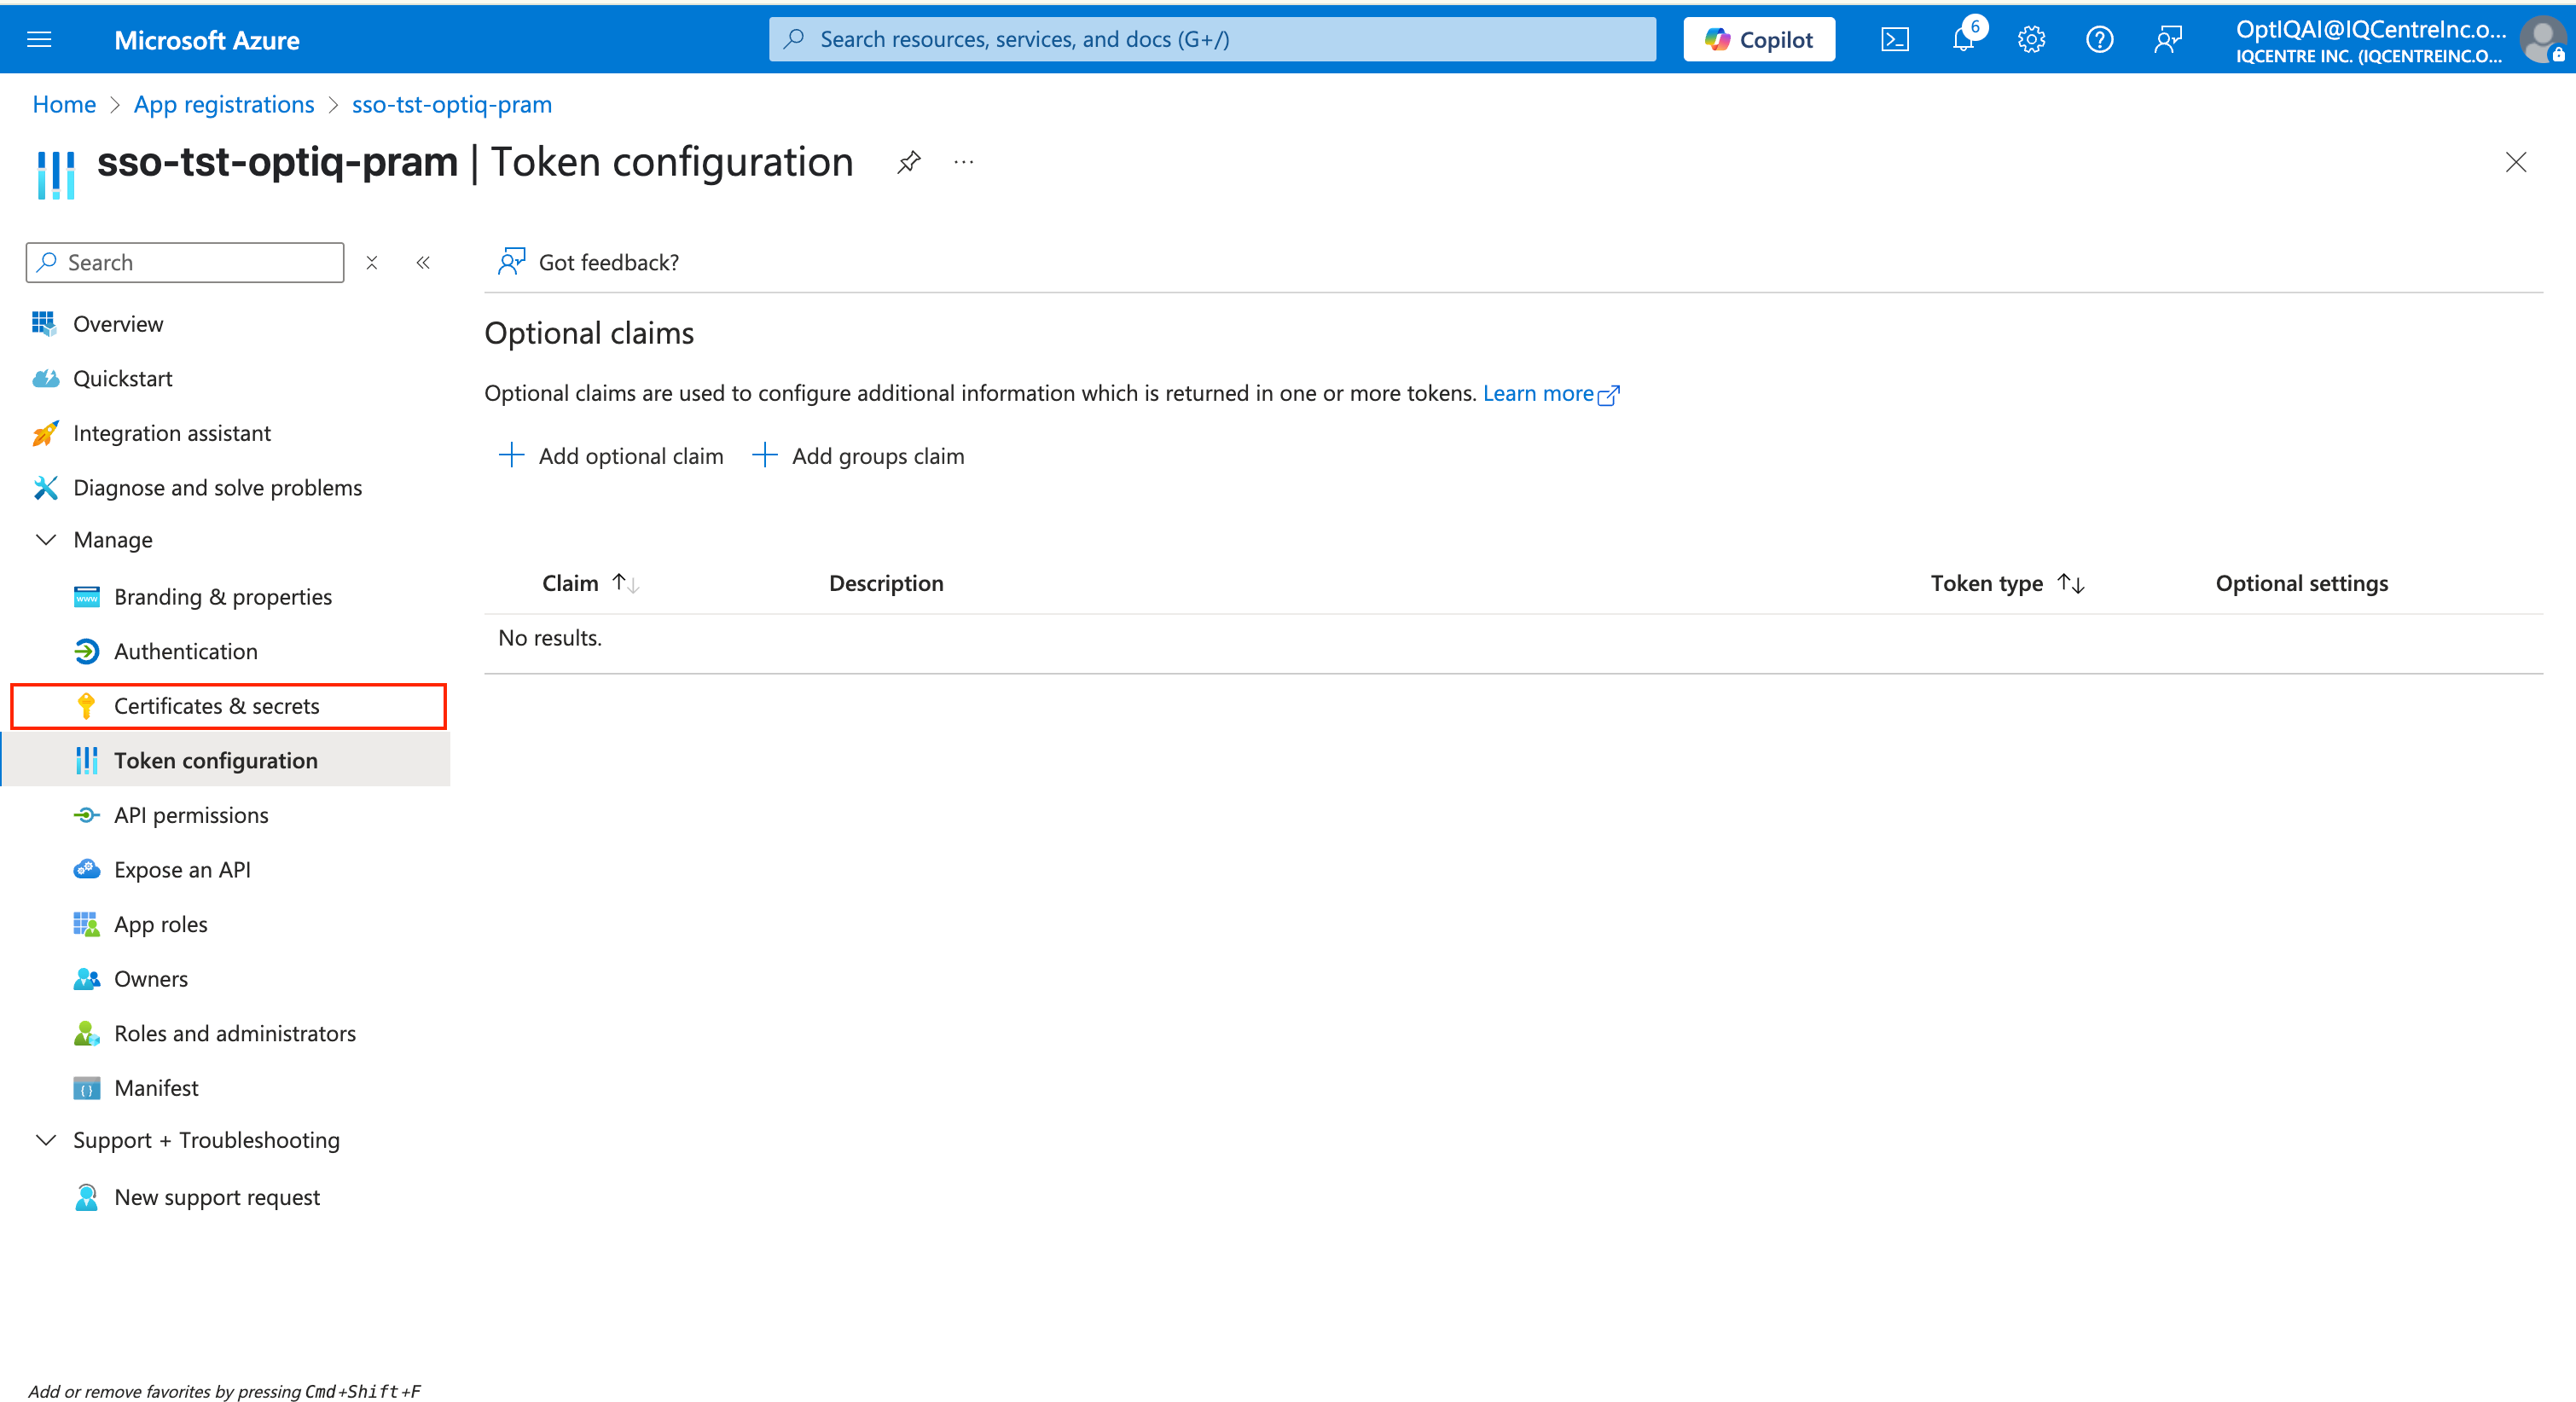
Go to the Certificates & secrets tab.
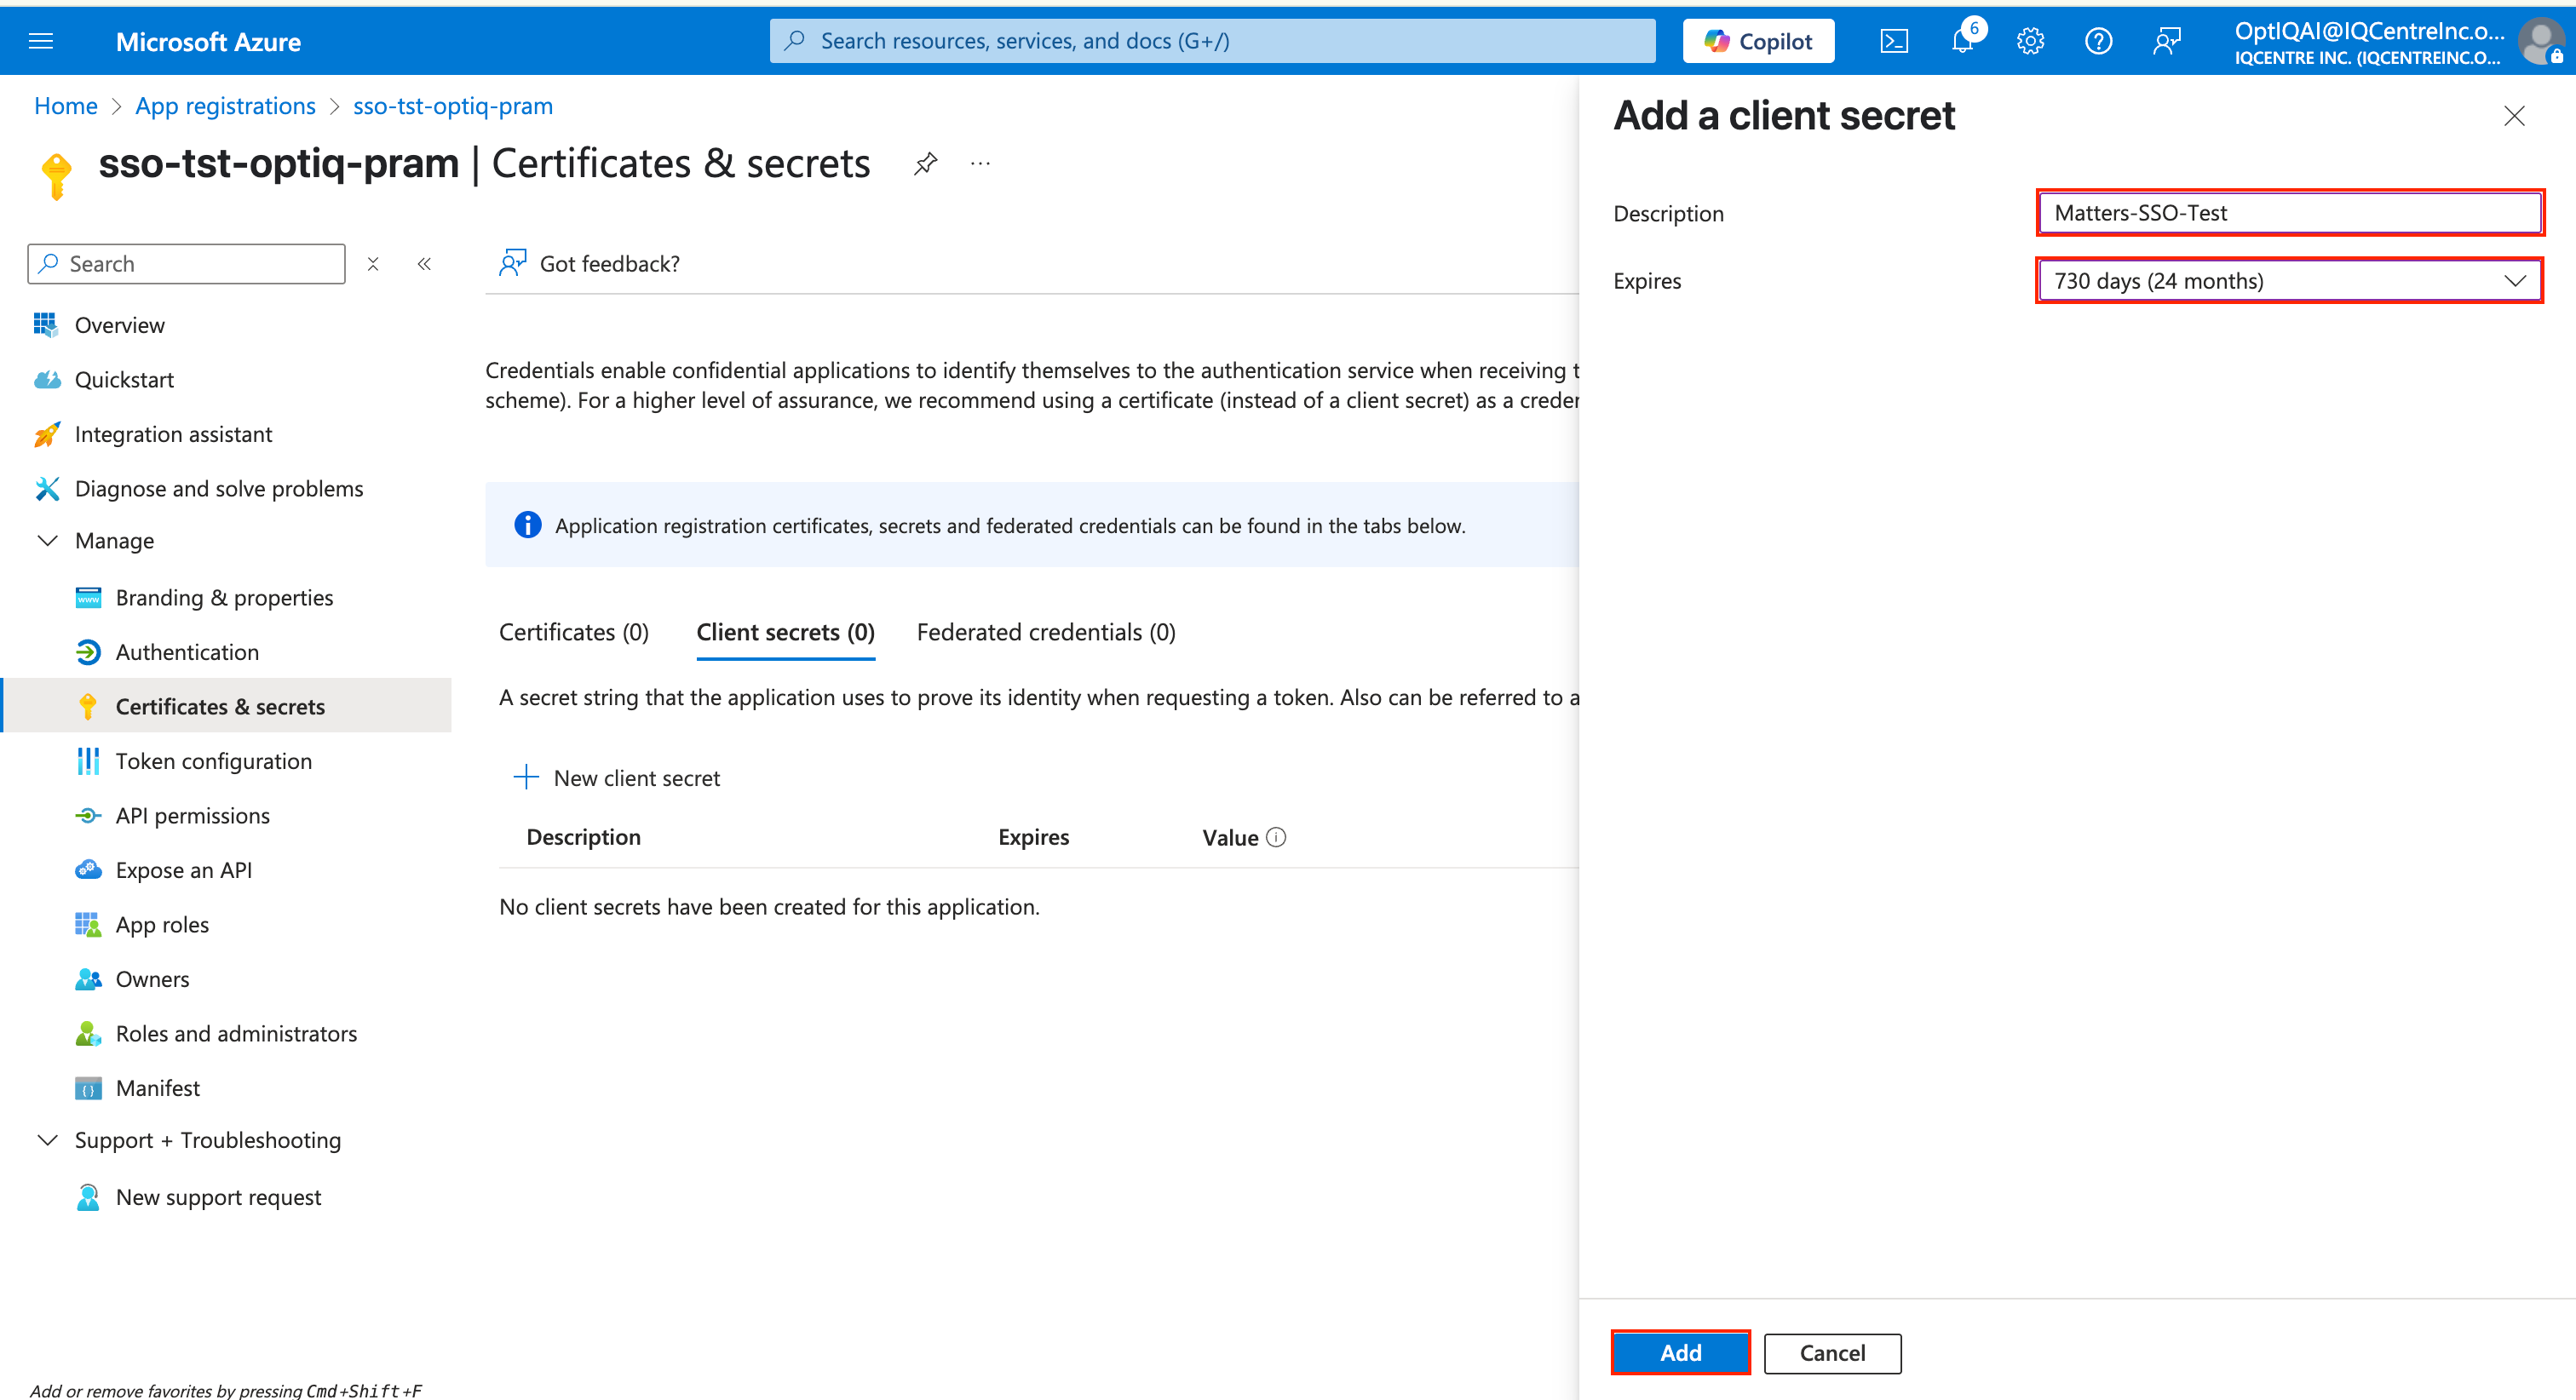
Click + New client secret.
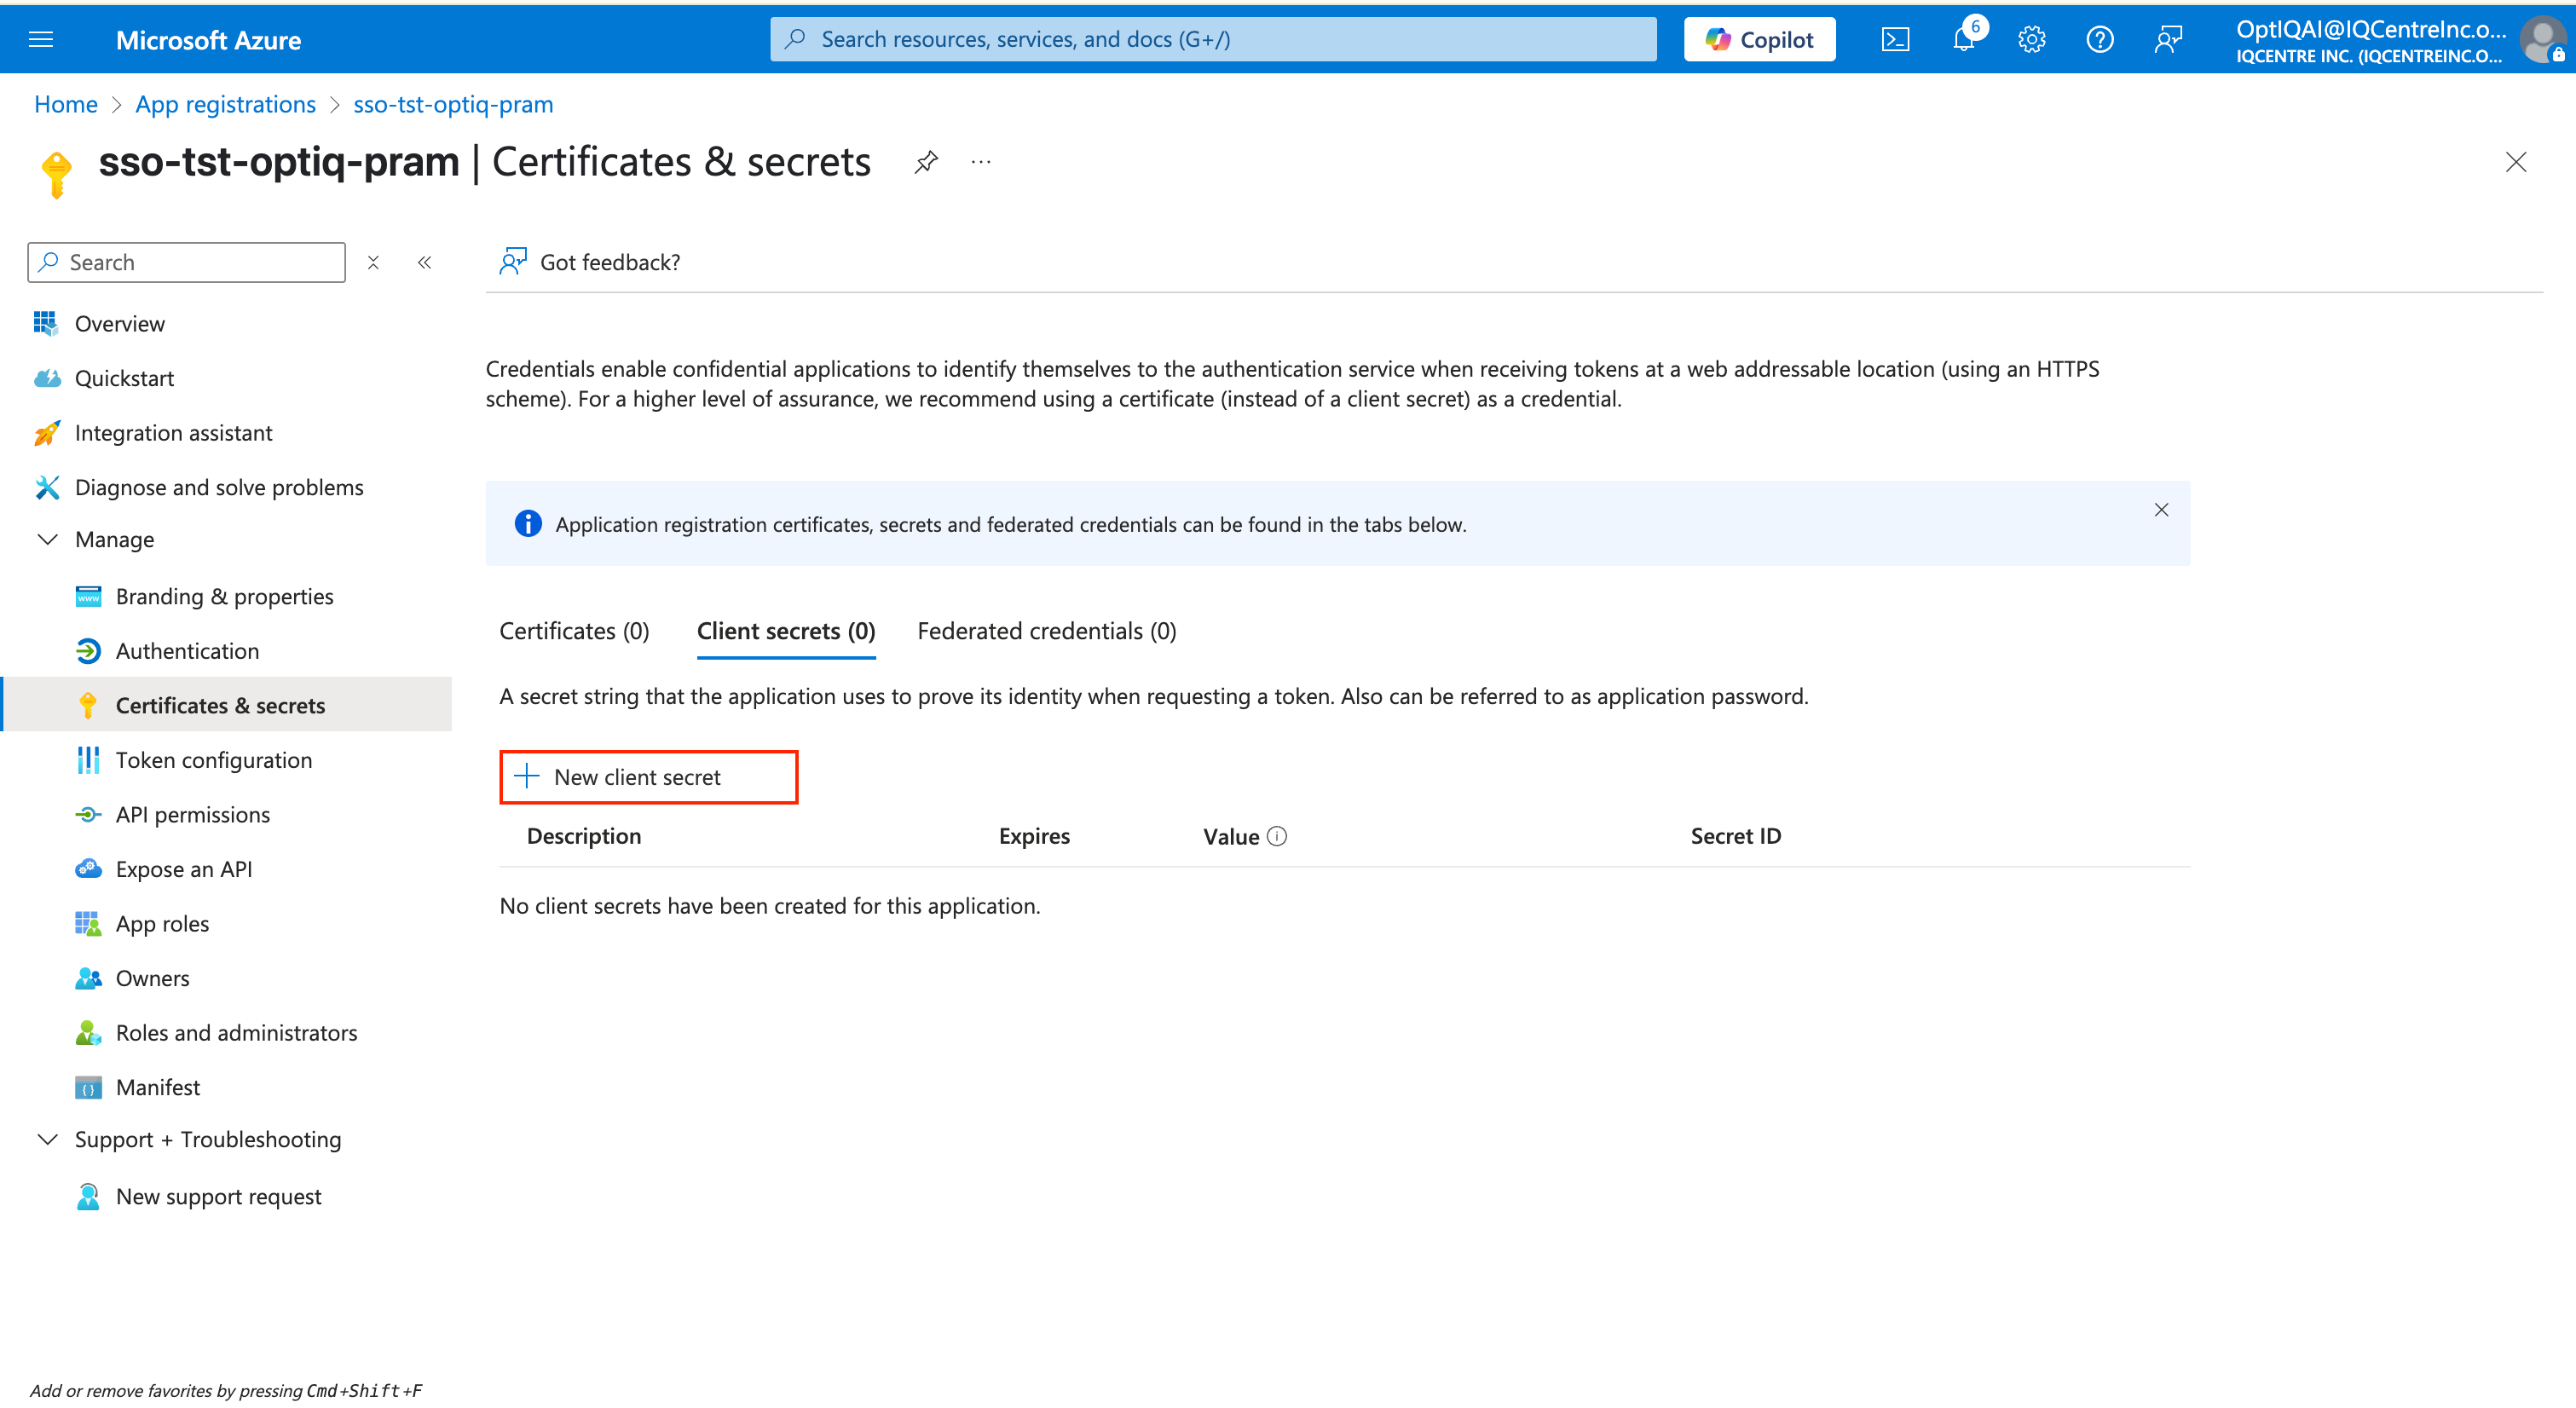
Add a description and expiration period, then click Add.
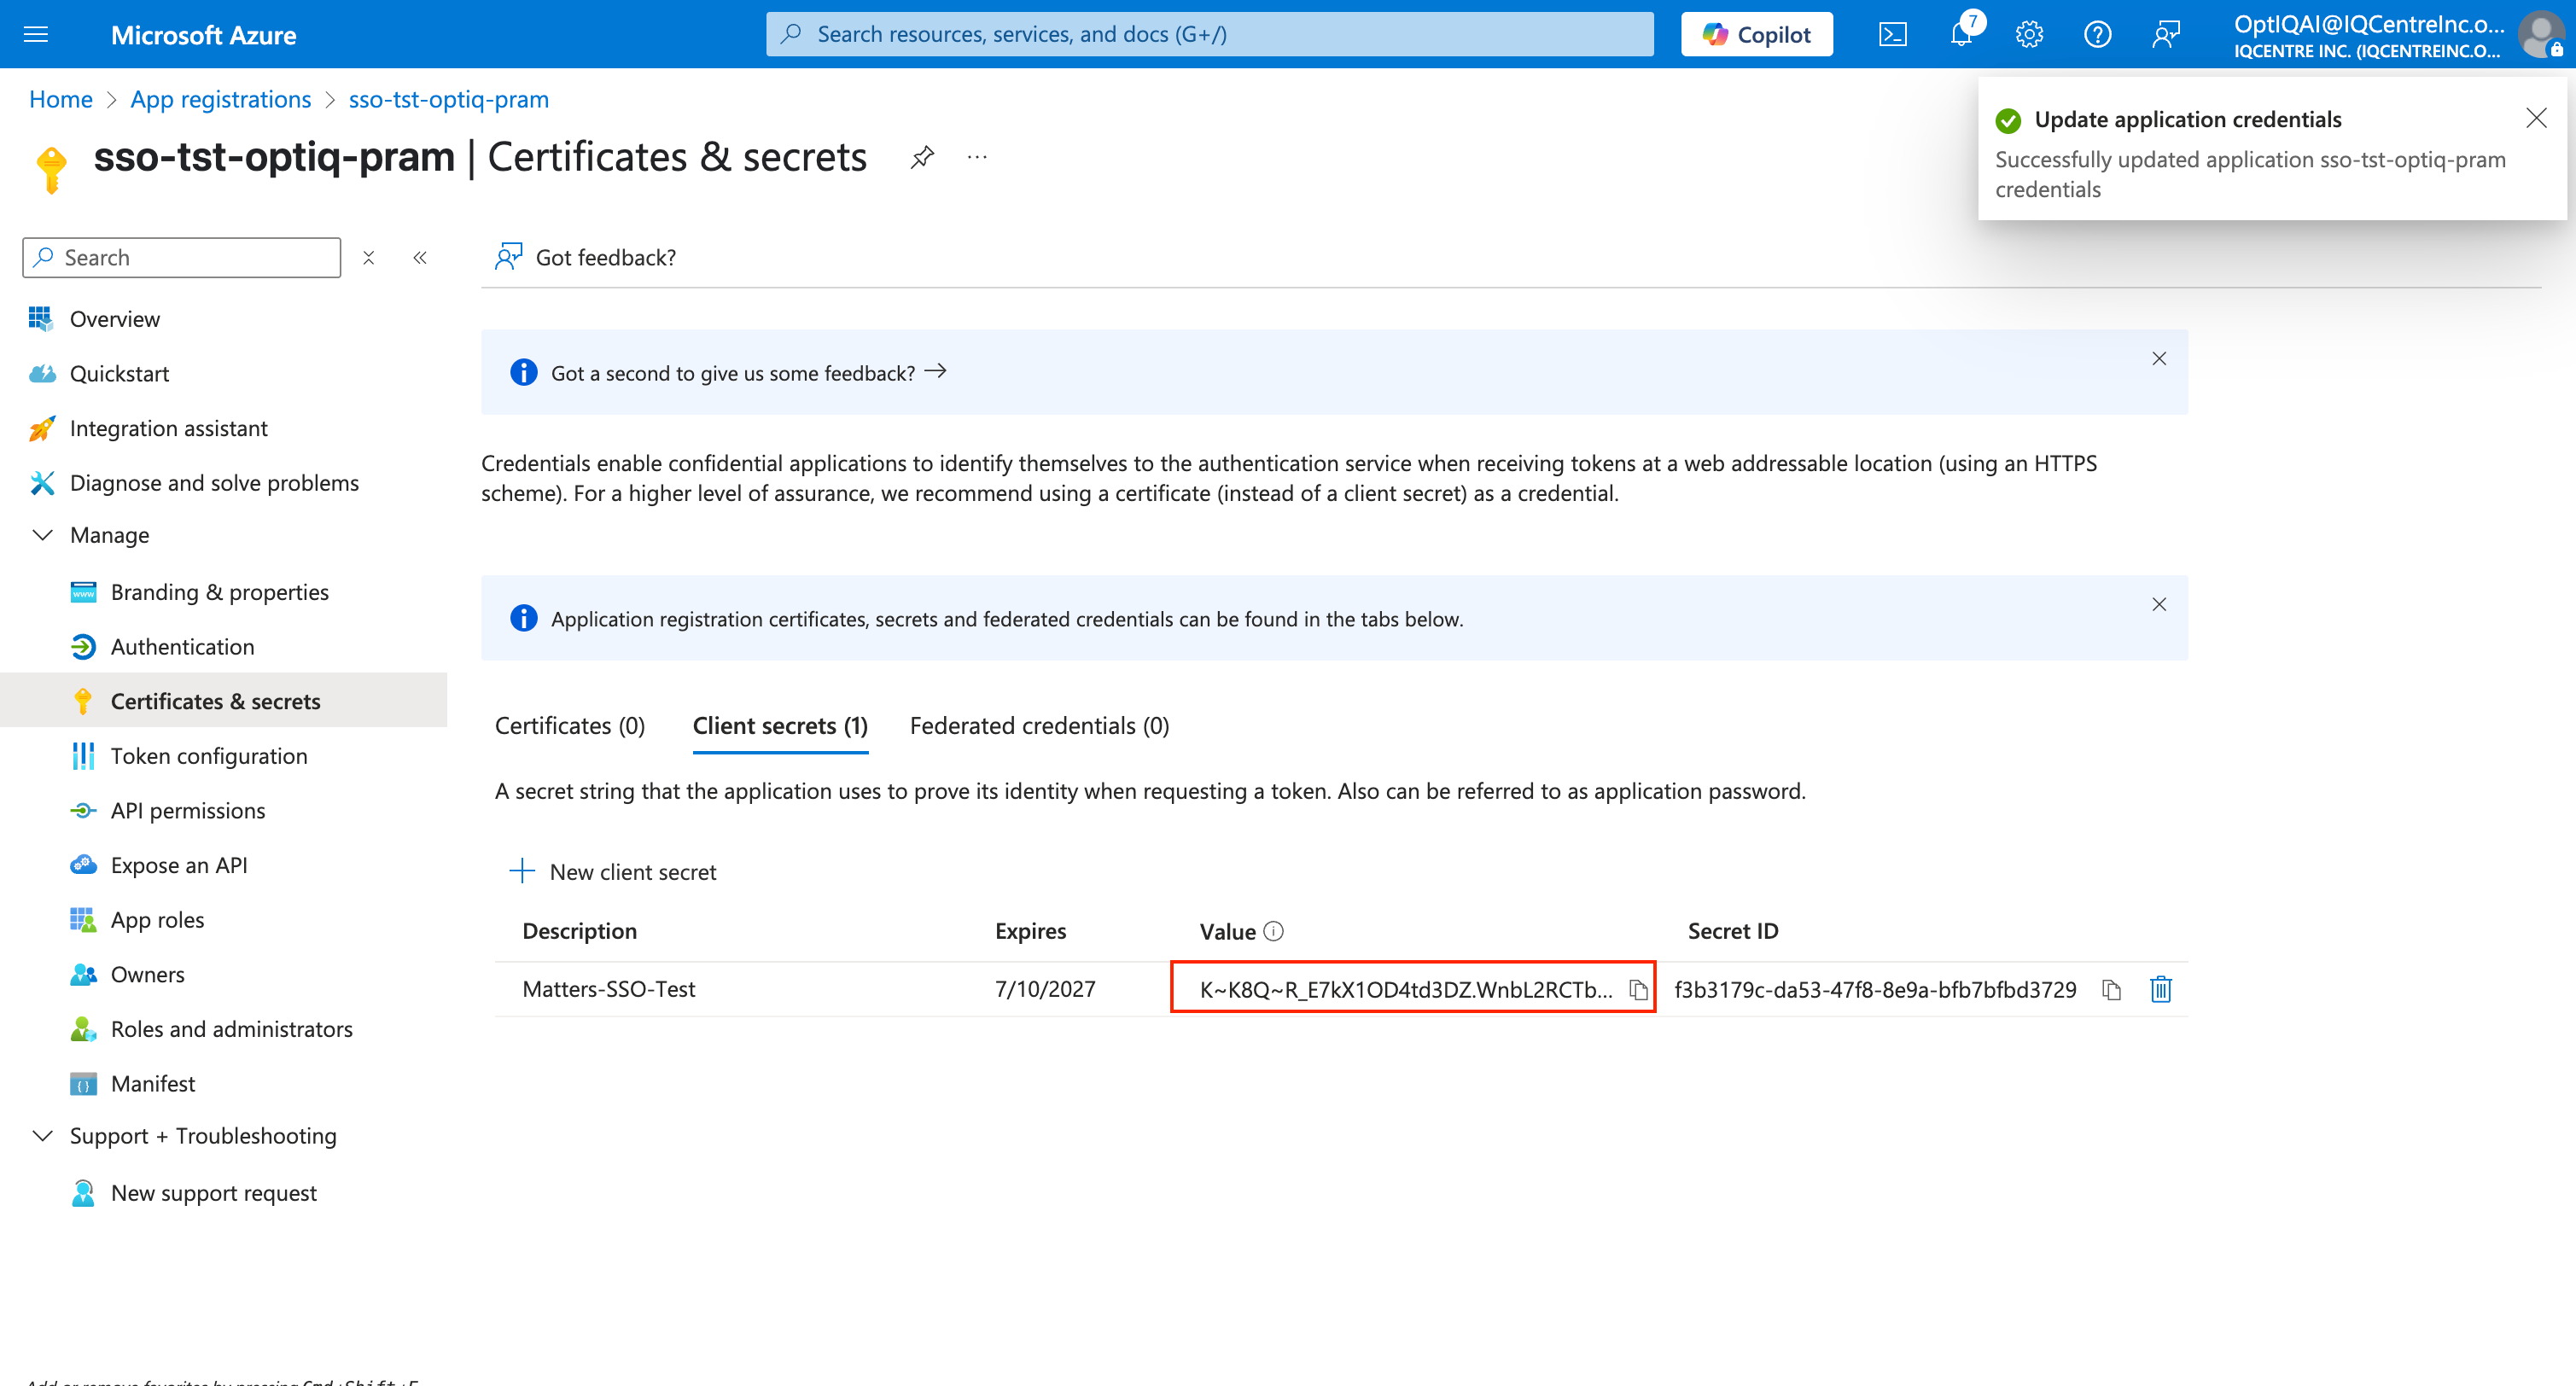
Copy the Client Secret. It will only be shown once, so make sure to store it securely.
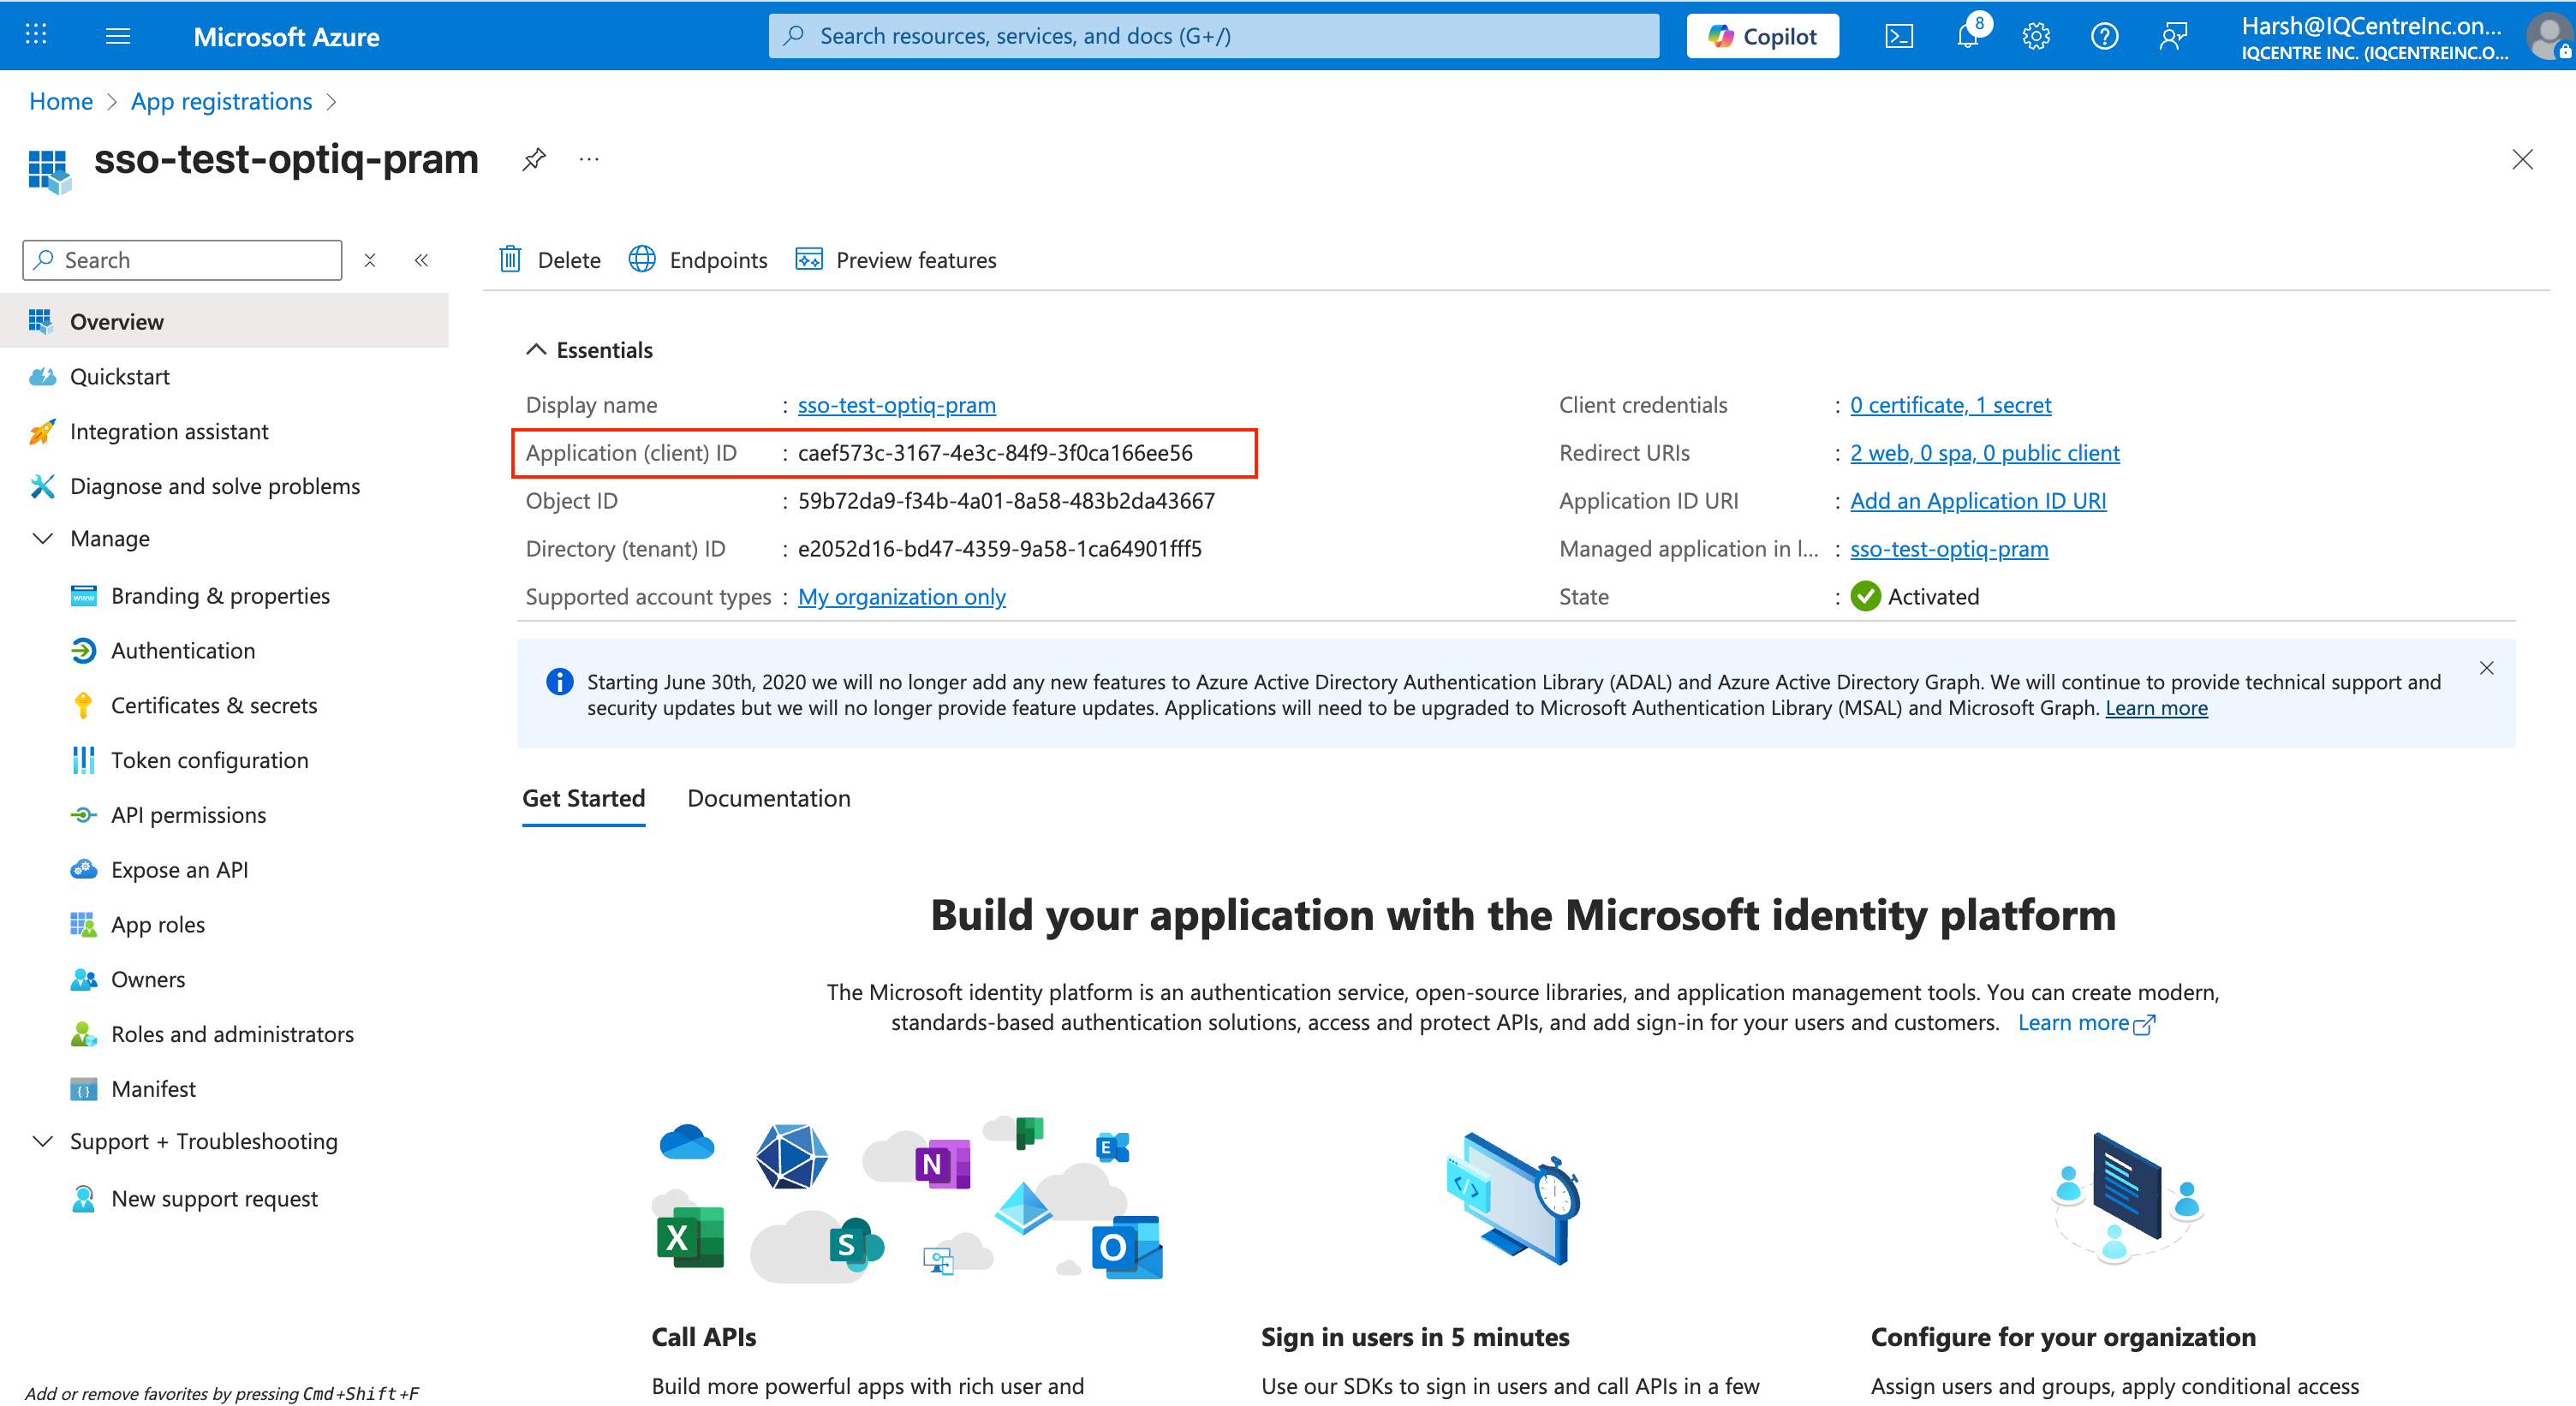
The Client ID is displayed on the app's Overview page.
Step 6: Assign Users and Groups to the Application
Creating the User
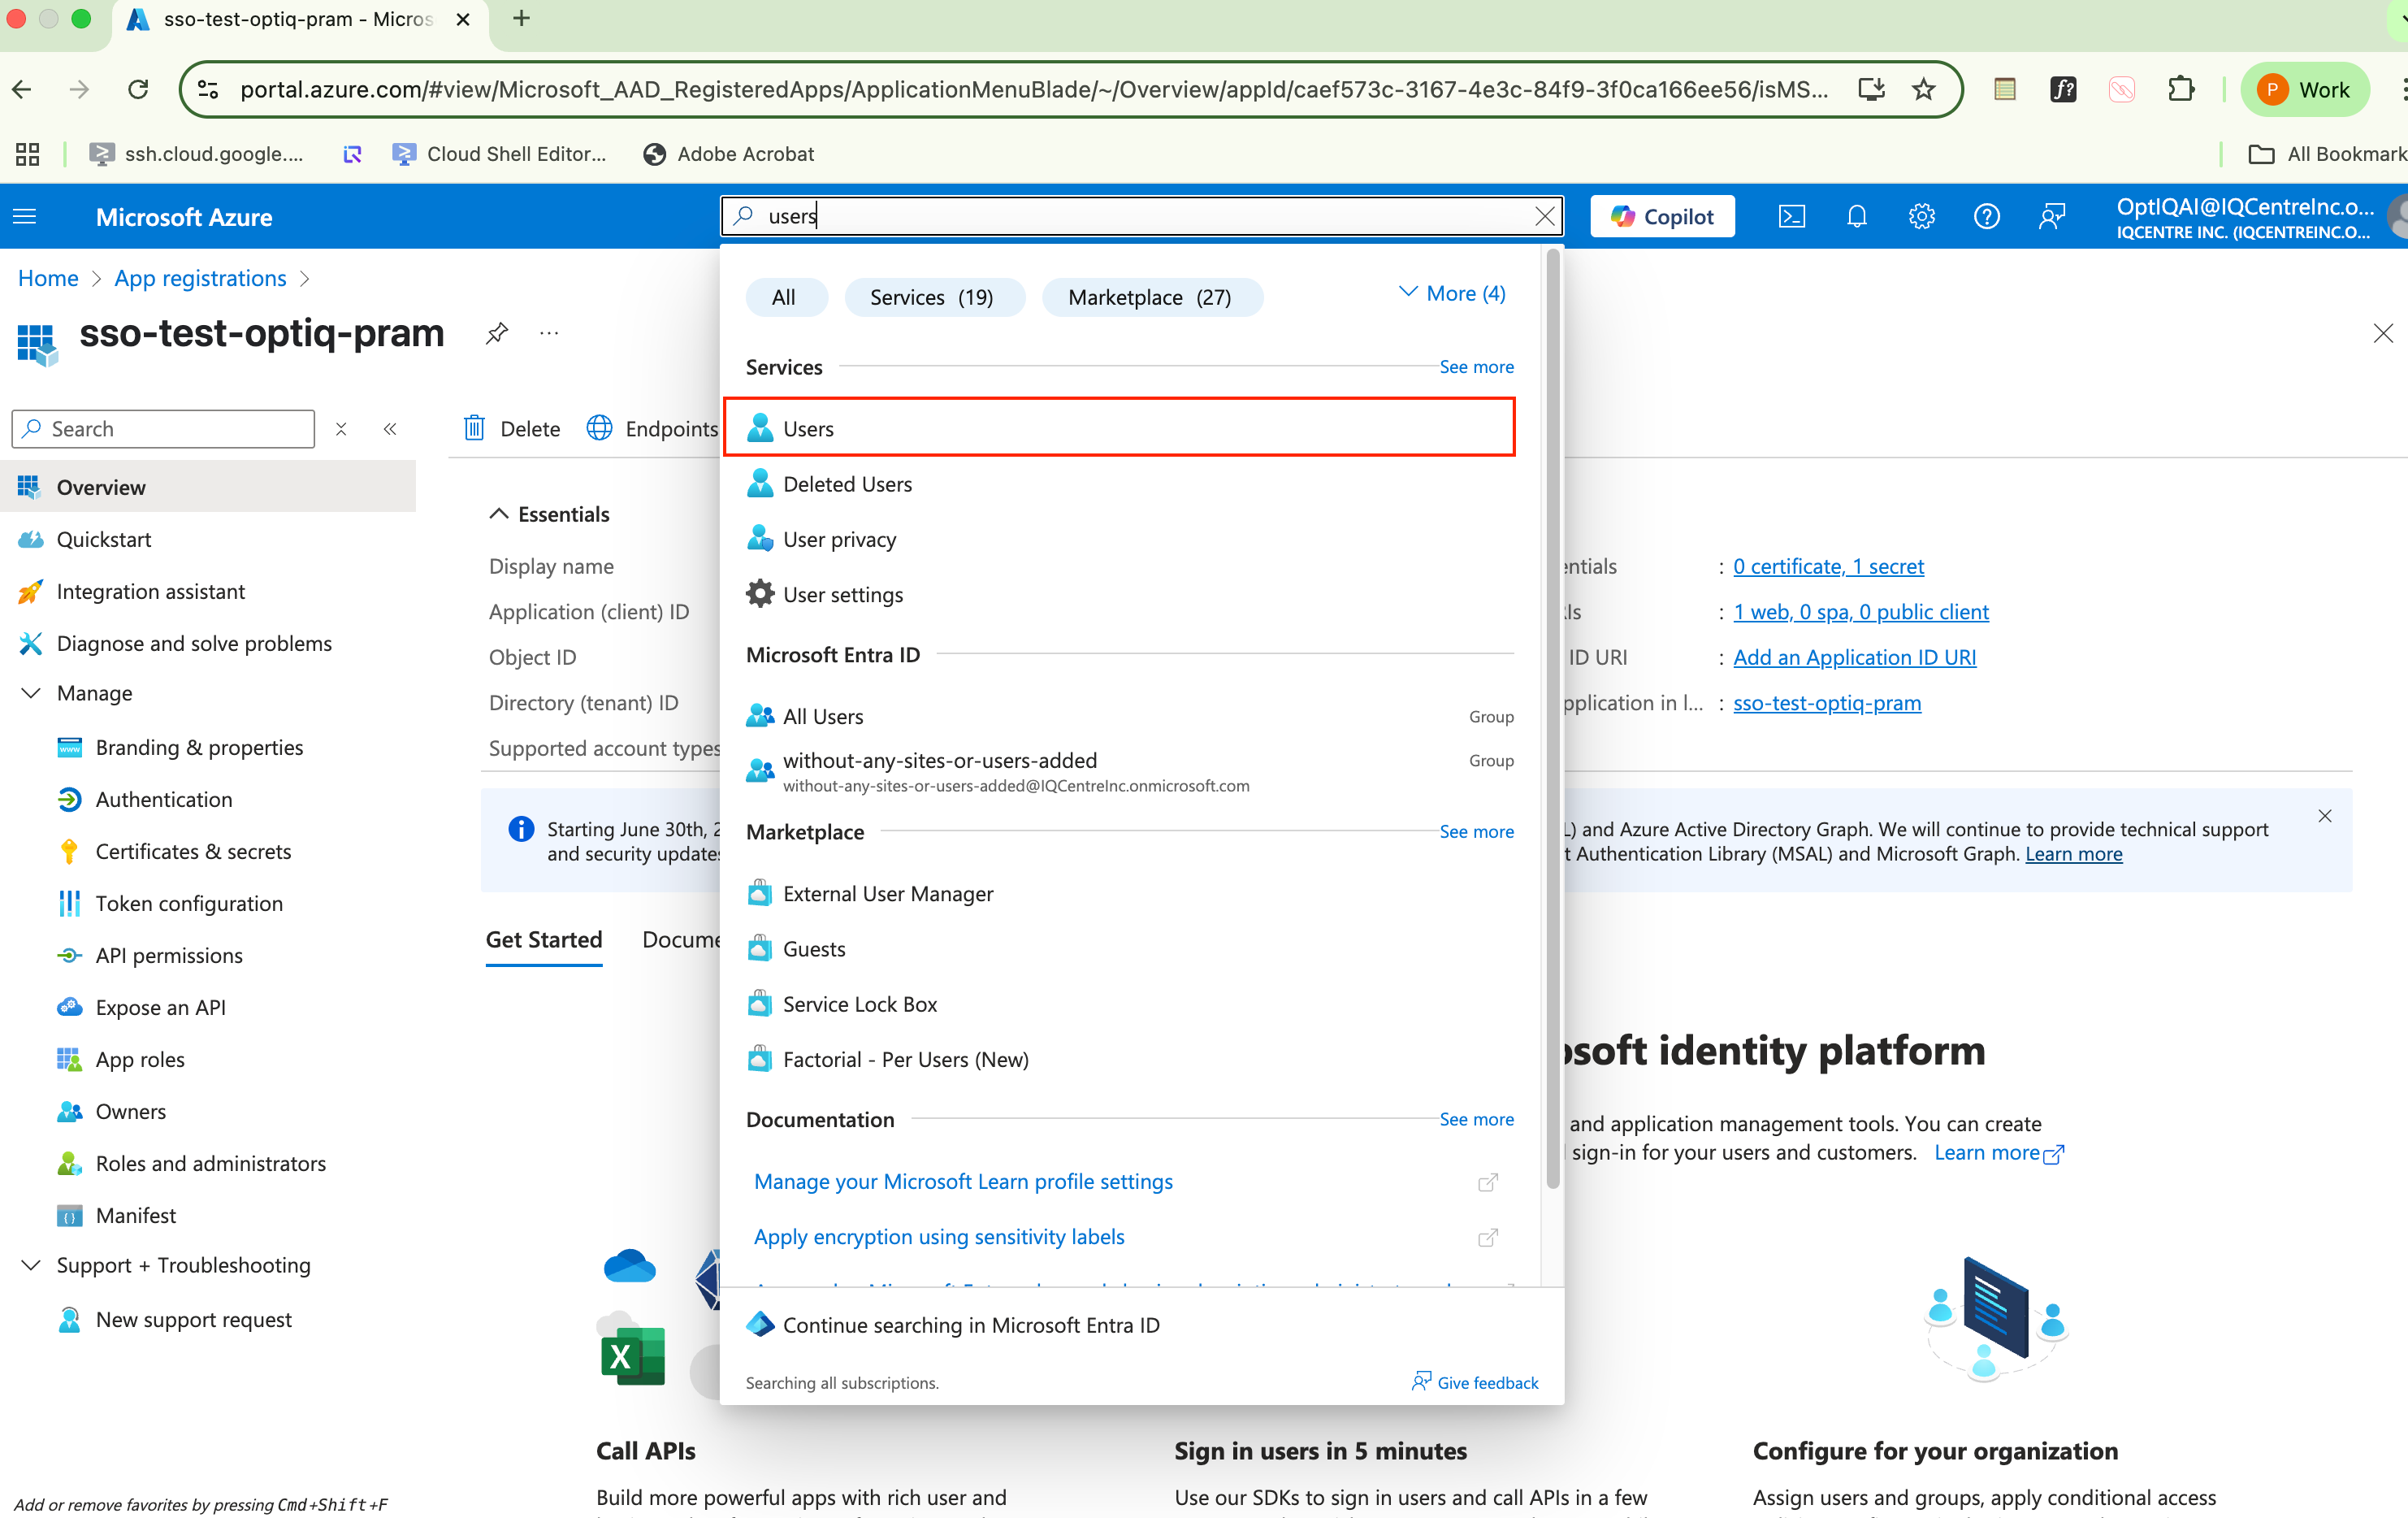
i. Search for Users on the top search Bar
ii. In the Next step click on “+New User” button
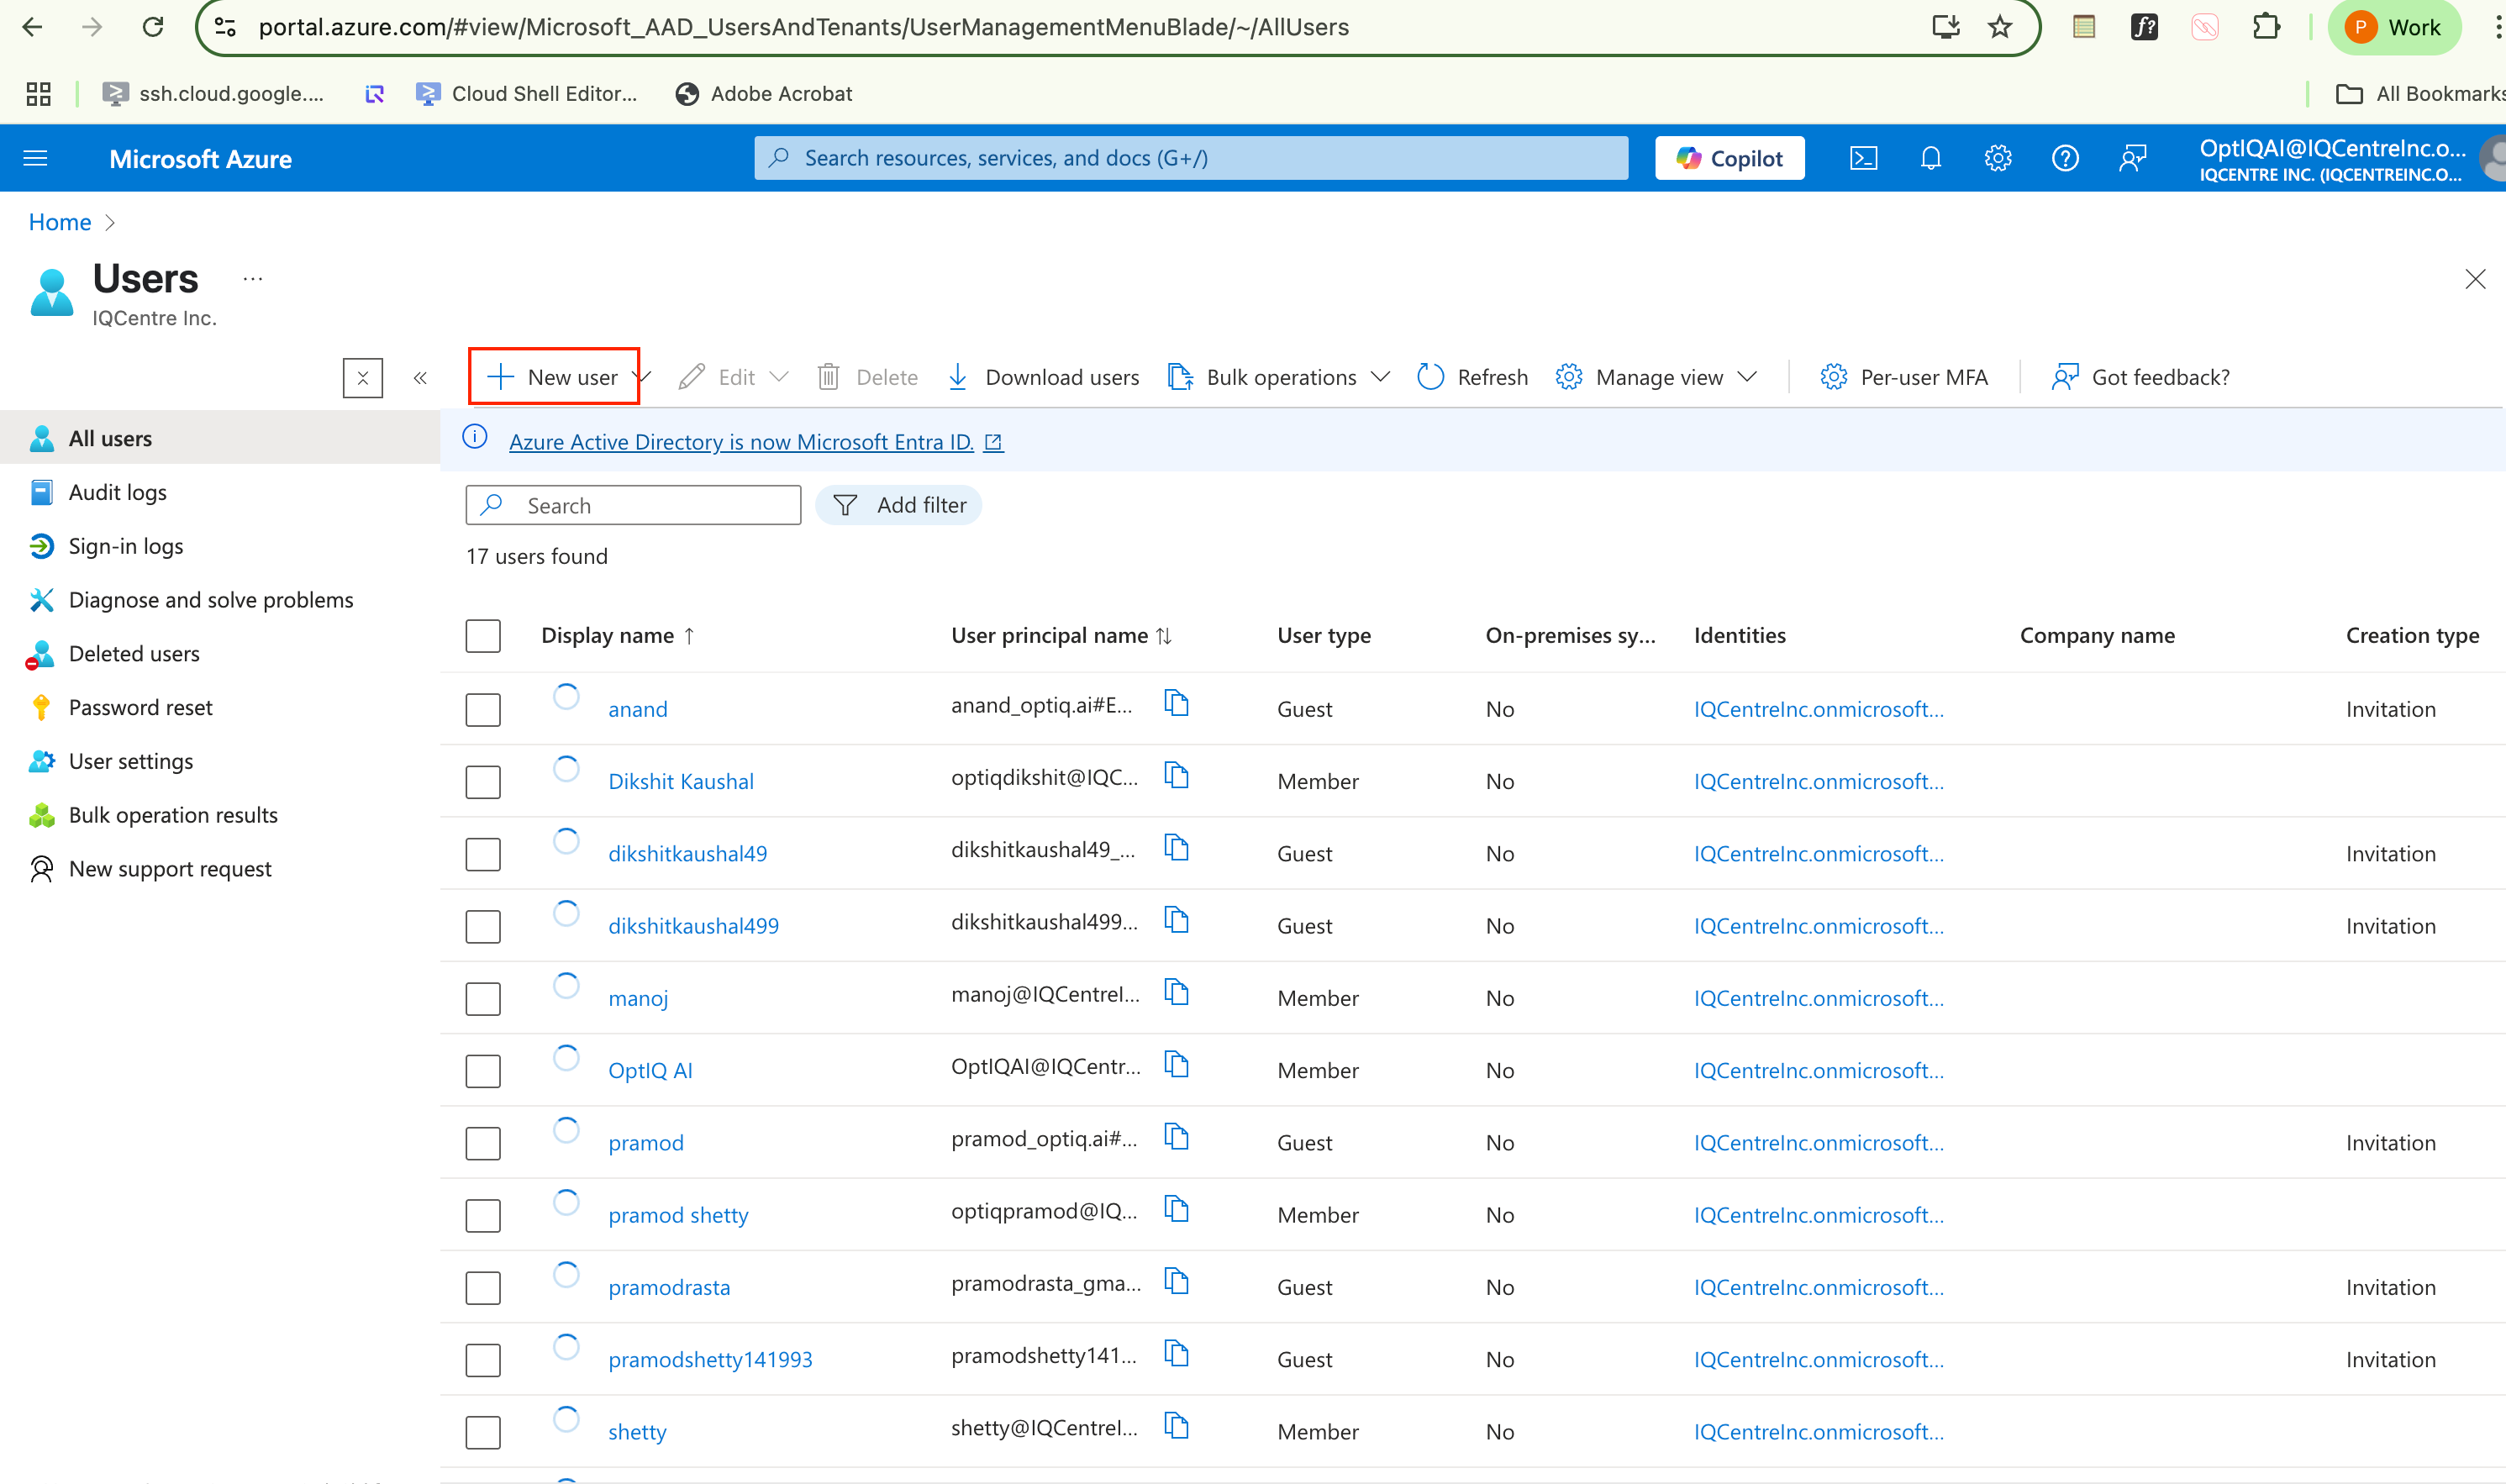
iii. Enter the Principal Name and Display Name and click on Review and Create
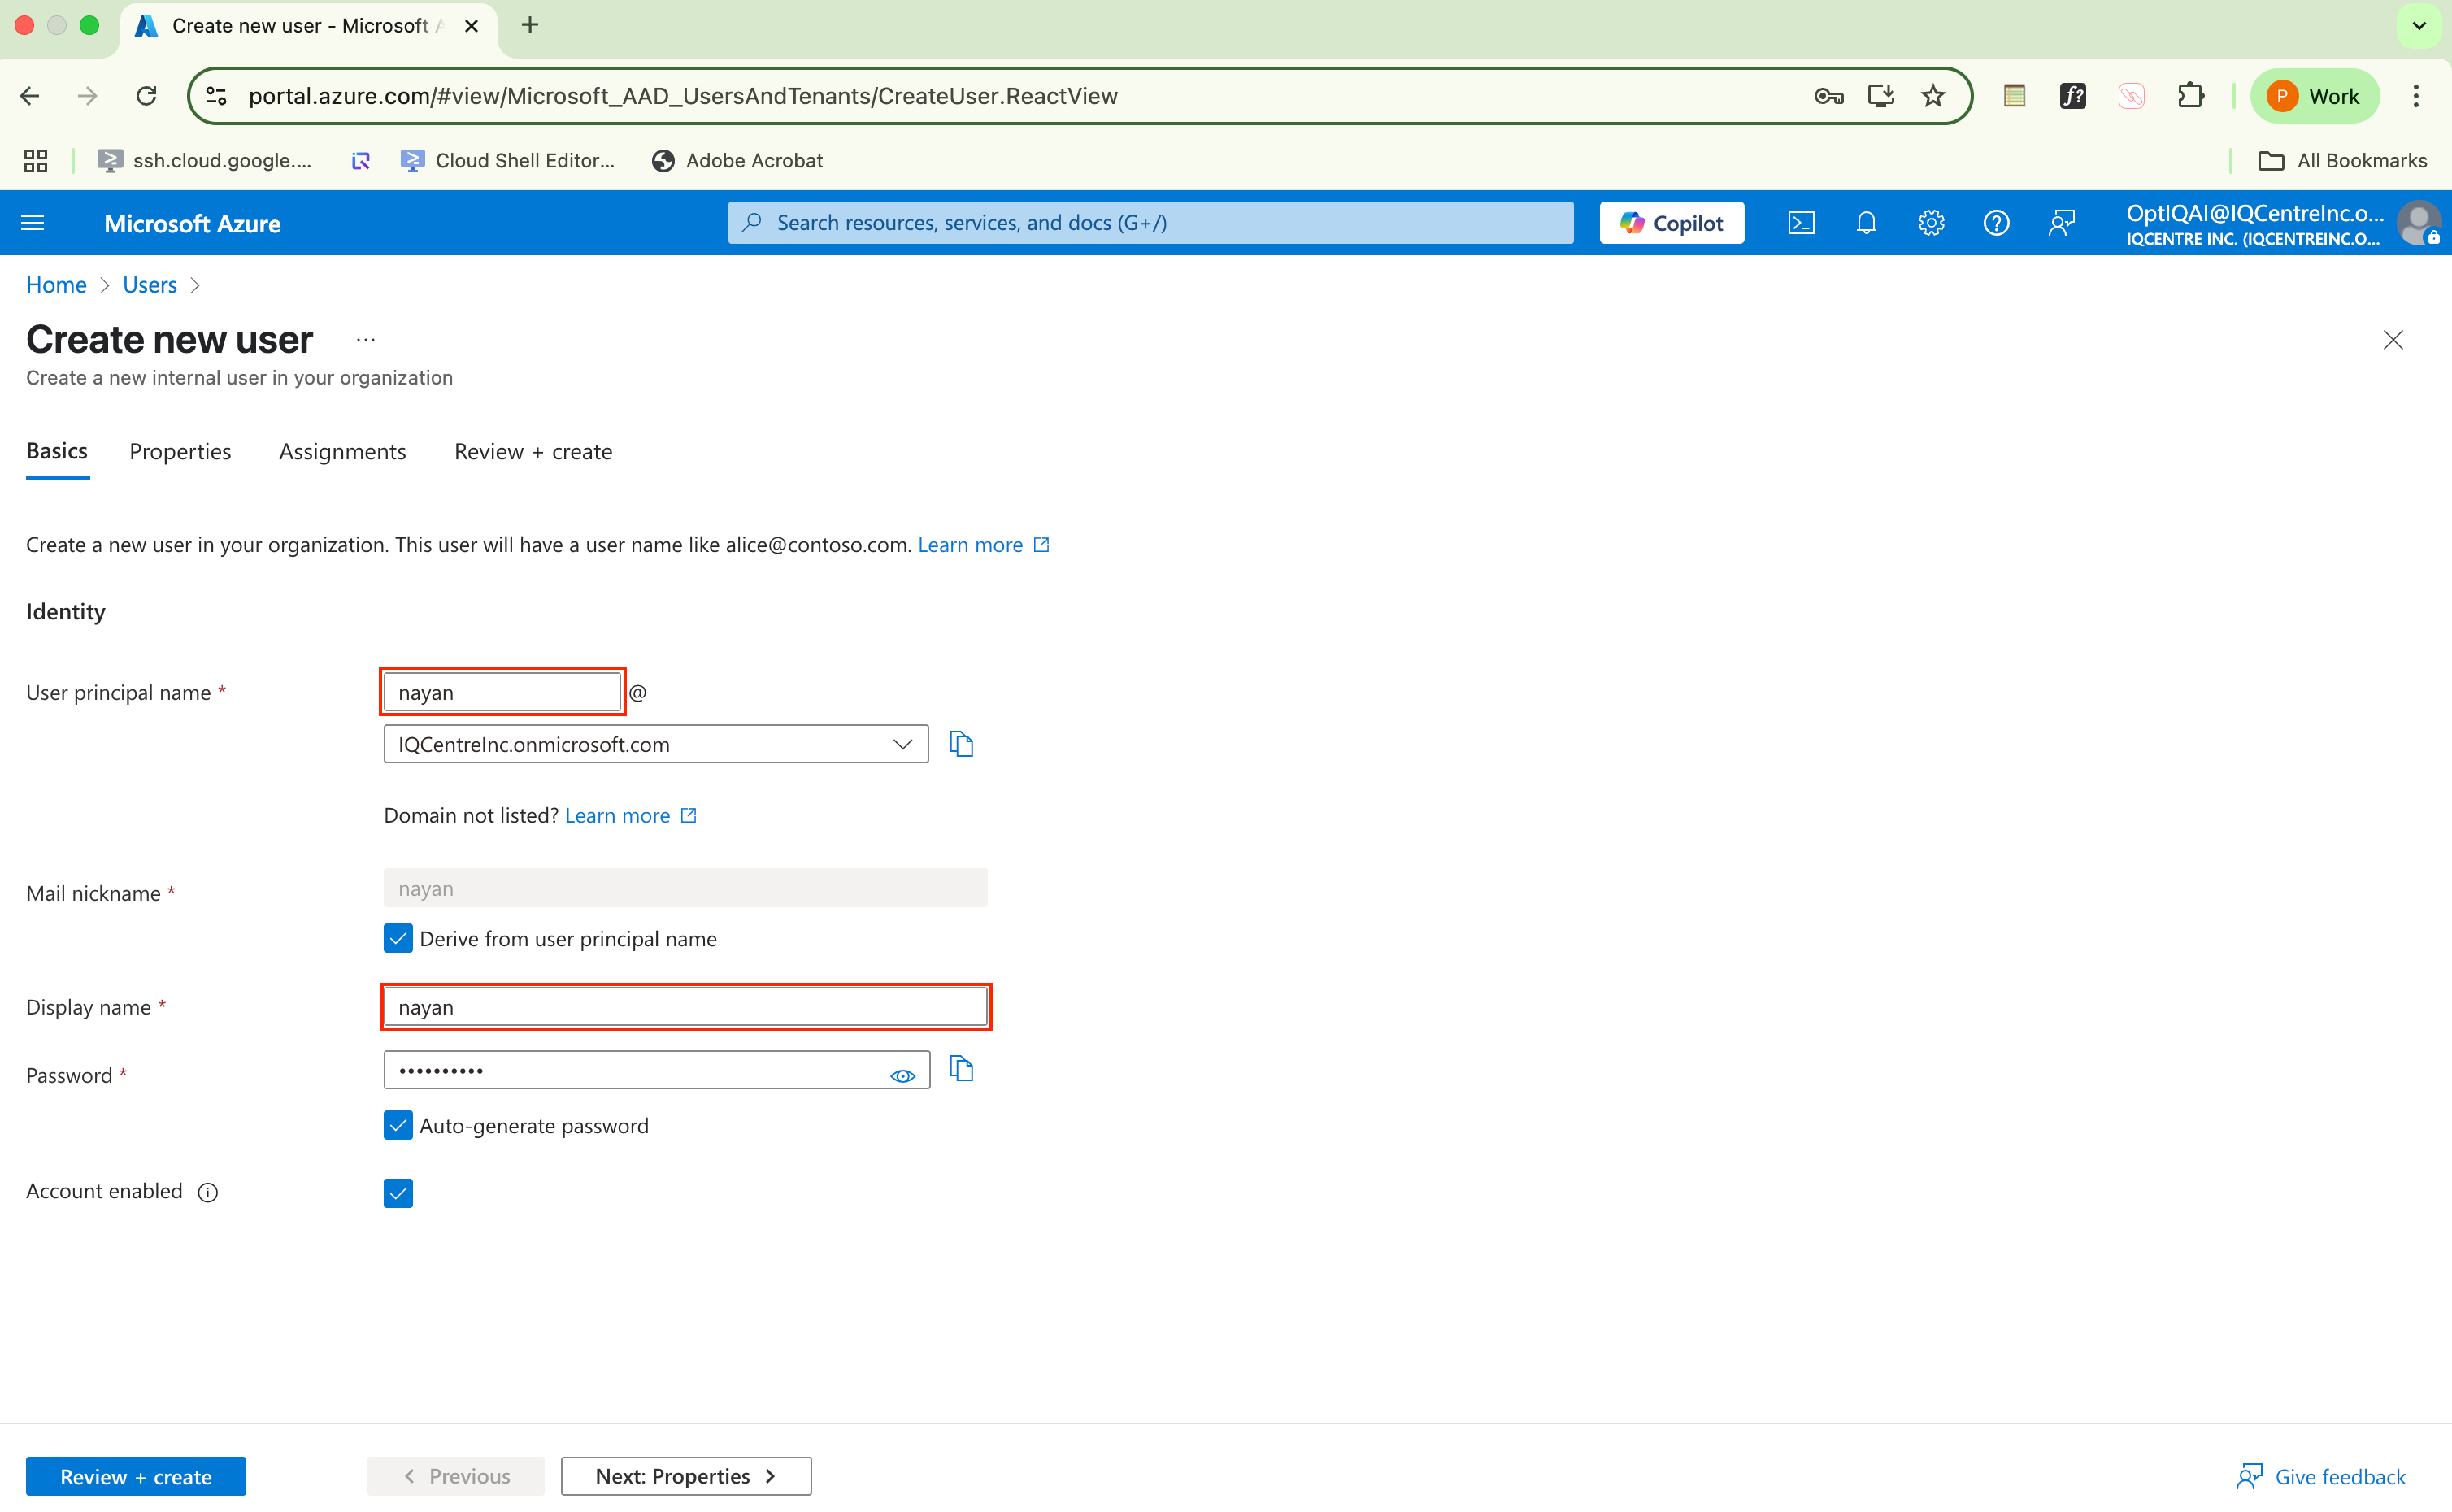
Creating Groups
i. Search Groups on the Top Search Bar
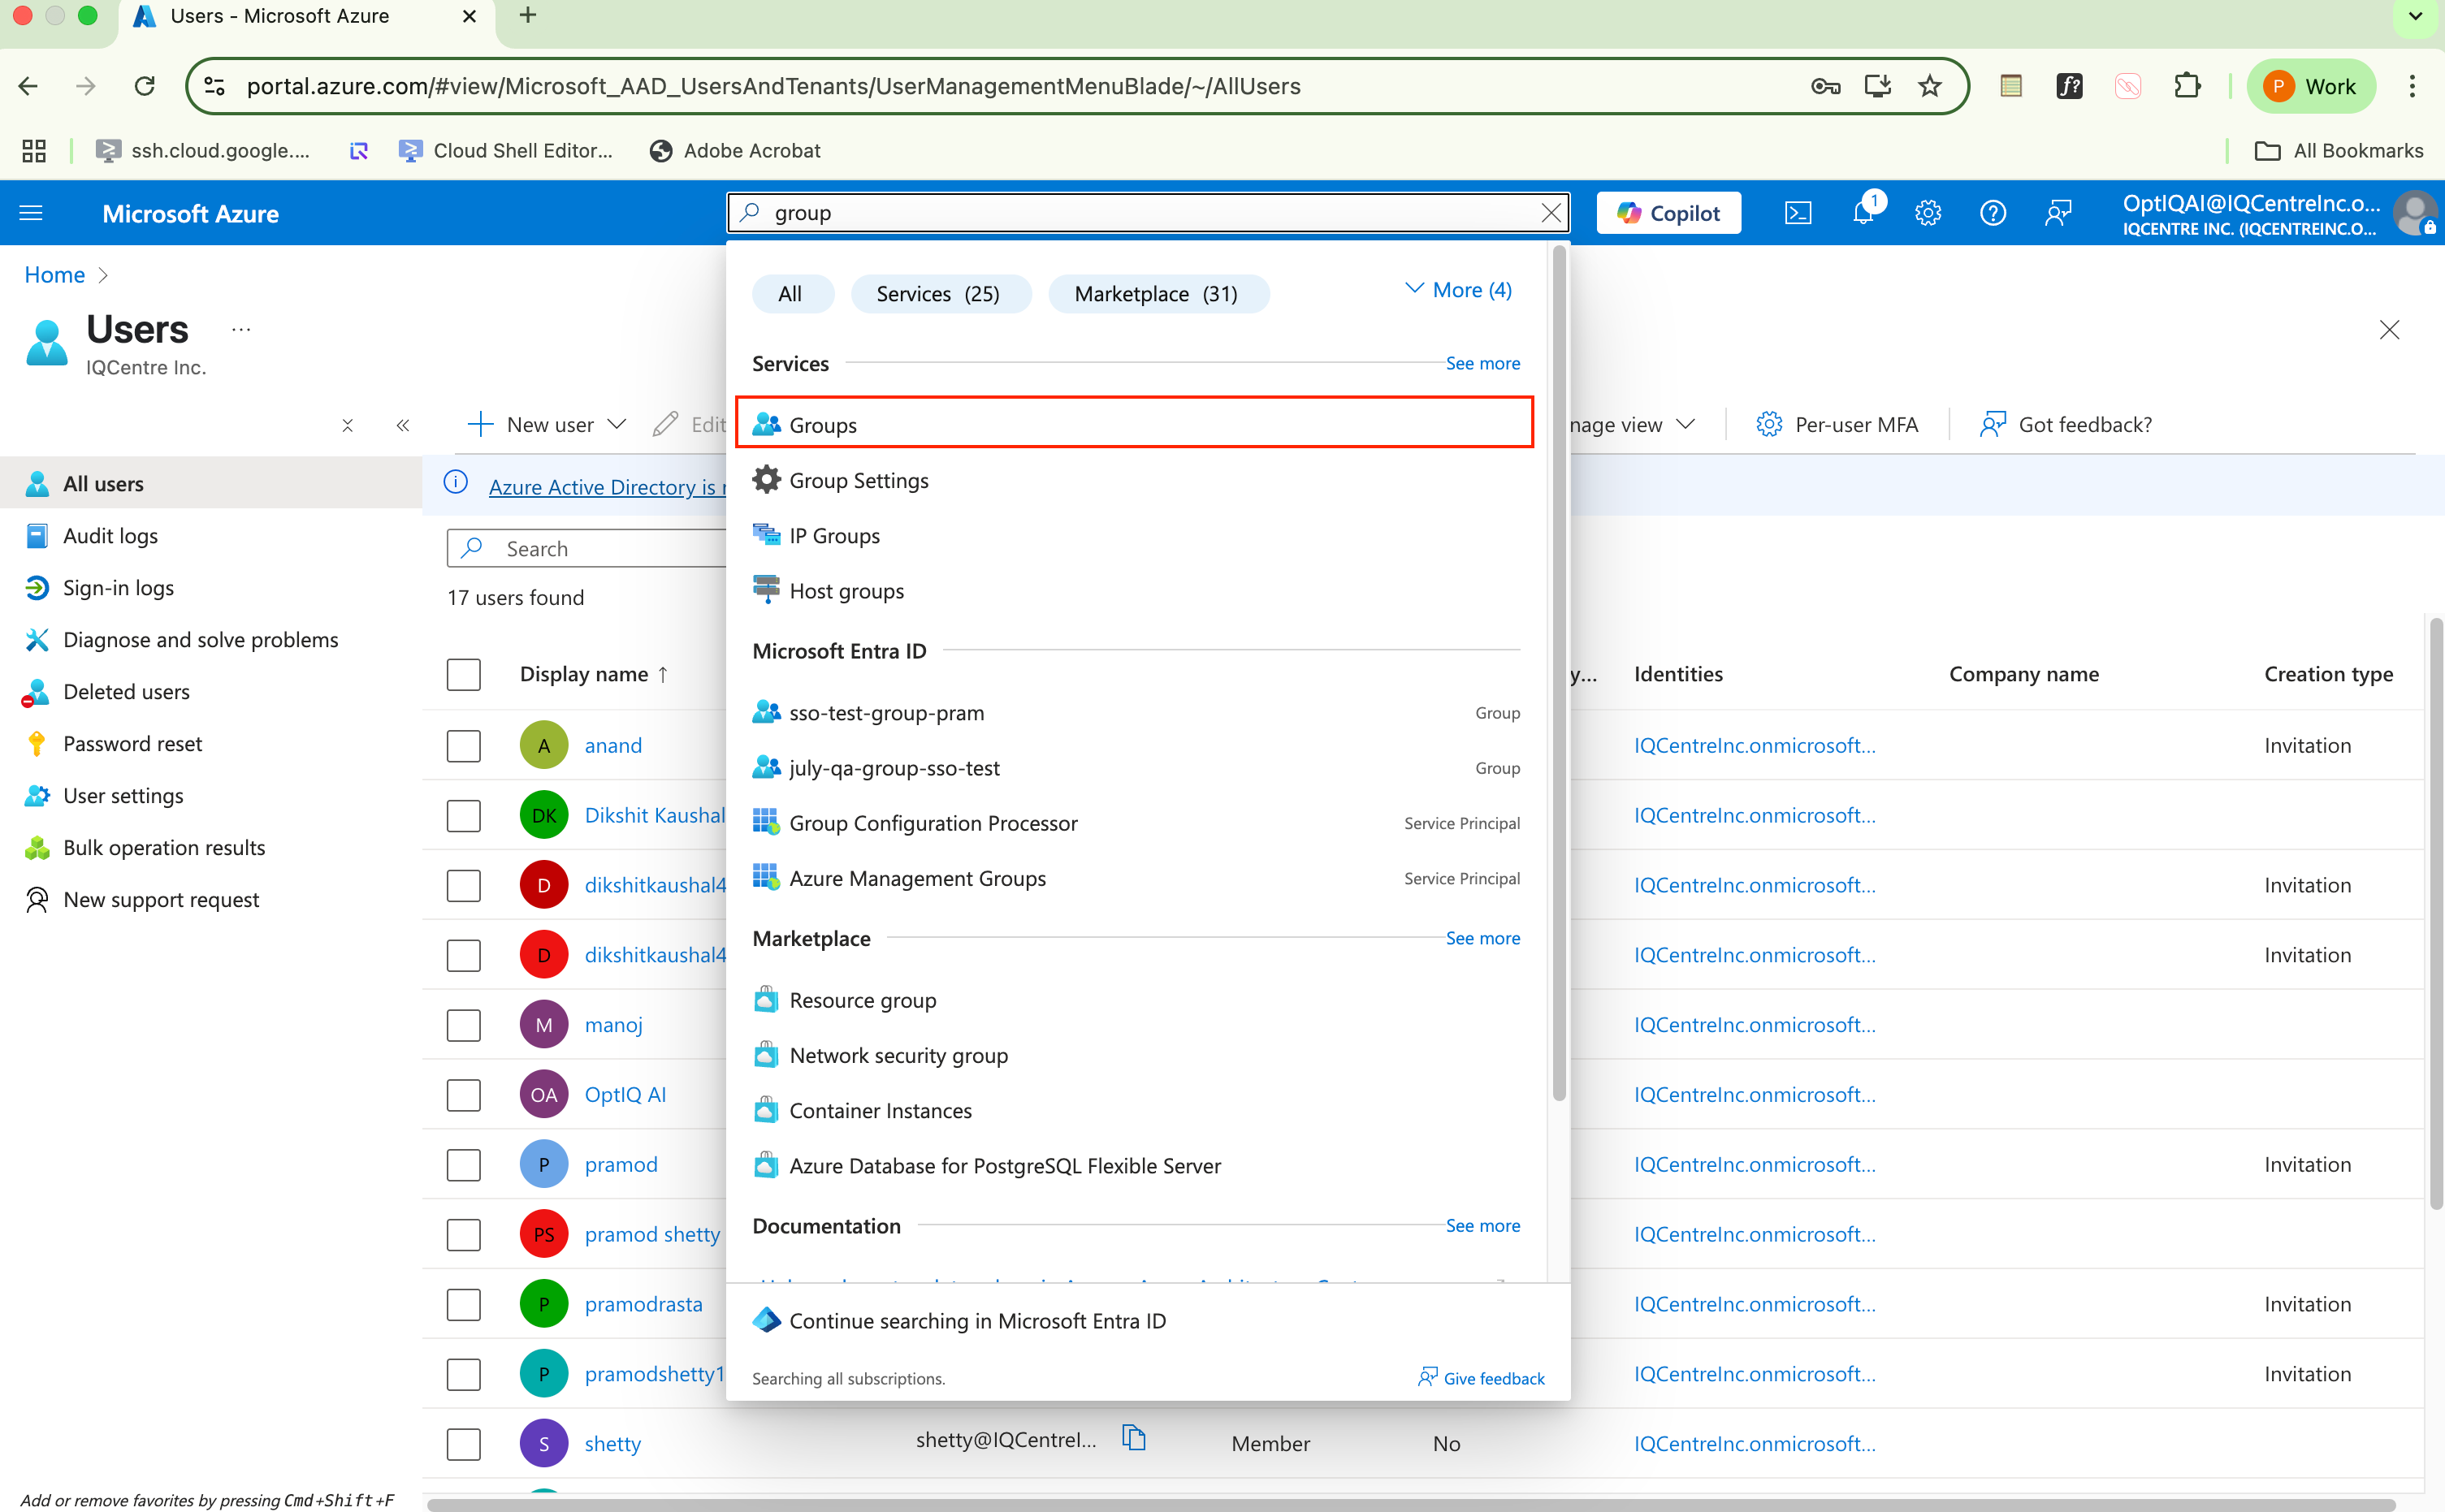
ii. Click on New Group.
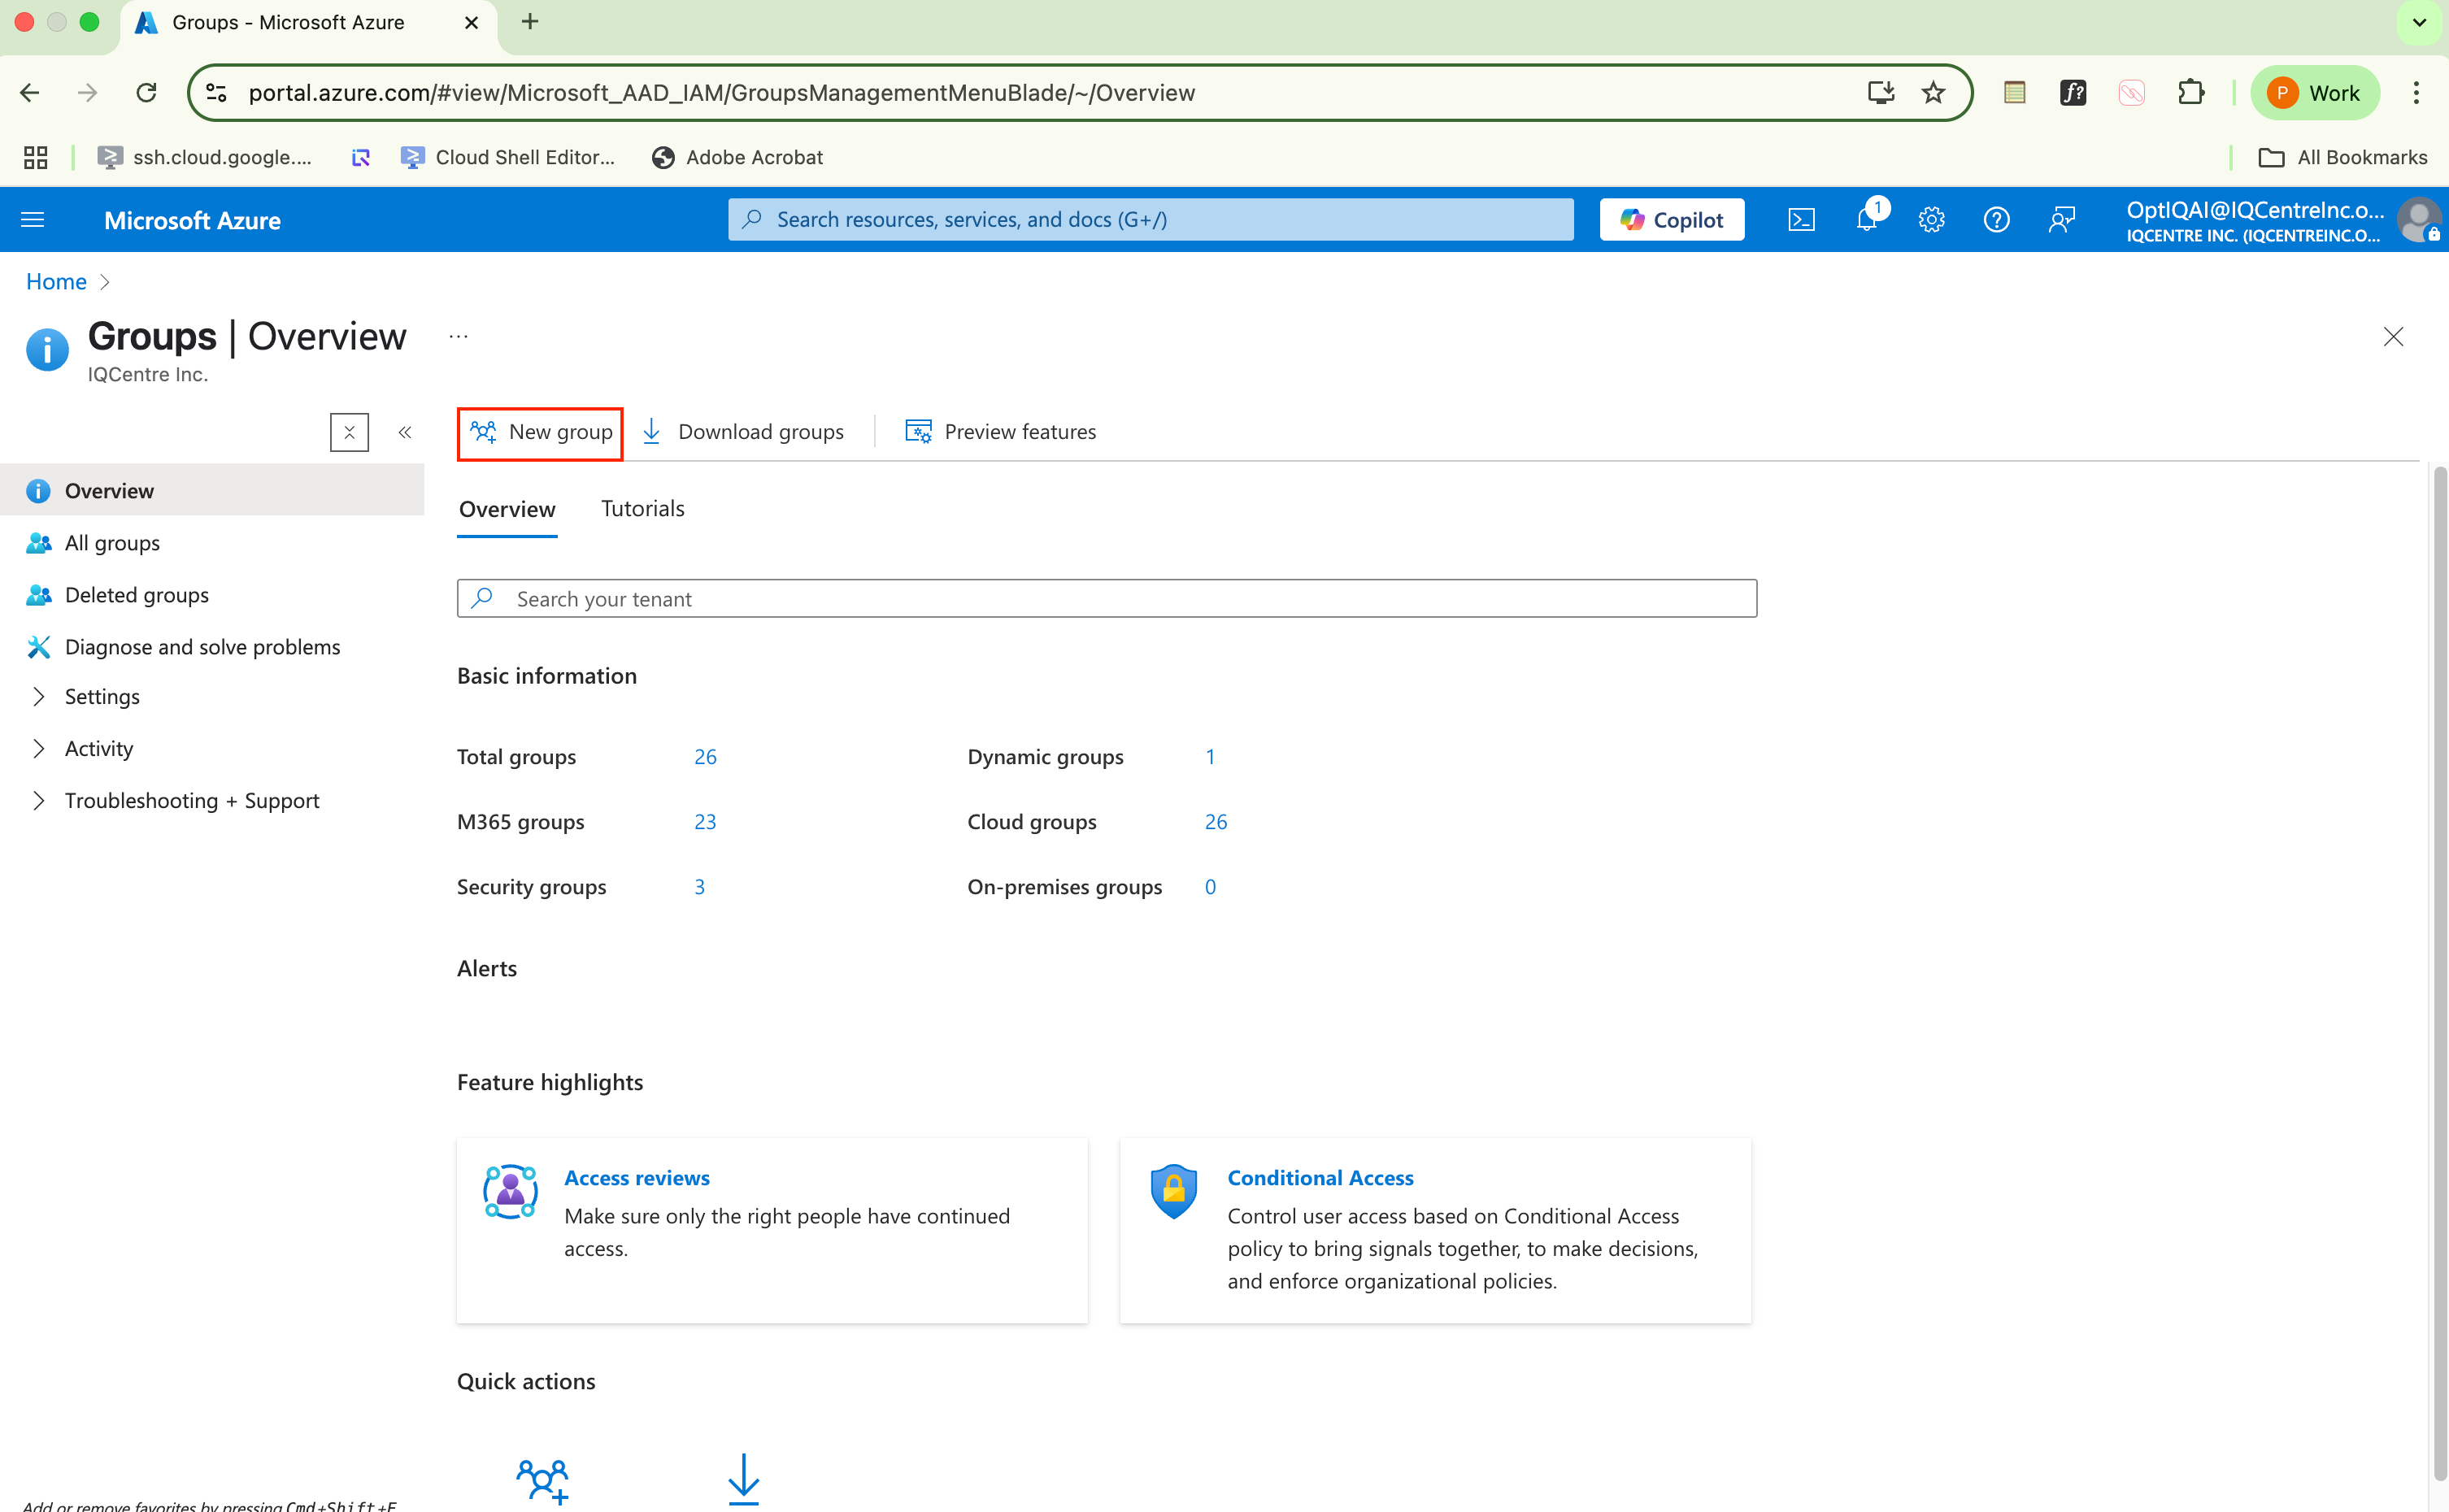
iii. Enter the Group Name
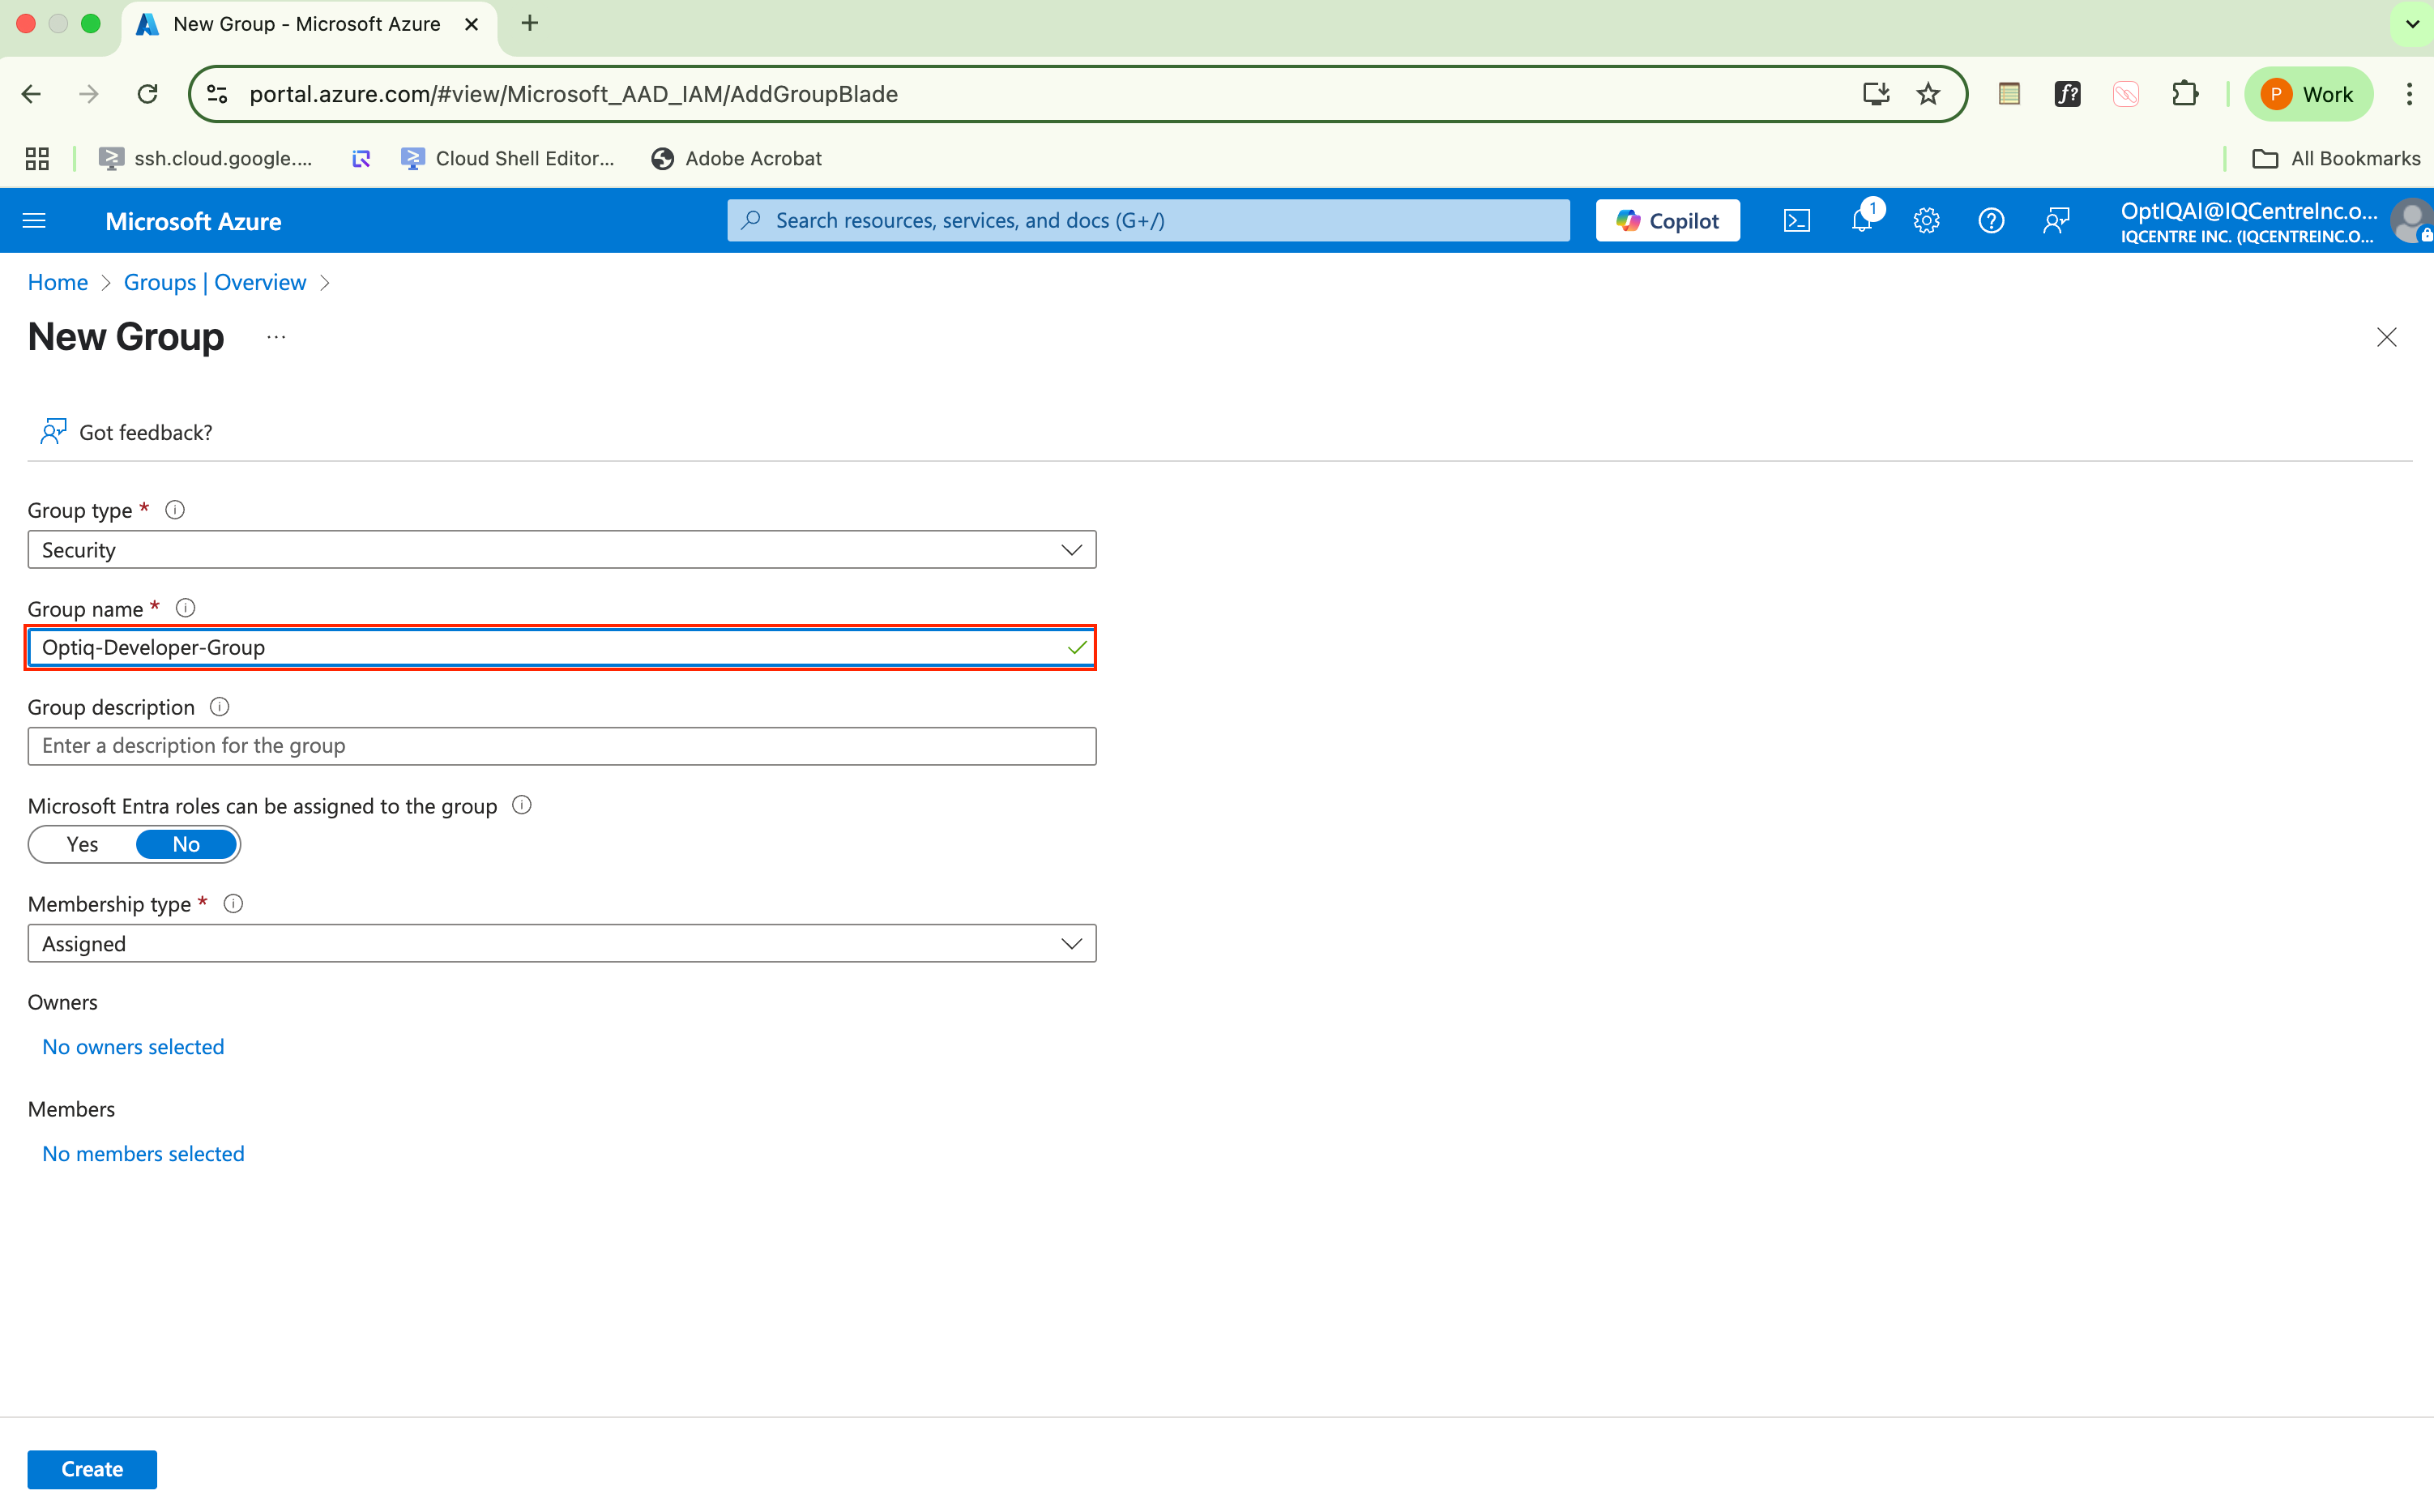
iv. For adding members to the group click members button as shown below
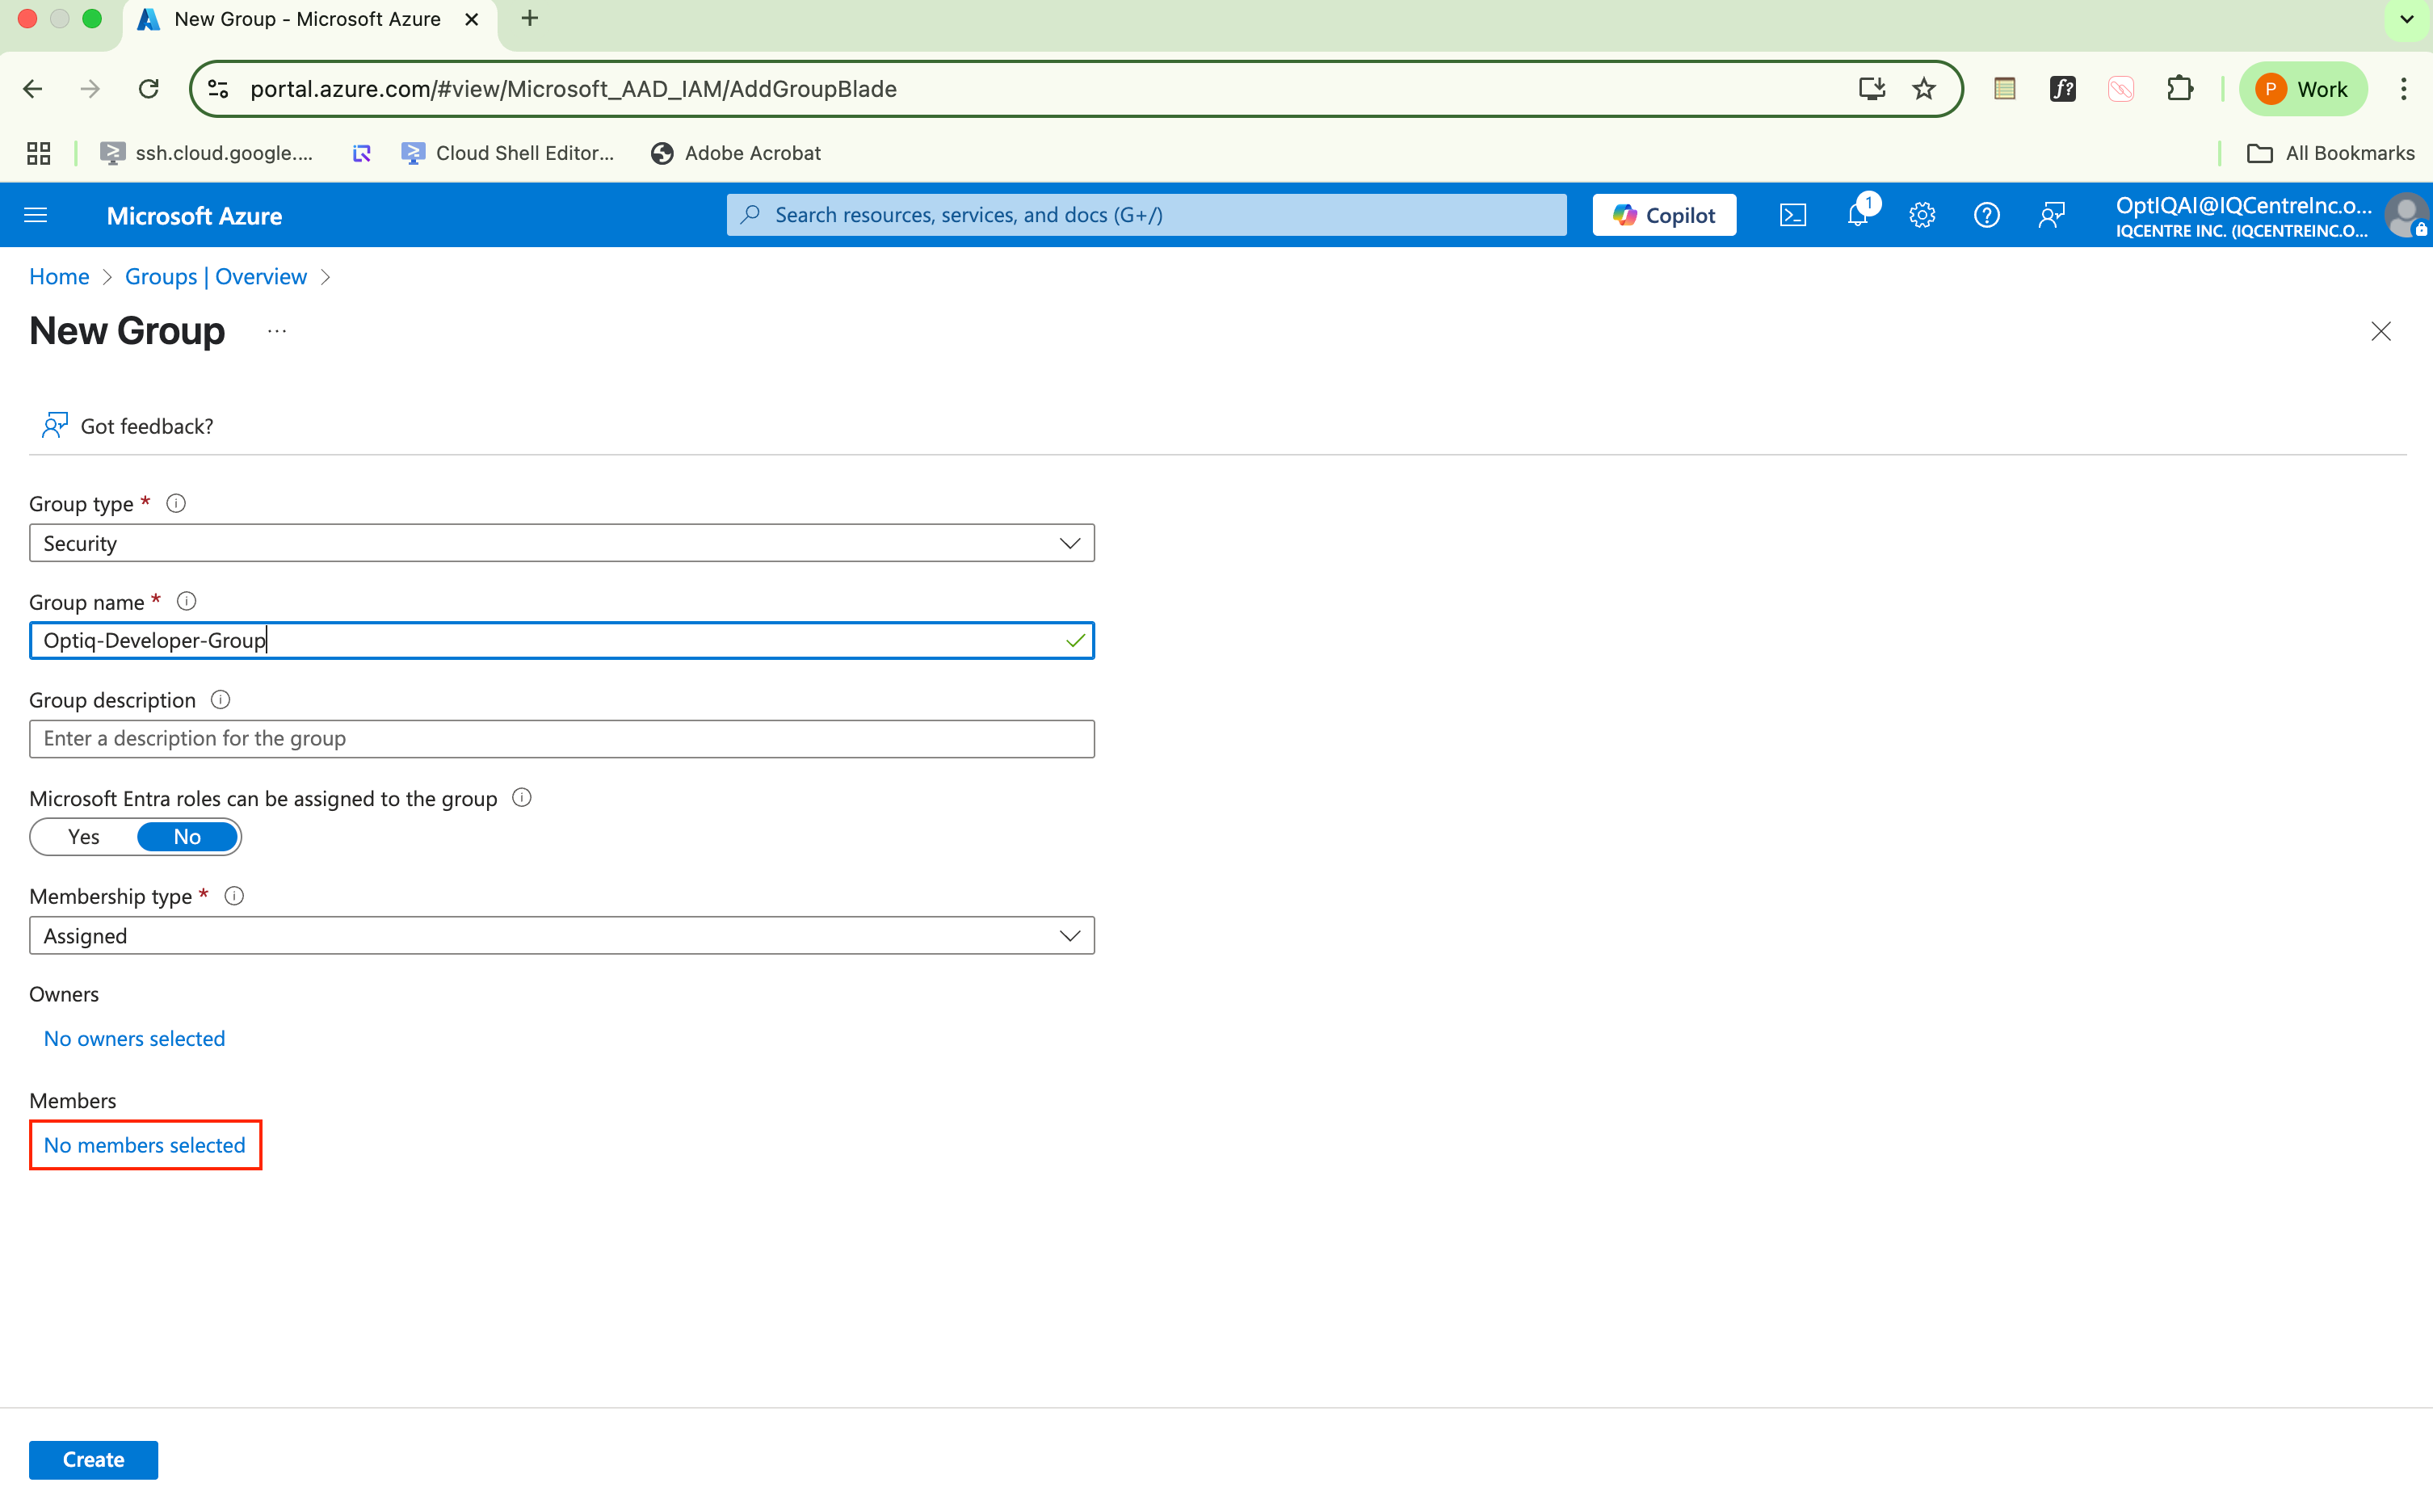
v. Add the all the users you need and click on Select
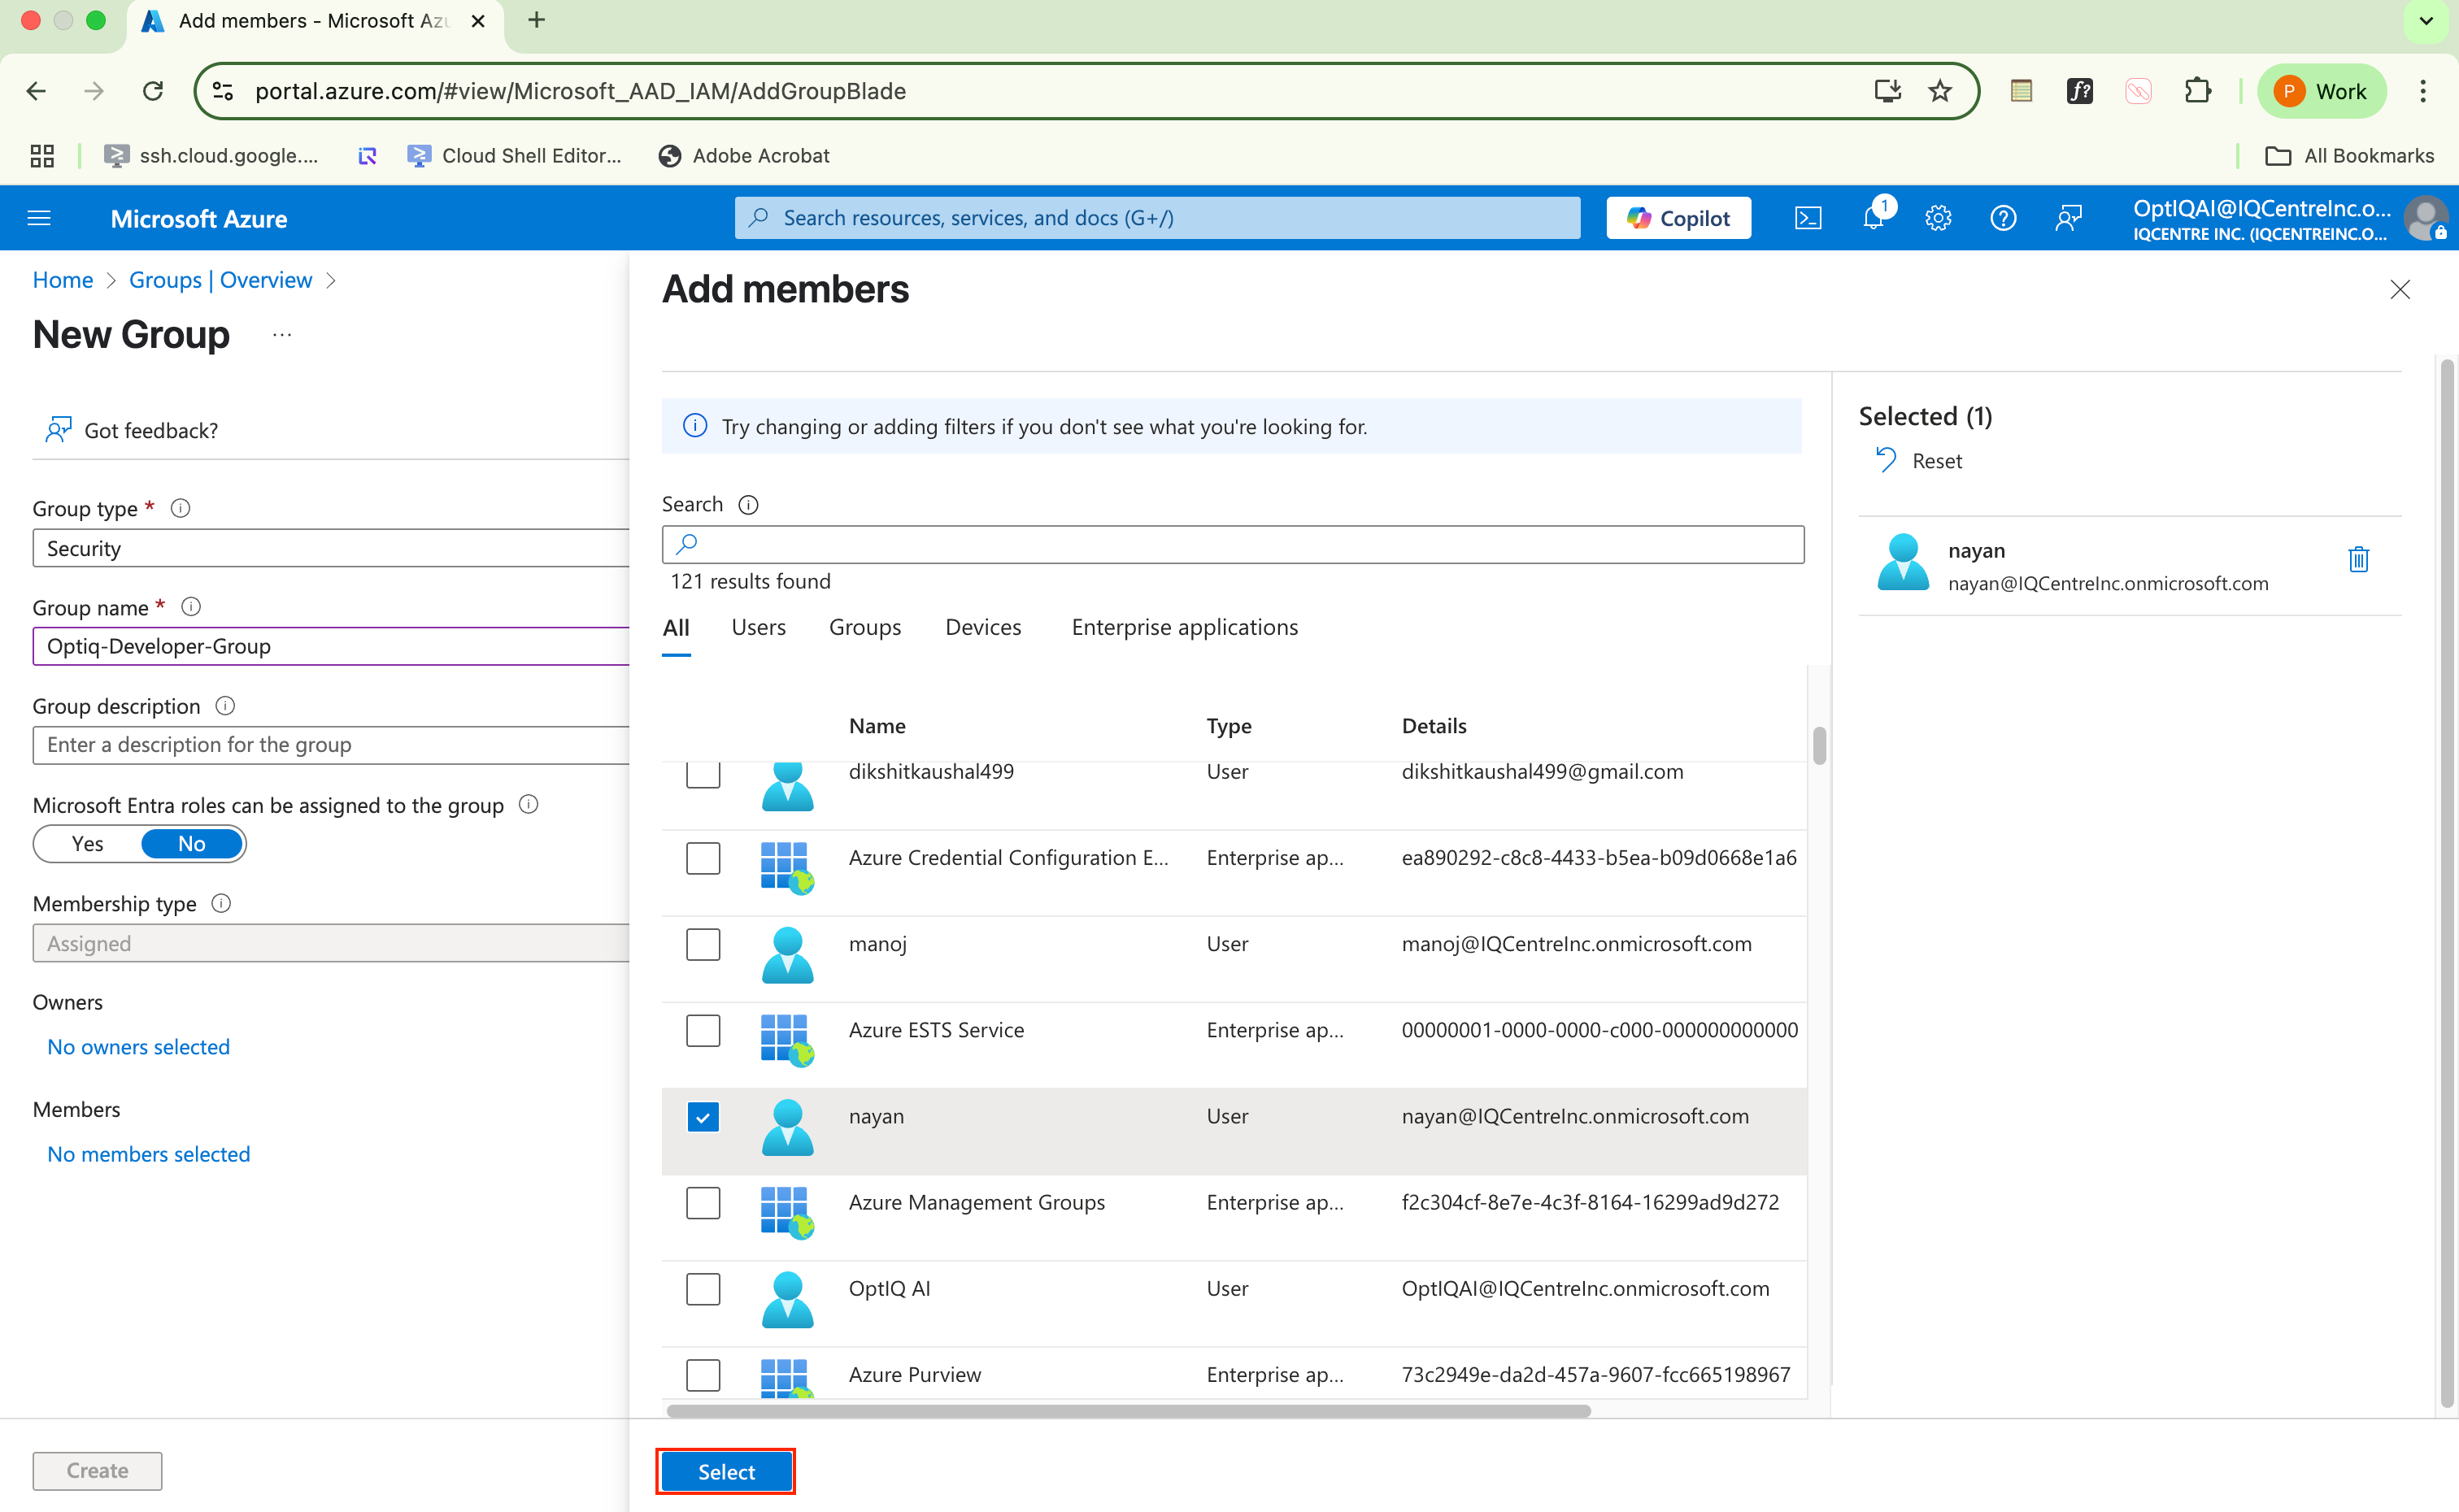
vi. After configuring click on Create button as shown below
Step 7: Assign Users and Groups to the Application
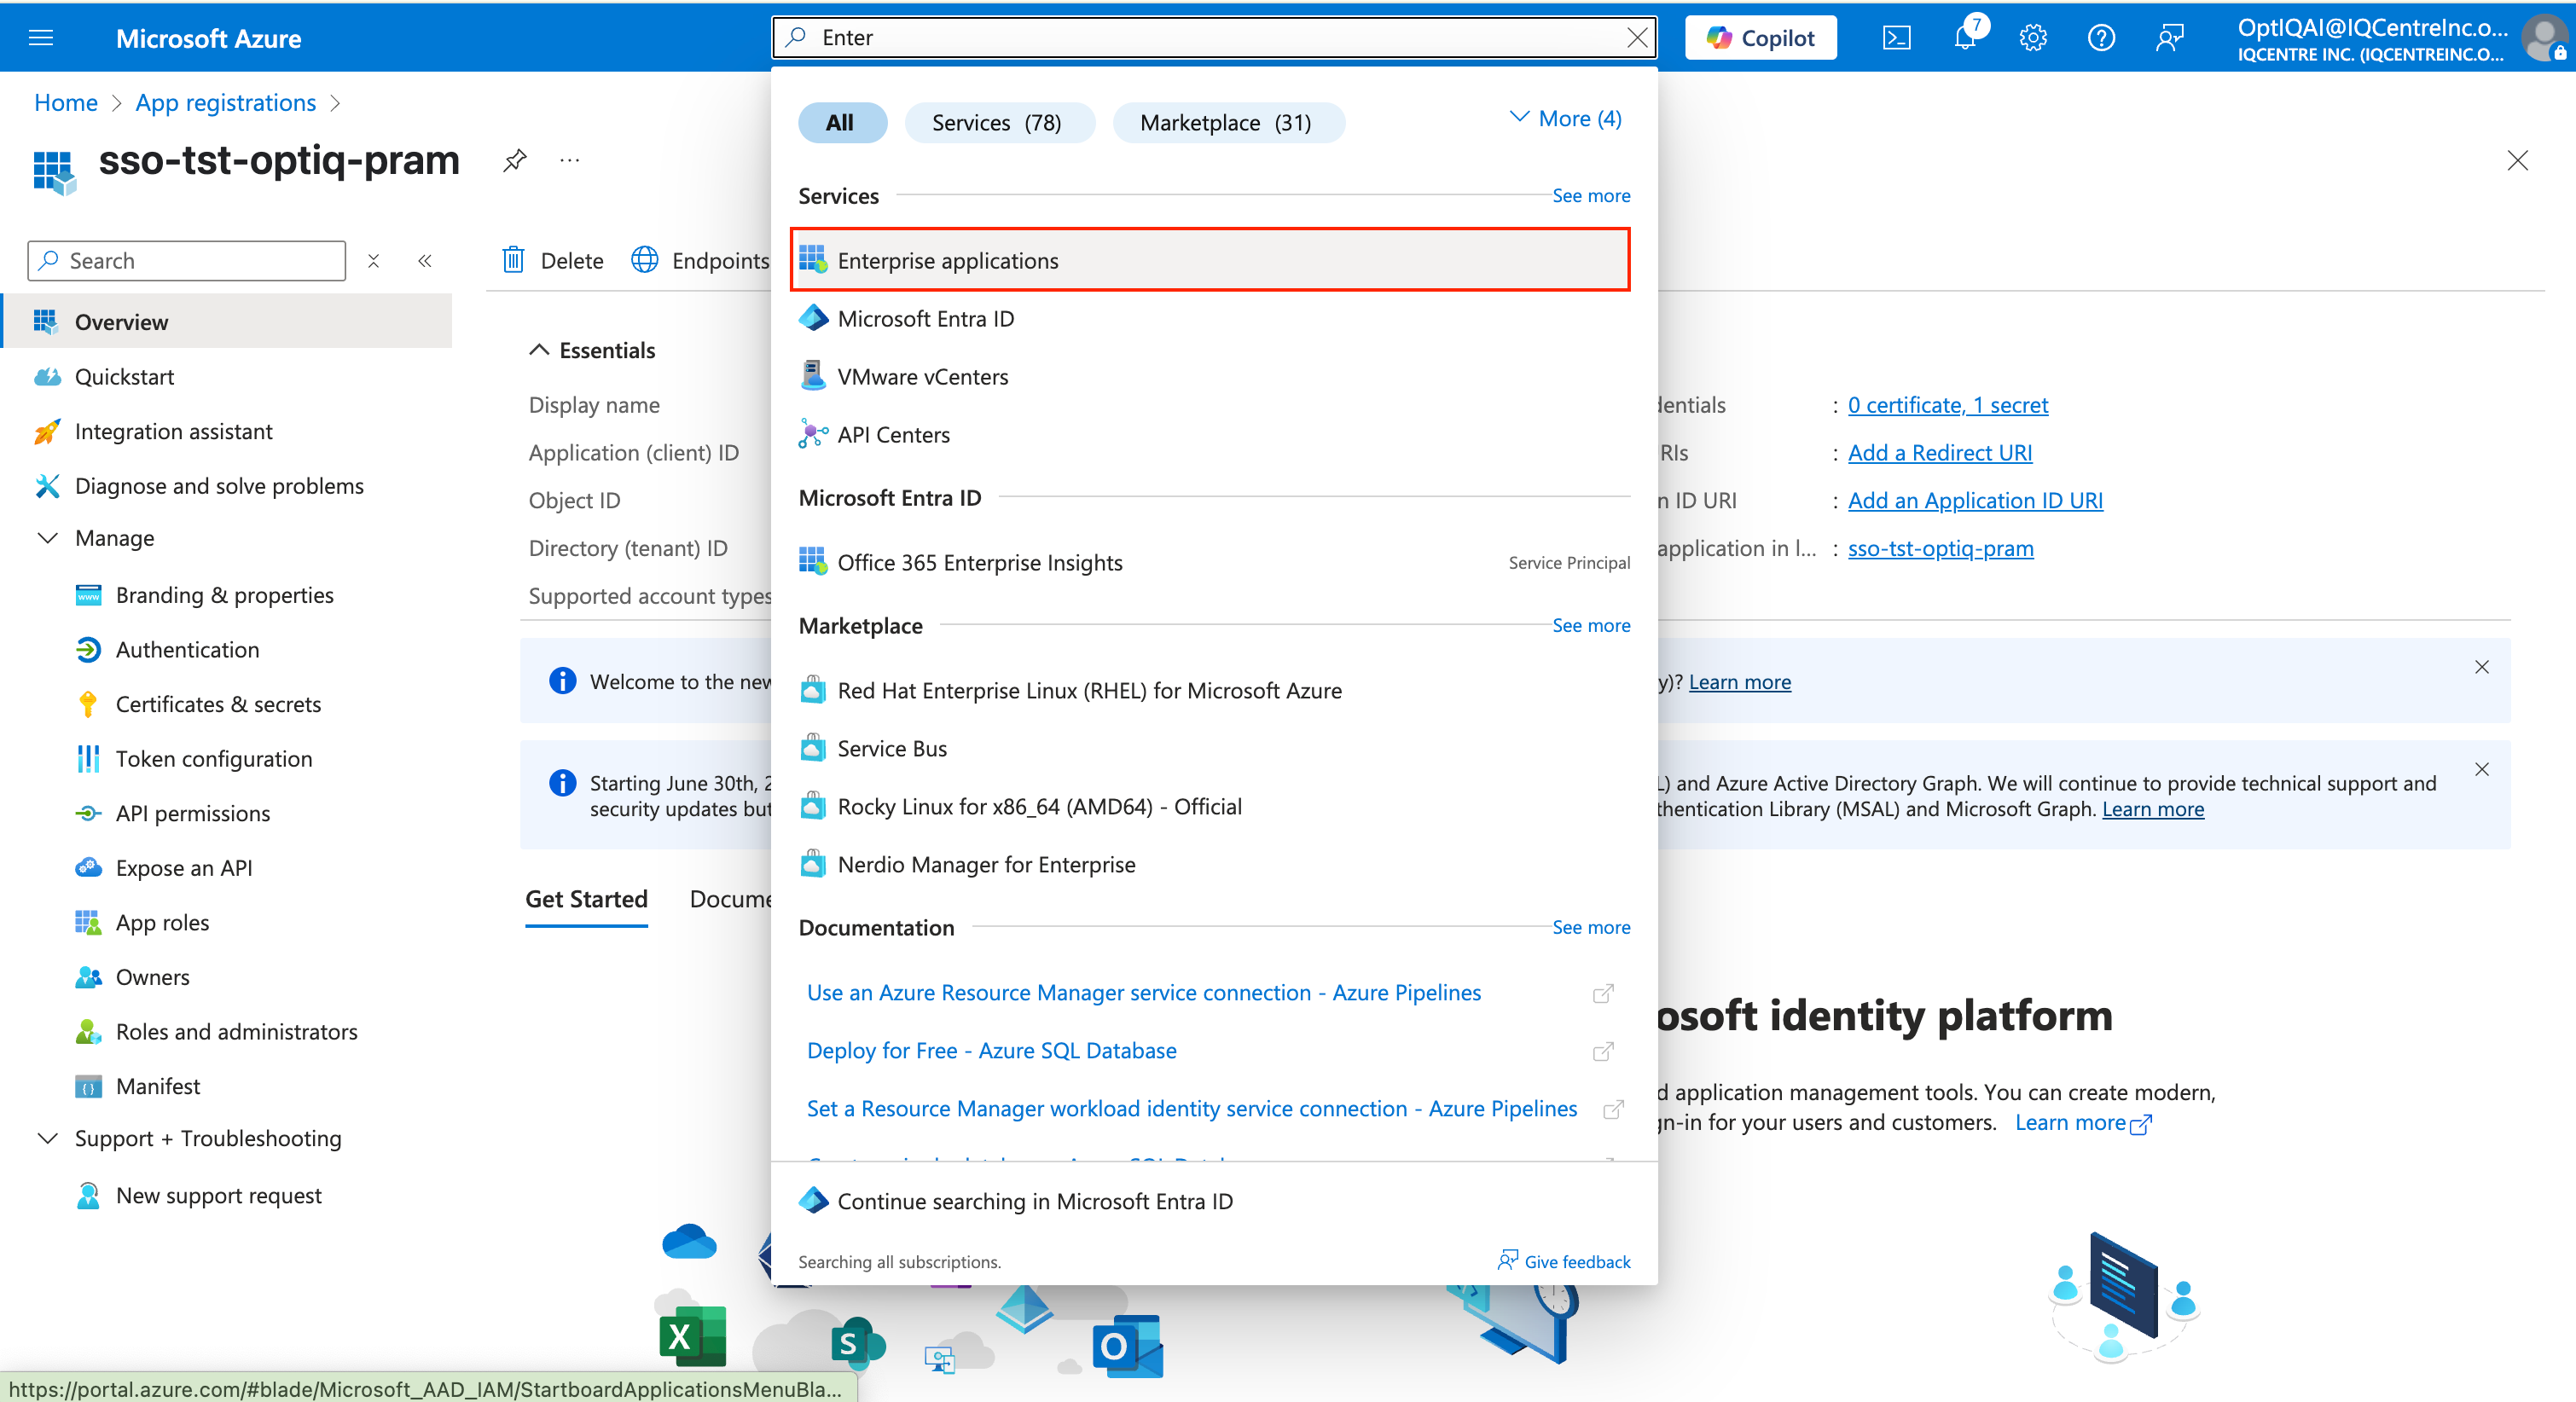
Navigate to the Enterprise Applications (search in the search bar) section in the Azure AD menu.
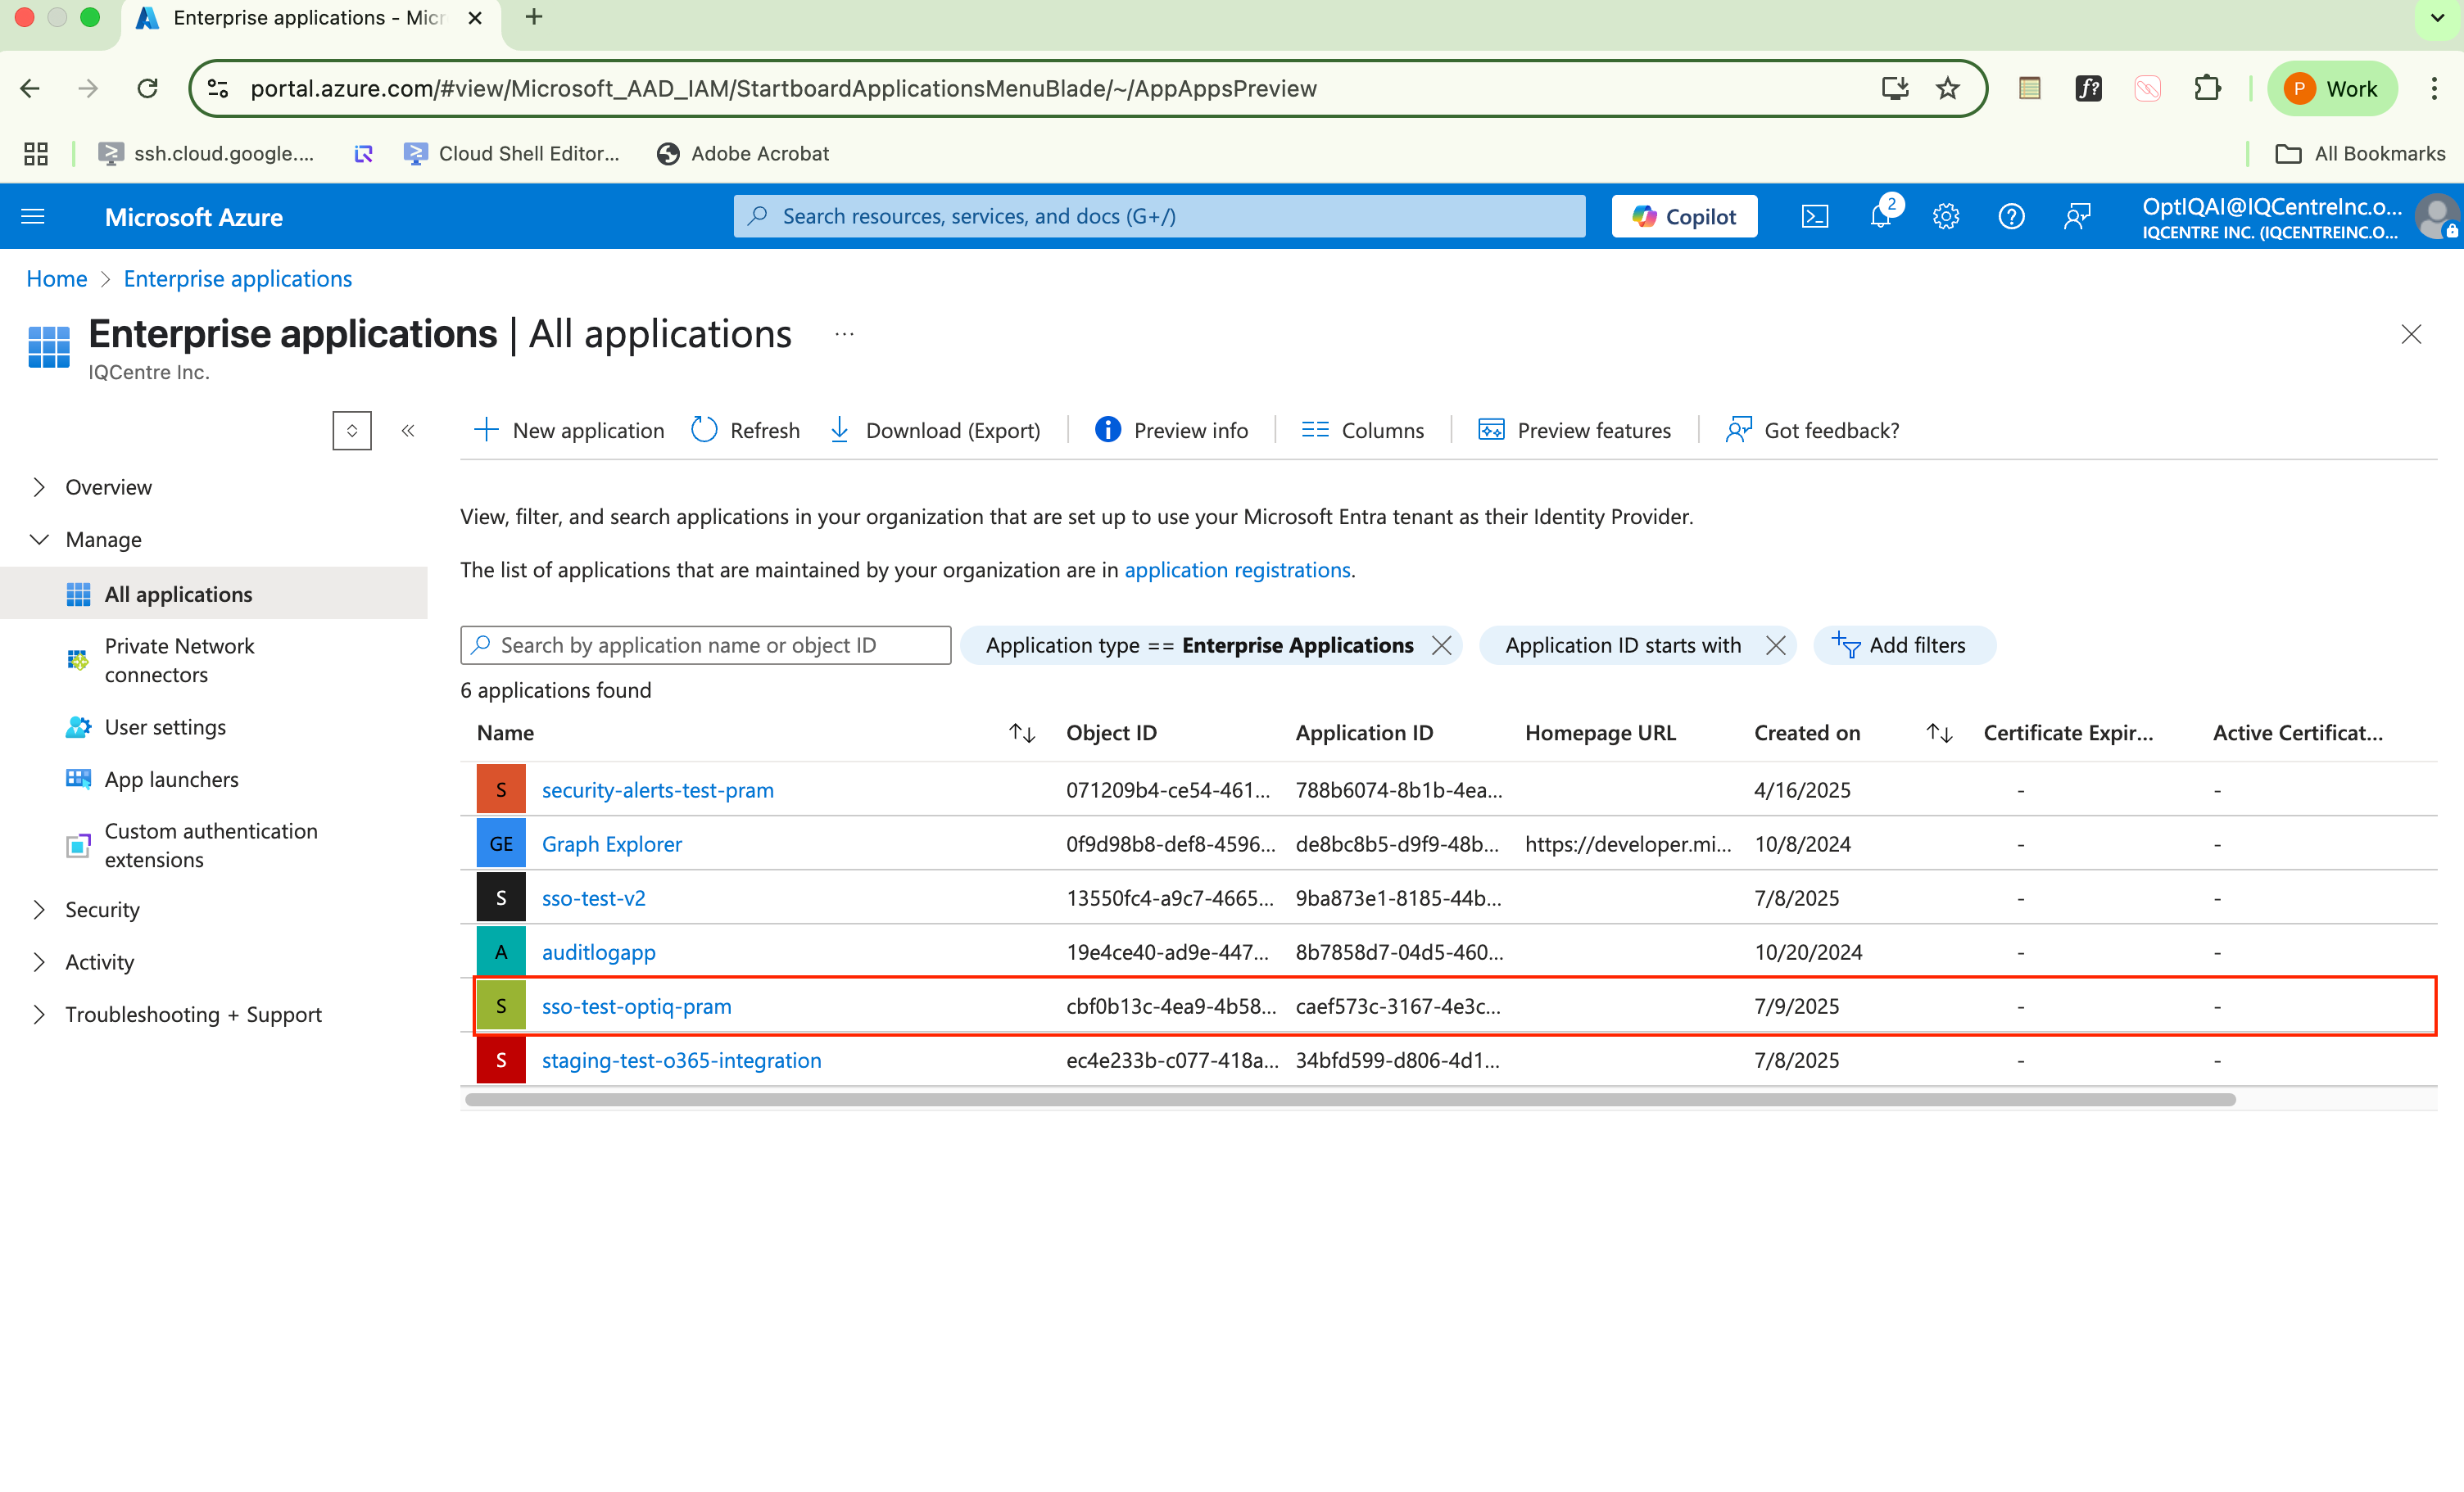
Select the application you created.
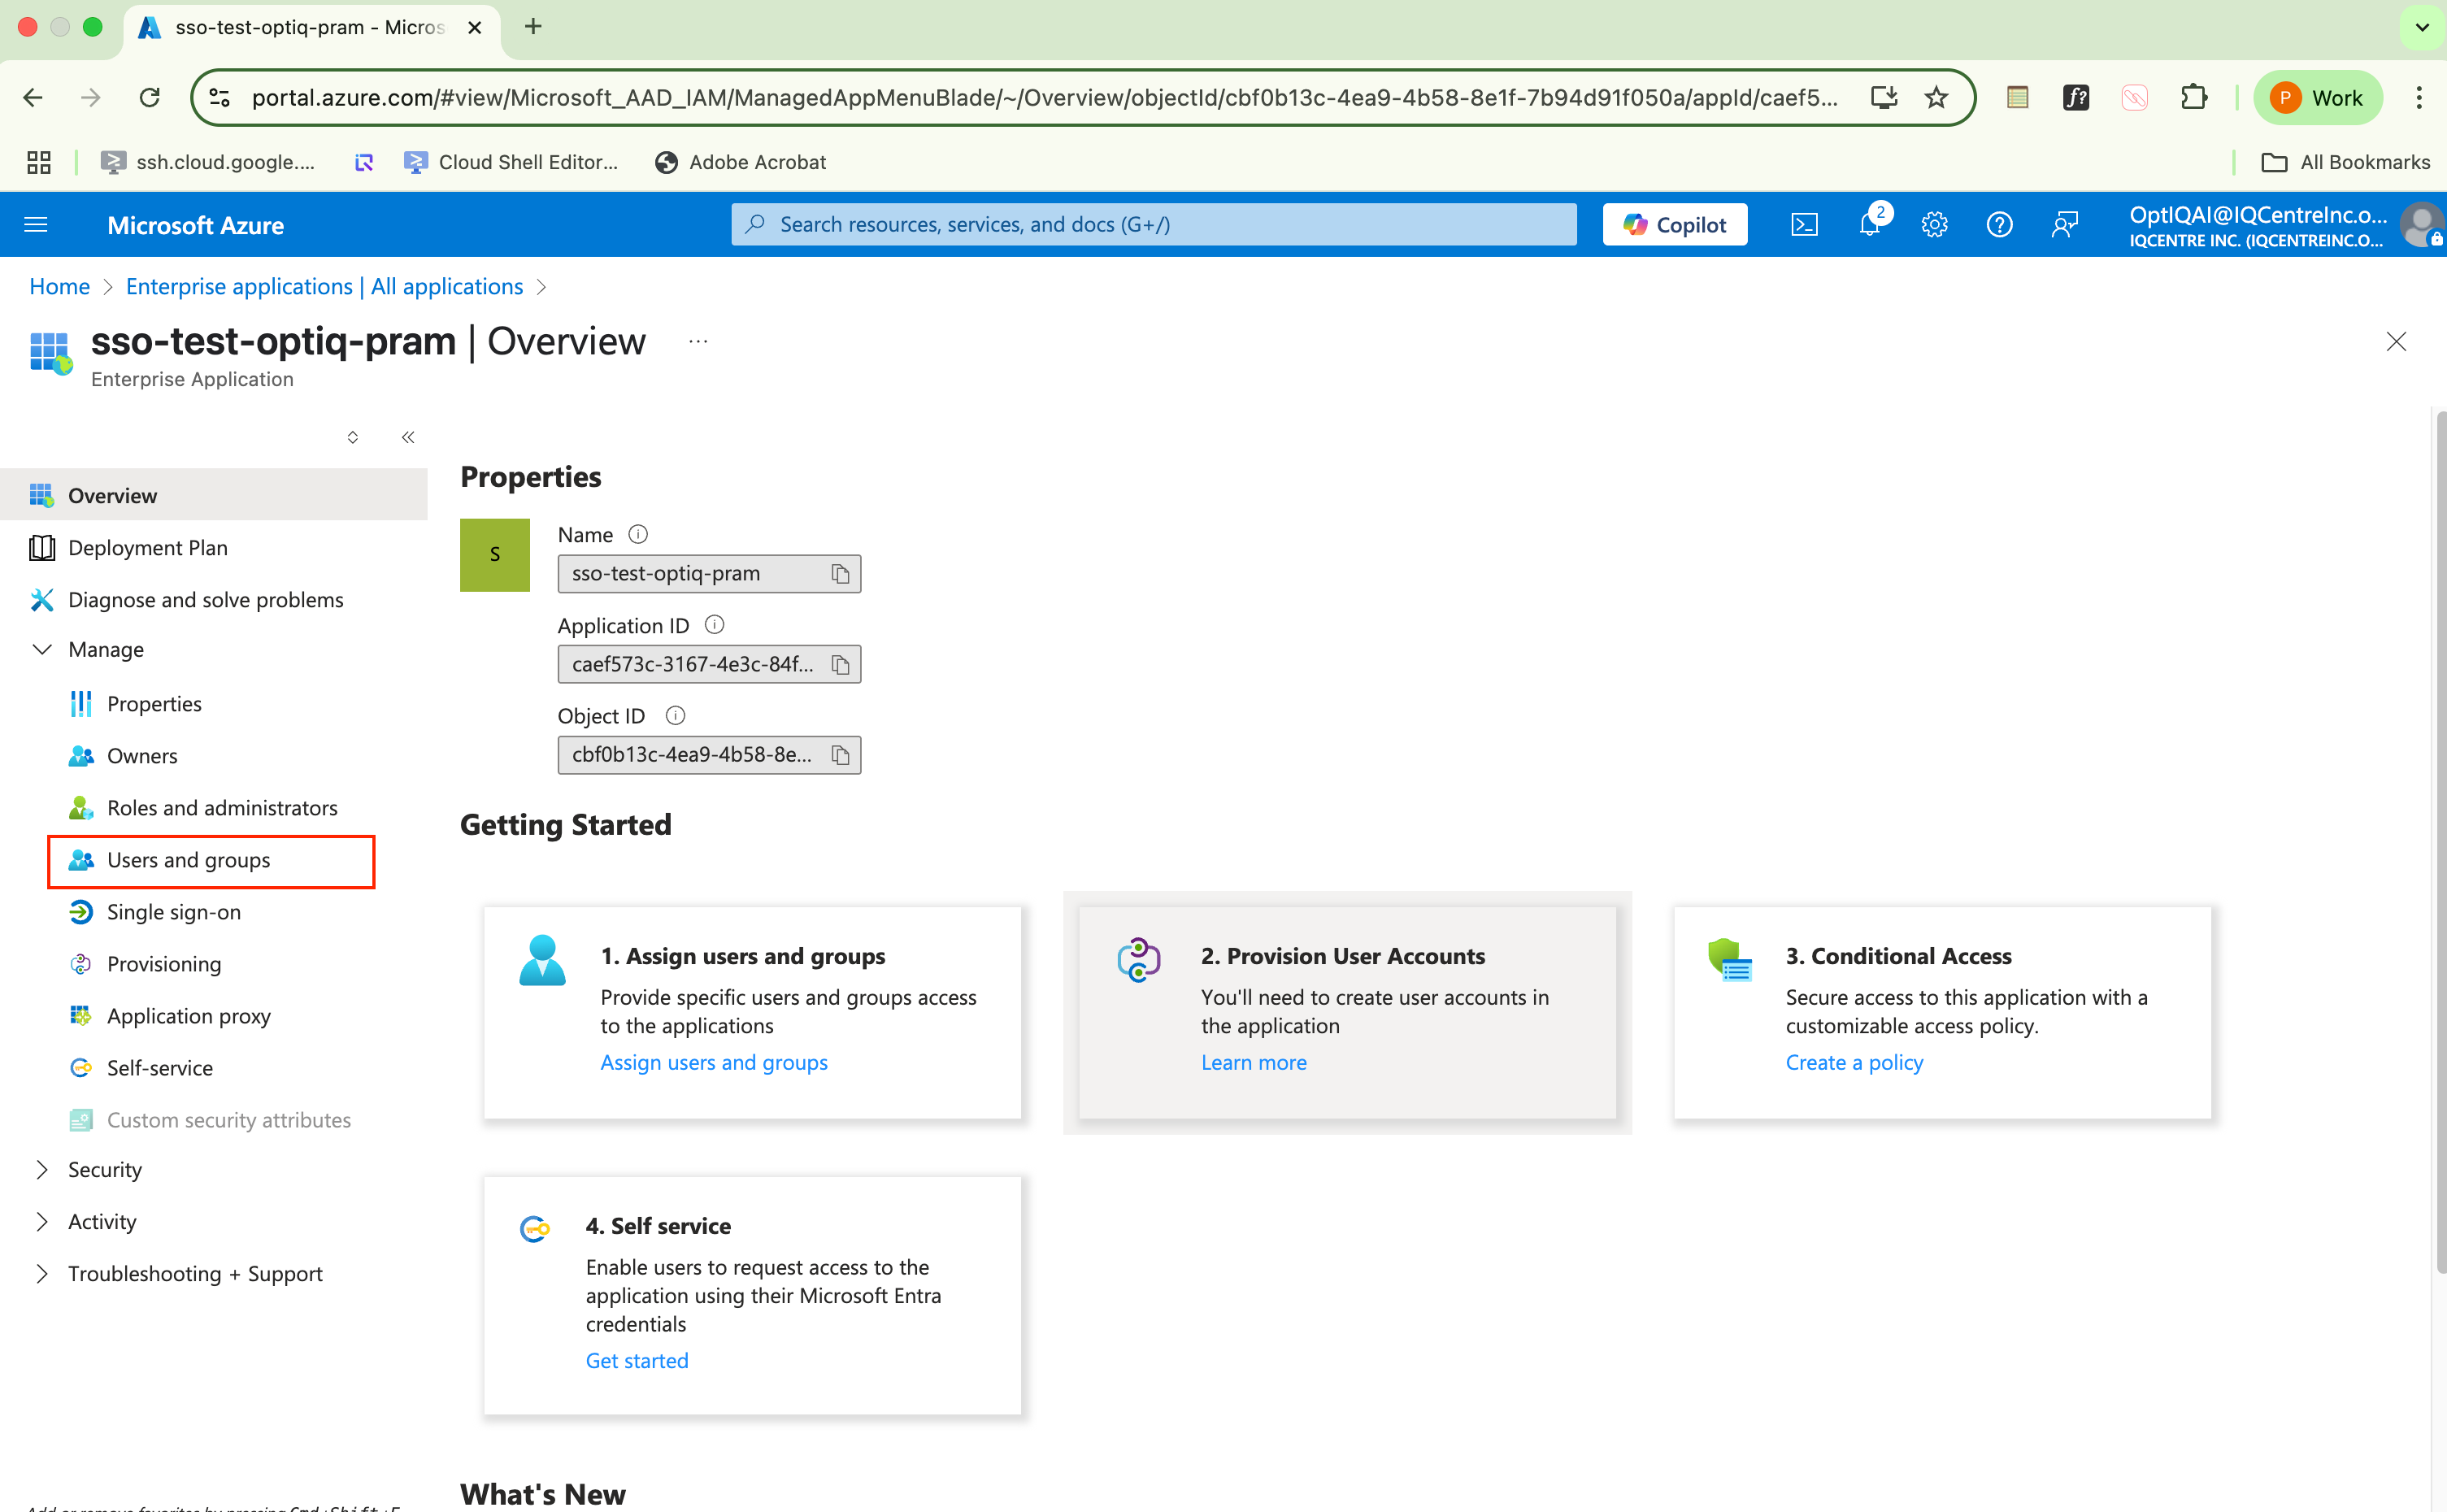
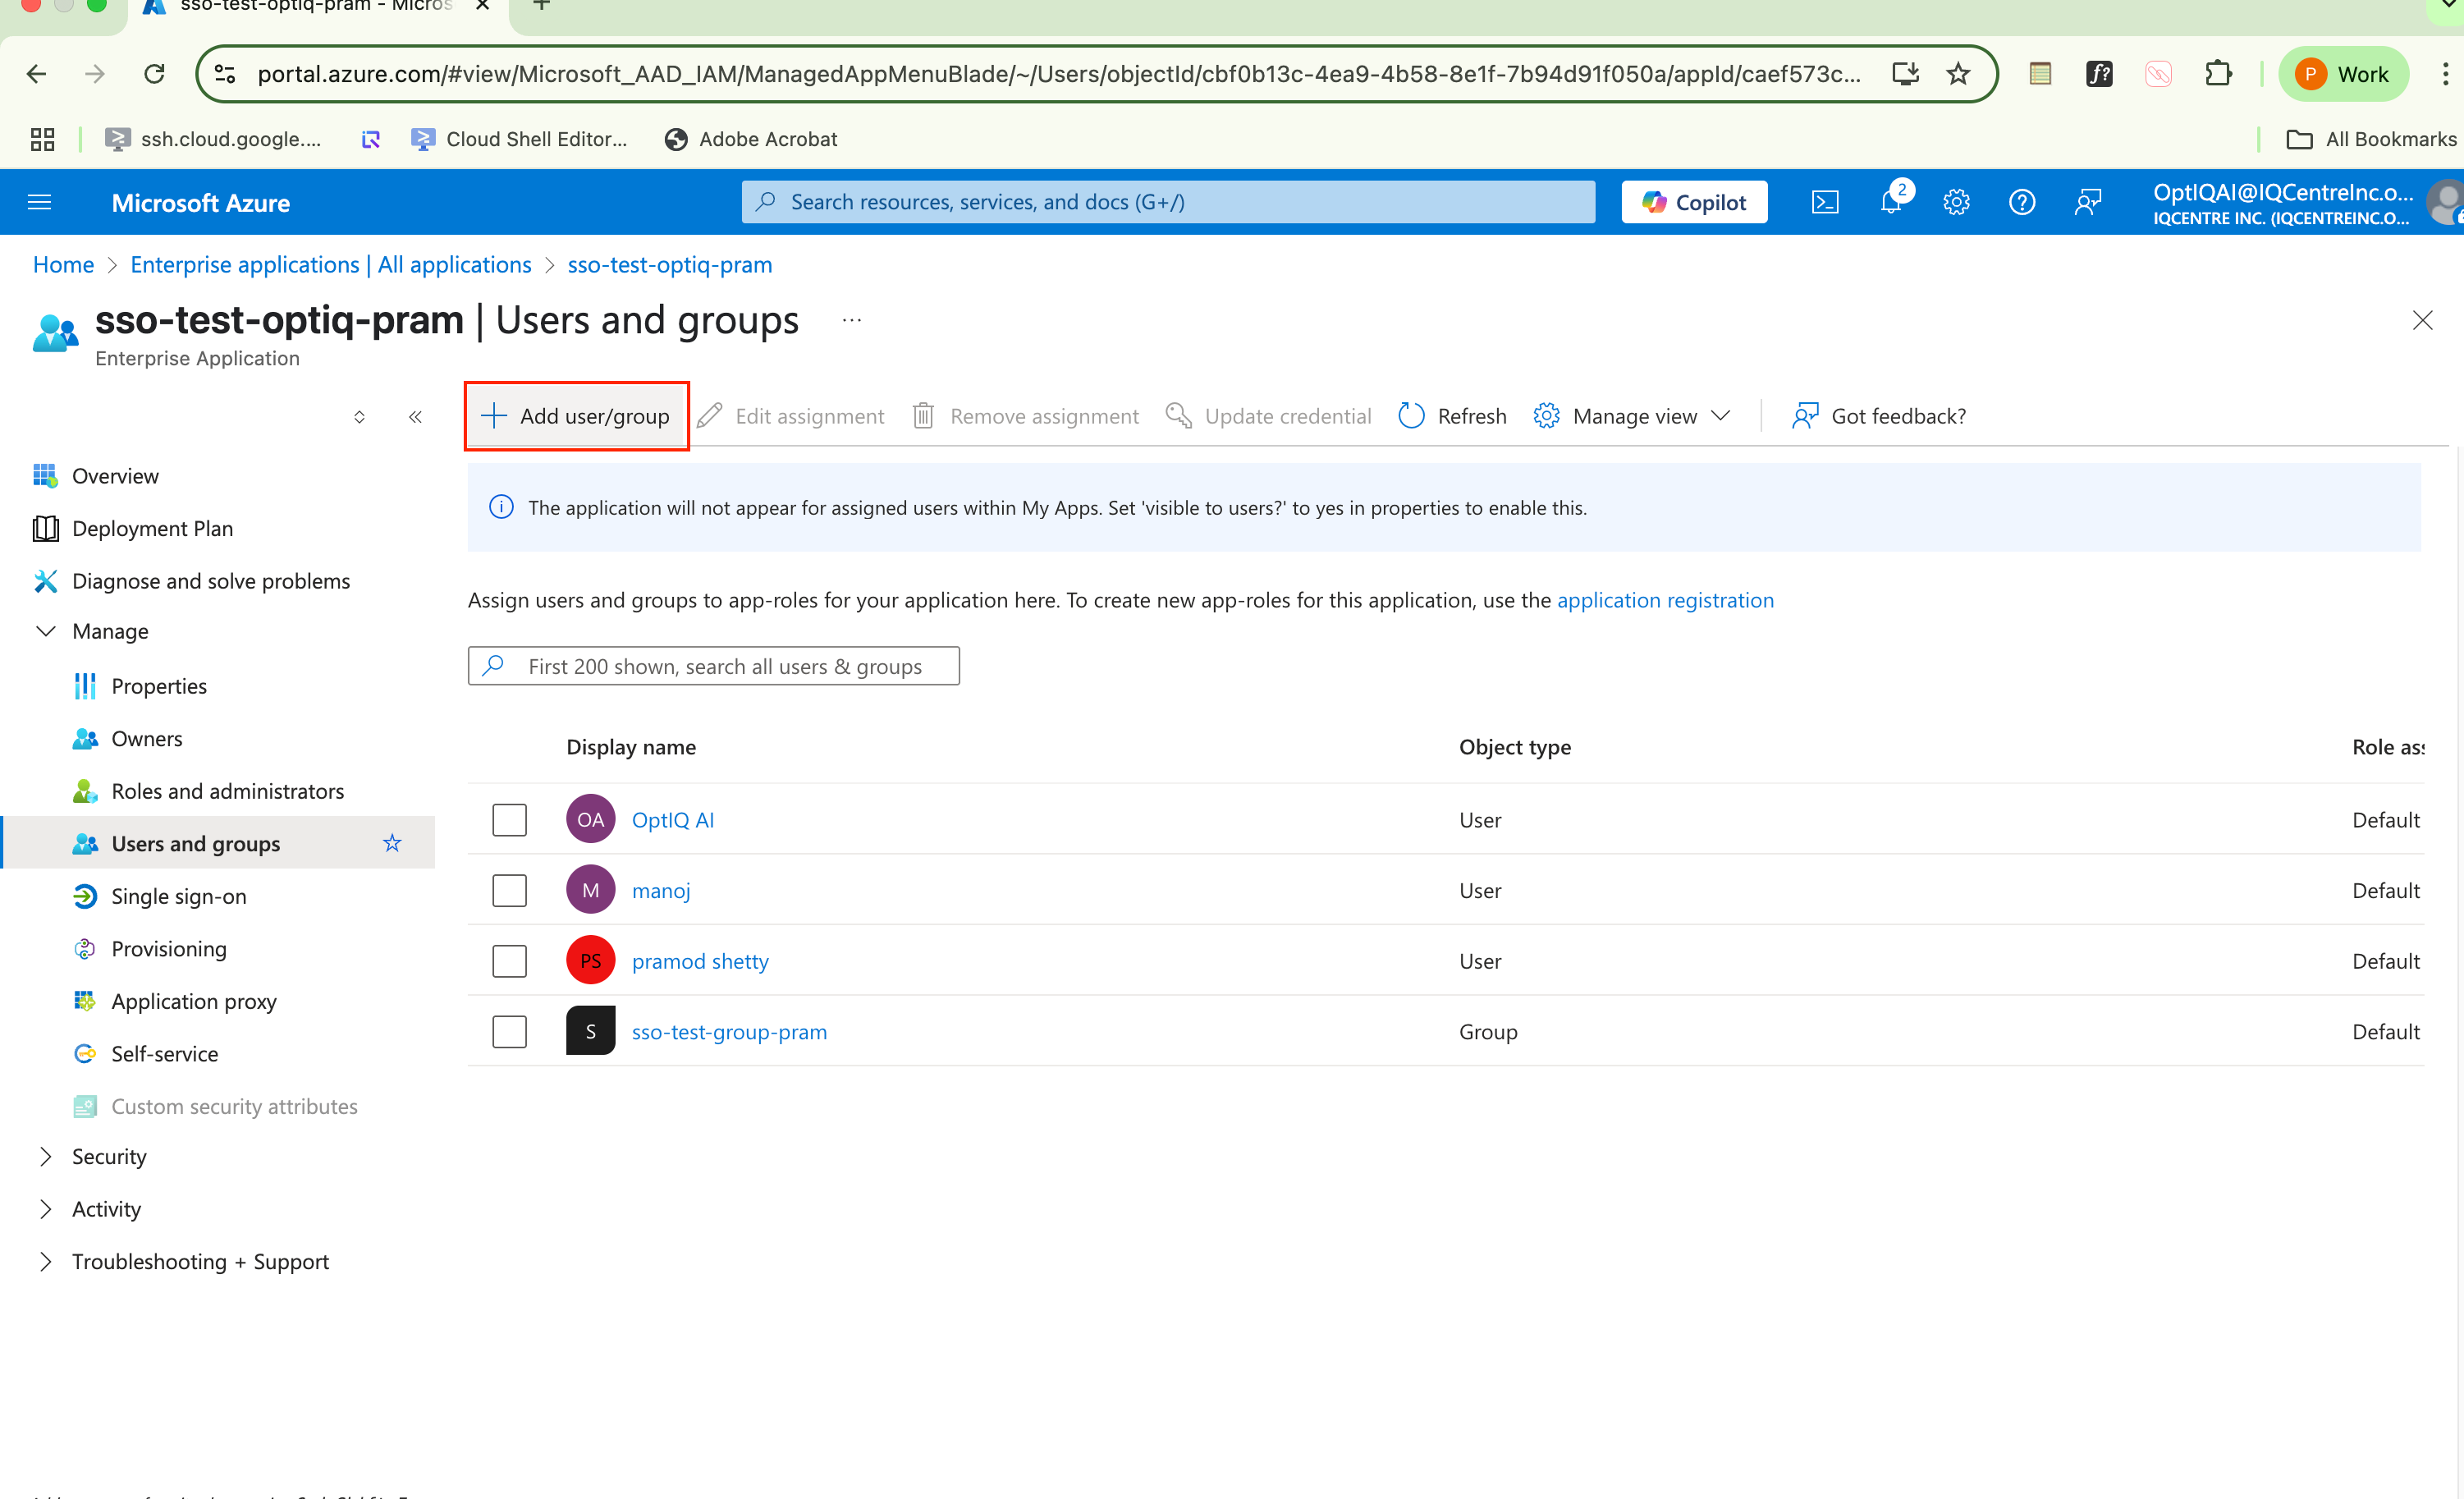
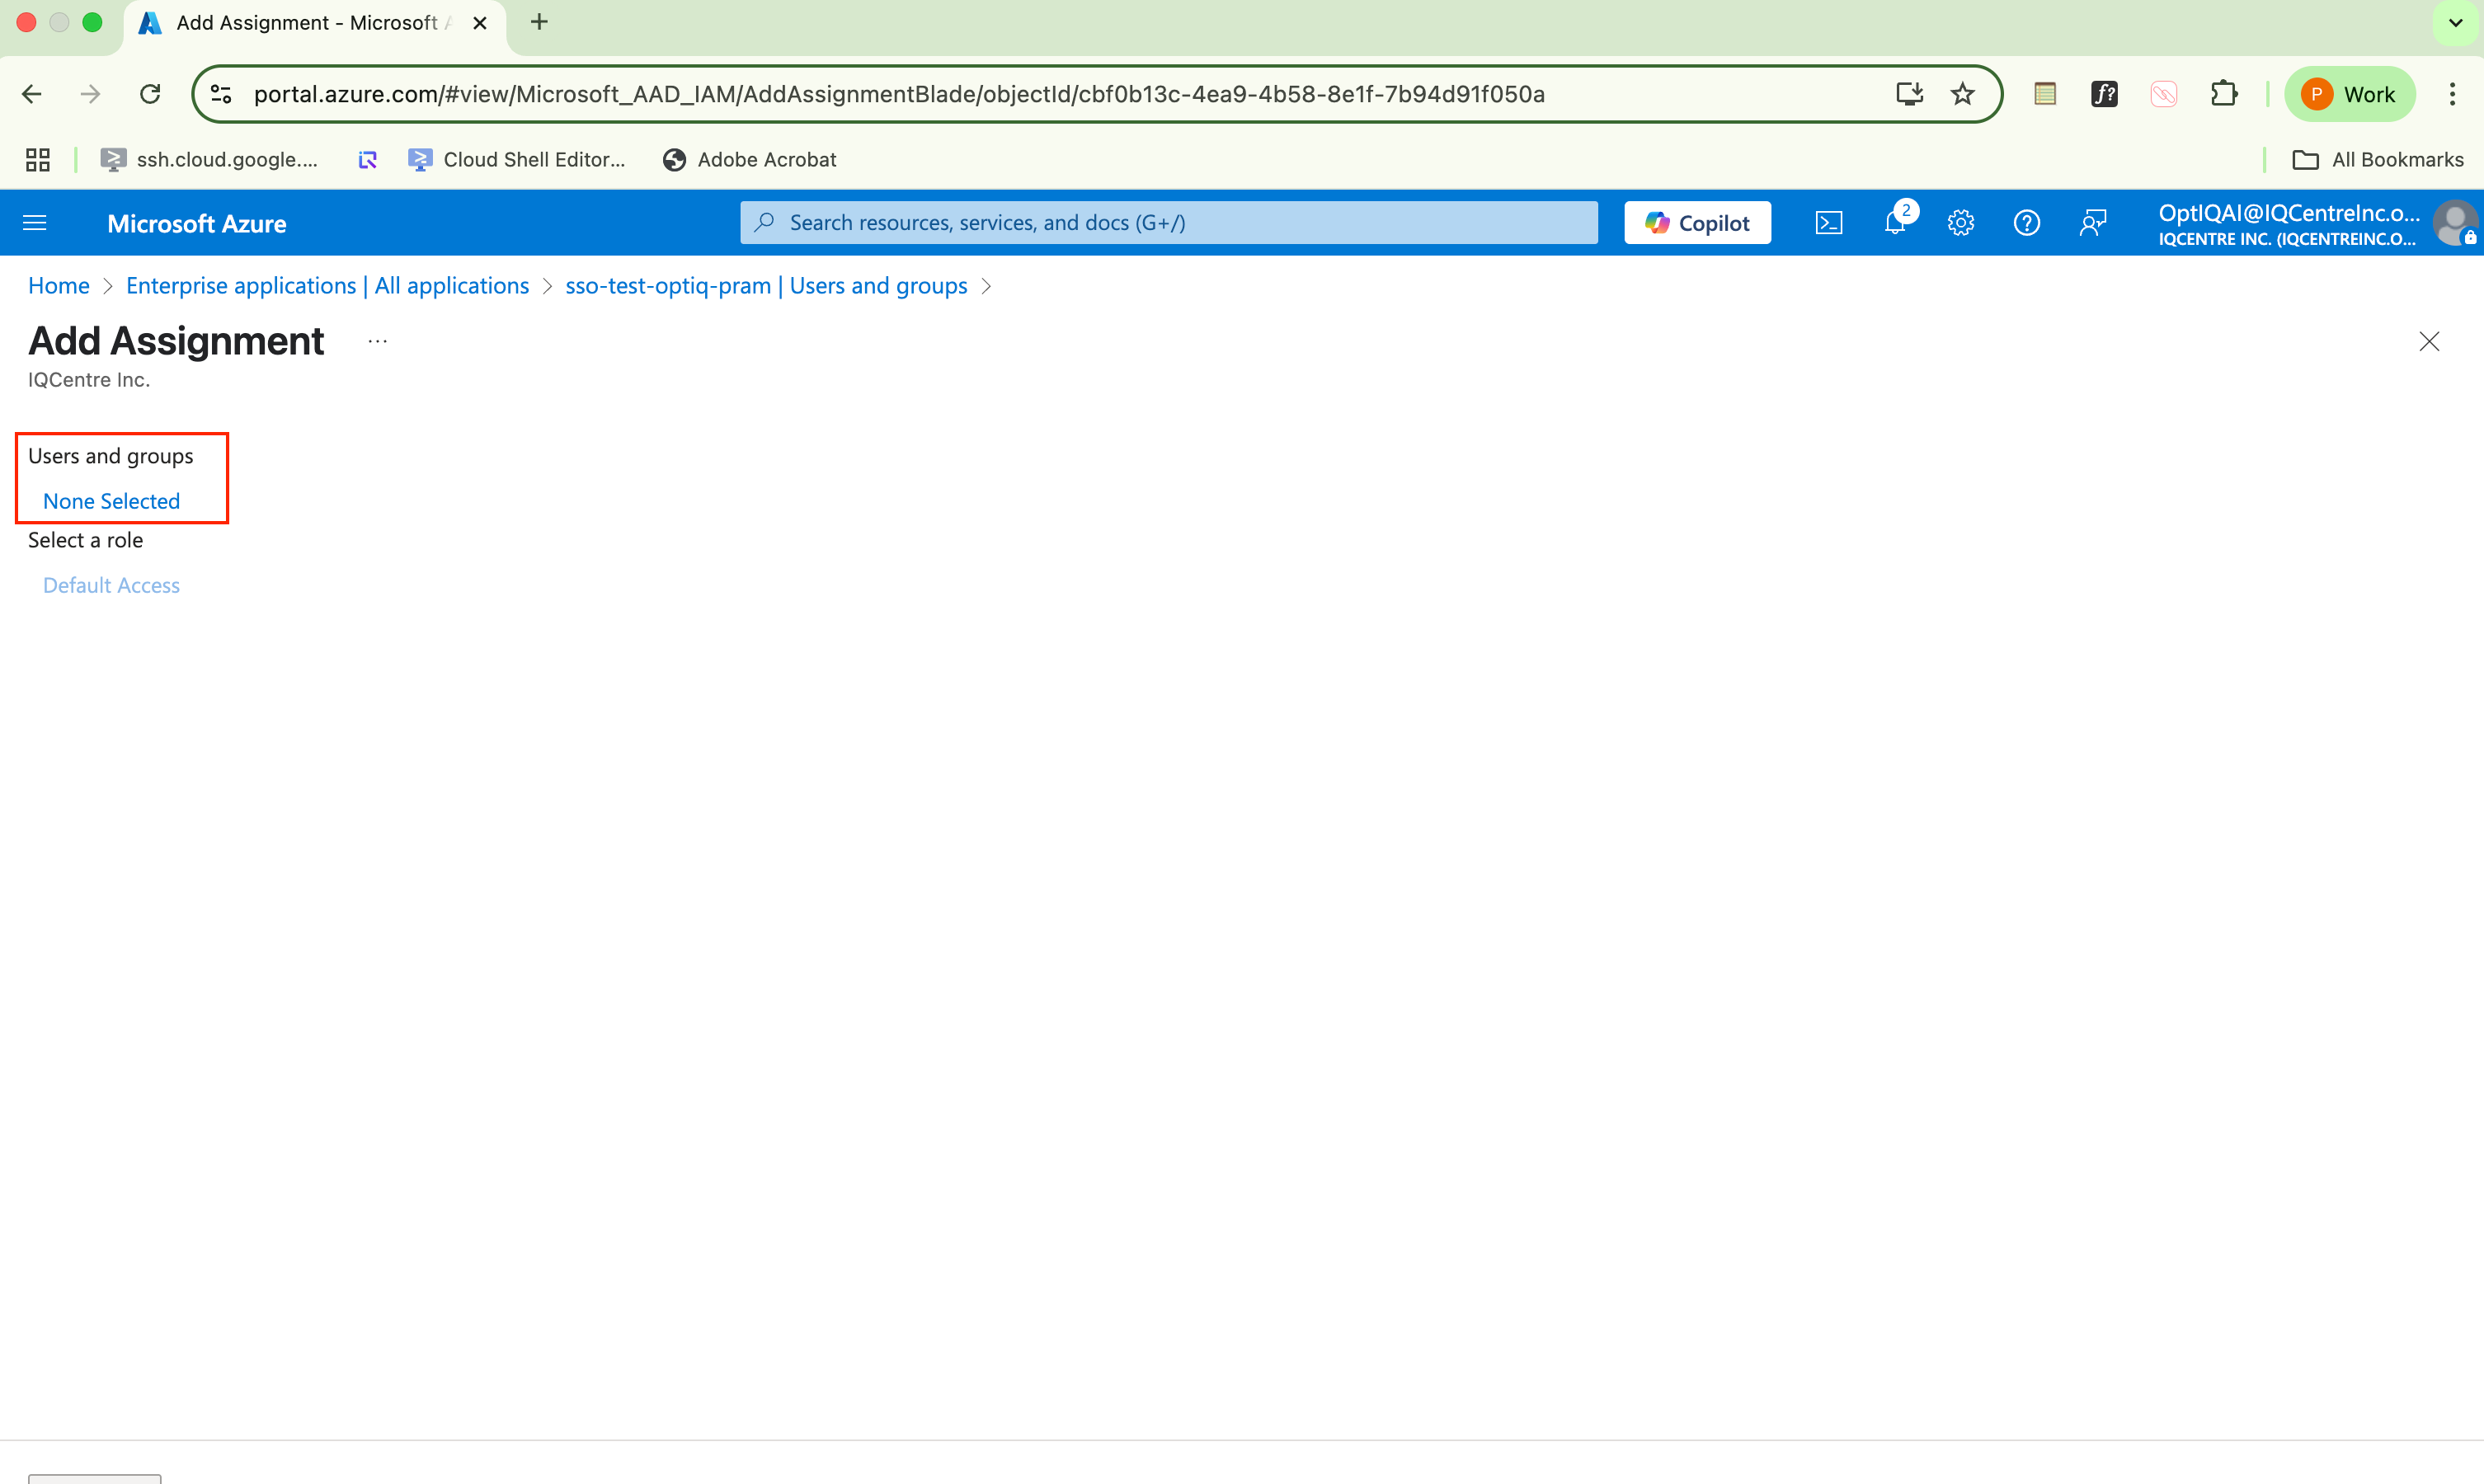
Go to the Users and Groups tab under Manage, then click Add user/group.
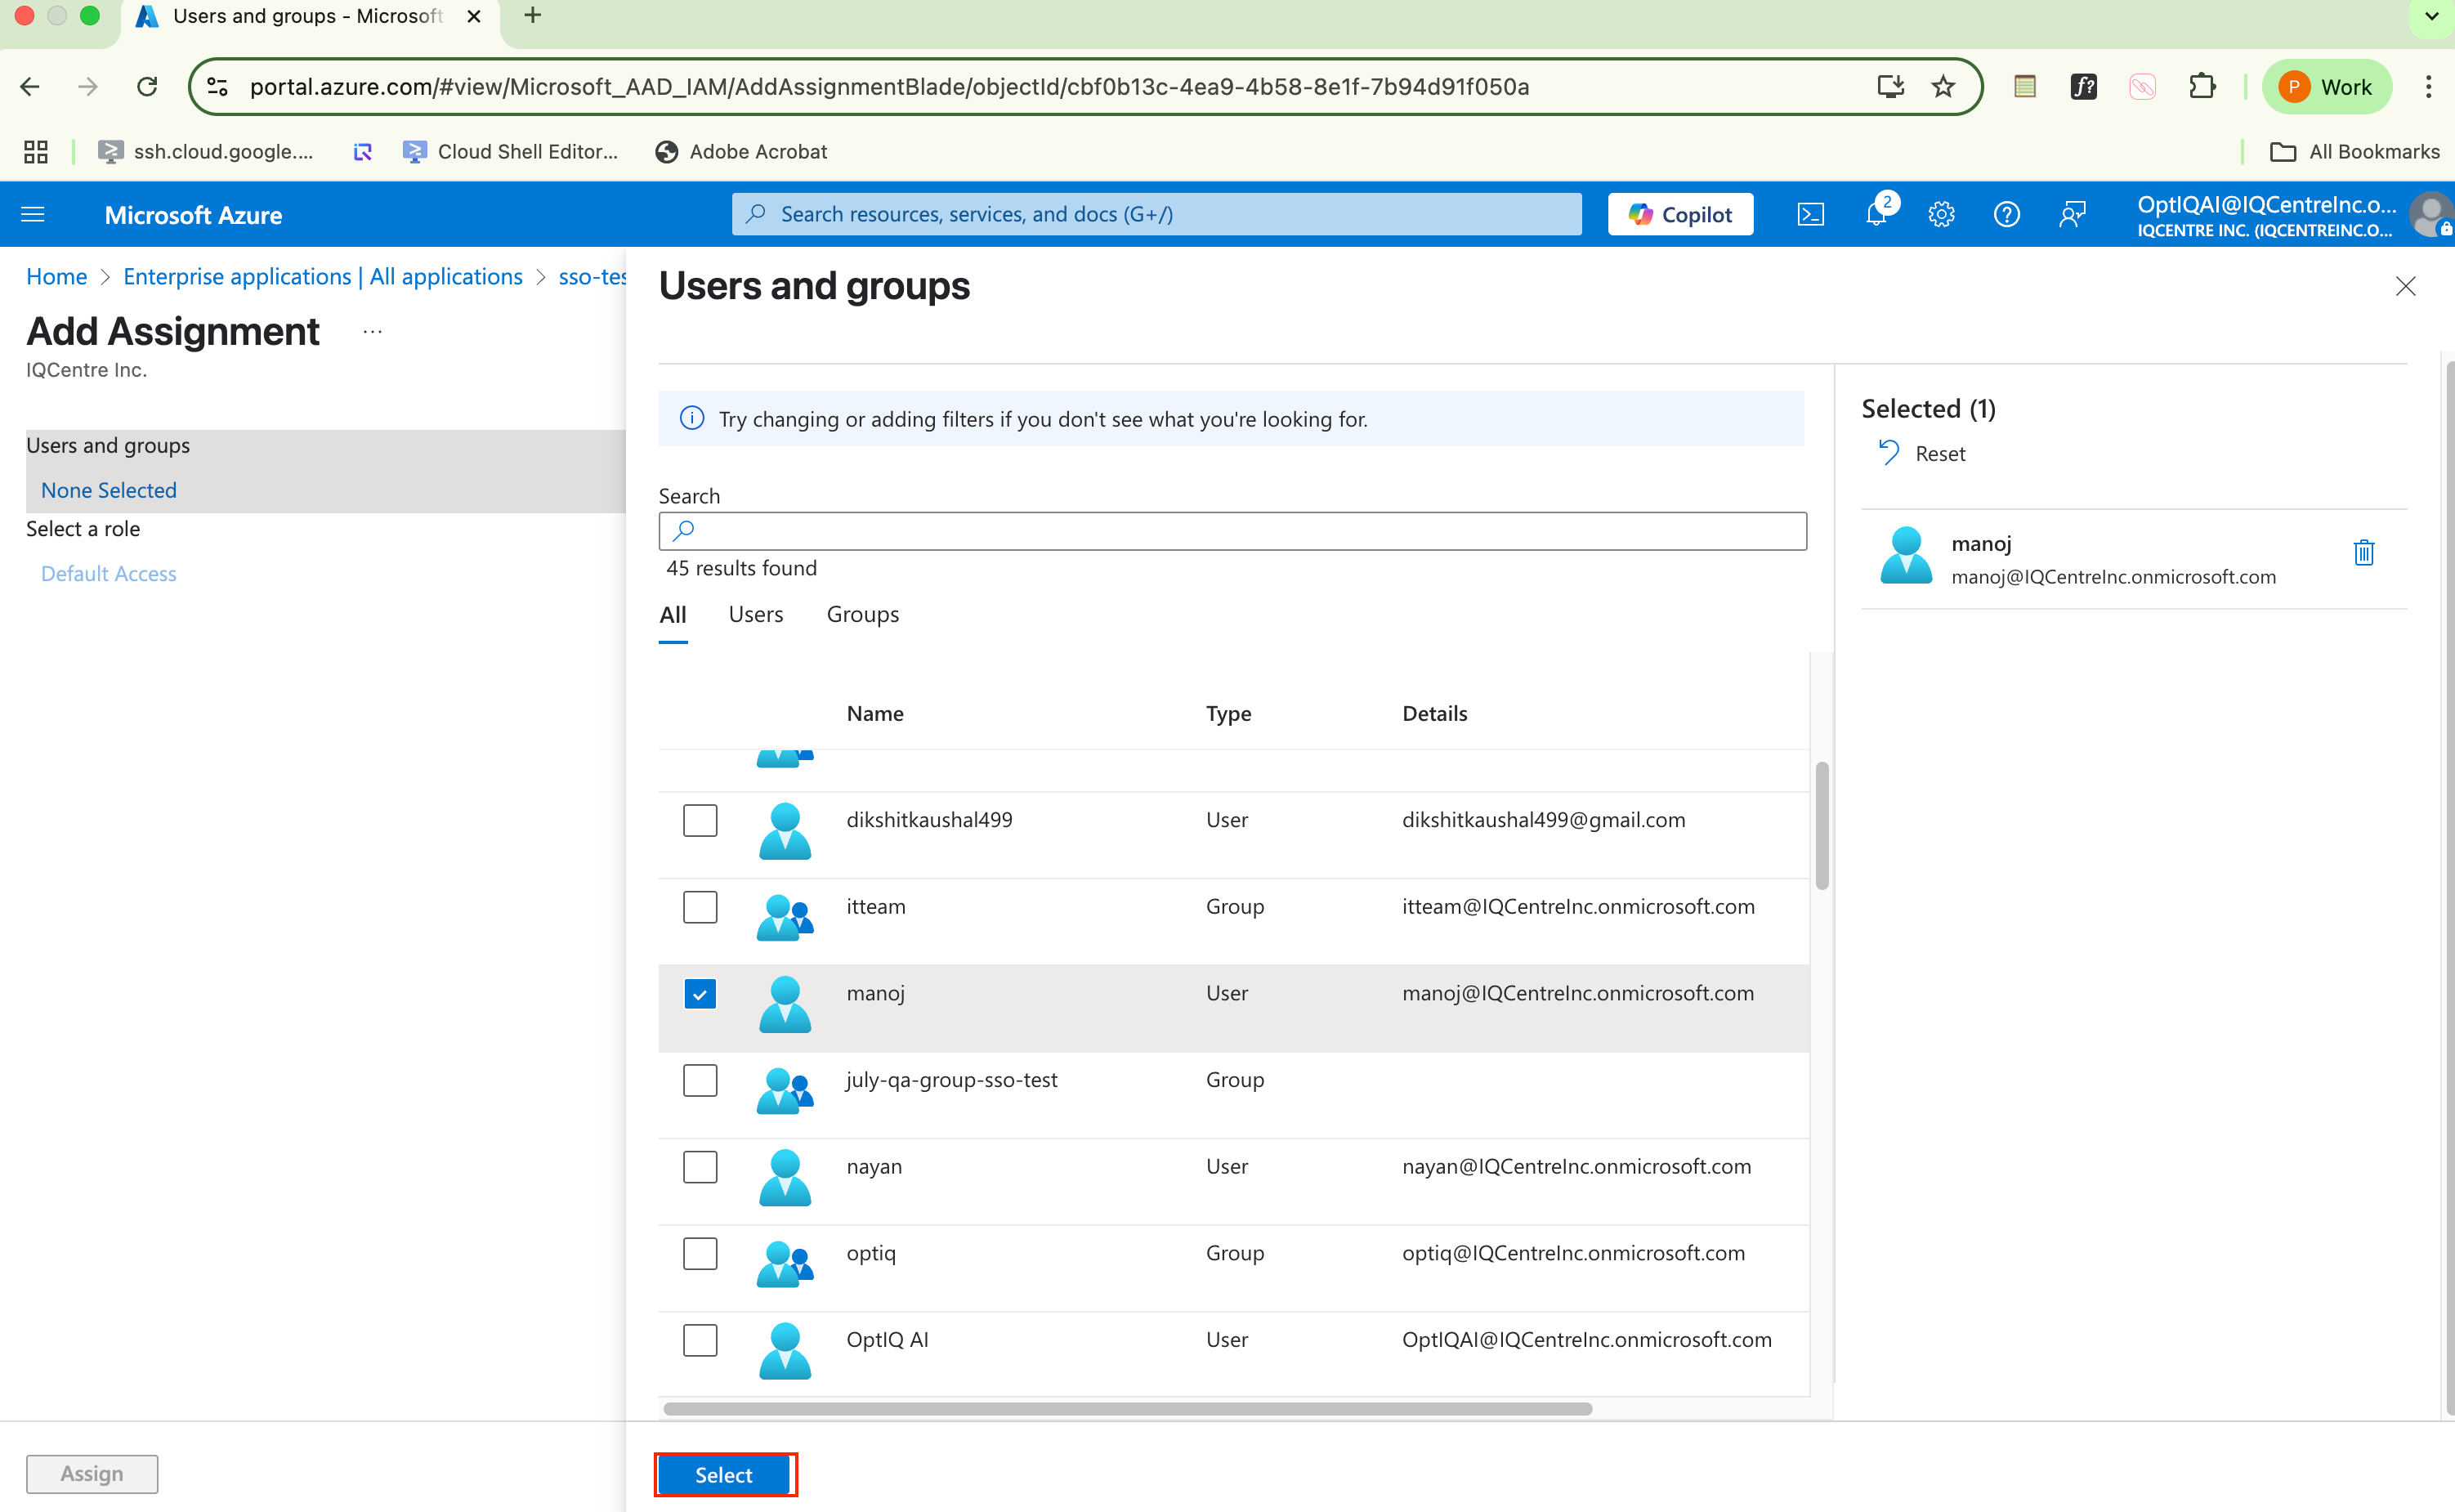
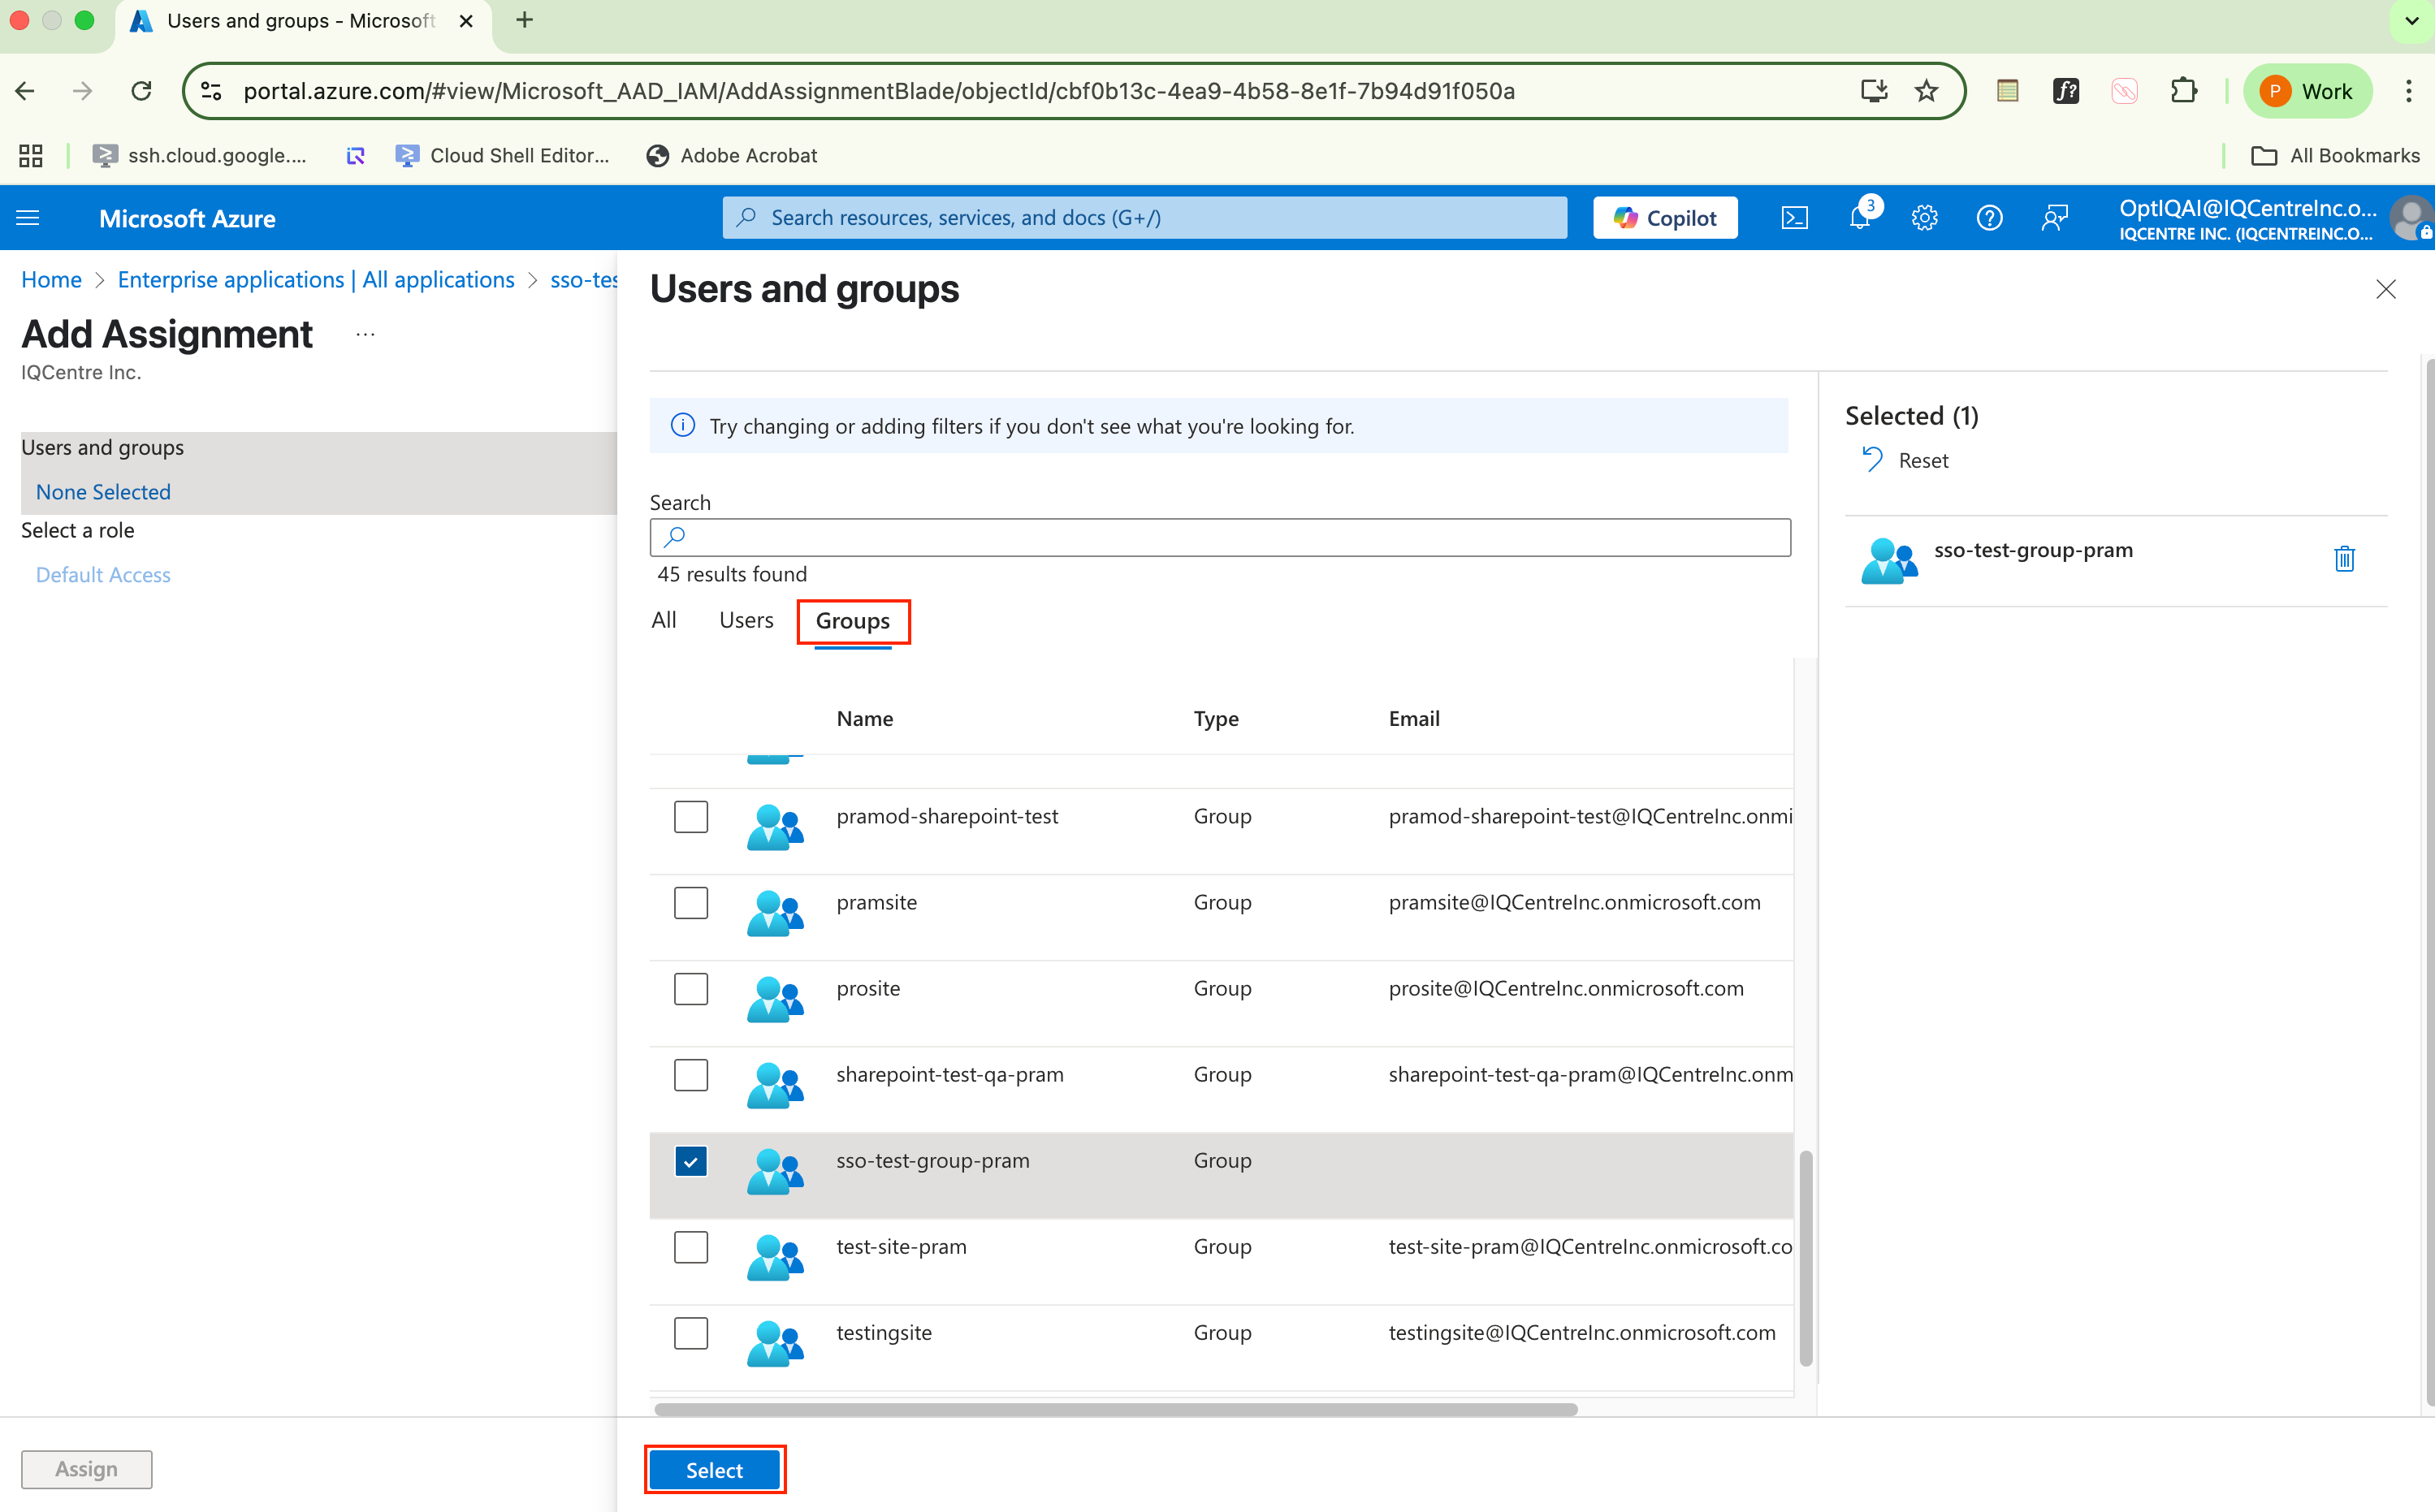
Search for and select the users or groups you want to assign to the application.
Click on Users and Groups Tab
Select Users and Groups from List and click on Select.
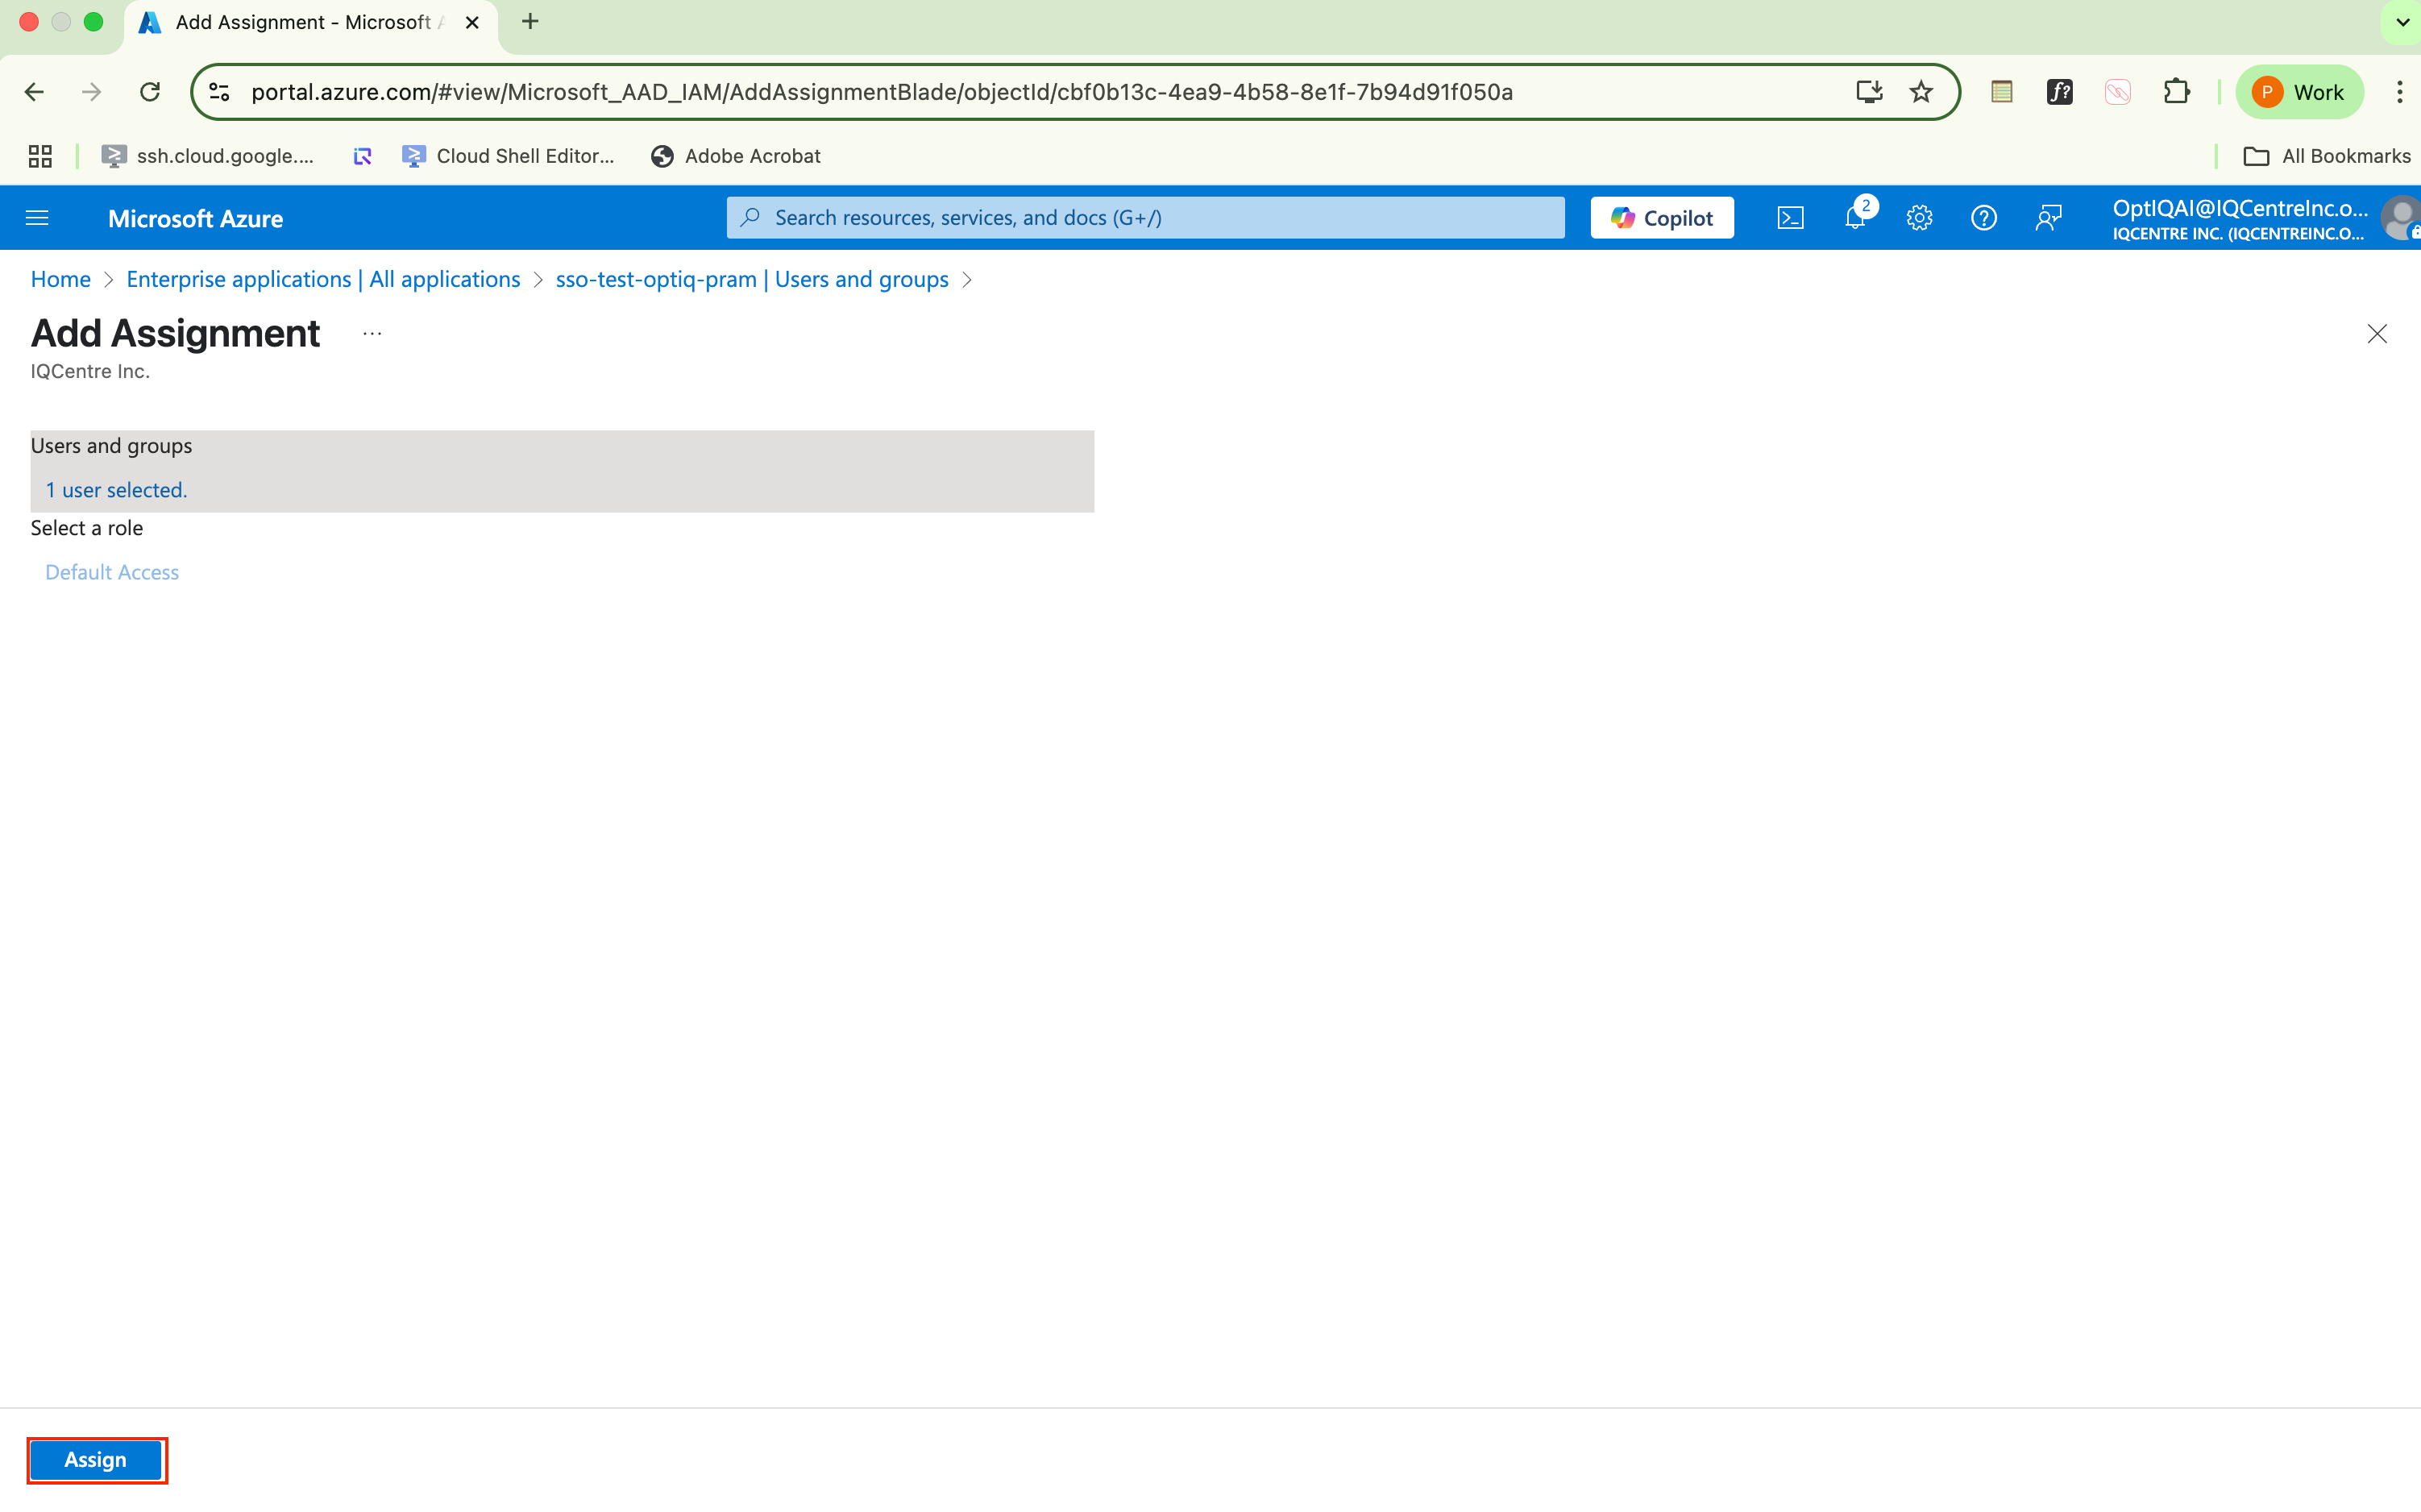
Click Assign to finalize the assignment.
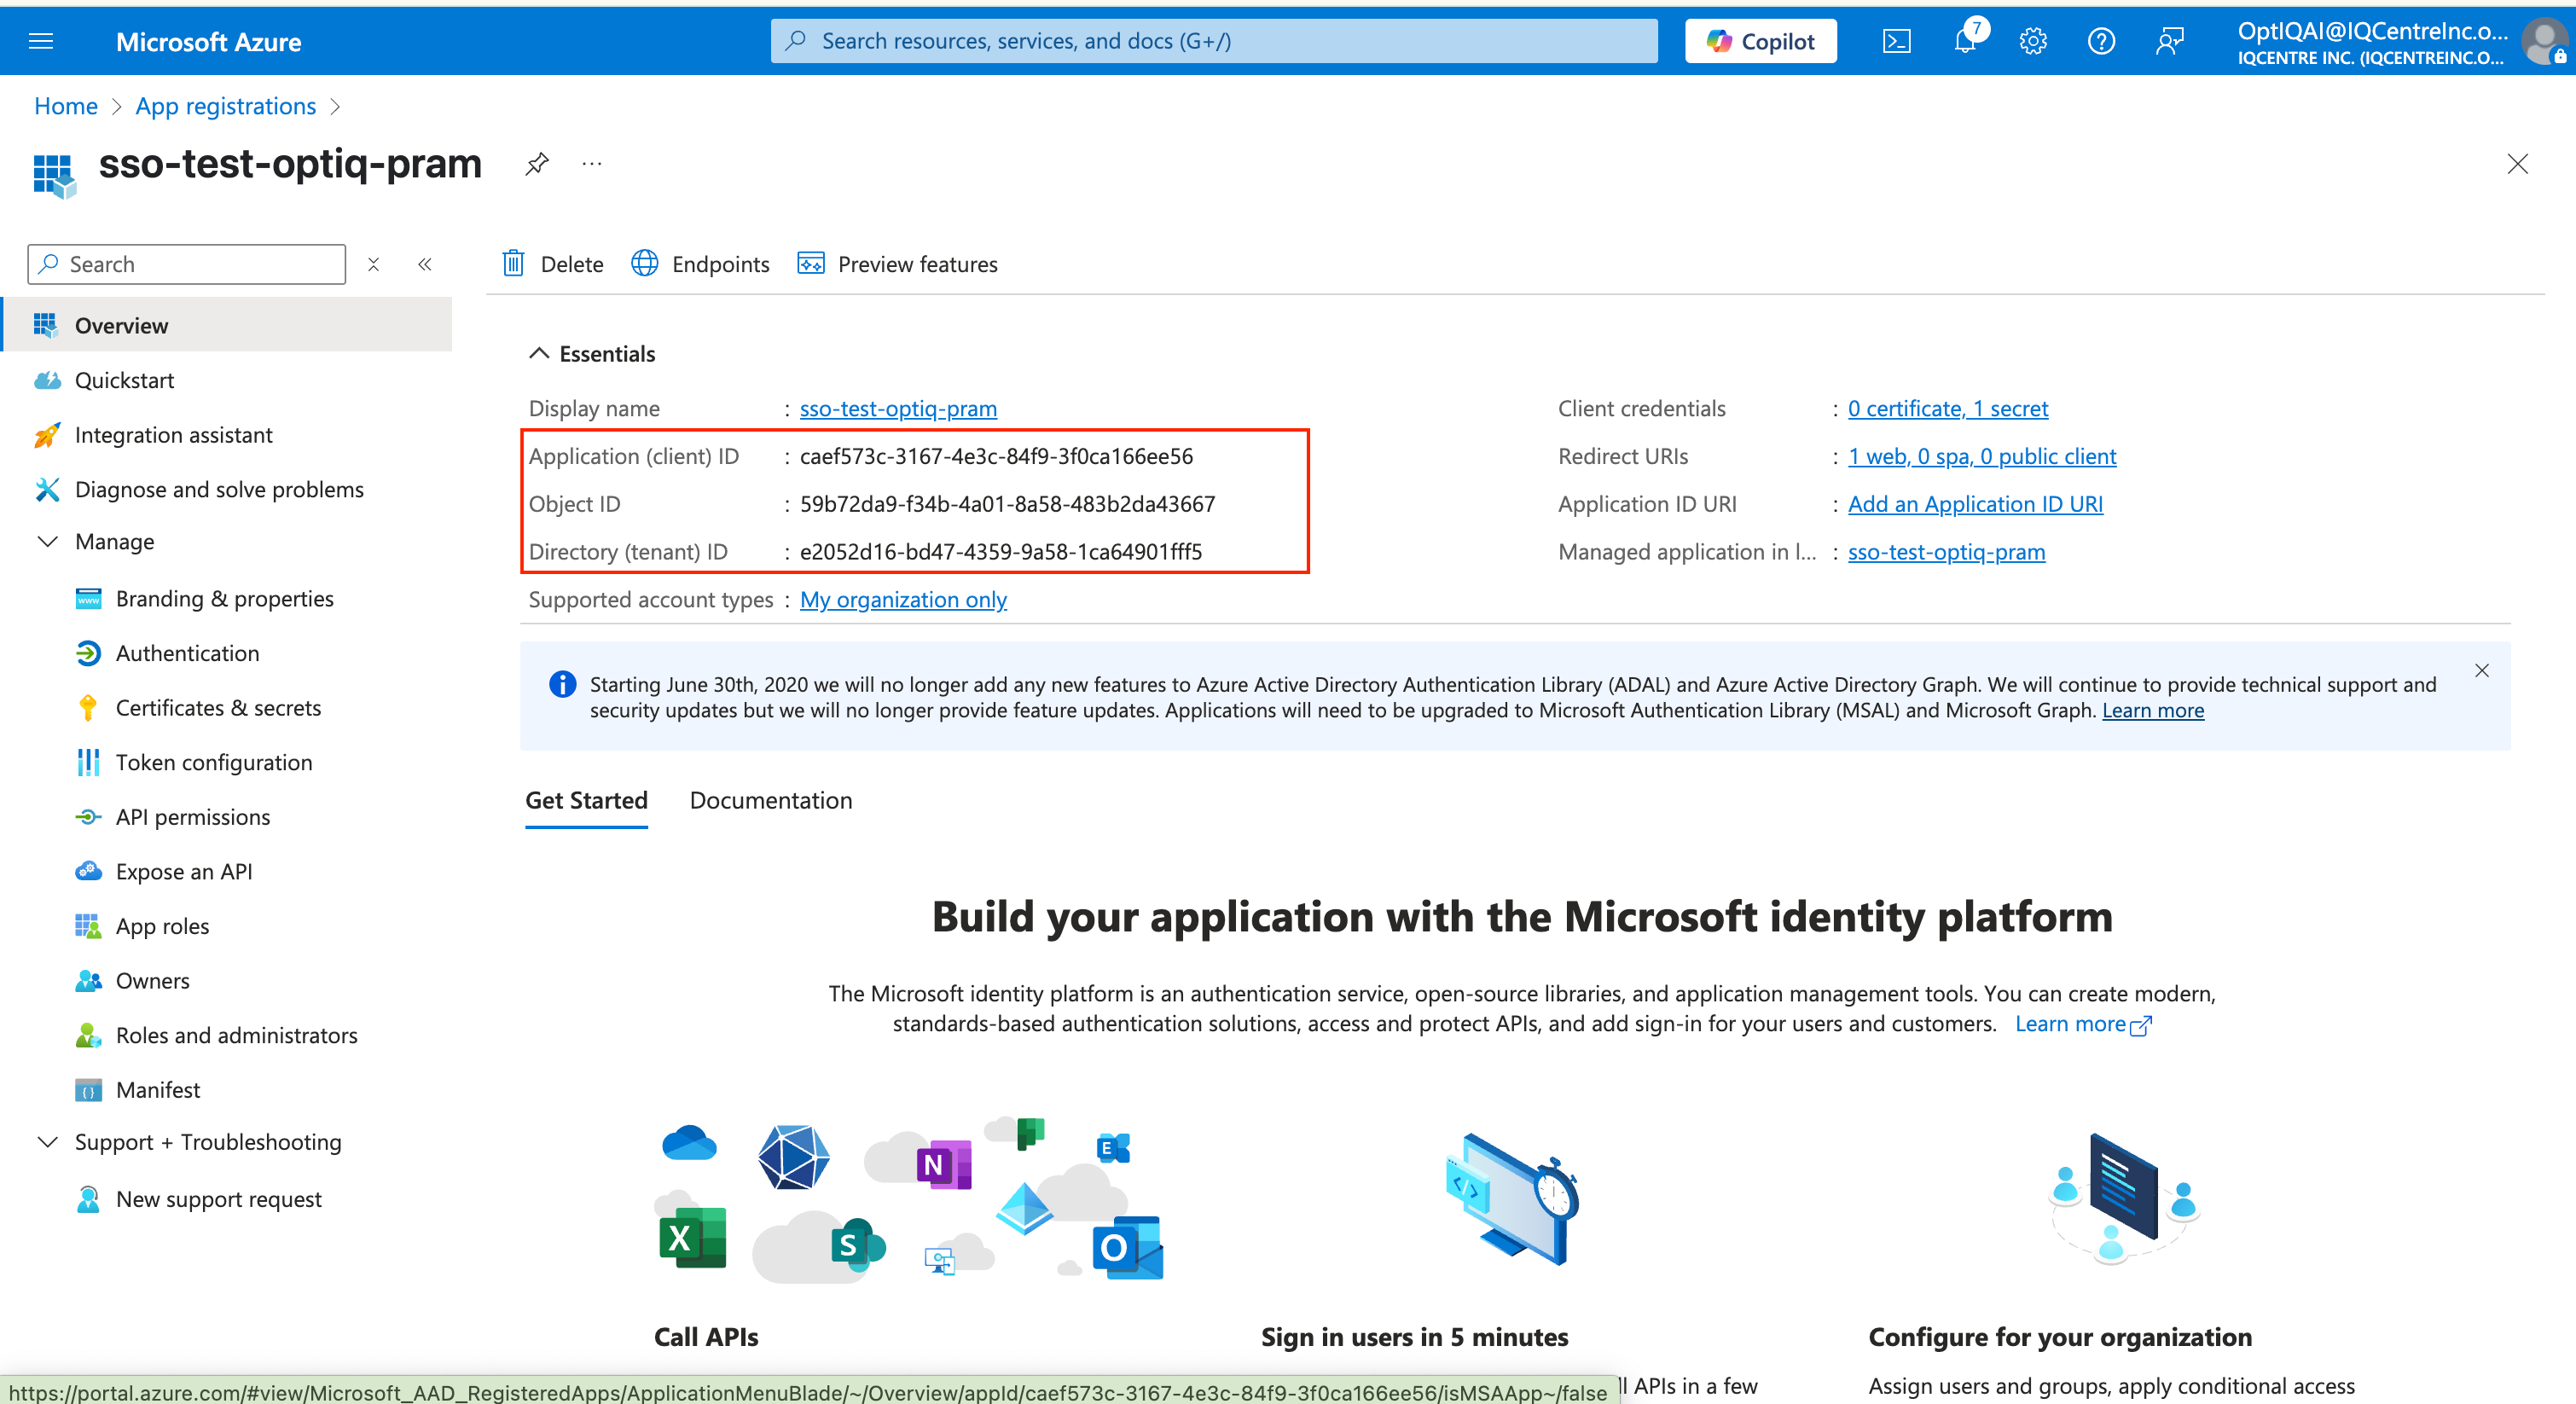
Save Client Id ,Object Id and Tenant Id from the Overview page for further use.
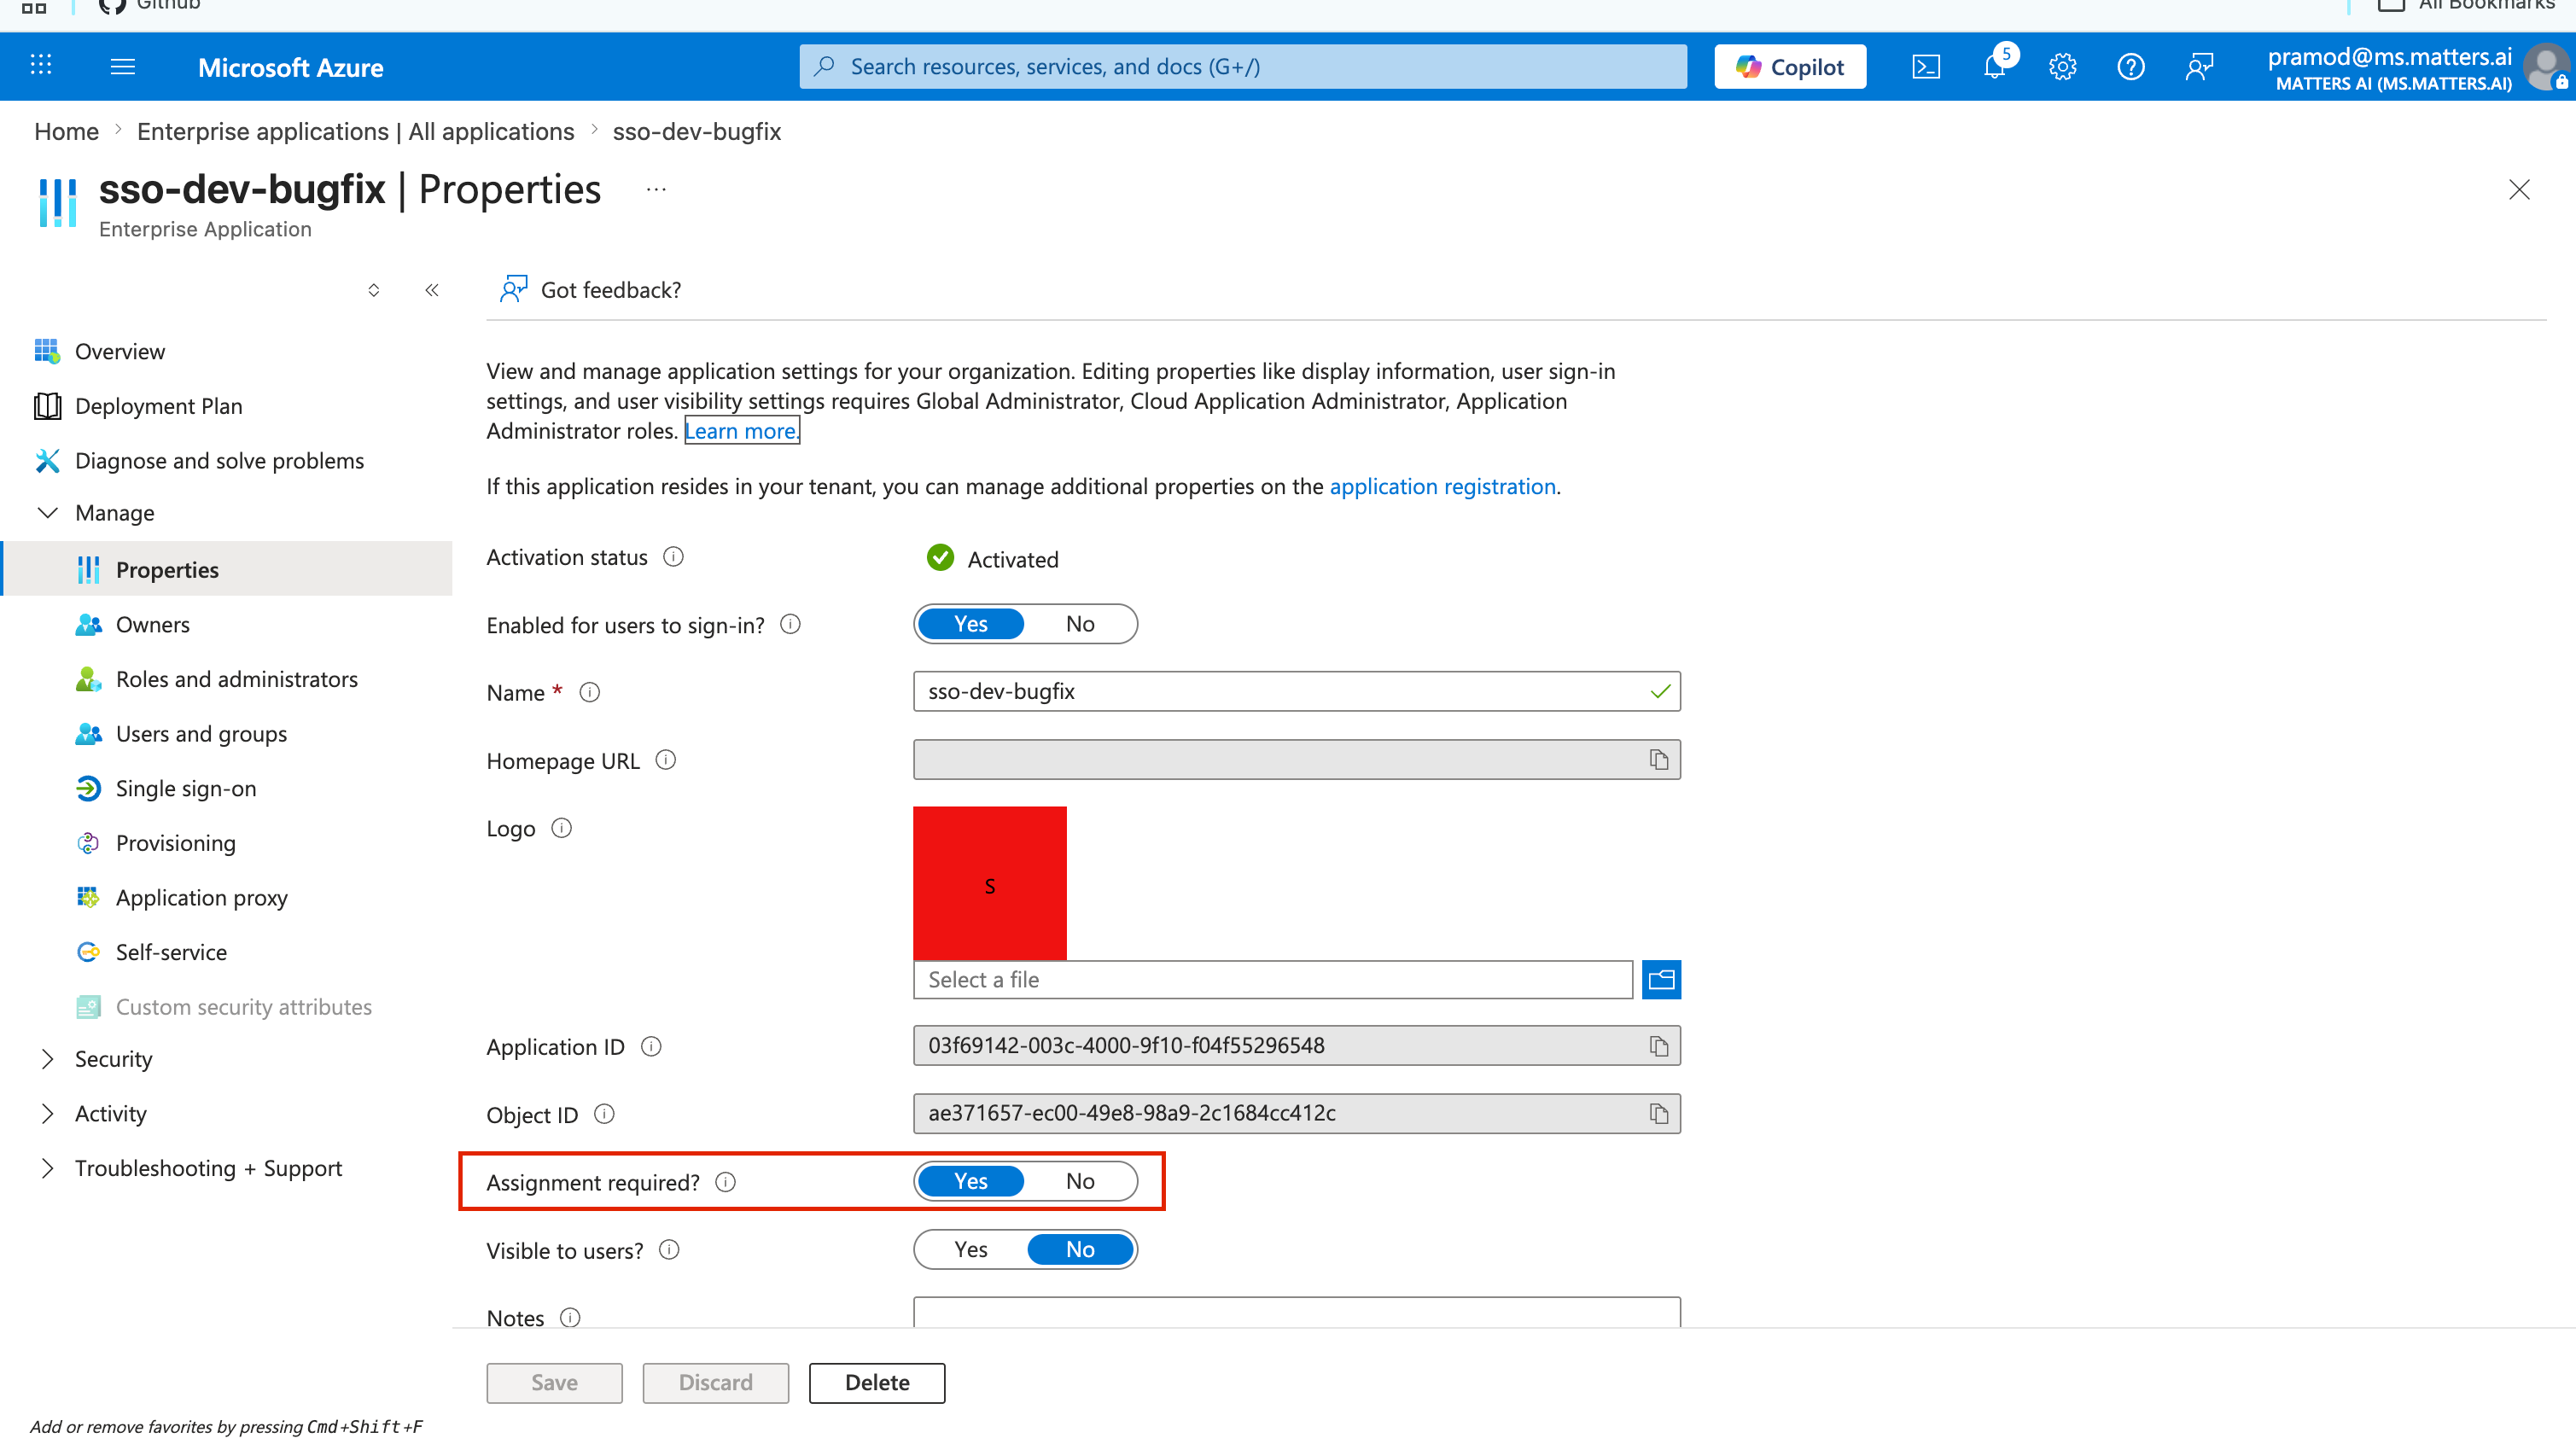
For the SSO Users to Login to the account, you have to enable a property named Assignment required as Yes from the Properties tab.
Step 8: Configure Identity Provider in Matters Dashboard
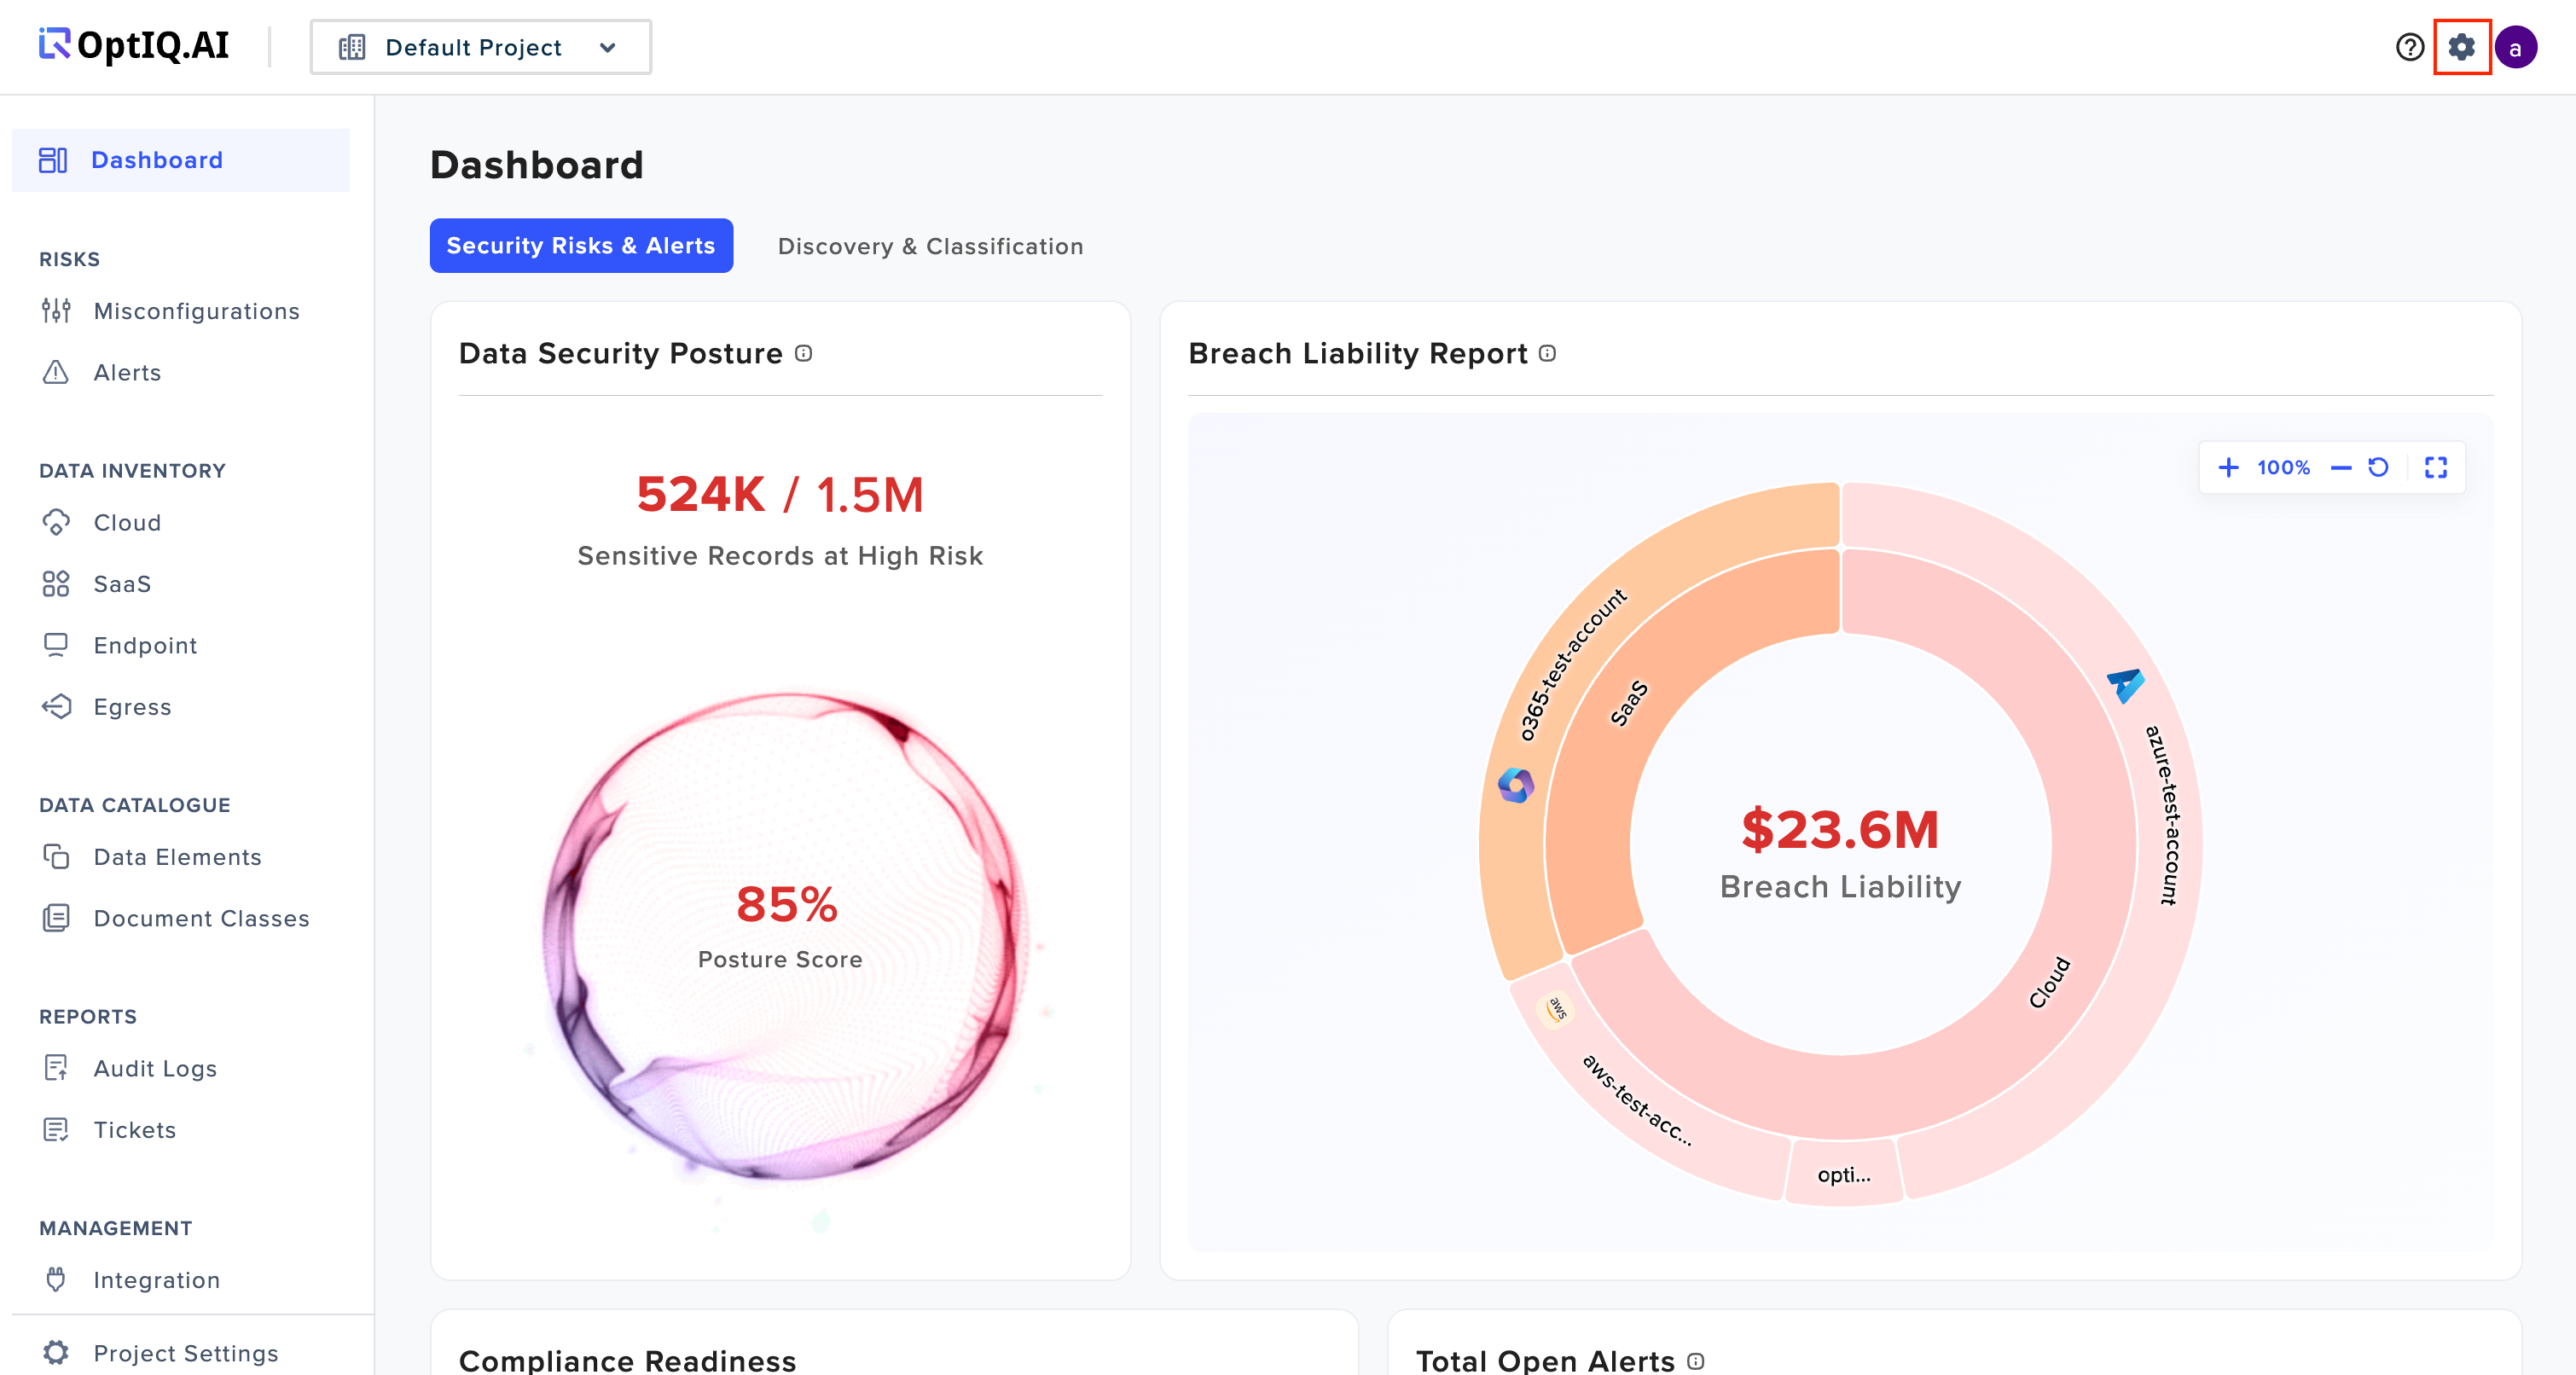
After completing the Azure AD setup, log in to the Matters Dashboard as super admin and Click on Settings Button on the Top Right Corner
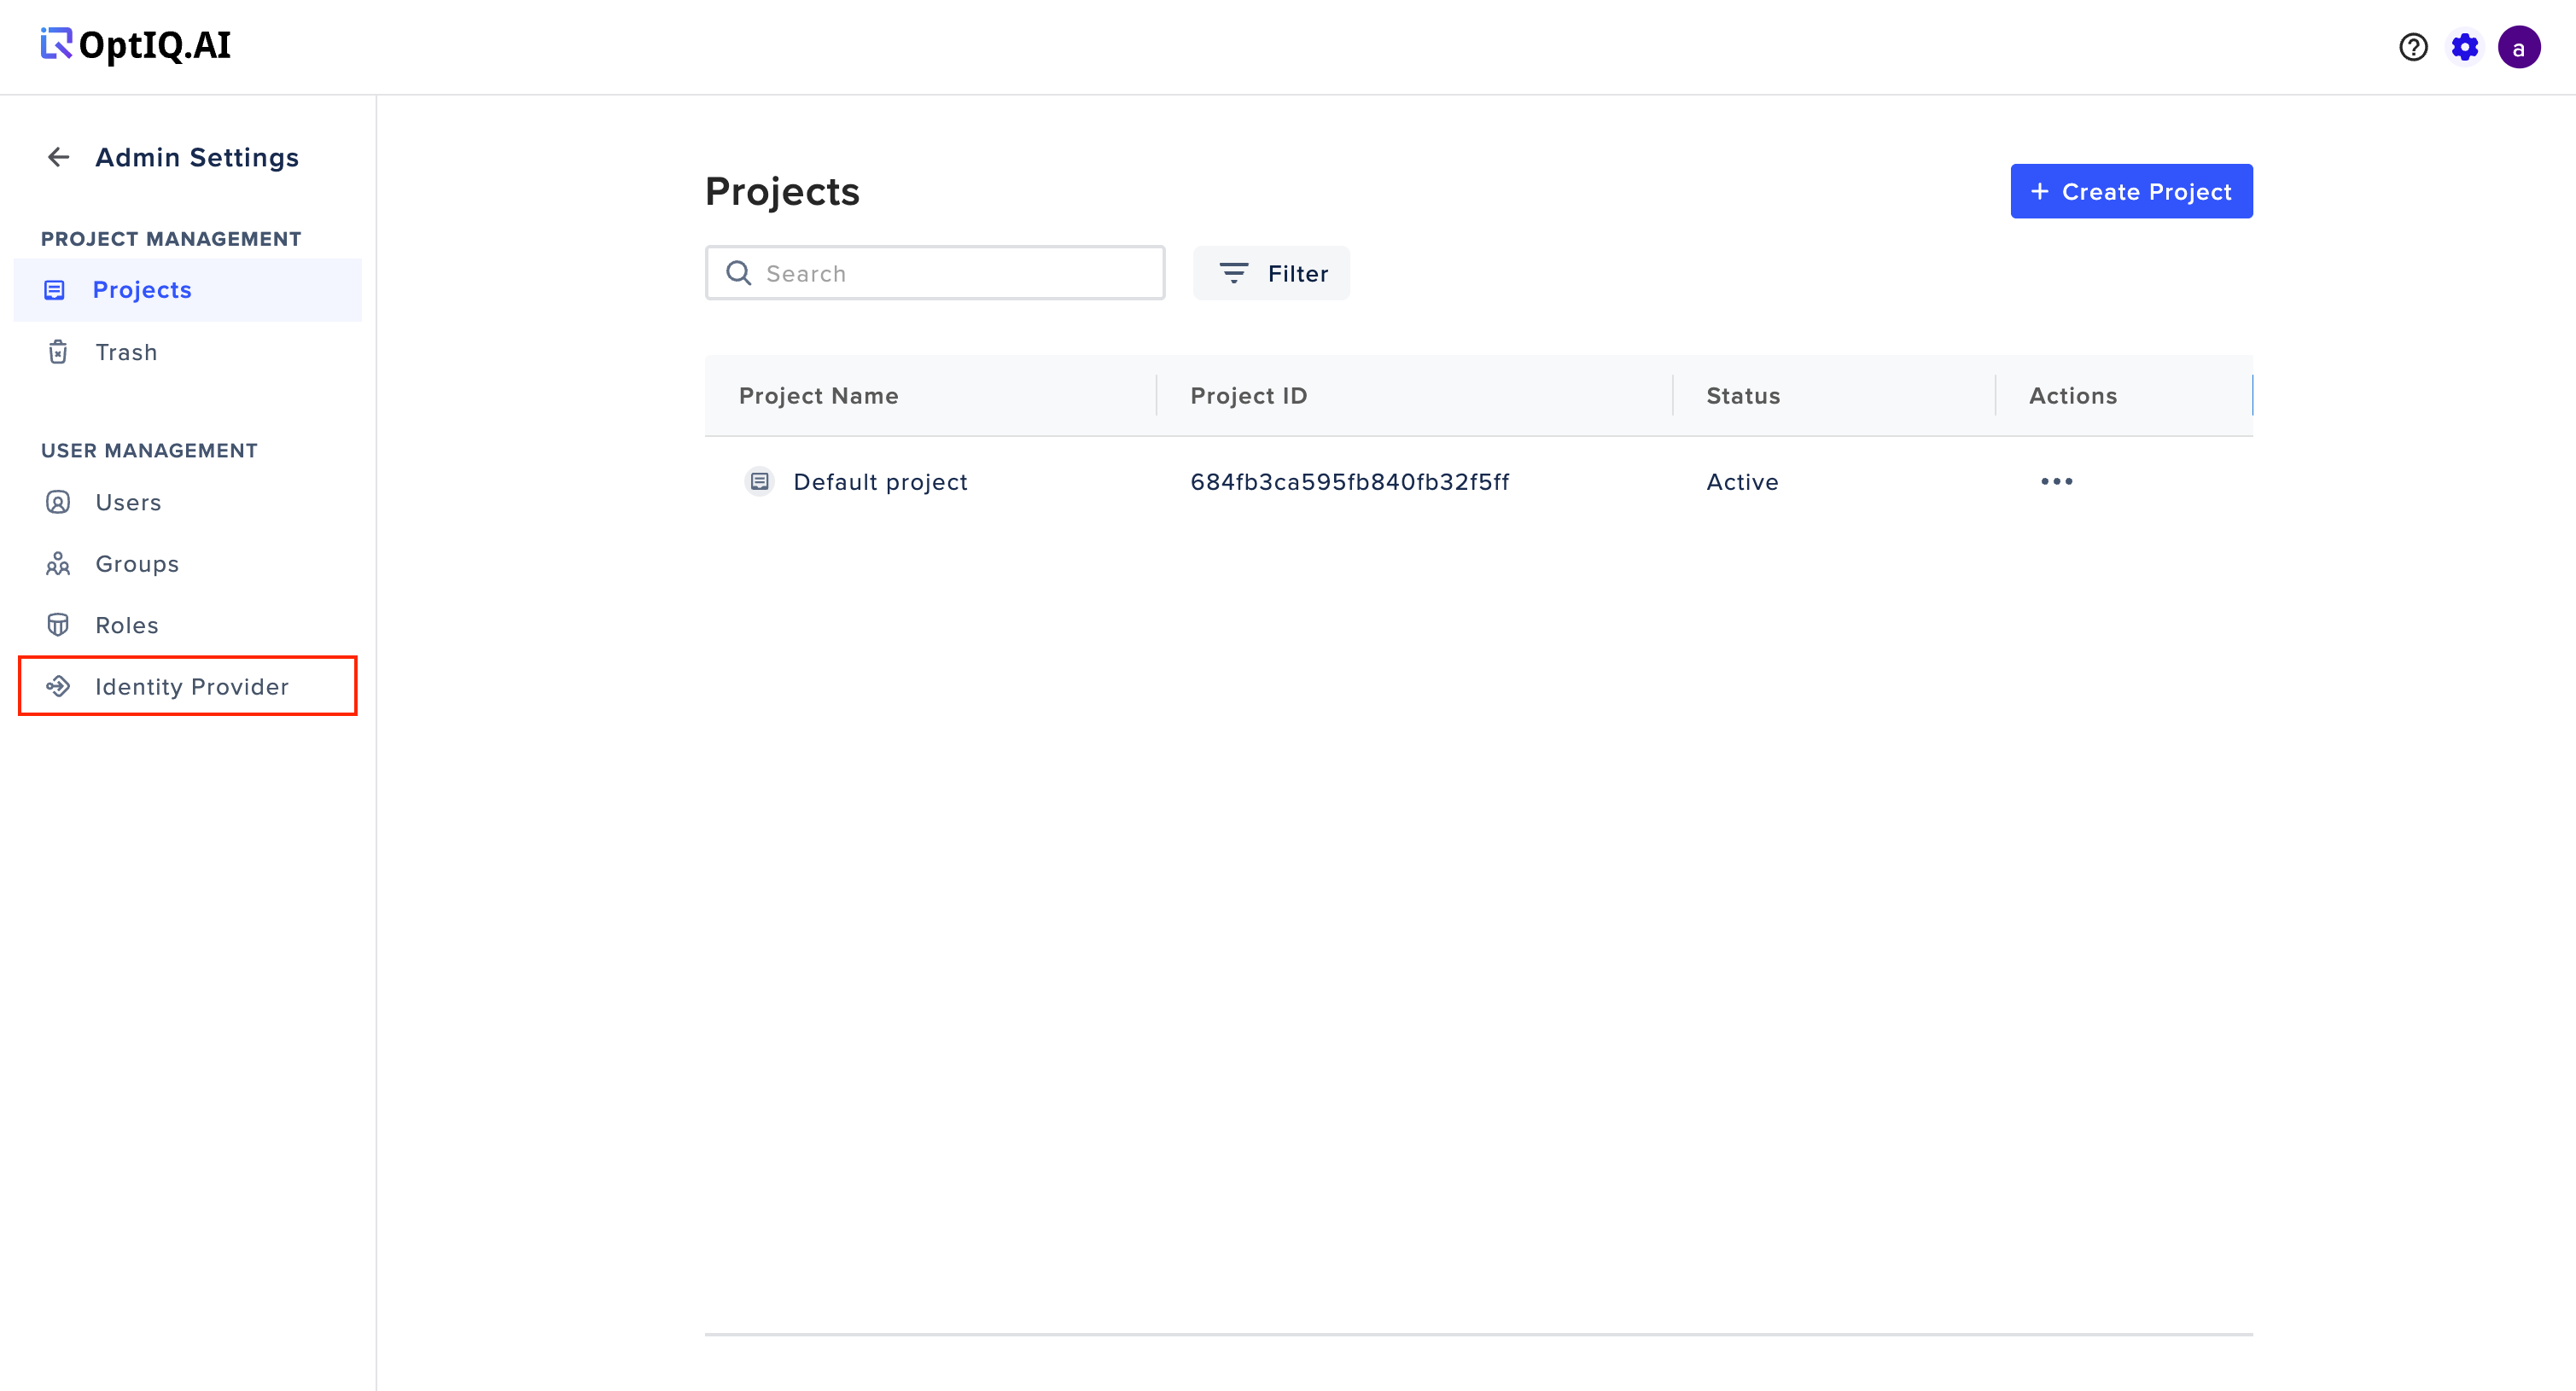
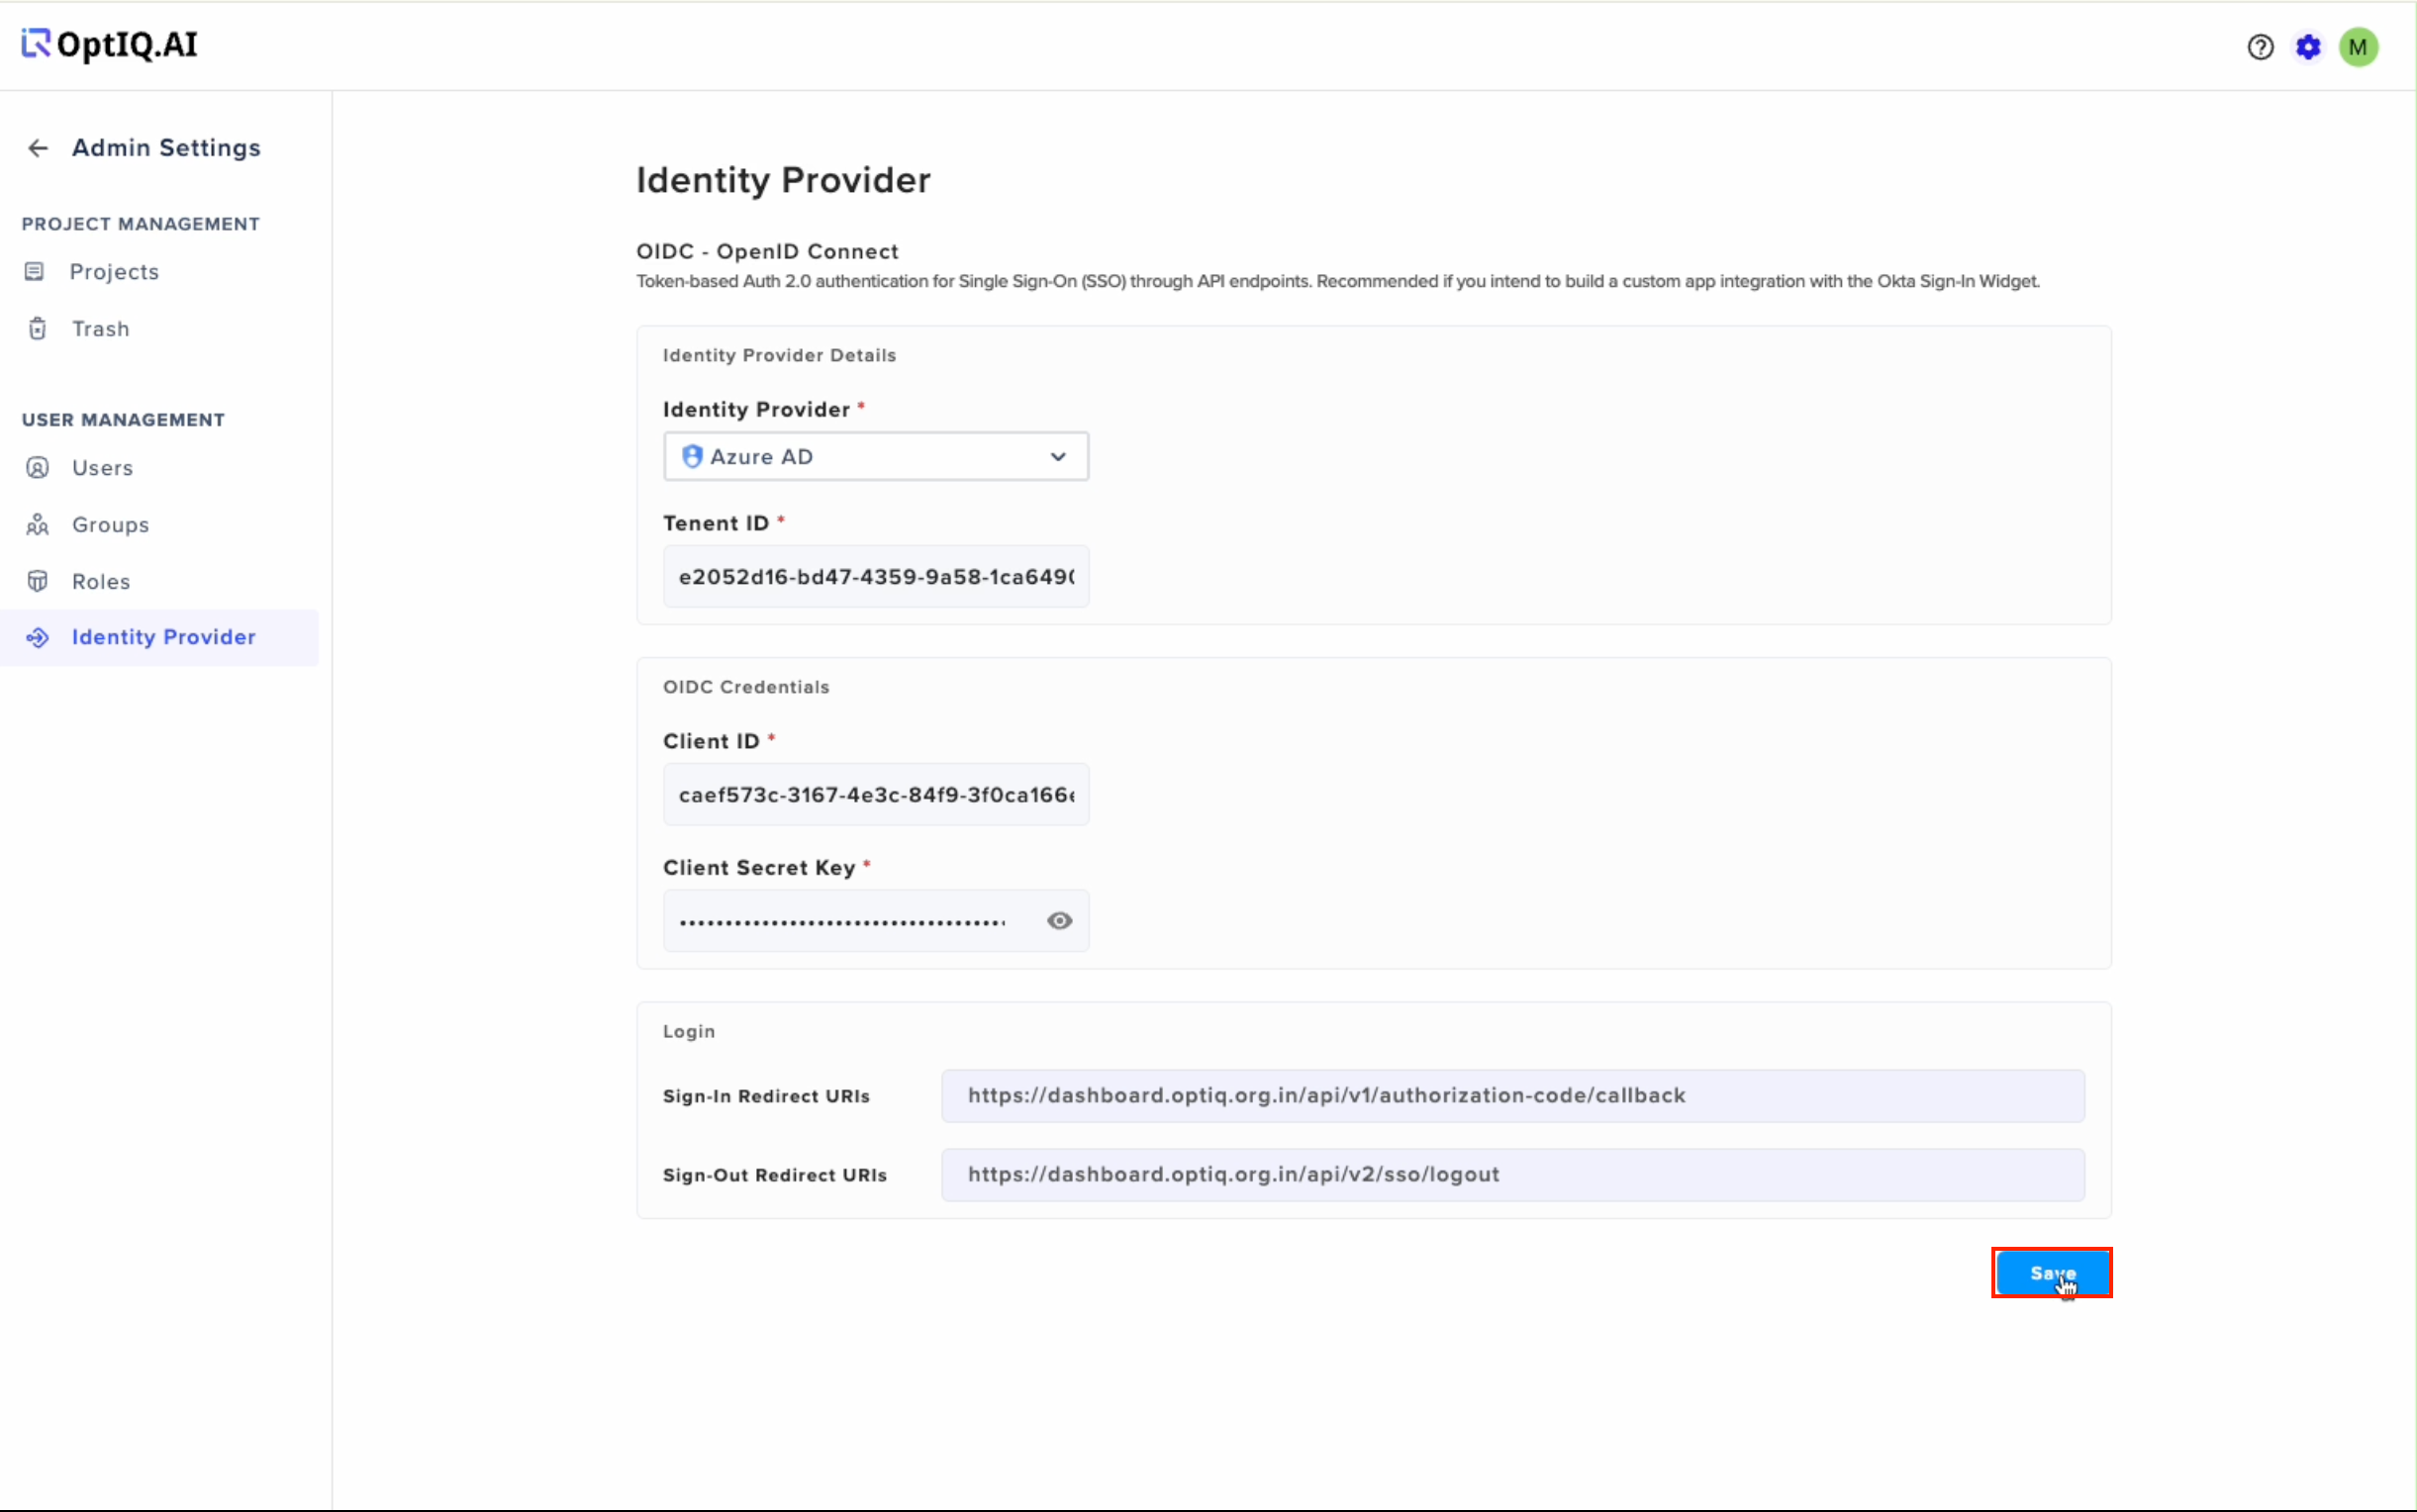
Click on Identity Provider under User Management
Here, you will need to enter the following details from the Azure AD application under App registrations:
Client ID: Available in the application registrations in Azure AD, which was configured earlier.
Client Secret: Available in the Certificates & secrets section (create new if needed).
(Directory)Tenant ID: Found in the Overview section of Azure AD.
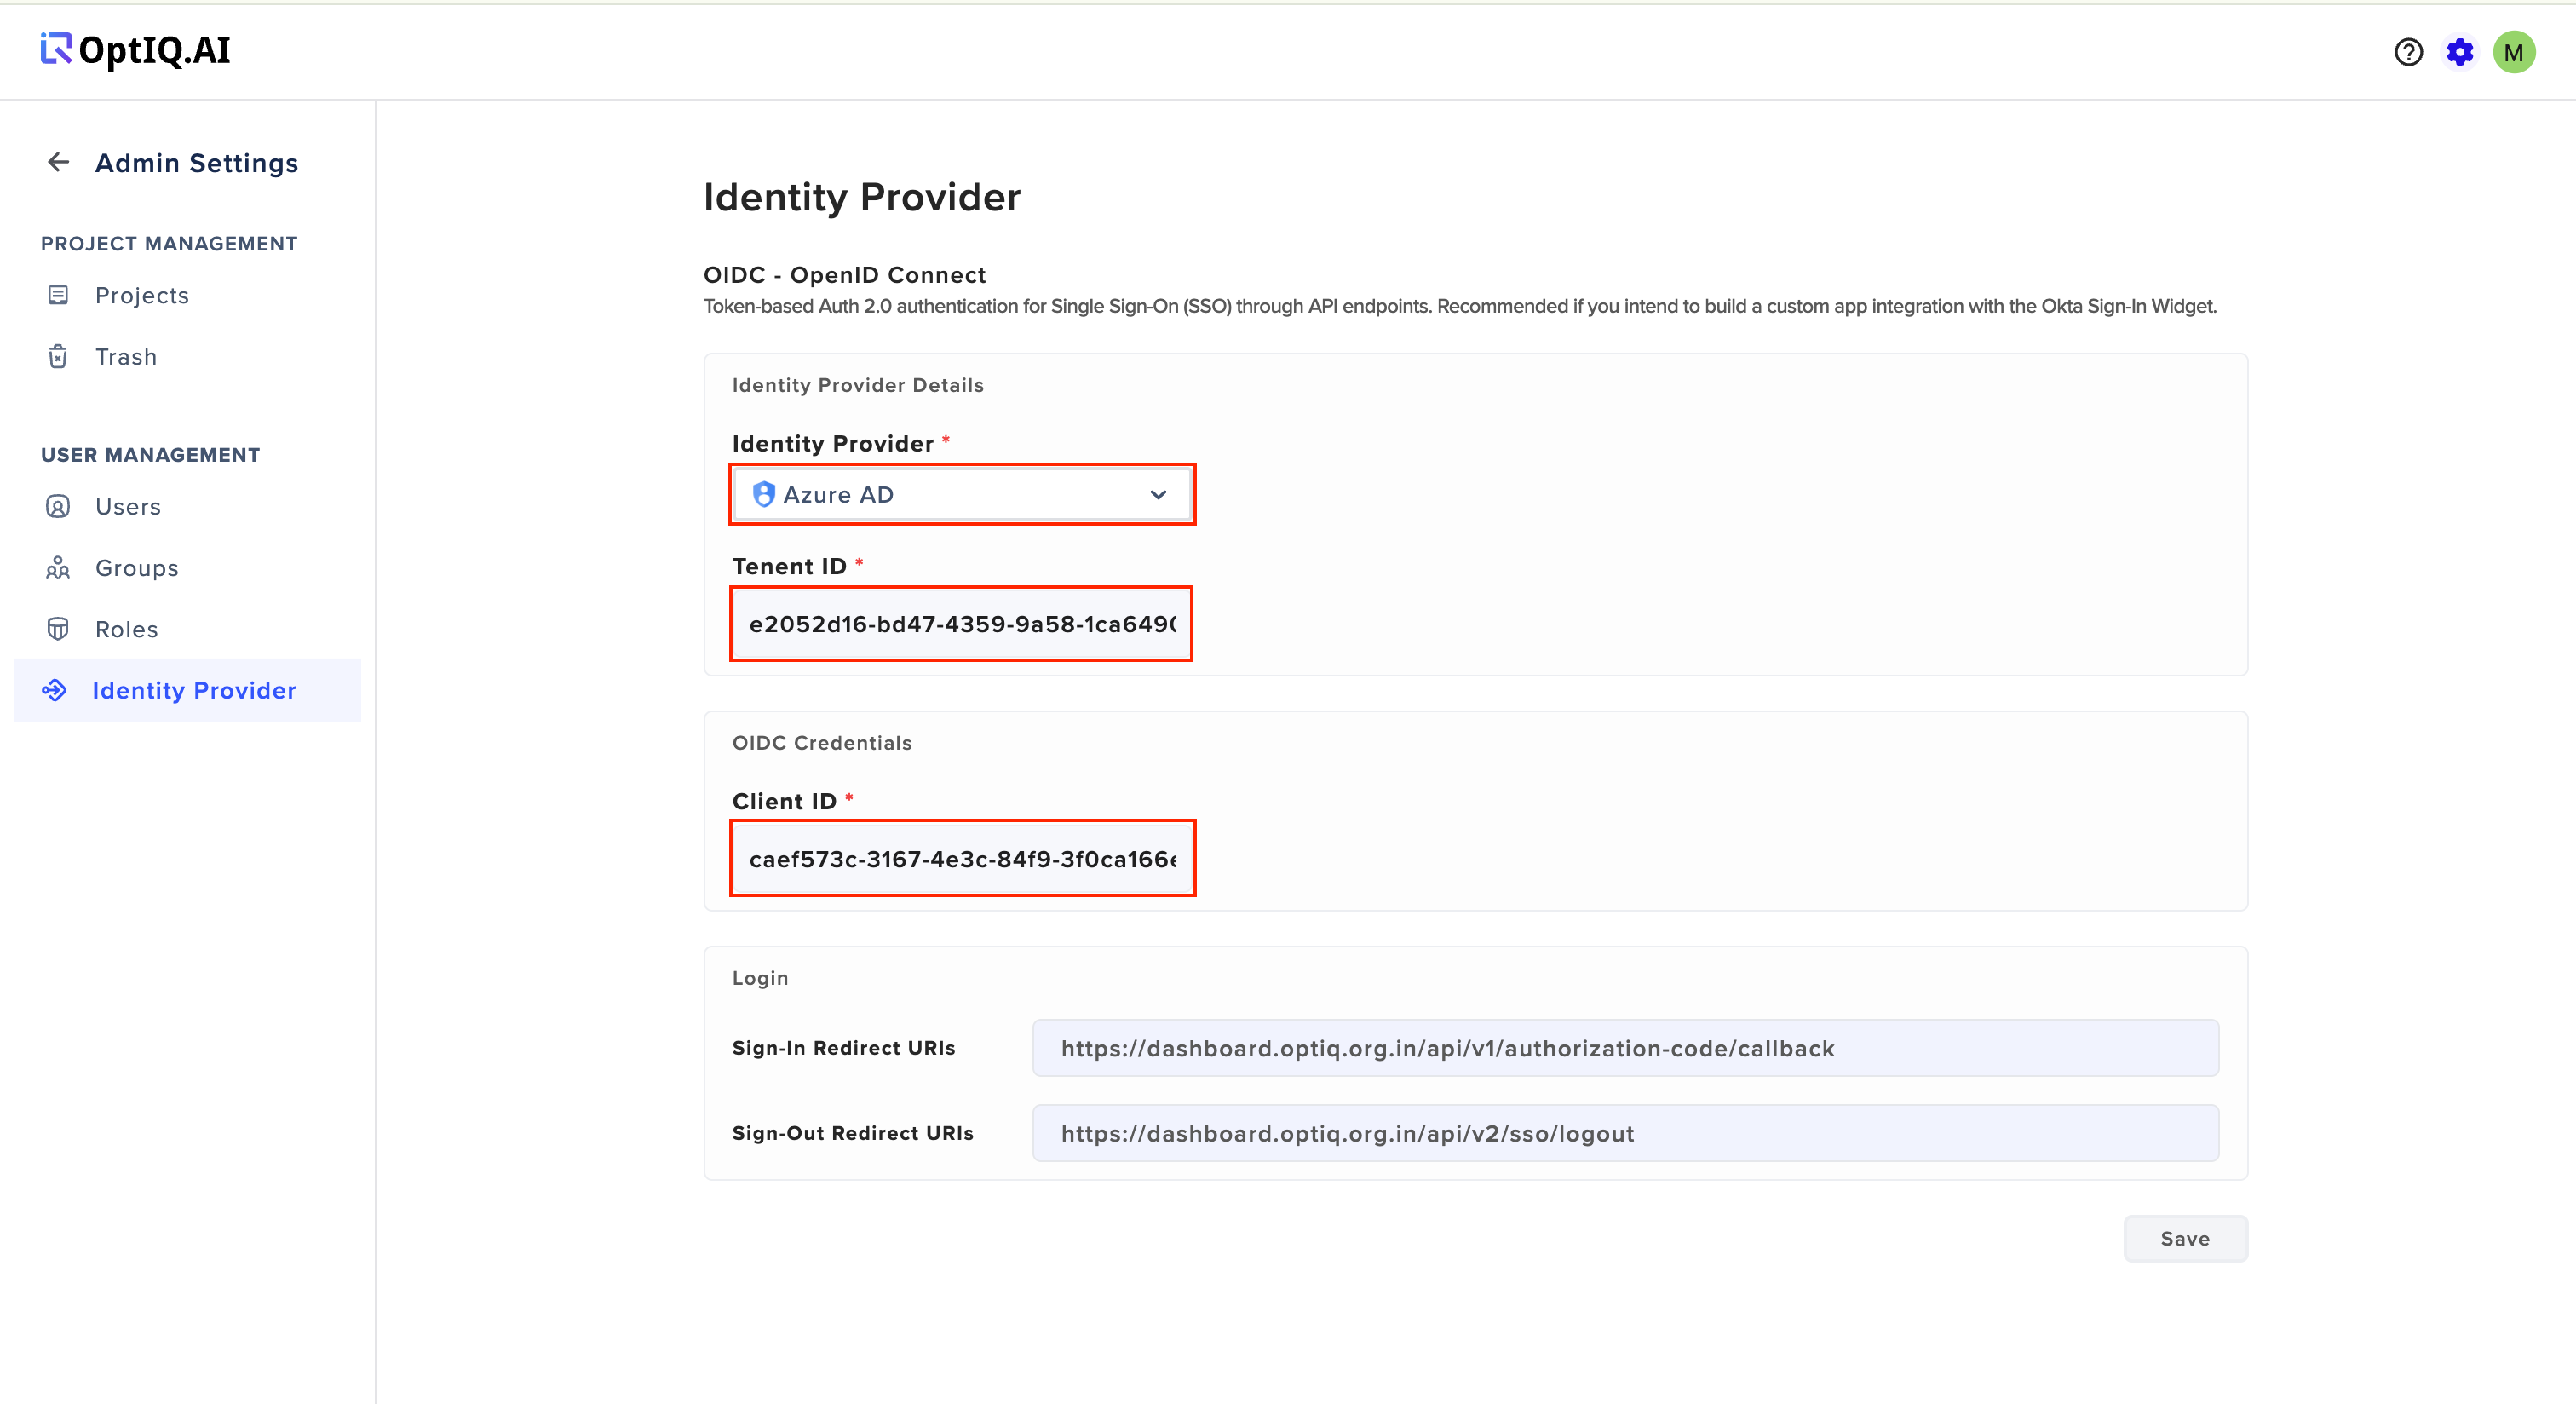
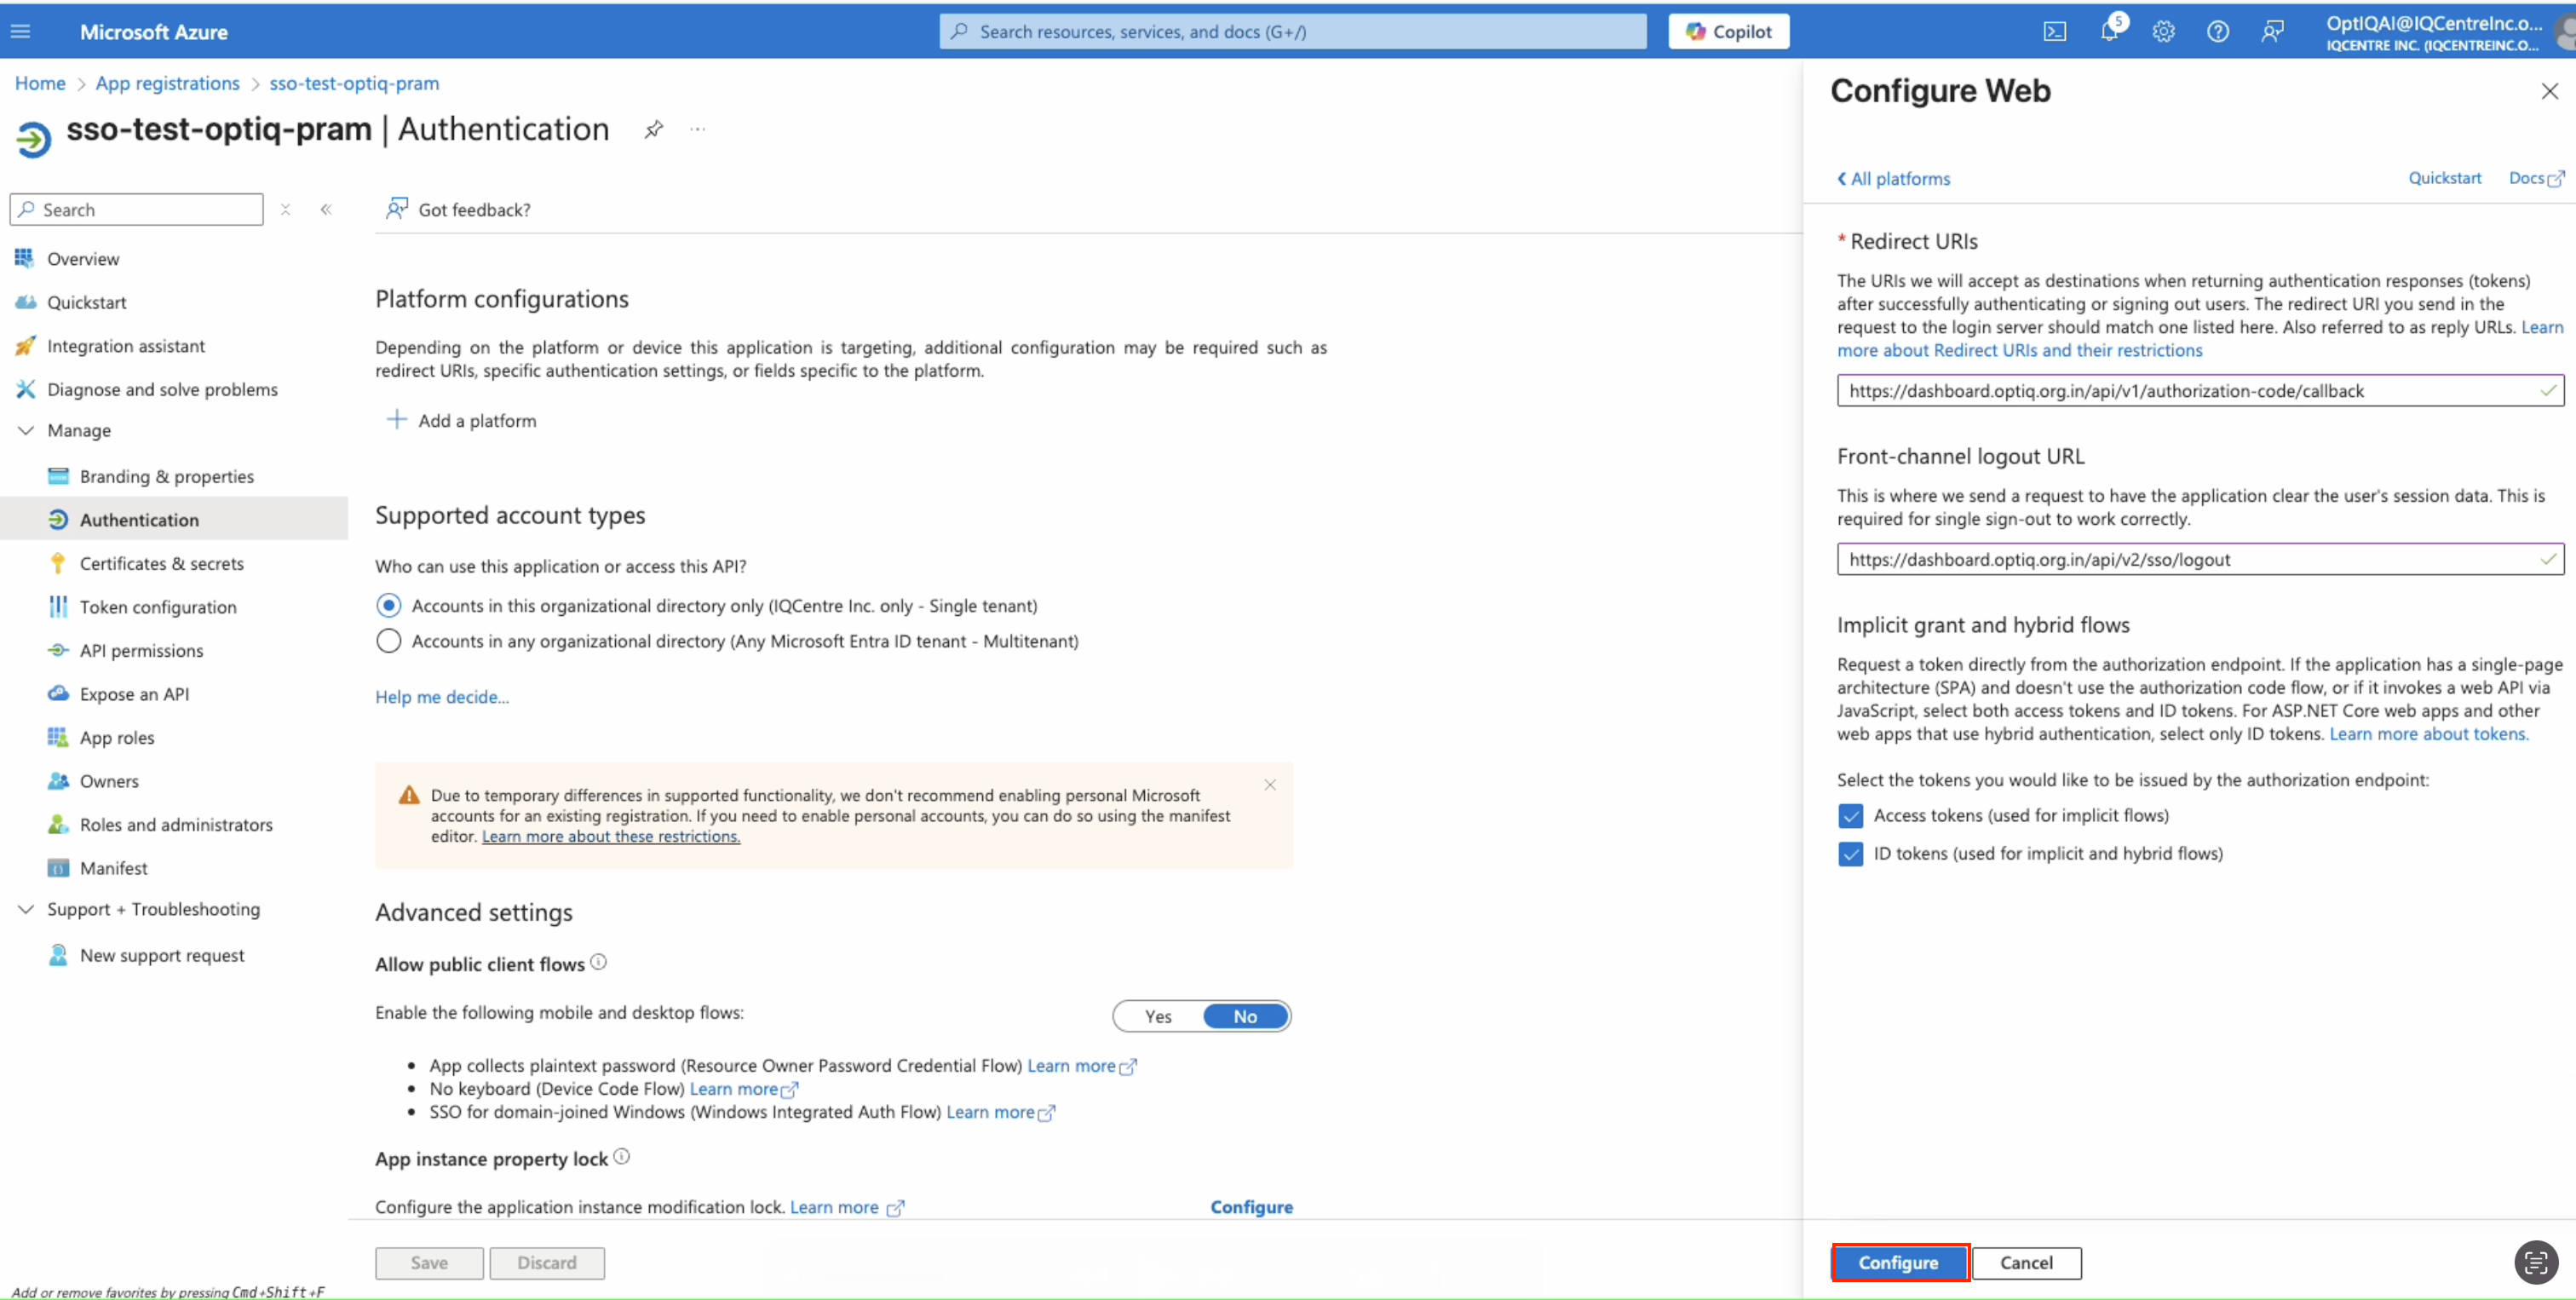
Configure the Redirect URI and the Front-channel logout URL to your application in the App Registrations section.
Select the Application were you want configure
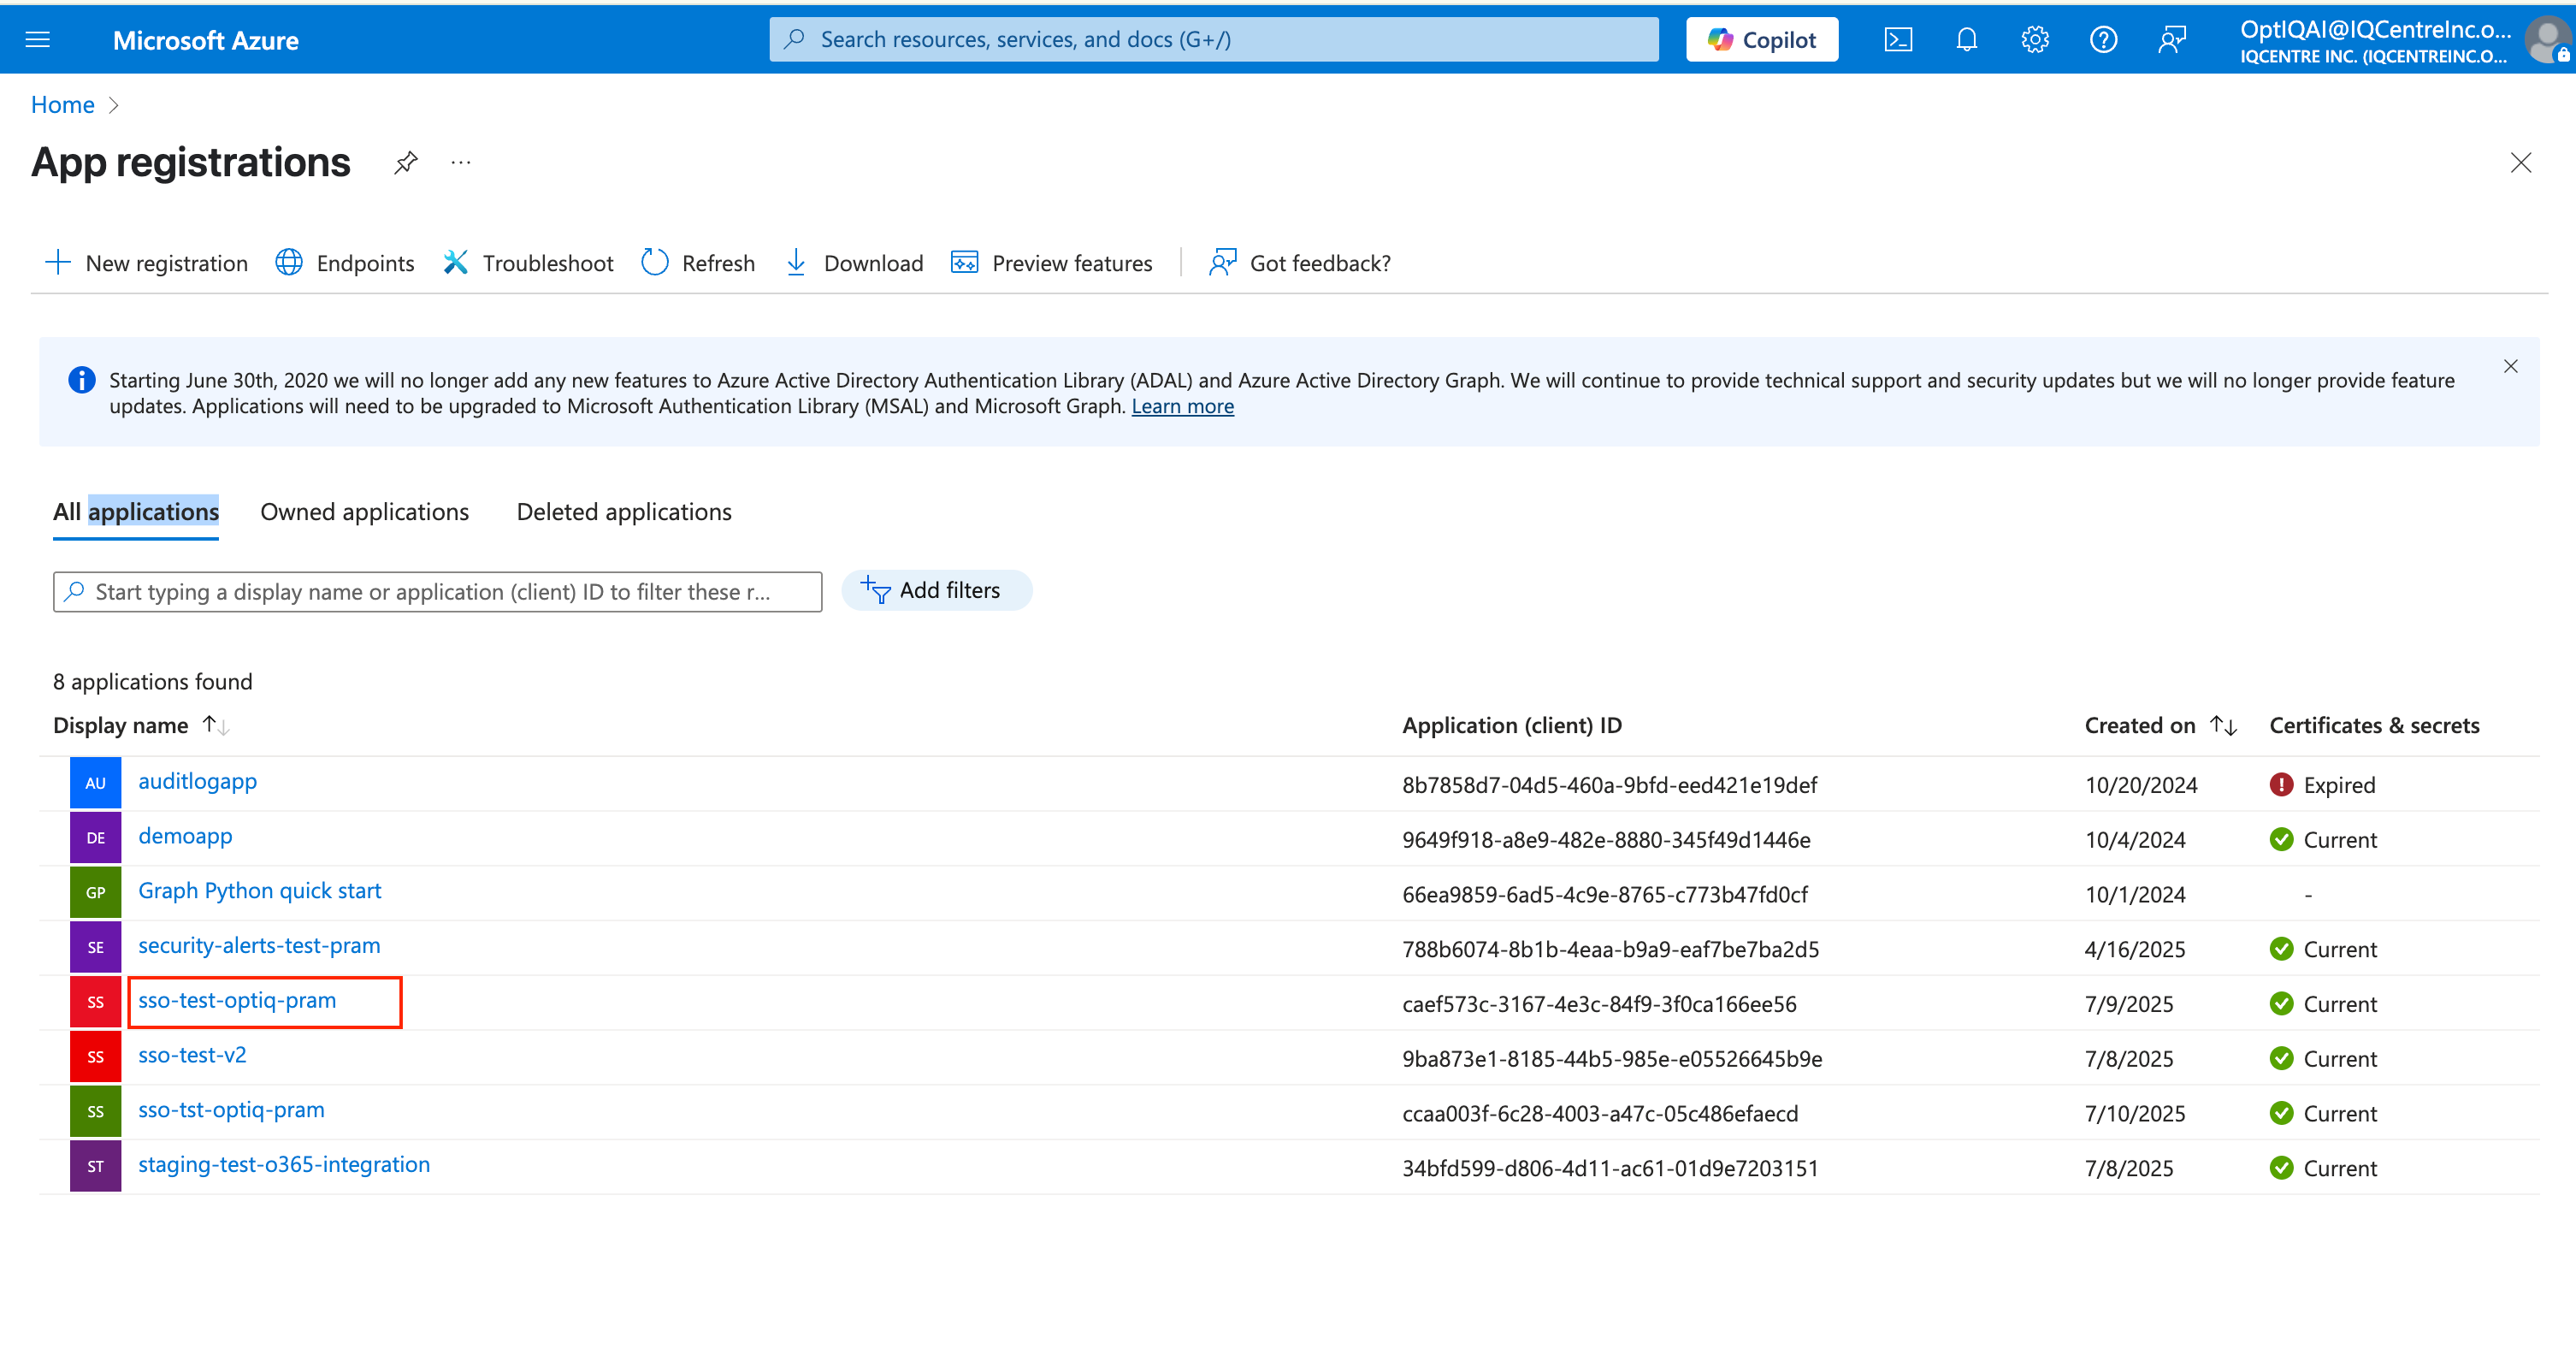
Click on Authentication Tab as displayed in the Below image
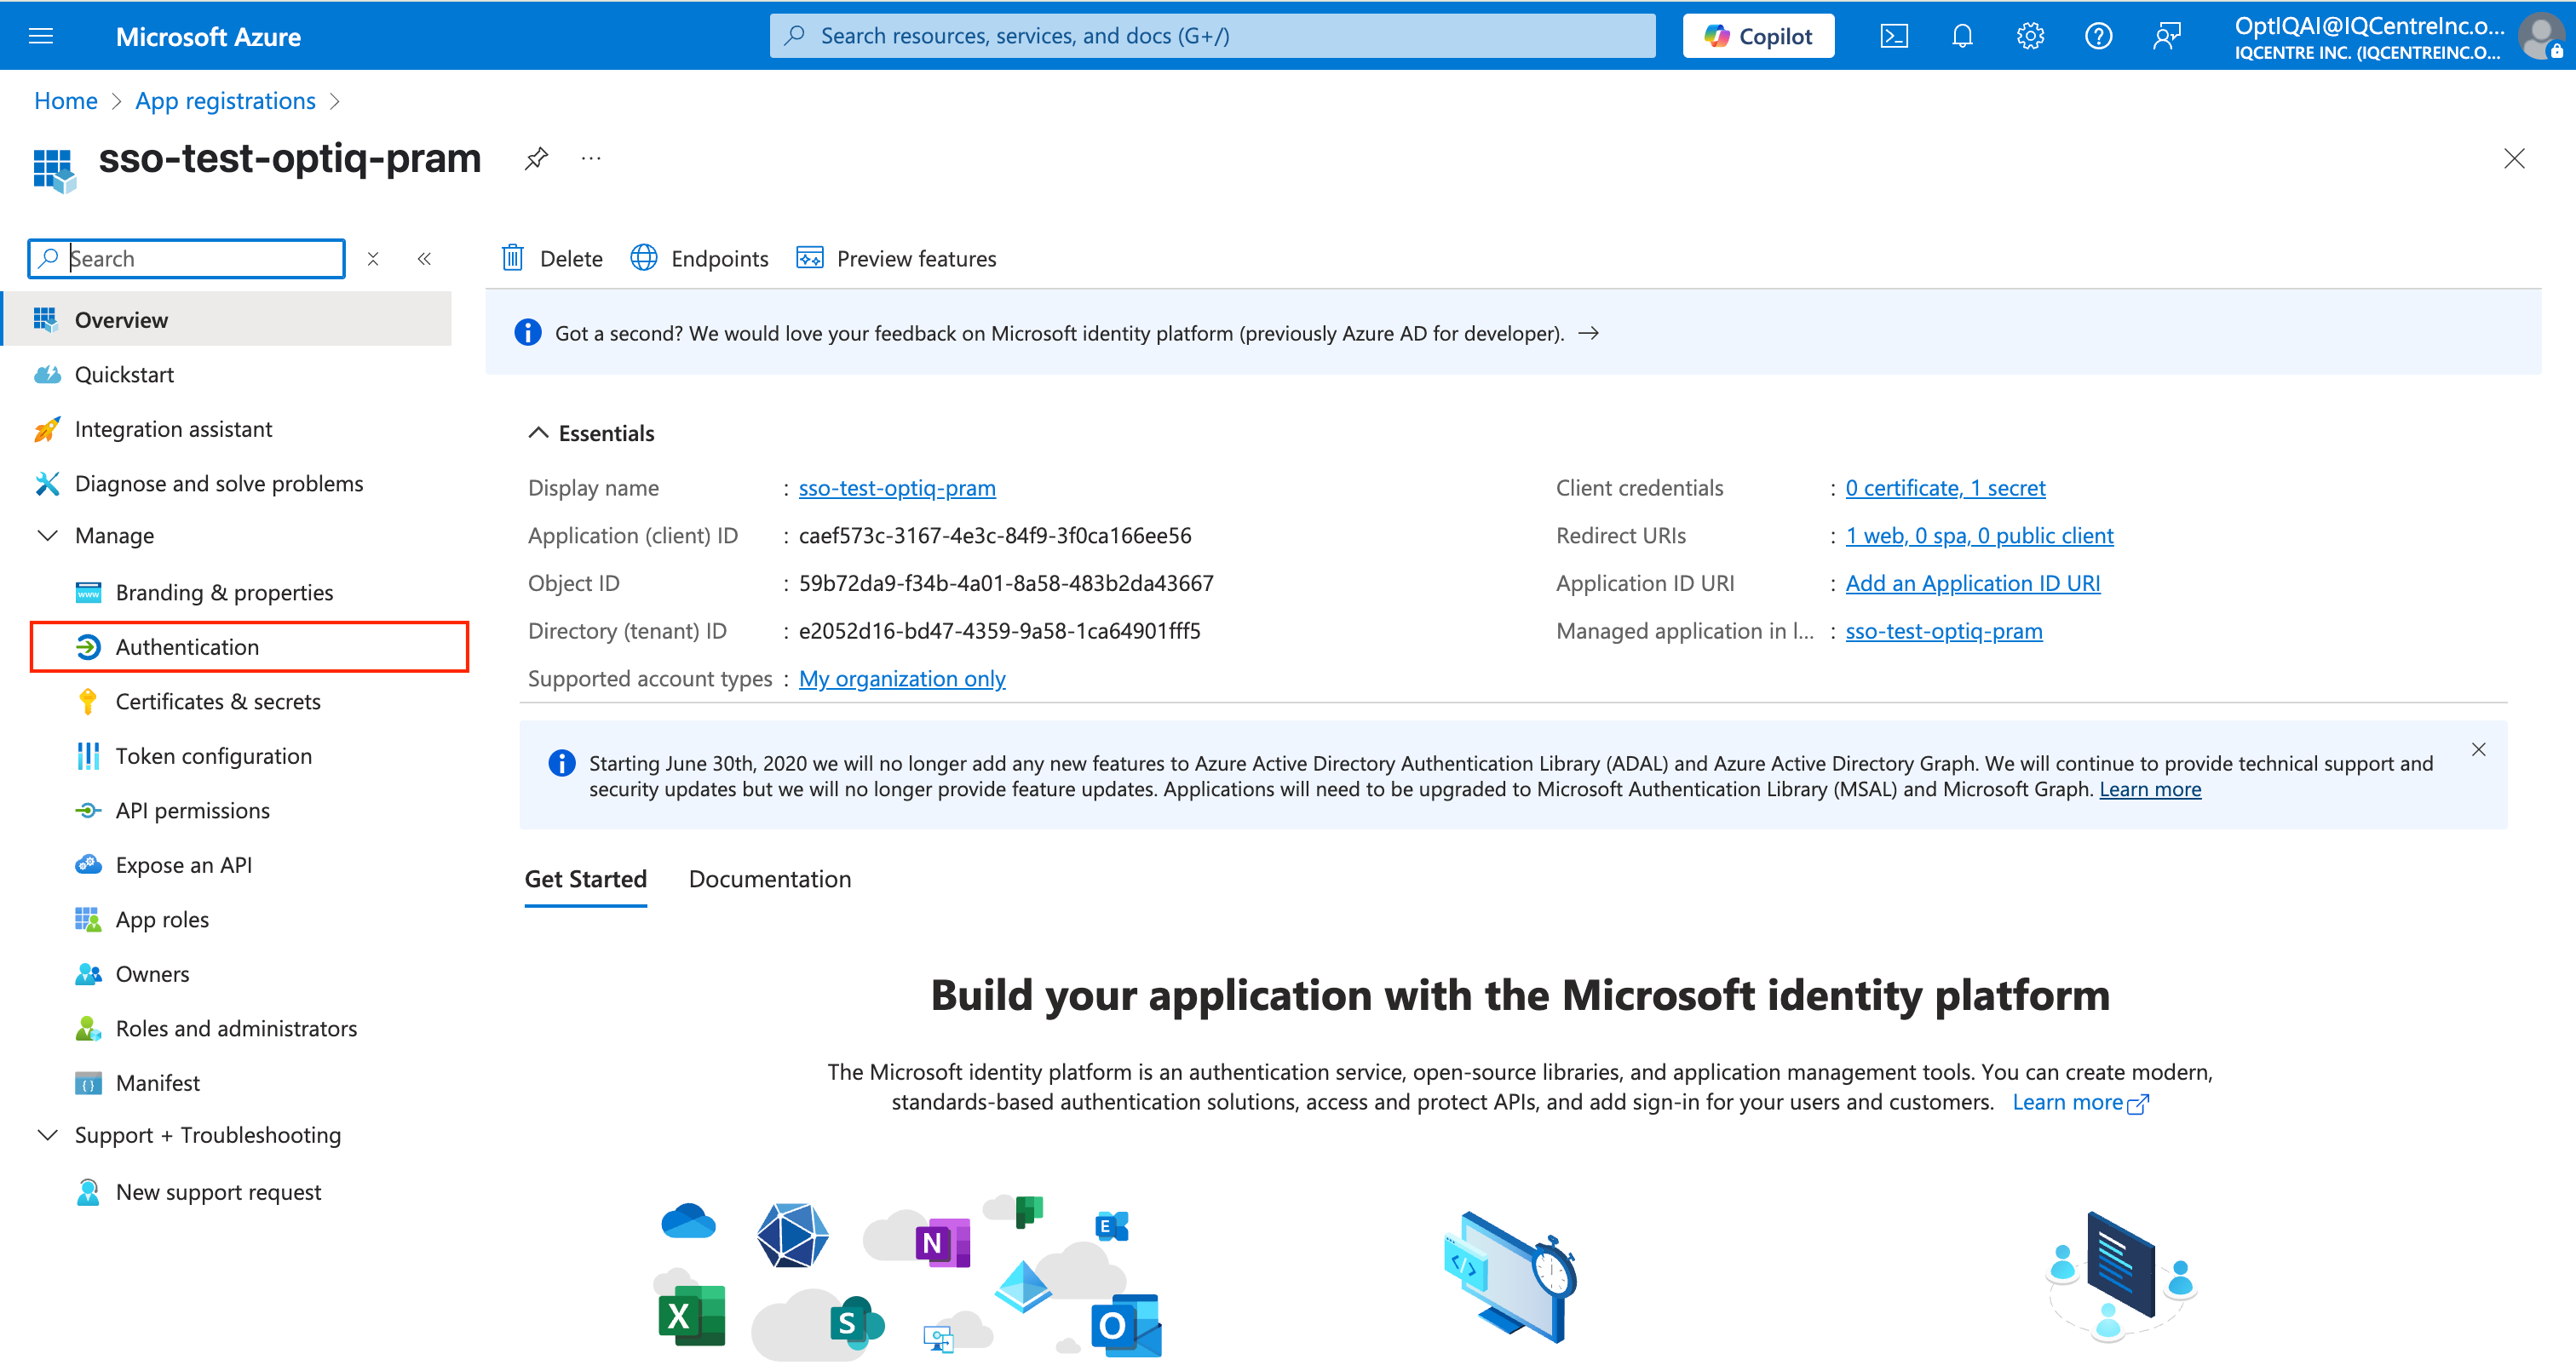
Select Add Platform
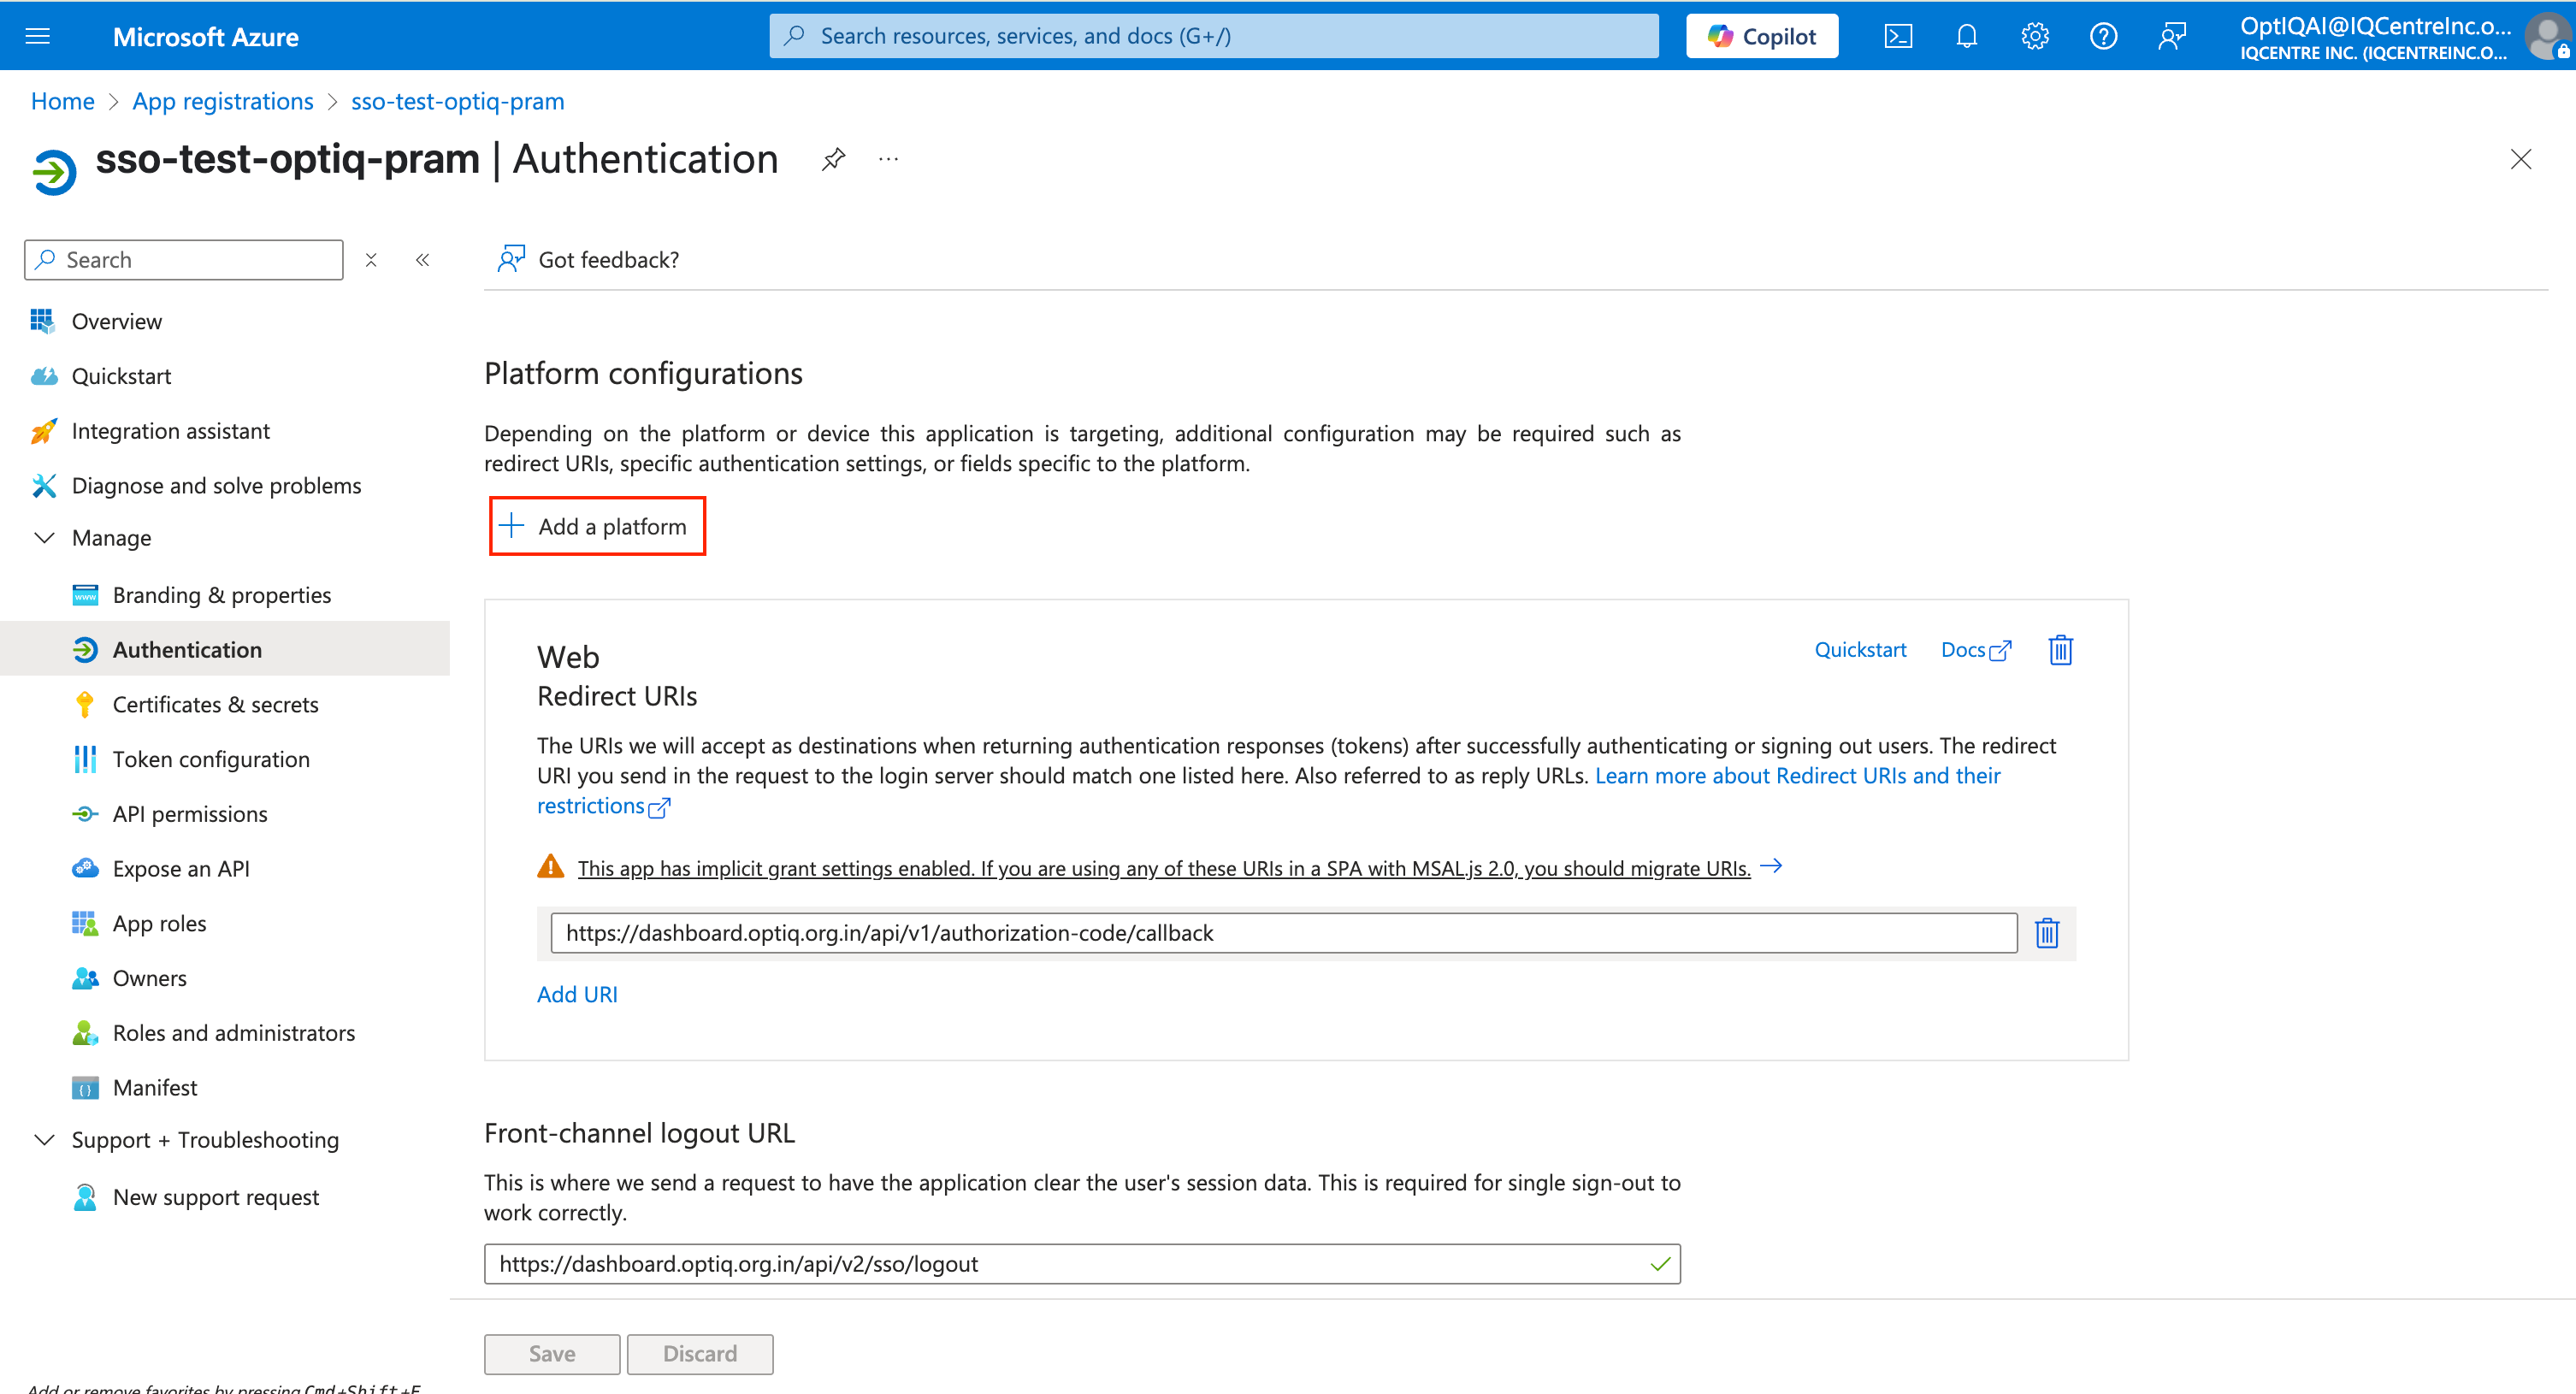
Click on Web Application
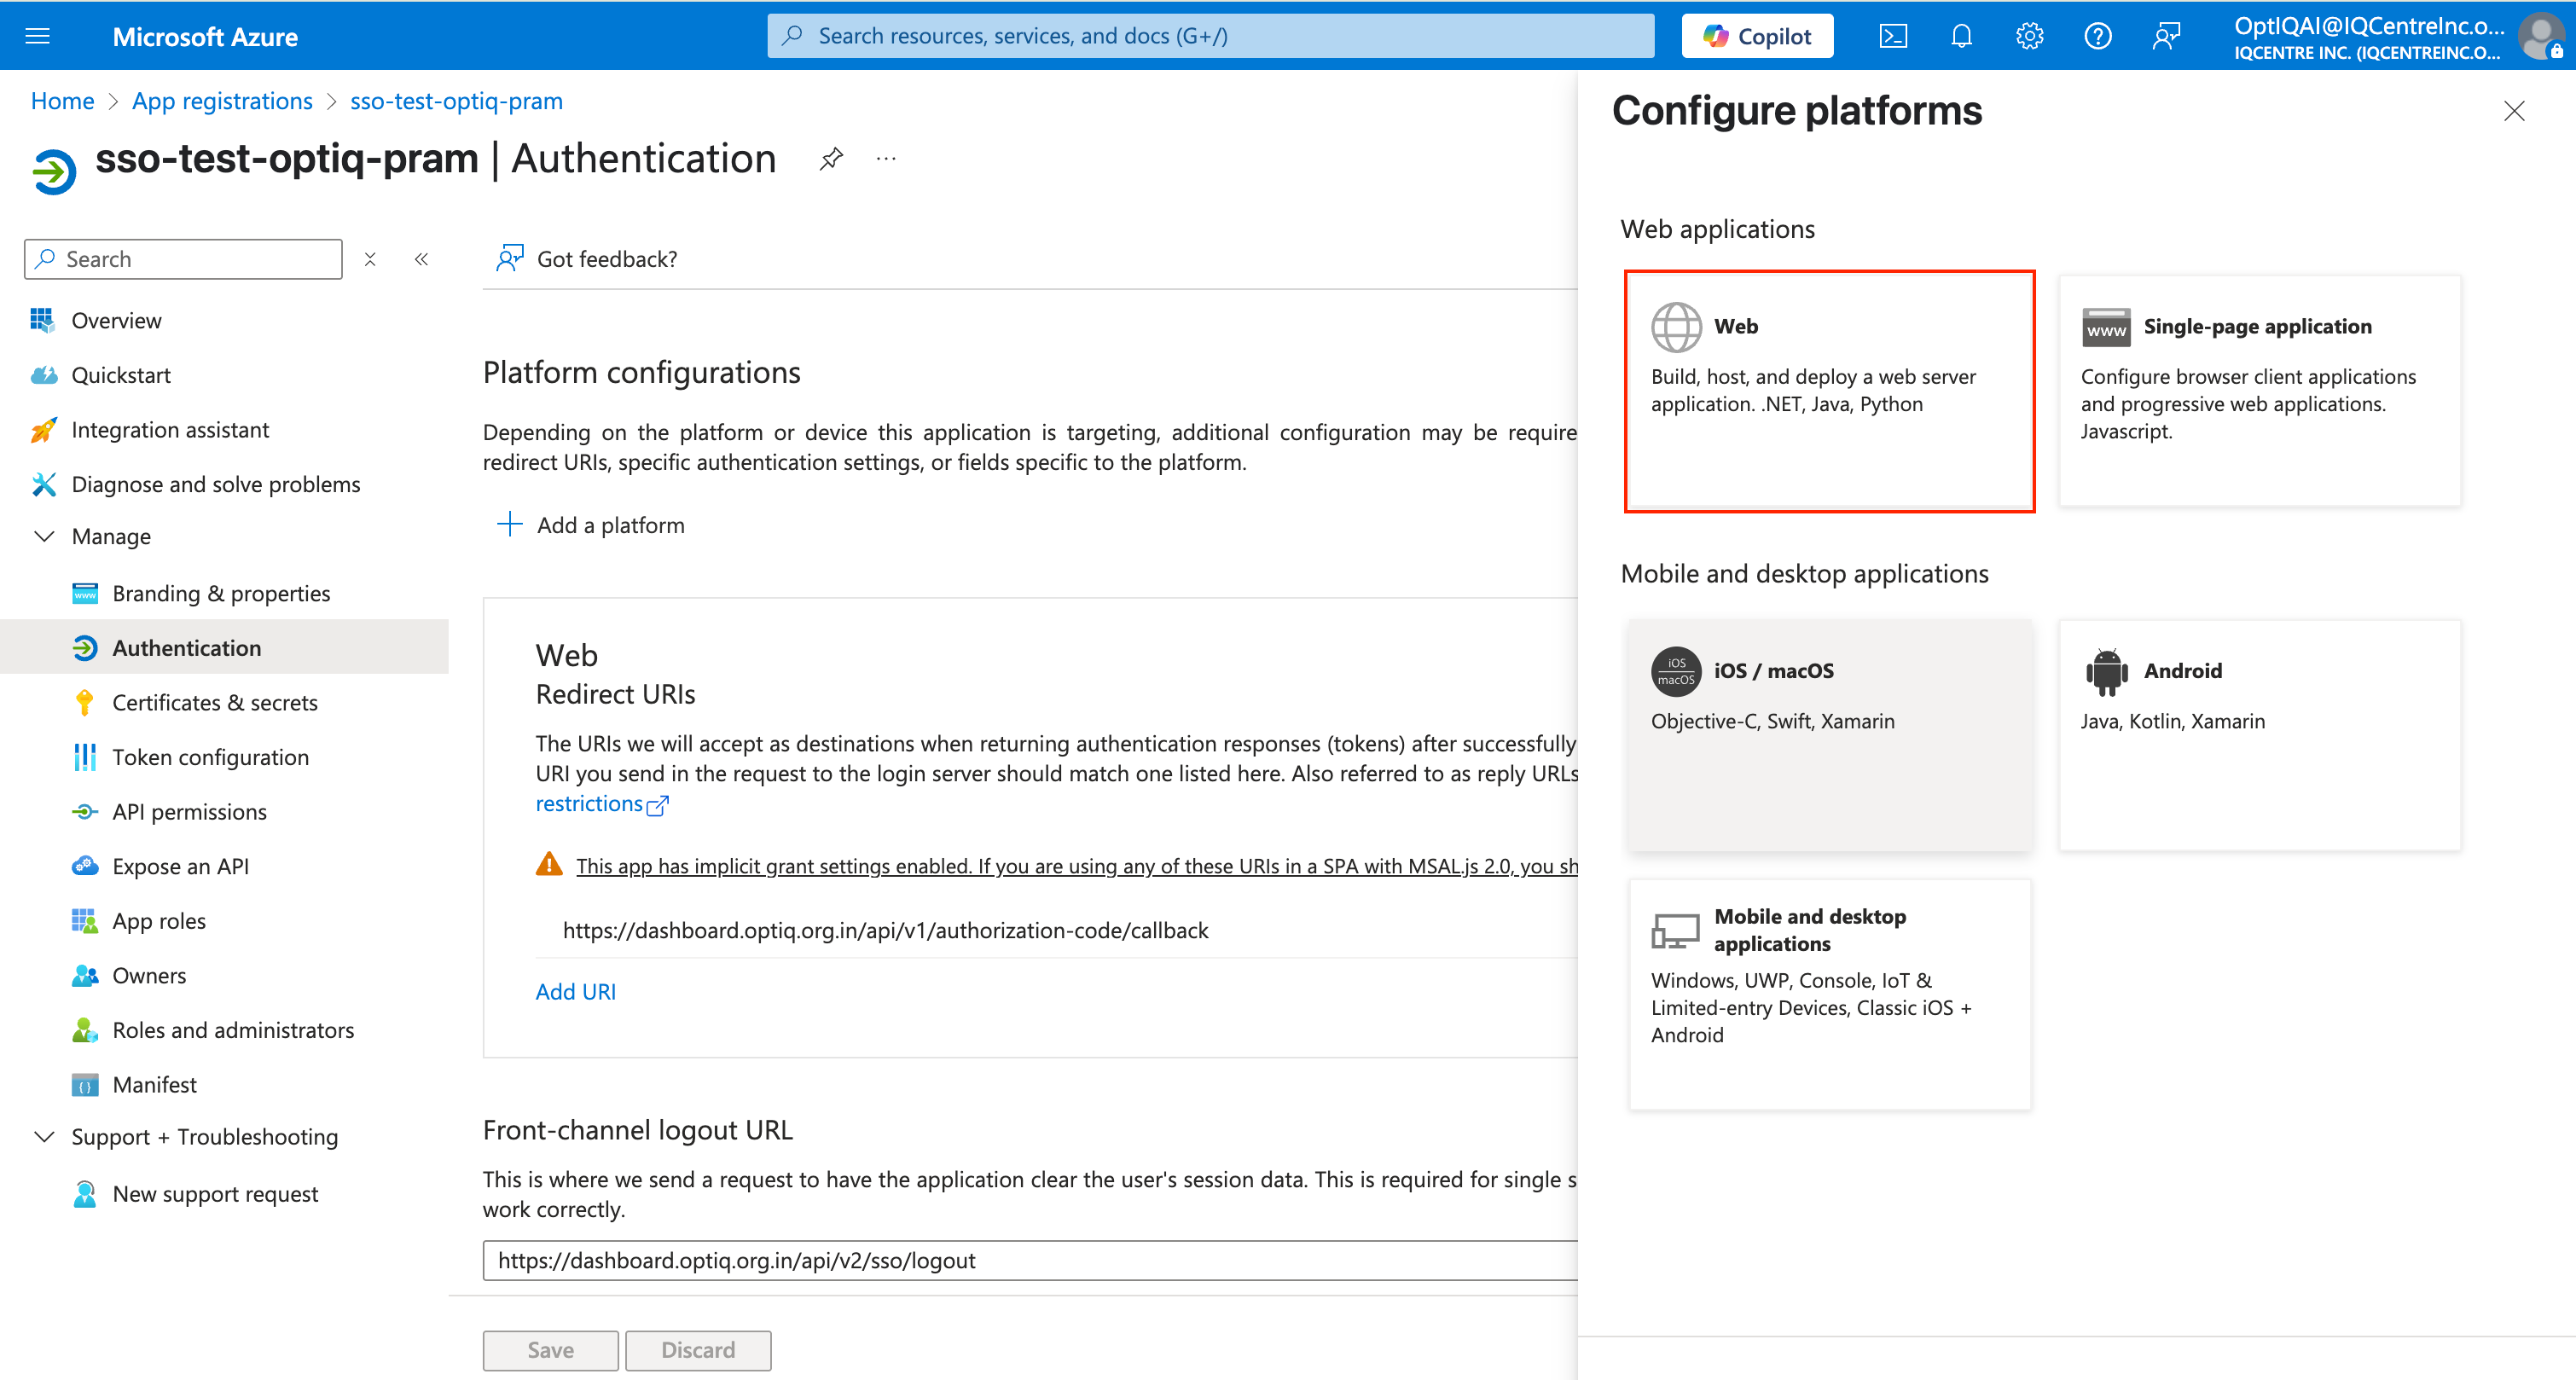
Copy and add “Sign-In and Sign-out” URIs on the text fields and click on Configure button as displayed below
Save the settings of Identity Provider on Matters Dashboard to complete the identity provider integration.
Step 9: Managing SSO Users
a. Adding Users
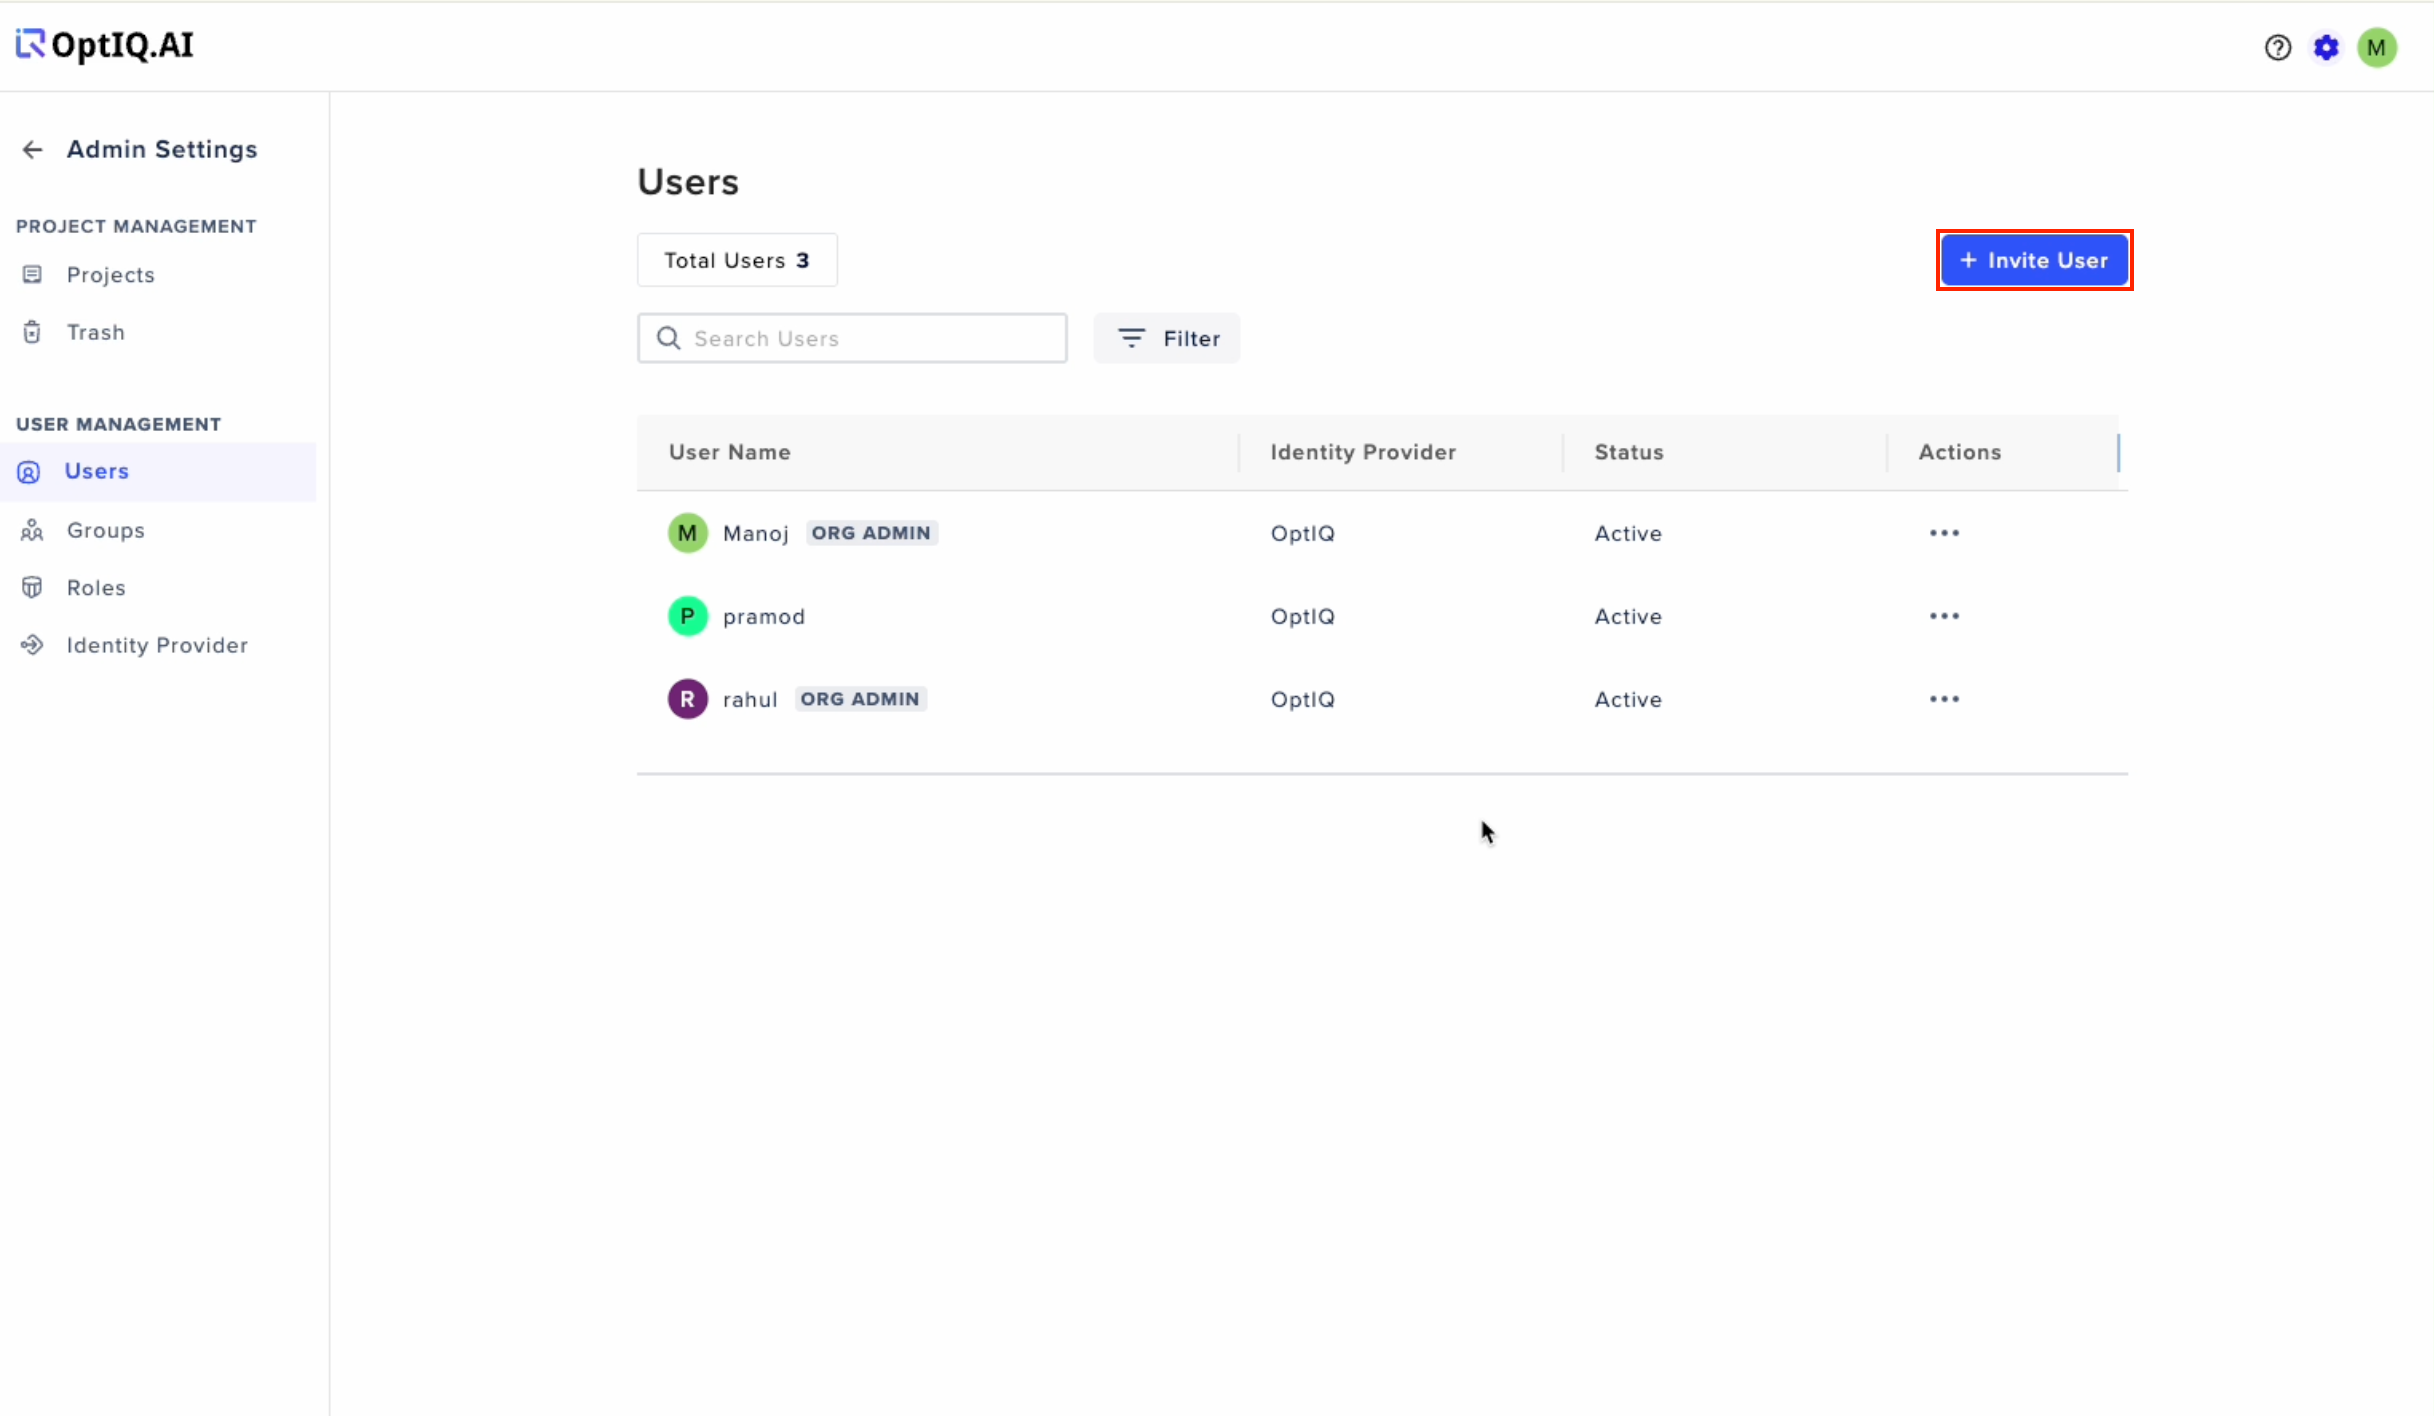
Navigate to Users Screen under User Management
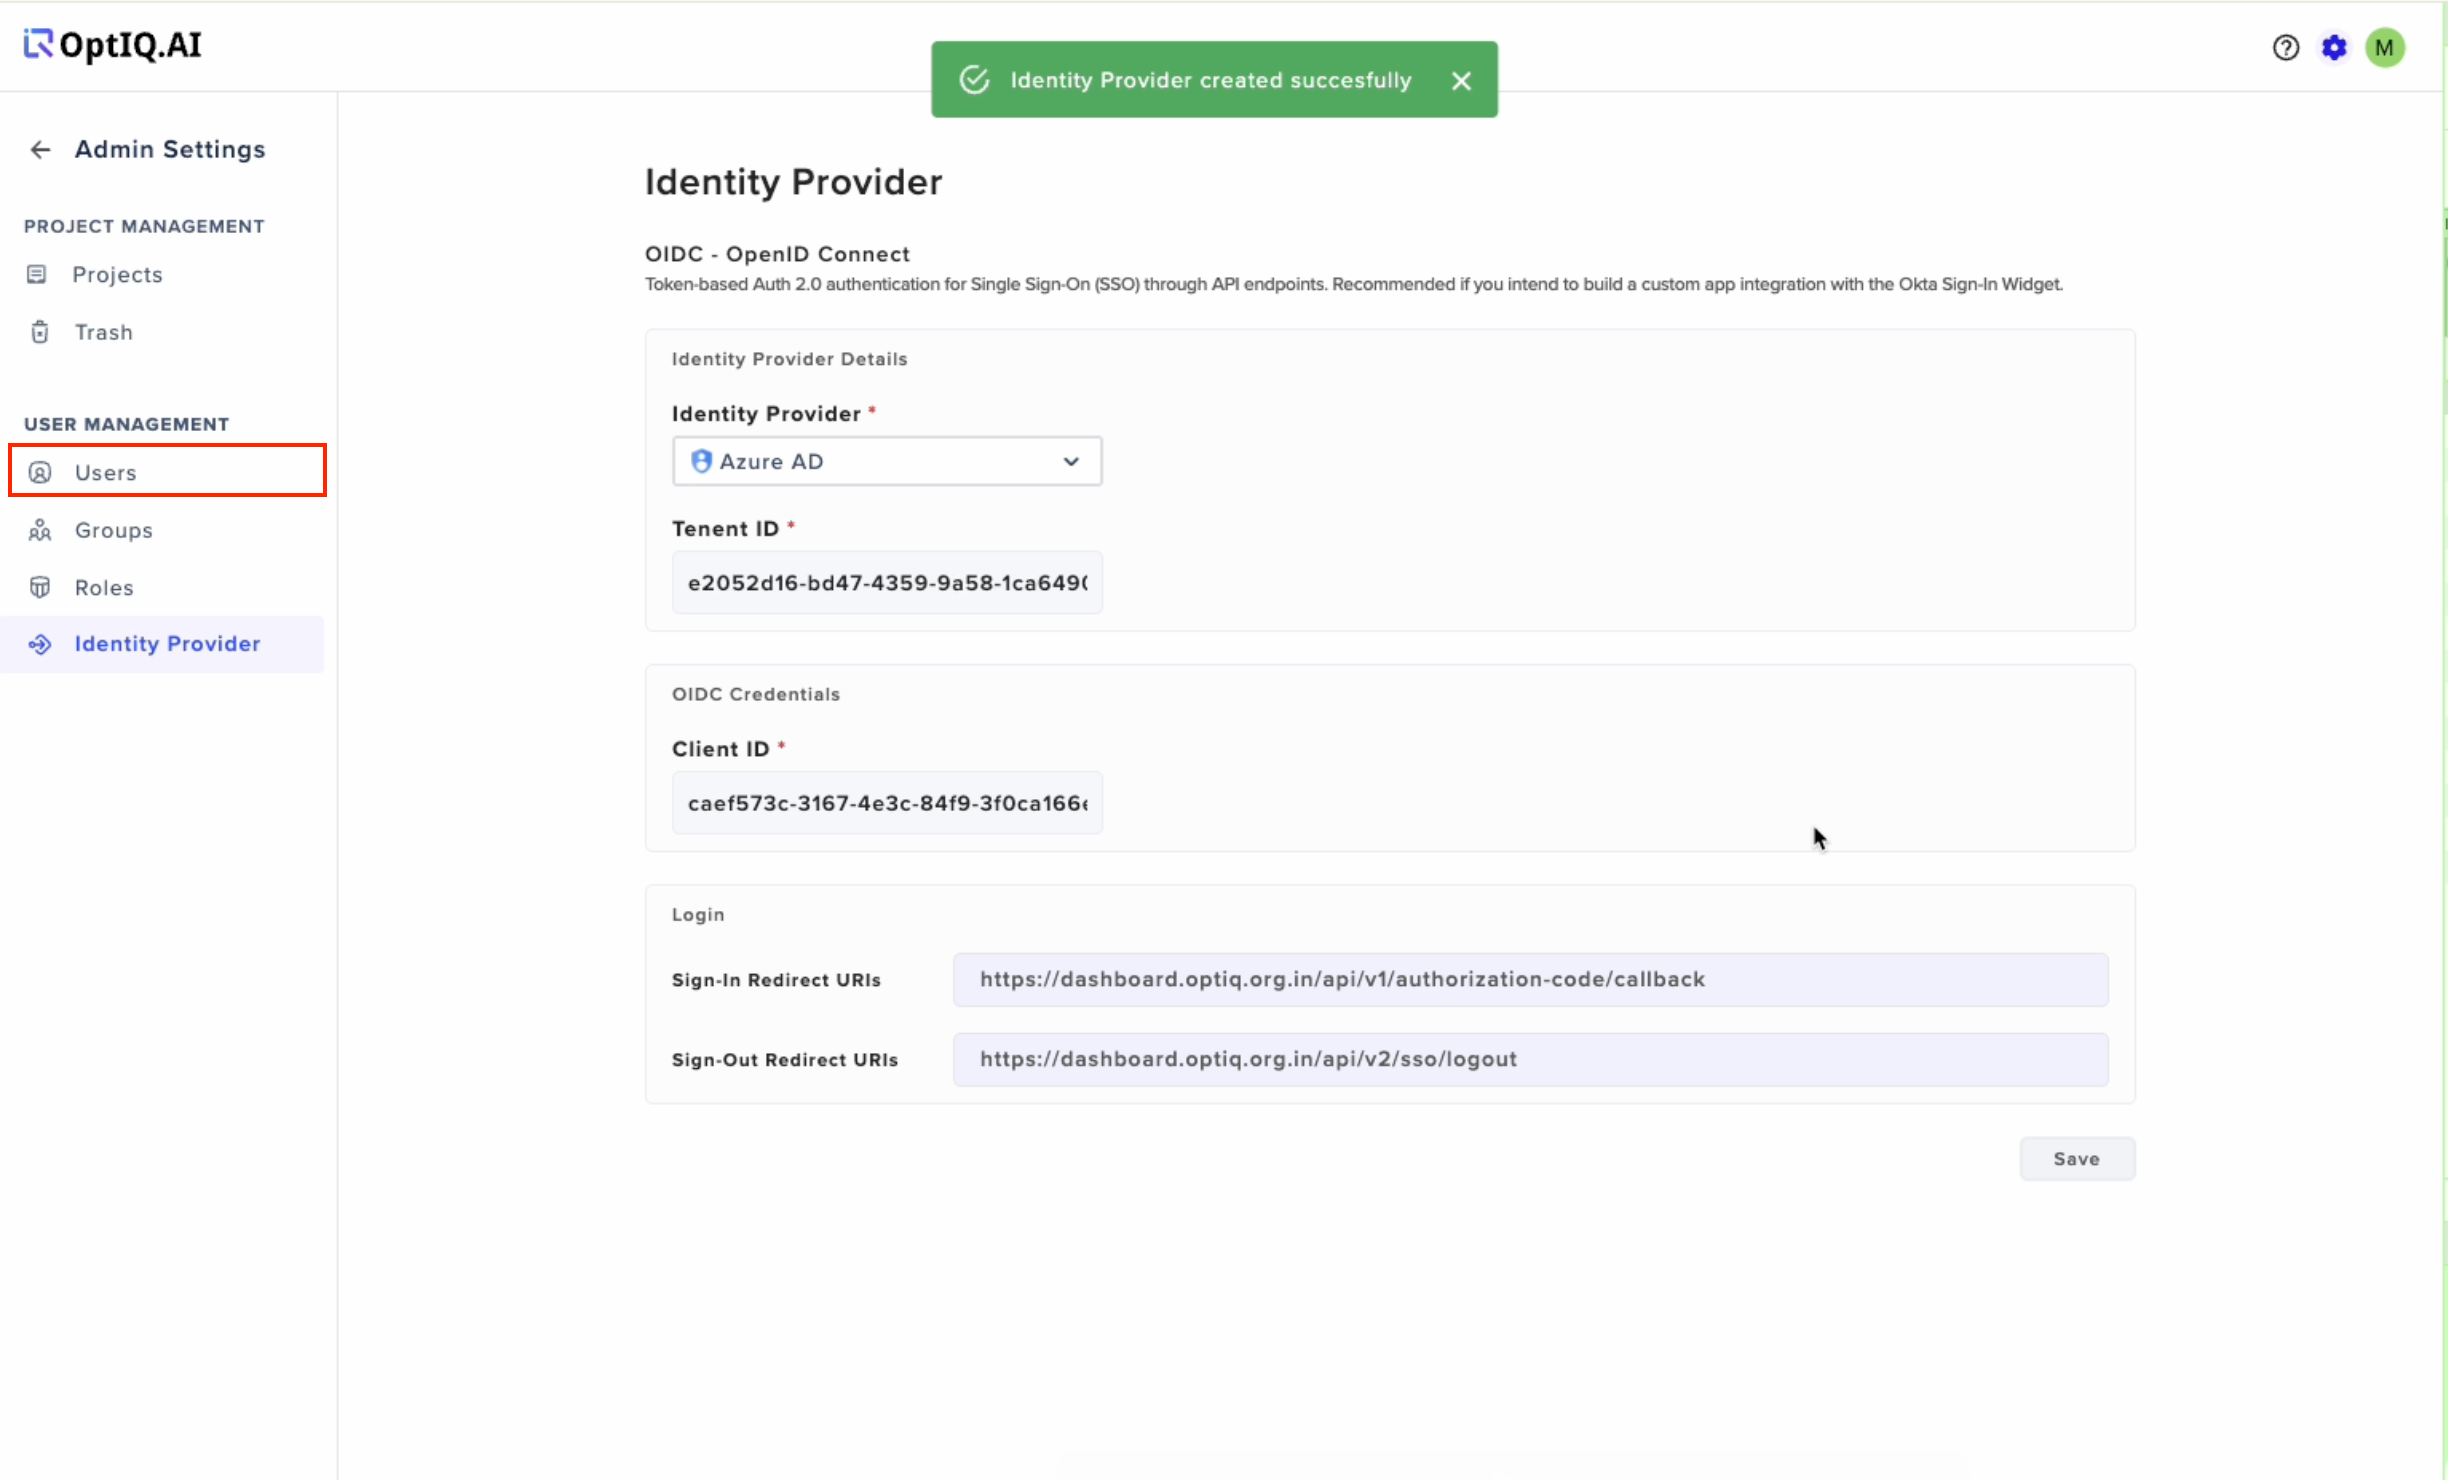
Click on Invite User
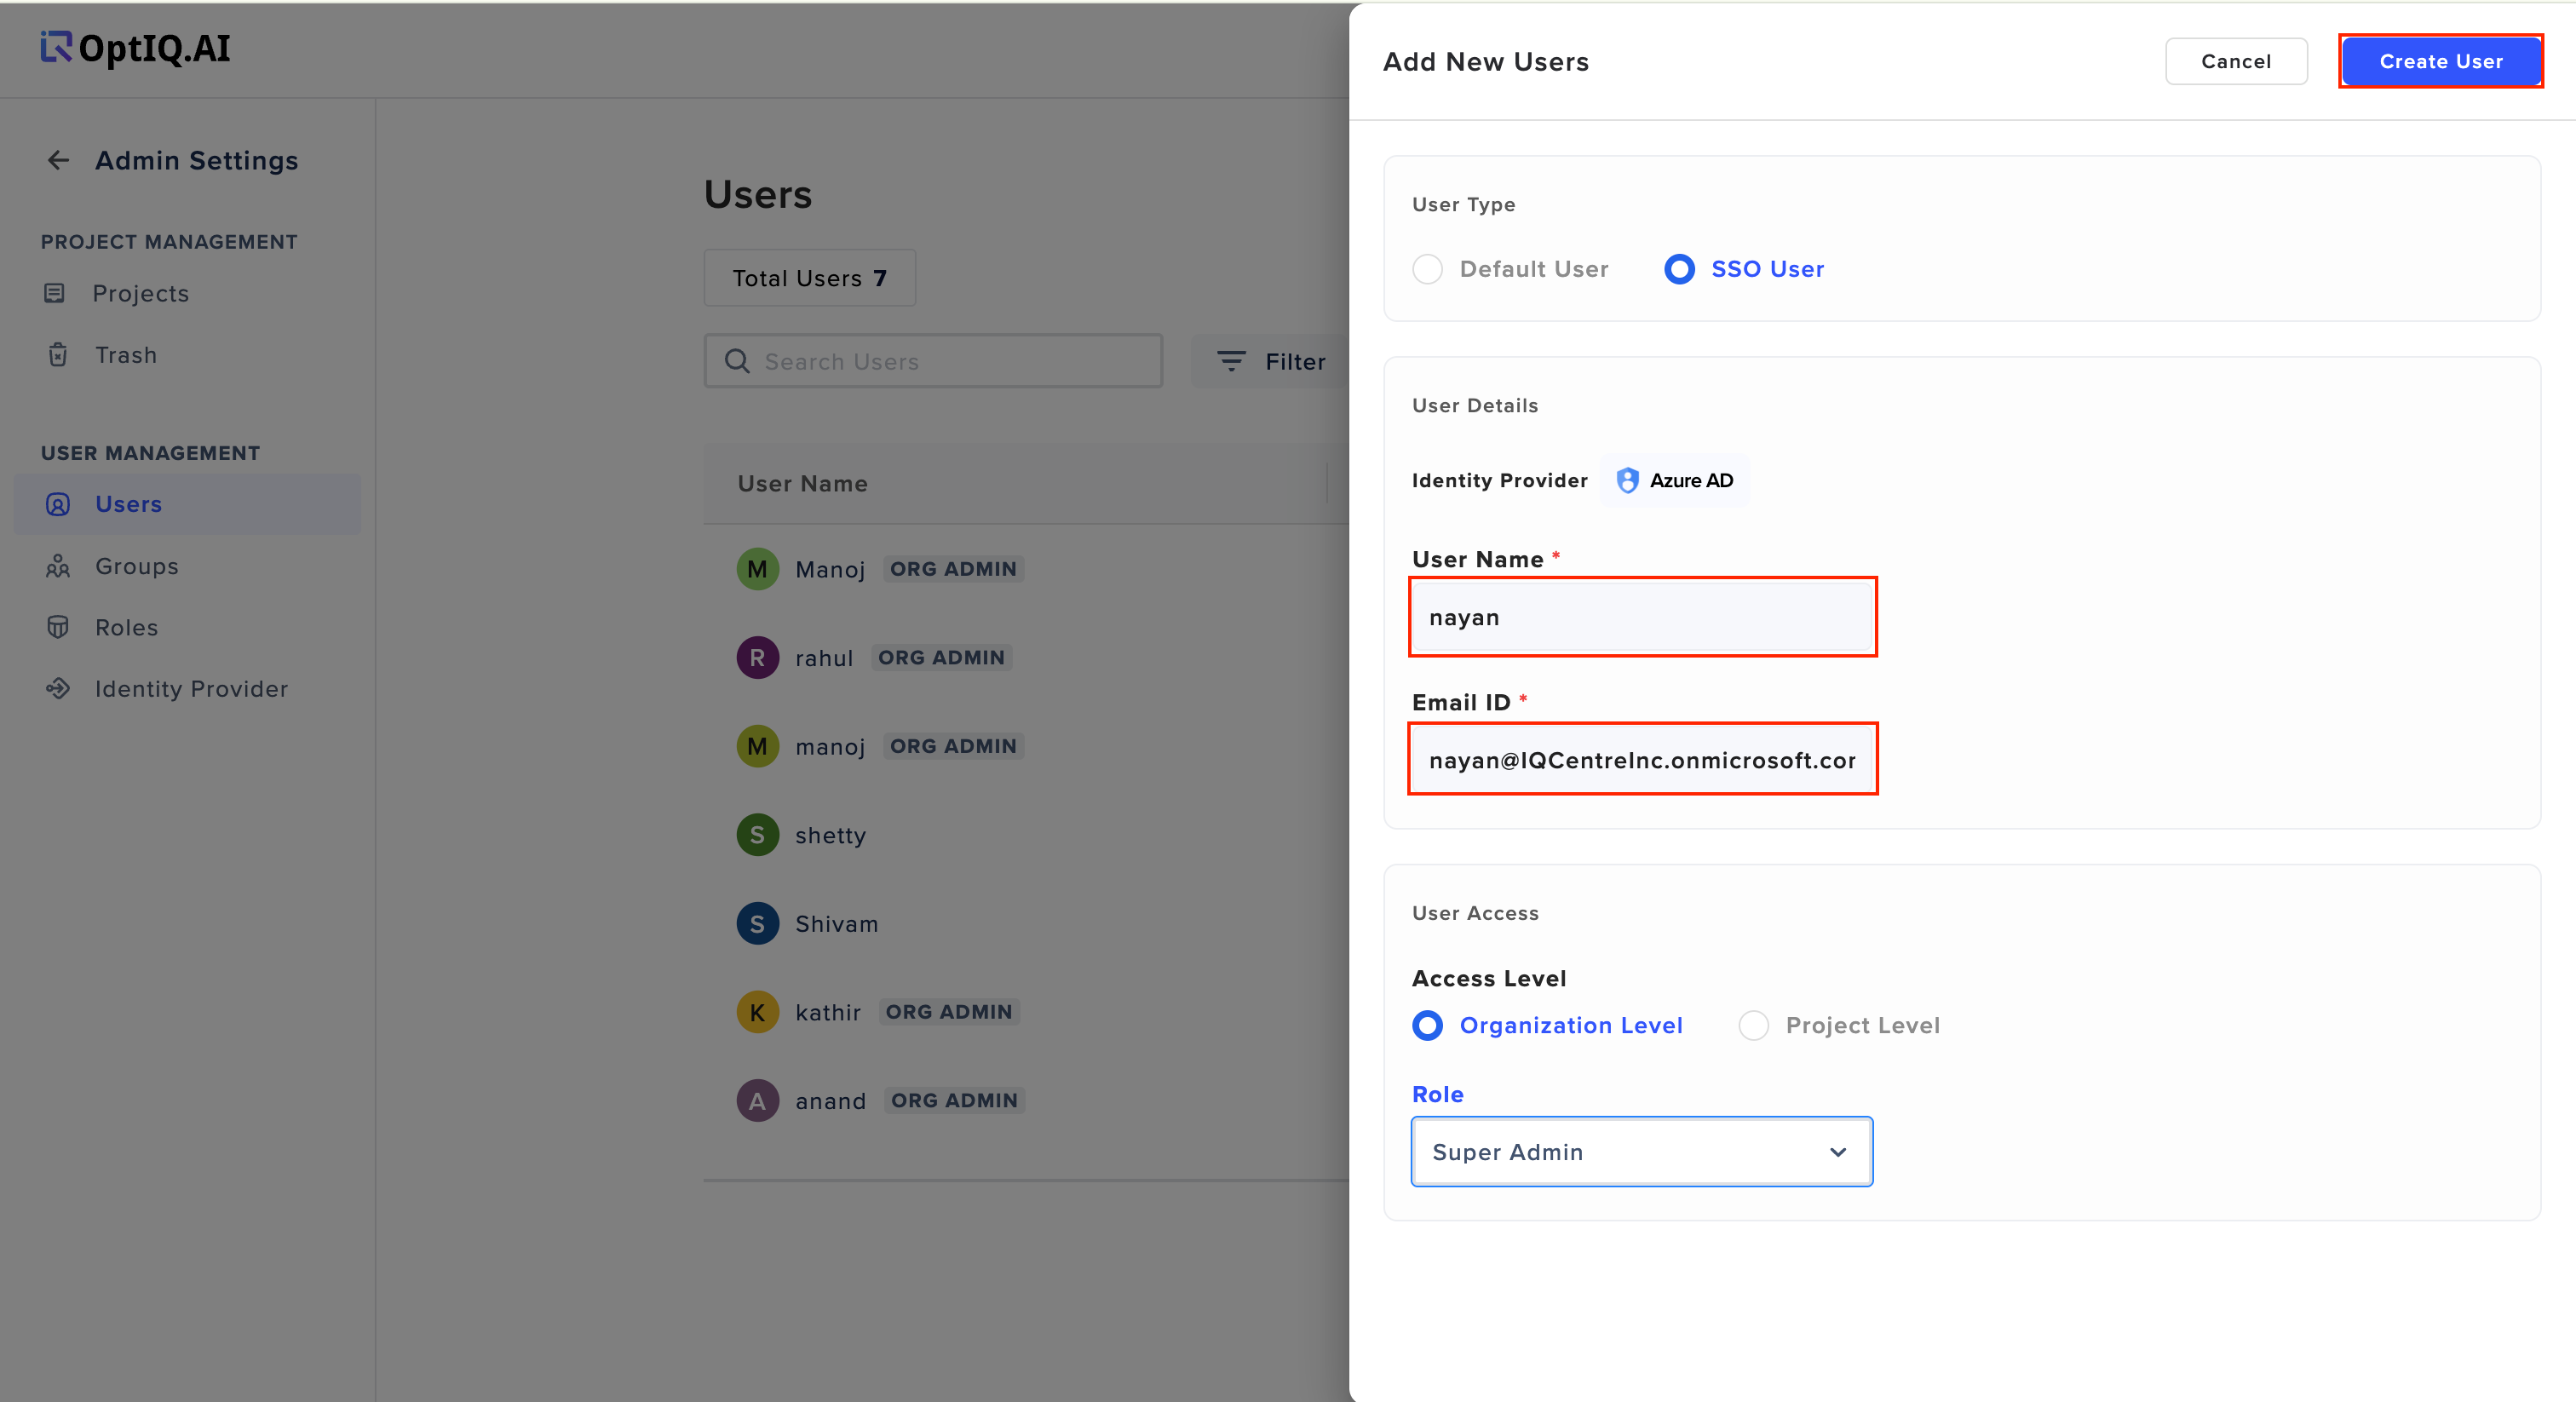
Enter Username, Email Id of Azure AD user and Select the Access Level as Organisational Level or Project Level and corresponding Role from the dropdown and click on Create User
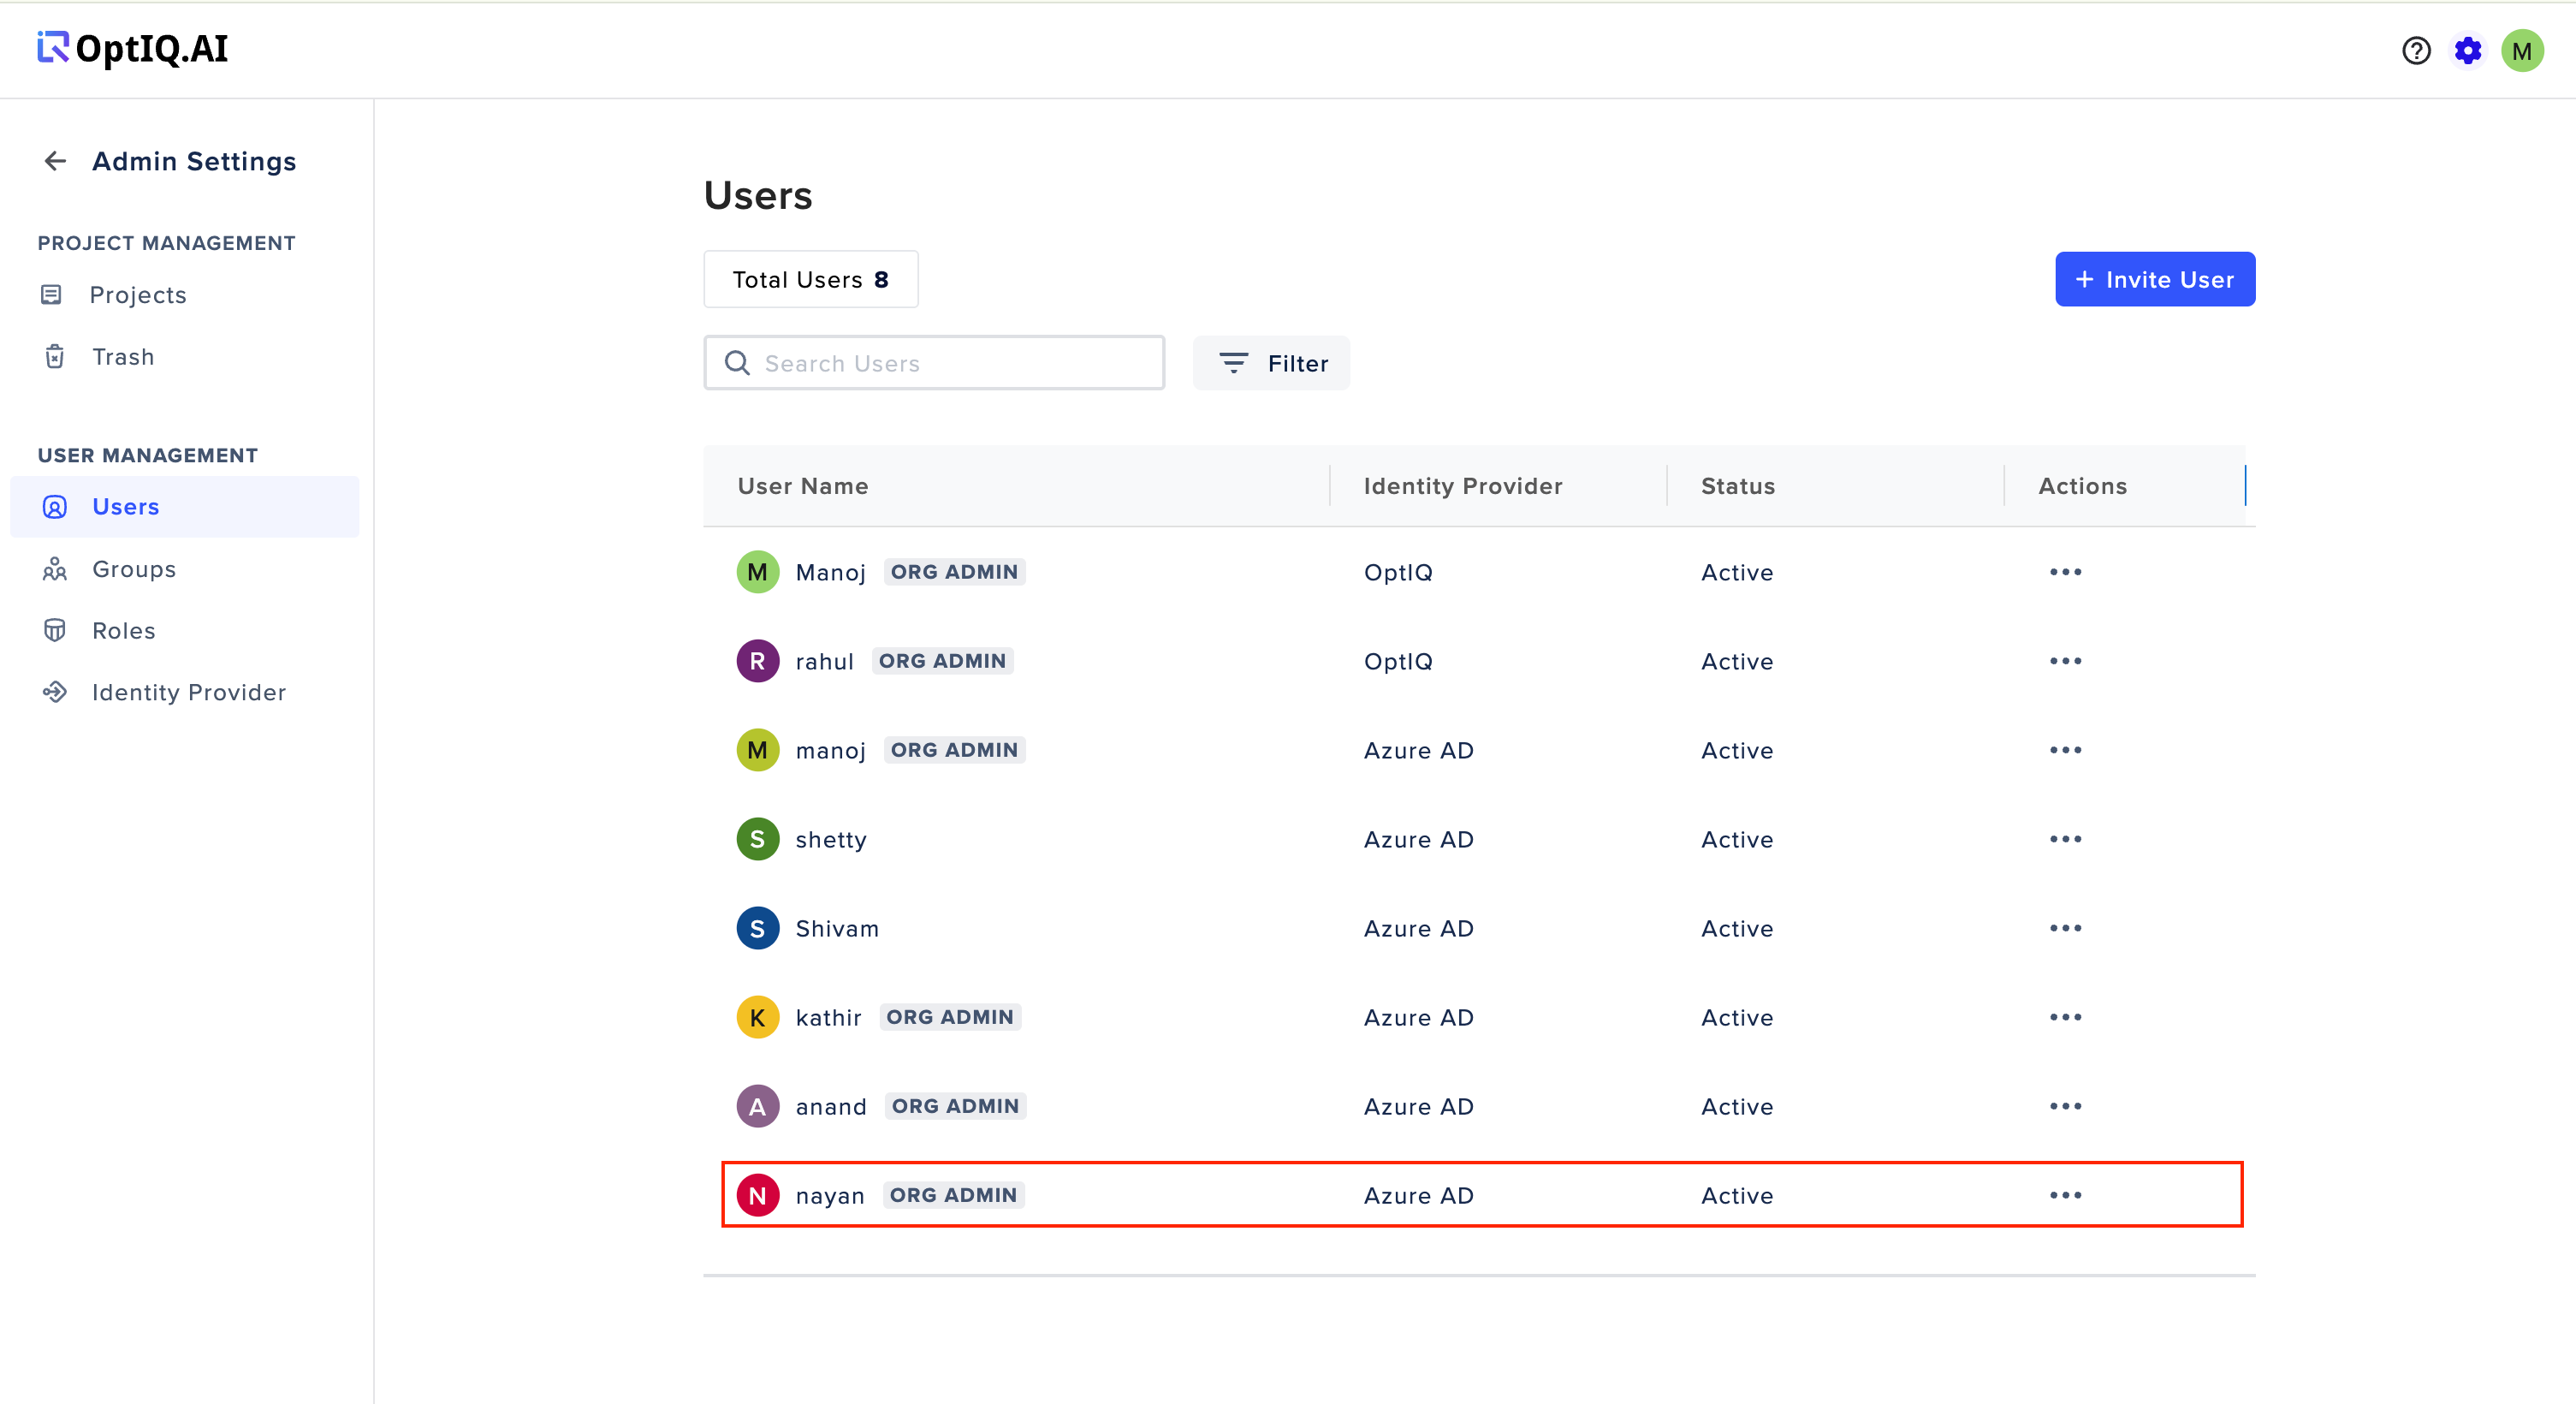
the User will created and will be added in the users list
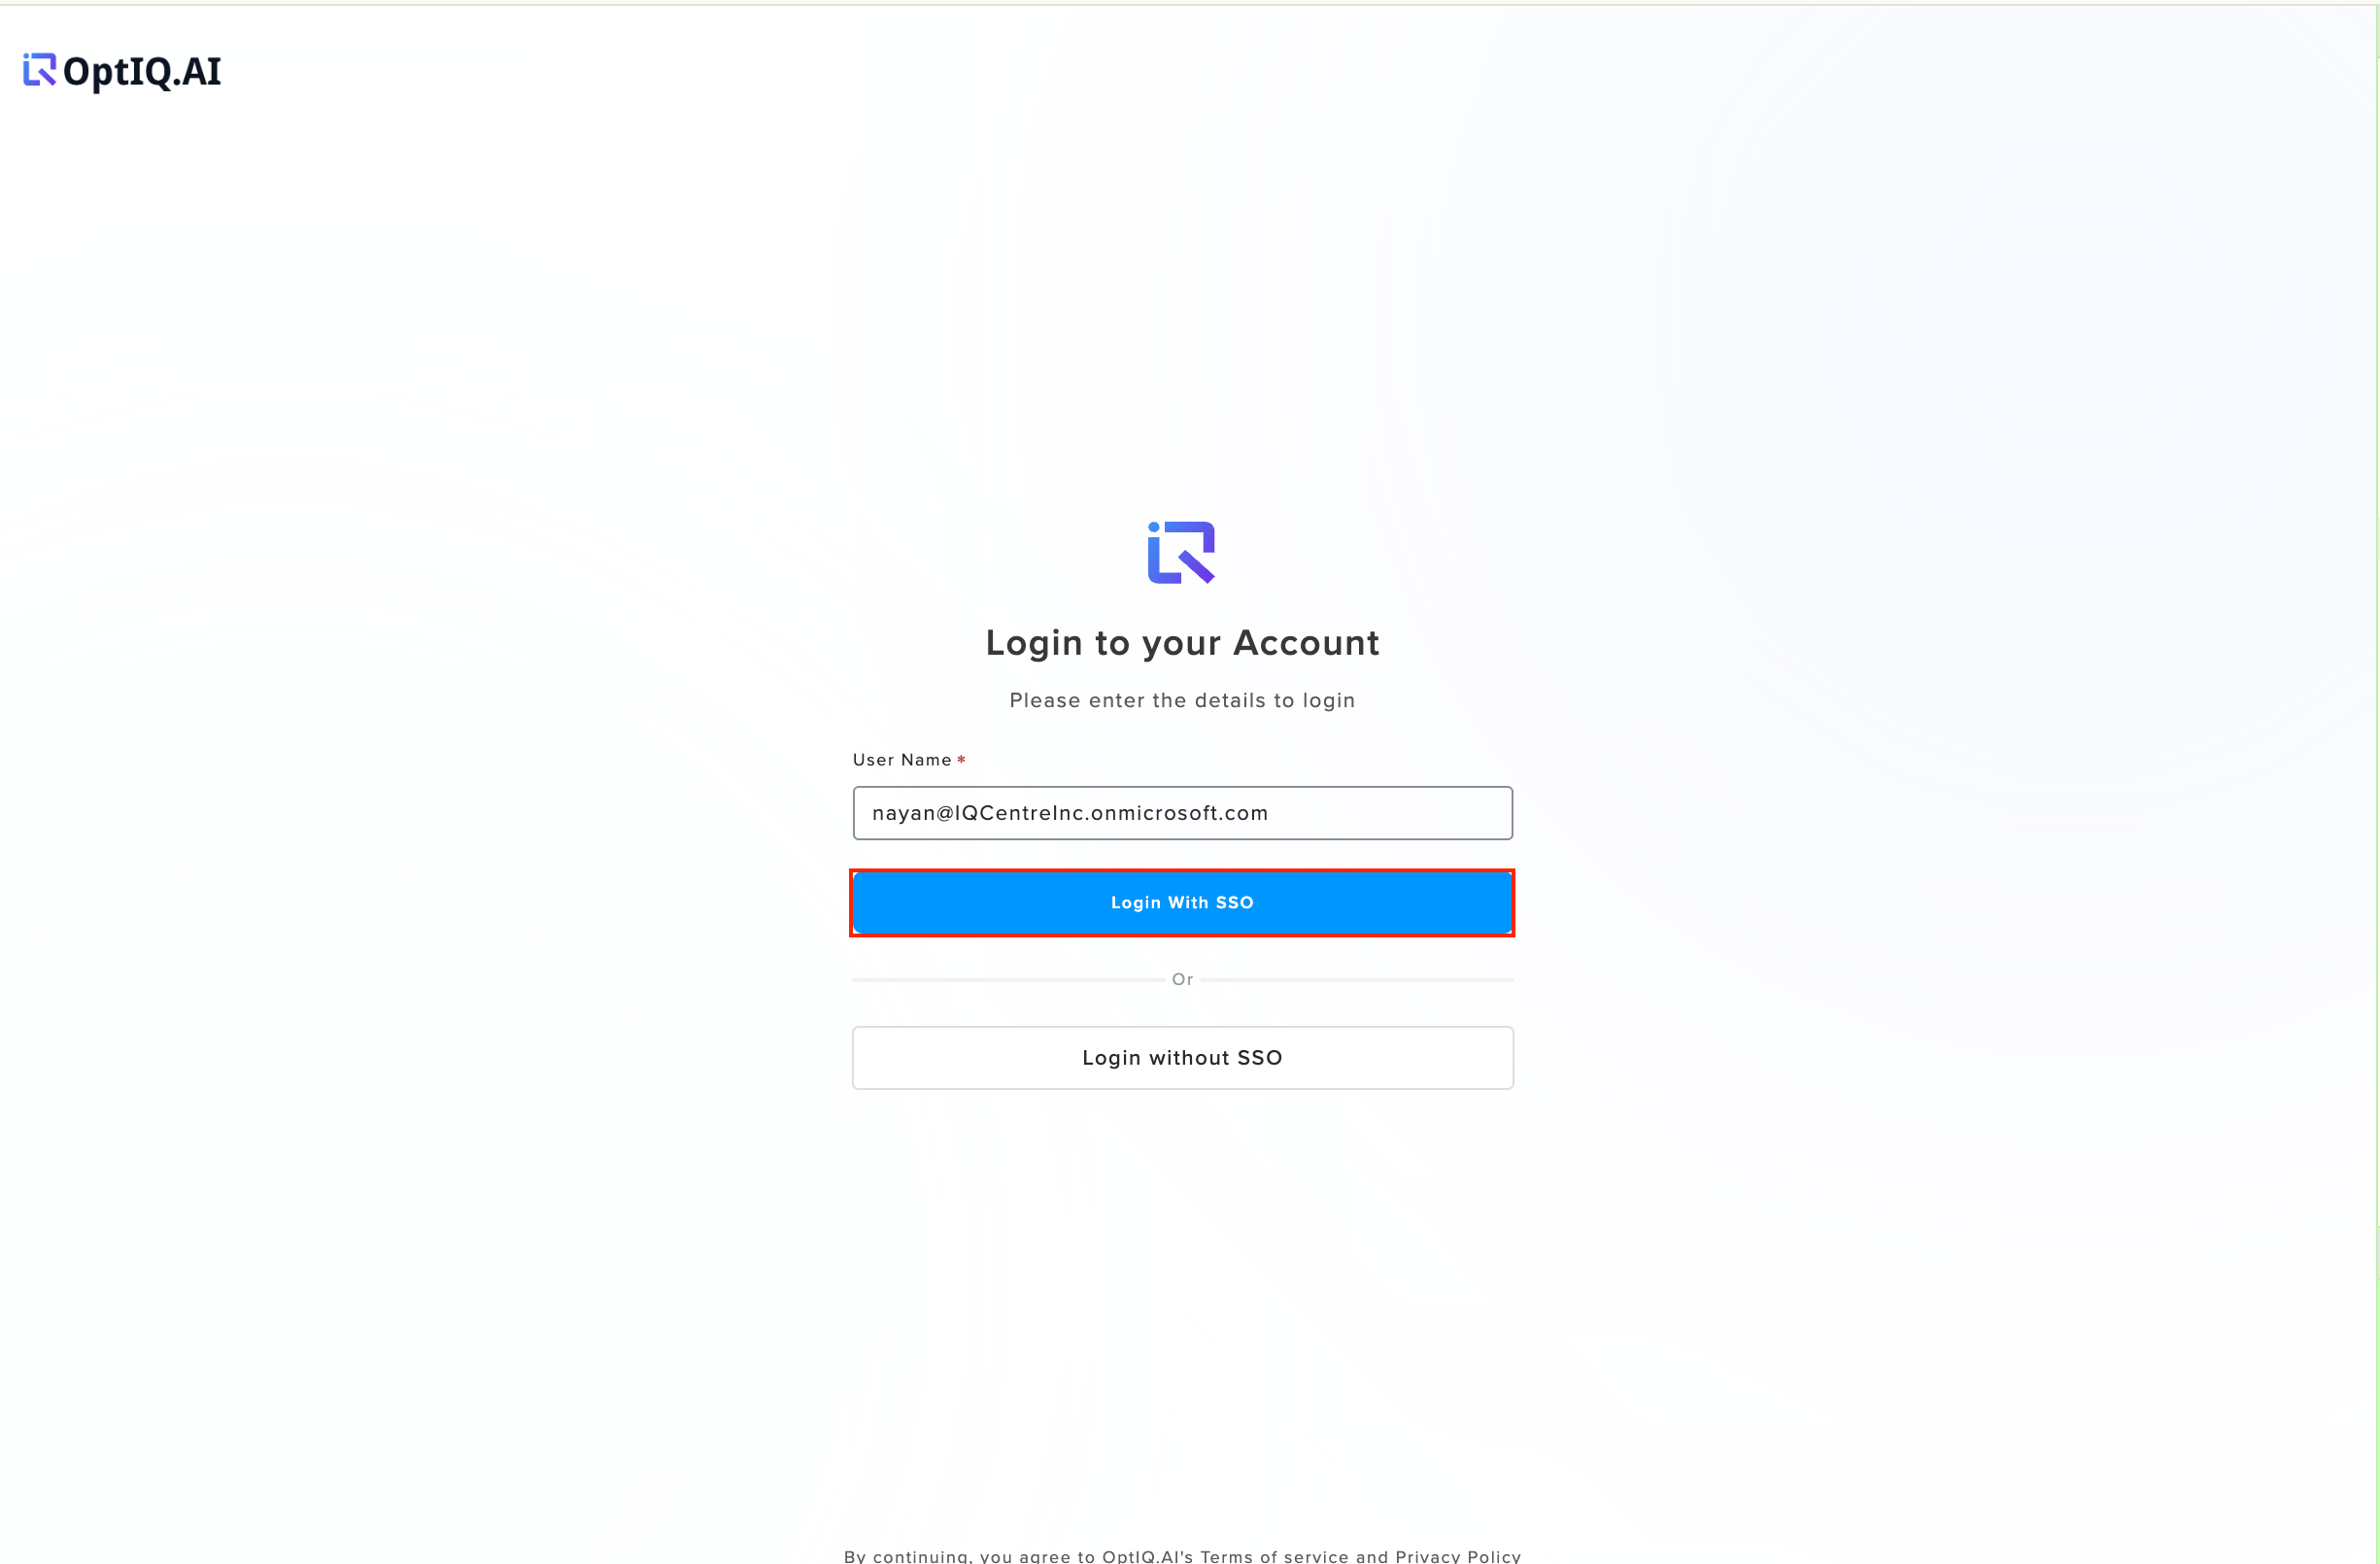
The User can now log in by clicking on “Login with SSO” on Login page of Dashboard
b. Adding Groups
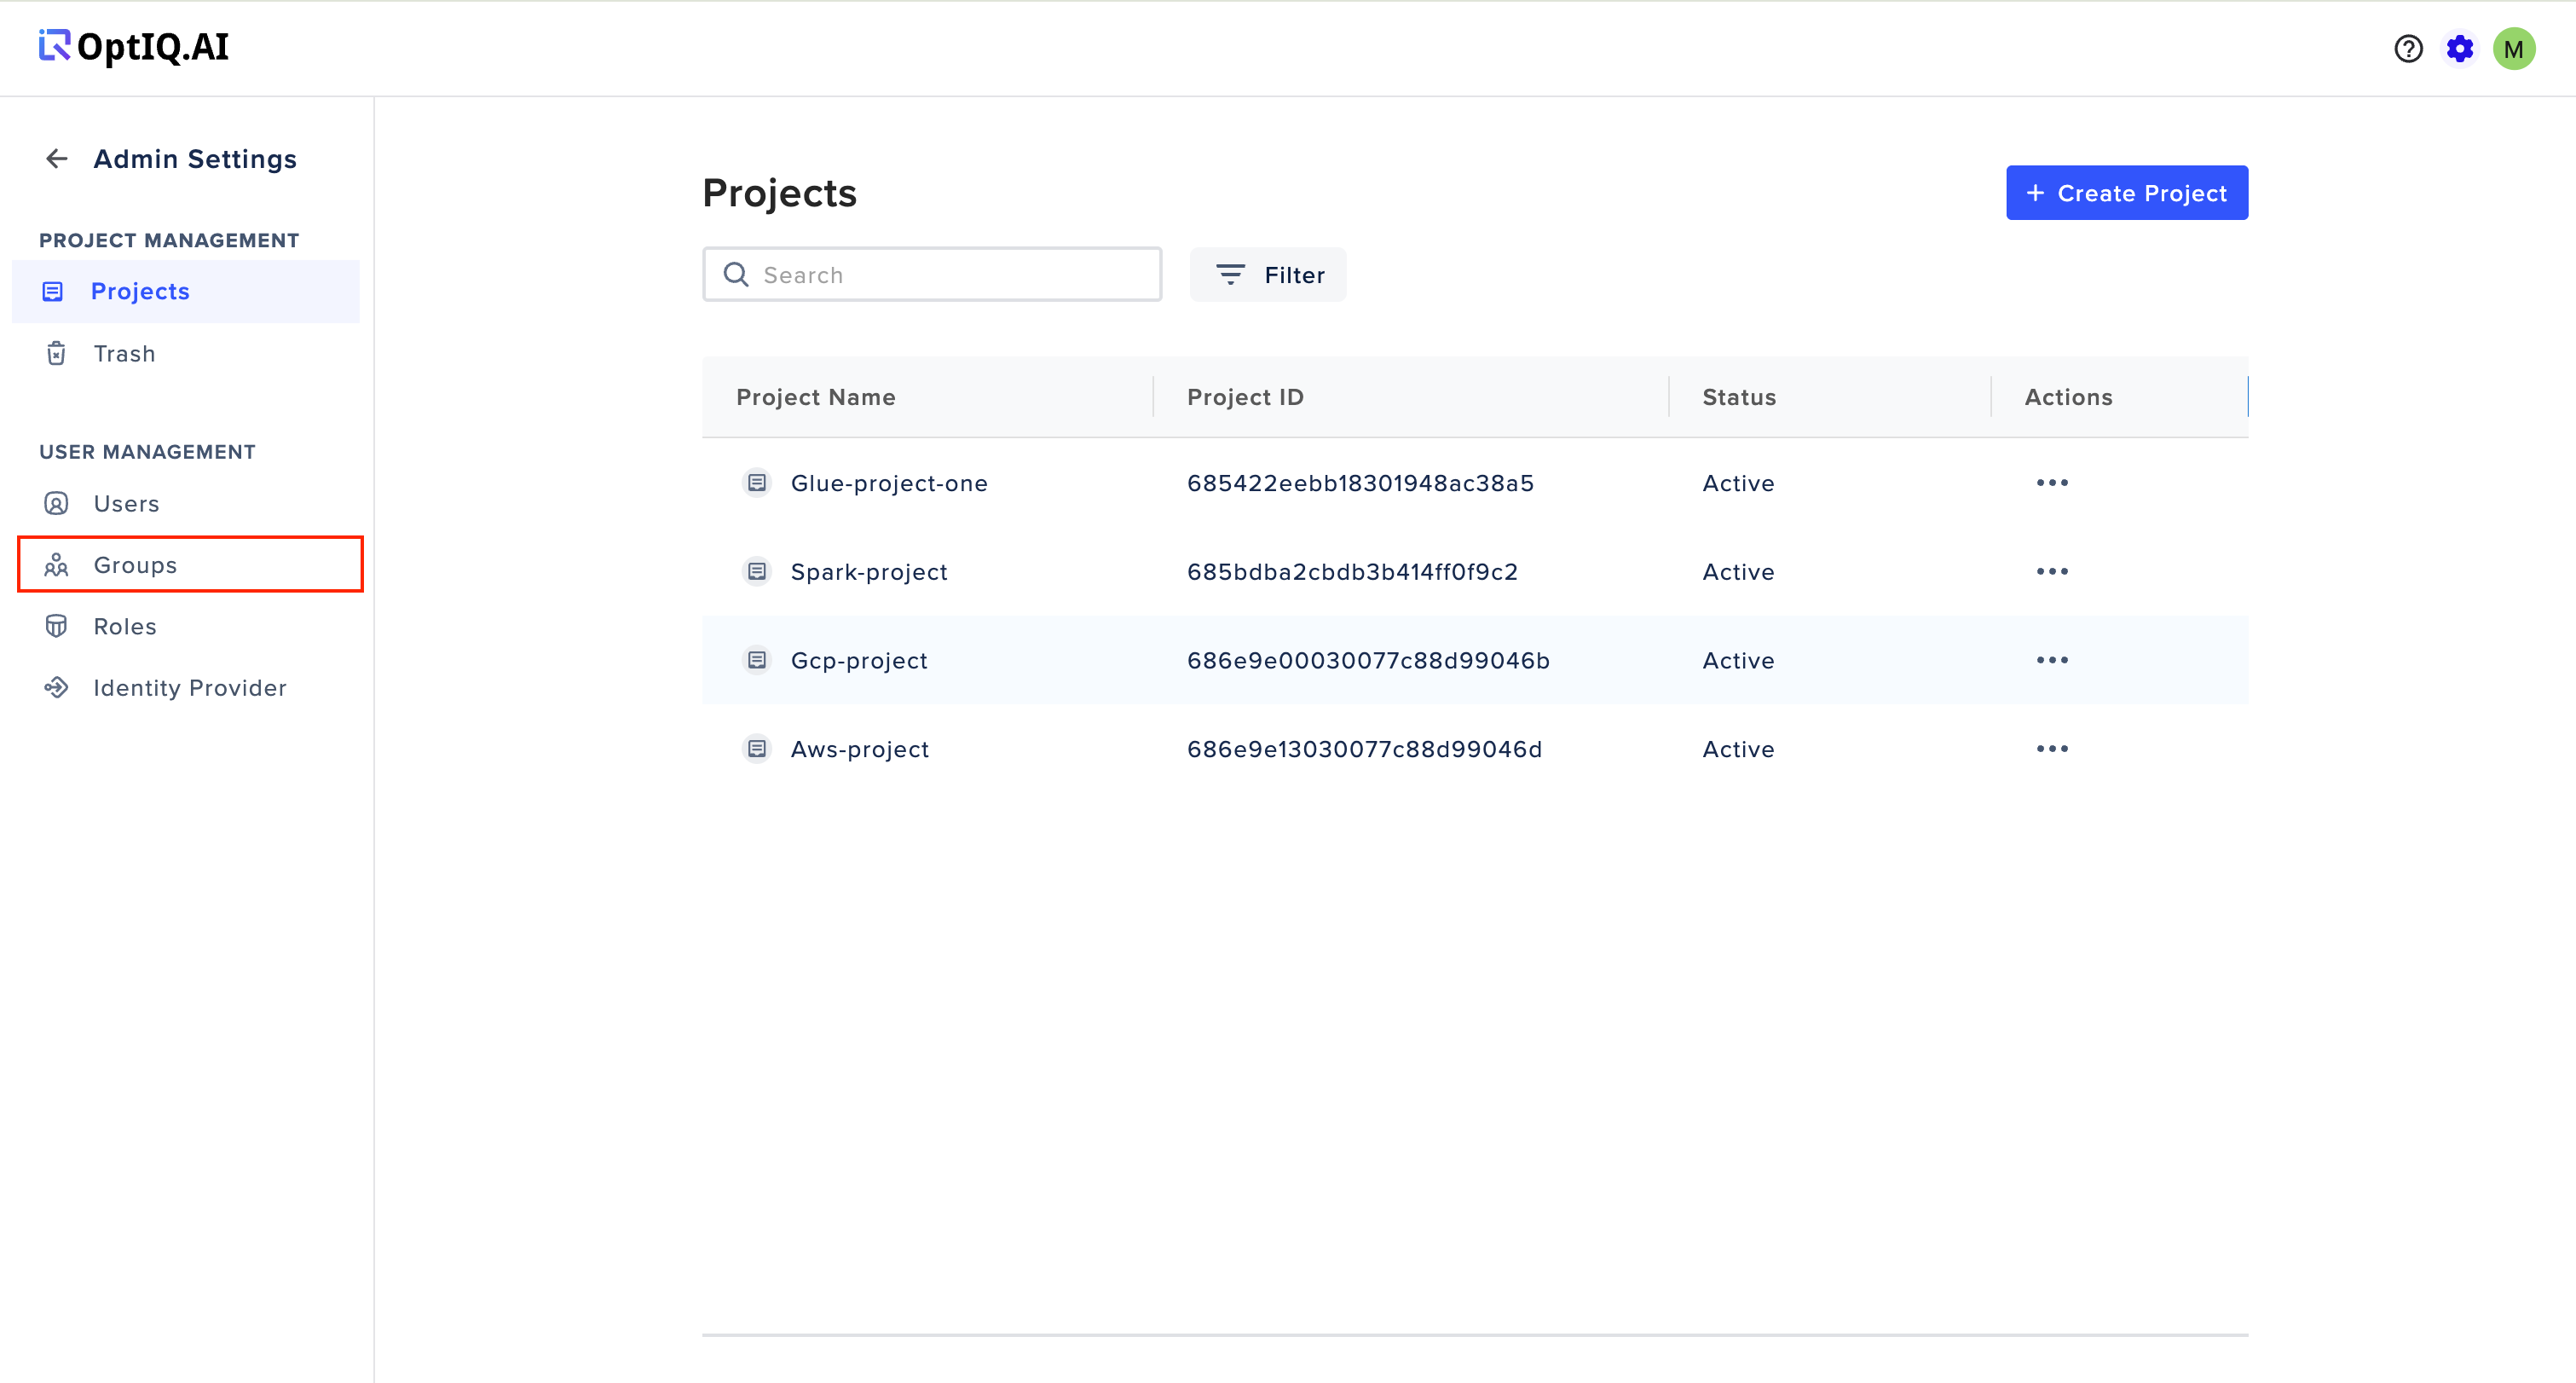
Navigate to Groups under User Management
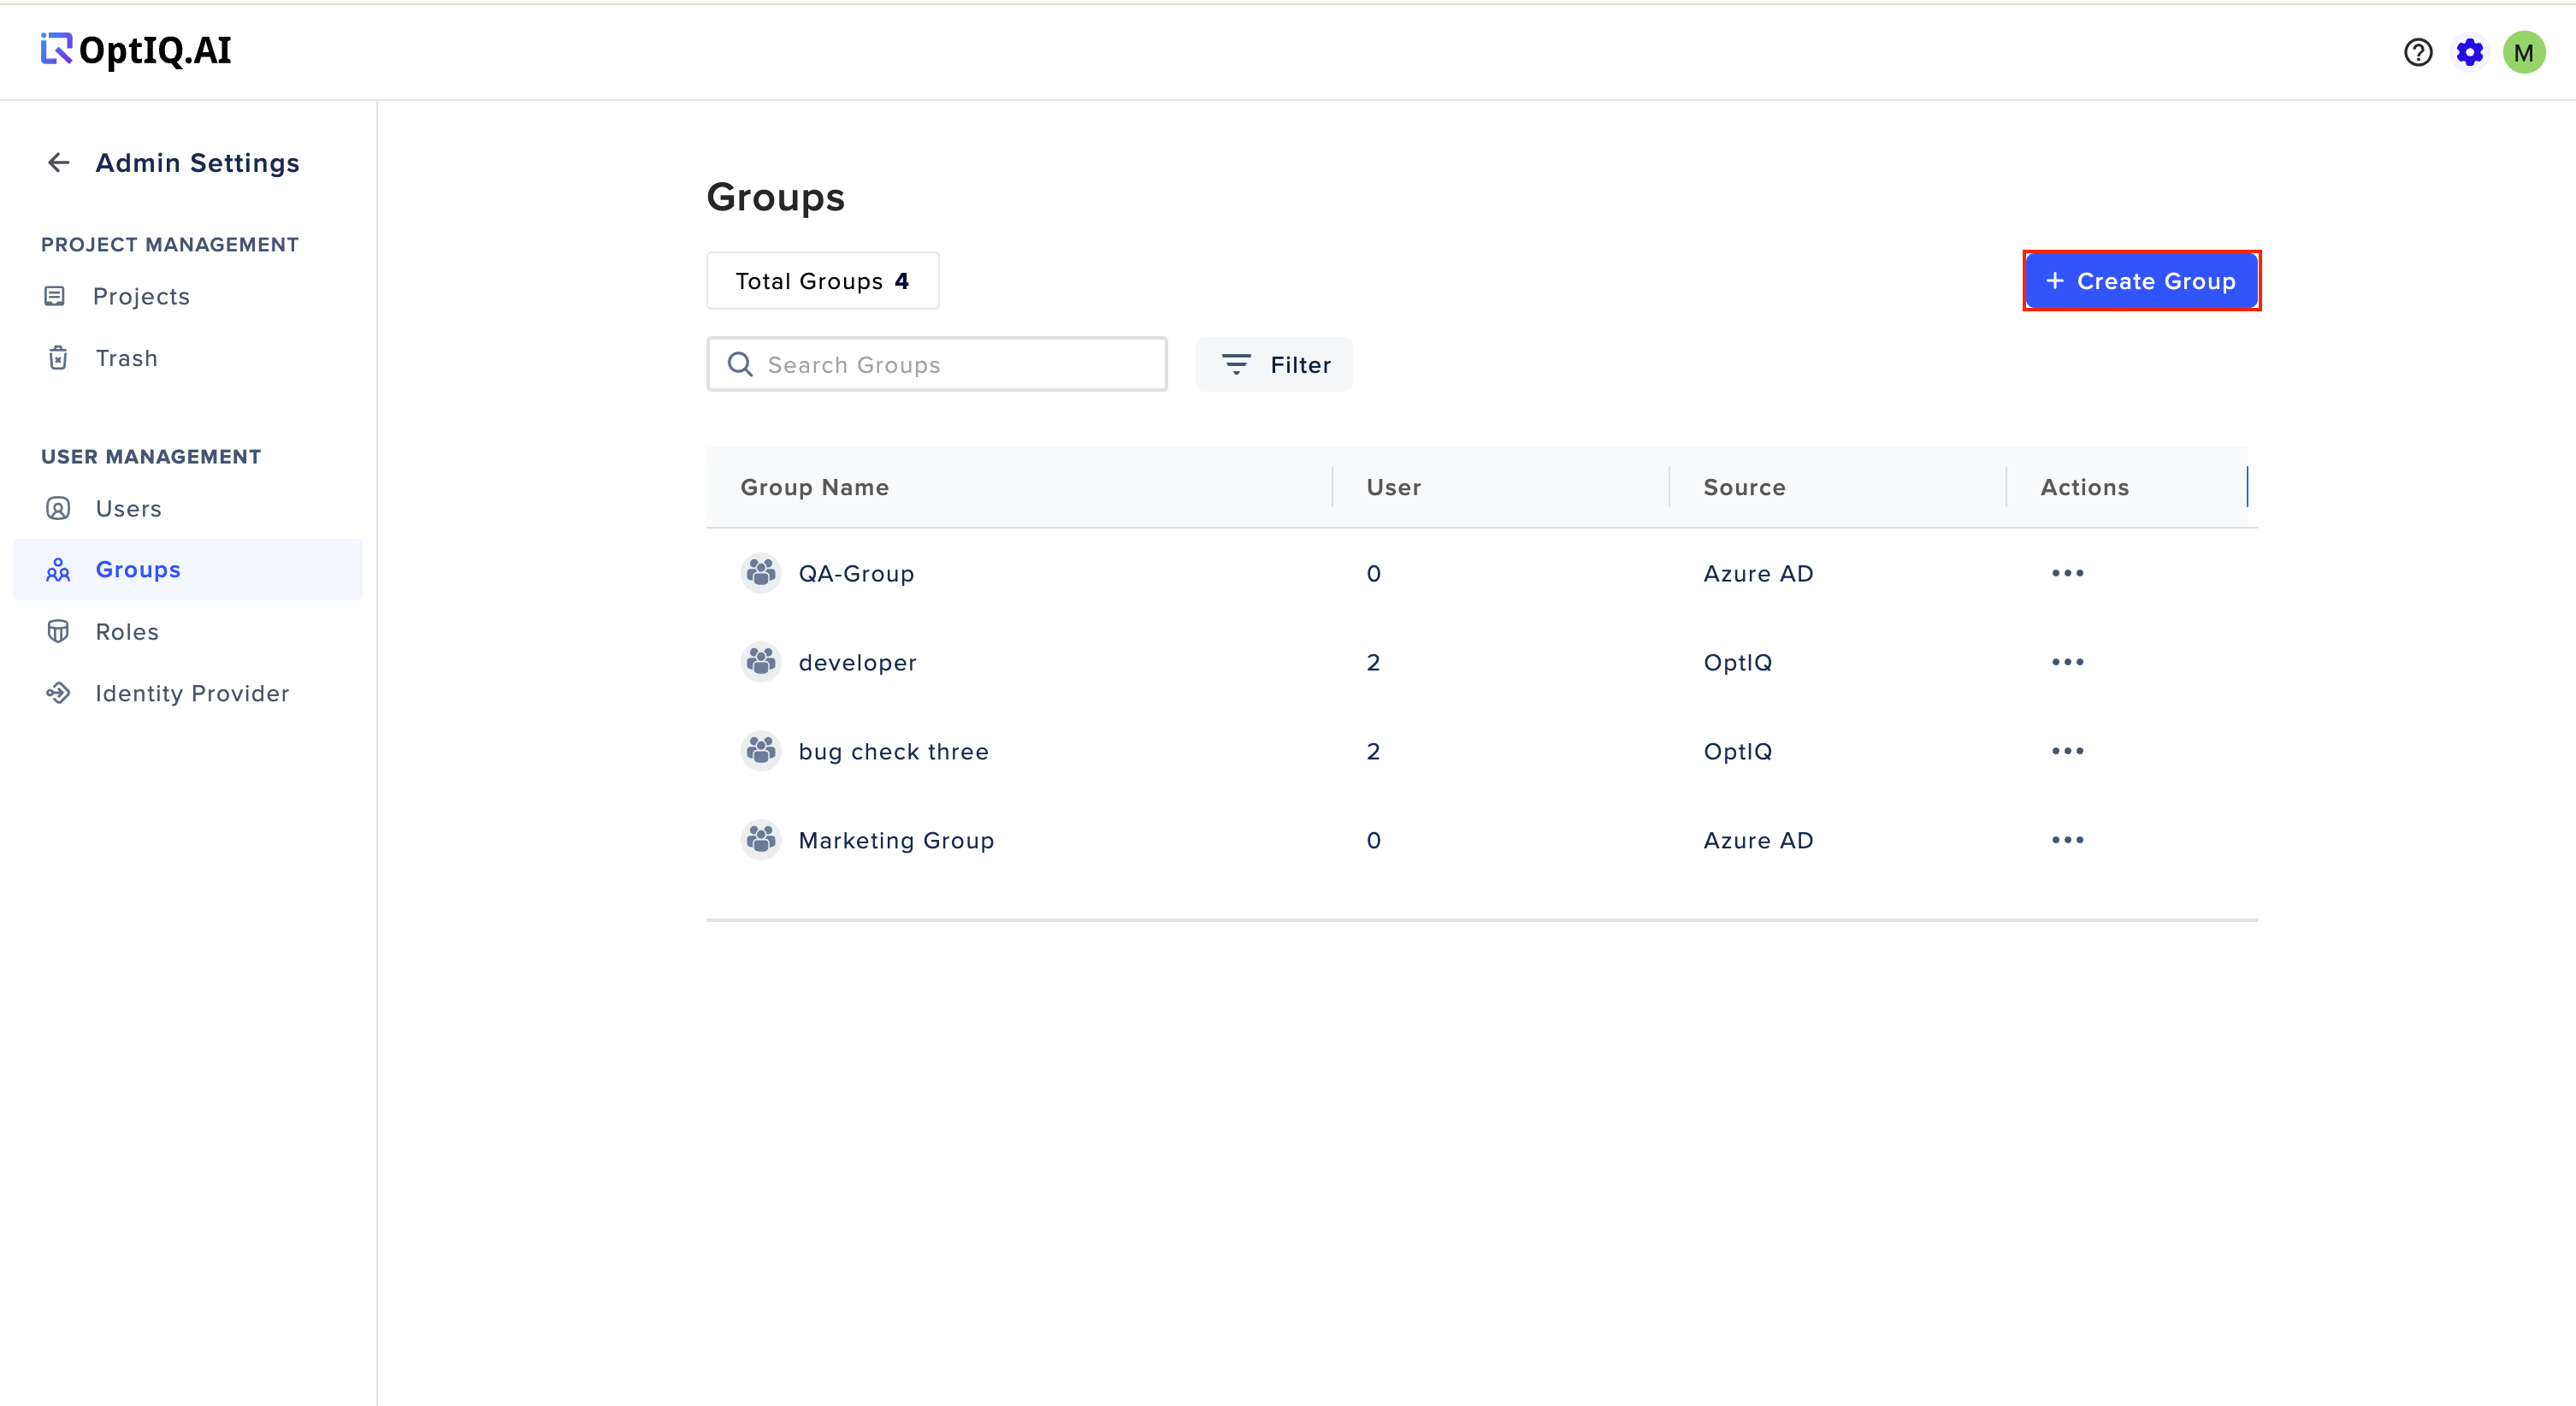
Click on Create Group
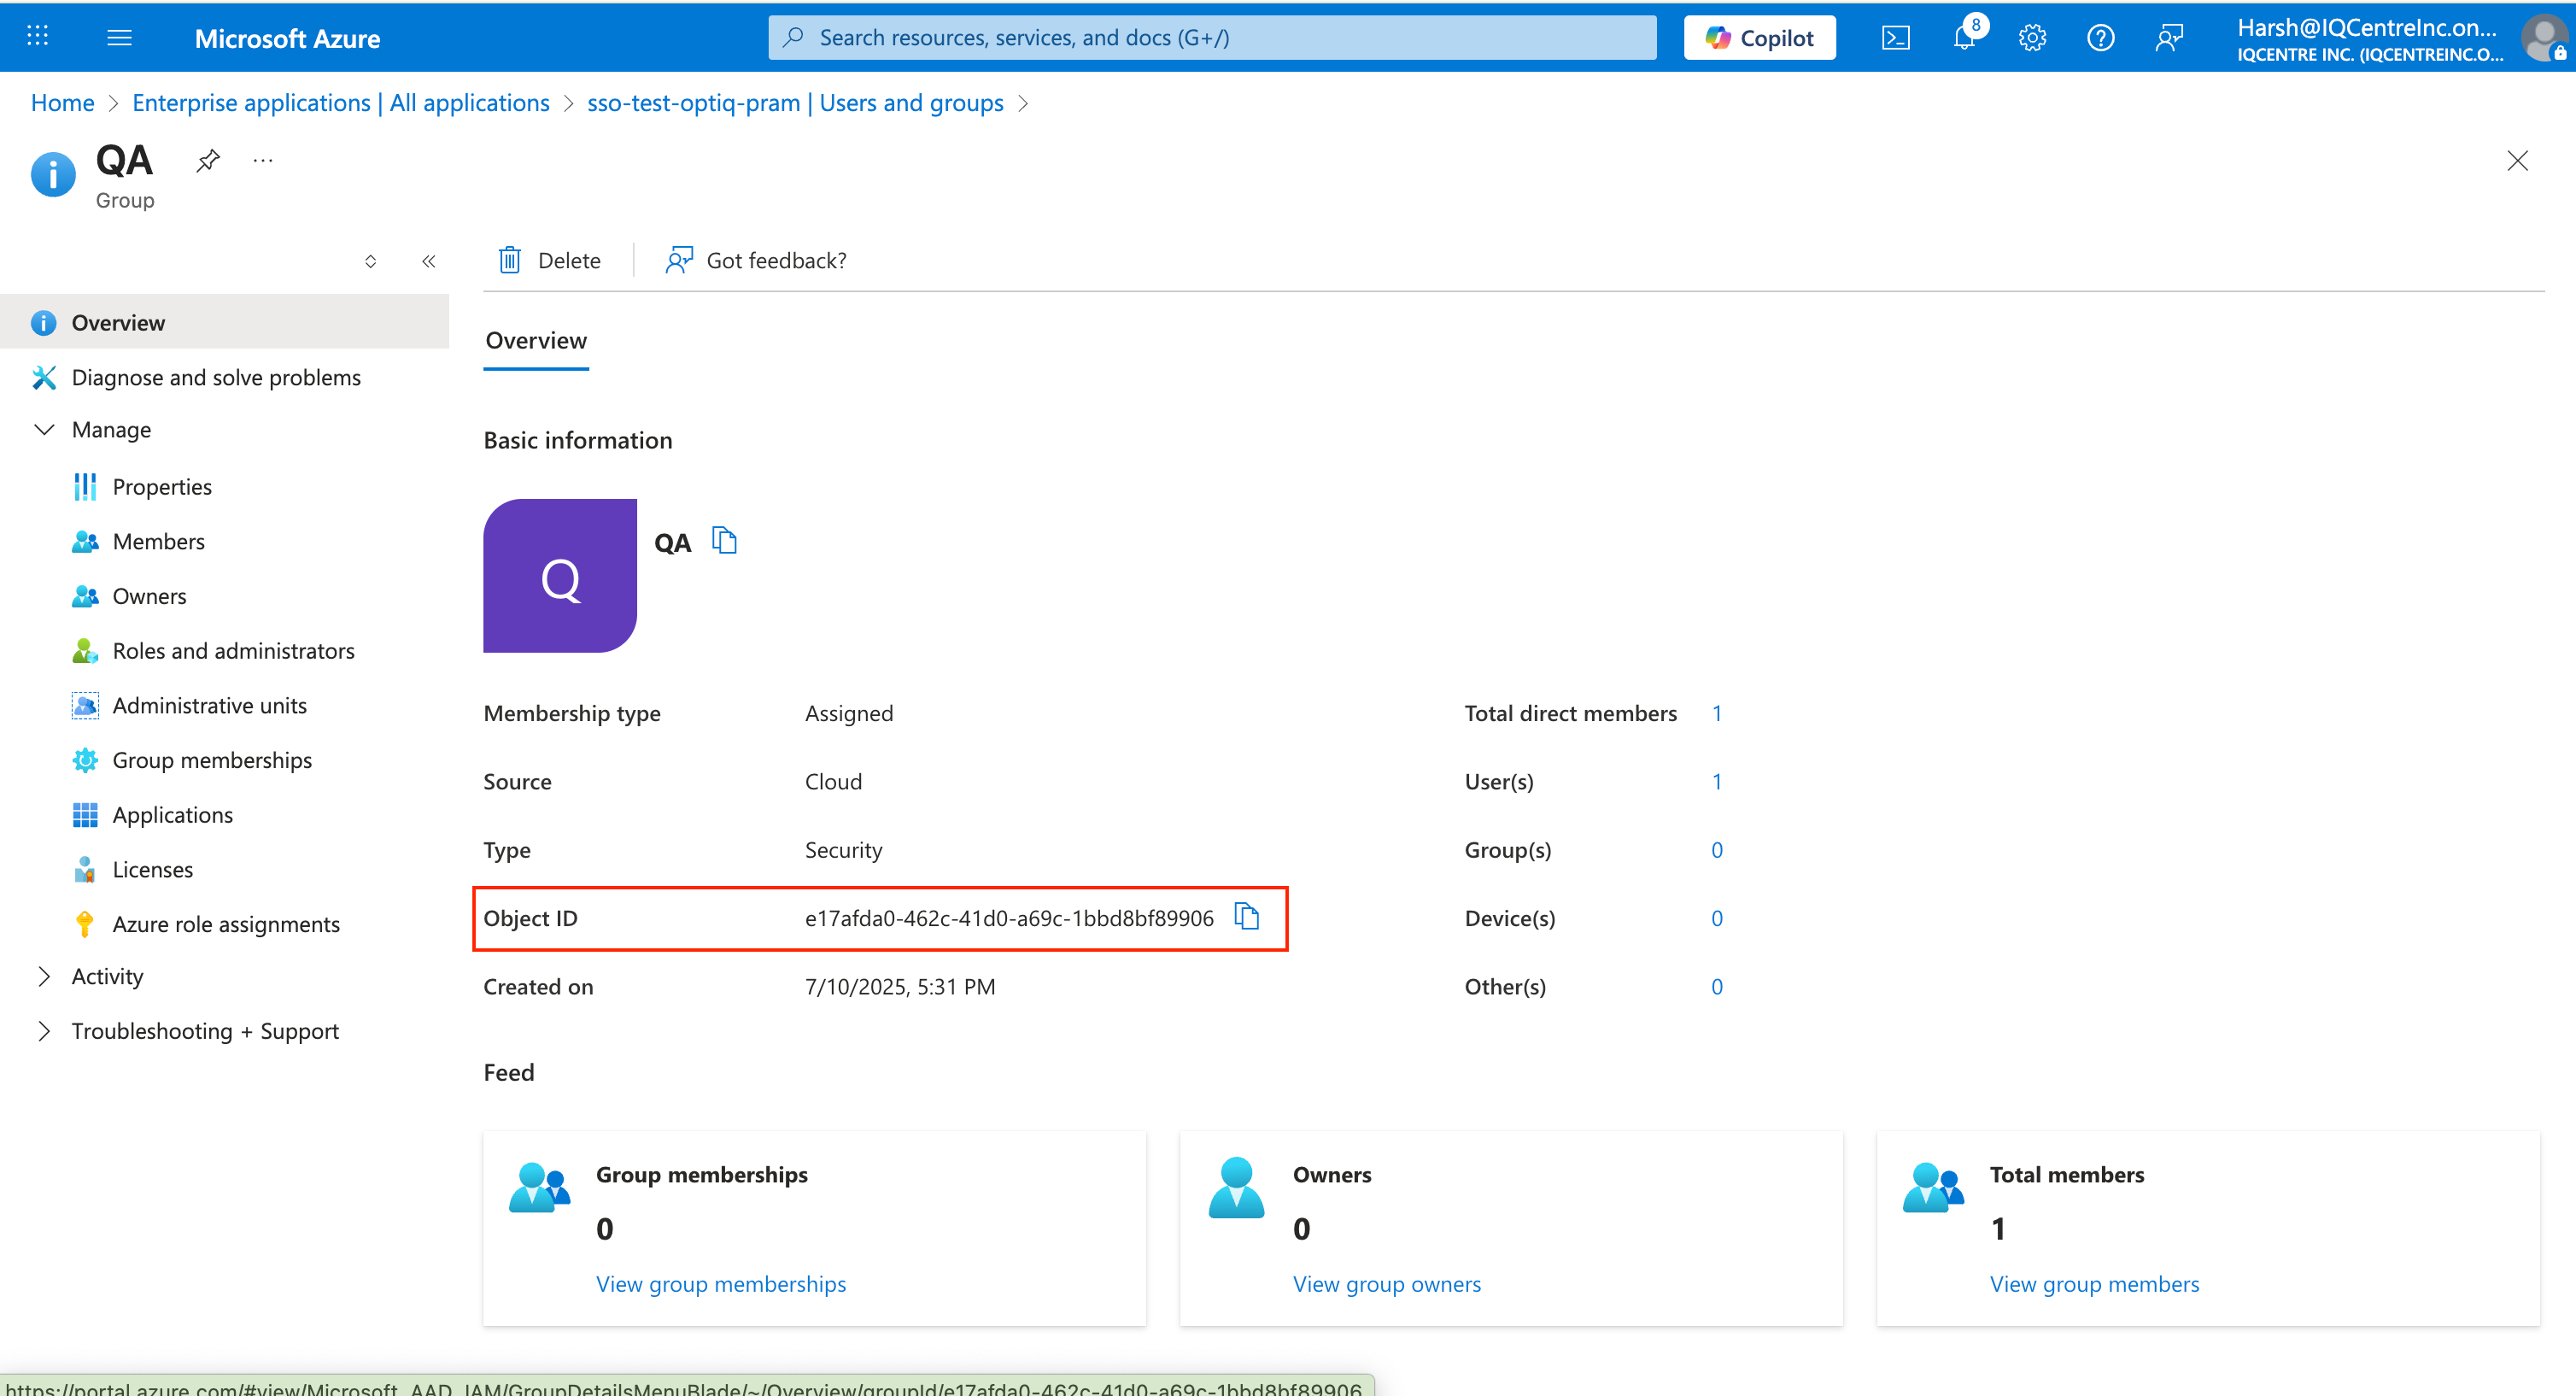
Copy the Object Id from the corresponding Group which you want to add on the Dashboard
Enter Group Name, Group Id which you copied earlier and select the Access level which you want to give to the members of the group and click on Create Group
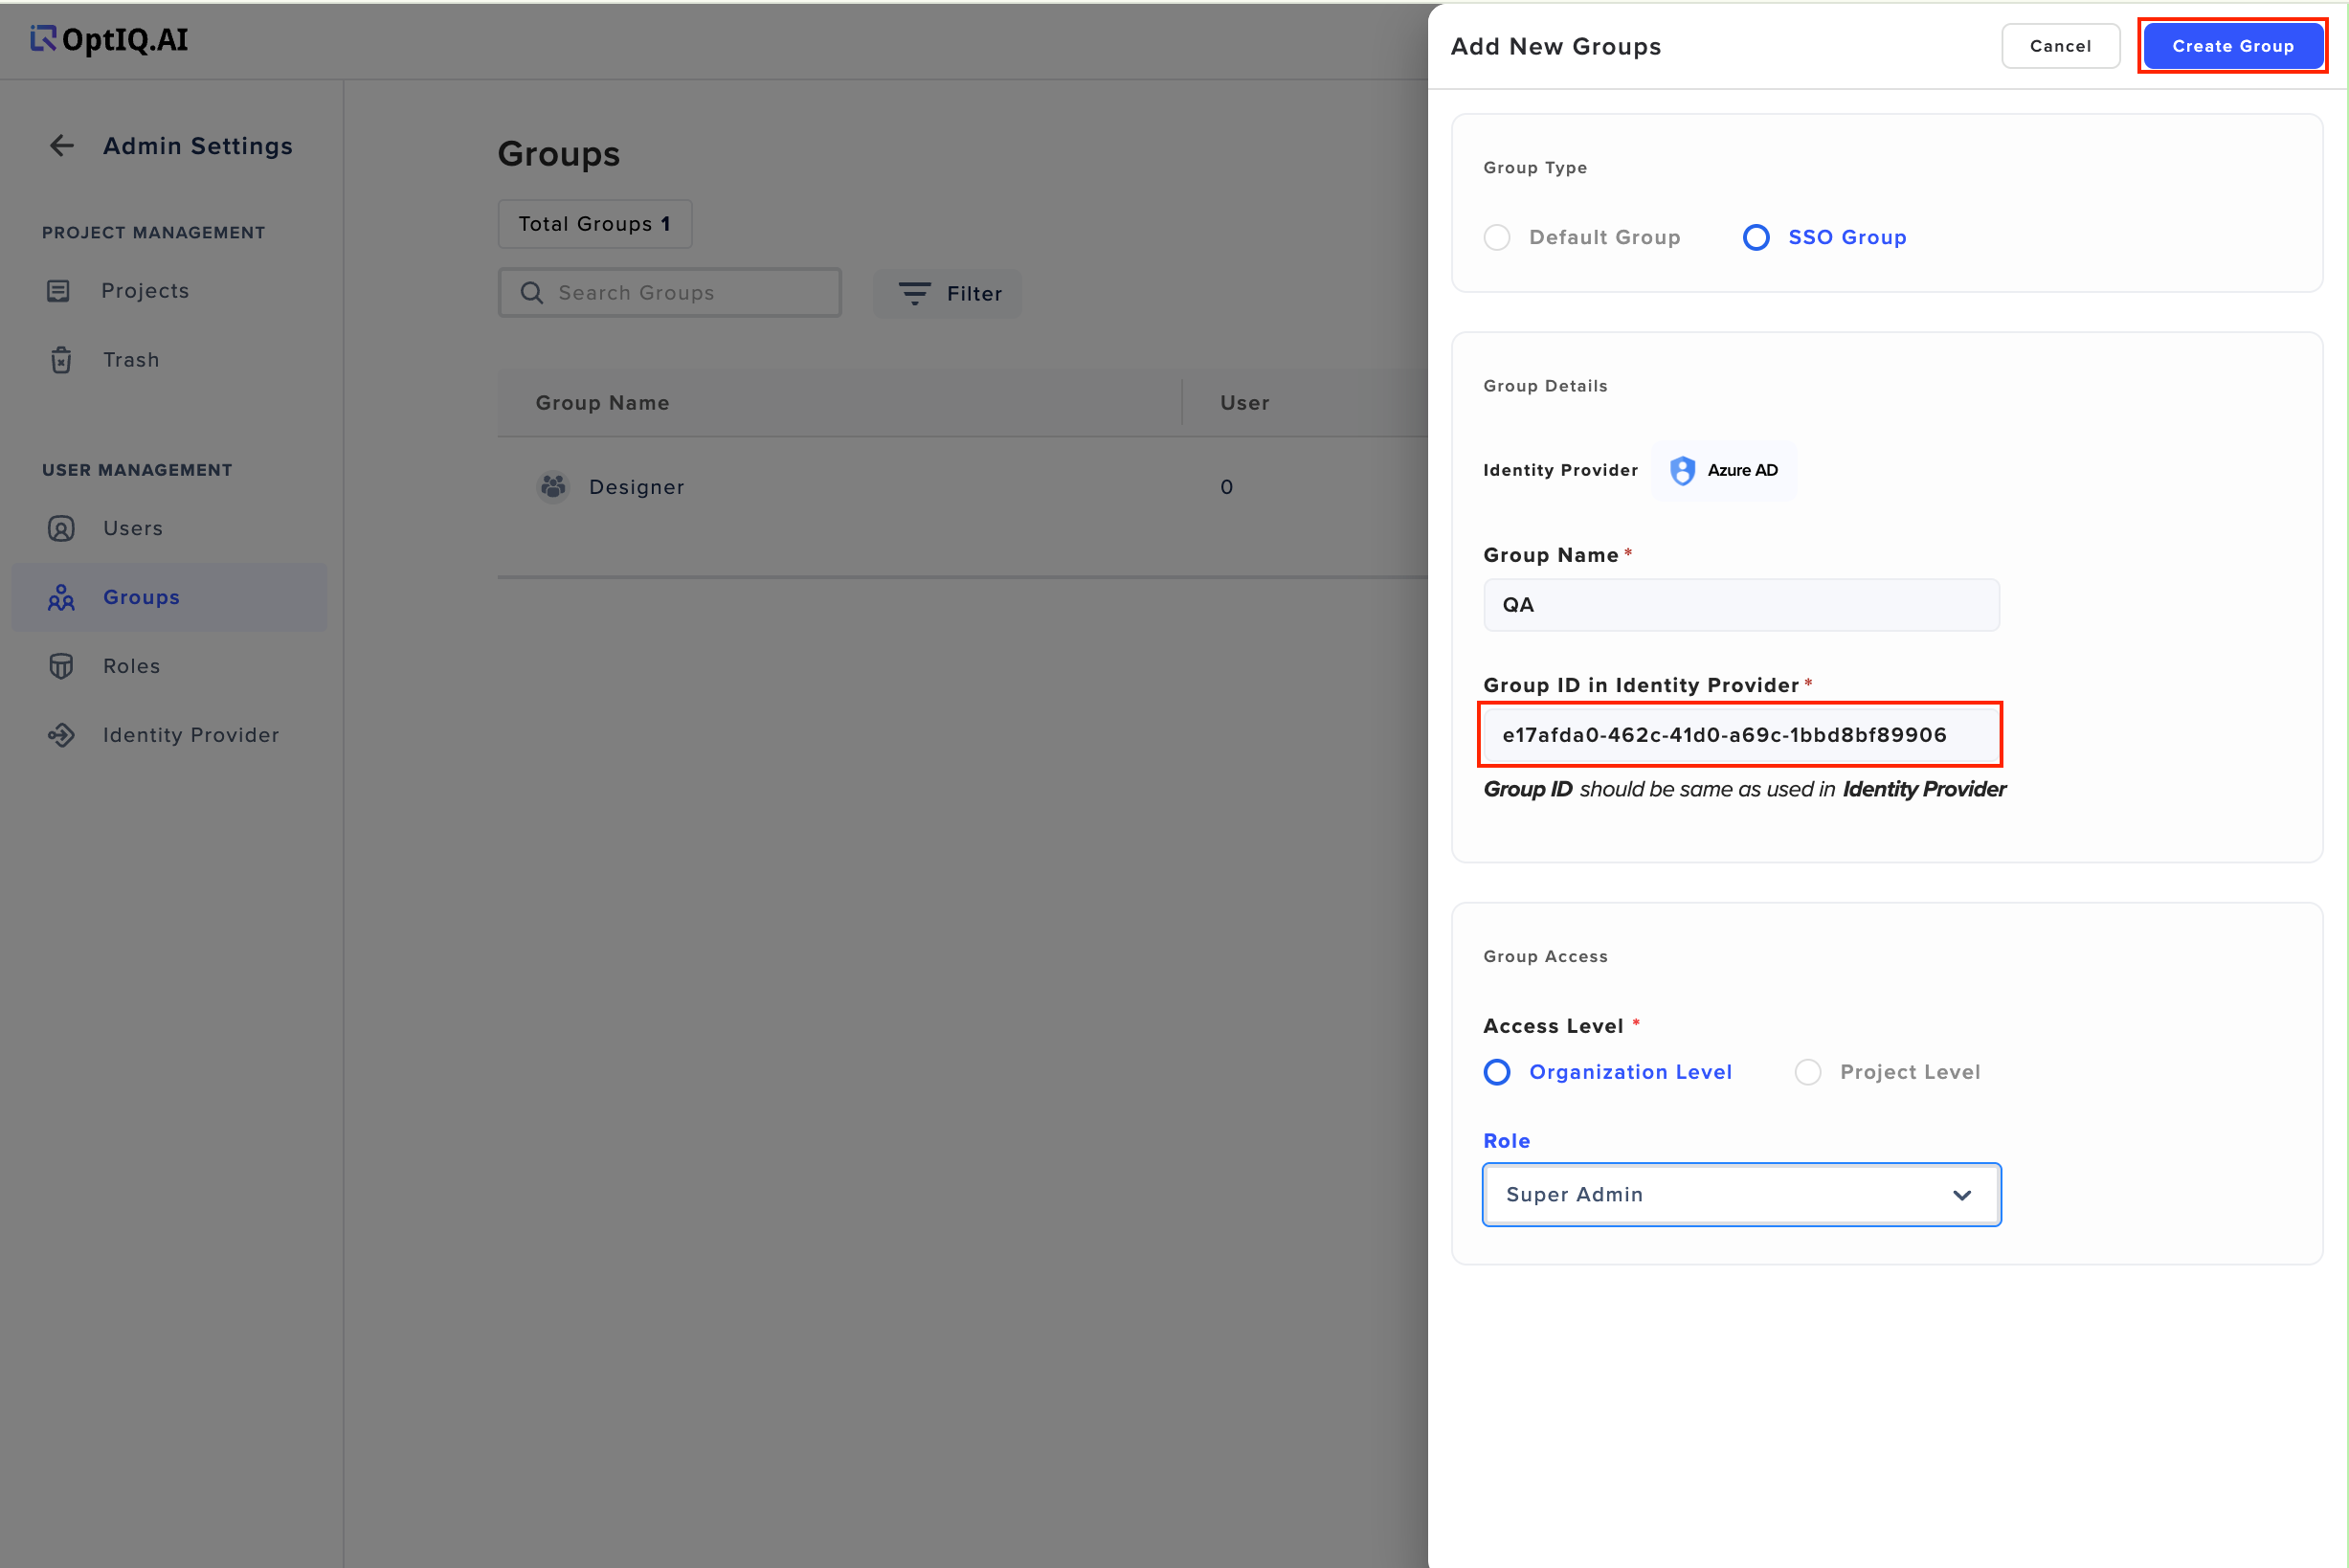
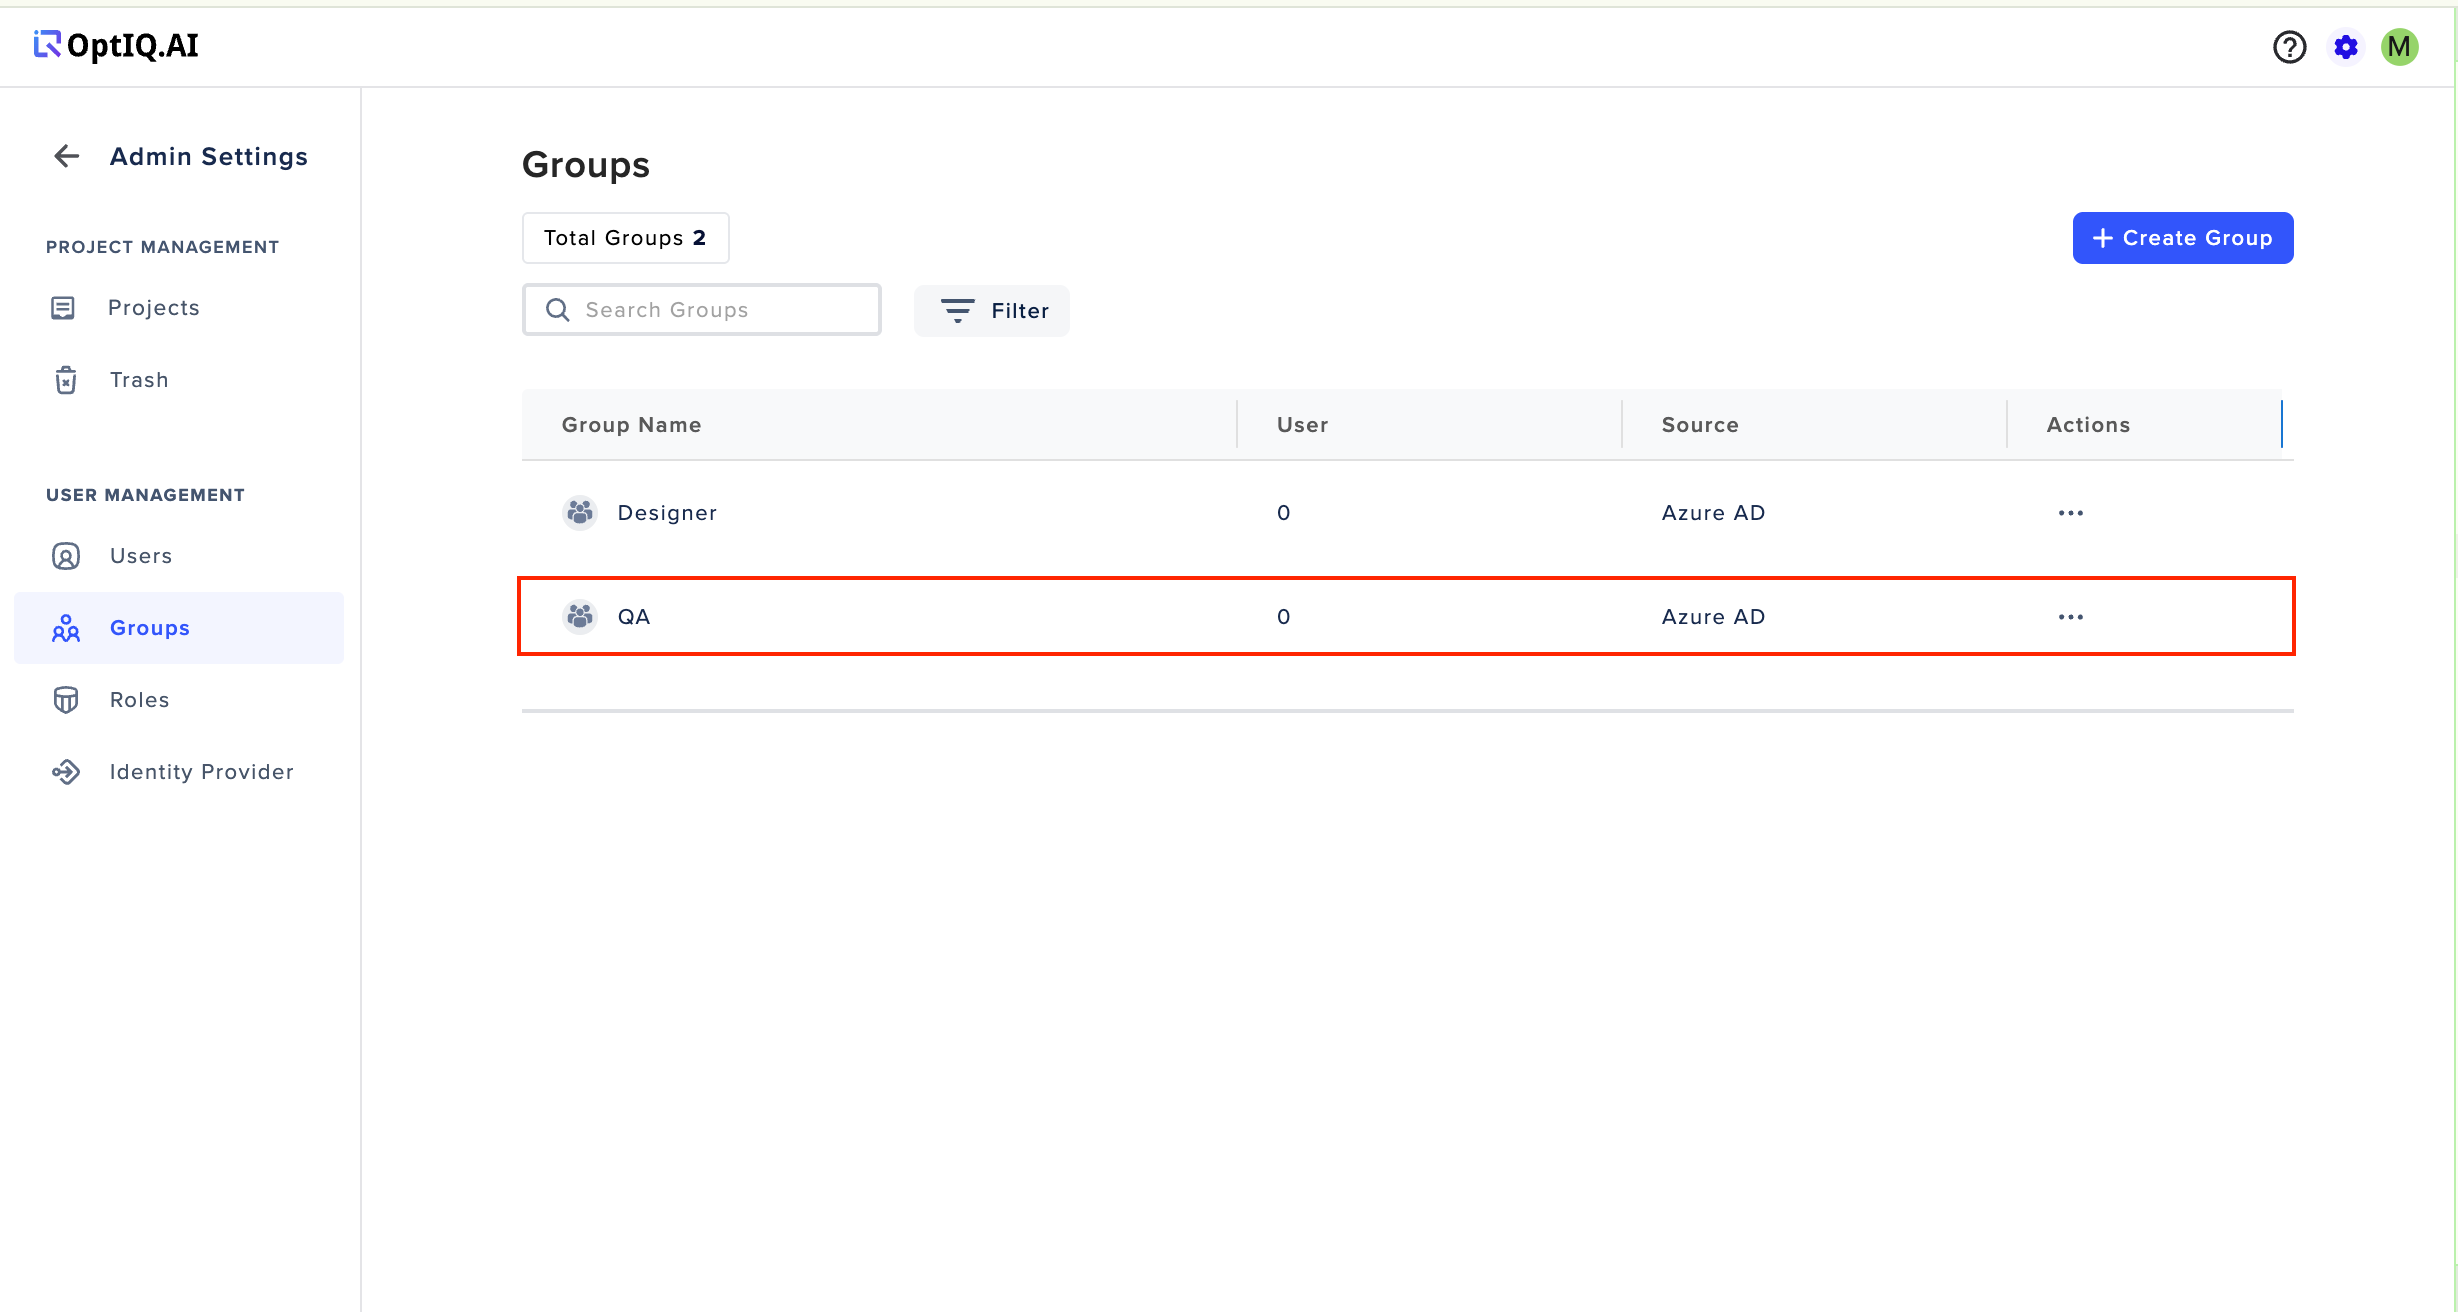
The Group will be created and will be added on the list of Groups as displayed in the Image, the Members of the group can now directly login to Dashboard by Clicking on “Login with SSO” on the Login Page