AWS Account-Level Onboarding -Manual Method
Last updated: April 6, 2026
Integrating AWS using the Manual Method includes the following major steps:
Configure Integration in the Matters Console
Create IAM Role with Custom Trust Policy in AWS
Attach IAM Policy to the Role
Complete Integration by providing IAM Role ARN in Matters Console
IAM Role Configuration, Prerequisites, and Permissions Required
1. Trust Policy
Specifies the entities allowed to assume this IAM role, in this case the Matters platform AWS account.
2. IAM Role Permissions and Prerequisites needed for AWS Export and Discovery Tasks
S3 Export Permissions (Scoped) |
|
| Full access to export buckets for RDS |
IAM List Permission |
|
| List identities |
RDS Export + Discovery |
|
| Snapshot export + DB metadata discovery |
DynamoDB Export + Discovery |
|
| Export DynamoDB tables + metadata |
EBS Discovery |
|
| Discover storage volumes for RDS |
Secrets Manager Scoped Access |
|
| Manage DB connection secrets |
IAM Pass Role + Assume Role Update |
|
| Delegate export tasks to specific roles |
S3 Discovery Global |
|
| Bucket and object discovery |
IAM Read Permissions (Full Discovery) |
|
| IAM entity + permission mapping |
IAM Role Tagging + Identity Check |
|
| Role validation + tagging for identification |
S3 Full Access Buckets (Scoped) |
|
| Store exported logs + backups |
KMS Encryption Permissions |
|
| Access encrypted exports & grant temporary key permissions |
CloudTrail & Logs Discovery |
|
| Log discovery from CloudTrail |
DAM Permissions (Monitoring) |
|
| Pull log events for monitoring |
Follow Below Steps for Integrating AWS on Matters Console
Step 1: Configure Integration in Matters Console
Log in to the Matters Console using a Super Admin user account.
Navigate to:
Integrations → Cloud → AWS
If you are using a dedicated tenant, please replace the word ‘app’ with your tenant name in the Url
Click Connect on the AWS Integration card.
Enter:
A valid Integration Name
Choose Account under Access Level Scope
Select Manual Integration Method
You may skip CloudTrail Logs for DDR now (you can click on this CloudTrail for detailed explanation on CloudTrail).
Click Connect.

In the next Step Copy the Trust Policy from the Matters Console and Use it for creating the IAM Role with Custom Trust Policy

Step 2: Create IAM Role with Custom Trust Policy in AWS Console
Follow these steps in the AWS Console:
Log in to your AWS Management Console.
In the top search bar, type IAM and select IAM (Identity and Access Management).
In the left navigation panel, click Roles → Create role.
Under Trusted entity type, choose Custom trust policy.
Click the “Switch to custom trust policy” button.
Copy and paste the following trust policy JSON from Matters Console into the editor :
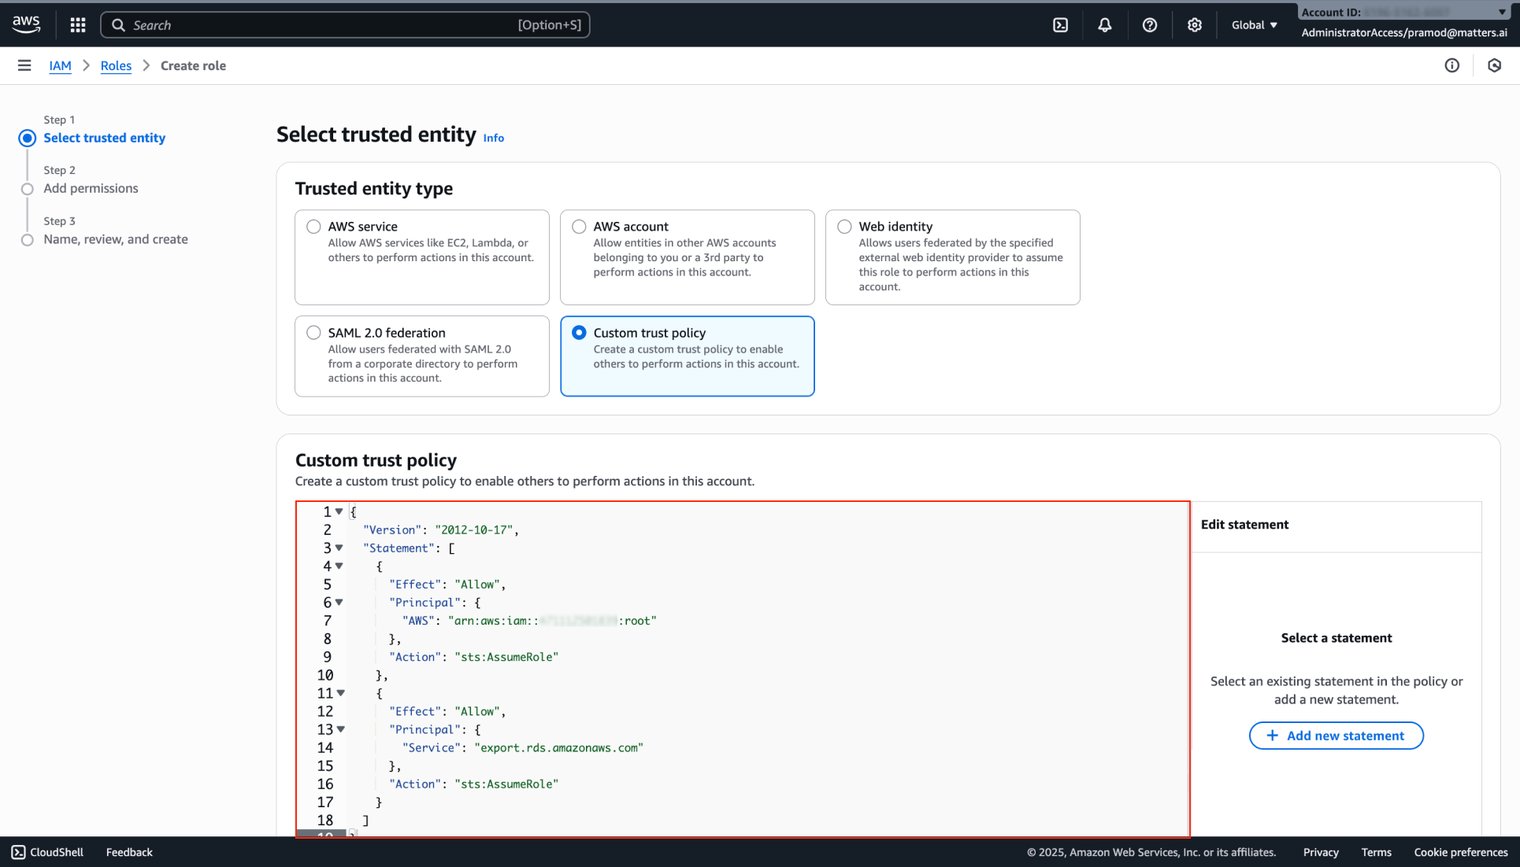
Click Next (no permissions need to be added at this stage).
Provide a Role Name (example:
Demo-Matters-Role).
You may also add an optional description.
Important: The role name should include the keyword “Matters”. This helps the platform automatically detect and validate the correct role during the integration process, ensuring a smooth and error-free setup.

Click Create role. Your role with the required trust relationship is now created.
On Matters Console confirm by clicking on "I’ve Created The Role With Trust Policy" to proceed.

Step 3: Attach the IAM Policy to the Role
Copy the Role Policy from Matters Console

On AWS Console, Navigate back to the IAM → Roles page.
Select the role you created in Step 1.
Open the Permissions tab.
Click on Add inline policy.
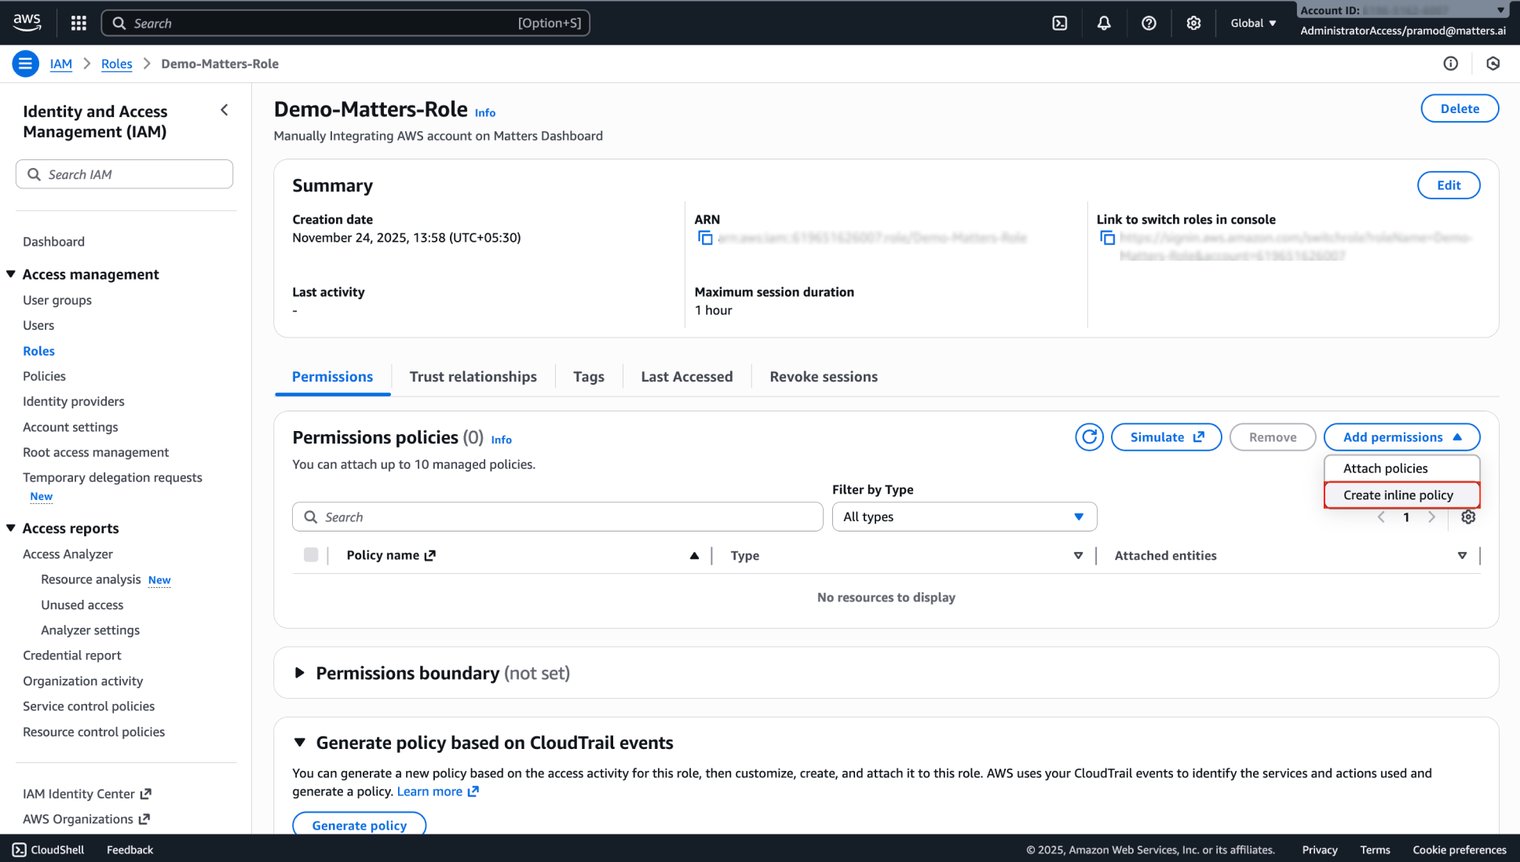
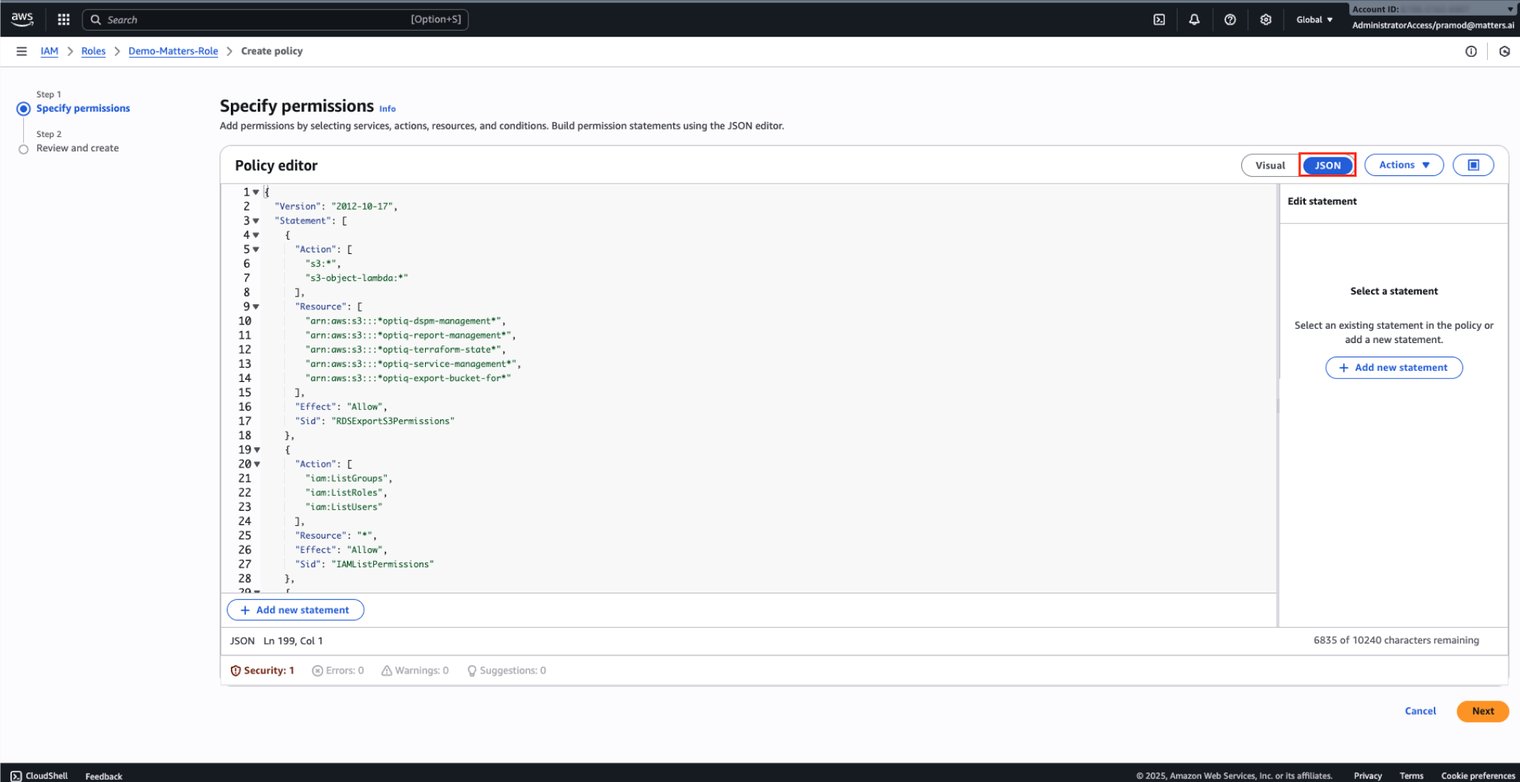
Select the JSON tab.
Paste the following IAM policy JSON(You can also copy the Role Policy from the Matters Console):
Click Next.
Enter a name for the inline policy (example:
Demo-AWS-Integration-Policy).Click Create policy.
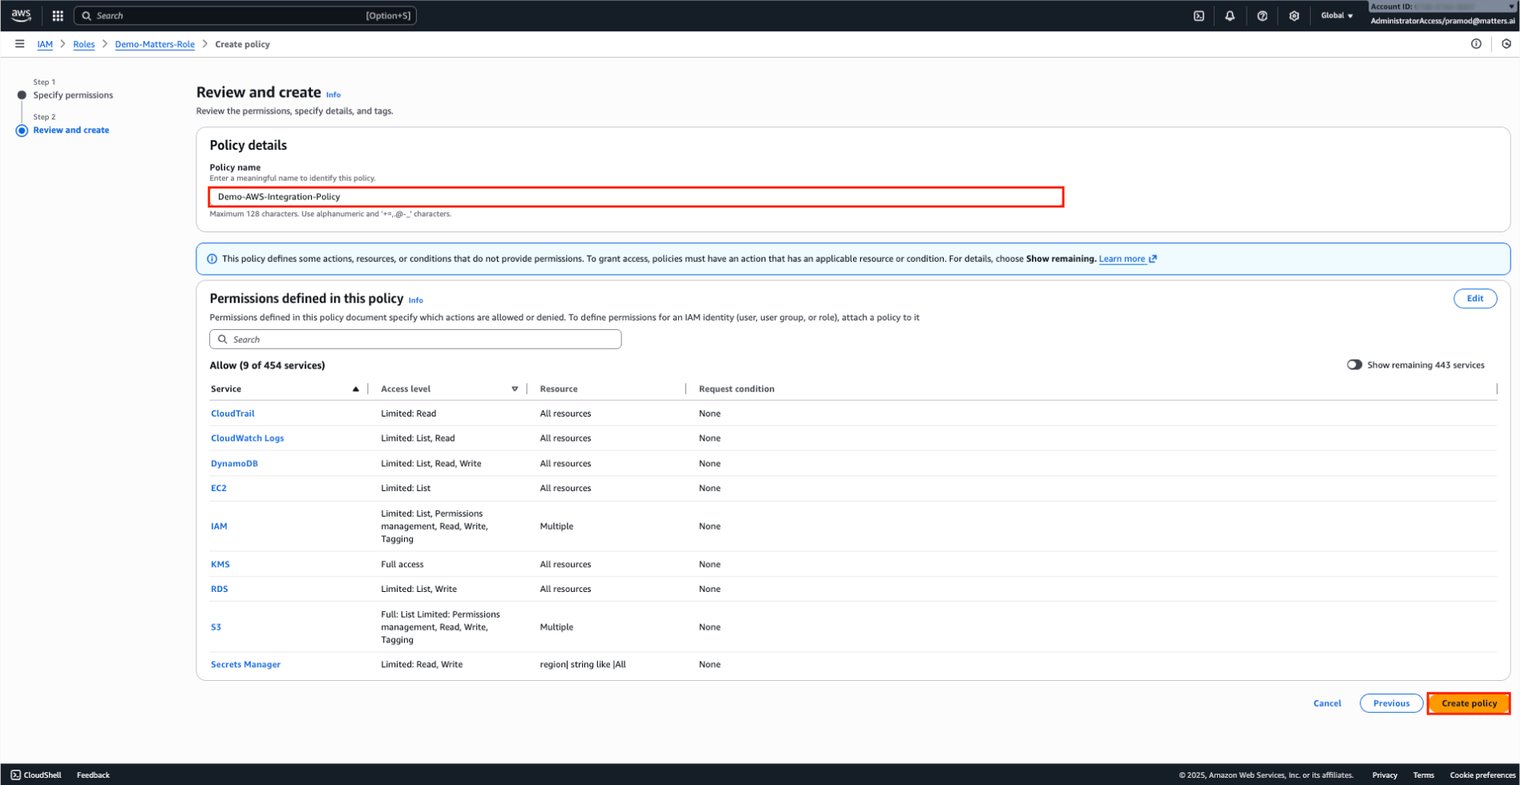
Your IAM role is now fully configured. Copy and Save ARN from created role for further use.
On Matters console confirm by clicking on “I’ve Created the IAM Policy.”

Step 4: Provide Role ARN and Complete Integration
Paste the ARN of the IAM Role you created in AWS and Click Save Integration.

Once the integration is successfully completed, you will see a confirmation message on the Console.
