Office 365 guide under SAAS Integrations
Last updated: July 27, 2026
This guide provides detailed, step-by-step instructions to integrate Microsoft Office 365 (M365) with Matters.ai for secure, real-time, and historical scanning of OneDrive,SharePoint and Outlook data.
Integrating Office 365 involves 2 Steps
Create and Configure the Microsoft Entra Application
Connect Microsoft 365 to Matters.ai
Step 1 Create and Configure the Microsoft Entra Application
1.1 Register a New Application
Go to https://entra.microsoft.com, search for App registrations in the top search bar.
Click App registrations.
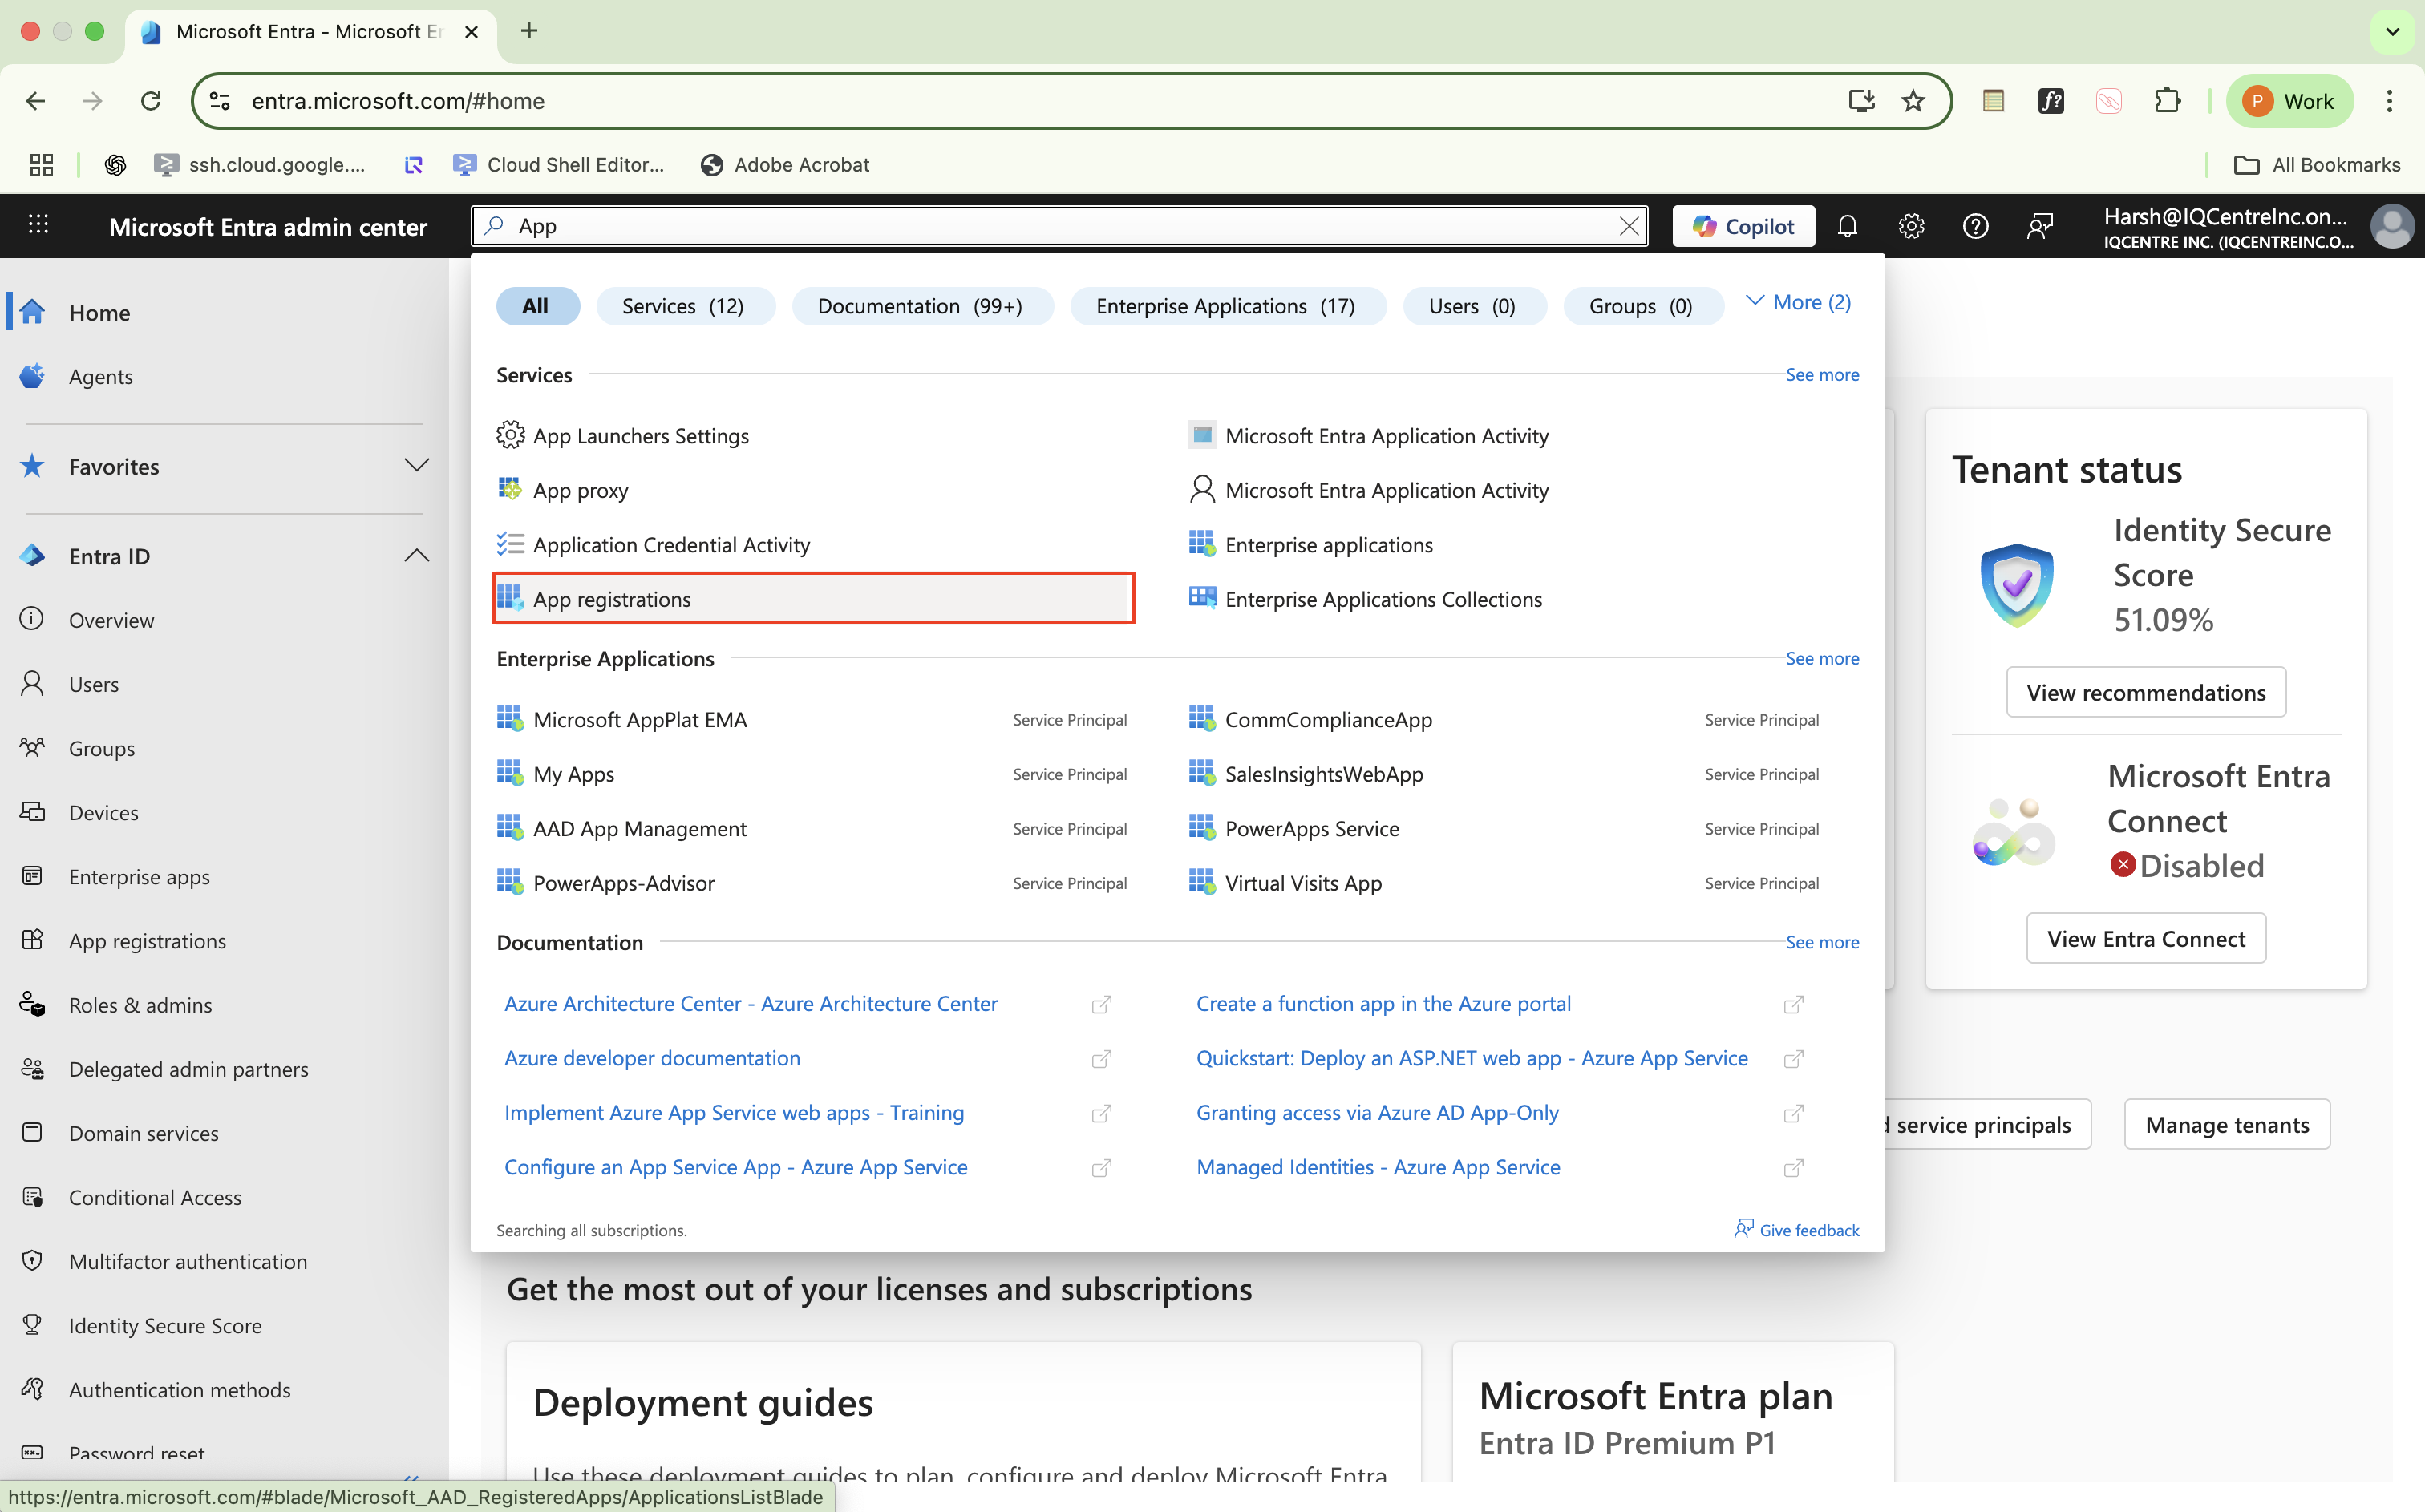
Select New registration.
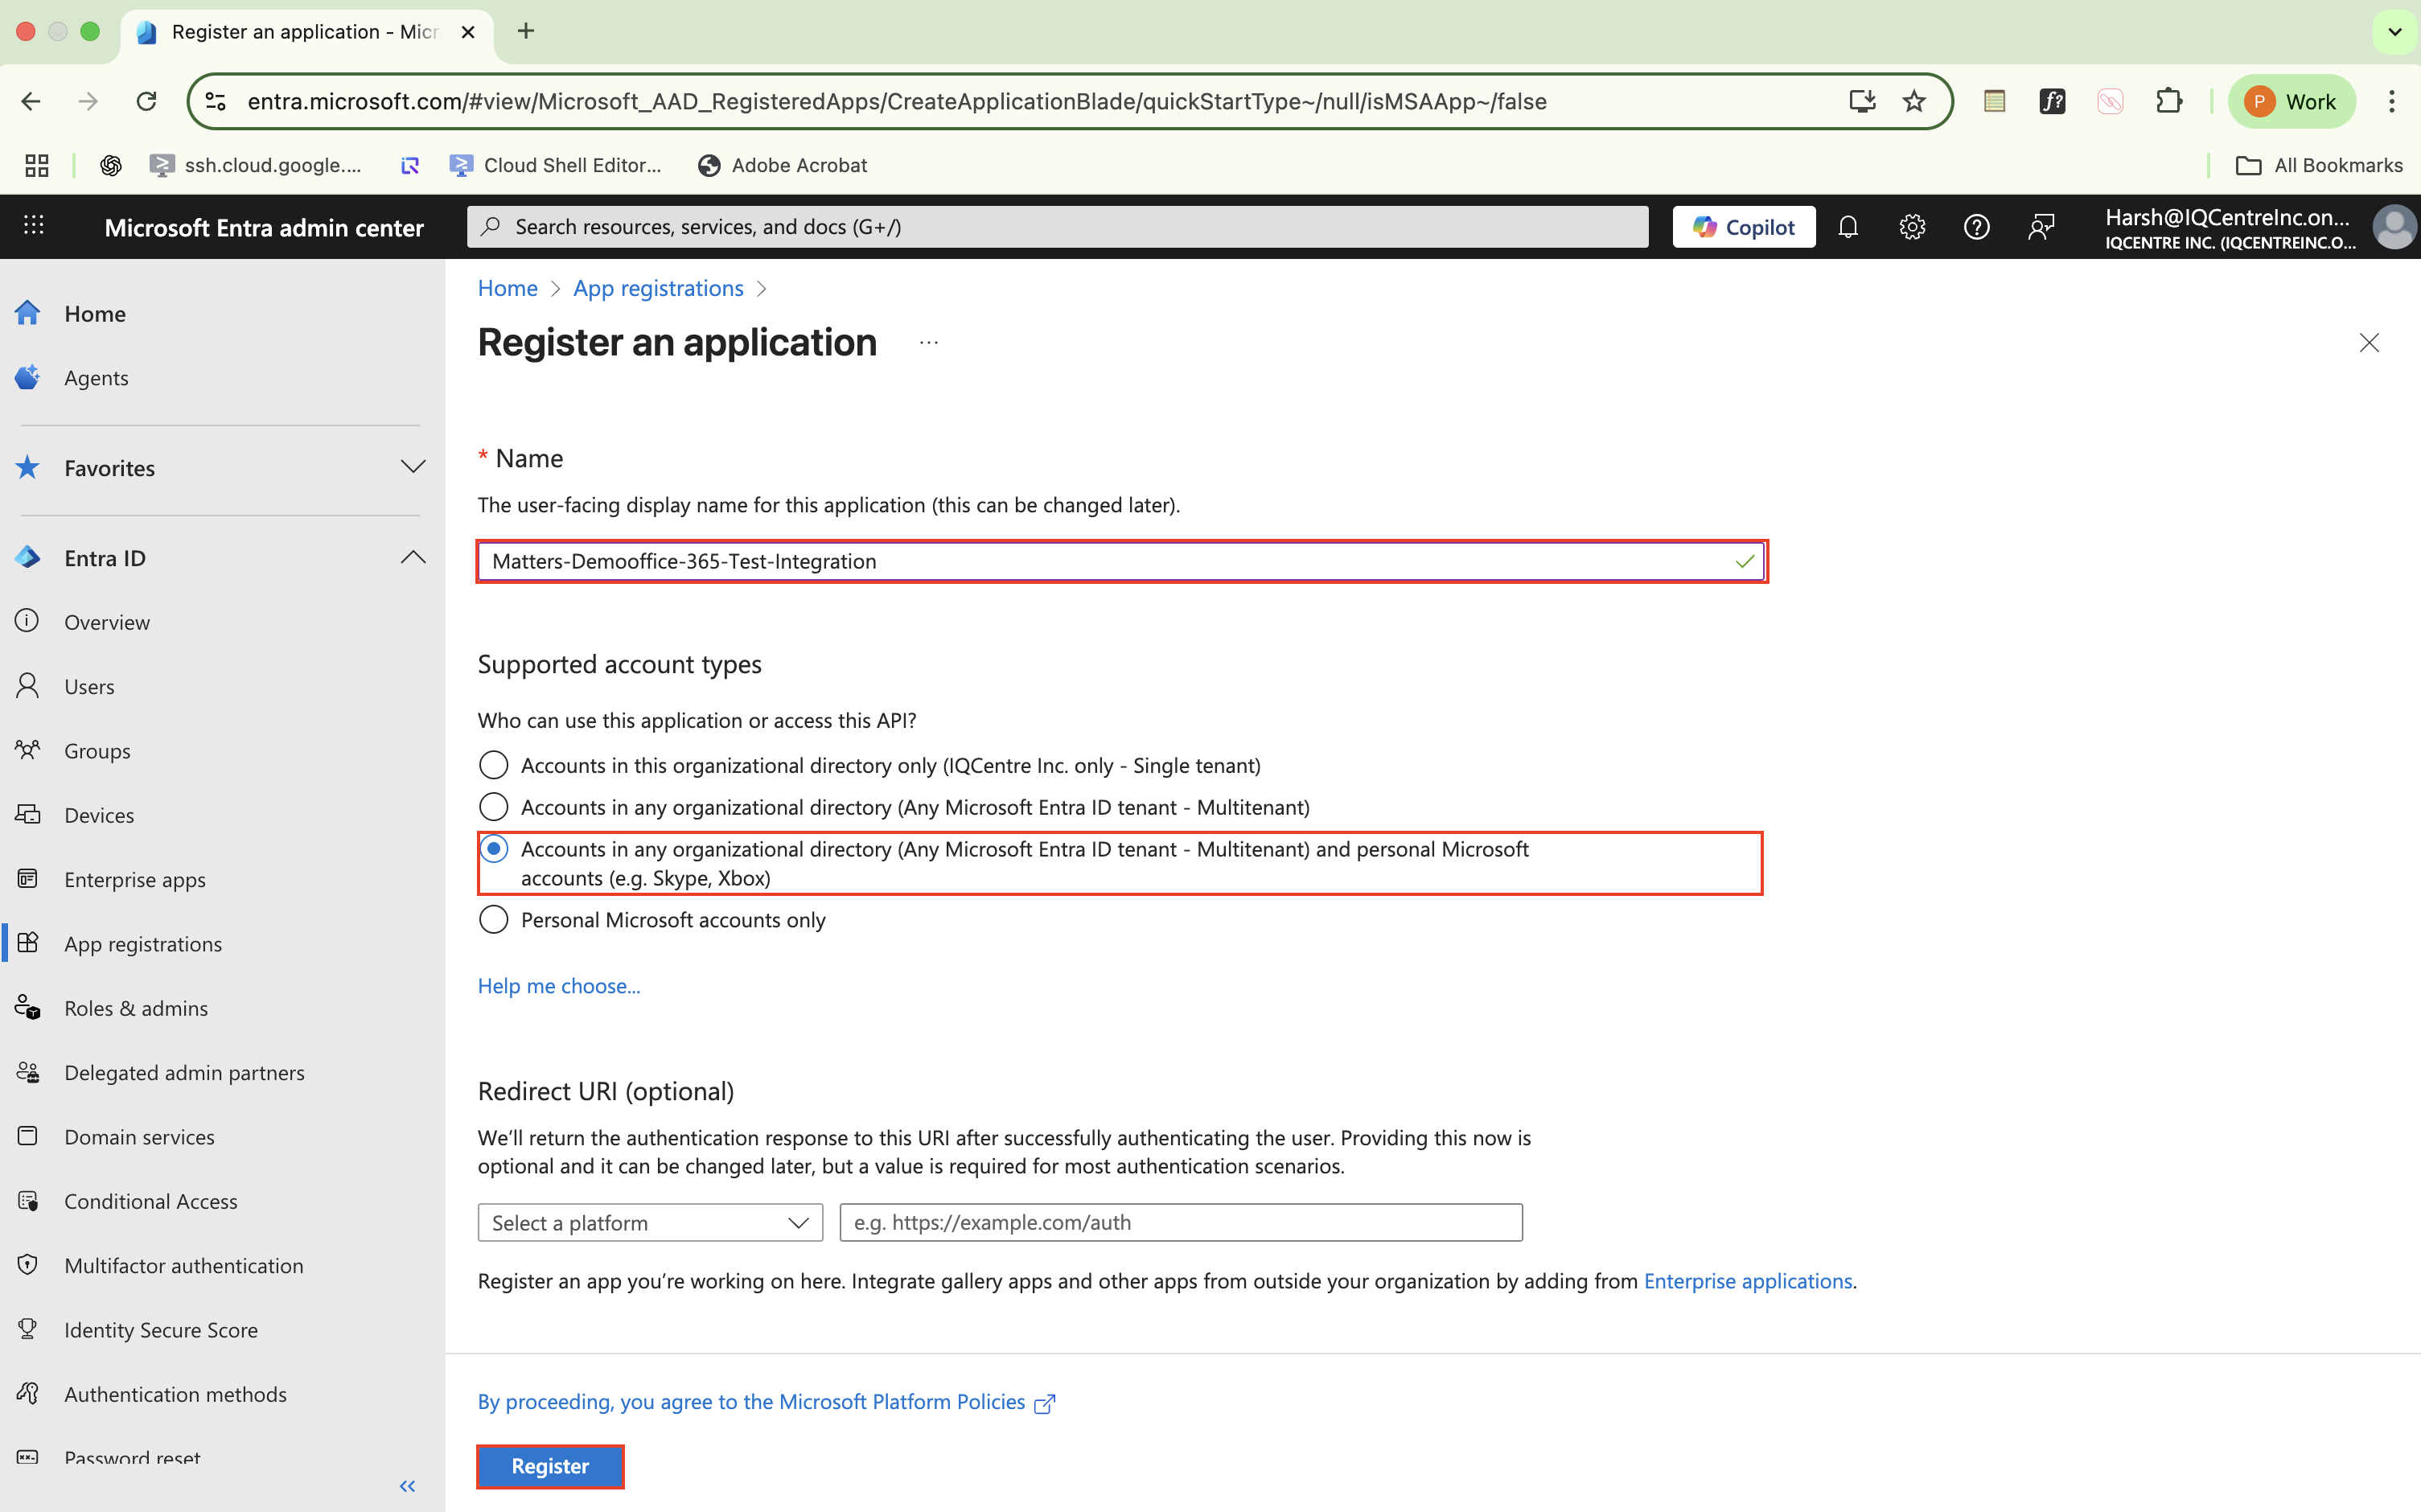
Complete the registration form:
Name: Enter a descriptive name (e.g.,
Optiq O365 Integration).
Supported account types: Select
Accounts in any organizational directory (Any Microsoft Entra ID tenant – Multitenant) and personal Microsoft accounts (e.g., Skype, Xbox).
Click Register.
1.2 Add API Permissions — Microsoft Graph
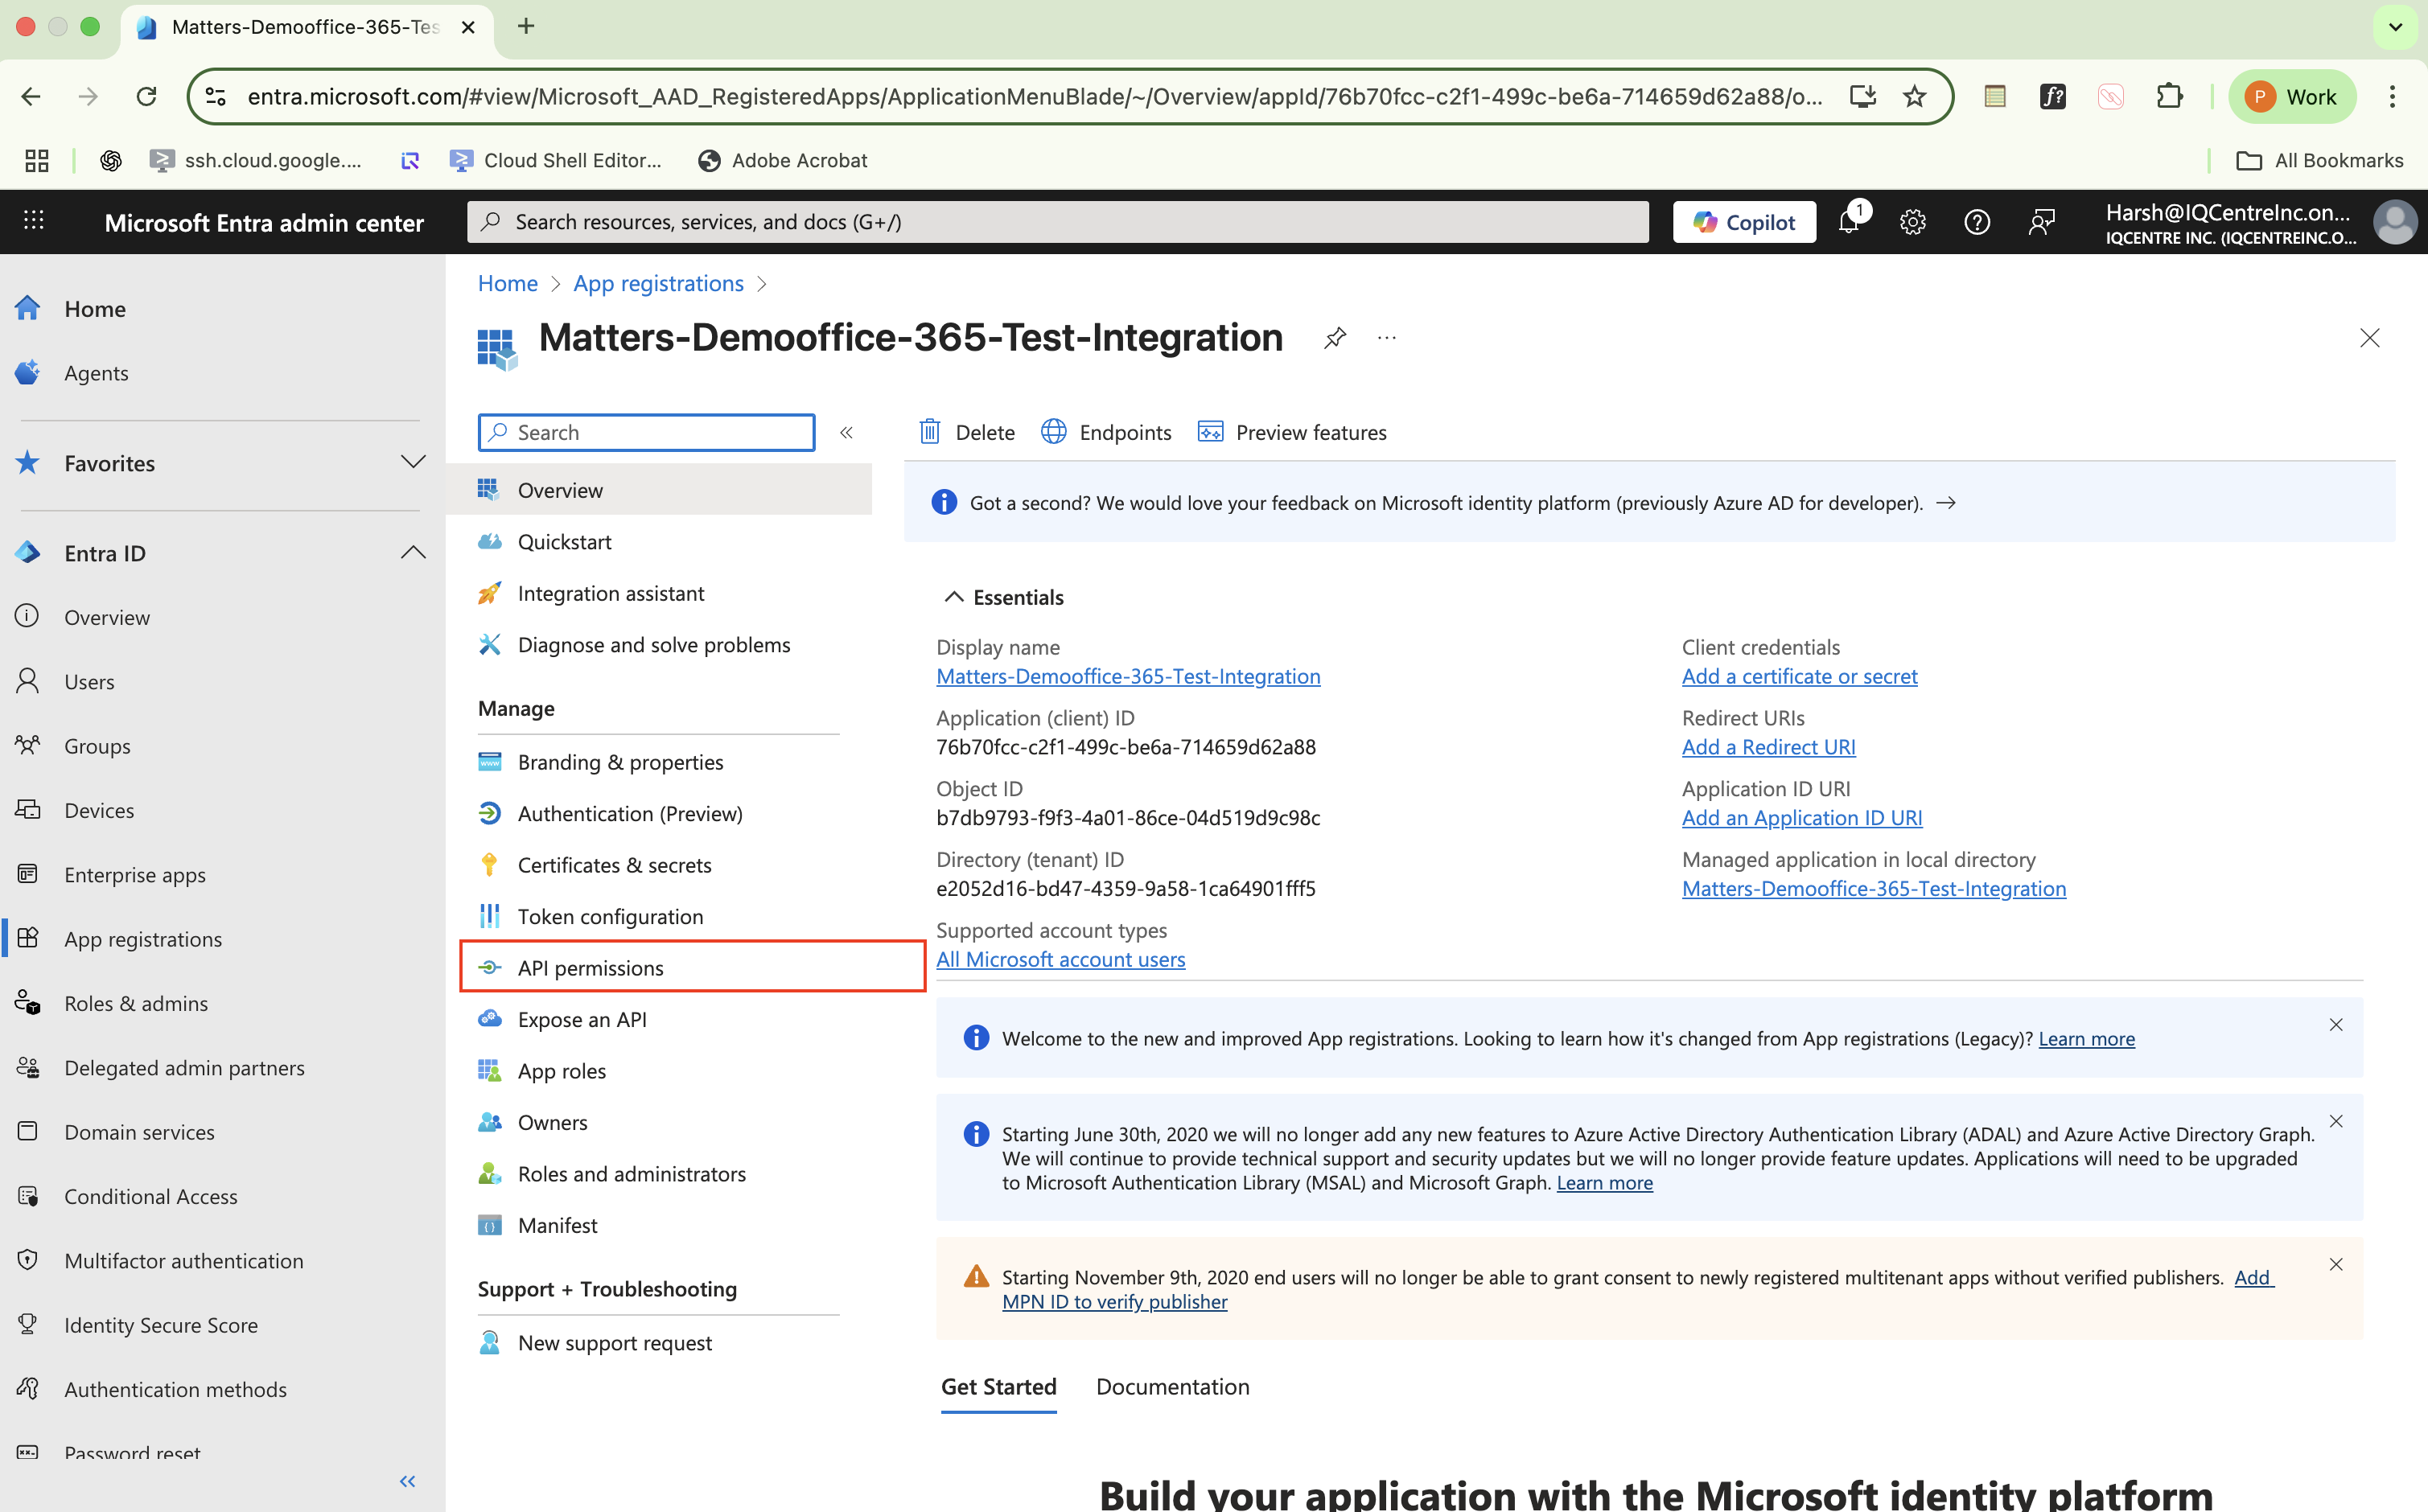
In the left menu, click API permissions.
Select Add a permission → Microsoft Graph → Application permissions.
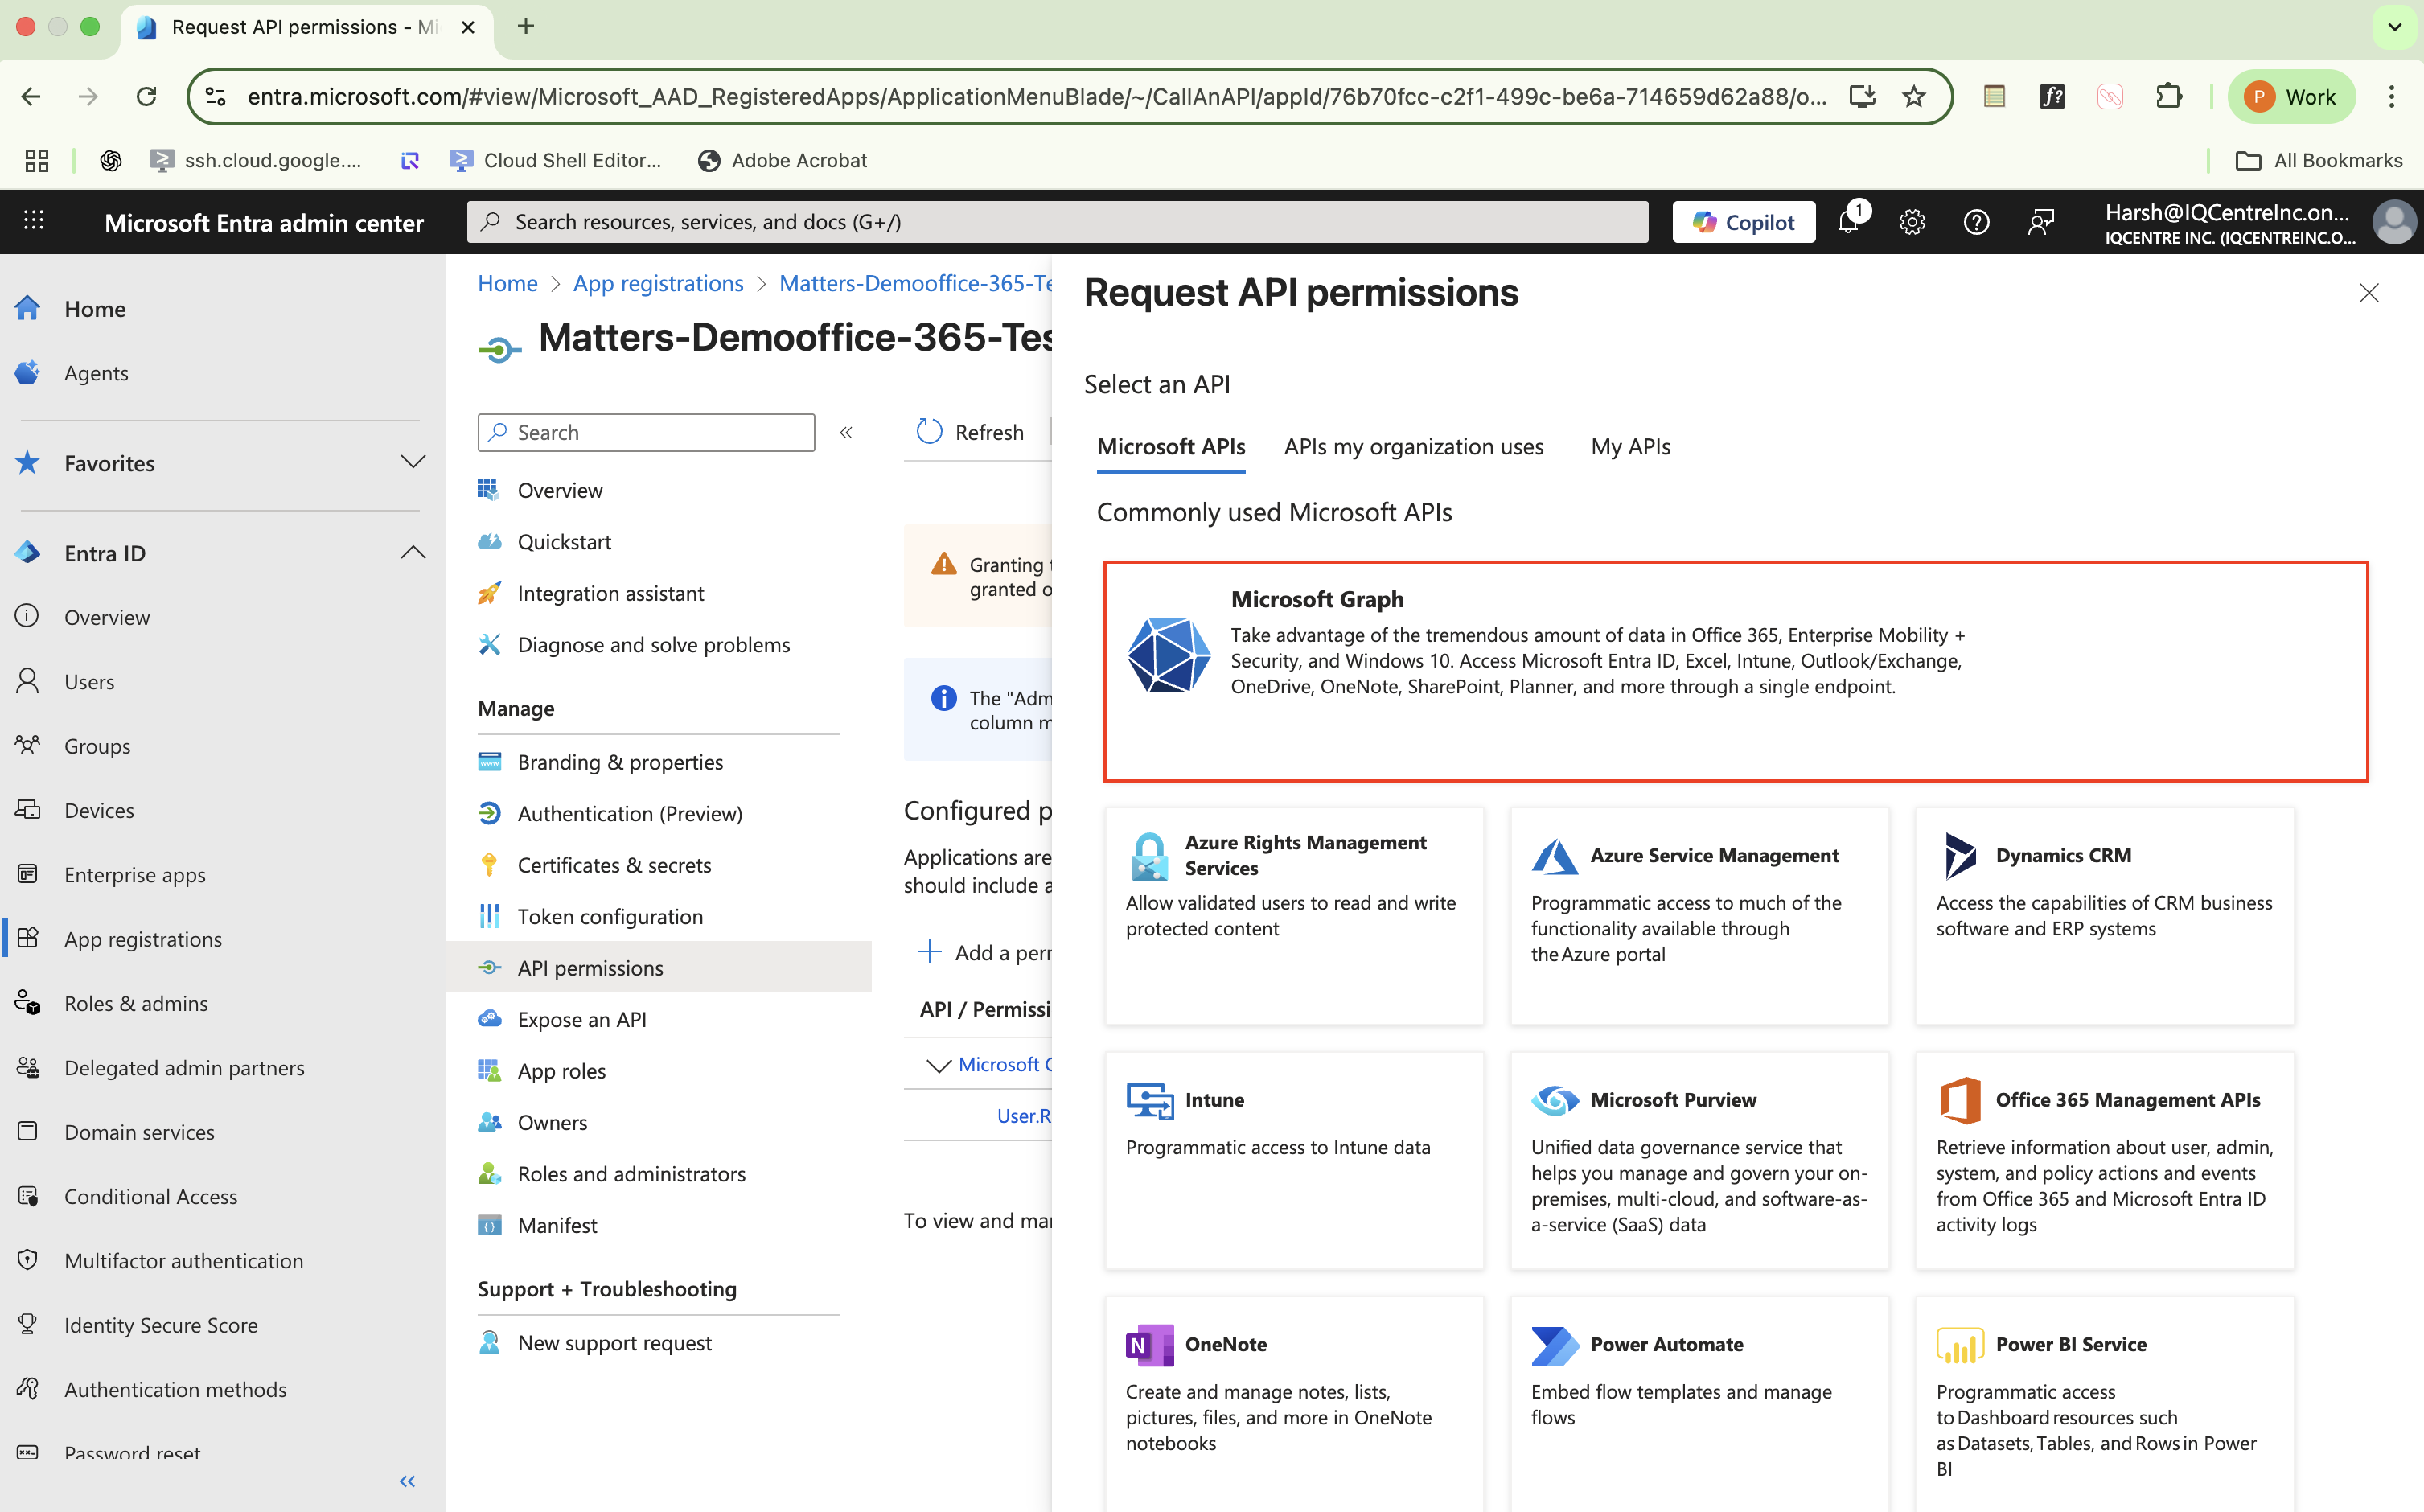
Add the following permissions:
PermissionTypePurpose | ||
| Application | Allows the app to read all files in all site collections without a signed in user. |
| Application | Read SharePoint site files for scanning. |
| Application | Access directory structures for file scanning. |
| Application | Retrieve audit logs for alerts and monitoring. |
| Application | Read activity audit log from the audit store. |
| Application | Allows the app to read and query audit logs from Entra (Azure AD) workload, without a signed-in user |
| Application | Allows the app to read and query audit logs from Exchange workload, without a signed-in user |
| Application | Allows the app to read and query audit logs from OneDrive workload, without a signed-in user |
| Application | Allows the app to read and query audit logs from SharePoint workload, without a signed-in user |
| Application | Allows the app to read and query audit logs from all services. |
| Application | Allows the app to read events of all calendars without a signed-in user. |
| Application | Allows the app to read events of all calendars, except for properties such as body, attachments, and extensions, without a signed-in user. |
| Application | Allows the app to read all audit logs for events that contain information about custom security attributes, without a signed-in user. |
| Application | Allows the app to read conversations of the groups this app has access to without a signed-in user. |
| Application | Allows the app to read group properties and memberships, and read conversations for all groups, without a signed-in user. |
| Application | Allows the app to read mail in all mailboxes without a signed-in user. |
| Application | Allows the app to read basic mail properties in all mailboxes without a signed-in user. Includes all properties except body, previewBody, attachments and any extended properties. |
| Application | Allows the app to read basic mail properties in all mailboxes without a signed-in user. Includes all properties except body, previewBody, attachments and any extended properties. |
| Application | Allows the app to read all the users' mailbox folders, without signed-in user. |
| Application | Allows the app to read user's mailbox settings without a signed-in user. Does not include permission to send mail. |
| Application | To Read the Profile of the User |
| Application | Allows the app to read user profiles without a signed in user. |
| Application | Allows us to read SharePoint and OneDrive tenant settings |
| Application | Allows us to read your organisation's policies |
| Application | Allows us to read Microsoft 365 service usage and activity reports across the organisation without requiring a signed-in user. |
Click Add permissions.
1.3 Add API Permissions - Office 365 Management APIs
From API permissions, click Add a permission.
Choose Office 365 Management APIs → Application permissions.
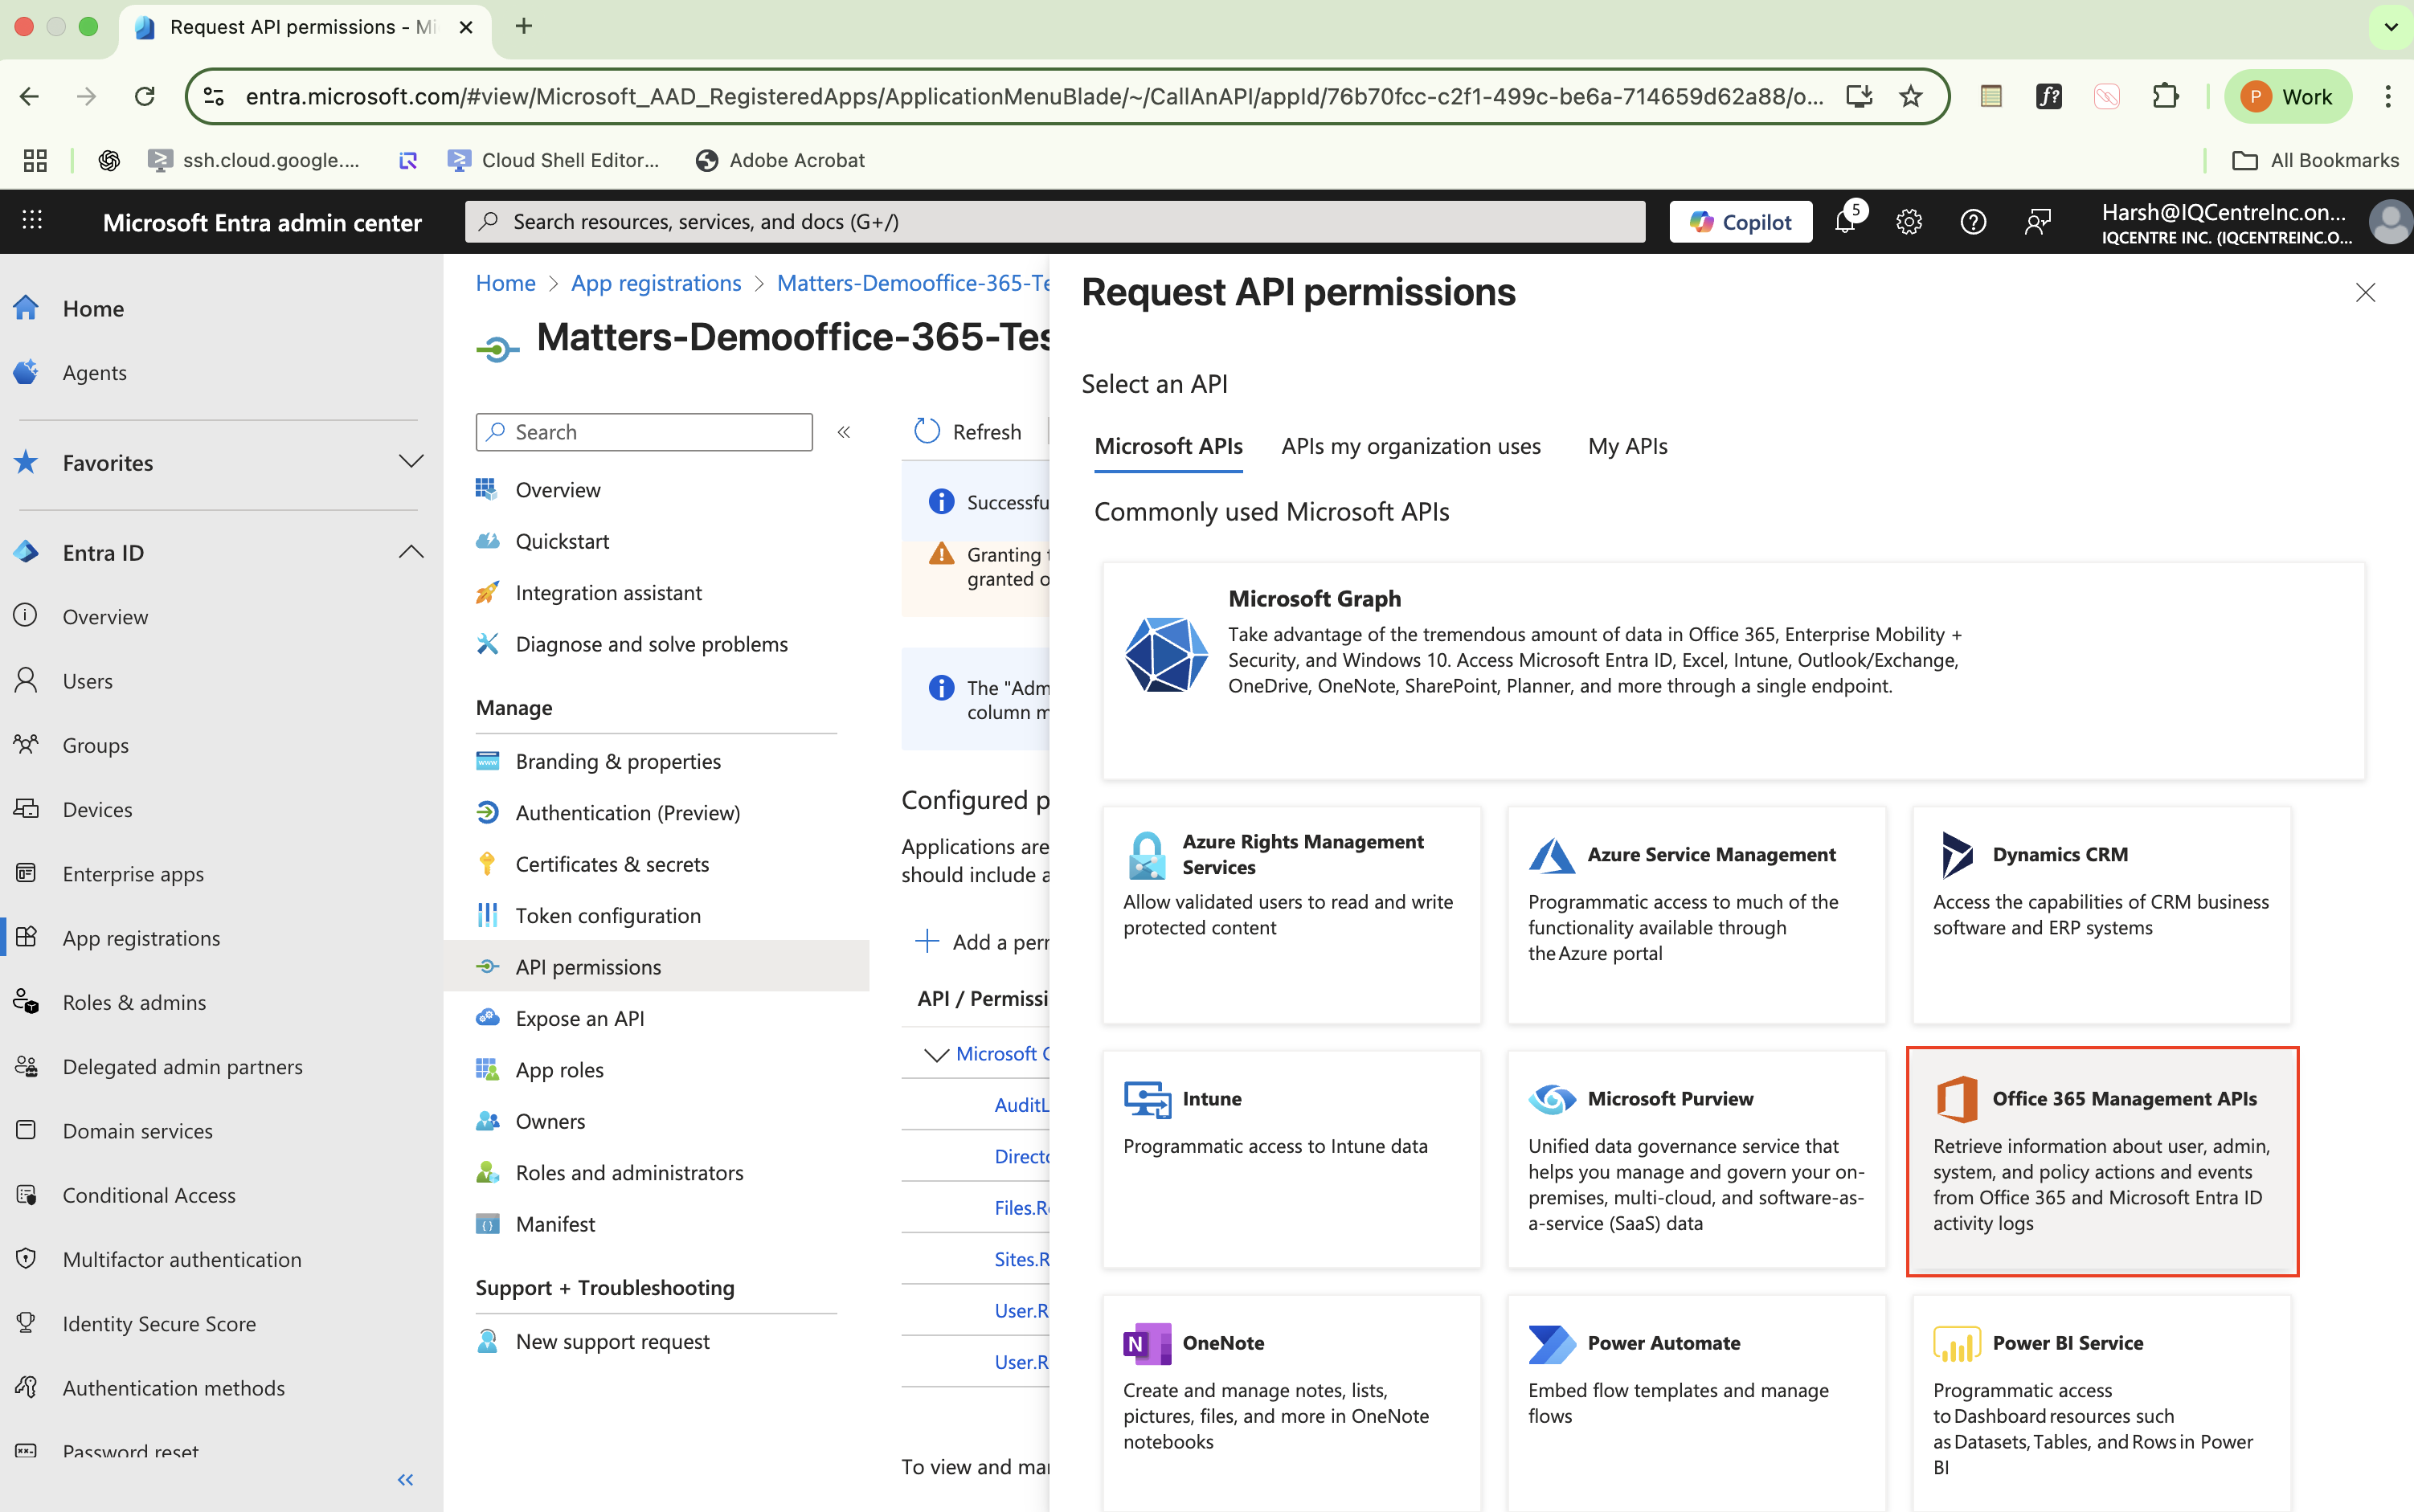
Add below permissions:
PermissionTypePurpose | ||
| Application | Access activity changes for real-time scanning. |
| Application | Allows the application to read DLP policy events, including detected sensitive data, for your organization. |
Click Add permissions.
1.4 Grant Exchange Online Permissions
In the API permissions section, click Add a permission, then select APIs my organisation uses.
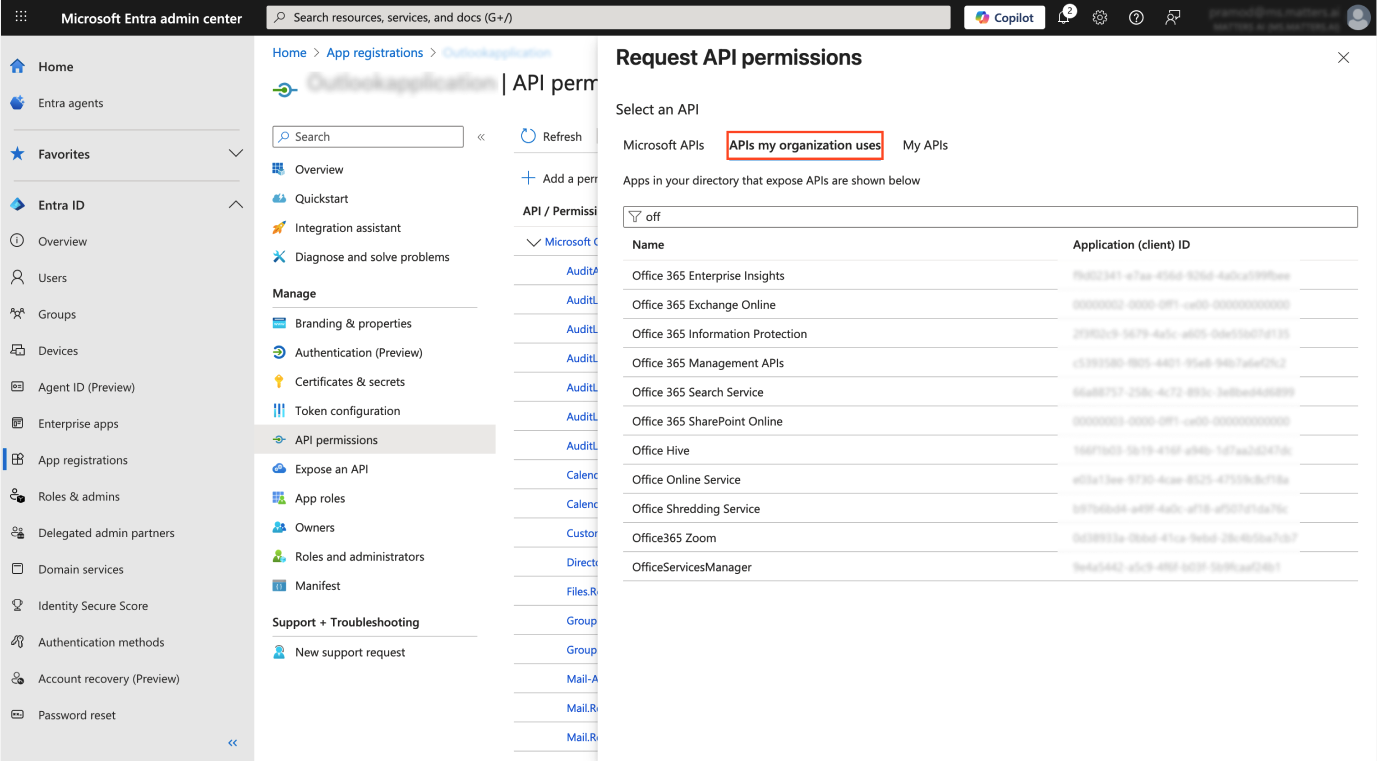
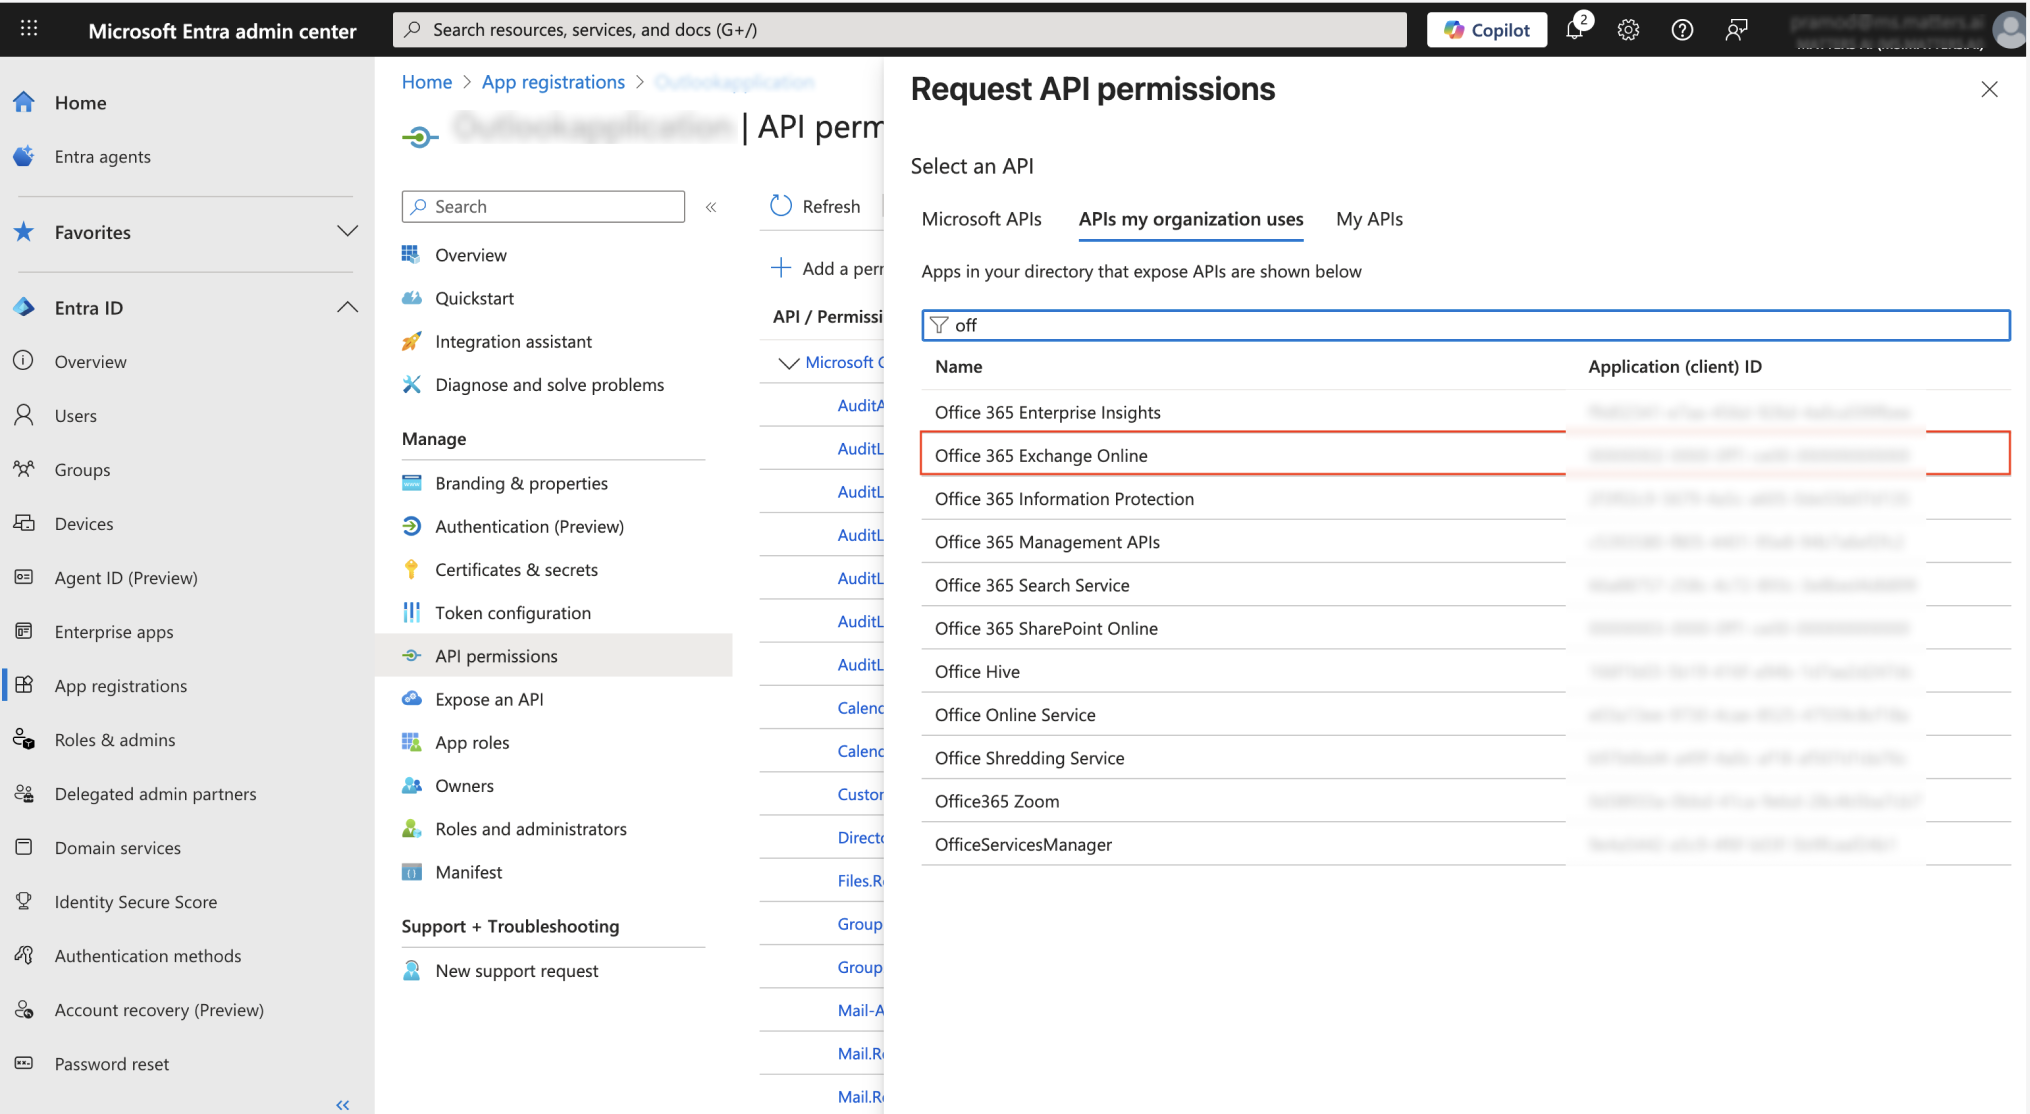
In the search bar, type Office 365 Exchange Online and select it from the results.
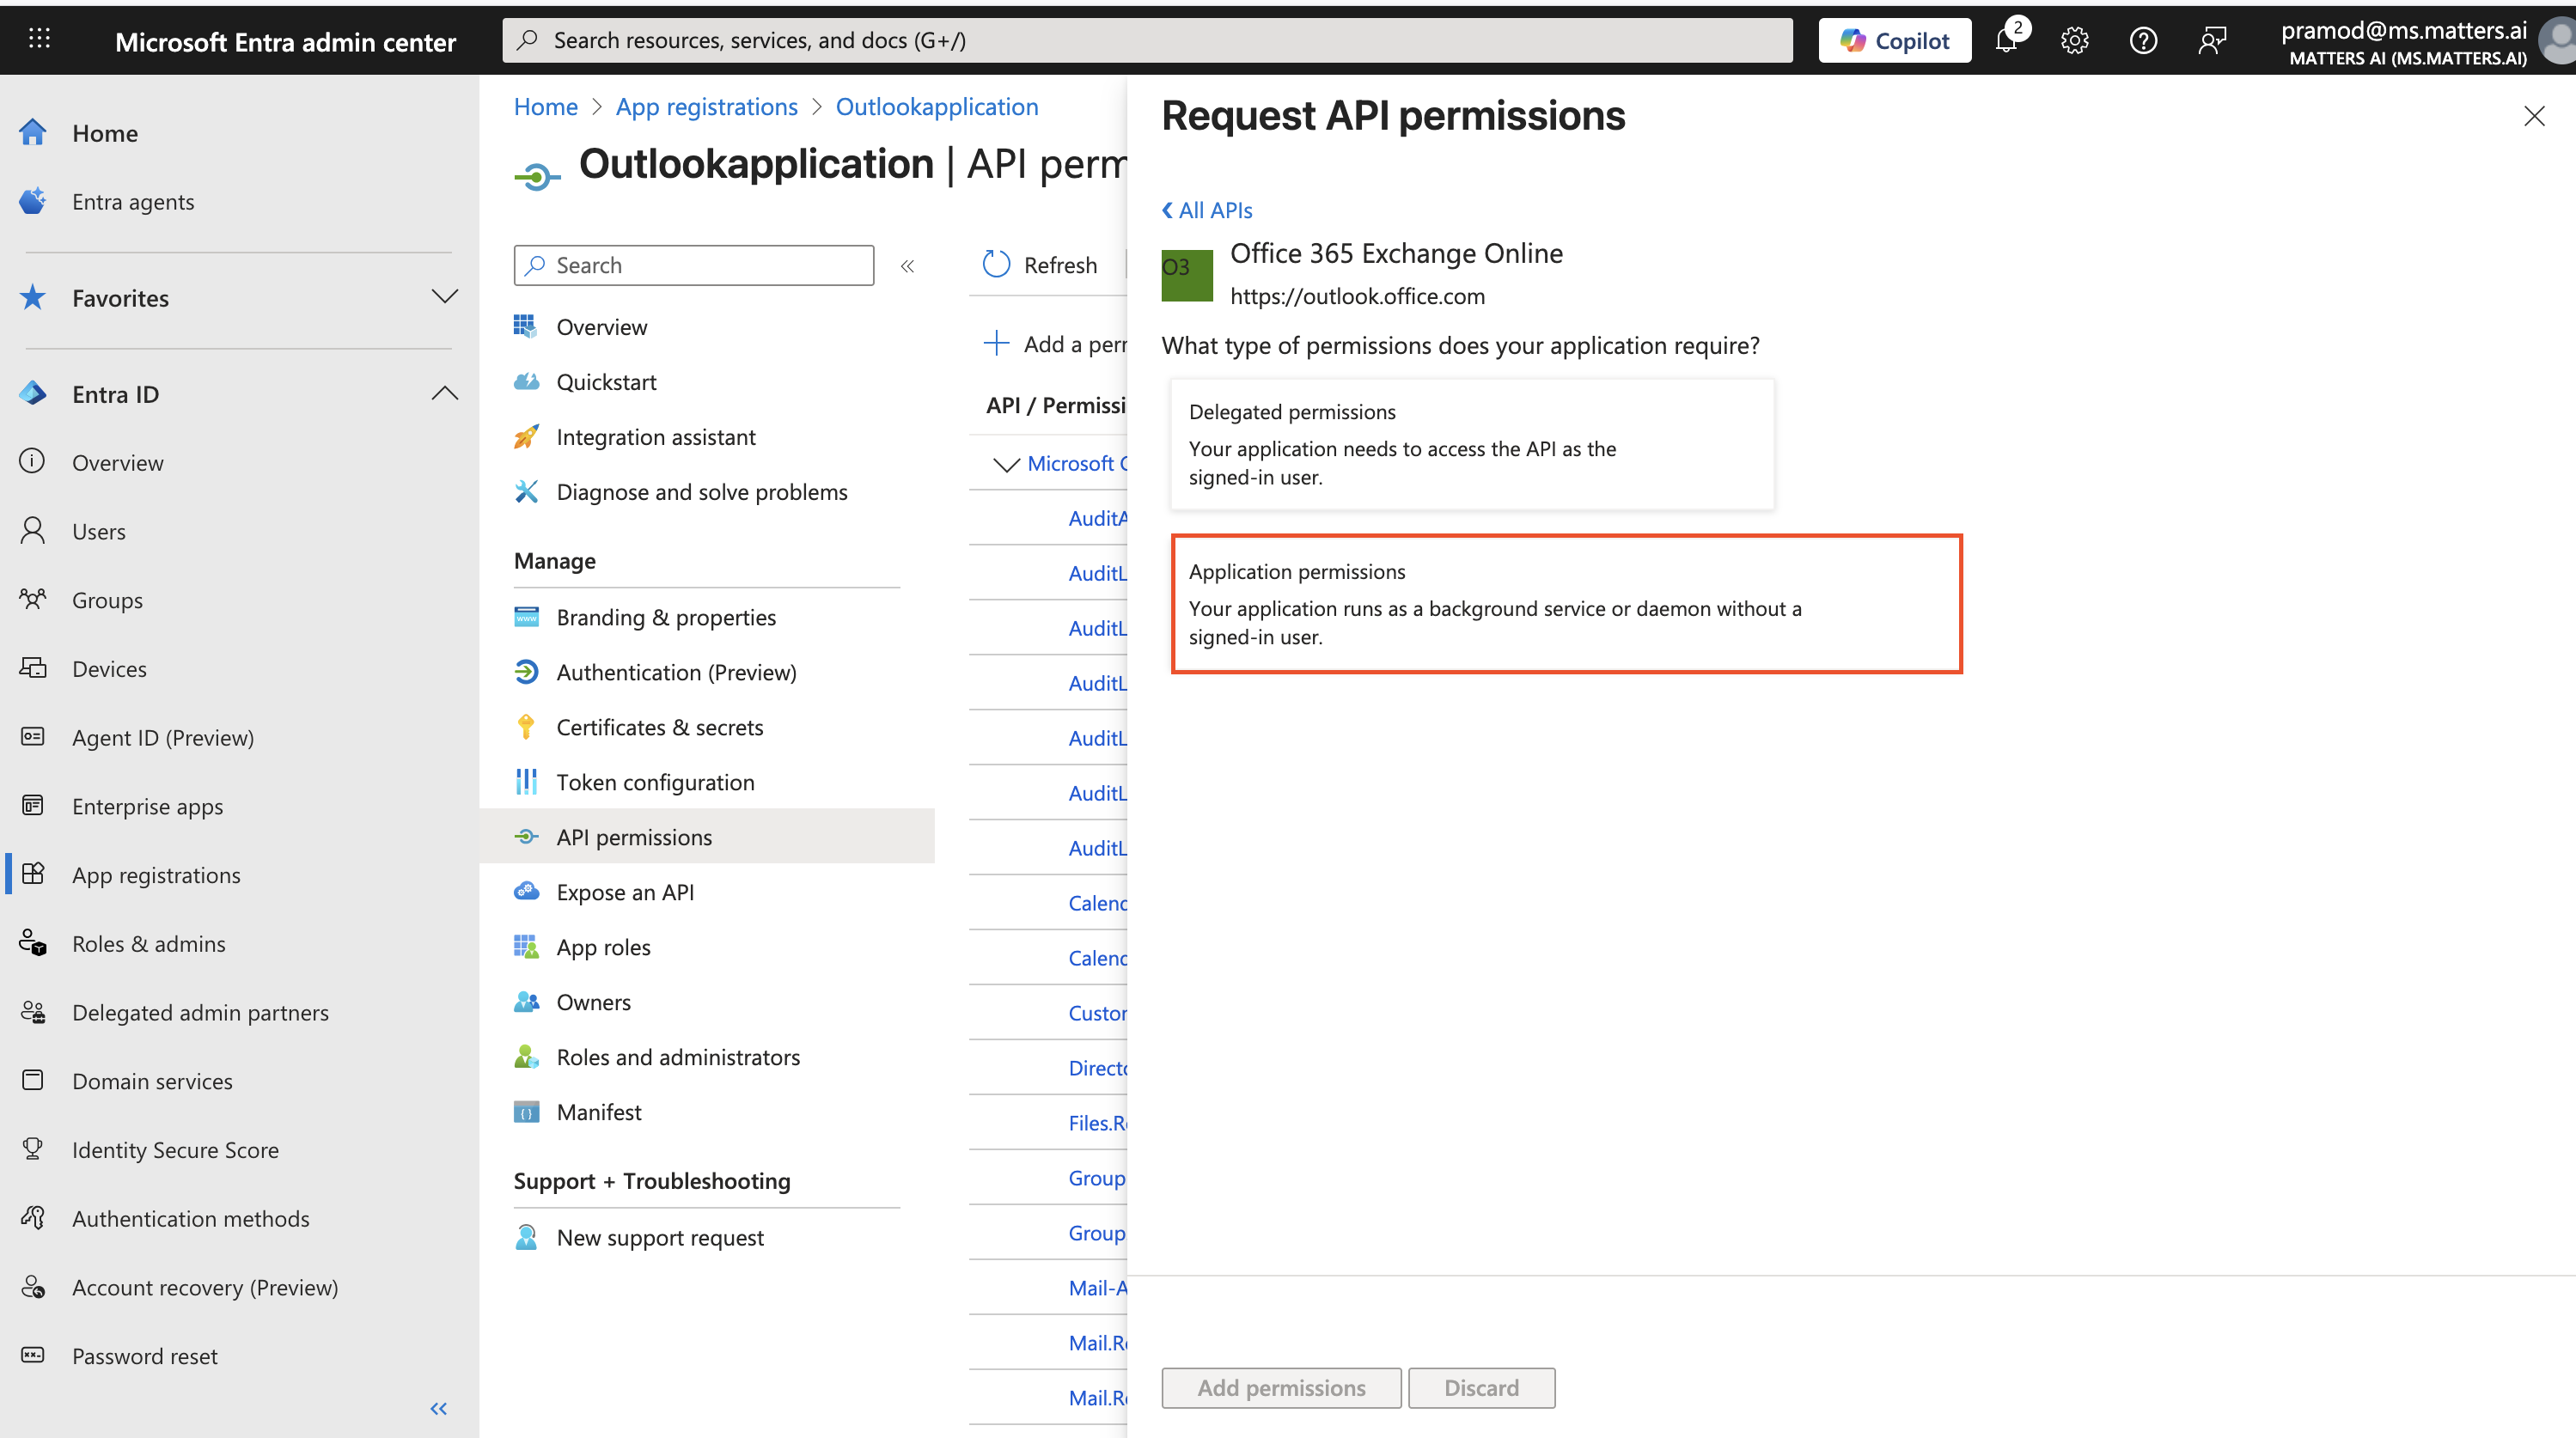
Choose Application permissions when prompted.
From the list of available permissions, select Exchange.ManageAsApp by checking the box. Confirm and save the selection to grant the permission.
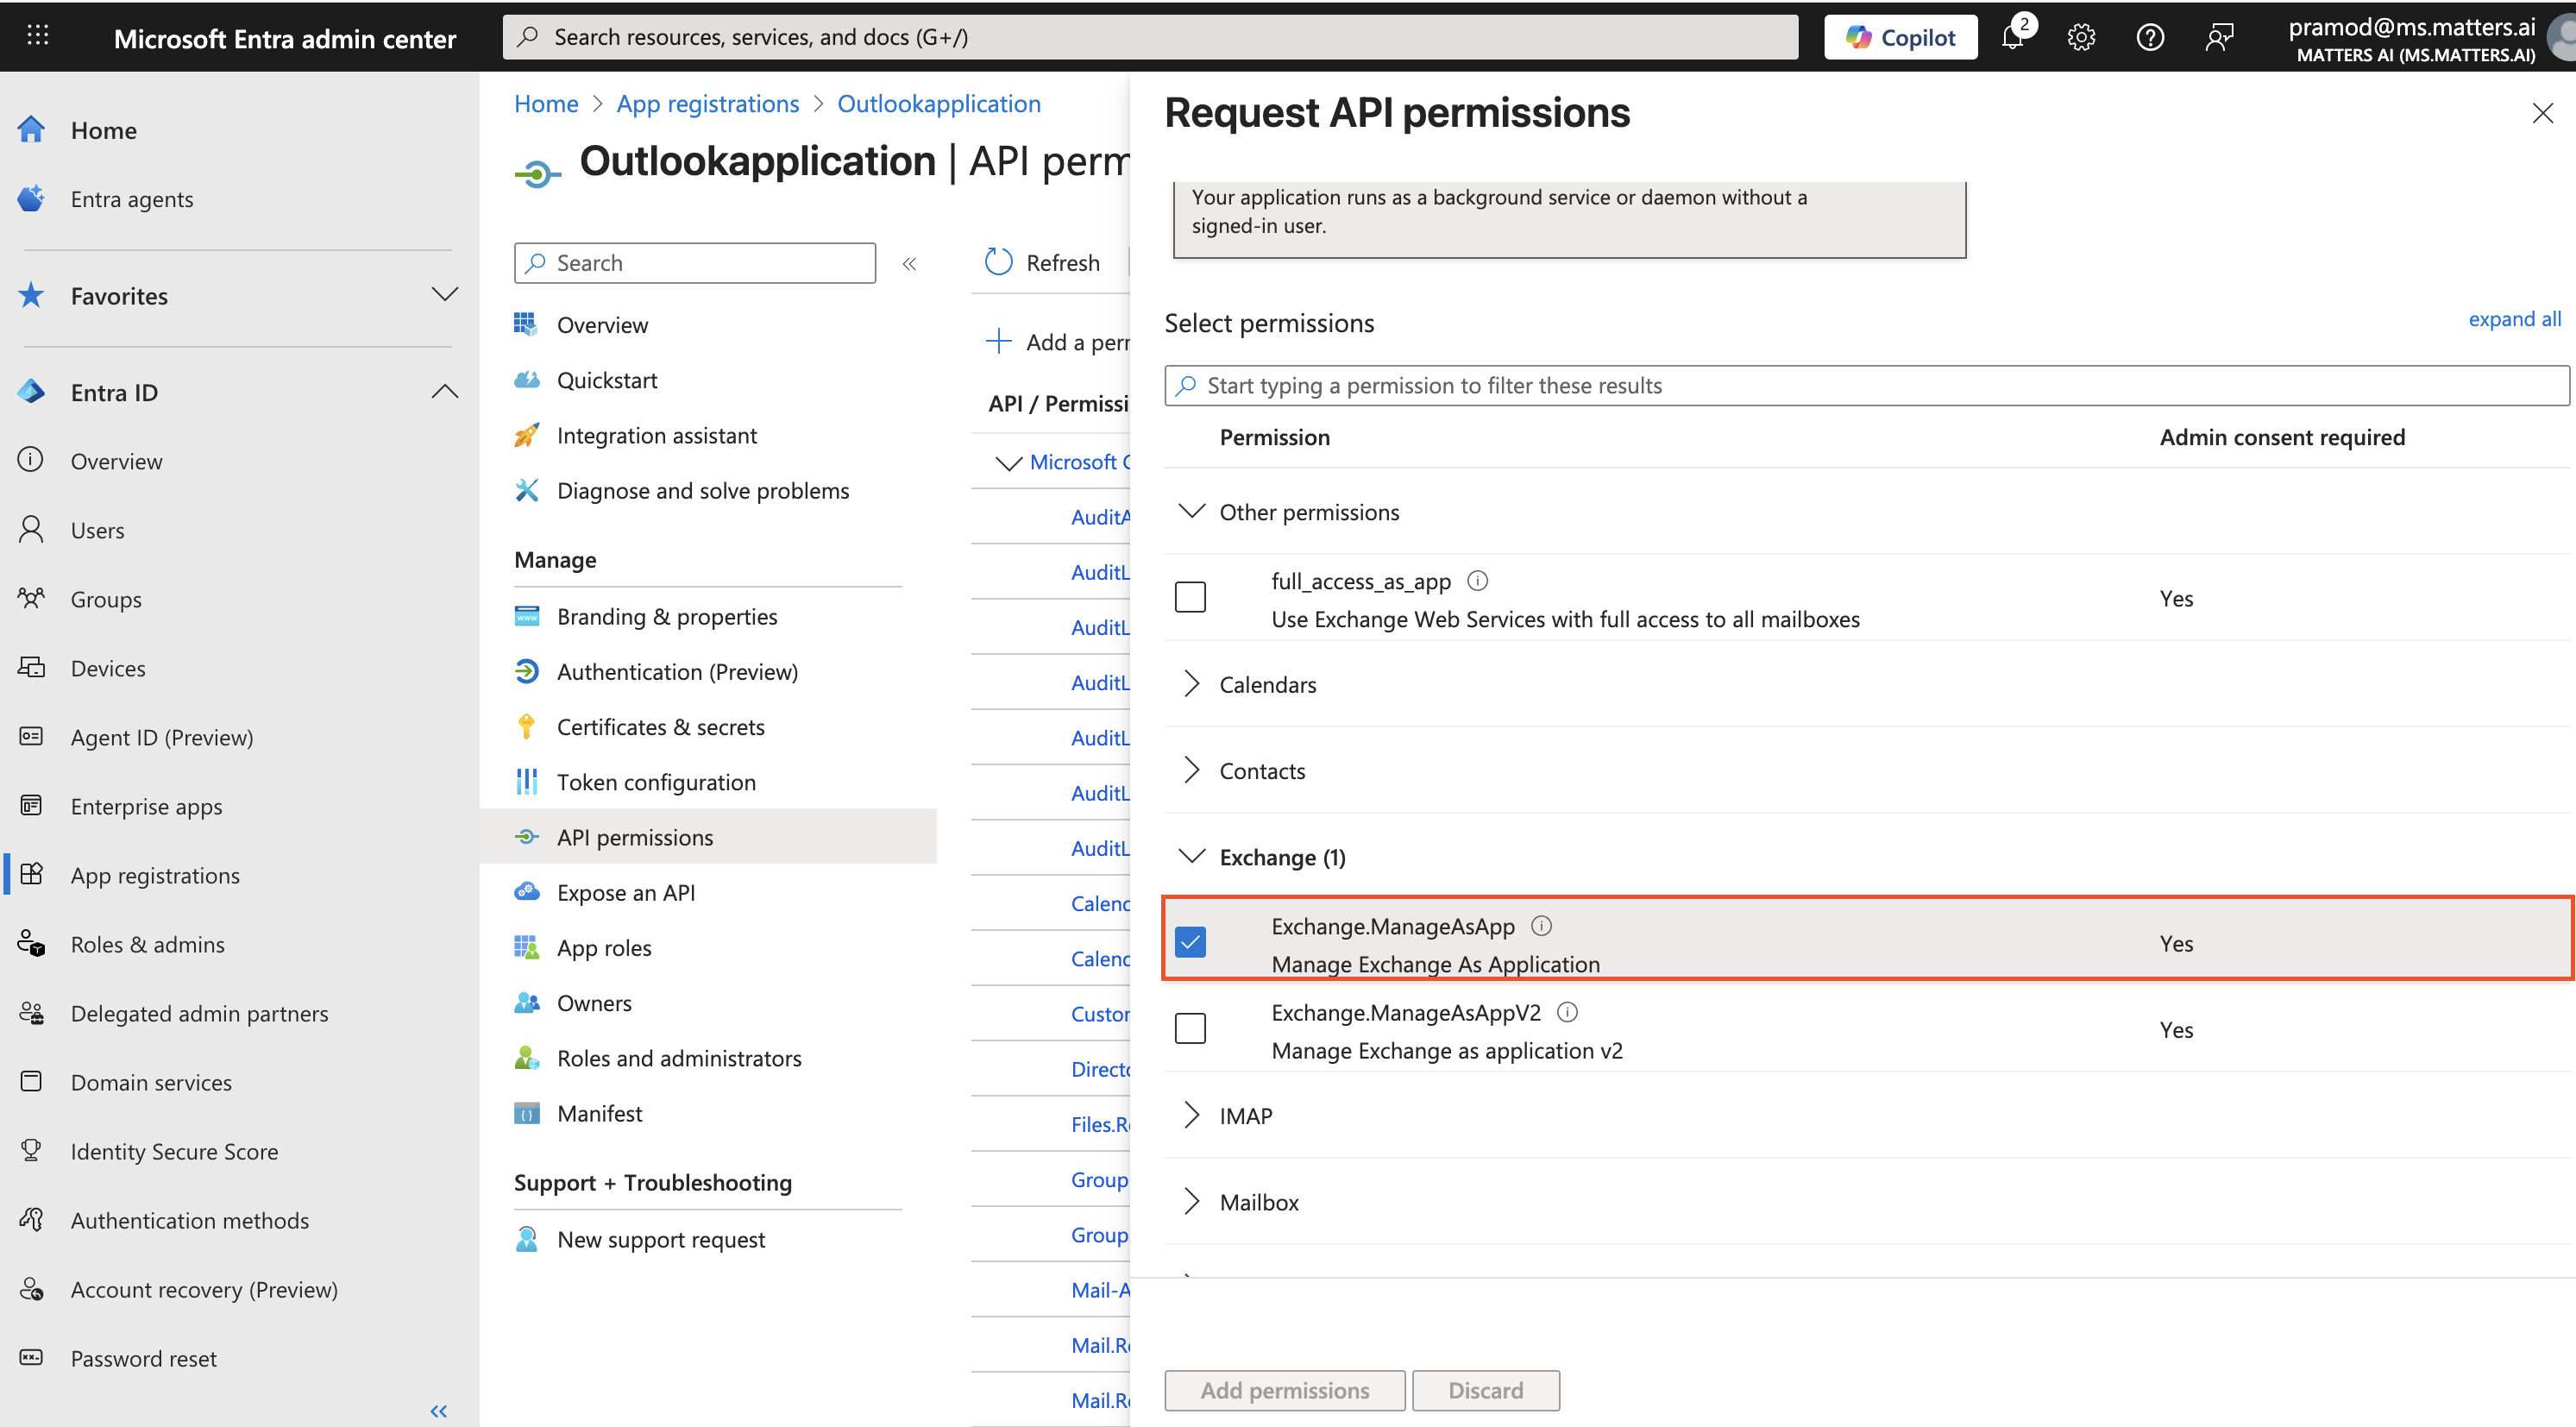
Permission given
Permission | Type | Purpose |
| Application | Manage Exchange As Application |
1.5 Grant Admin Consent
In API permissions, click Grant admin consent for <Your Organization>.
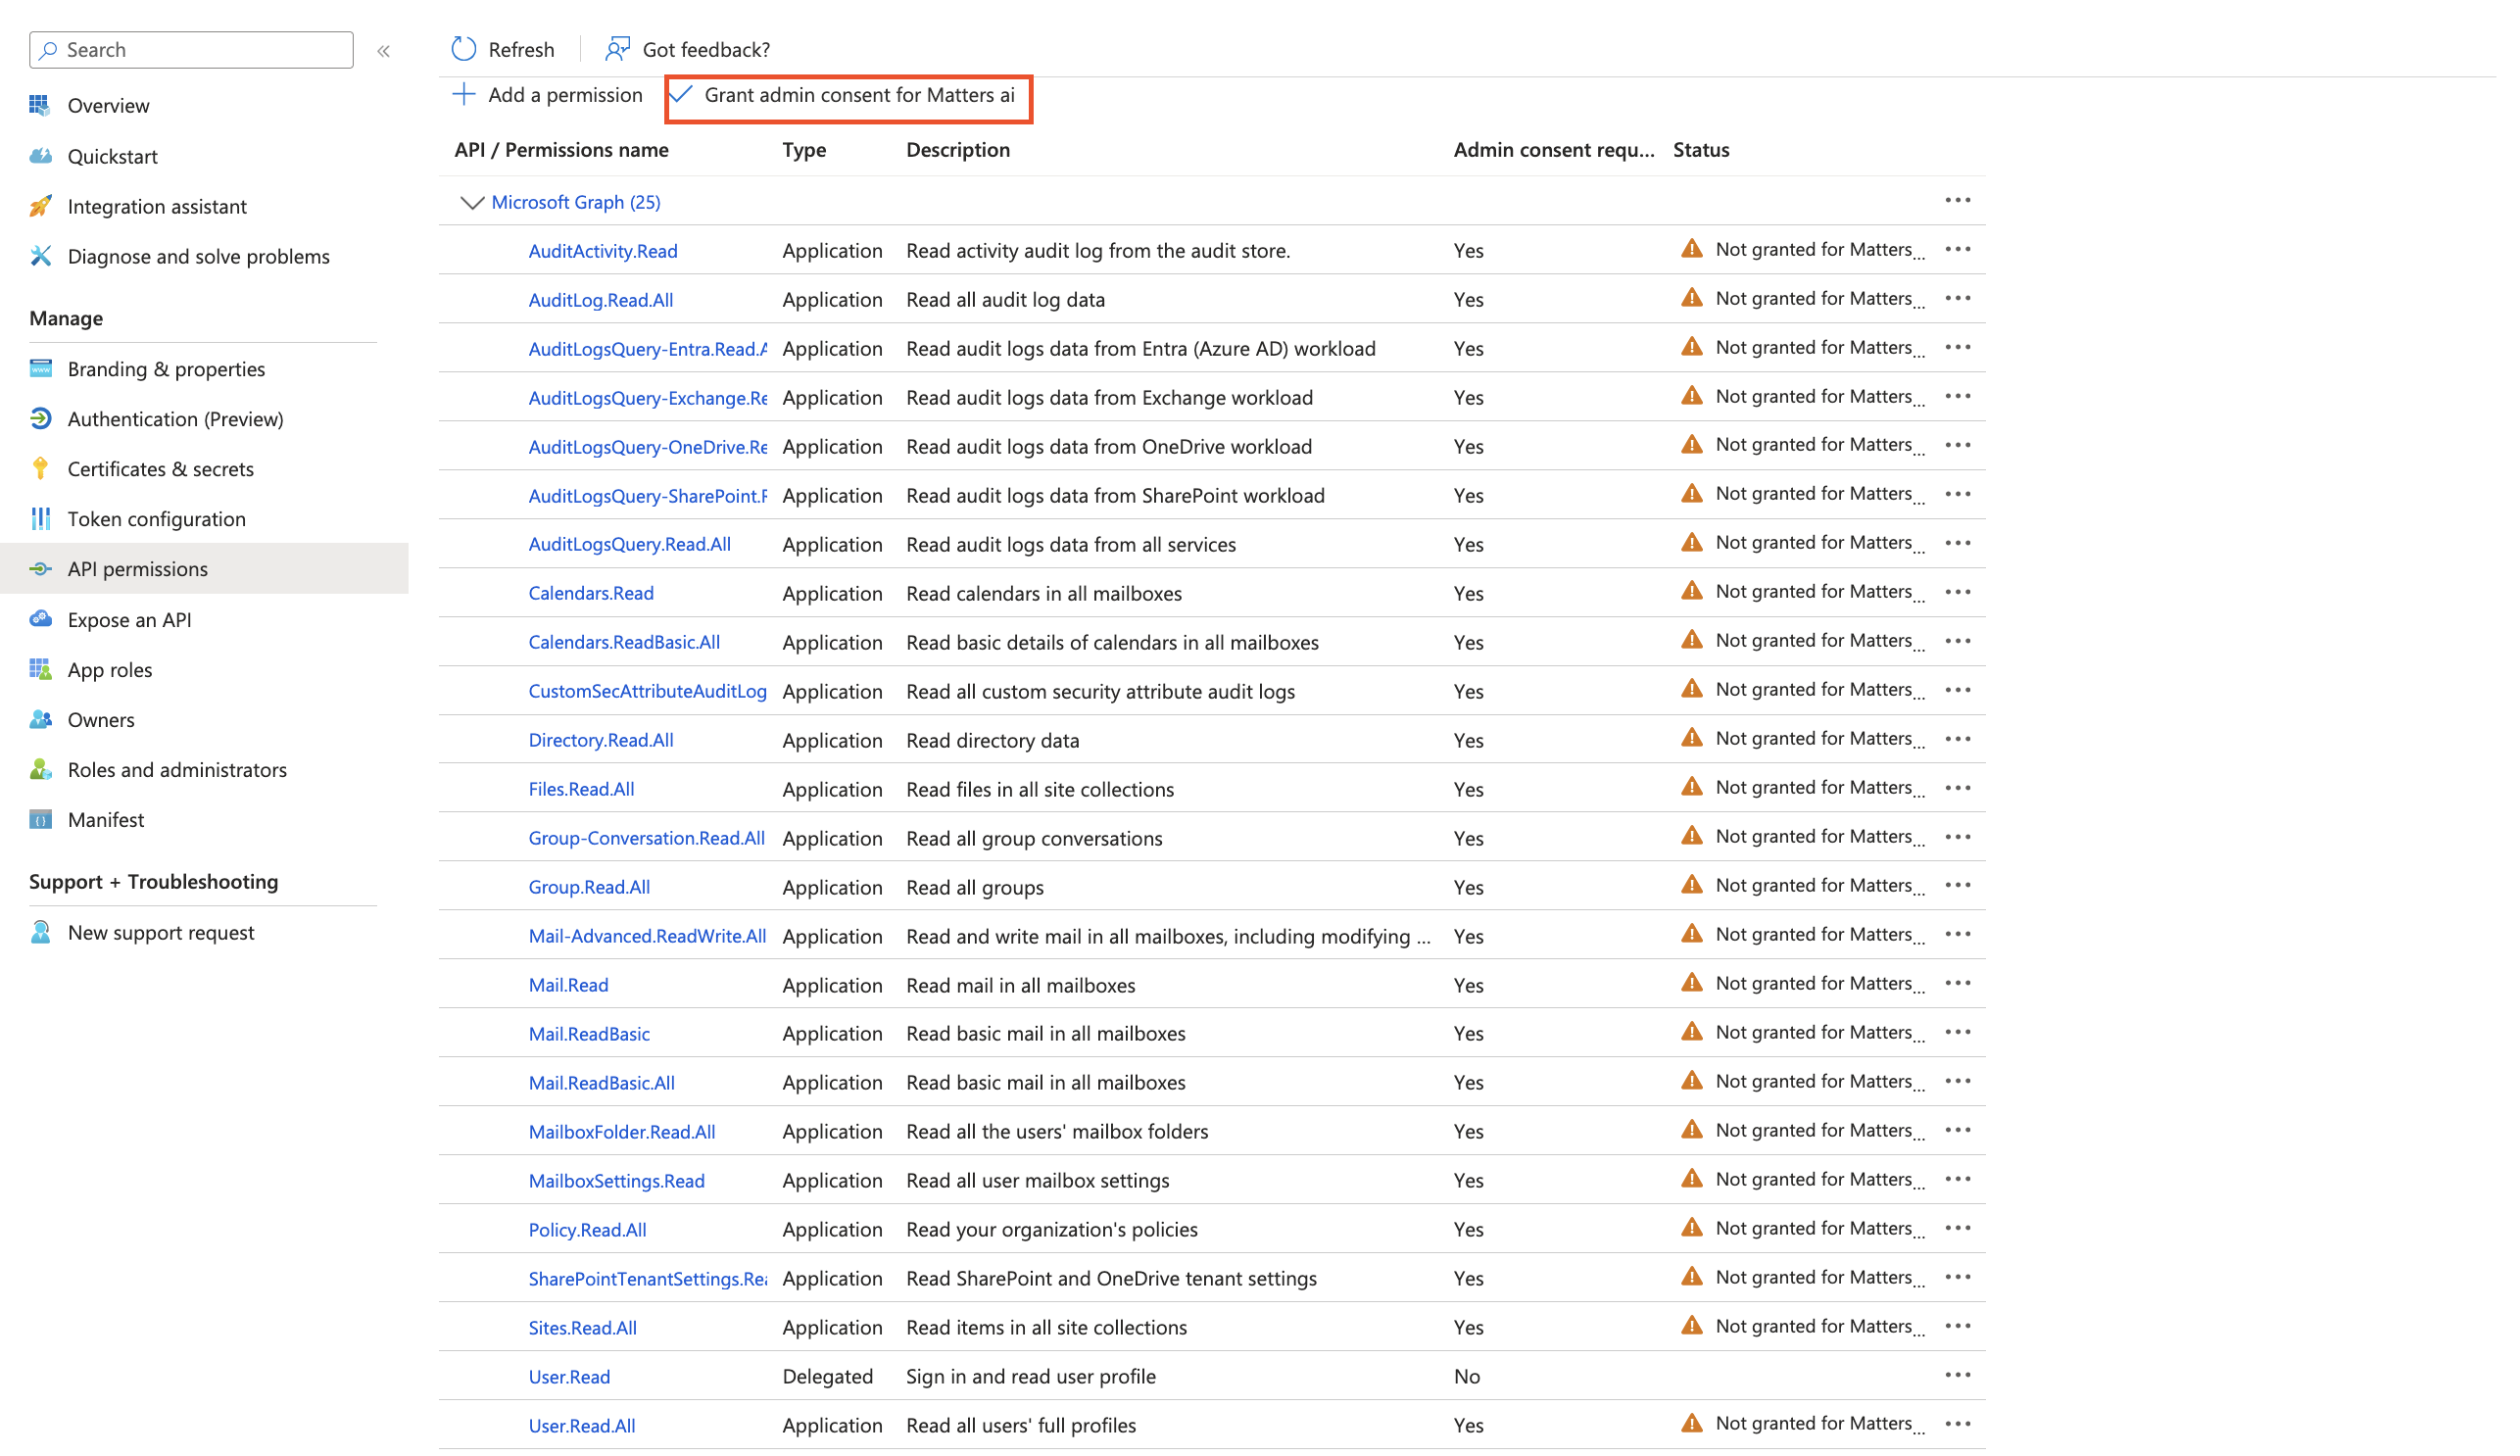
Confirm the action.
Ensure all permissions display Granted for <Your Organization>.
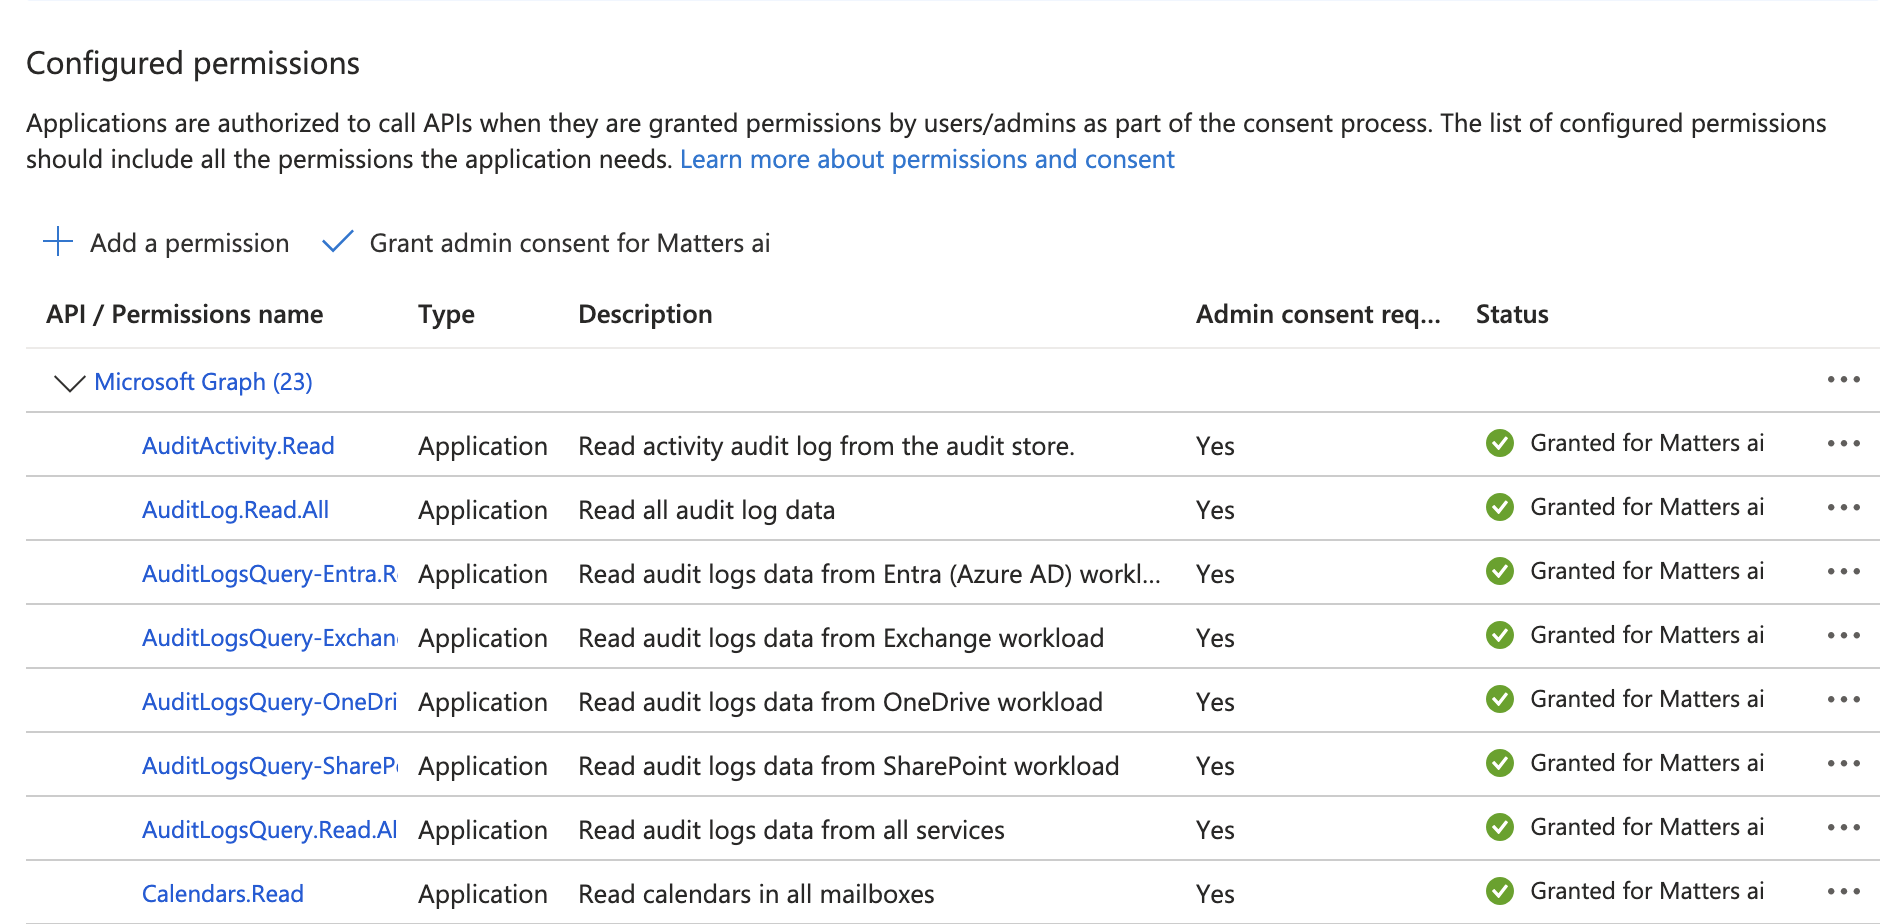
1.6 Create a Client Secret
Go to Certificates & secrets.
Under Client secrets, click New client secret.
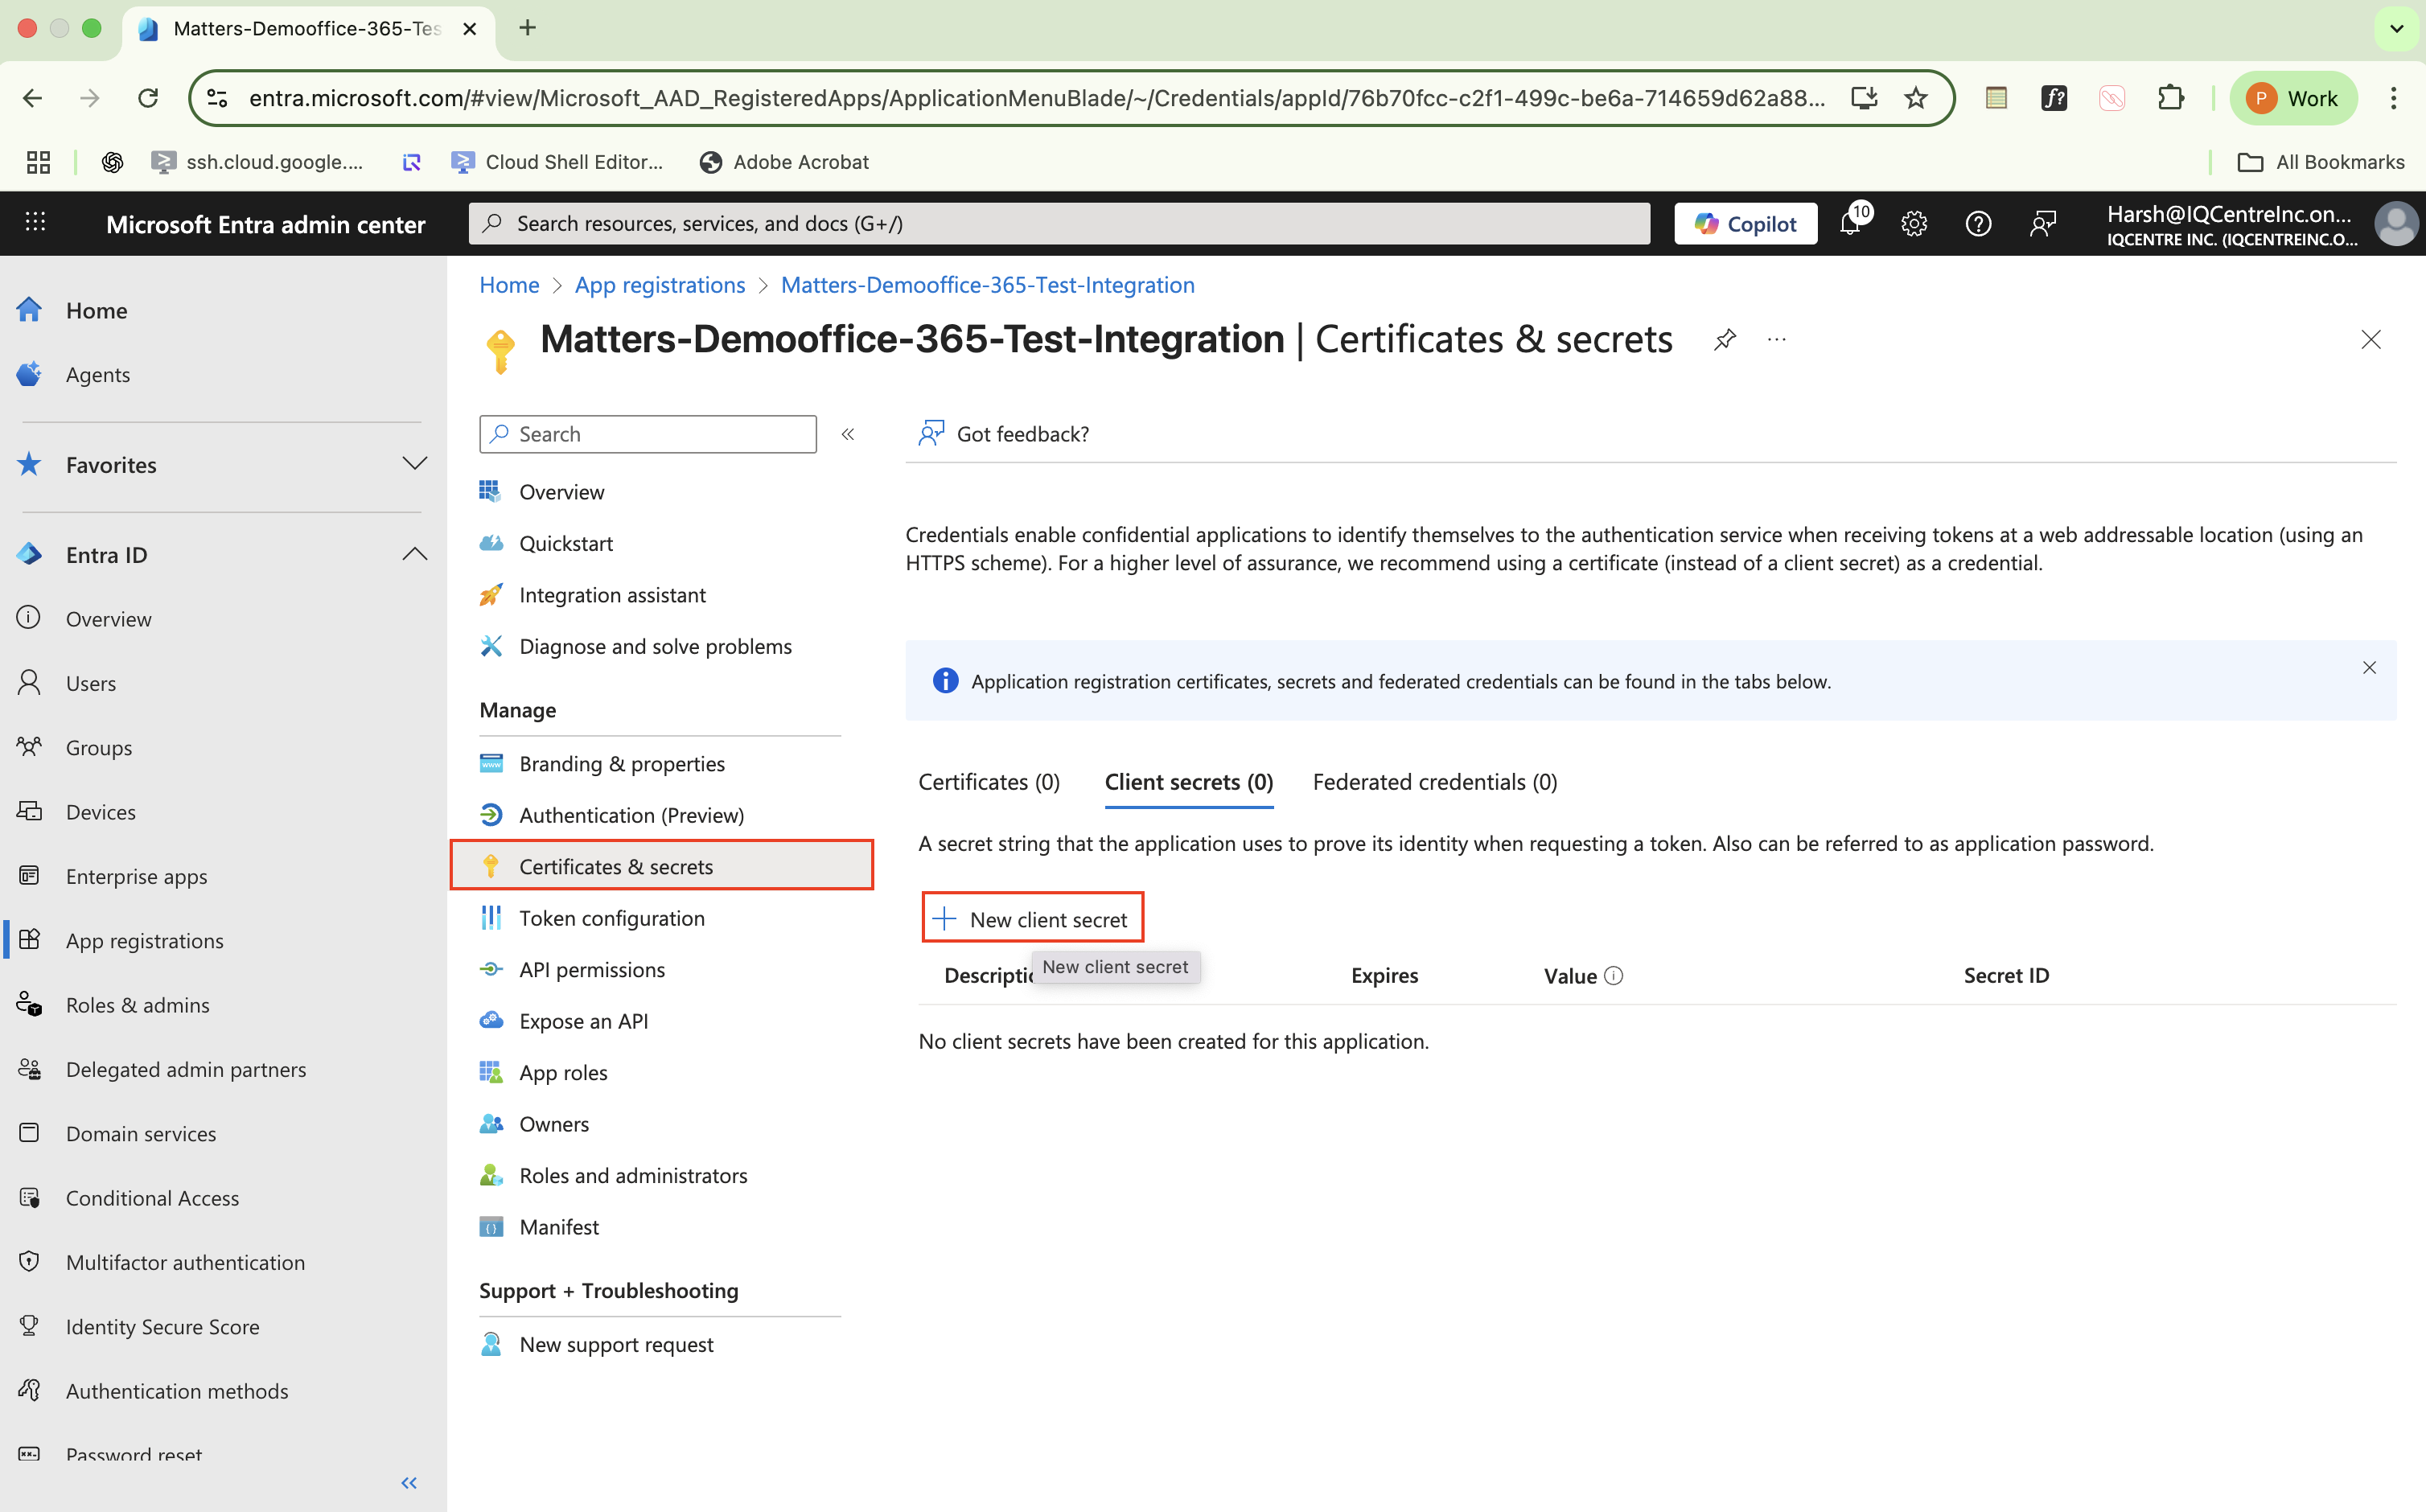
Enter:
Description: e.g.,
Optiq-Integration-Secret.
Expiry: Select per your organization’s policy.
Click Add.
Copy the Secret Value immediately and store it securely.
Note: This value will not be visible again.
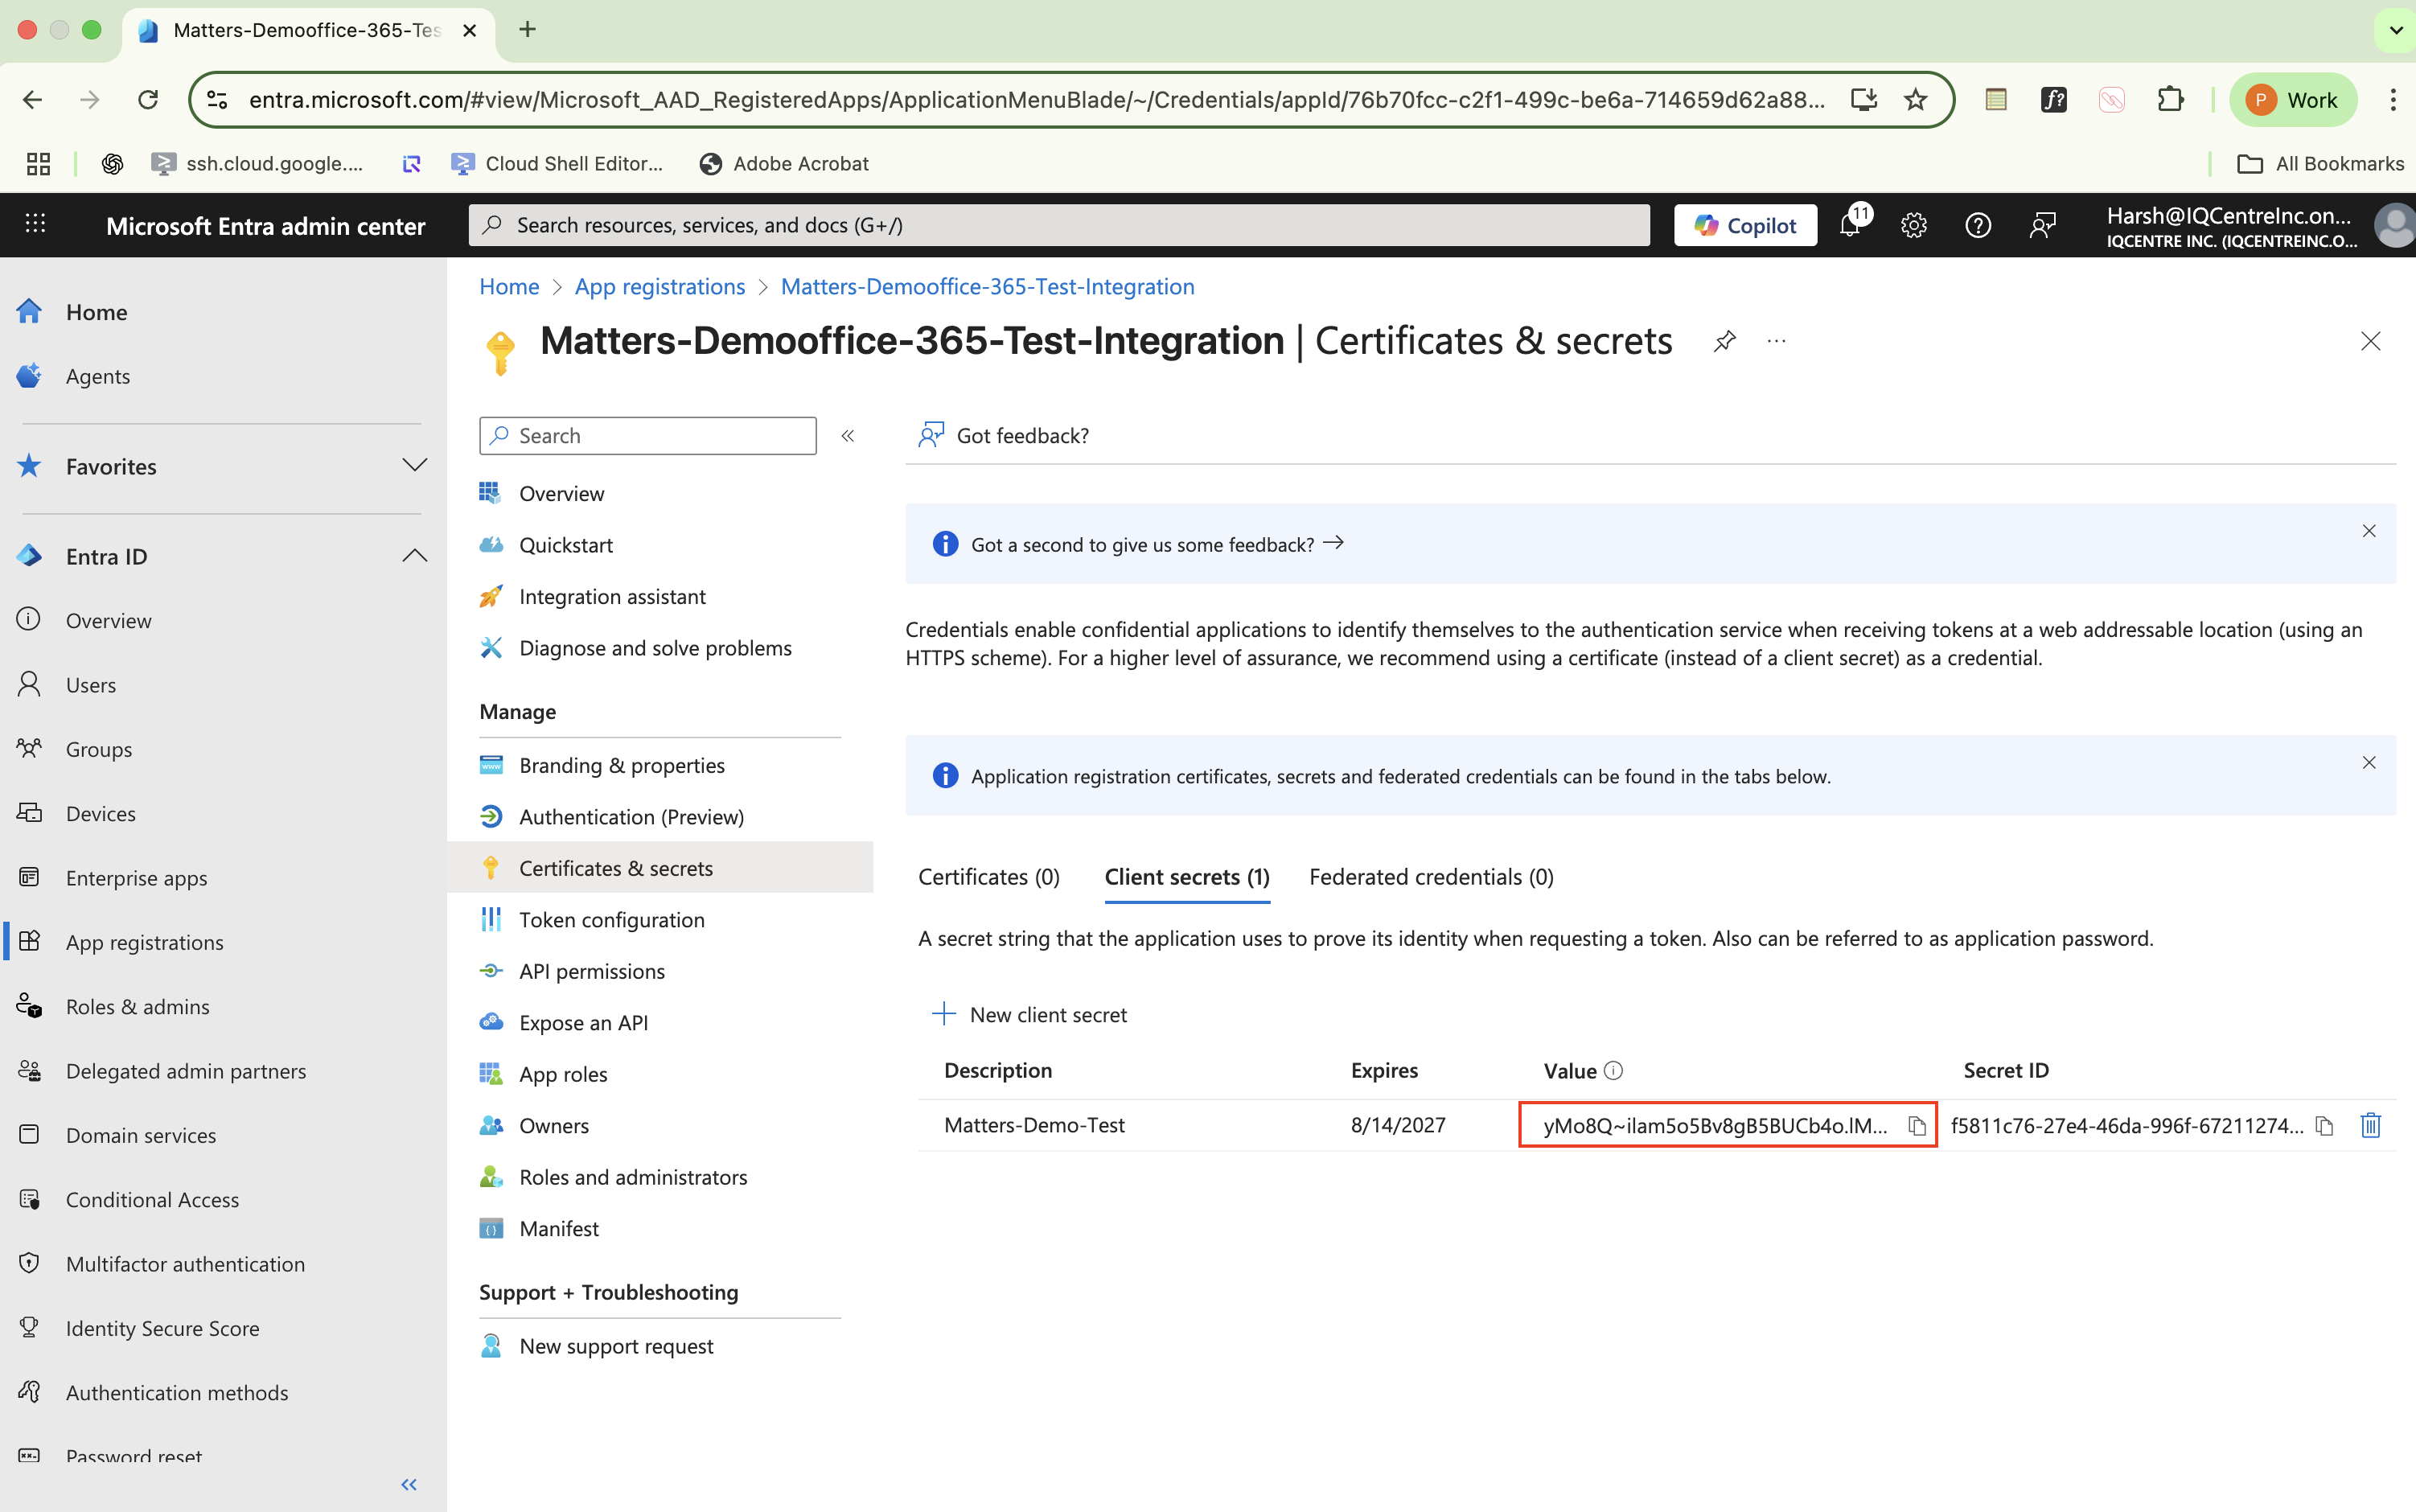
1.7 Record Application Identifiers
From the Overview page, copy and securely store:
Application (client) ID
Directory (tenant) ID
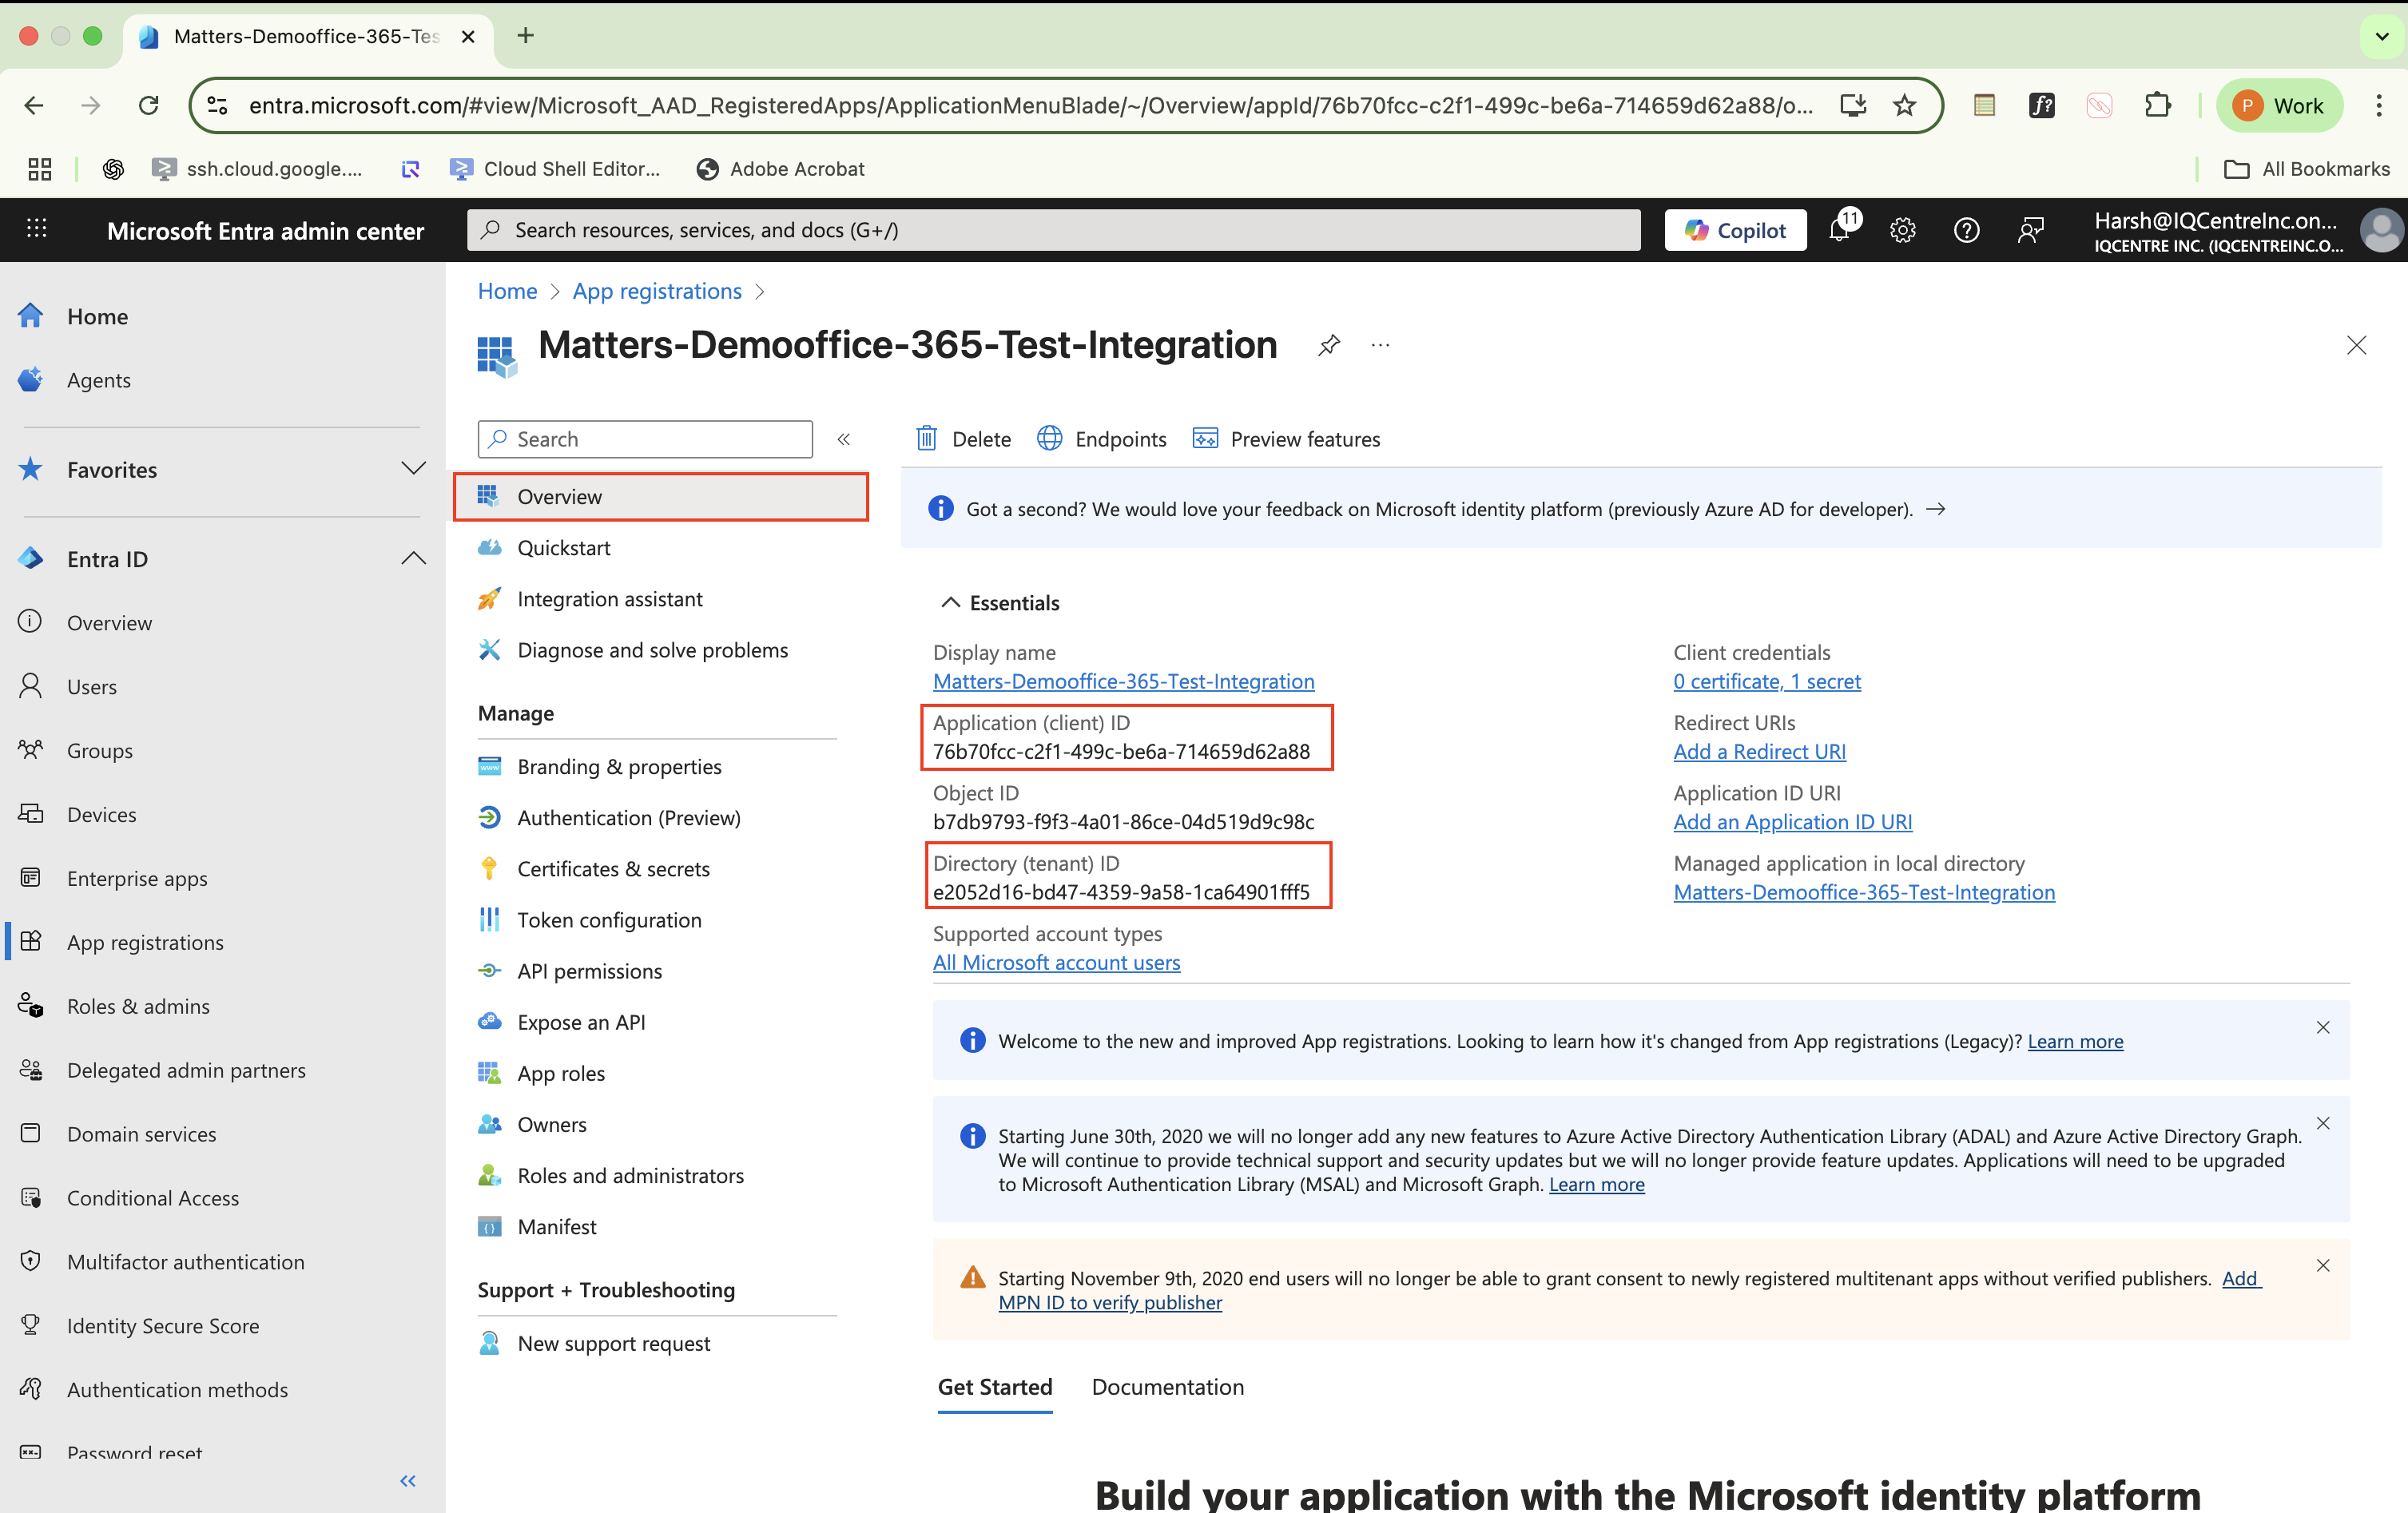
Step 2 Connect Microsoft 365 to Matters.ai
2.1 Open the Matters.ai Dashboard
Log in to Matters Dashboard.
You will land on the Dashboard Overview page.
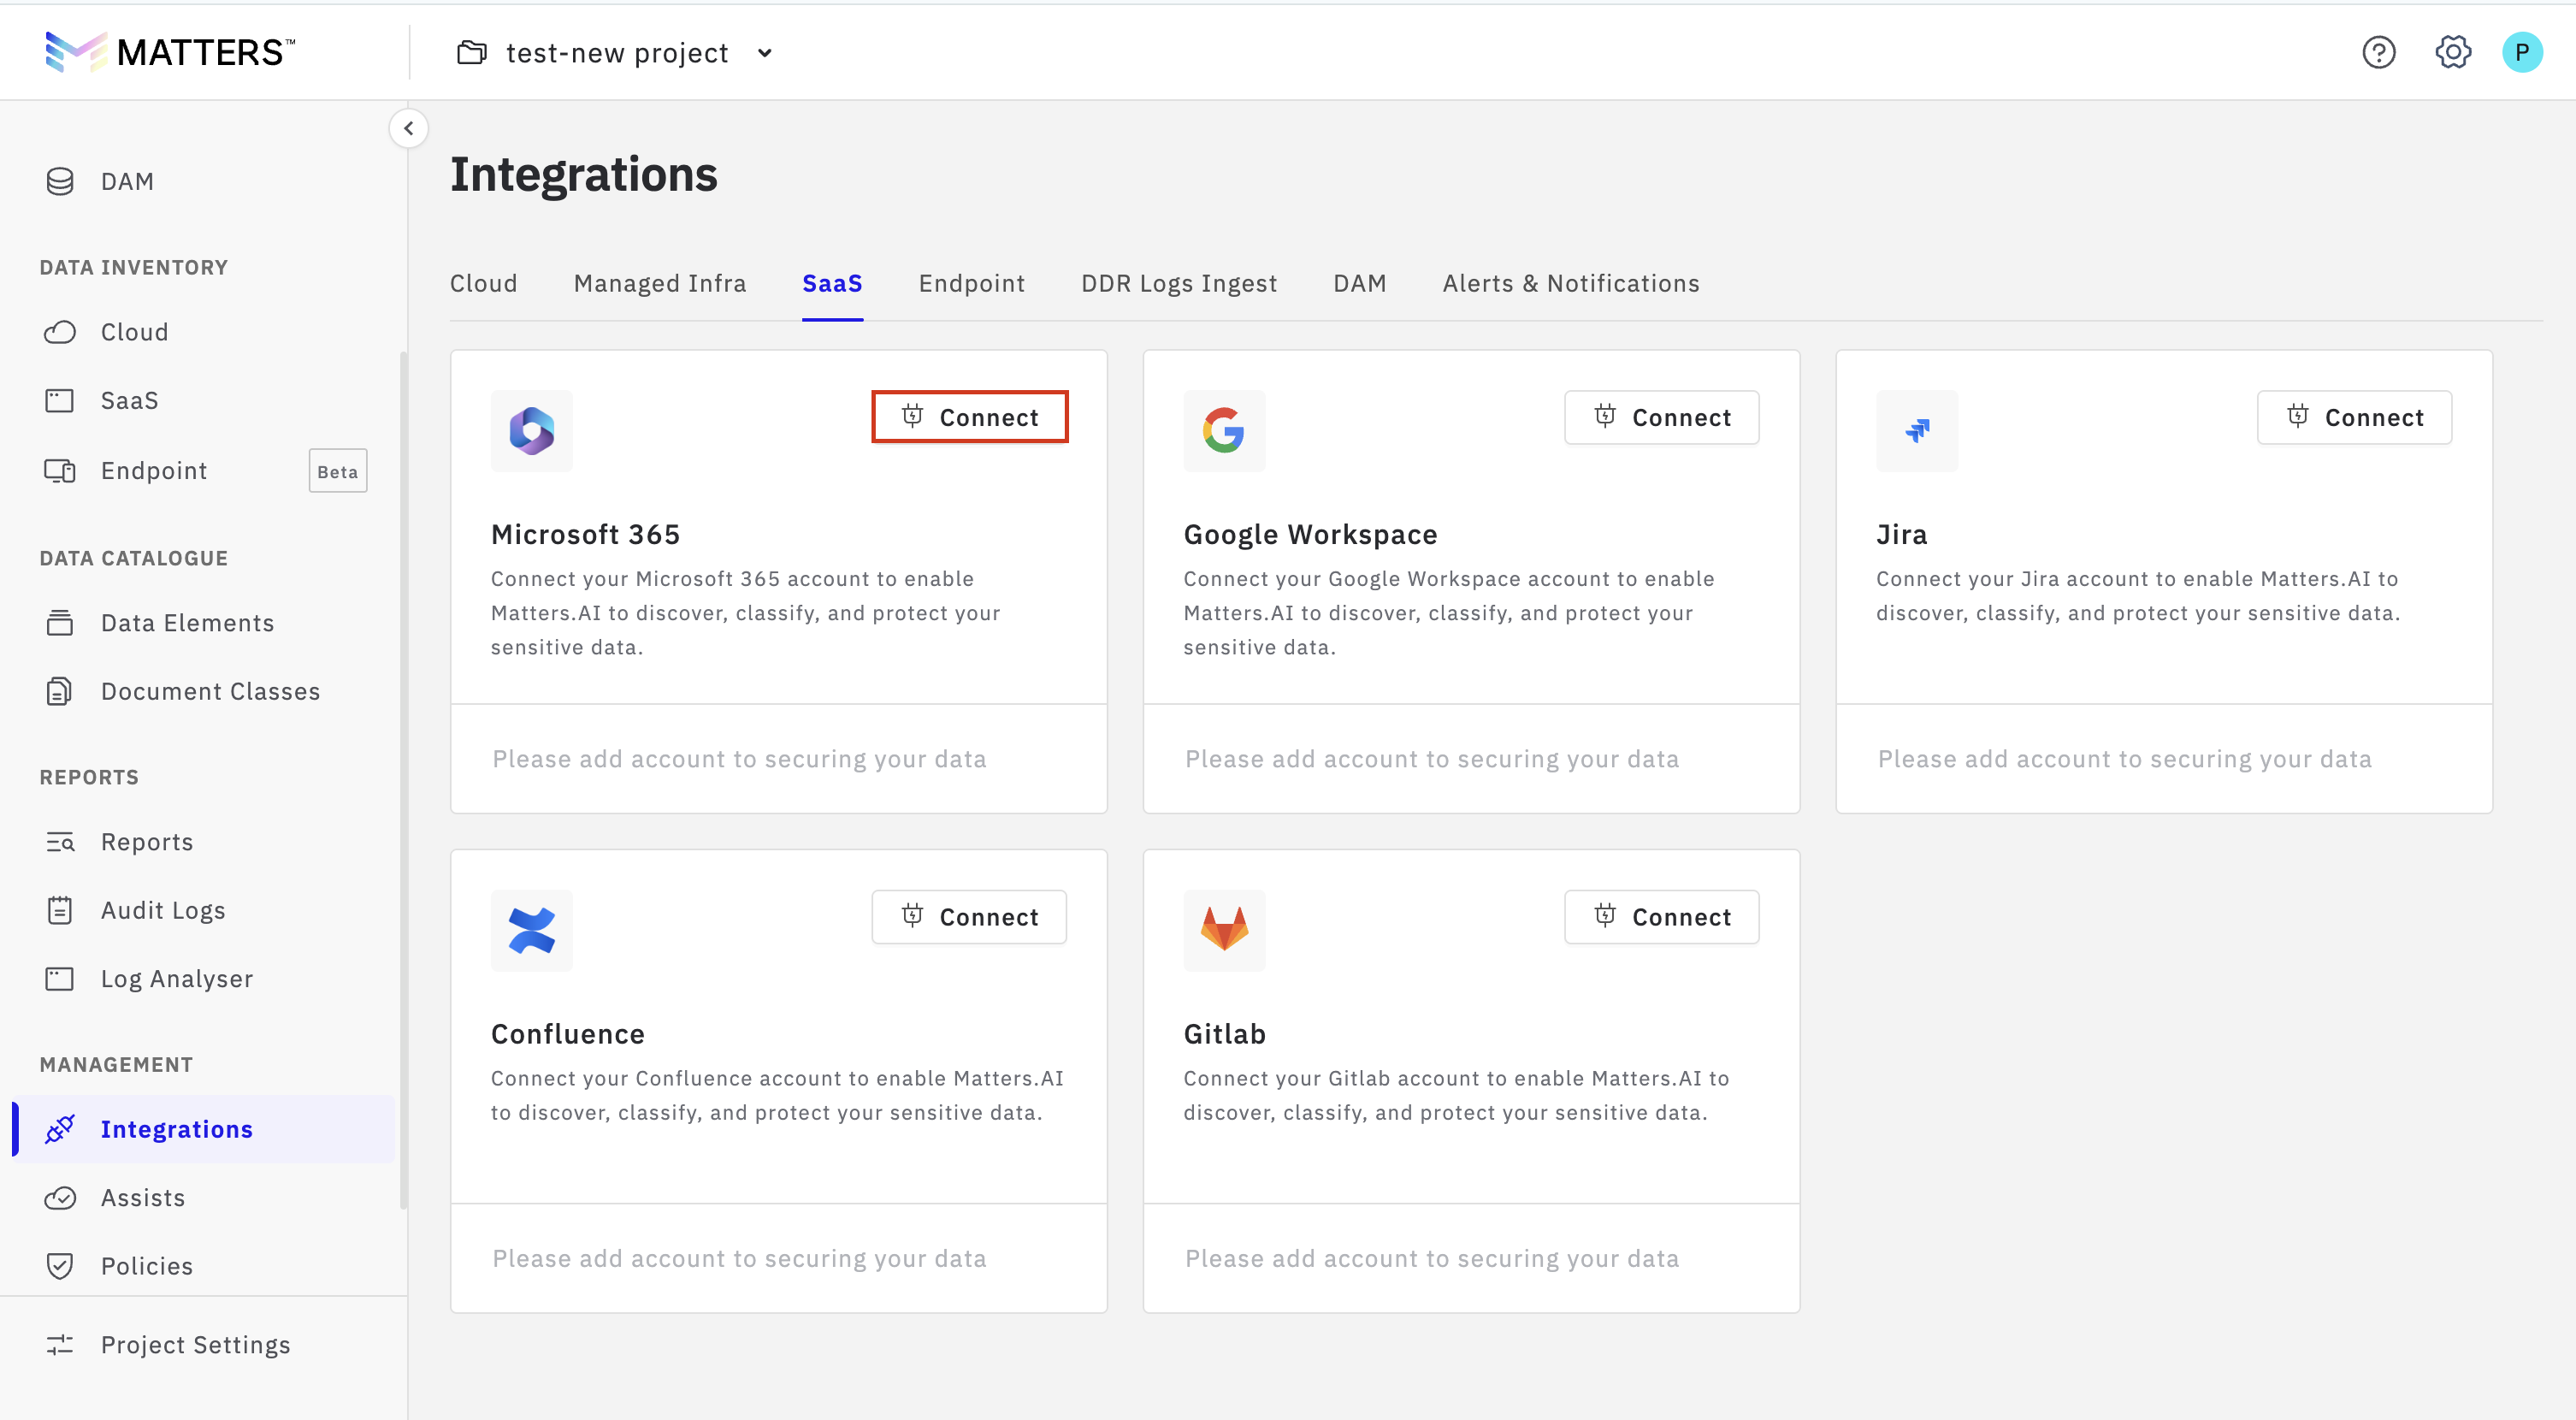
2.2 Navigate to the Office 365 Connector
Click Integrations in the navigation menu.
Select the SAAS tab.
Locate Microsoft Office 365.
Click Connect.
2.3 Complete the Integration Form
In the O365 Integration modal:
Integration Name: Provide a meaningful label (e.g.,
Prod-M365-Integration).
Client ID: Paste the Application (client) ID
Client Secret: Paste the Secret Value
Tenant ID: Paste the Directory (tenant) ID
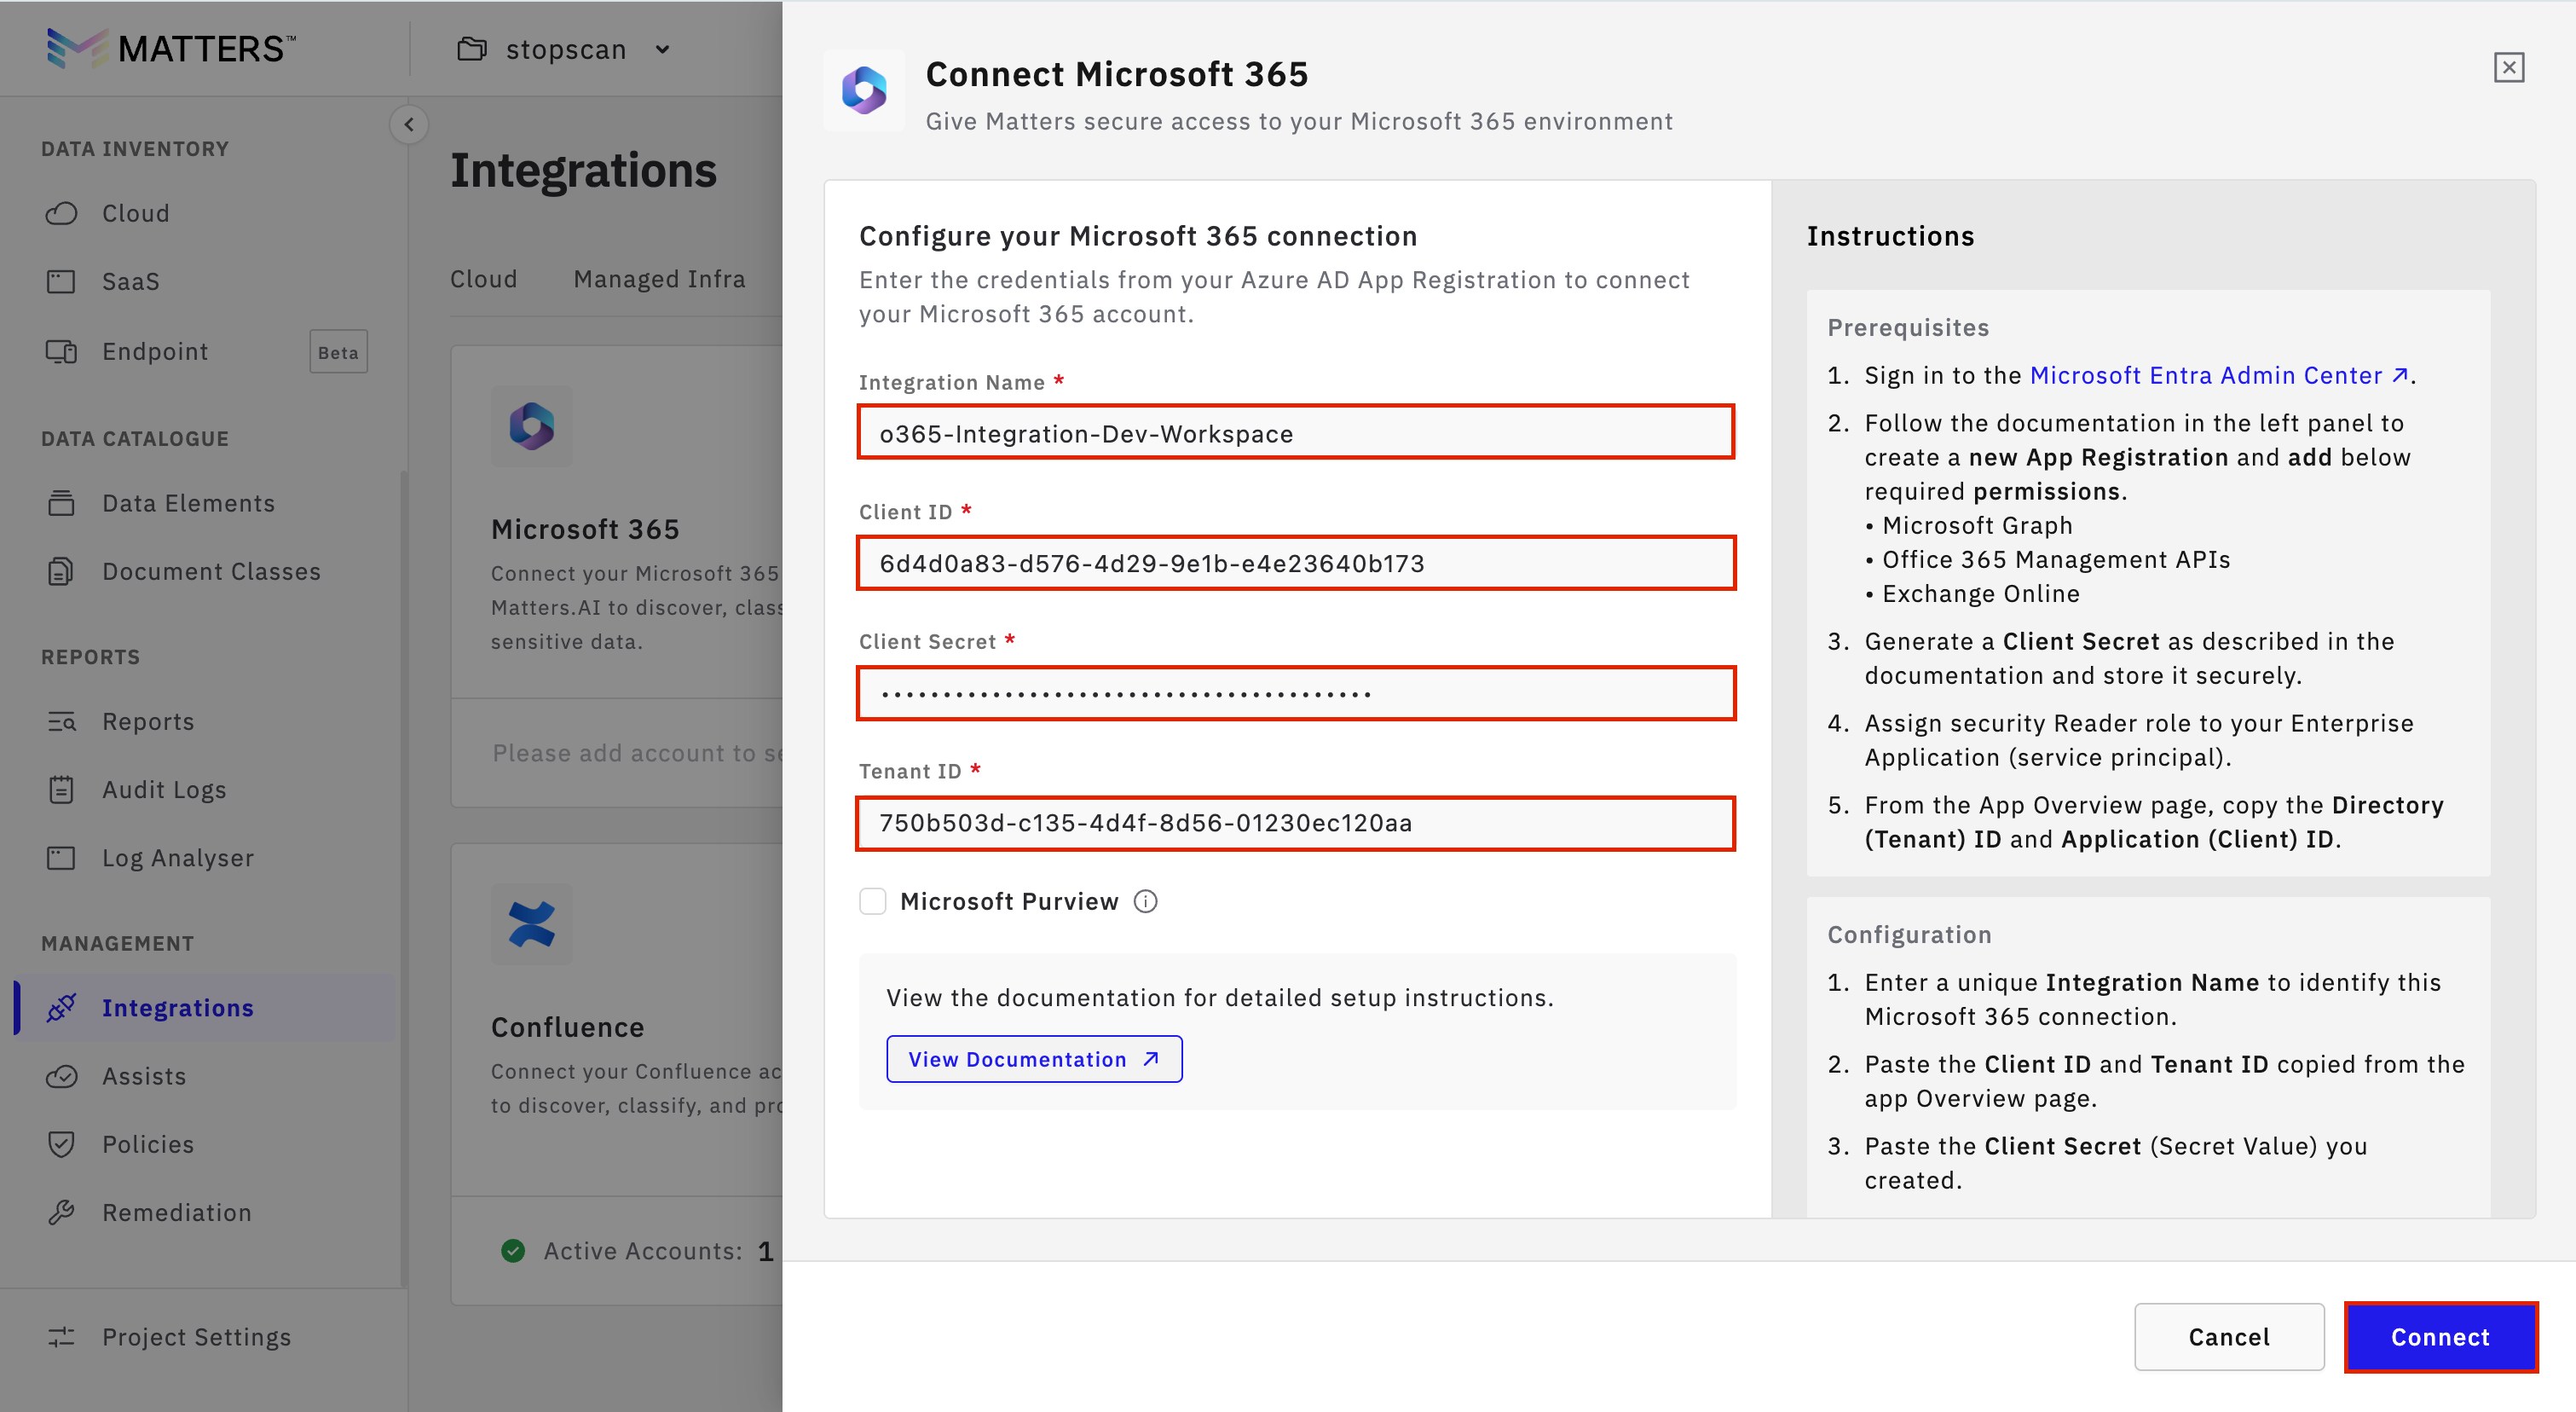
Click Connect.
On success, an Integration Success confirmation message will appear.
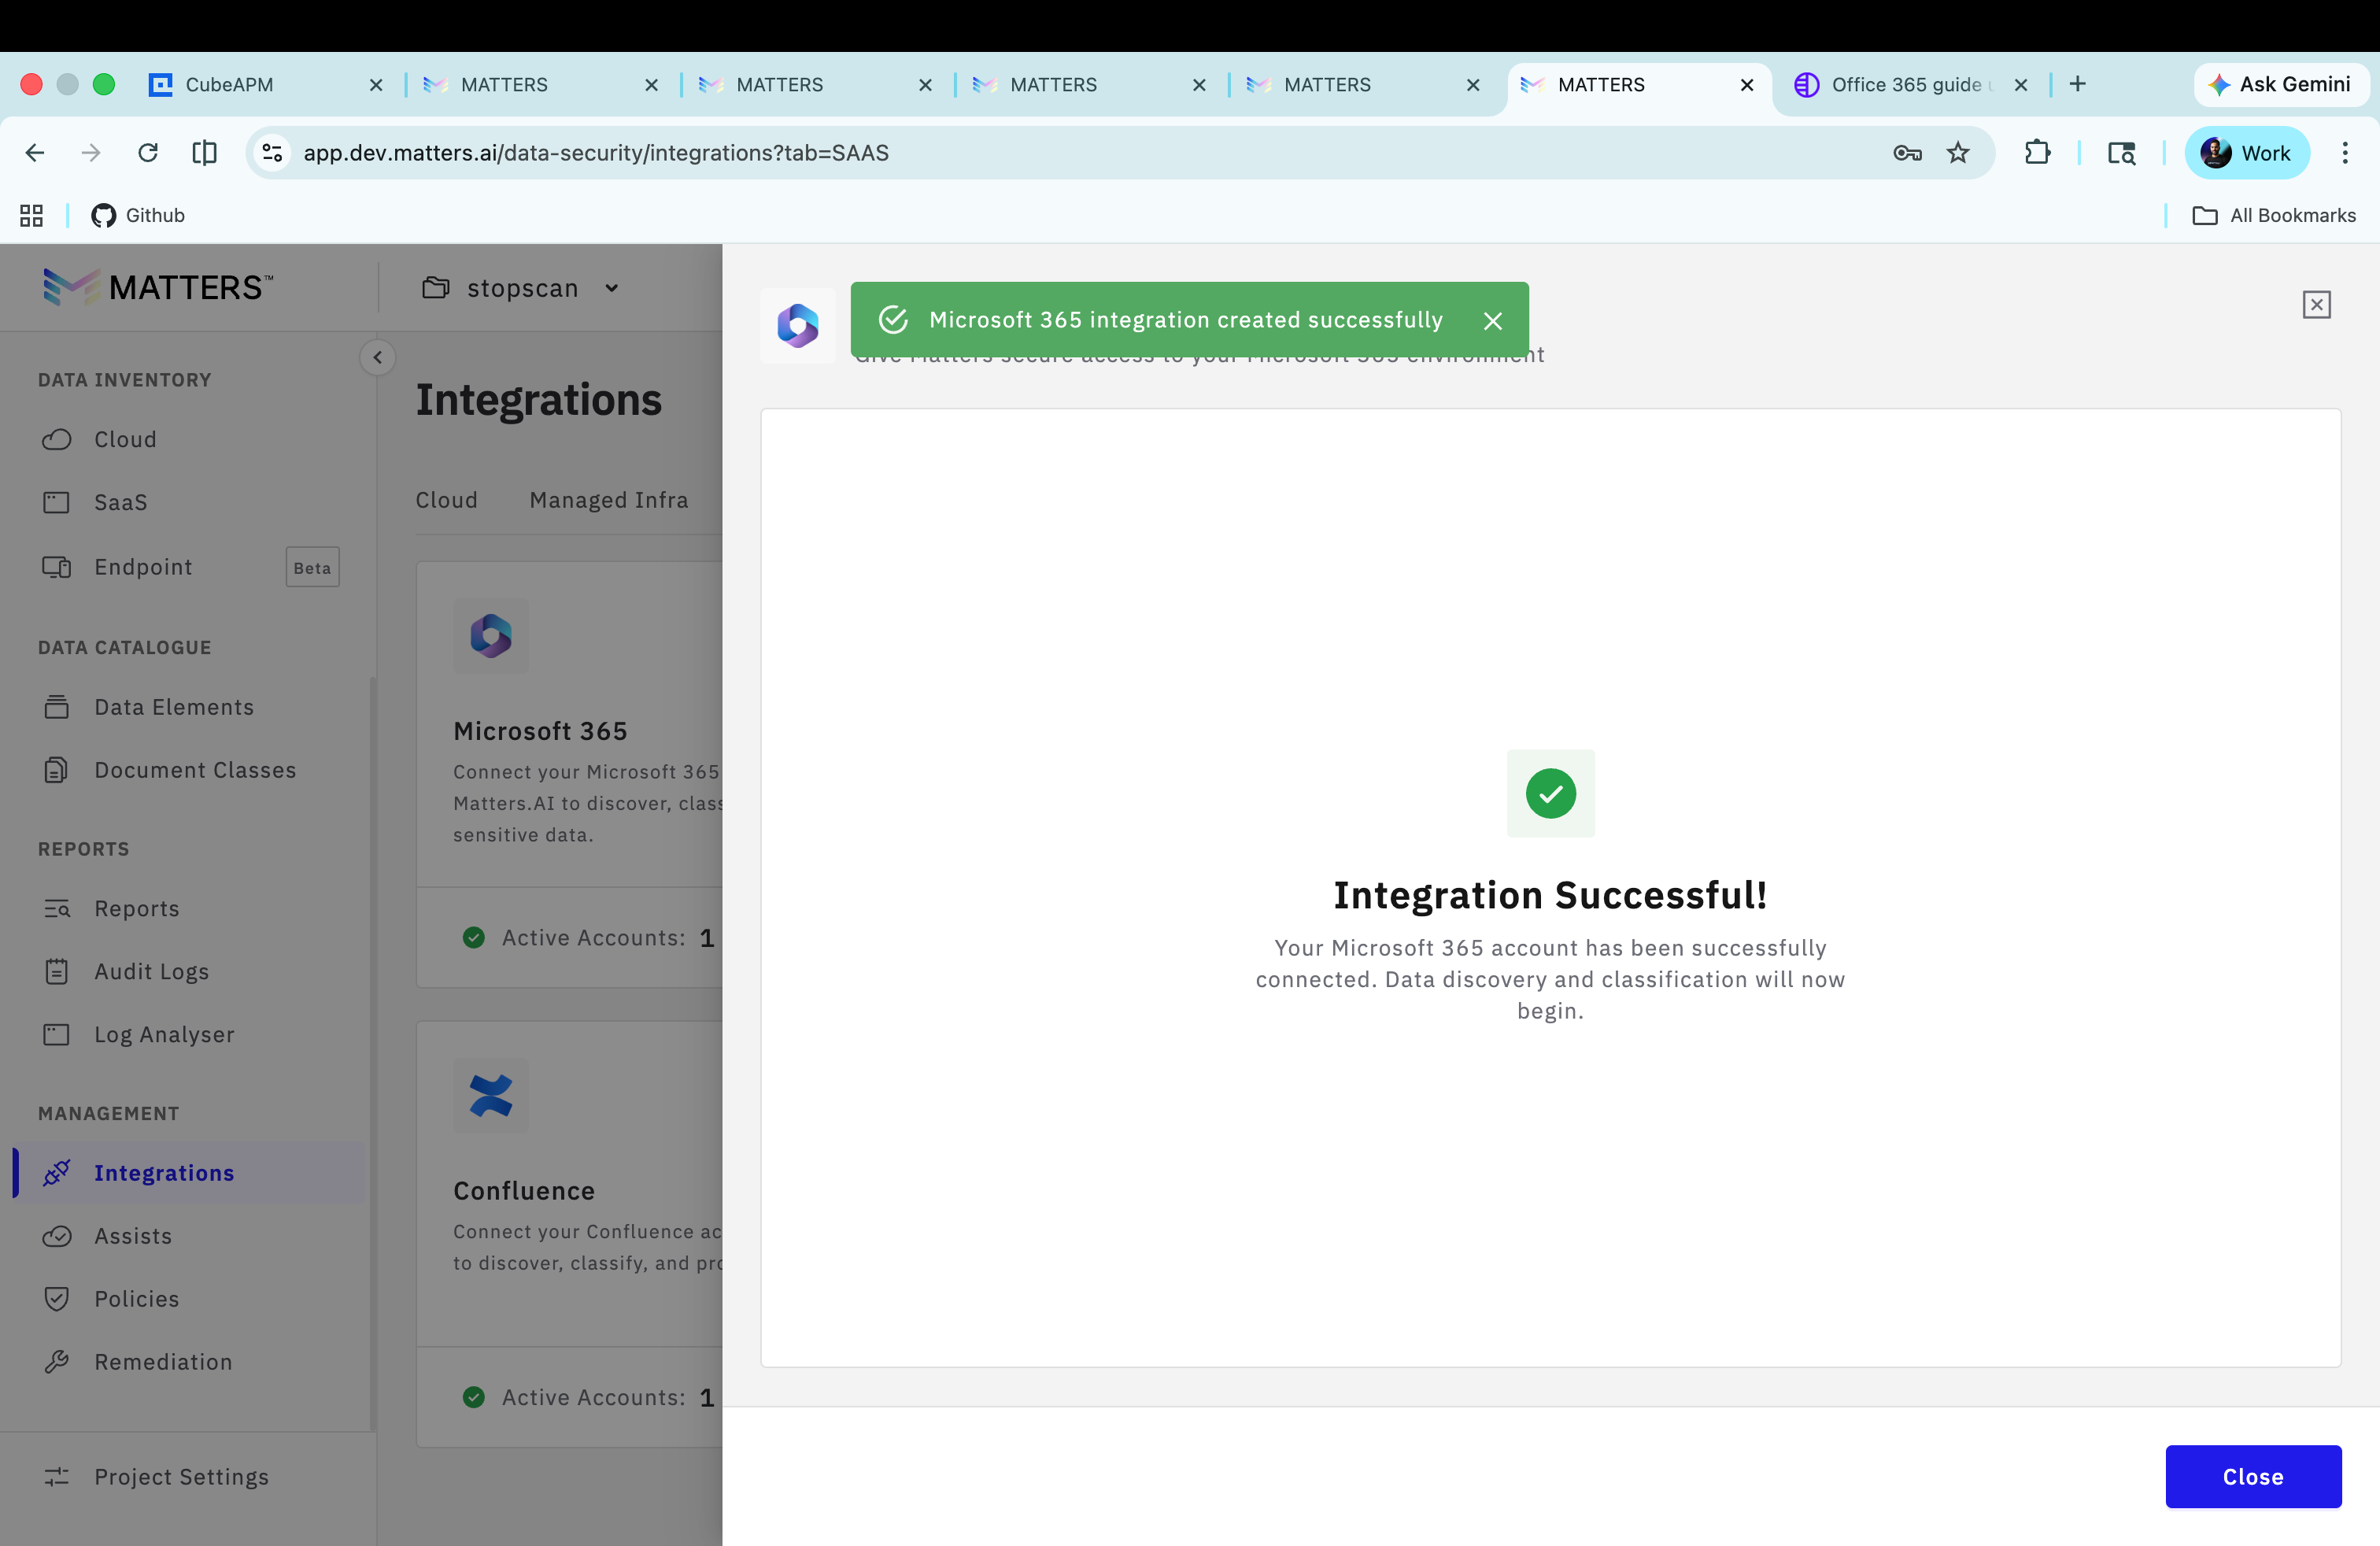
Step 2.4: Configure SAAS Scan Settings
Once Office 365 Integration is Complete:
Navigate to SAAS.
All SharePoint sites, OneDrive users, and Outlook-related data will be automatically Listed in the SAAS Inventory.
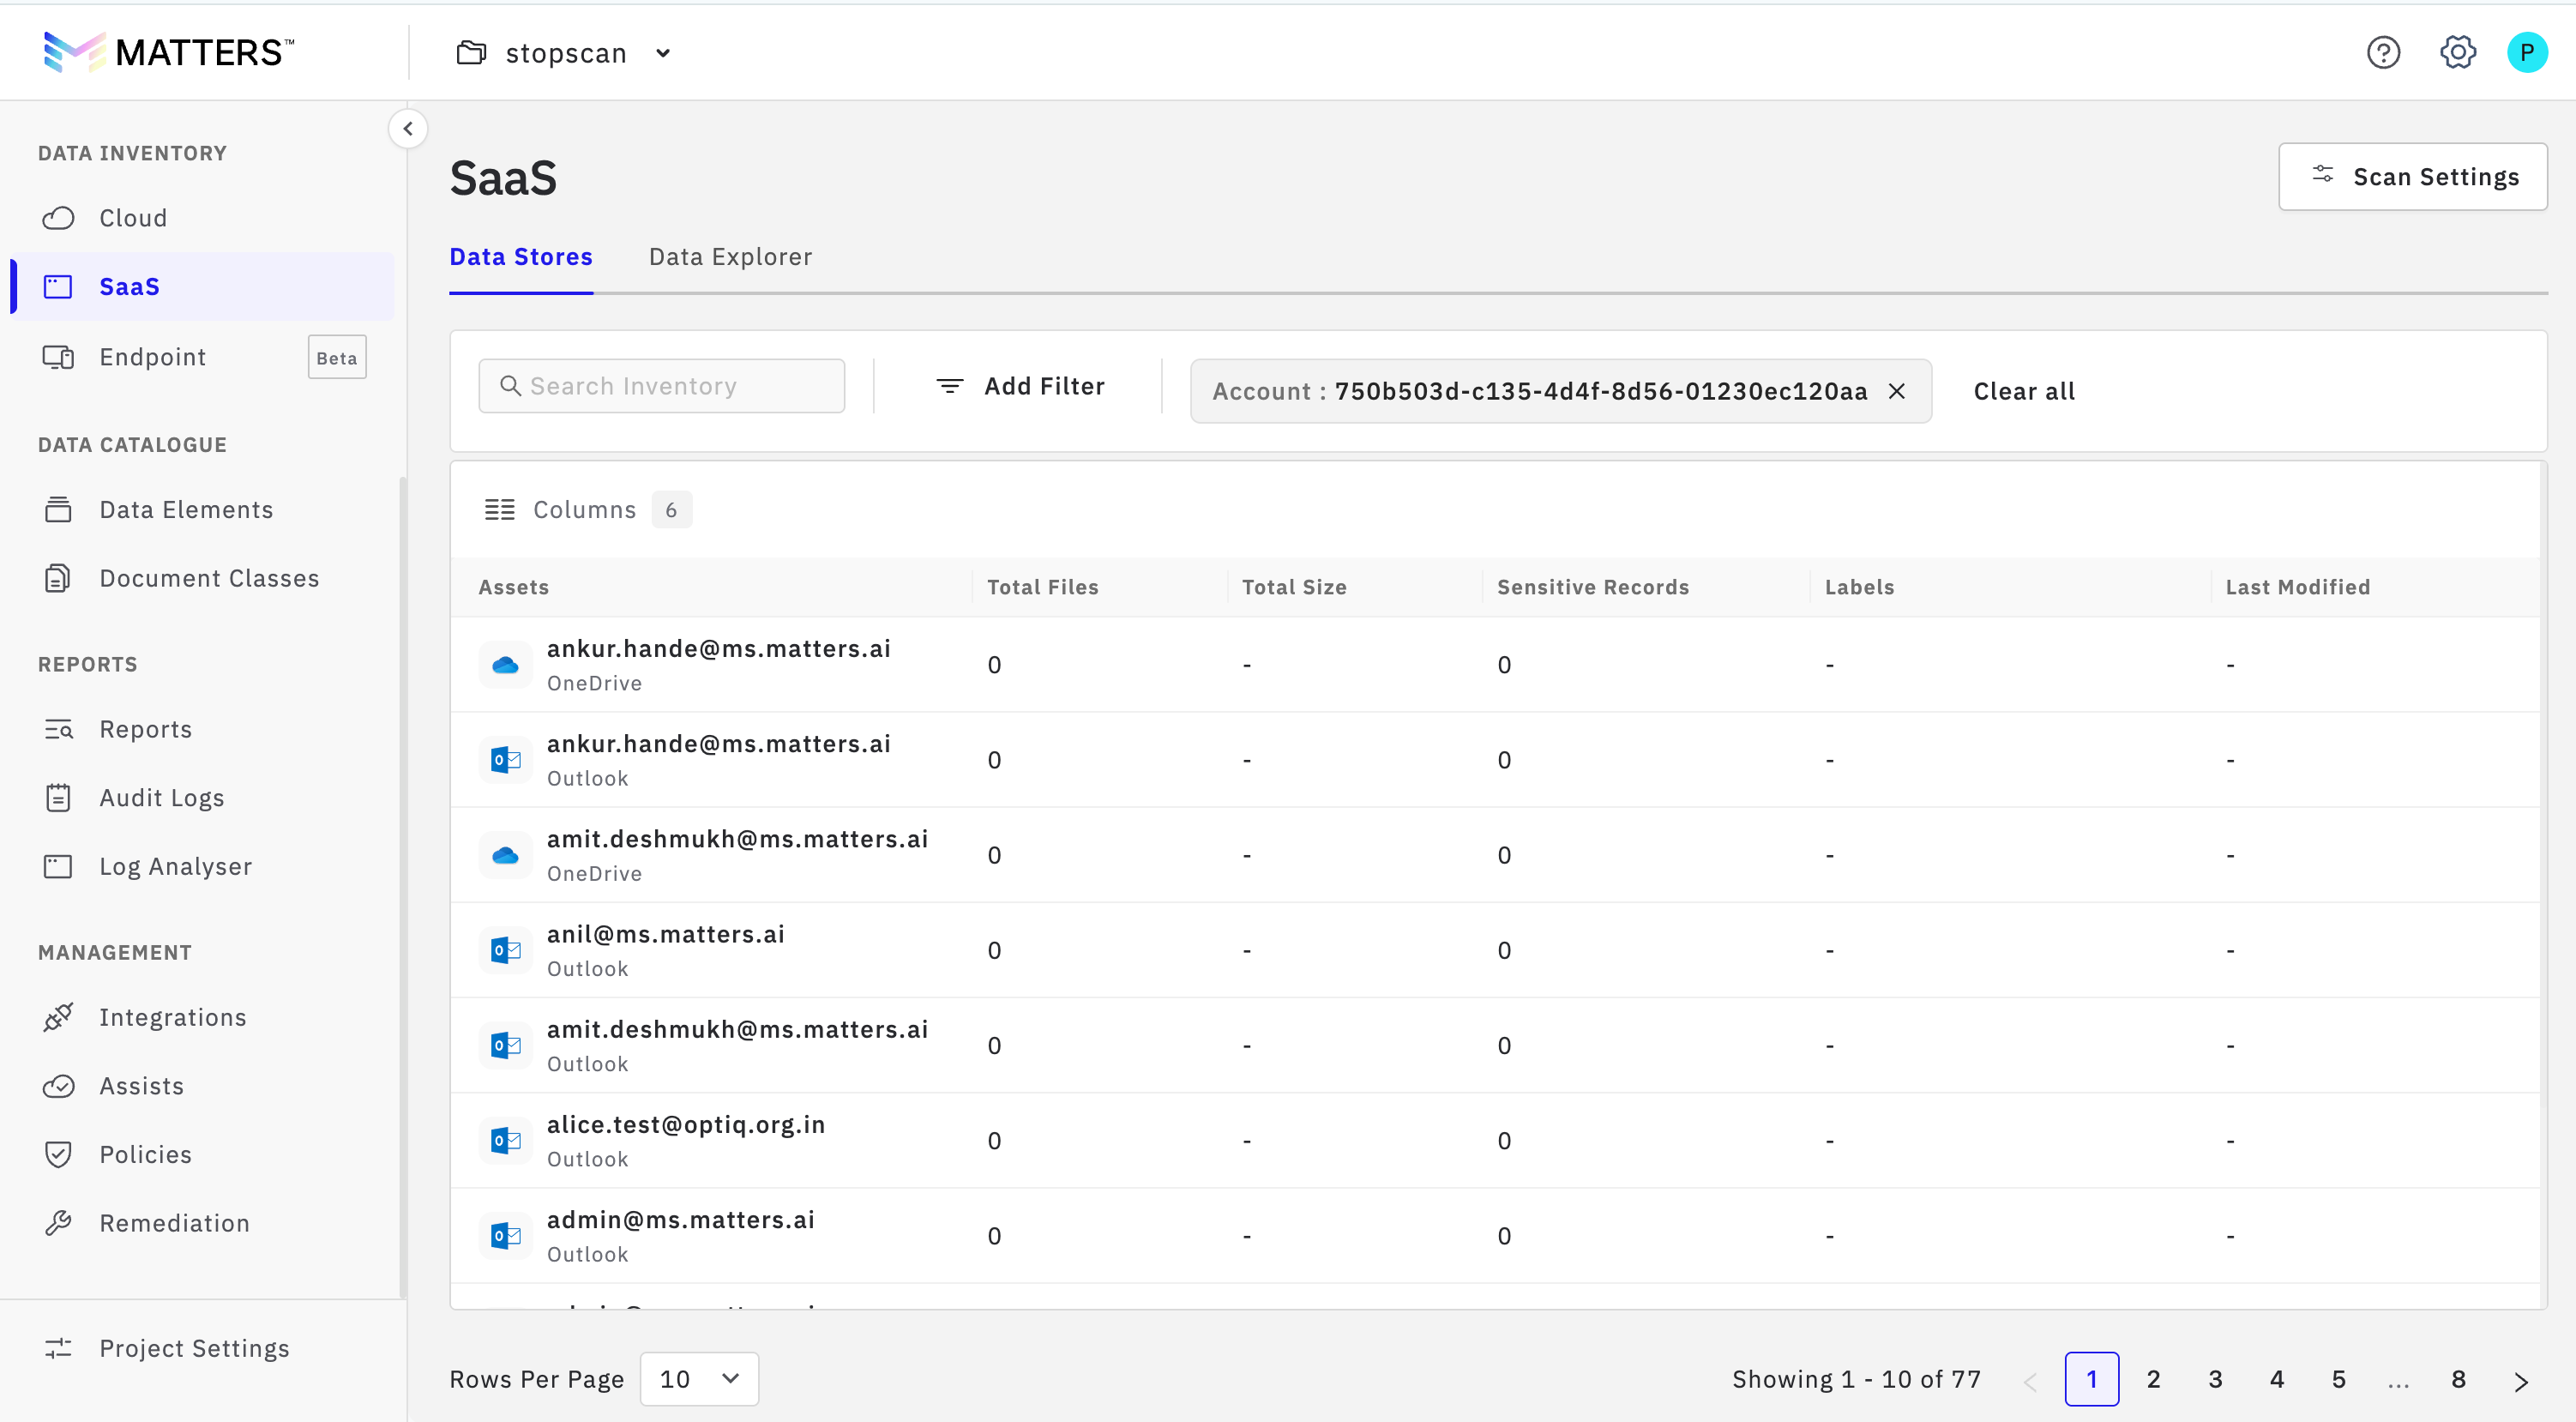
Step 2.5: Manually Configure SAAS Scans
To Configure SAAS Scans click on Scan Settings and follow the steps below to configure OneDrive, SharePoint, and Outlook scanning.
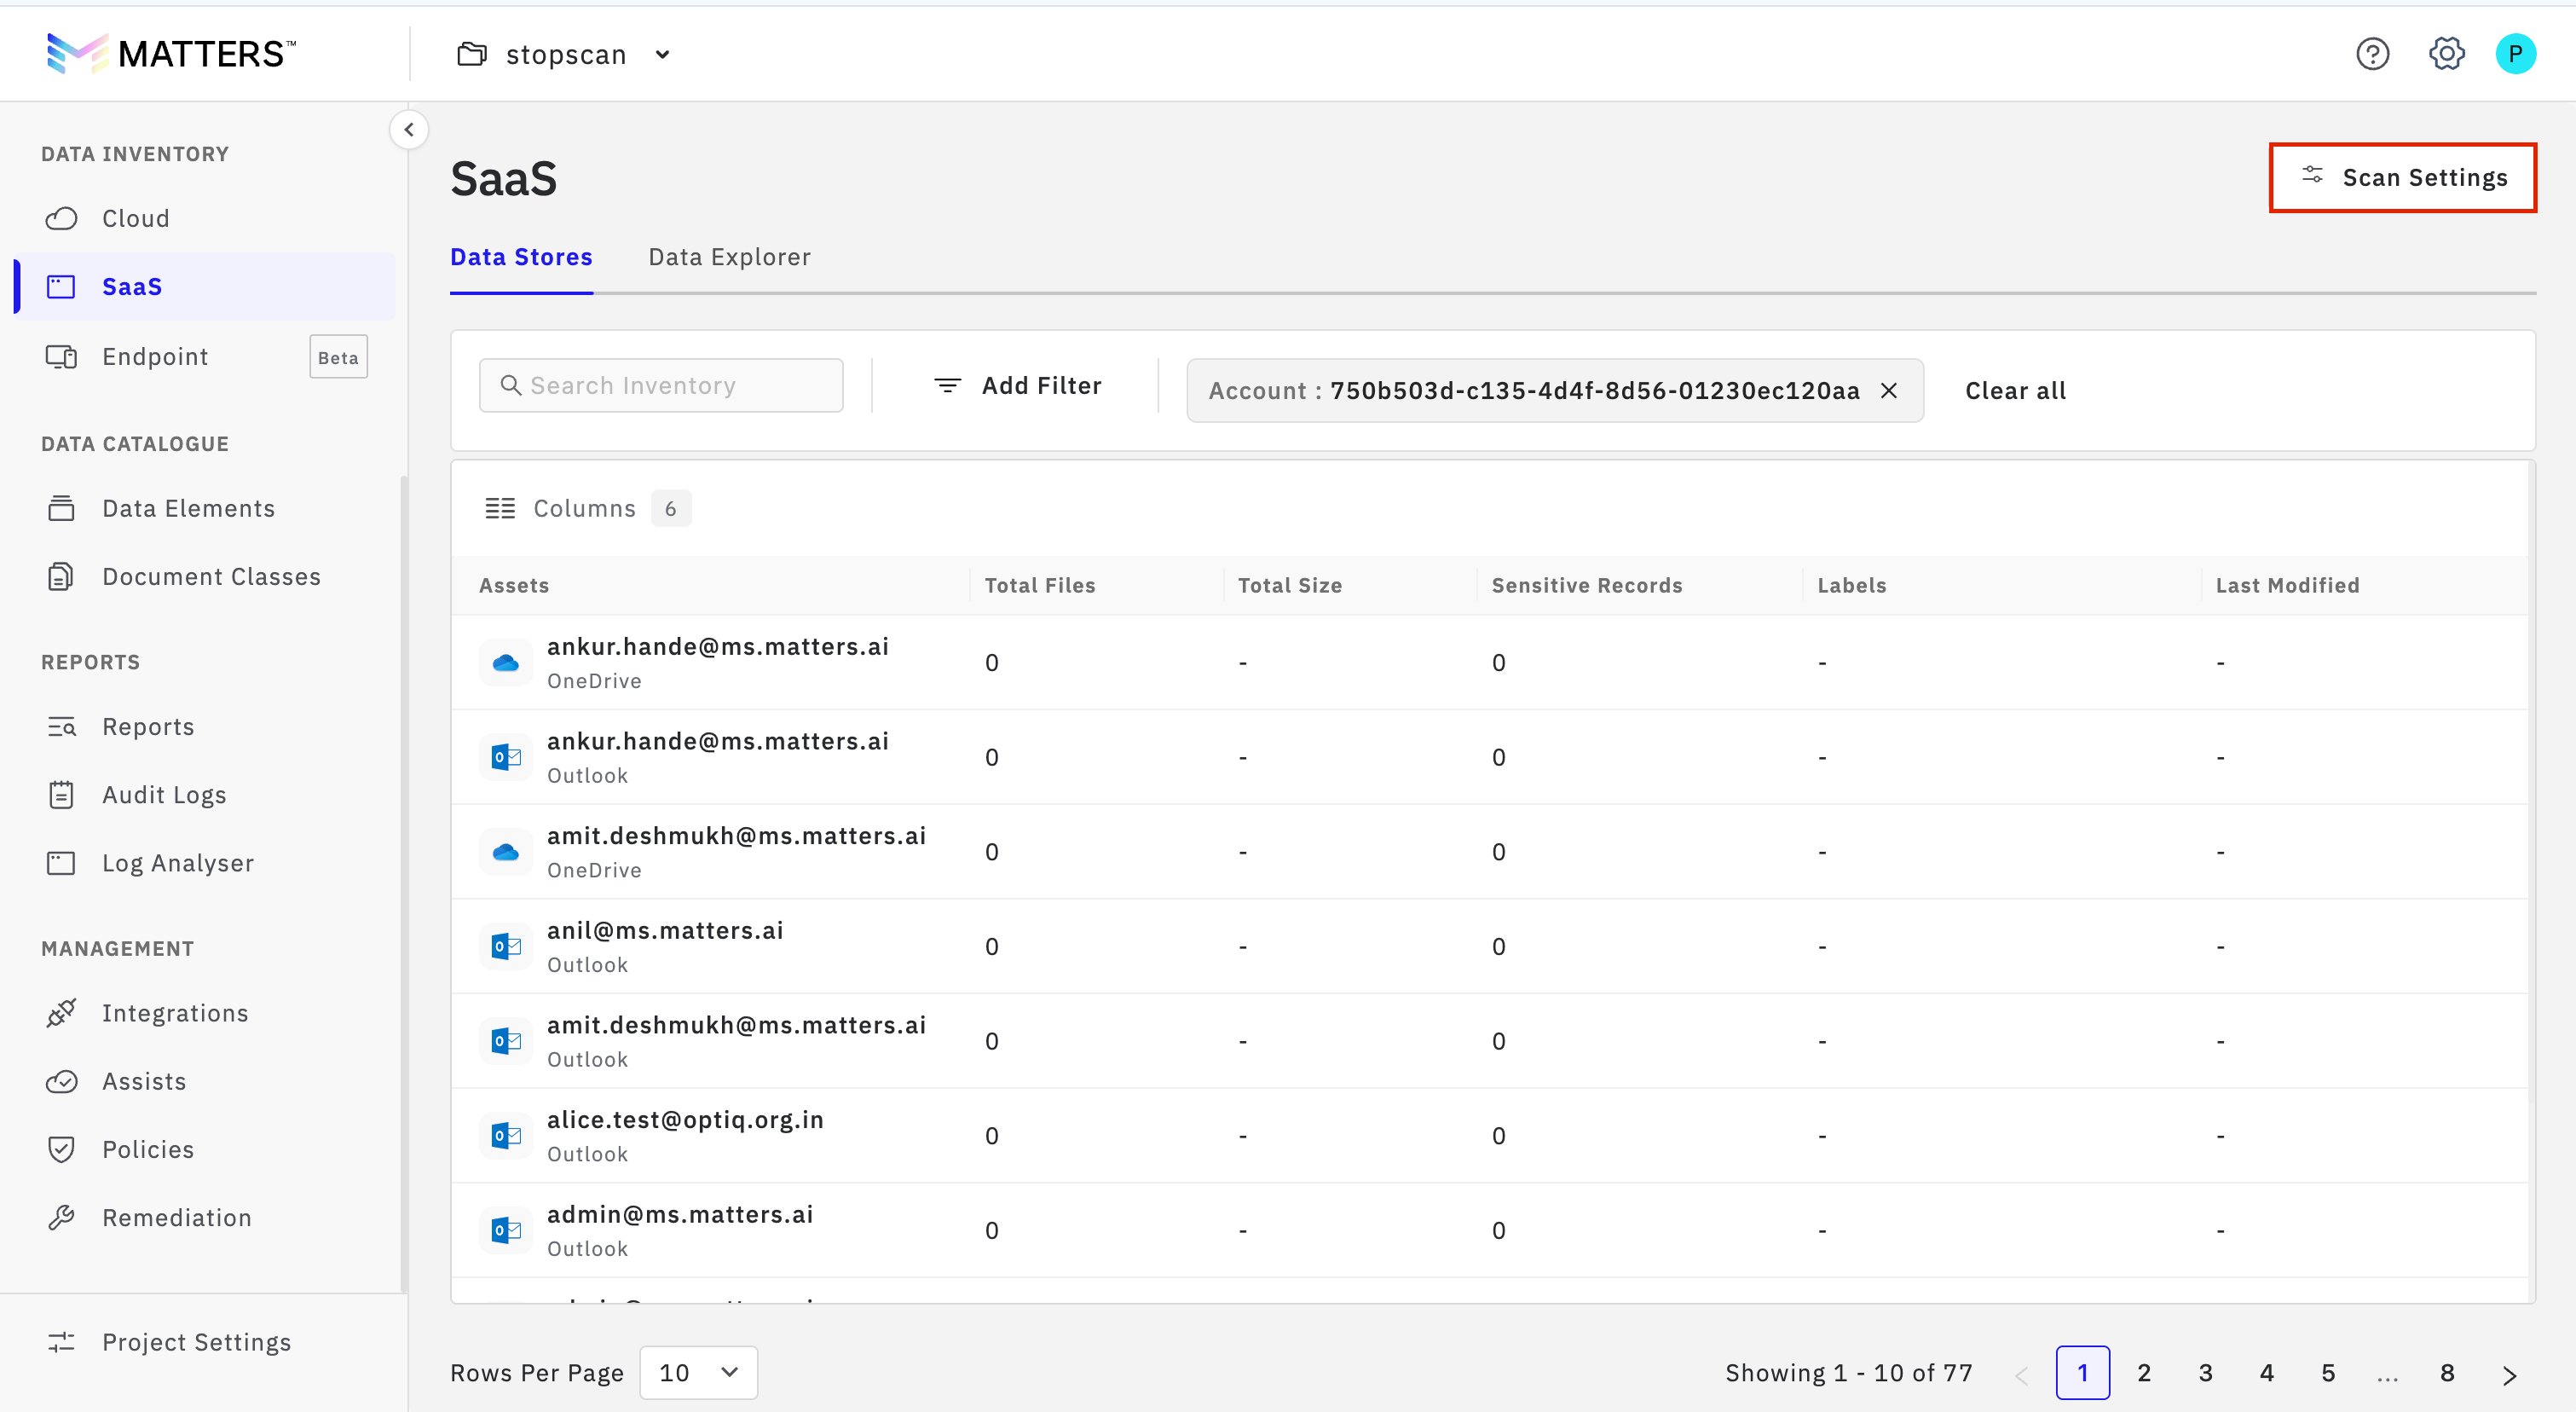
Step 2.5.1: Manage OneDrive User Scanning
Under the OneDrive section, you will see a list of users associated with your organization.
Add or remove users as needed to specify whose OneDrive content should be scanned.
This granular control allows you to focus scanning resources on relevant accounts only.
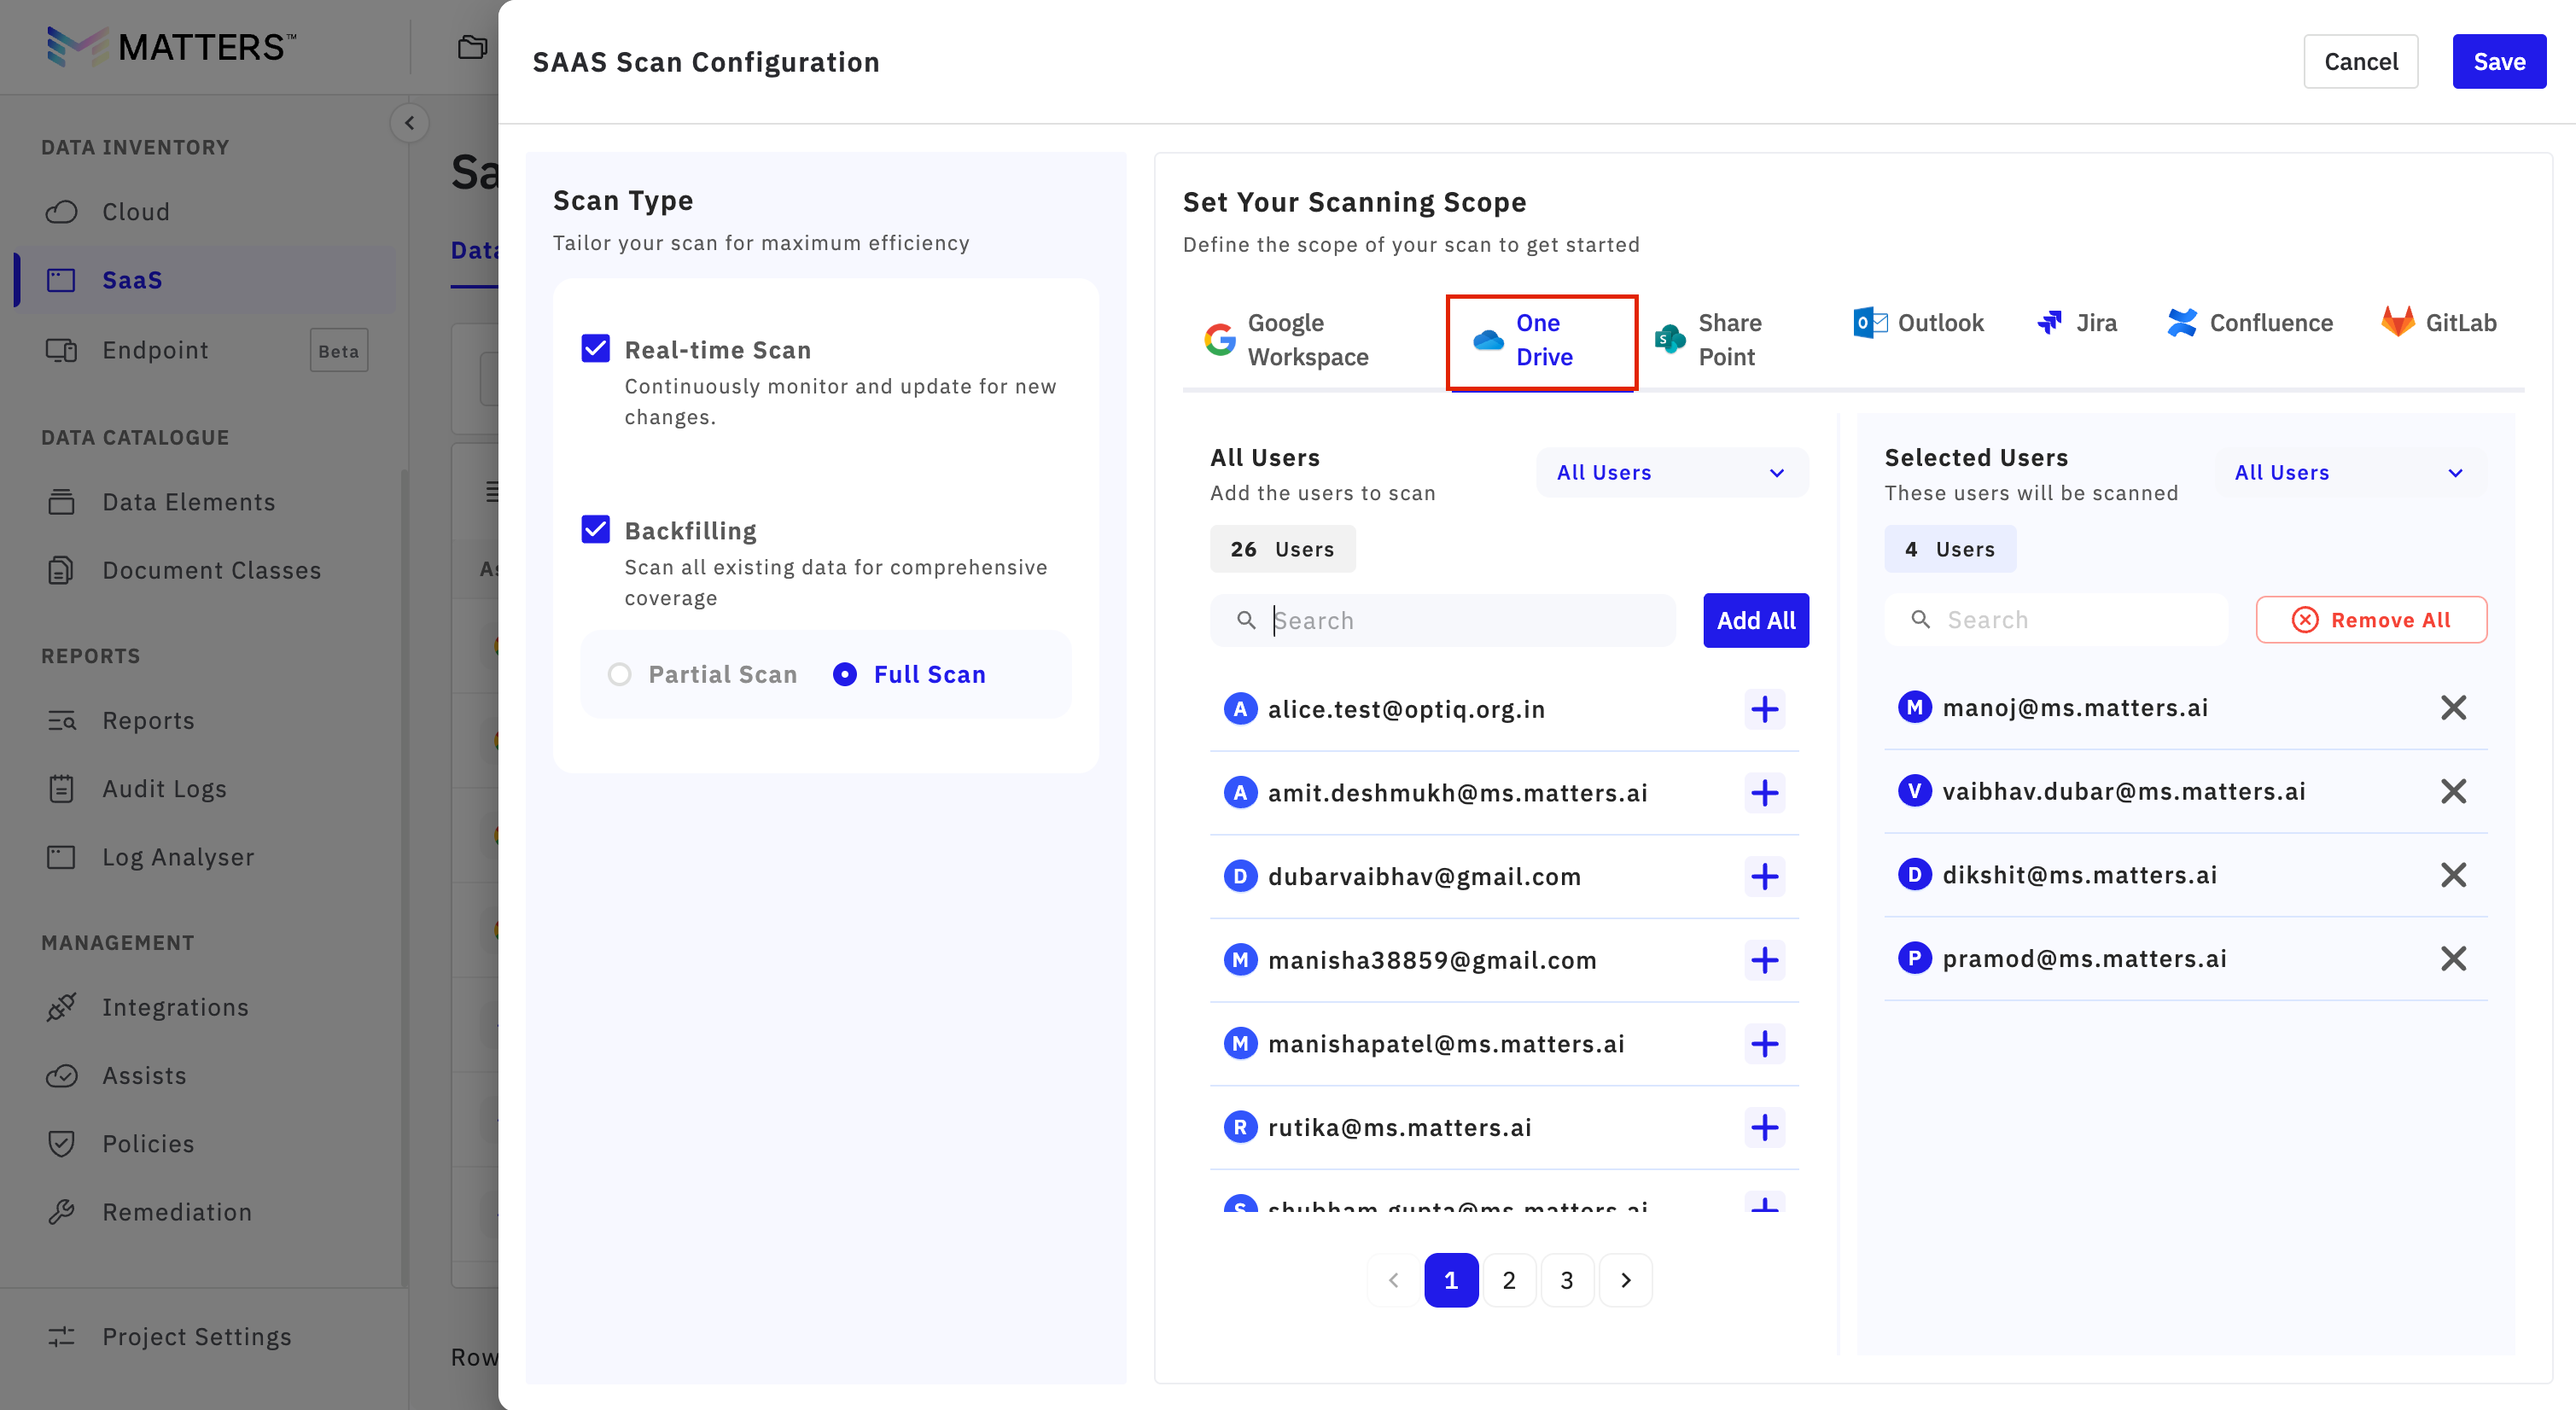
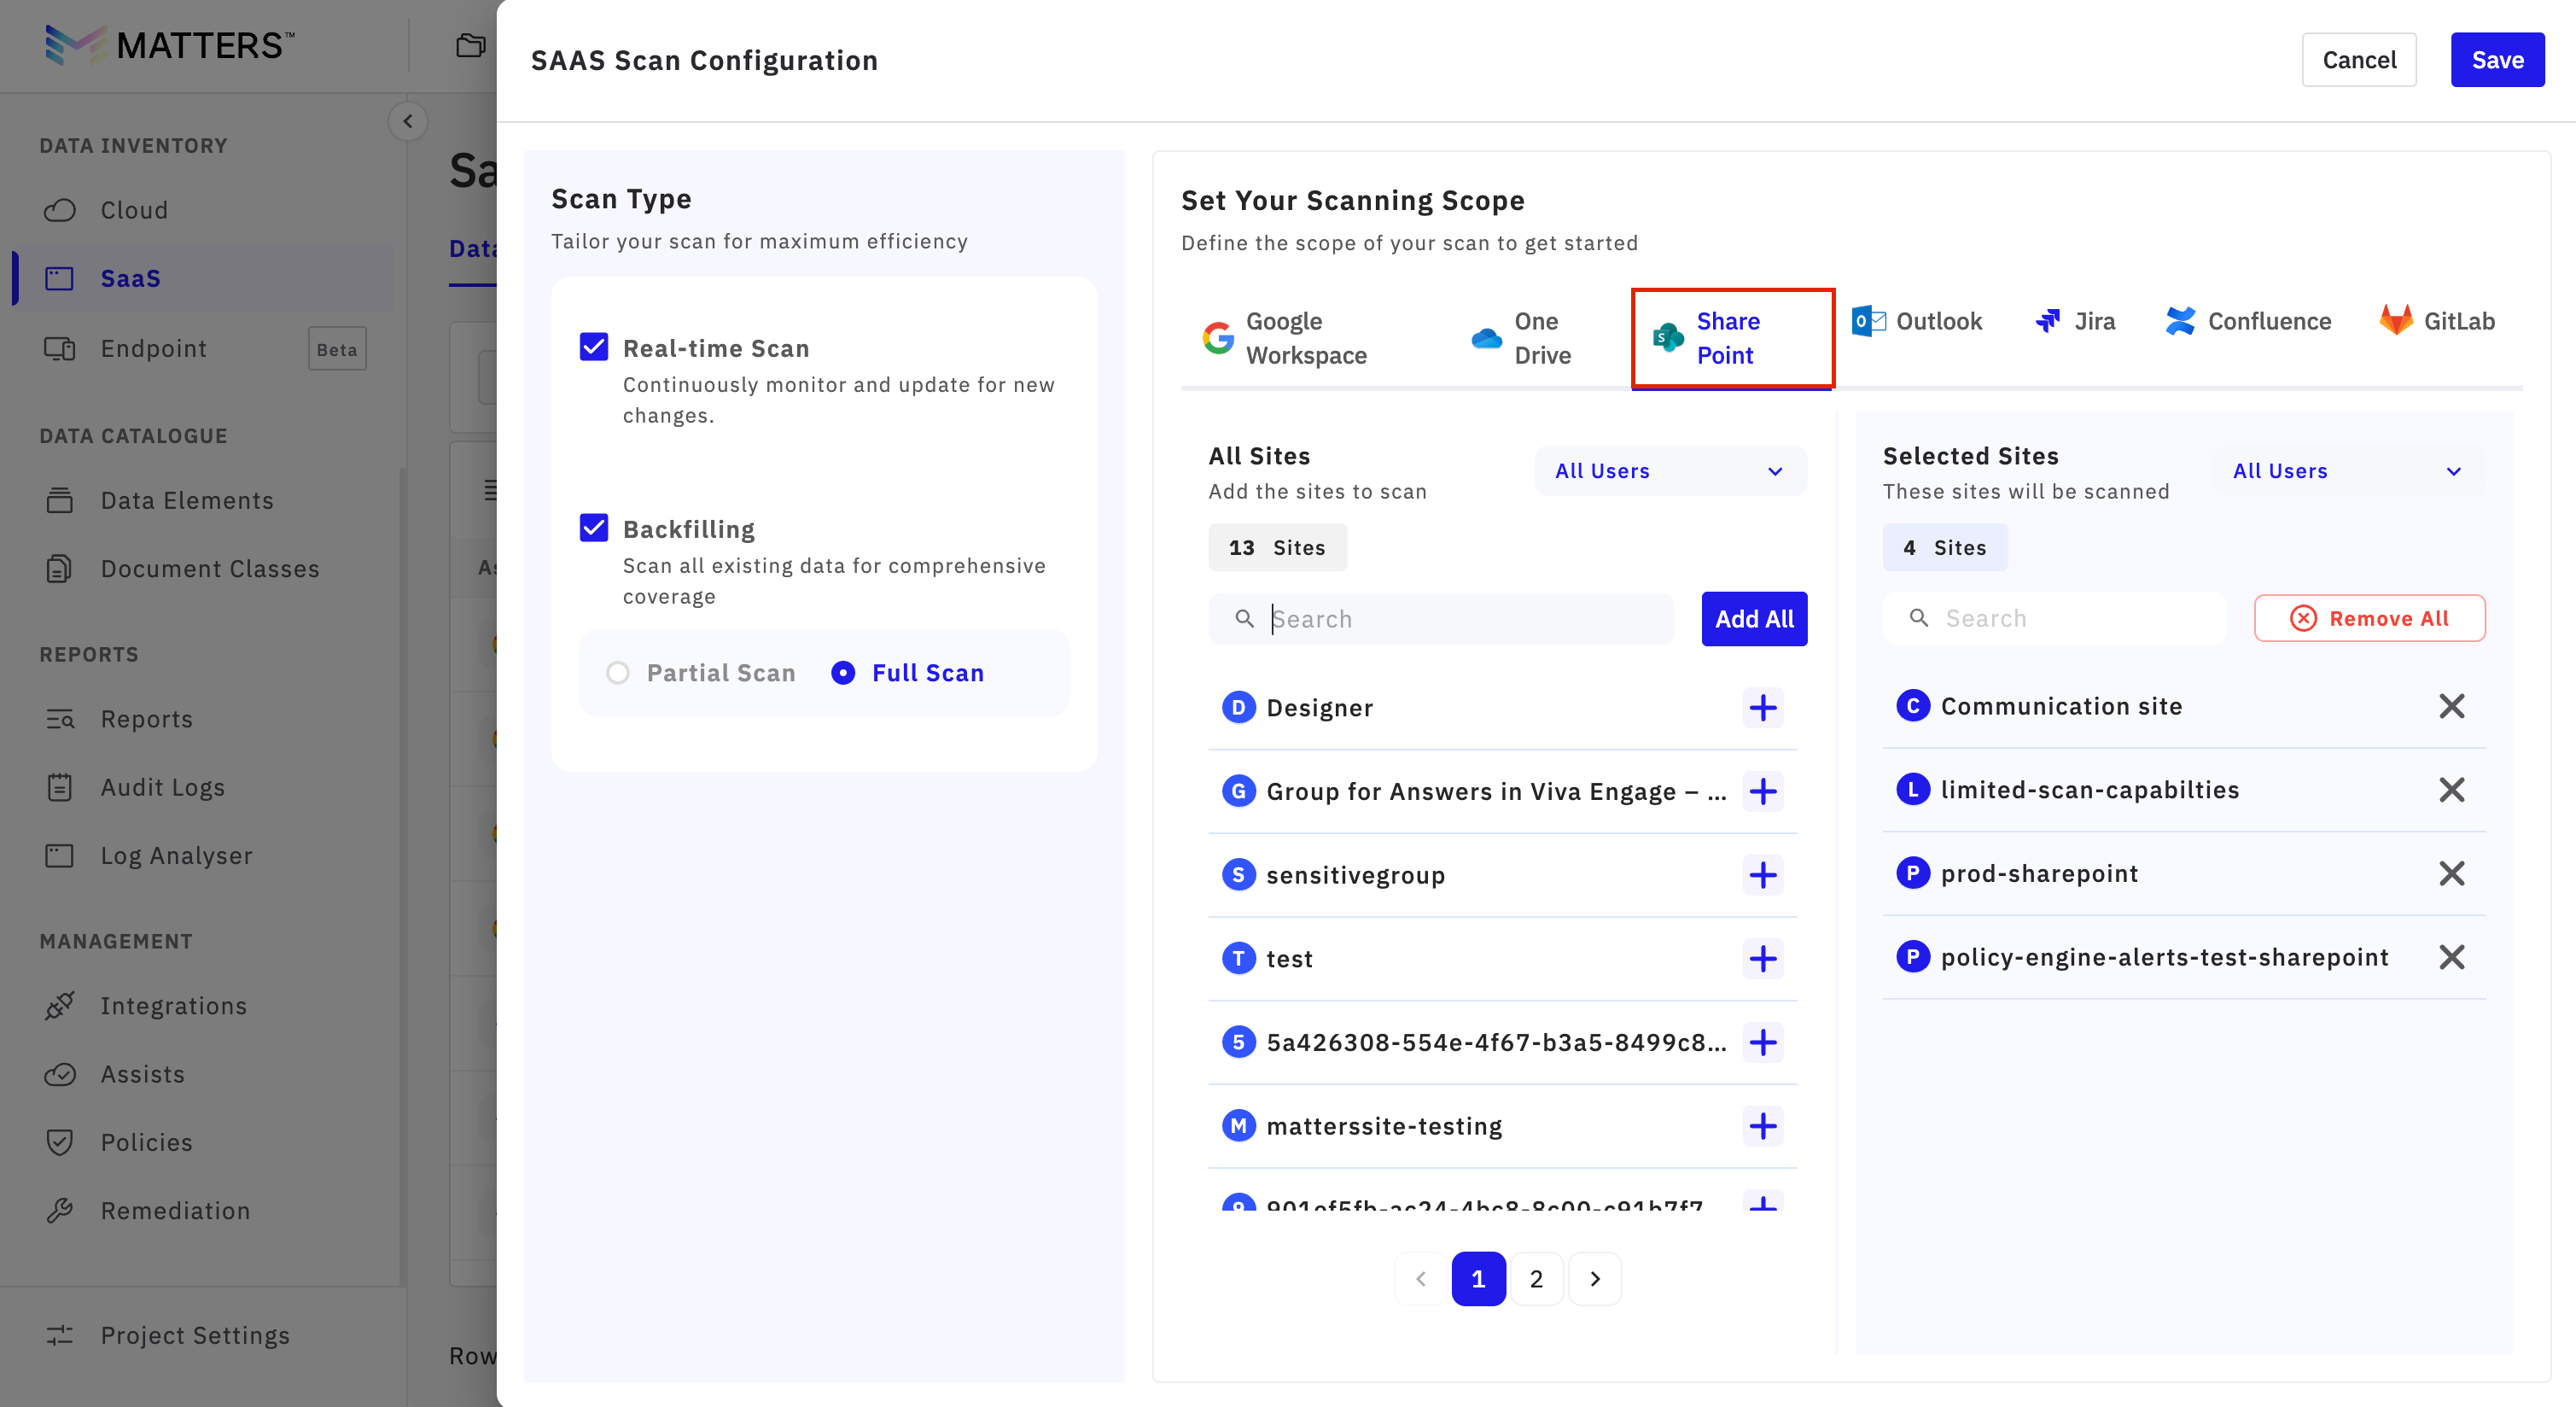
Step 2.5.2: Manage SharePoint Site Scanning
Switch to the SharePoint tab.
Here you can add or remove SharePoint sites to be included in the scan.
After selecting the sites, click Save to apply your configuration.
Step 2.5.3: Manage Outlook Mail Scanning
Switch to the Outlook tab.
Here you can add or remove Outlook mails to be included in the scan.
After selecting the Outlook mails click Save to apply your configuration.
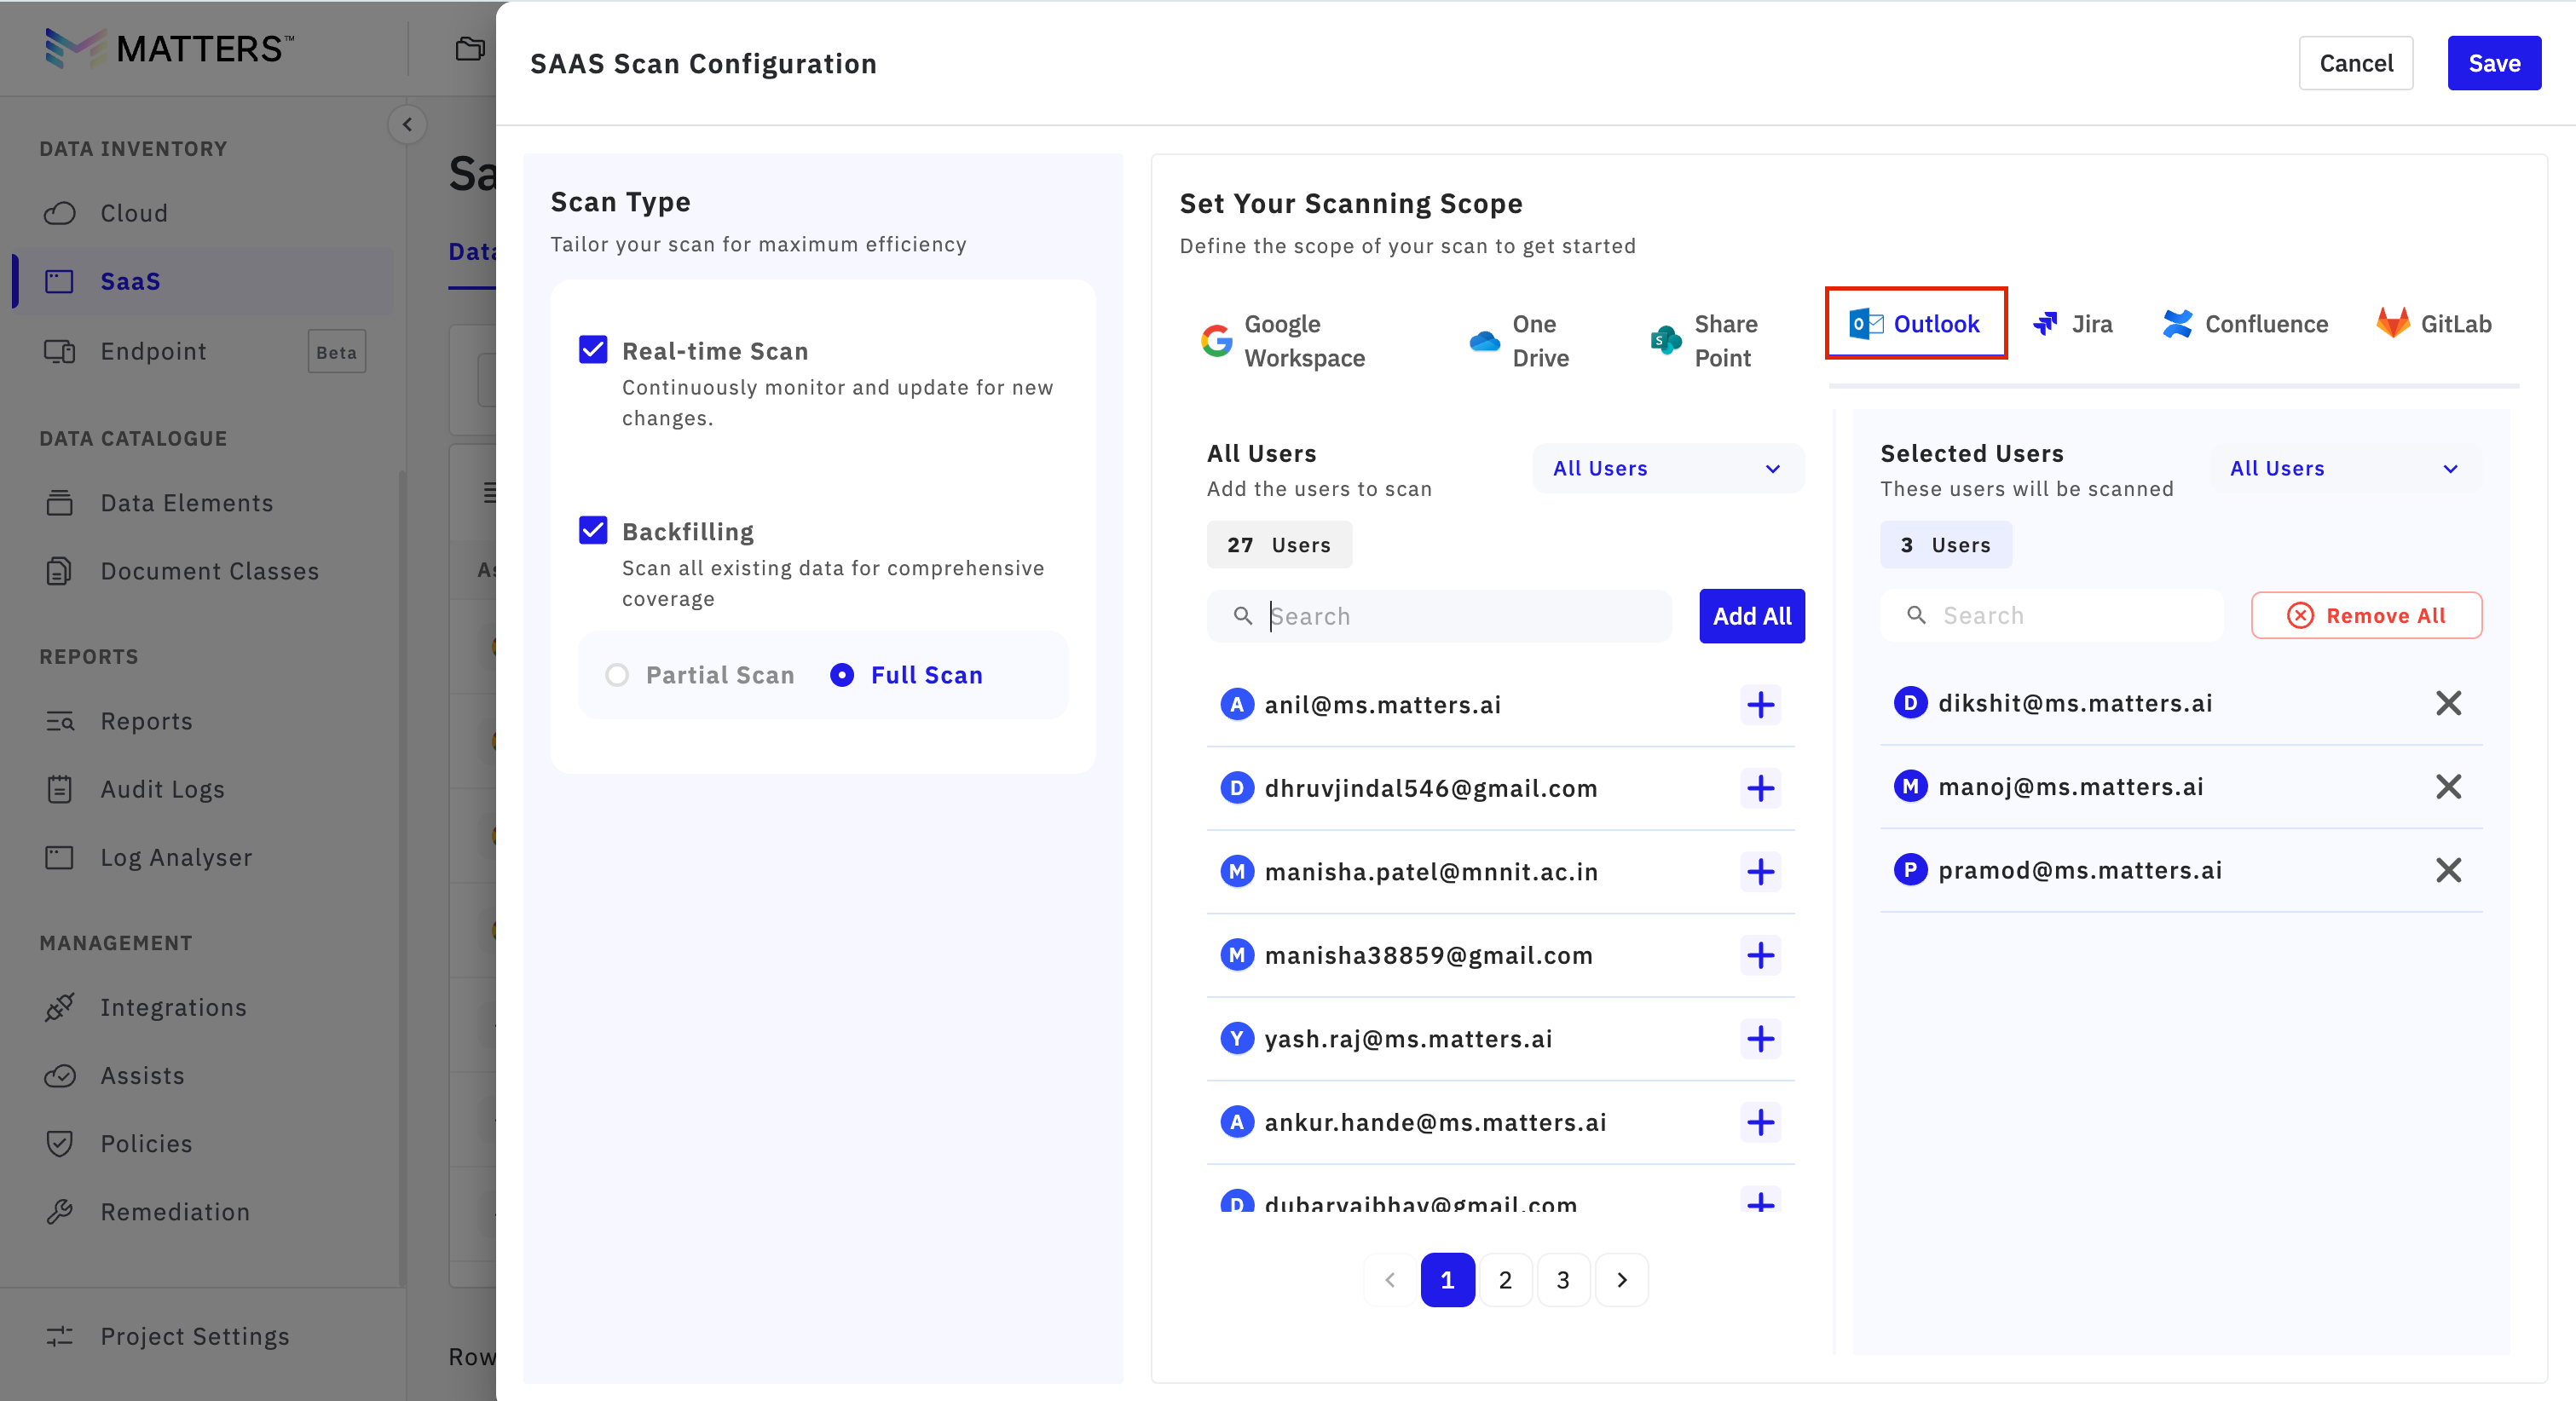
You can choose between two scanning modes based on your organizational needs:
Real-Time Scan: Enables continuous monitoring of changes in user accounts, files, and sites. This mode ensures immediate detection of new data or modifications.
Backfilling Scan: Scans all existing data comprehensively to establish baseline coverage and identify sensitive entities across historical content.
Step 2.6: Confirm Configuration and Start Scan
Upon saving, a success message “SaaS configuration saved successfully” will appear.
Scans will automatically run based on your configured schedule and options.
Sensitive entities discovered through scanning will be displayed in the dashboard for review.
Step 2.7: Review Scanned Entities
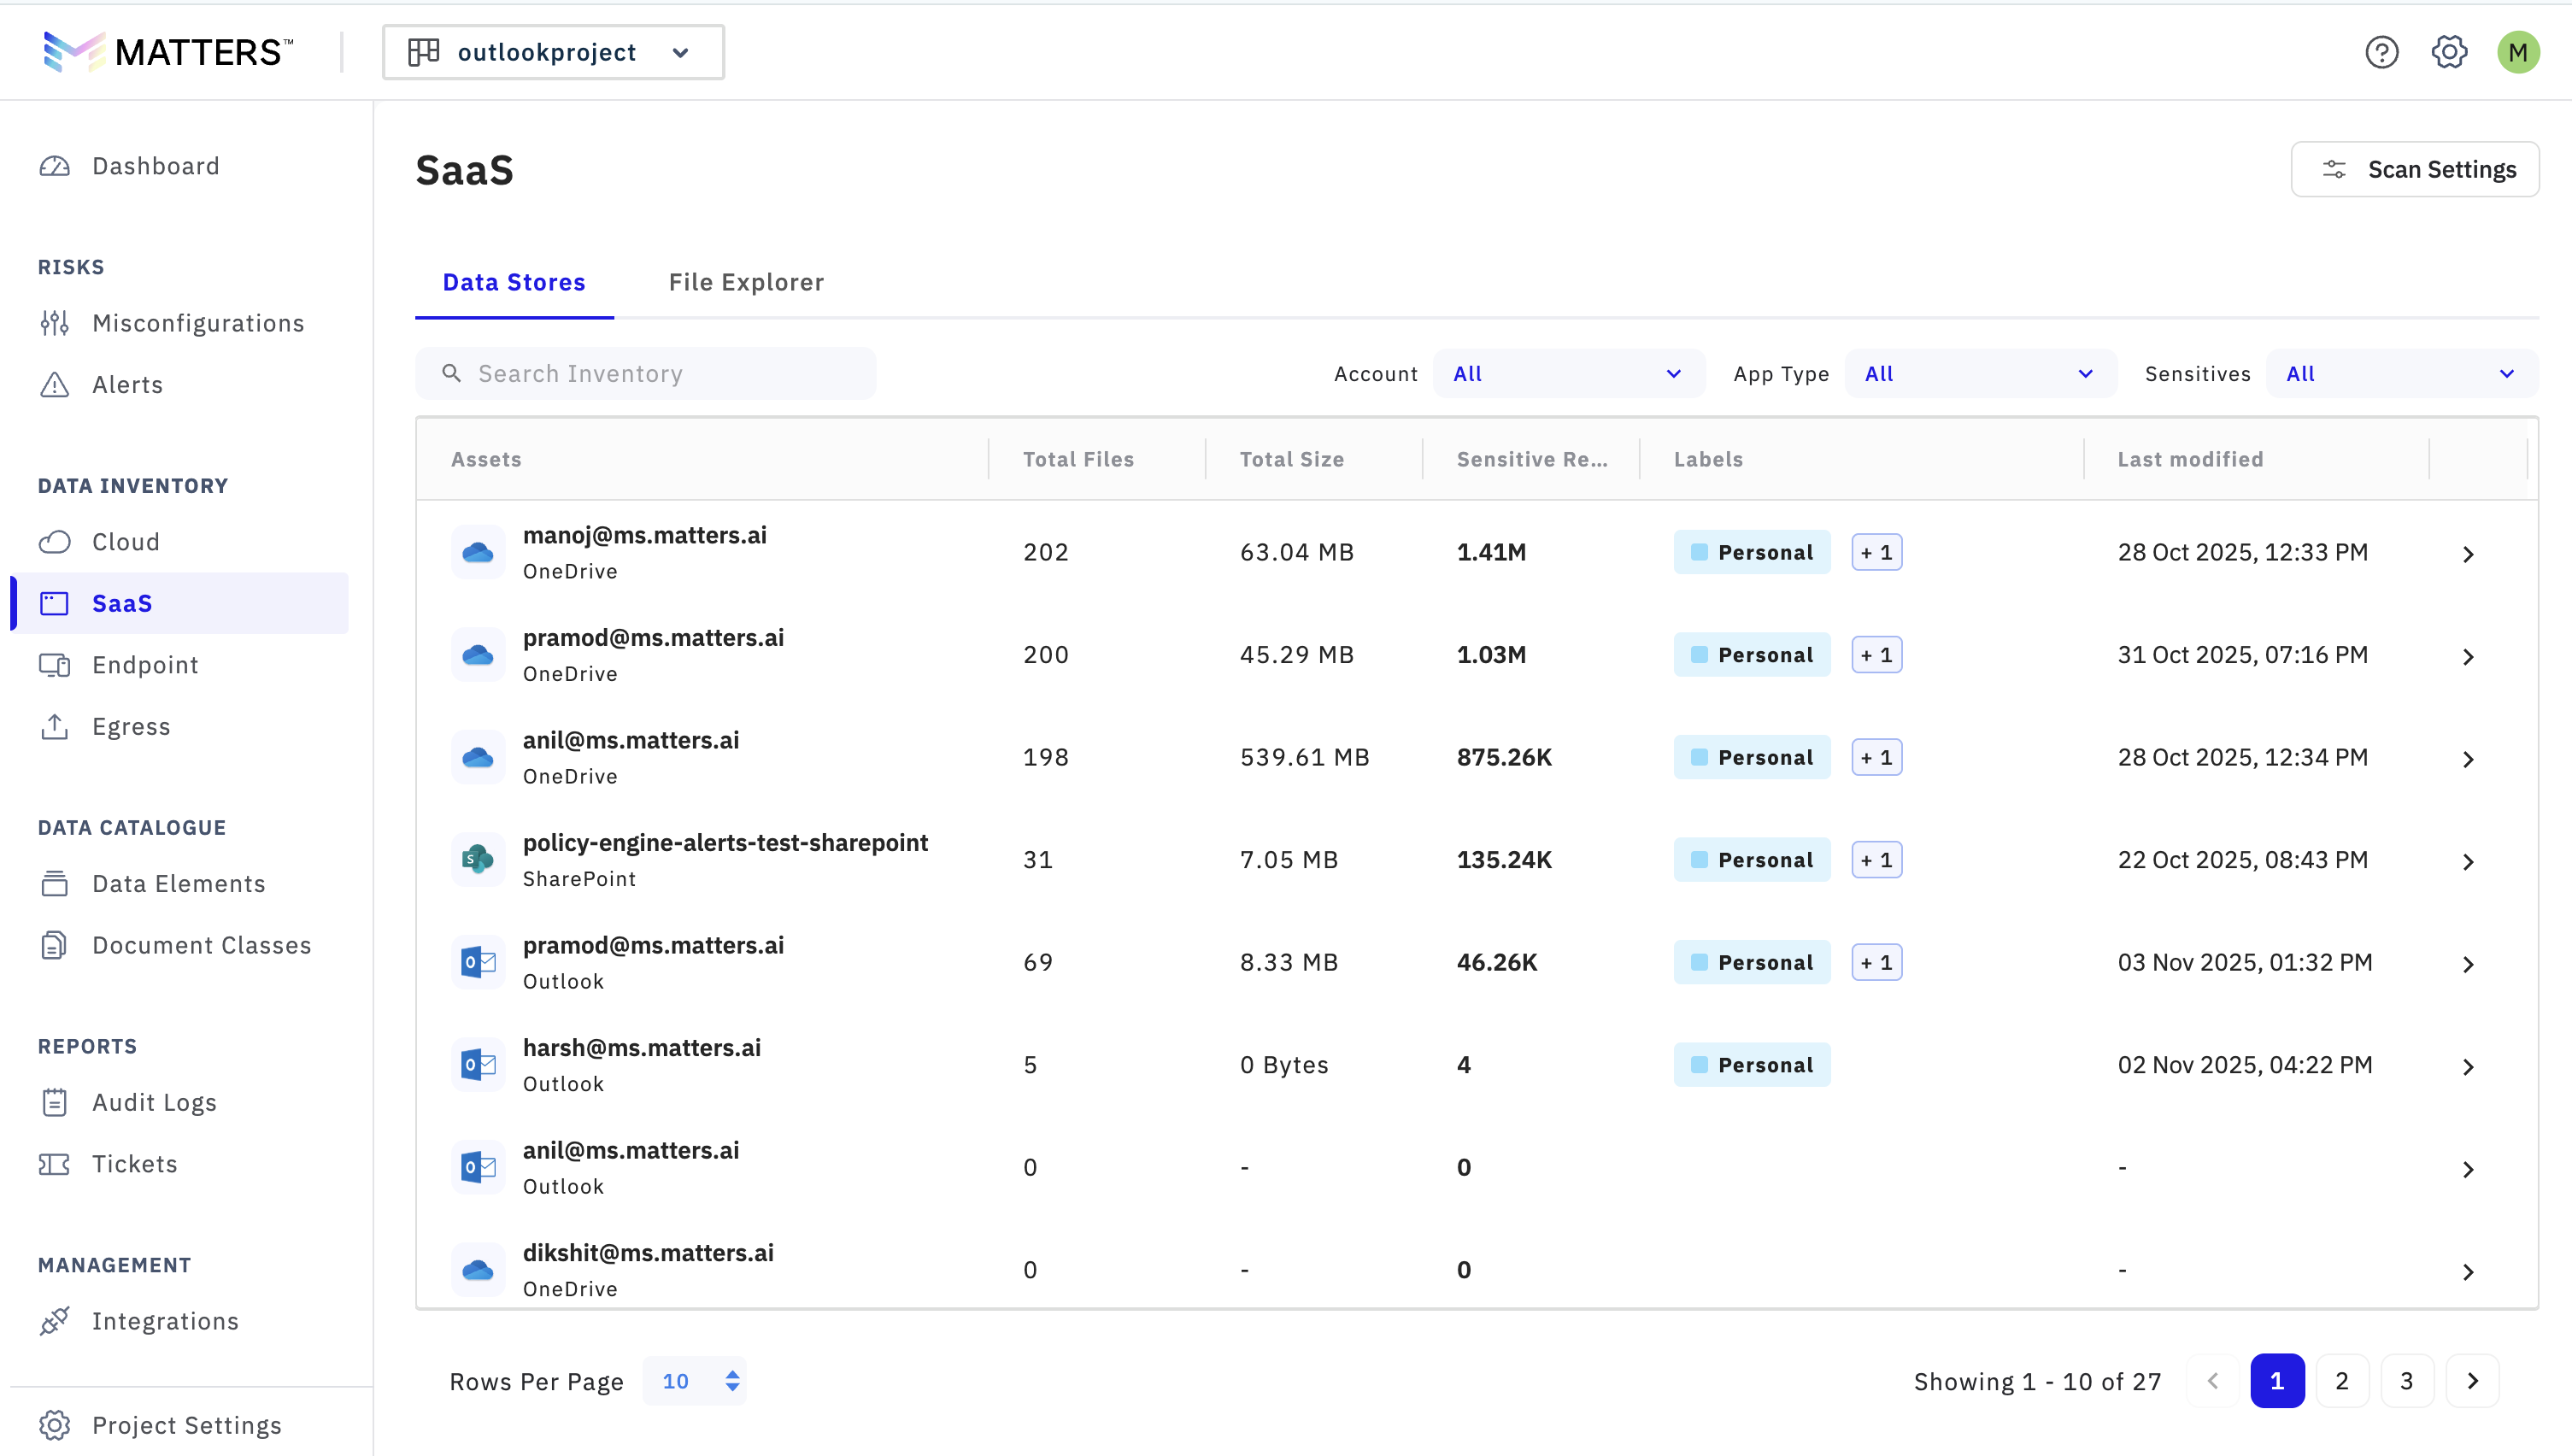
To inspect the detailed list of sensitive entities found:
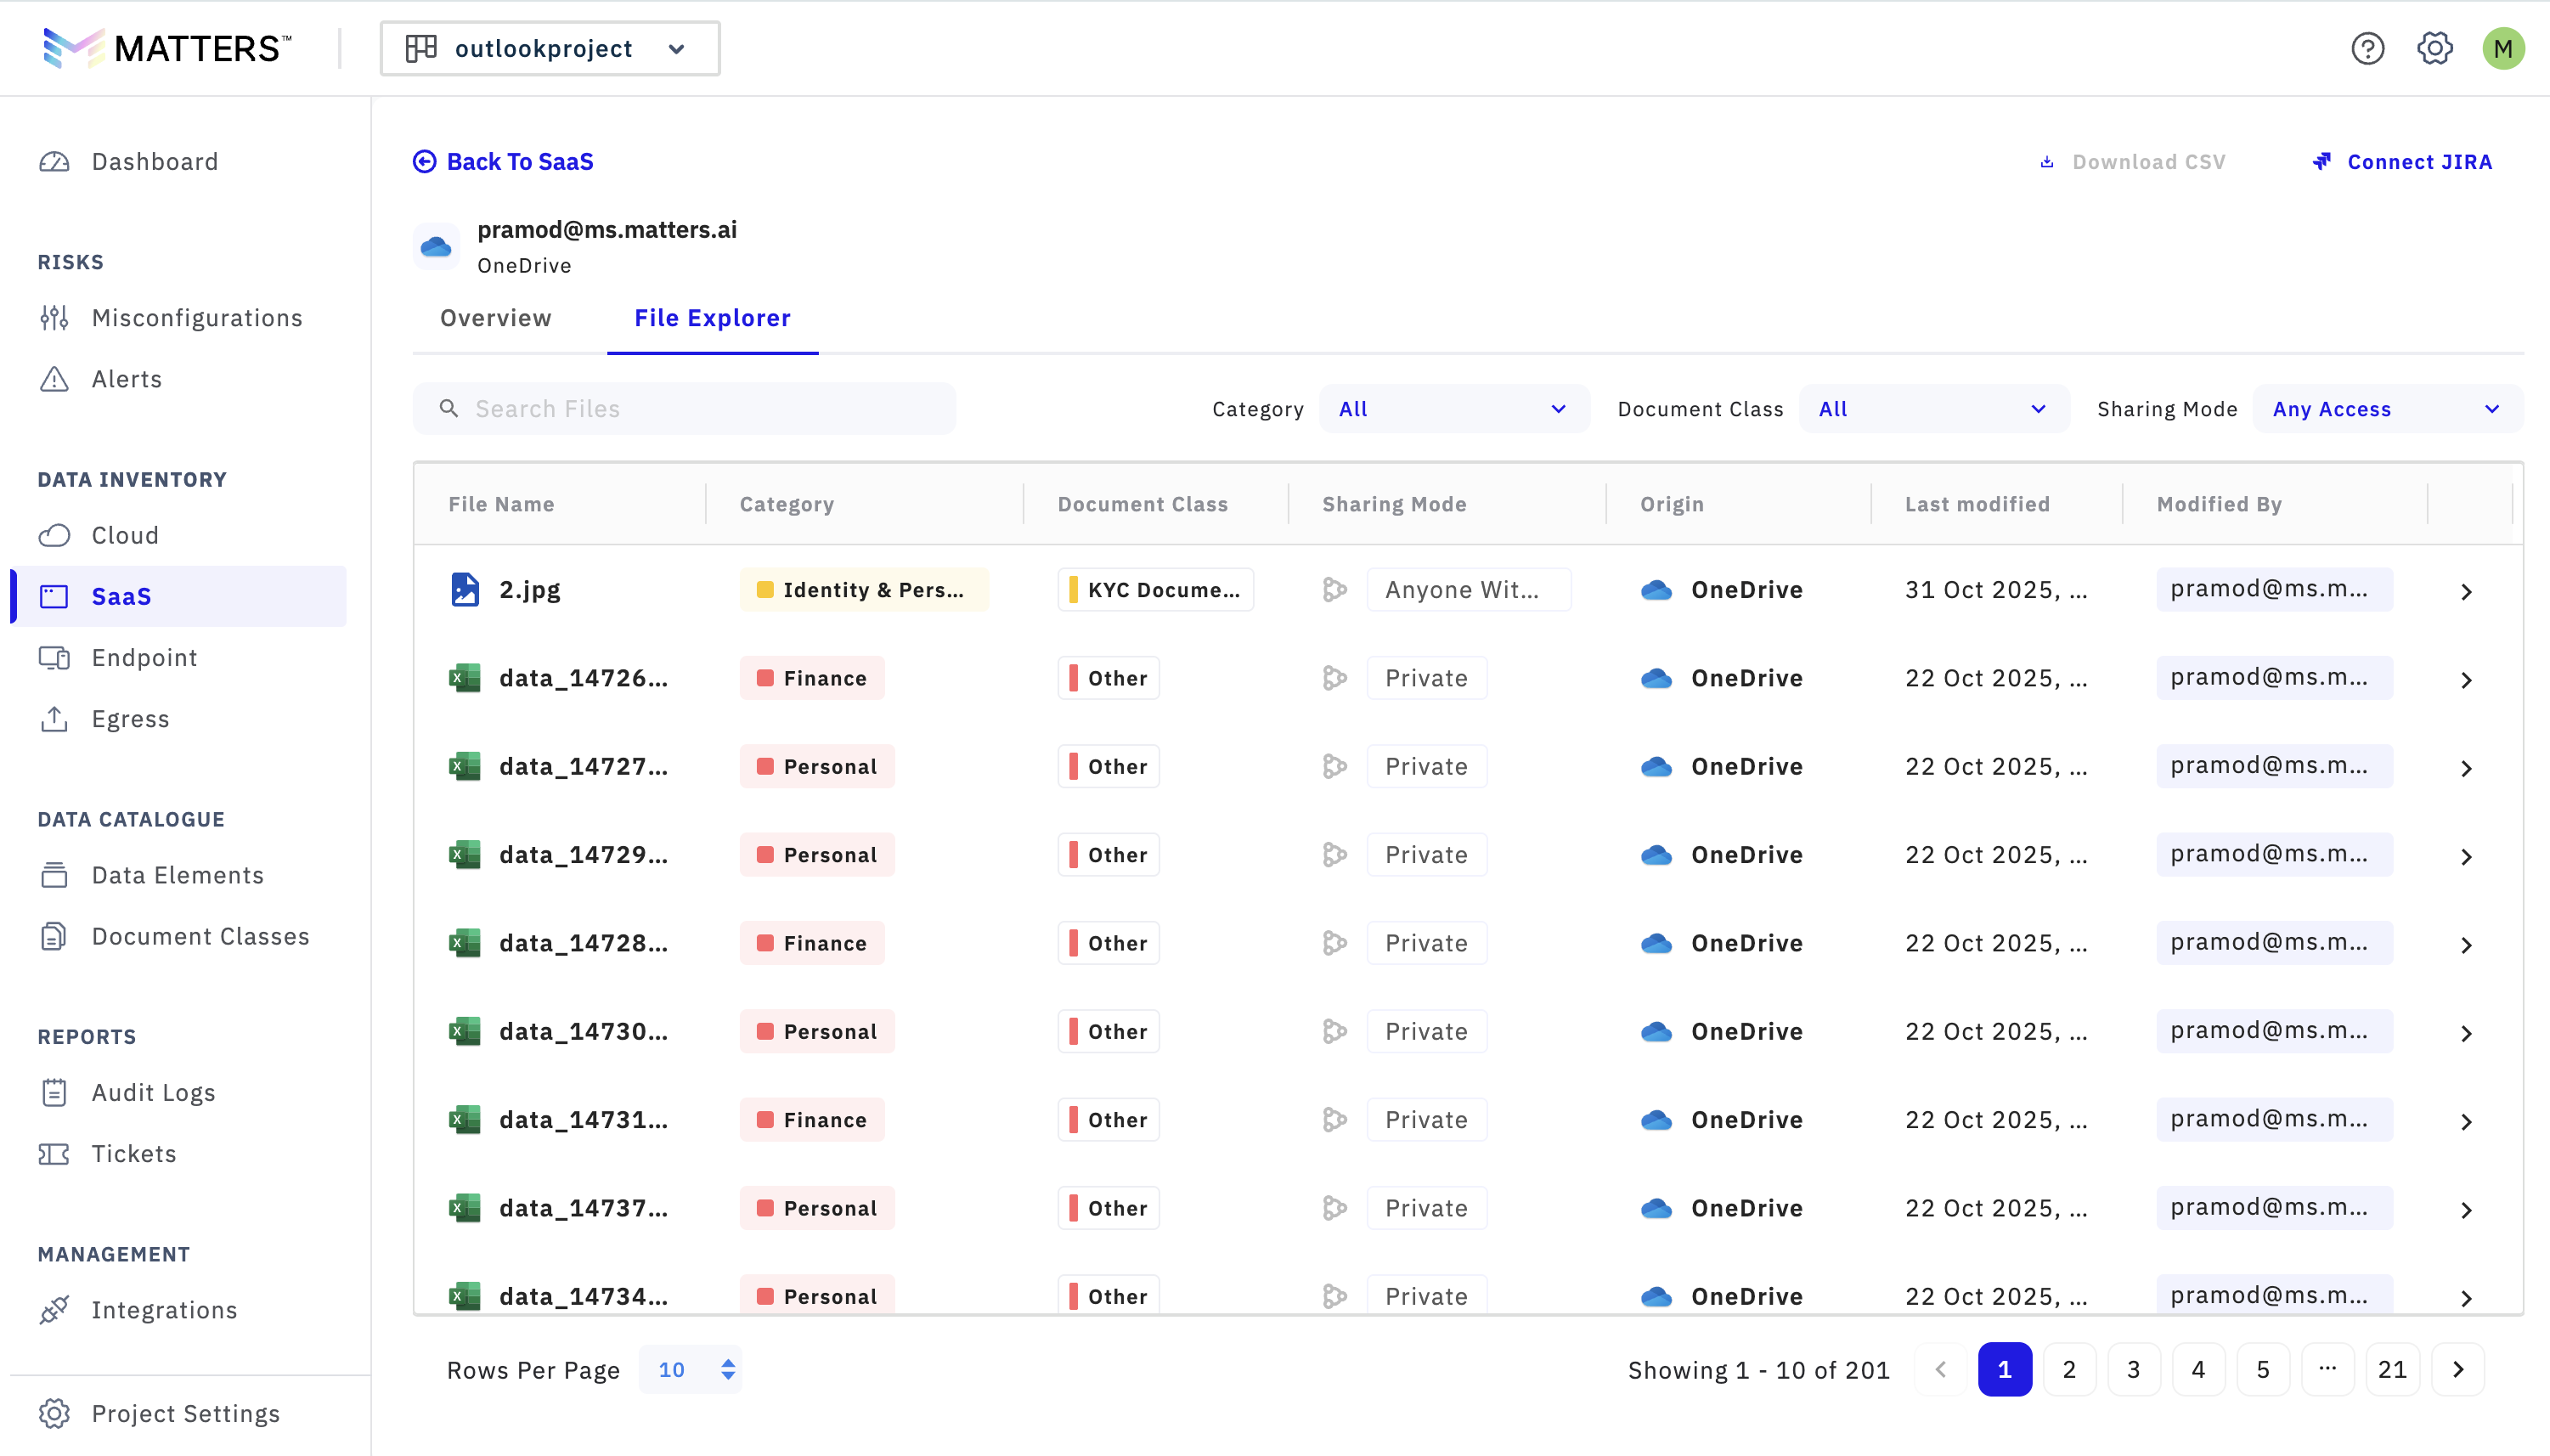
Click on the OneDrive Users, SharePoint sites or Outlook mails displayed on the Overview page to check for scanned data.
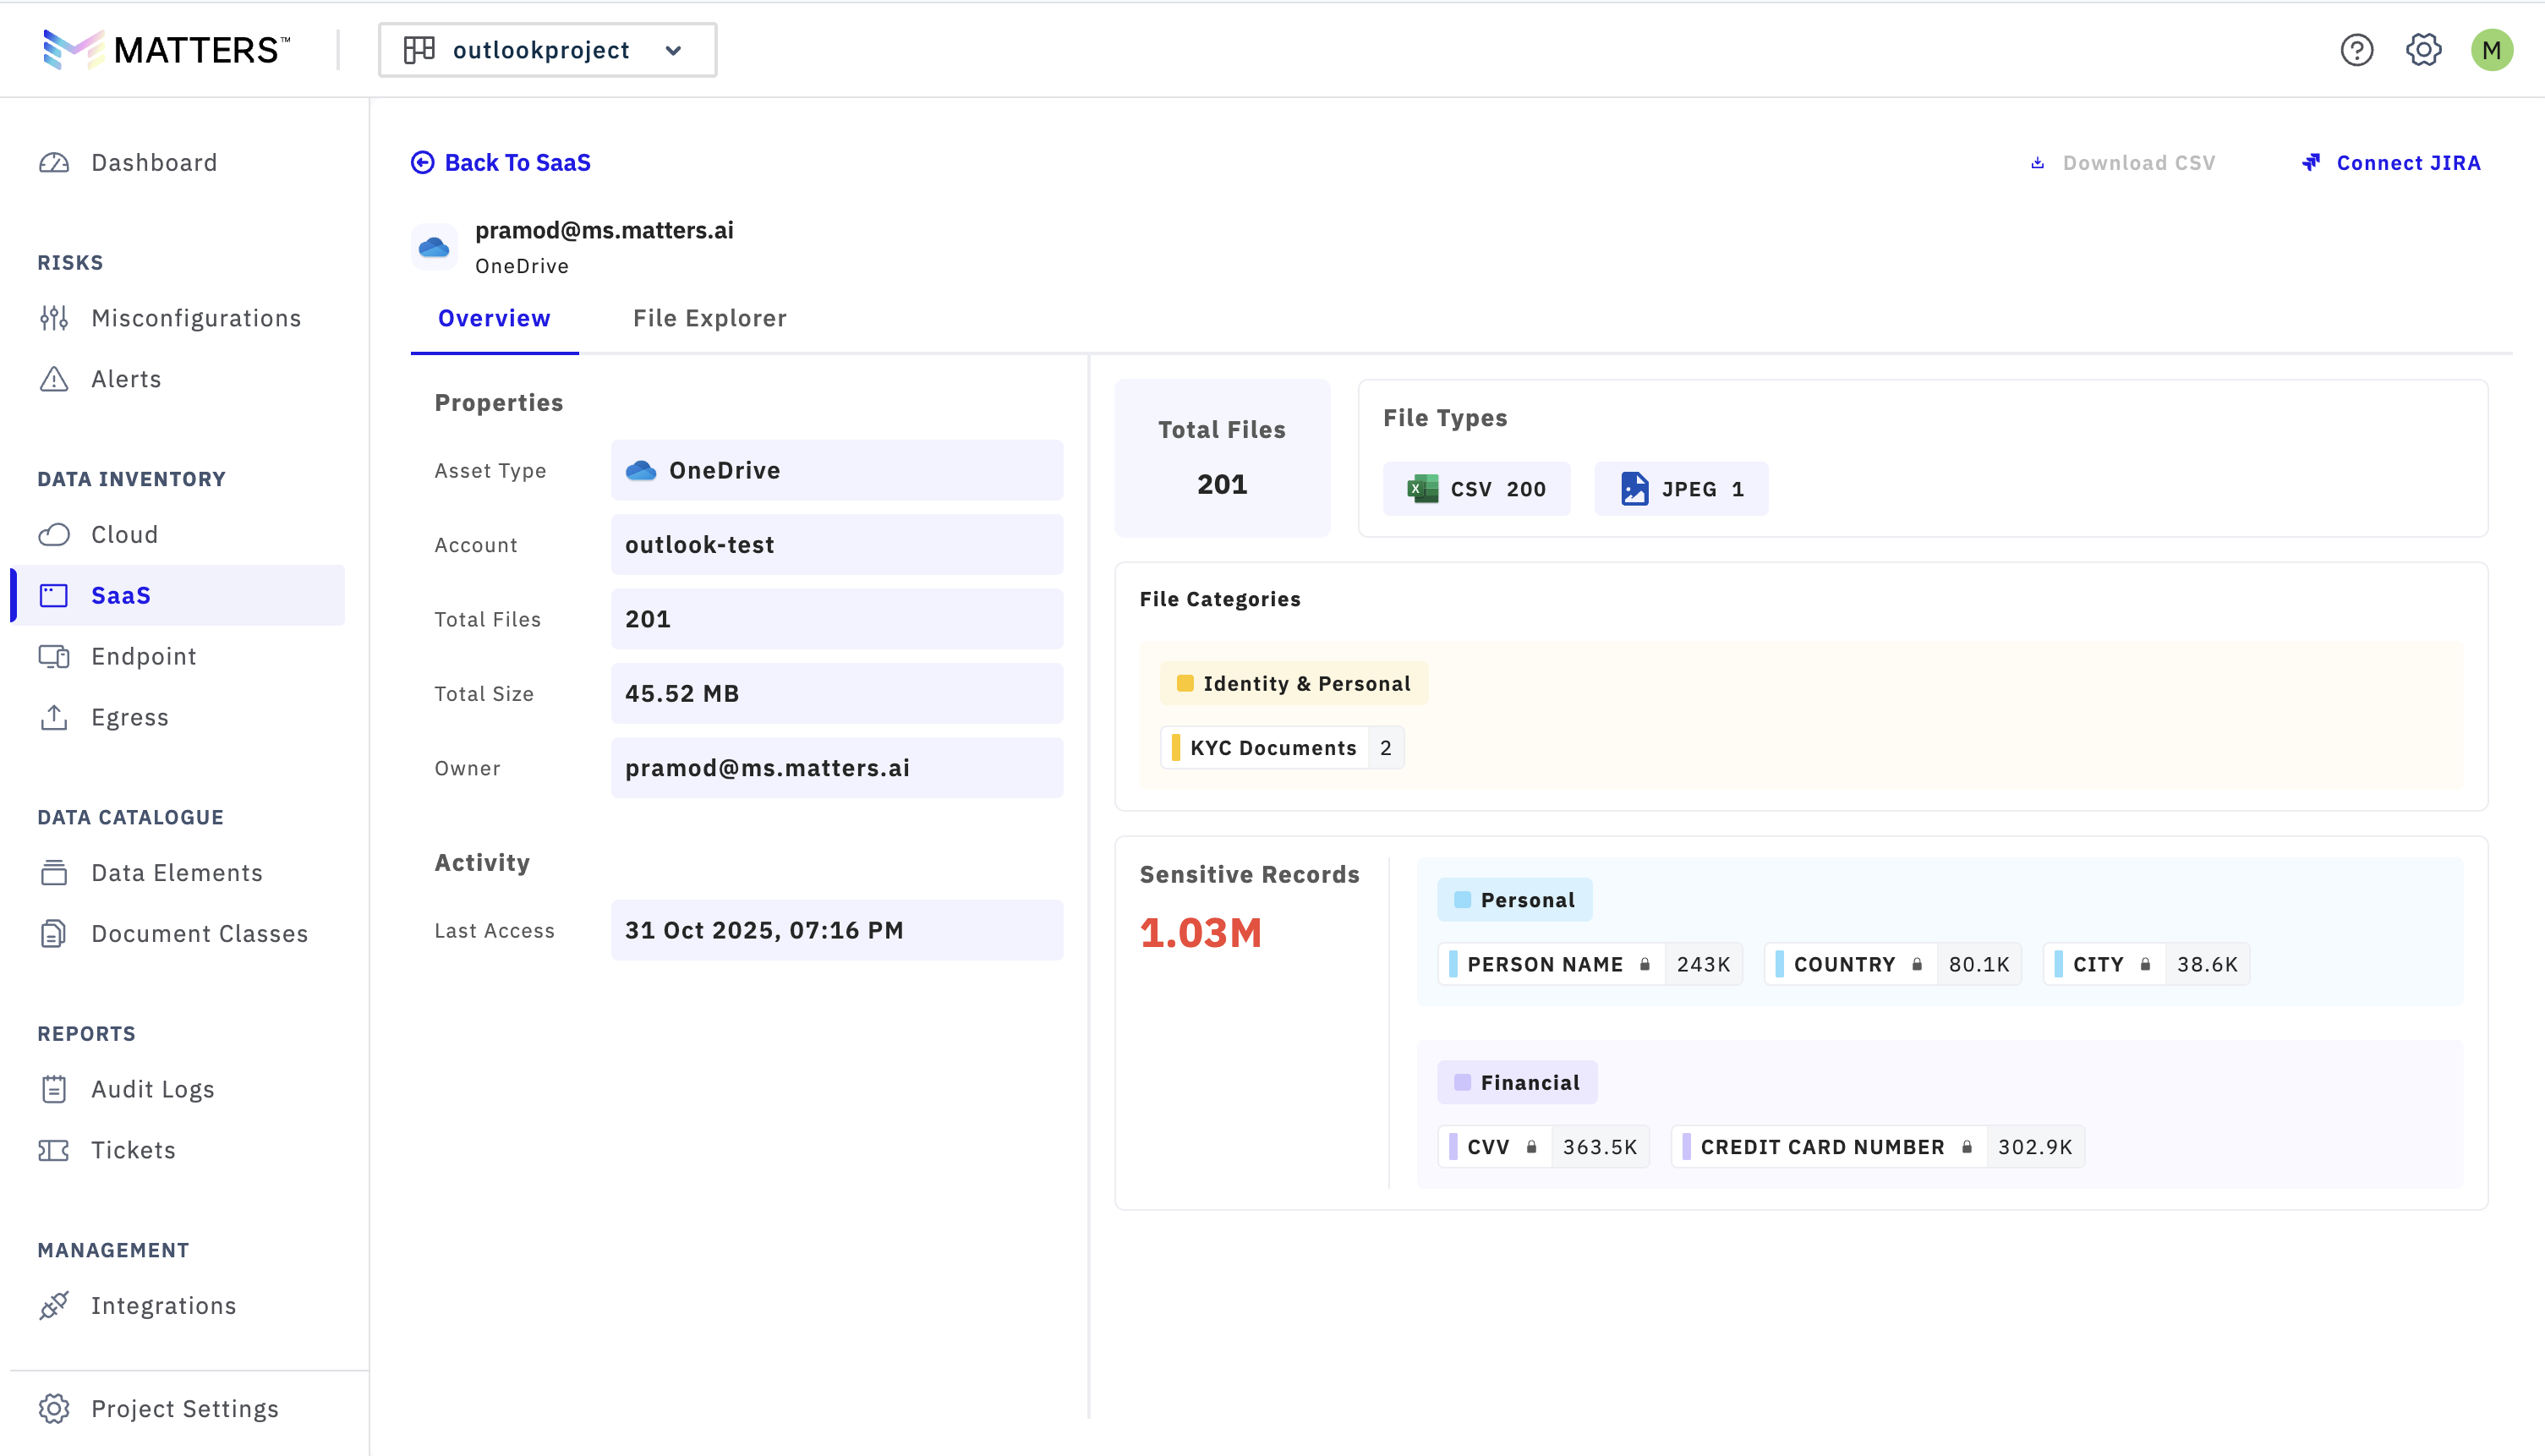
When clicked on the File Explorer view you can see the folder-structure navigation of scanned files and detected sensitive data.
Required Permissions Summary
Microsoft Graph (Application):
Files.Read.All

Sites.Read.All

Directory.Read.All

AuditLog.Read.All

AuditActivity.Read

AuditLogsQuery-Entra.Read.All

AuditLogsQuery-Exchange.Read.All

AuditLogsQuery-OneDrive.Read.All

AuditLogsQuery-SharePoint.Read.All

AuditLogsQuery.Read.All

Calendars.Read

Calendars.ReadBasic.All

CustomSecAttributeAuditLogs.Read.All

Group-Conversation.Read.All

Group.Read.All

Mail.Read

Mail.ReadBasic

Mail.ReadBasic.All

MailboxFolder.Read.All

MailboxSettings.Read

User.Read

User.Read.All
Office 365 Management APIs (Application):
ActivityFeed.Read

ActivityFeed.ReadDlp
Following this guide ensures that your Microsoft 365 environment is successfully integrated with Matters.ai enabling both real-time and historical data scanning across OneDrive, SharePoint and Outlook.This supports proactive compliance, data governance, and security monitoring within your organization.