Confluence Integration
Last updated: May 21, 2026
This guide provides a step-by-step process to integrate Confluence with the Matters Dashboard and scan Confluence blogs and pages for sensitive entities.
The integration involves two major phases:
Generating an Atlassian API token
Configuring Confluence in the Matters Dashboard and enabling scans
Step 1: Generate a API Token
To initiate the integration, an API token must be generated from Atlassian:
Navigate Atlassian API Token Management:
Navigate to Atlassian API Token Management.
Create an API Token:
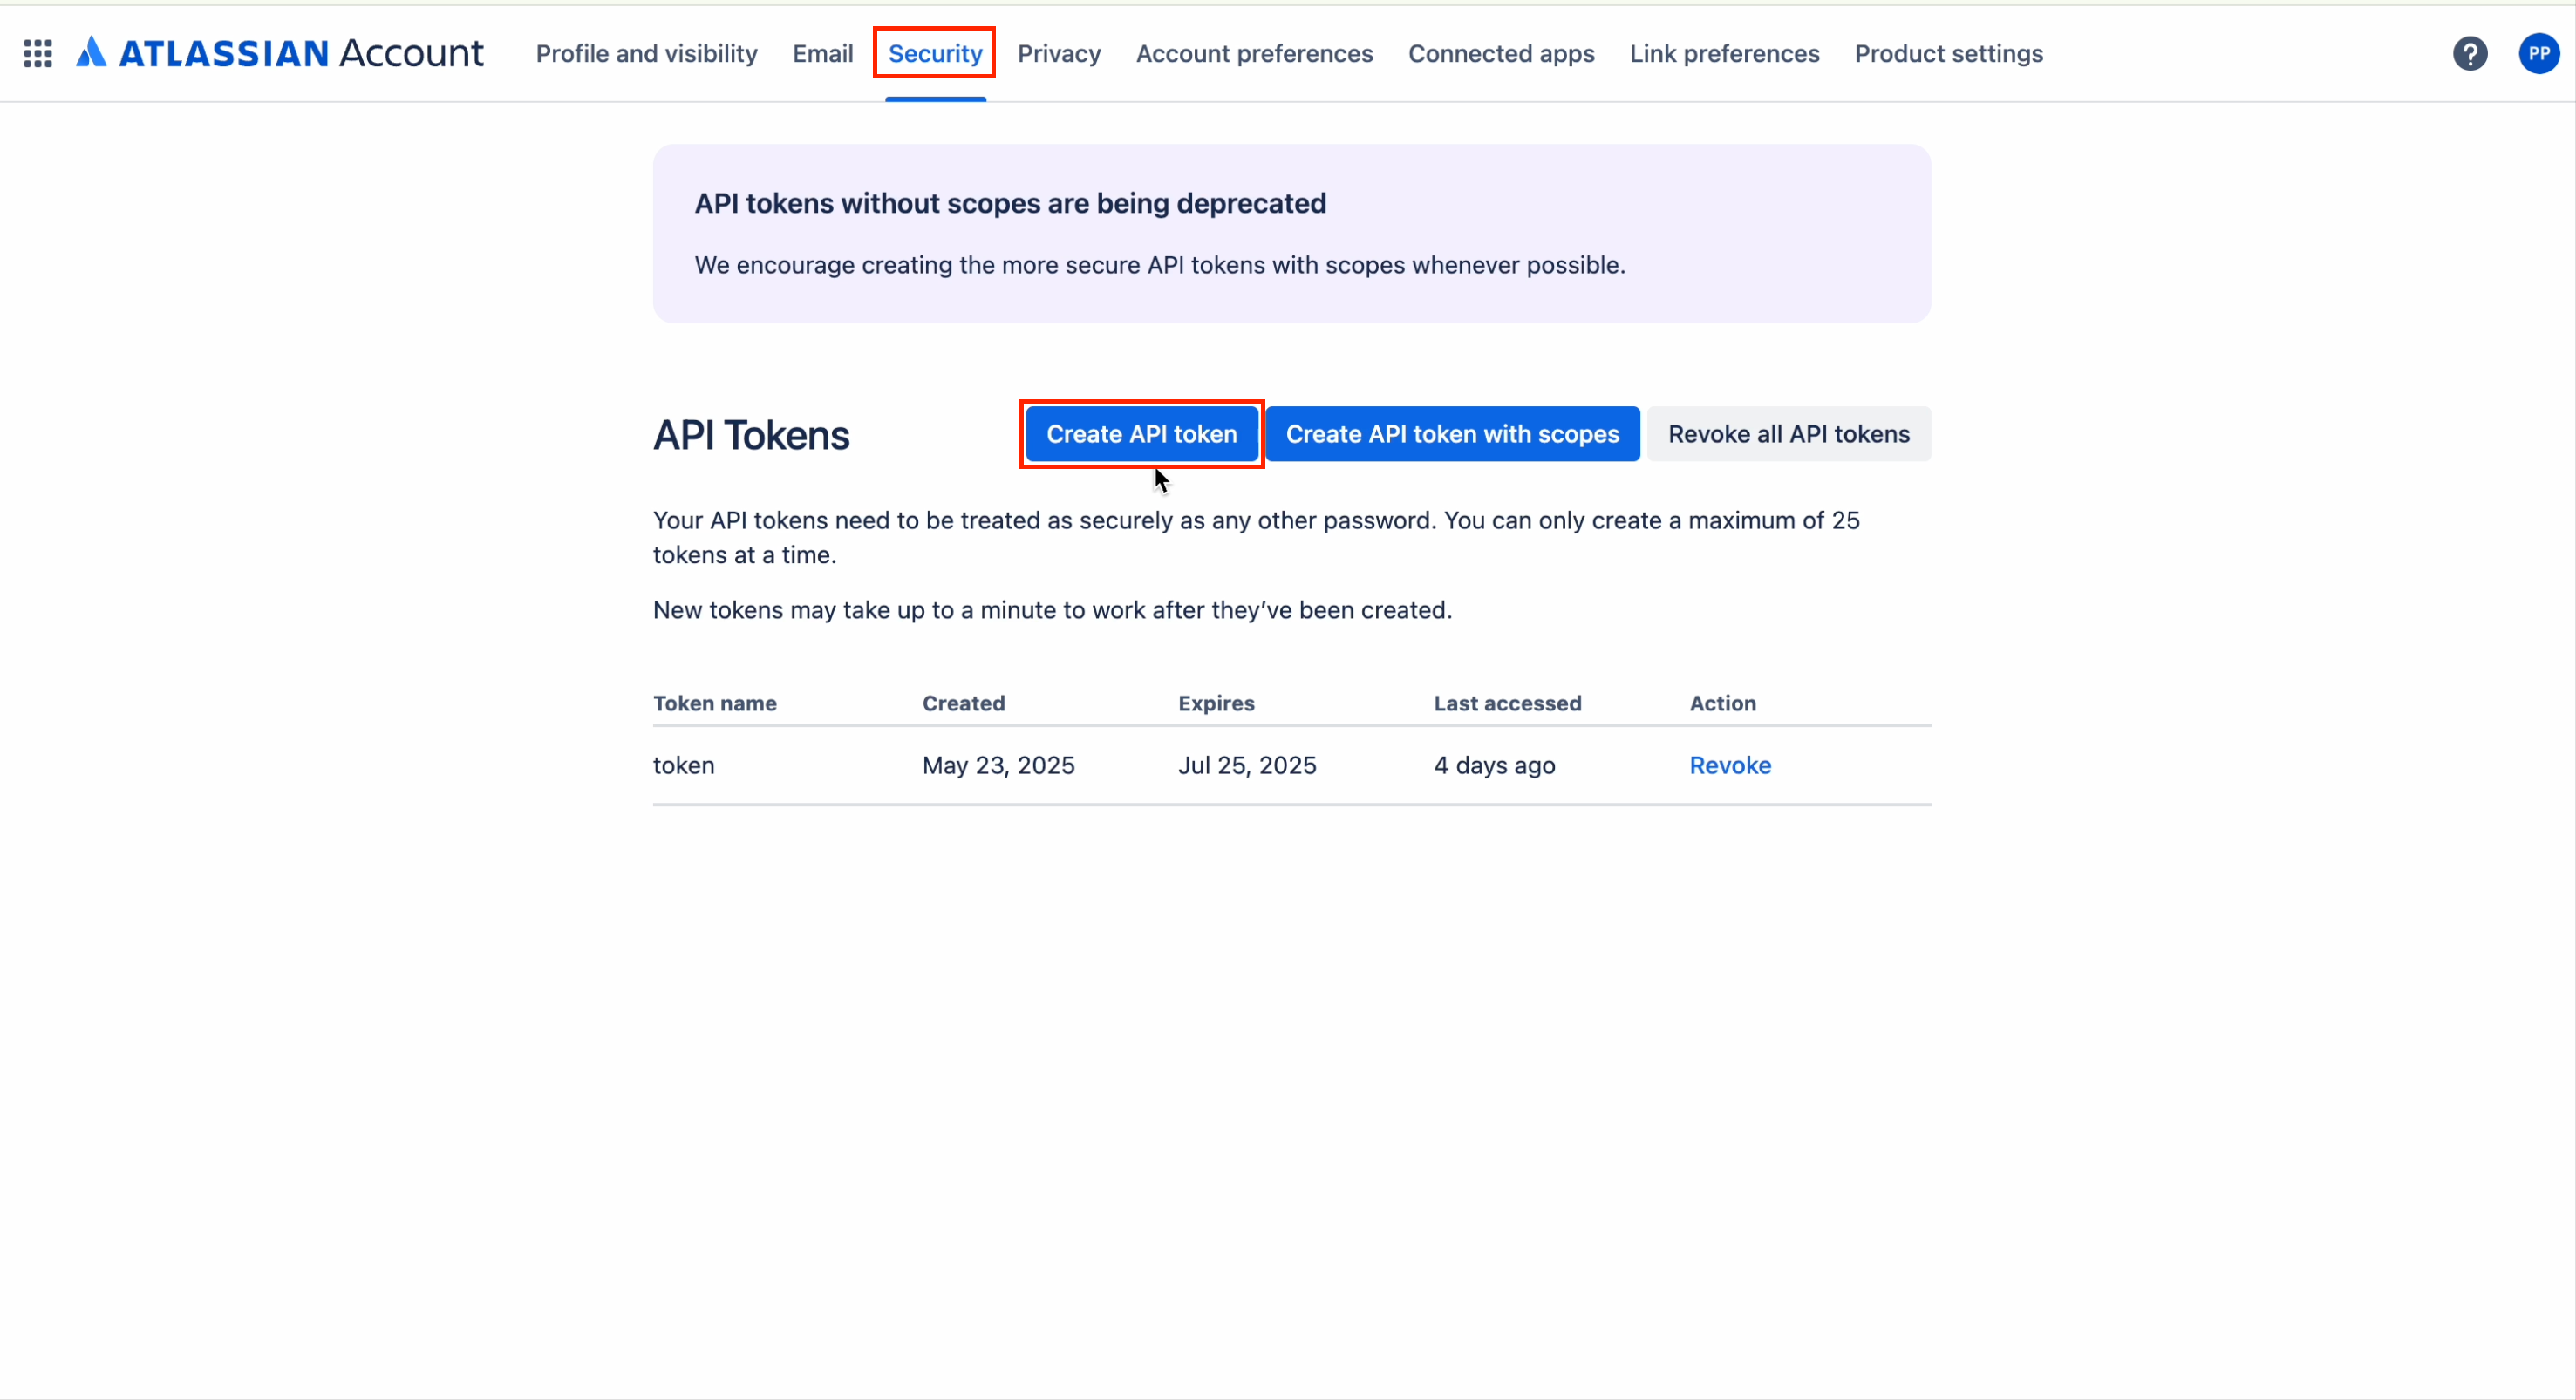
Under the Security section, click on Create API Token.
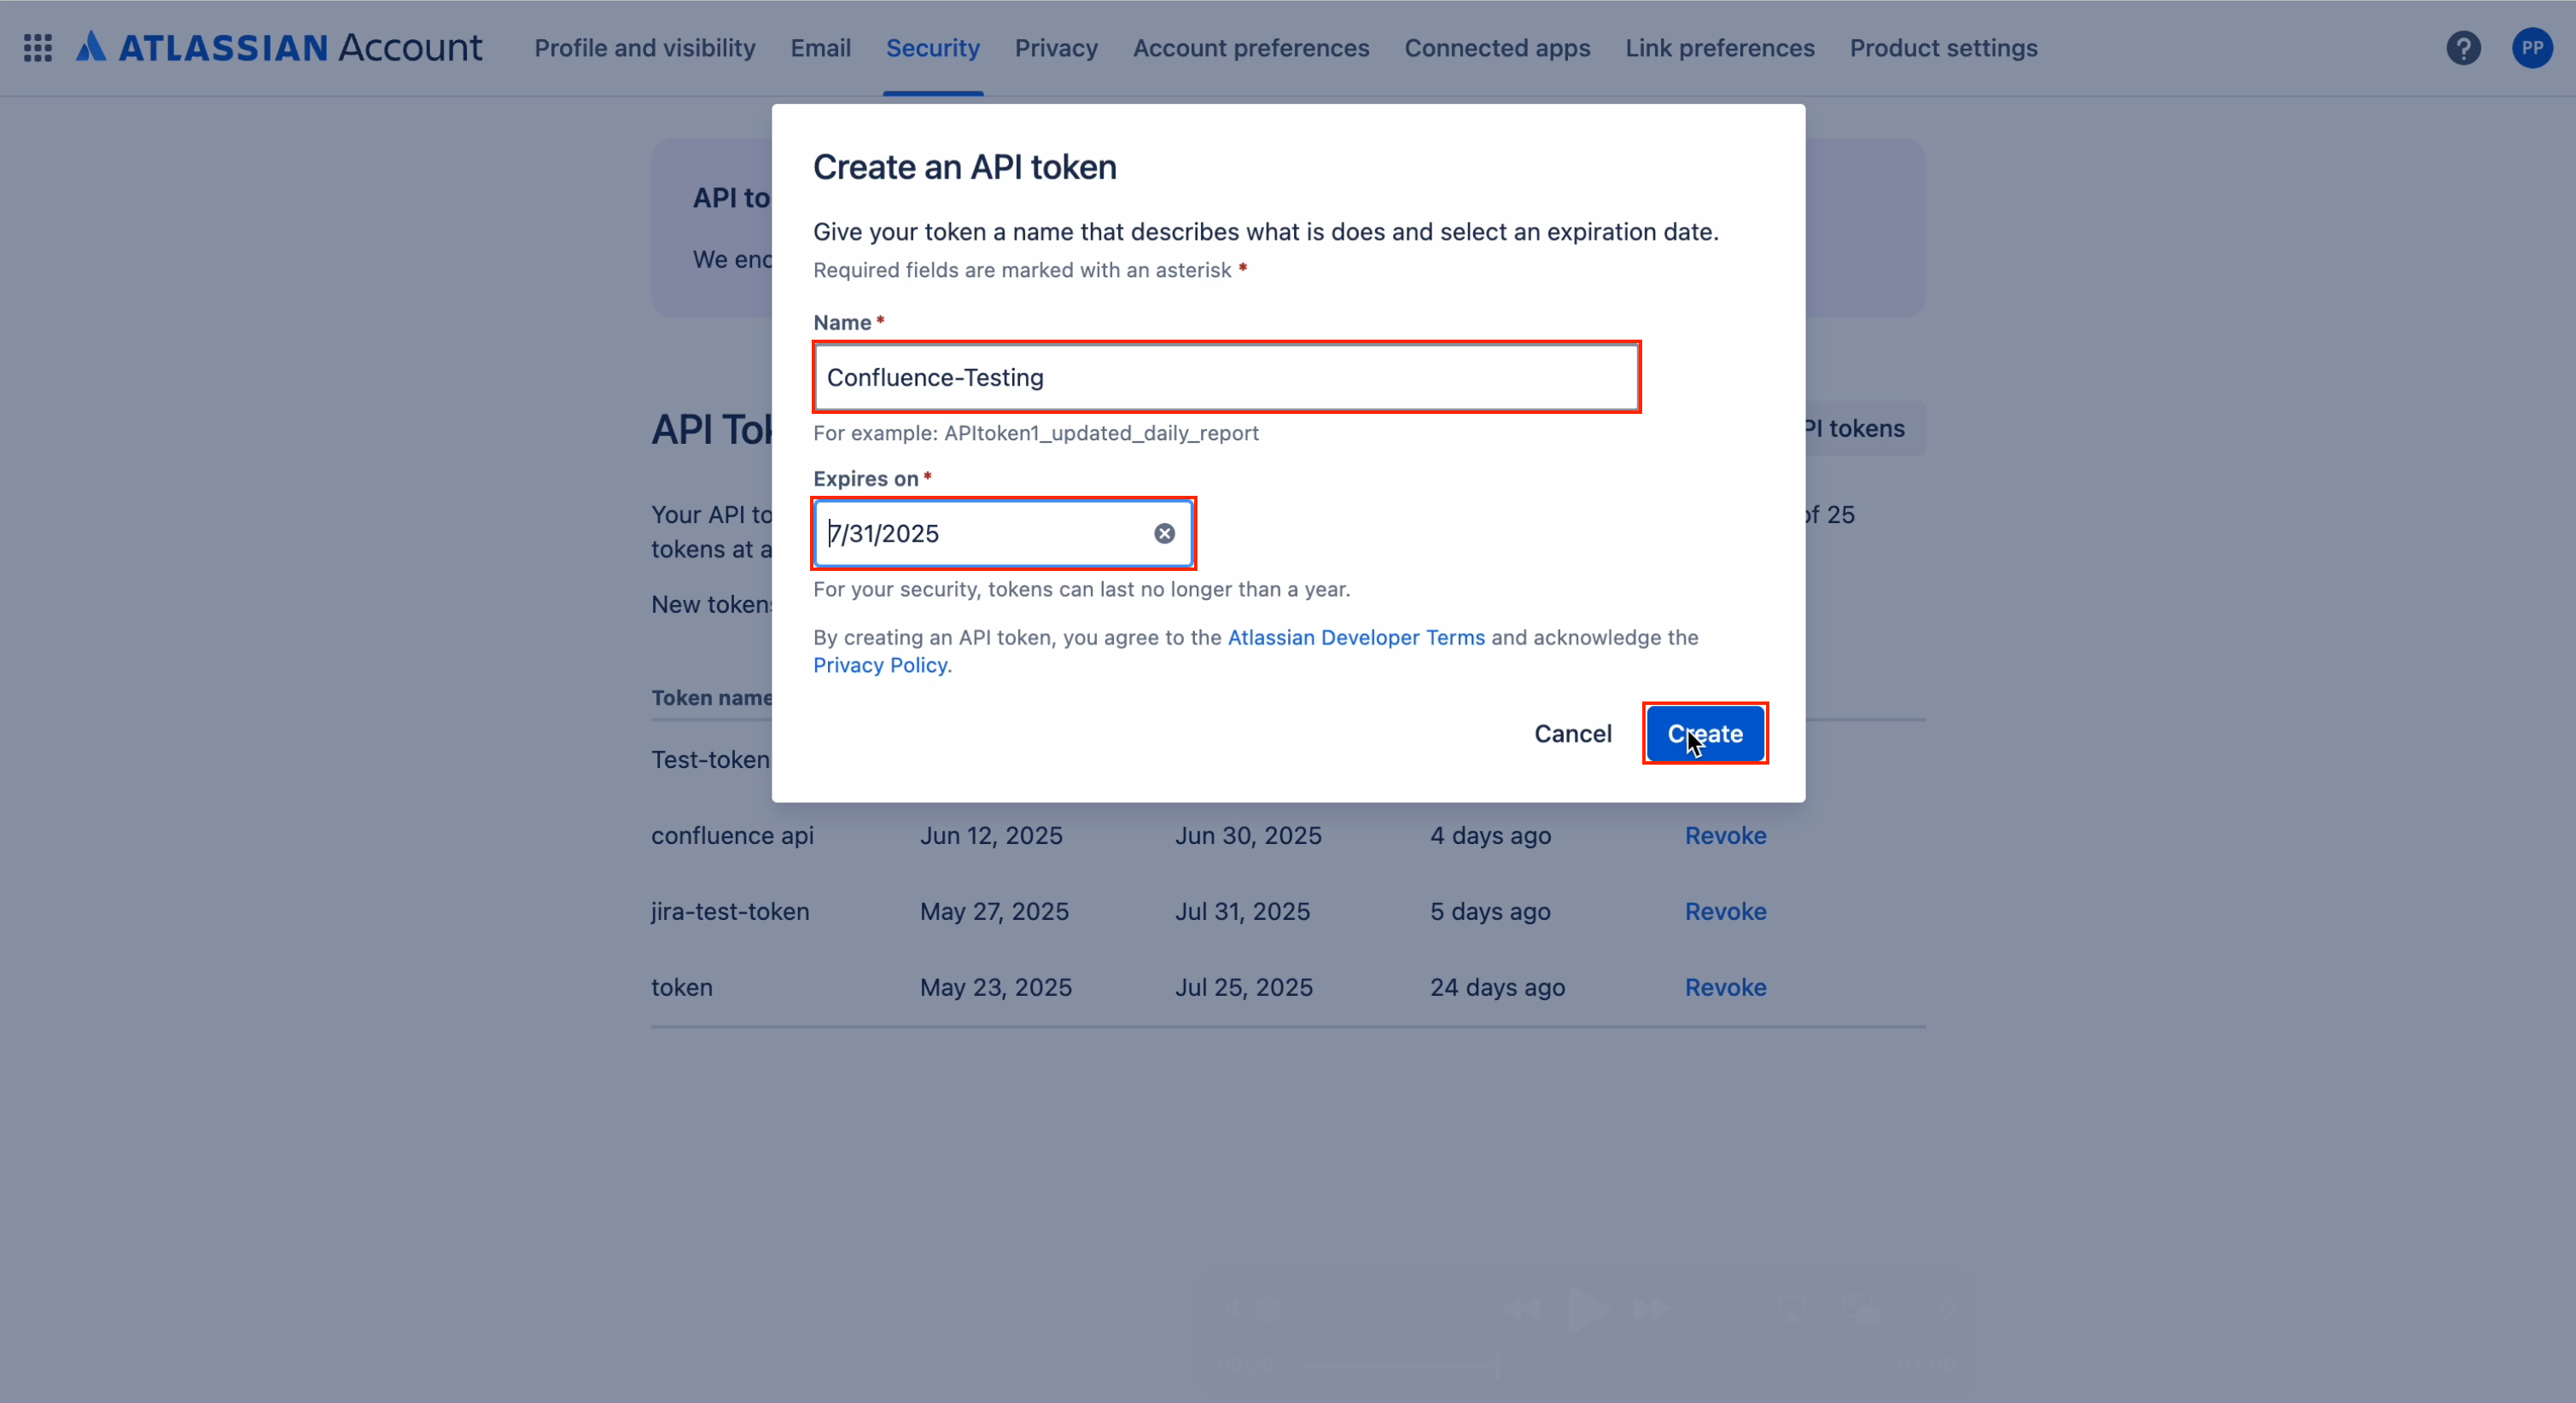
A modal window will appear where you must enter a token name and select an expiry interval. After filling in the required information, click Create.
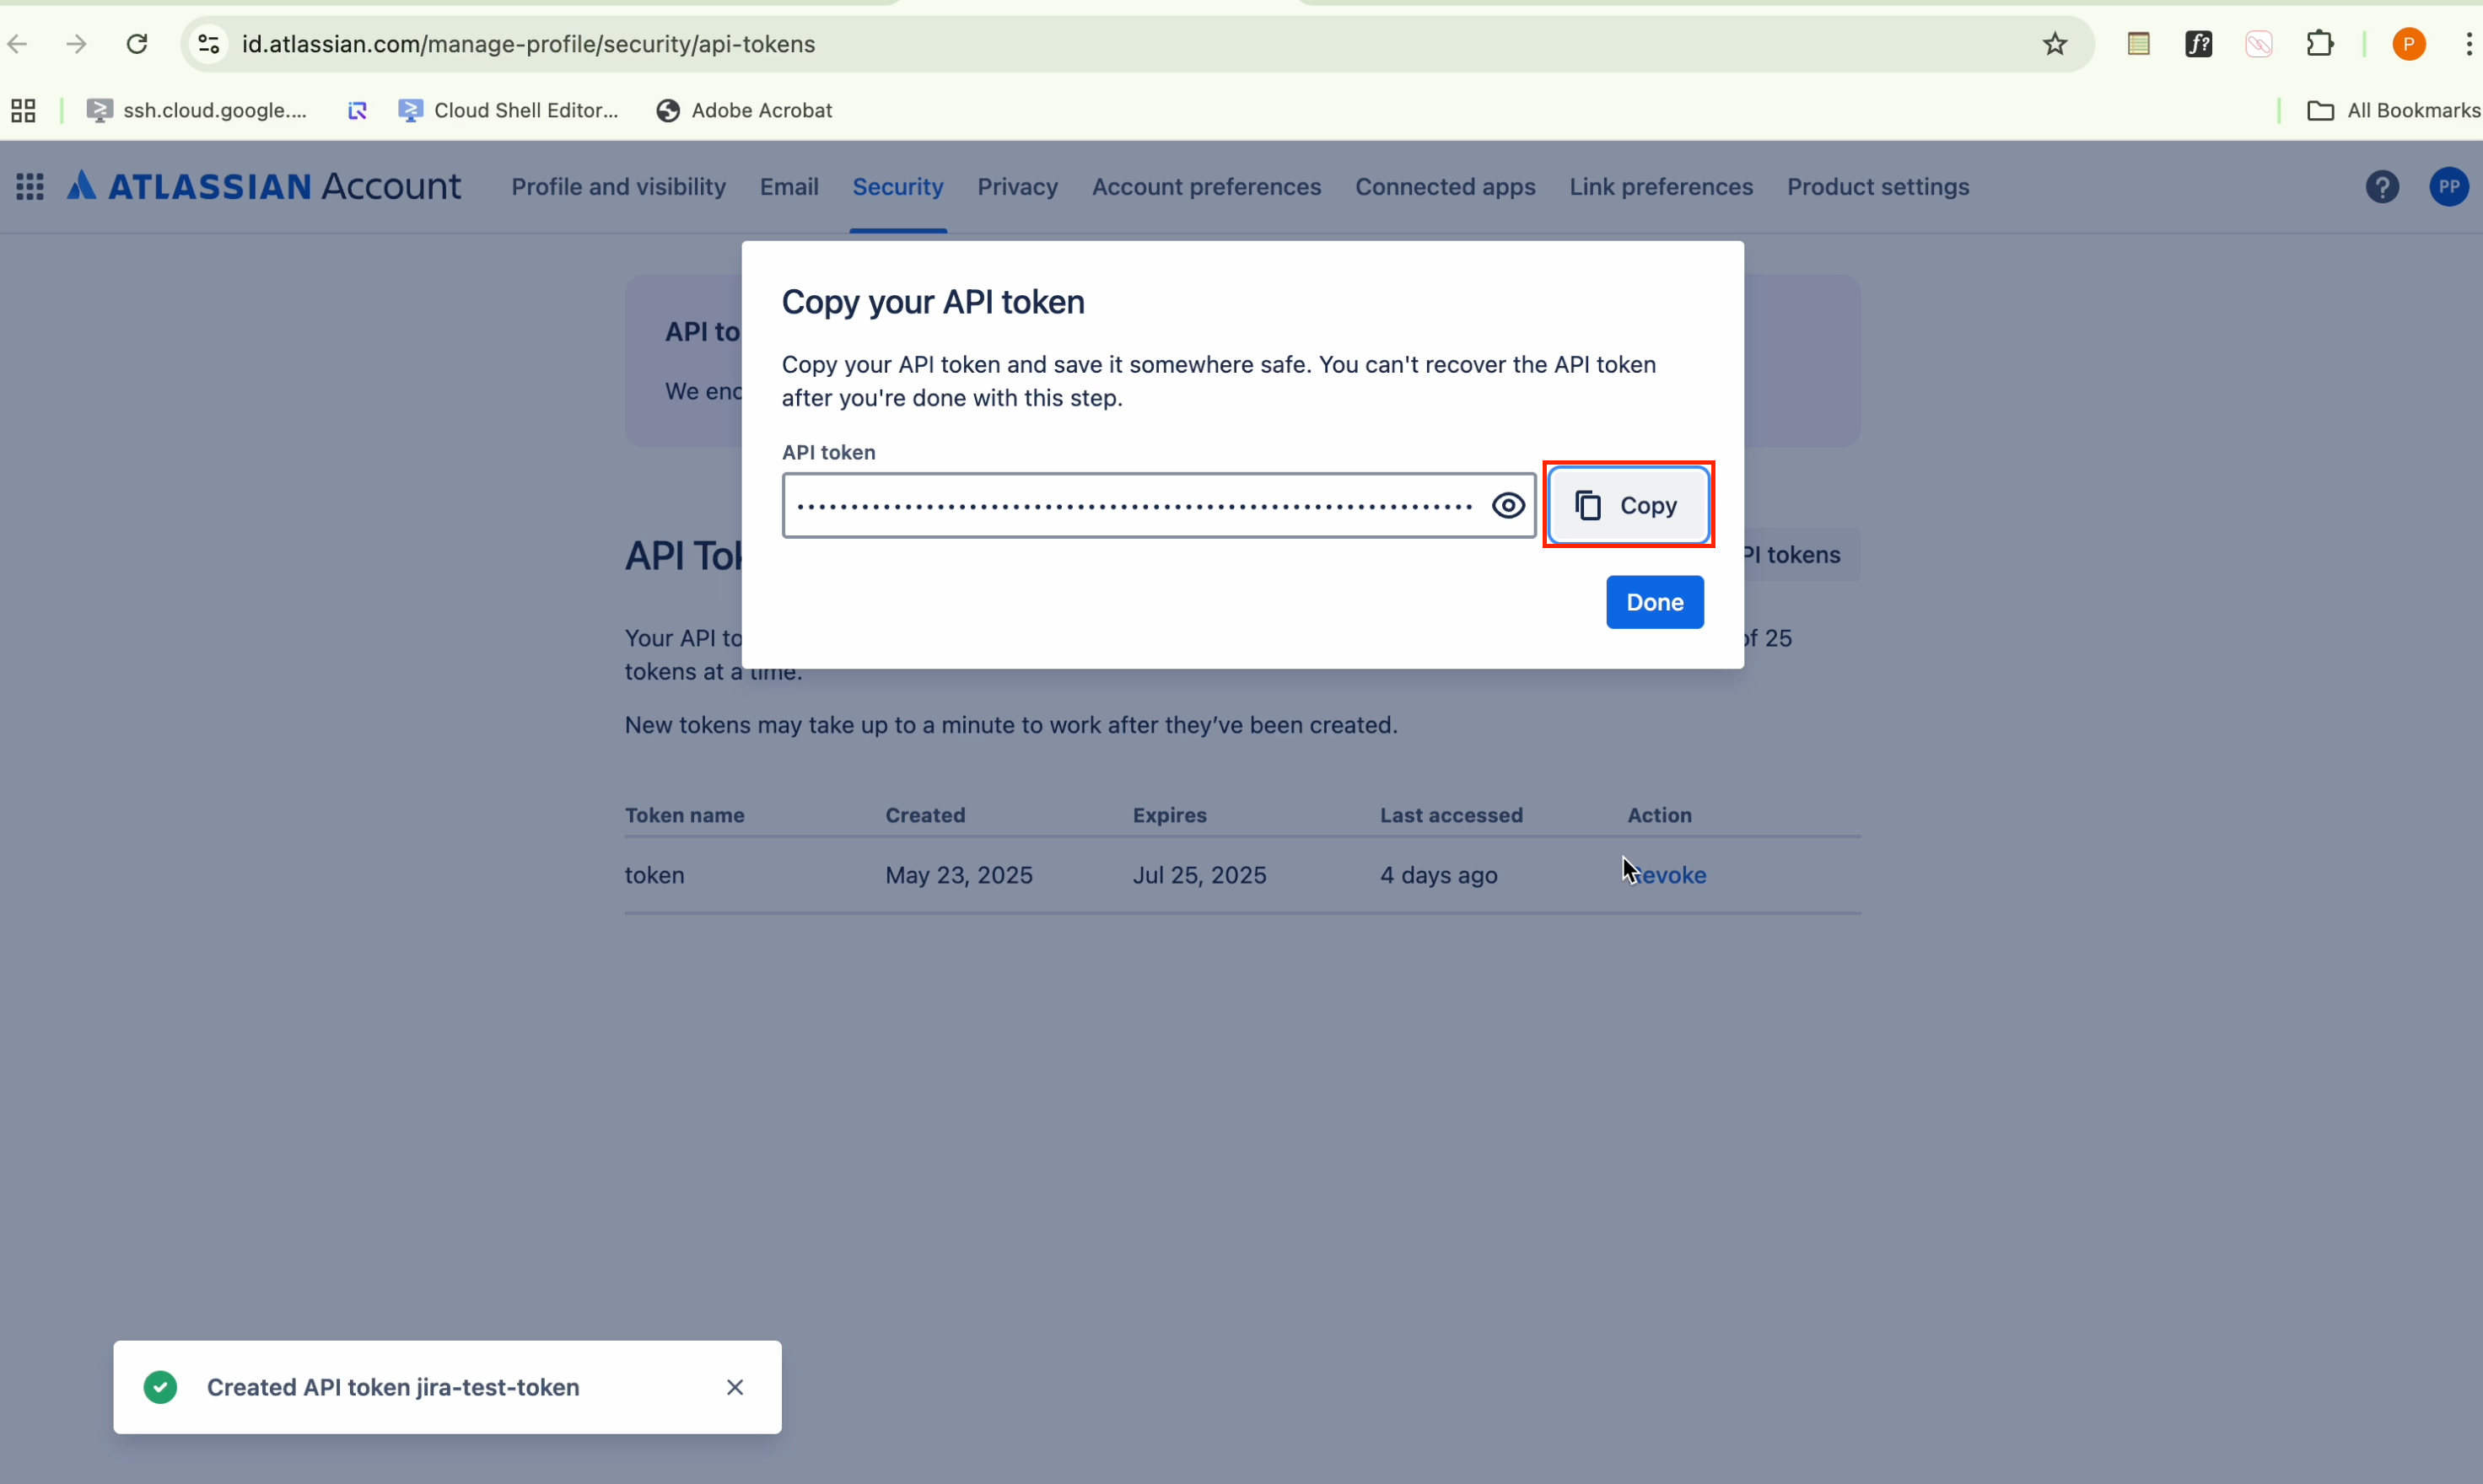
Copy and Store the Token:
Once the token is successfully created, copy the token and store it securely for future use during the integration process.
Step 2: Configuring Confluence on Matters Dashboard
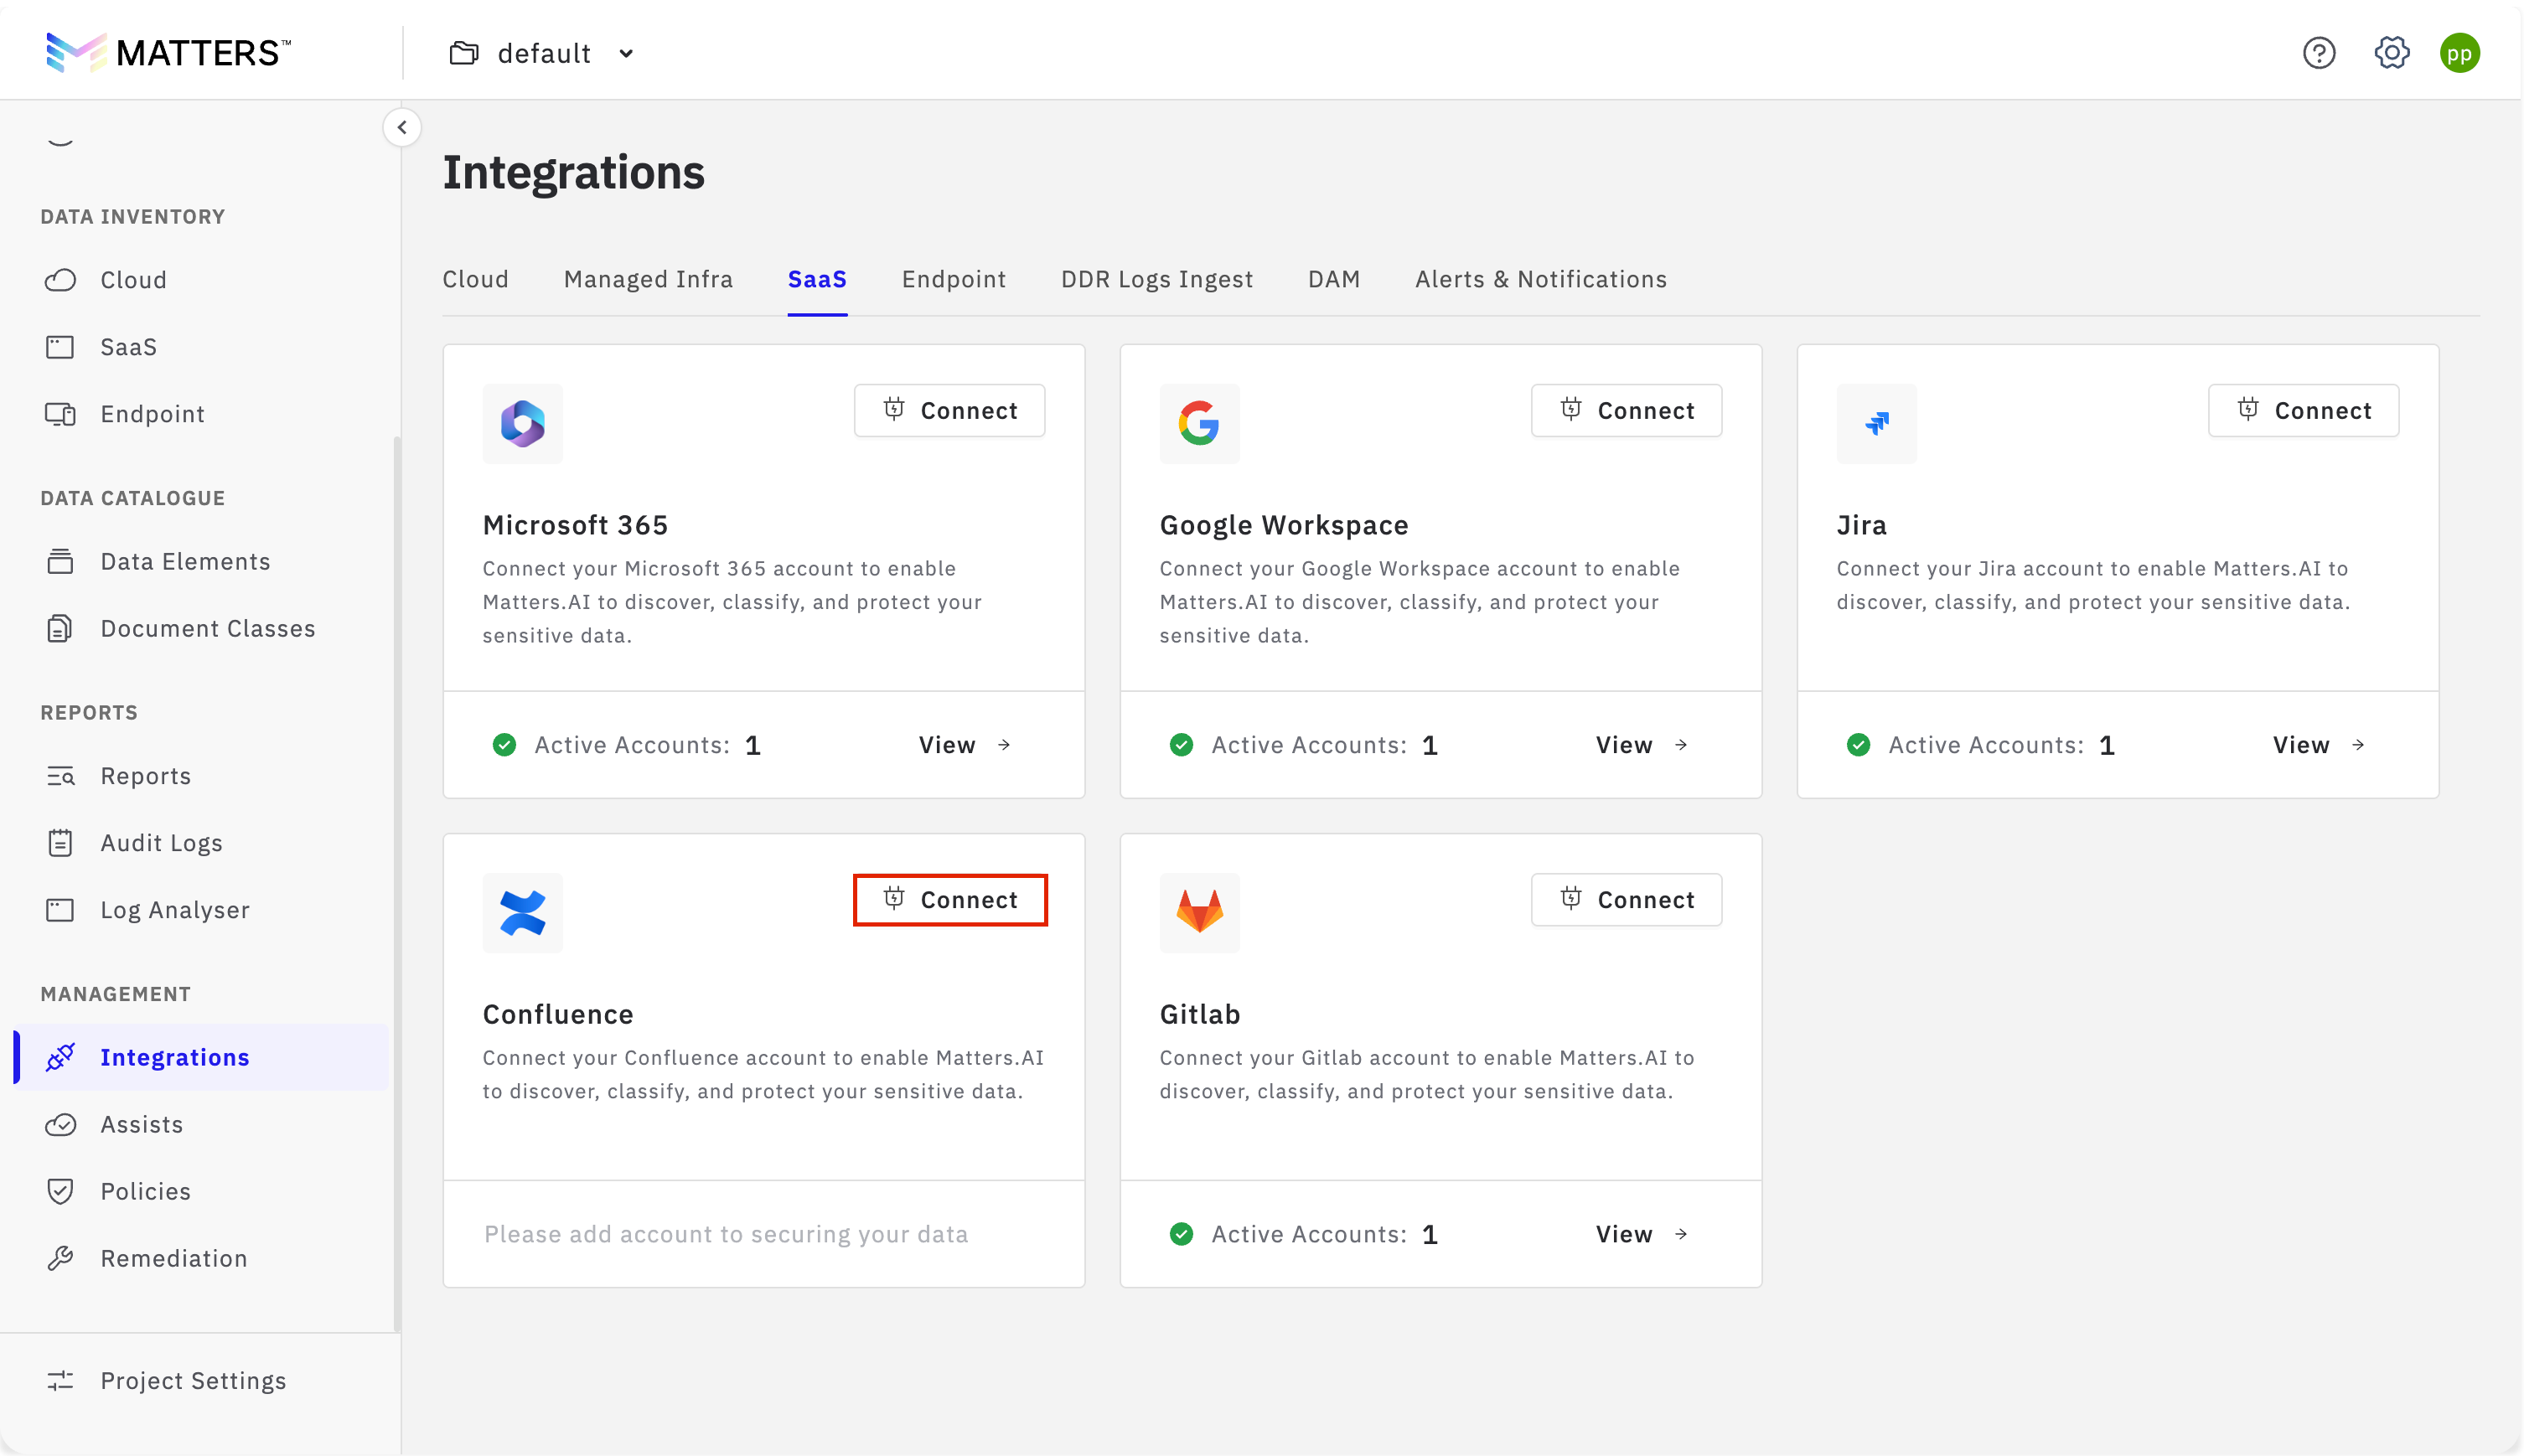
1. Open the SaaS Integrations Page
From the Matters Dashboard, navigate to:
Integrations > SaaS
Locate Confluence and click Connect.
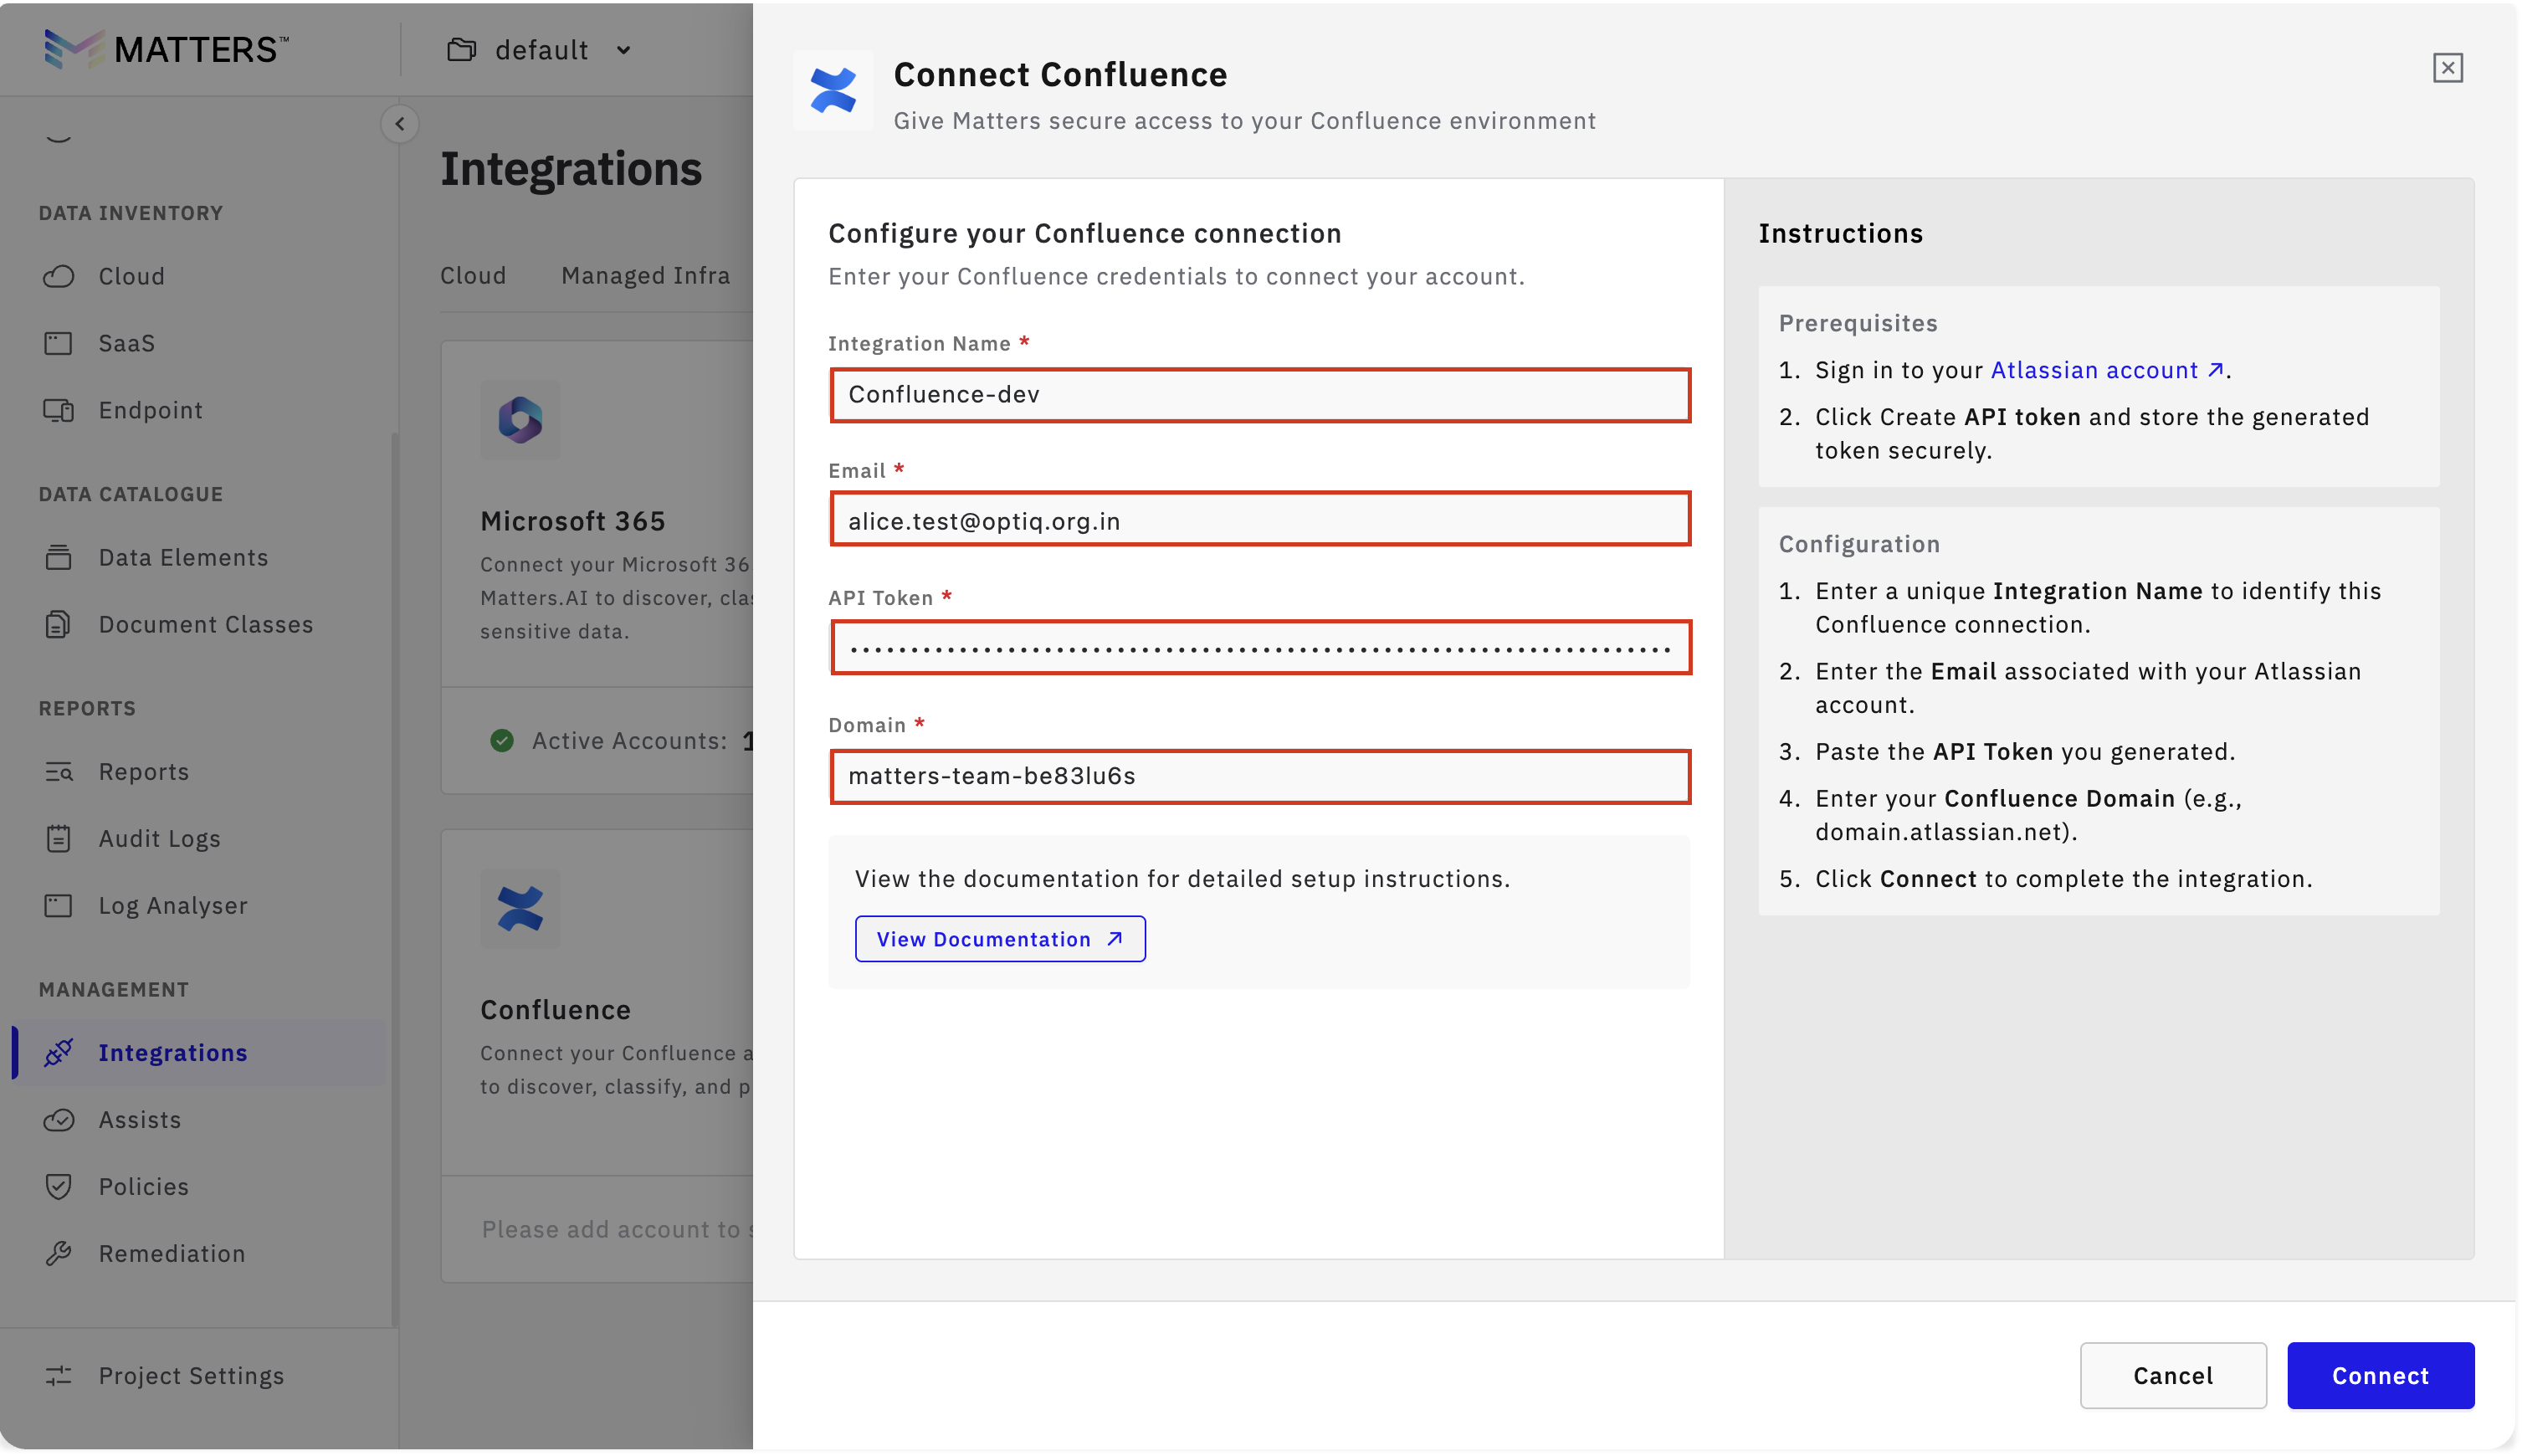
2. Configure the Confluence Integration
You will be prompted to complete the Confluence integration form.
Enter the following details:
Integration Name: A custom name to identify this integration.
Email ID: The email address associated with your Confluence account.
API Token: The Atlassian API token generated earlier.
Confluence Domain: Your Confluence project domain, for example:
domain.atlassian.net.
After entering all required details, click Connect.
3. Confirm the Connection
Once the integration is completed successfully, a confirmation message will appear on the UI.
Step 3: Configure Scan Settings
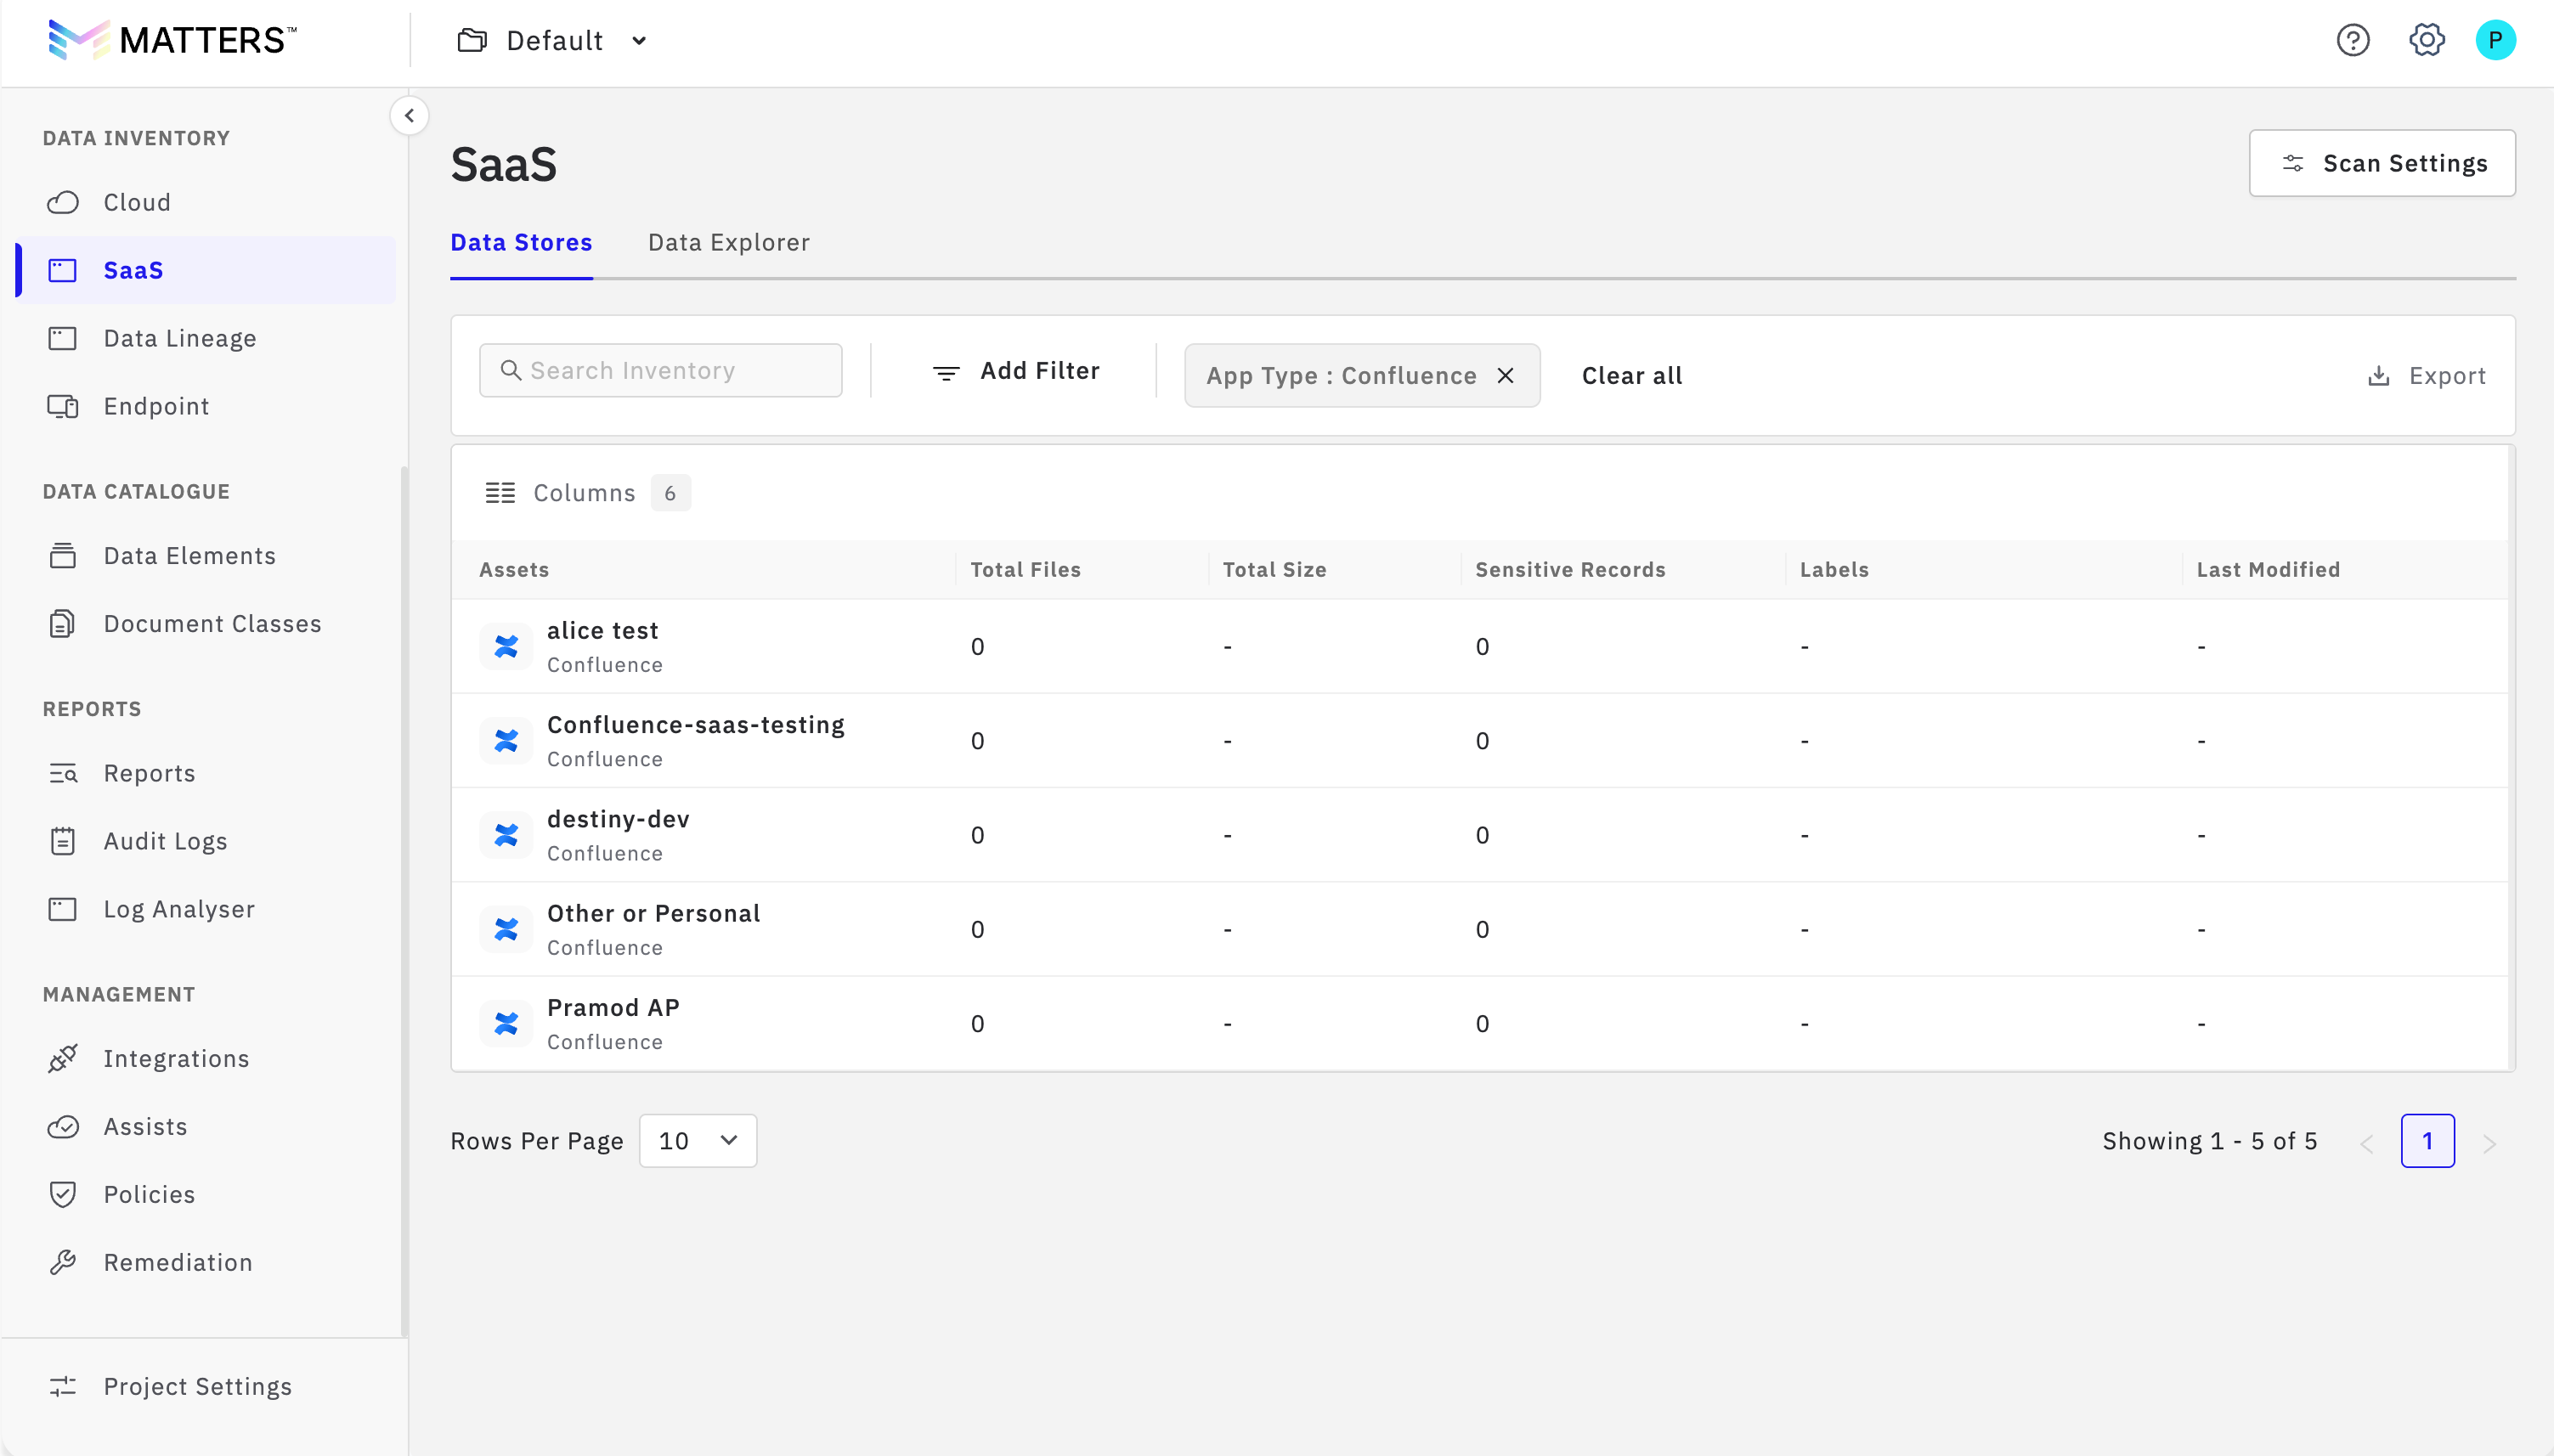
After the Confluence integration is completed, the discovered Confluence spaces will be listed in the SaaS Inventory.
1. Navigate to SaaS Inventory
Go to SaaS Inventory from the Matters Dashboard.
You will see all discovered Confluence spaces listed.
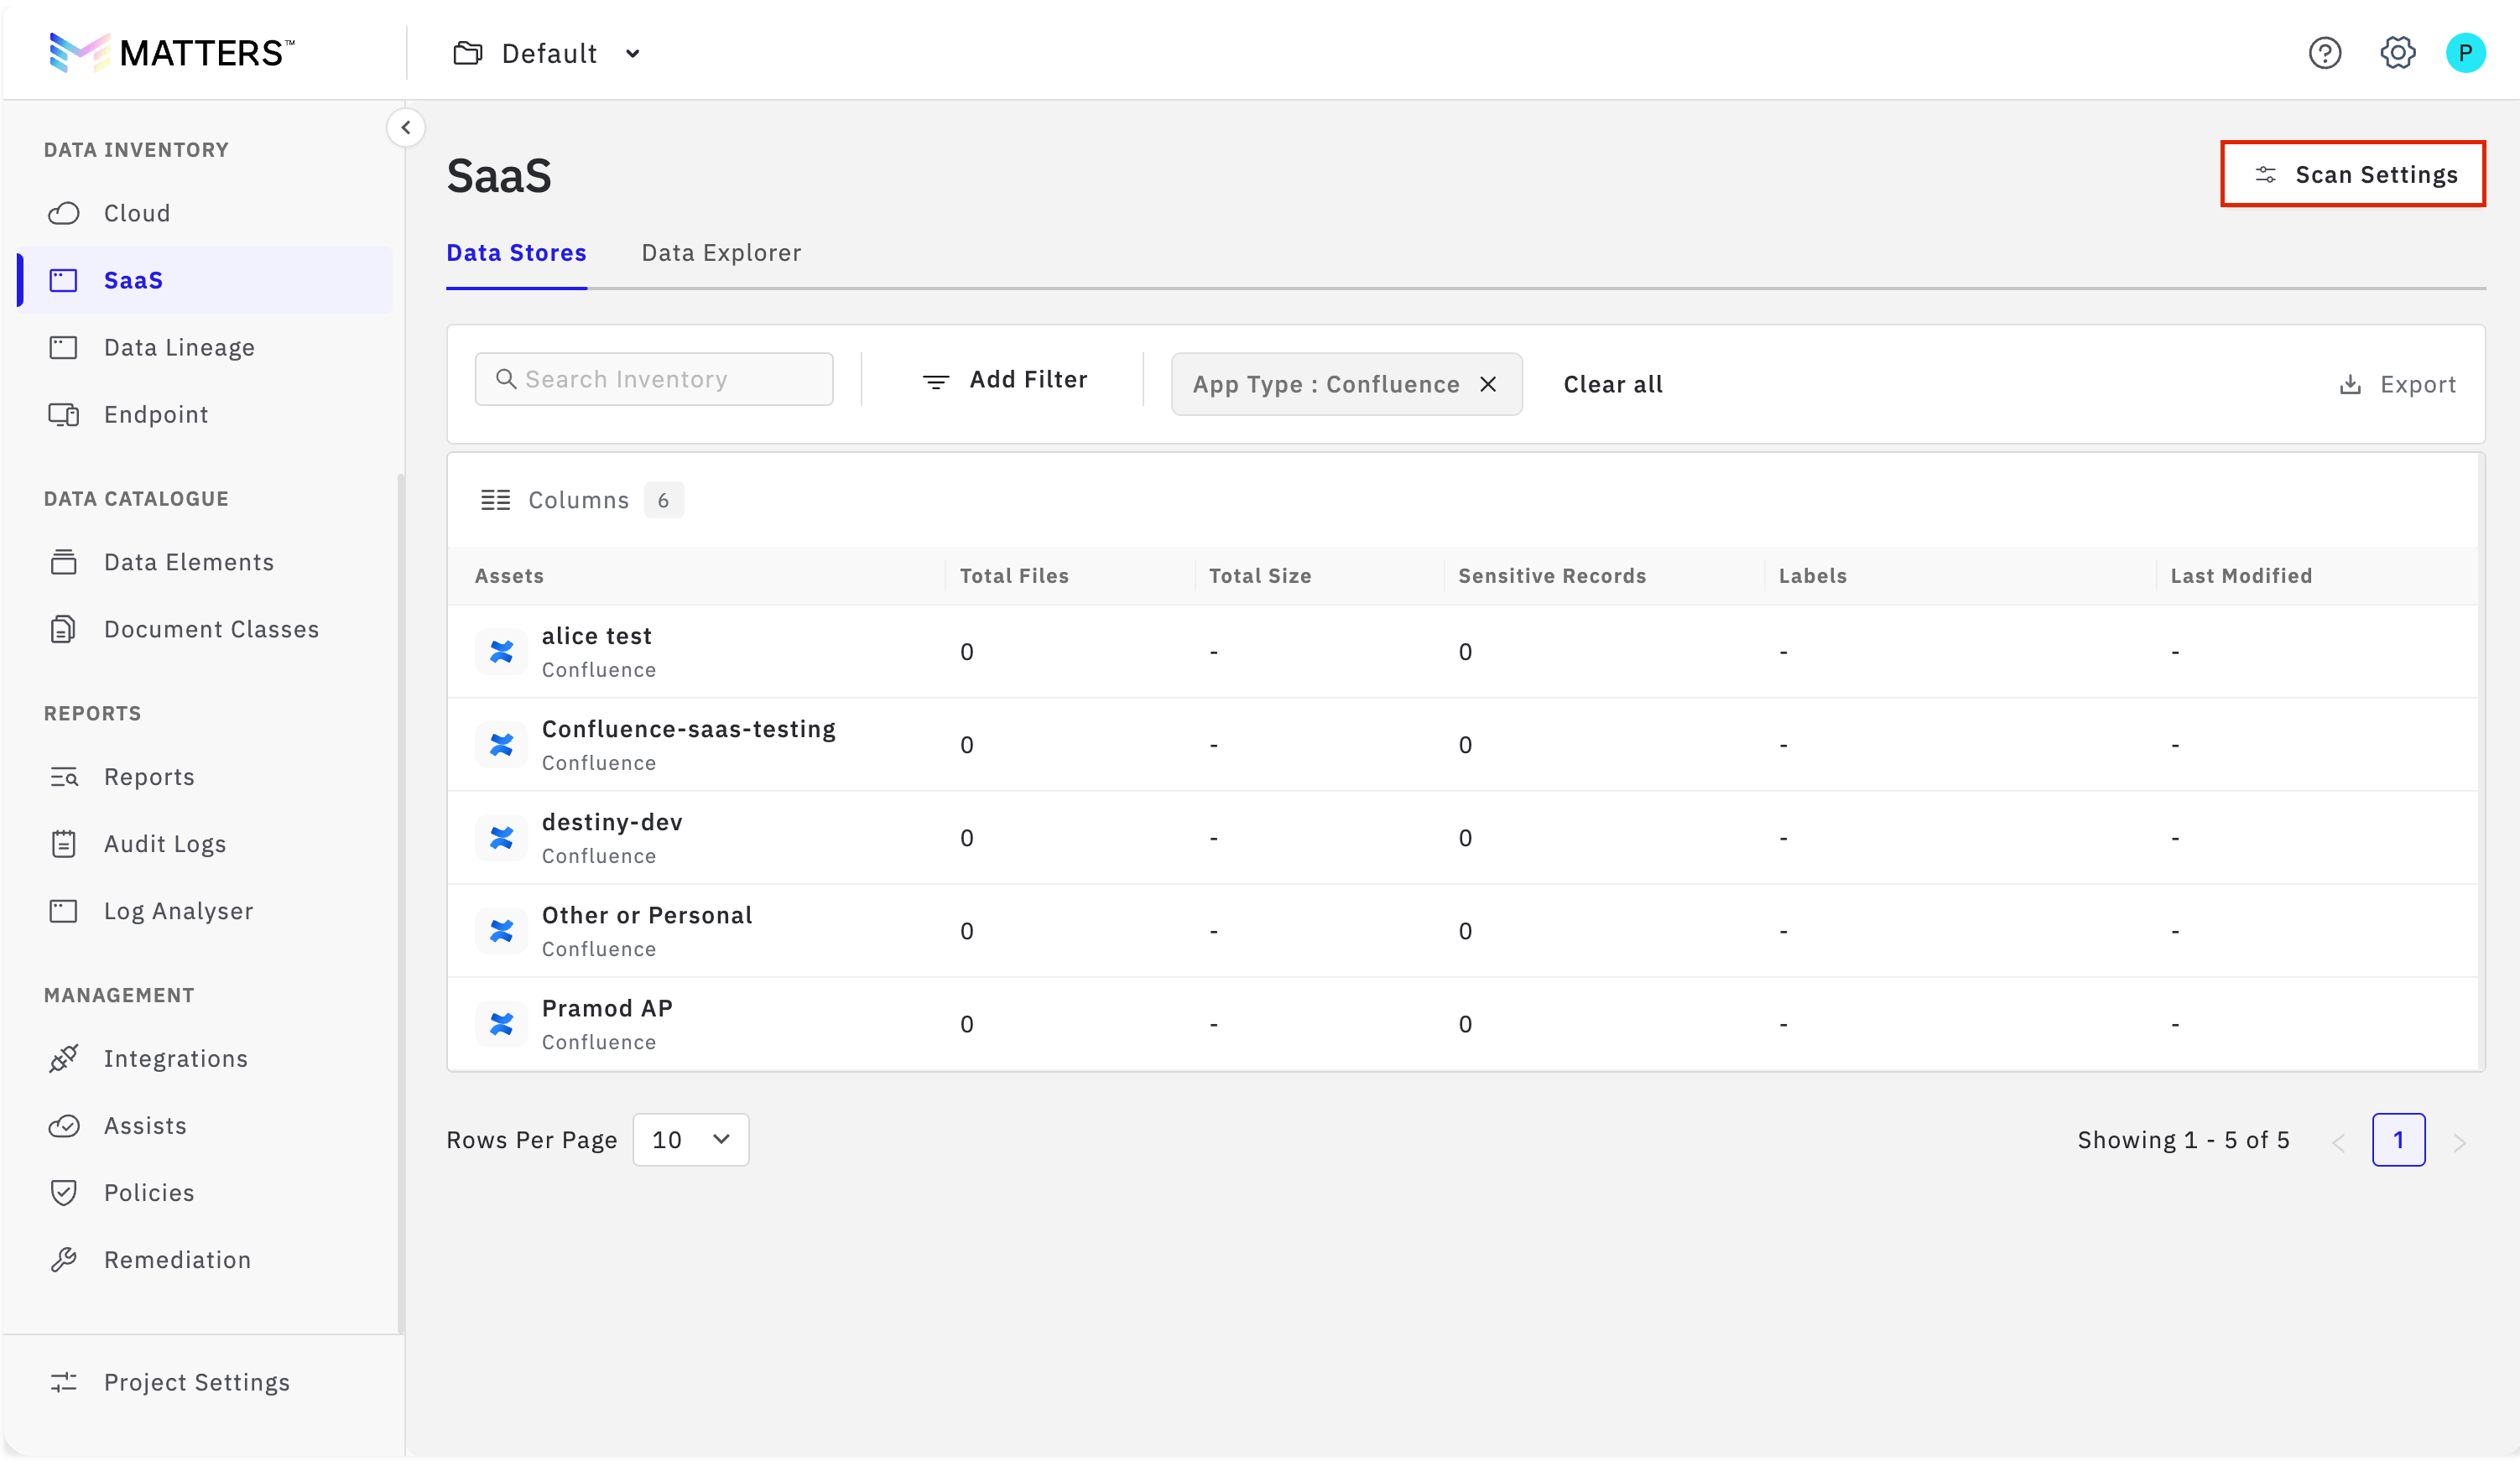
2. Open Scan Settings
Click Scan Settings to configure scanning for the selected Confluence spaces.
3. Select Spaces for Scanning
Choose the Confluence spaces that need to be scanned. You may remove any spaces that are not required for scanning.
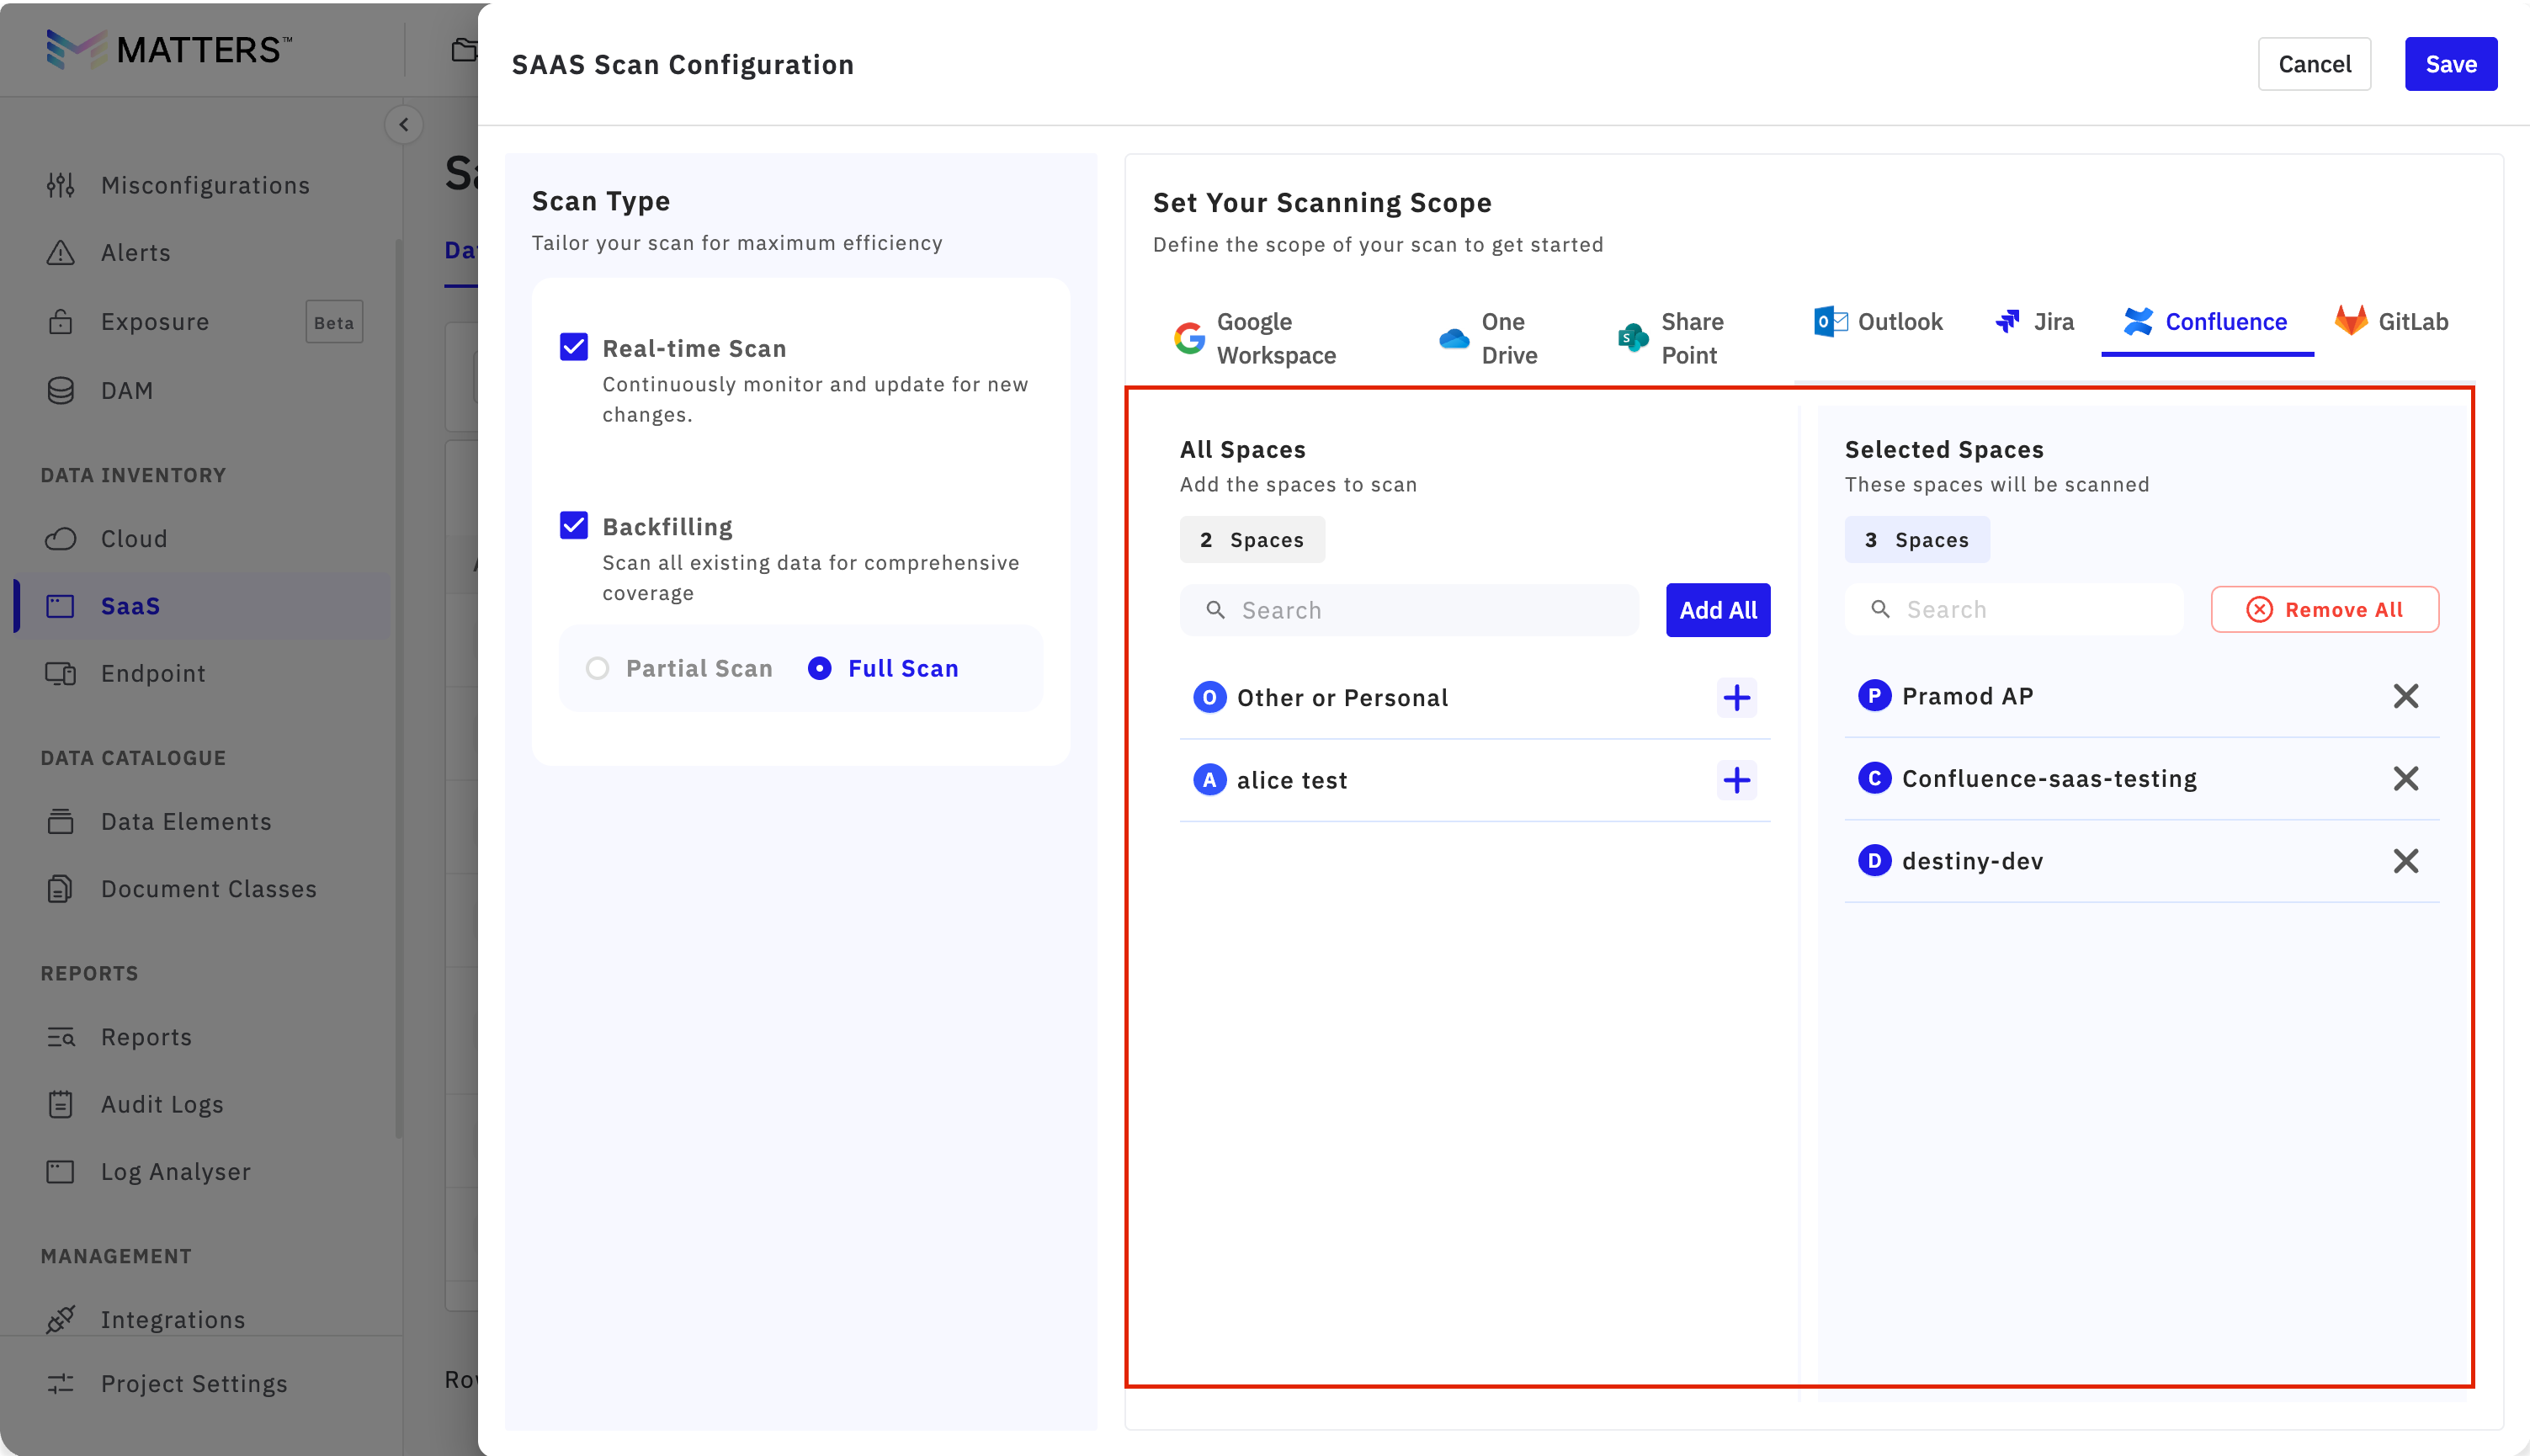
4. Choose the Scan Mode
Select available scan modes based on your organization’s requirements:
Real-Time Scan: Enables continuous monitoring of changes in user accounts, files, and sites. This helps detect new or modified sensitive data as soon as changes occur.
Backfilling Scan: Performs a comprehensive scan of all existing data to establish baseline coverage and identify sensitive entities across historical Confluence content.
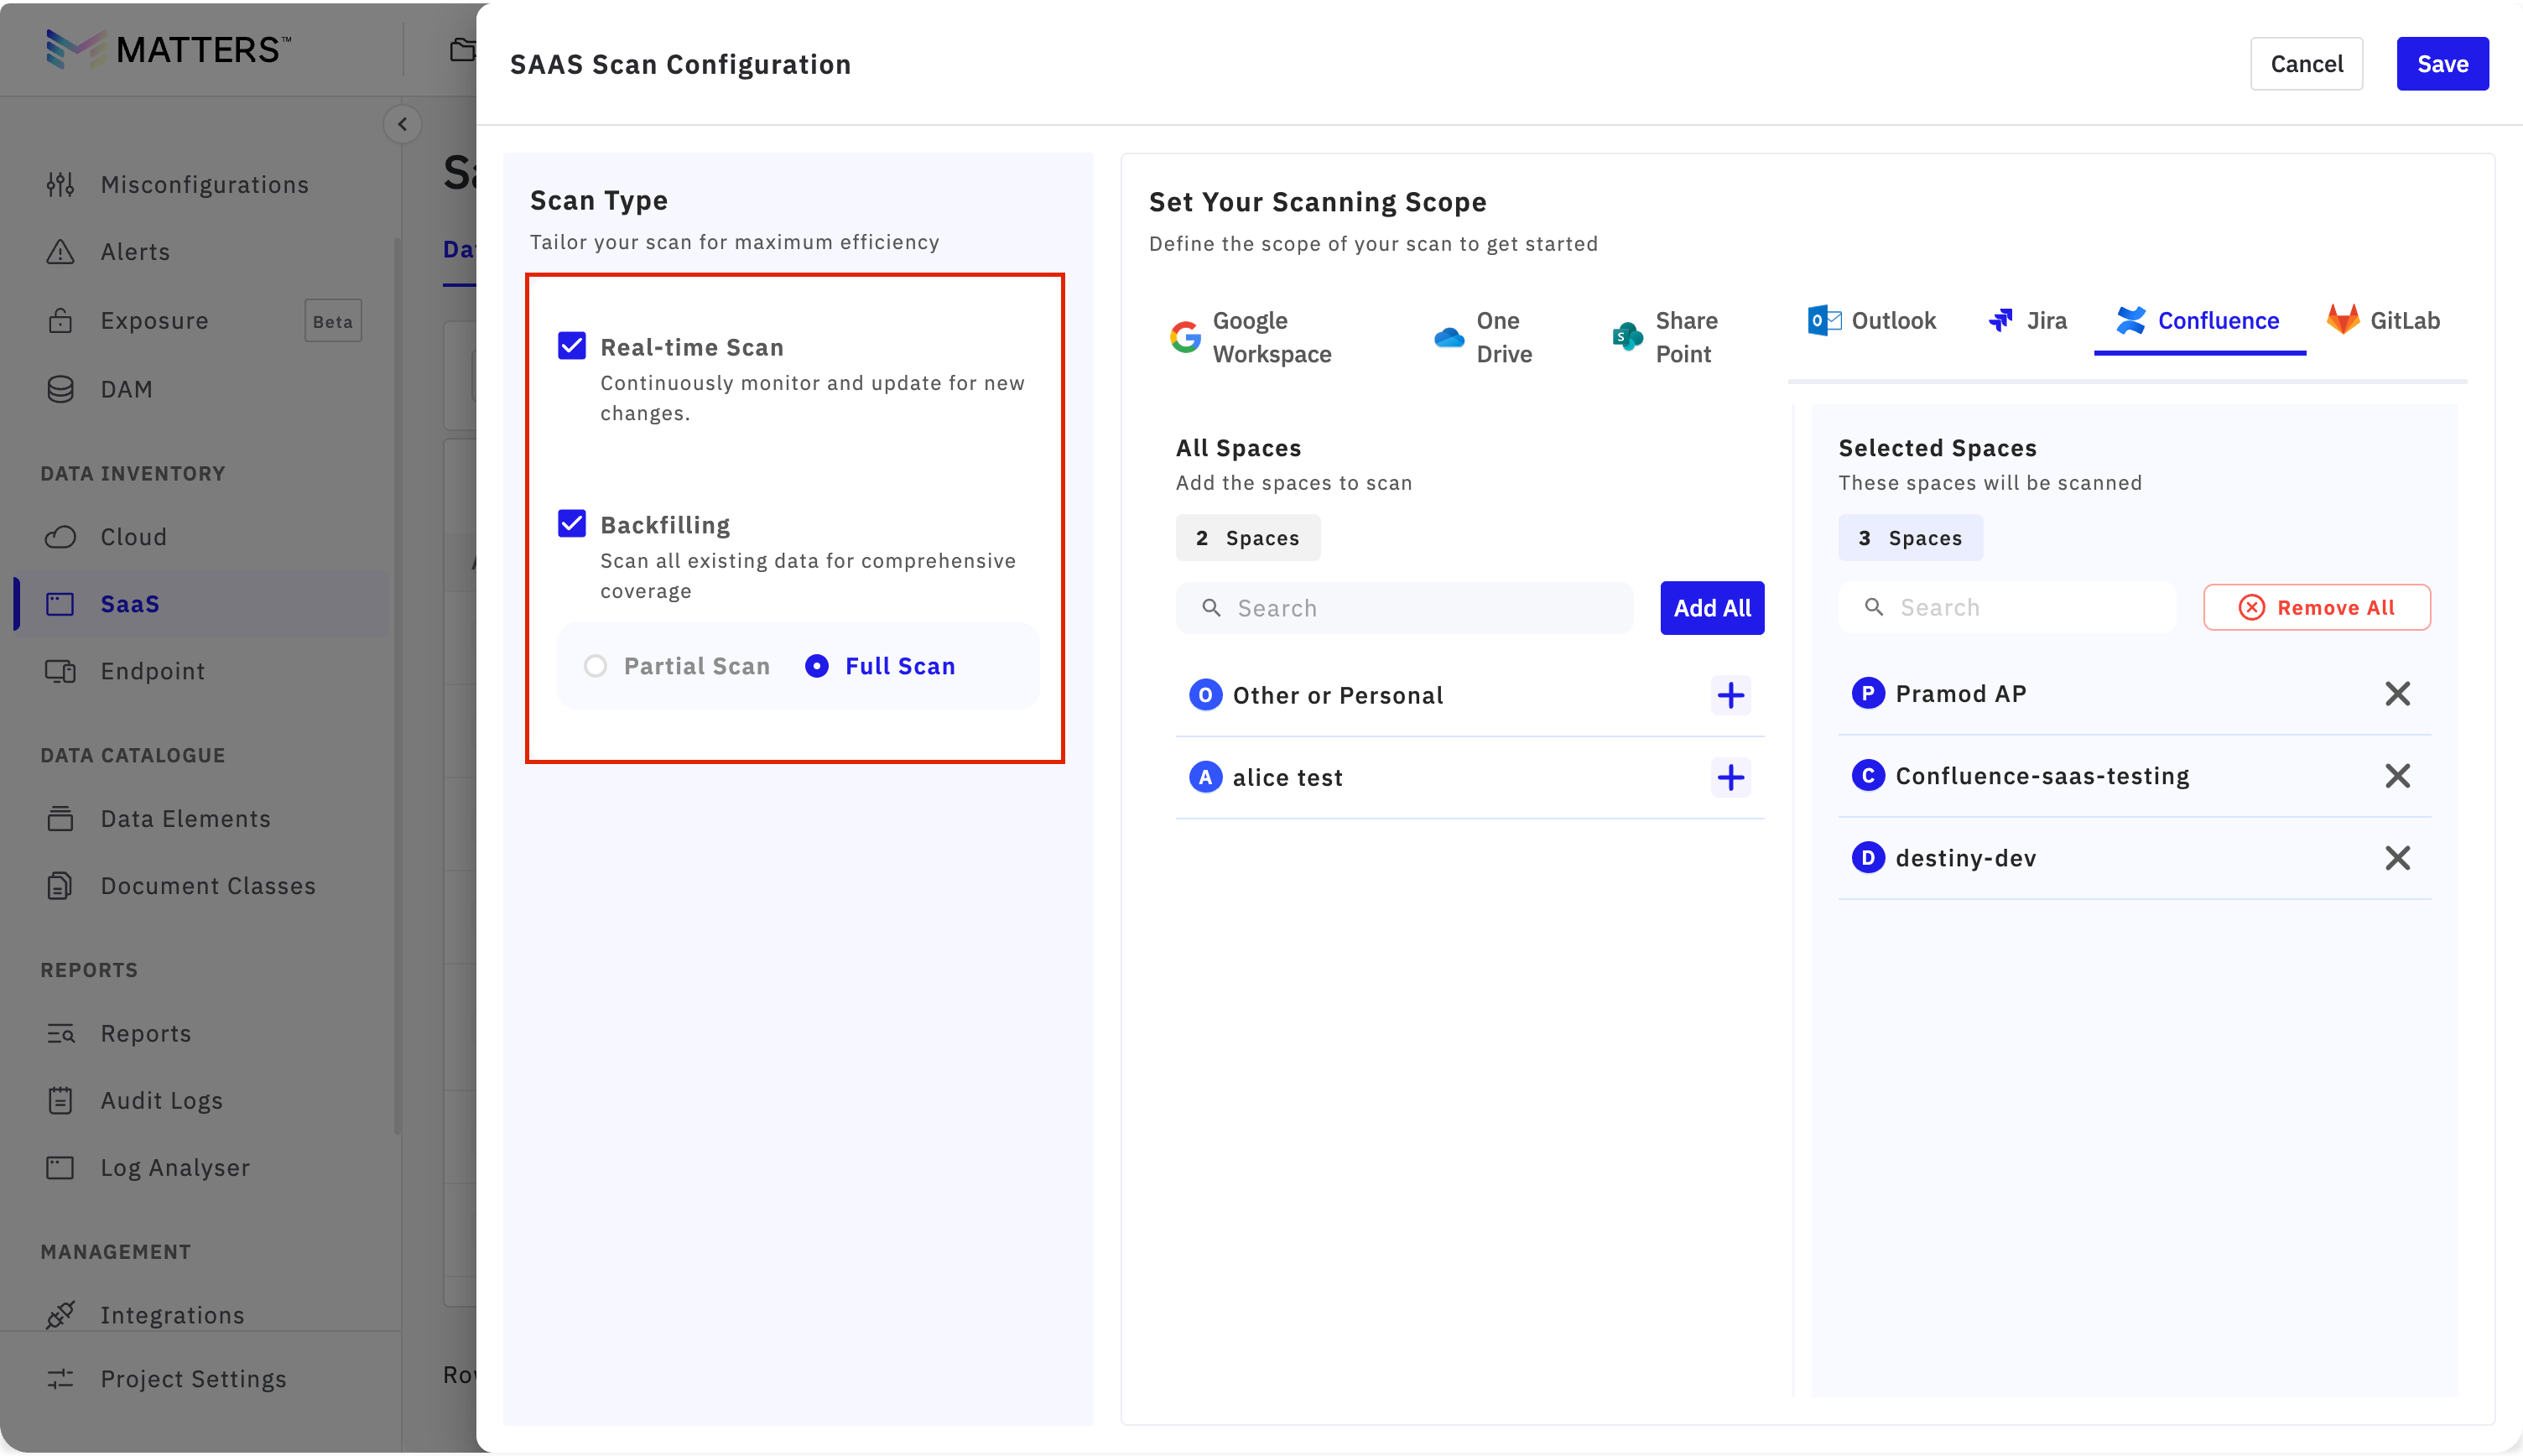
5. Save the Configuration
After selecting the spaces and scan mode, click Save to apply the scan configuration.
Once saved, scans will run automatically in the background. Matters will identify sensitive entities found across the selected Confluence spaces.
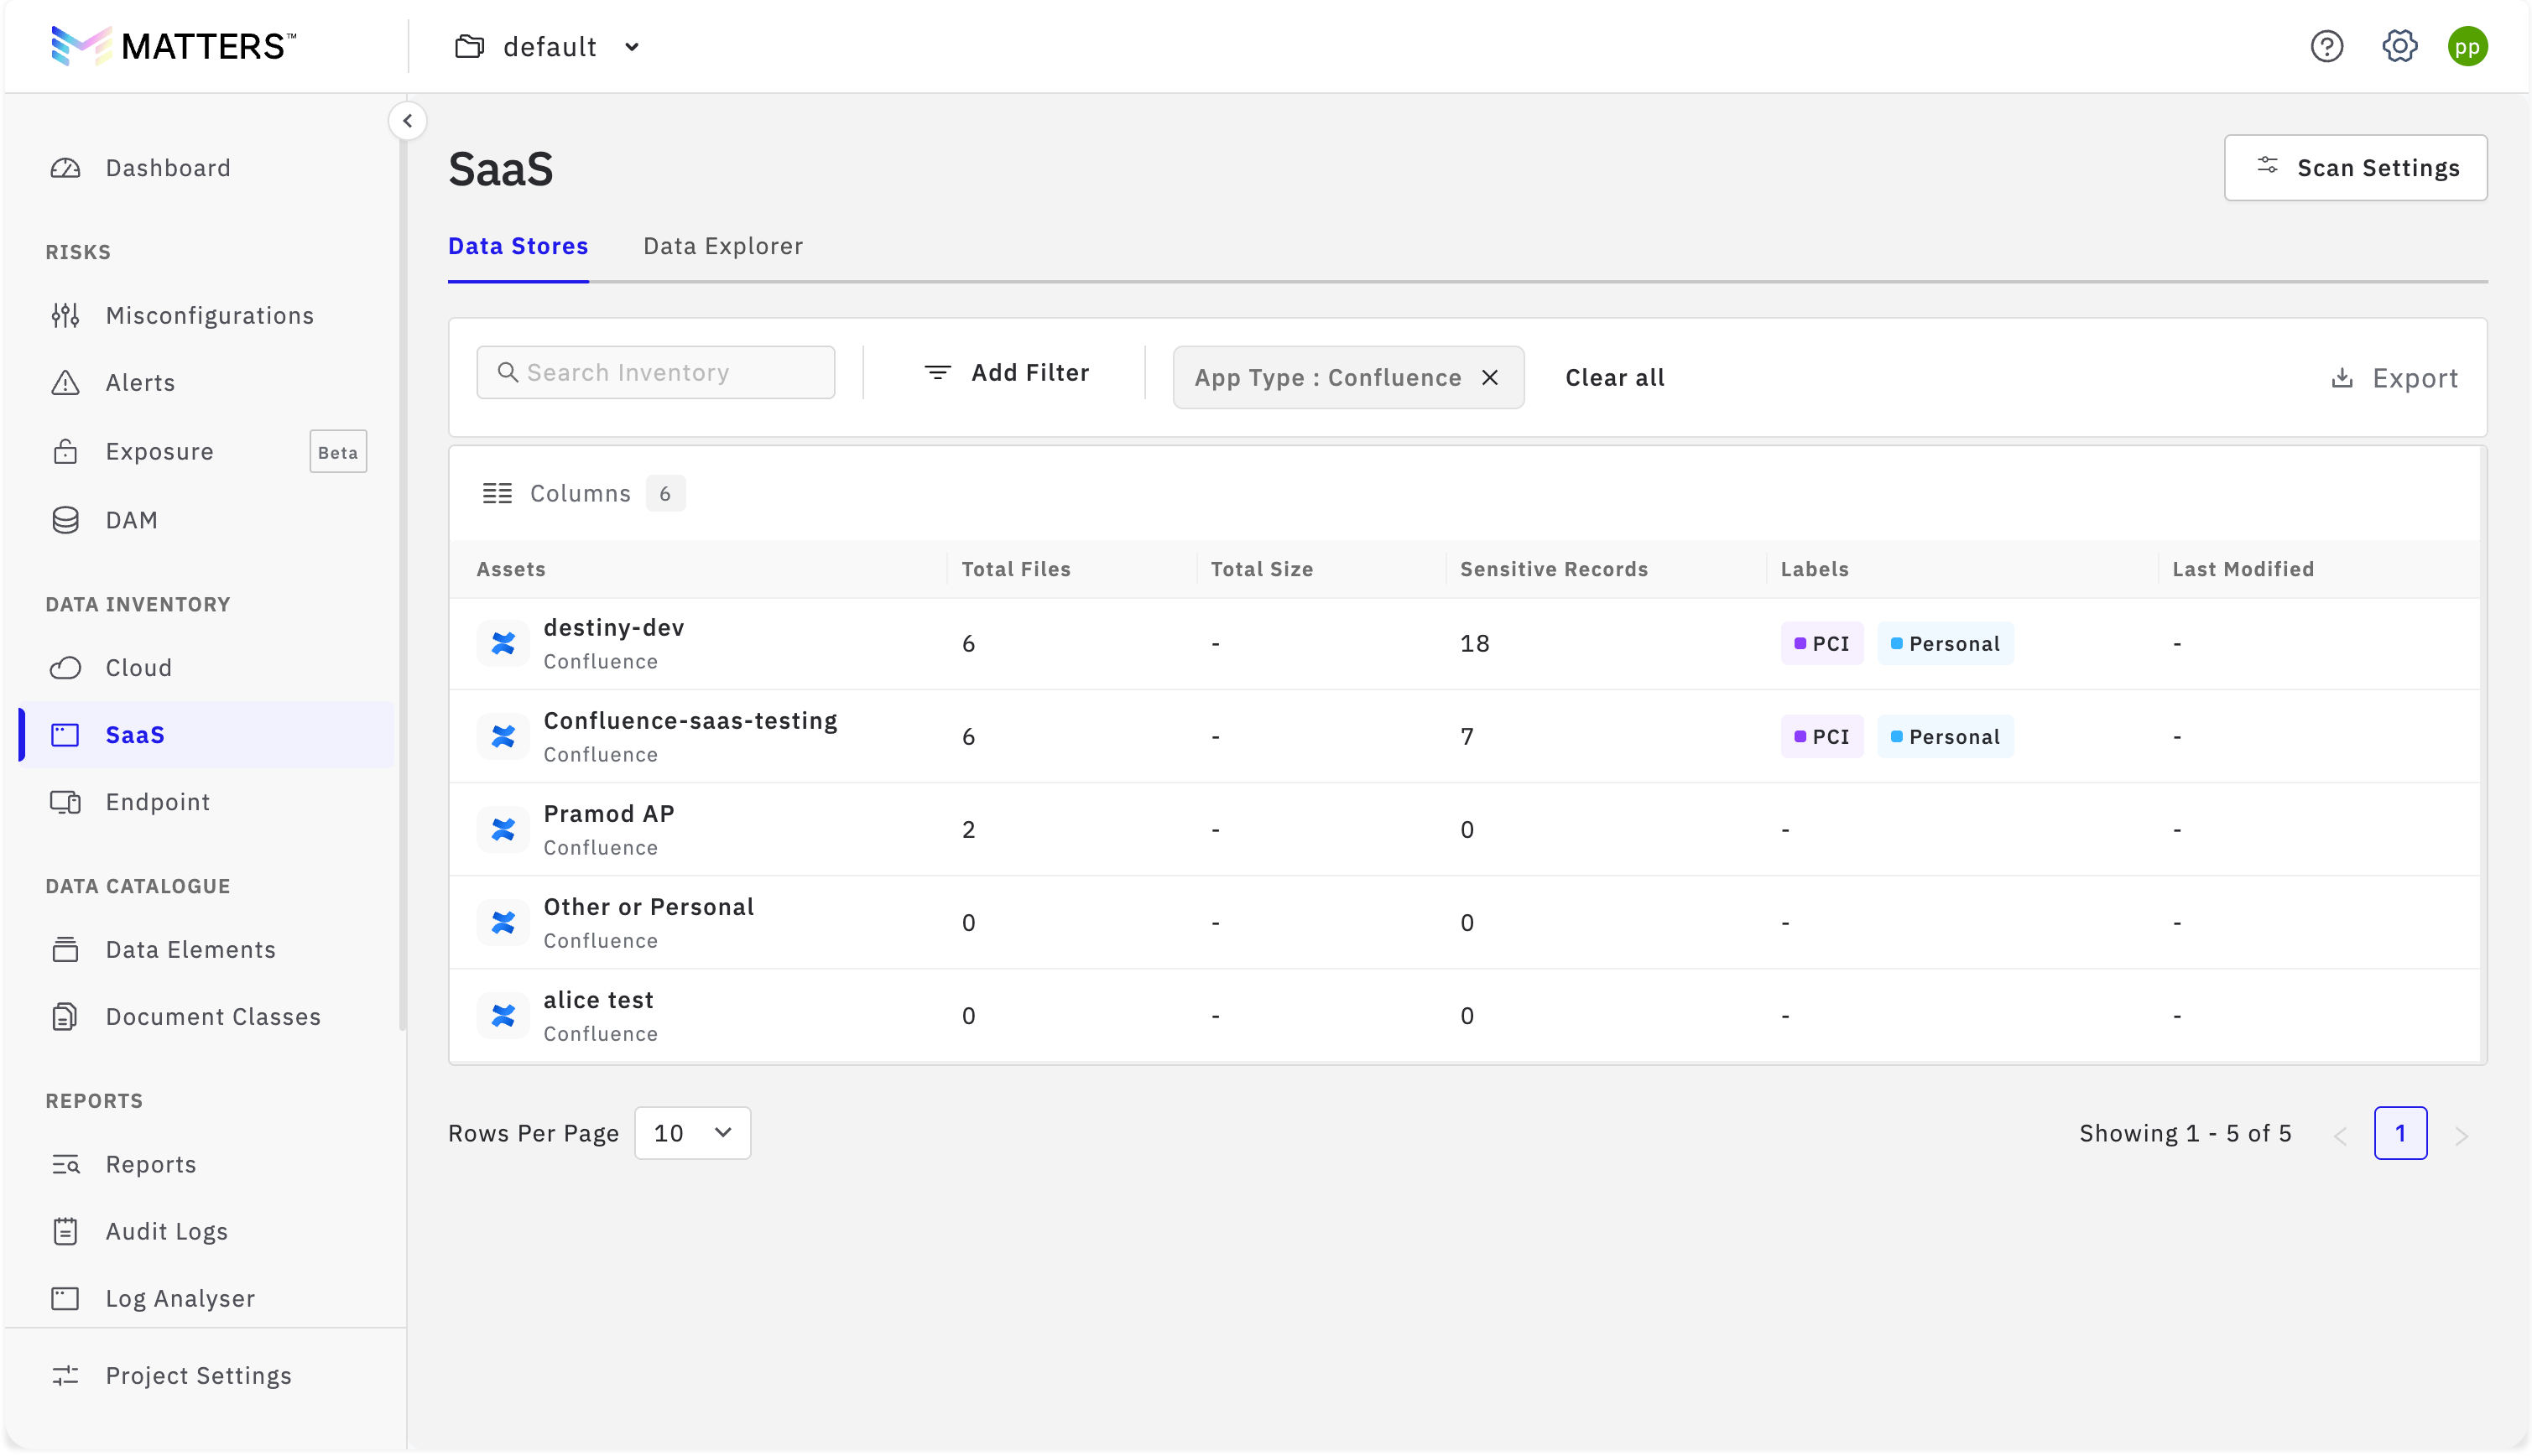
Step 4: Review Sensitive Entities
To view the sensitive entities identified during the scan, open any Confluence space from the SaaS Inventory.
The dashboard will display the detected sensitive entities associated with that space.
Step 5: Access Overview and File Explorer
To review all files and their associated sensitivity details:
Click Overview to view a summary of scanned Confluence content.
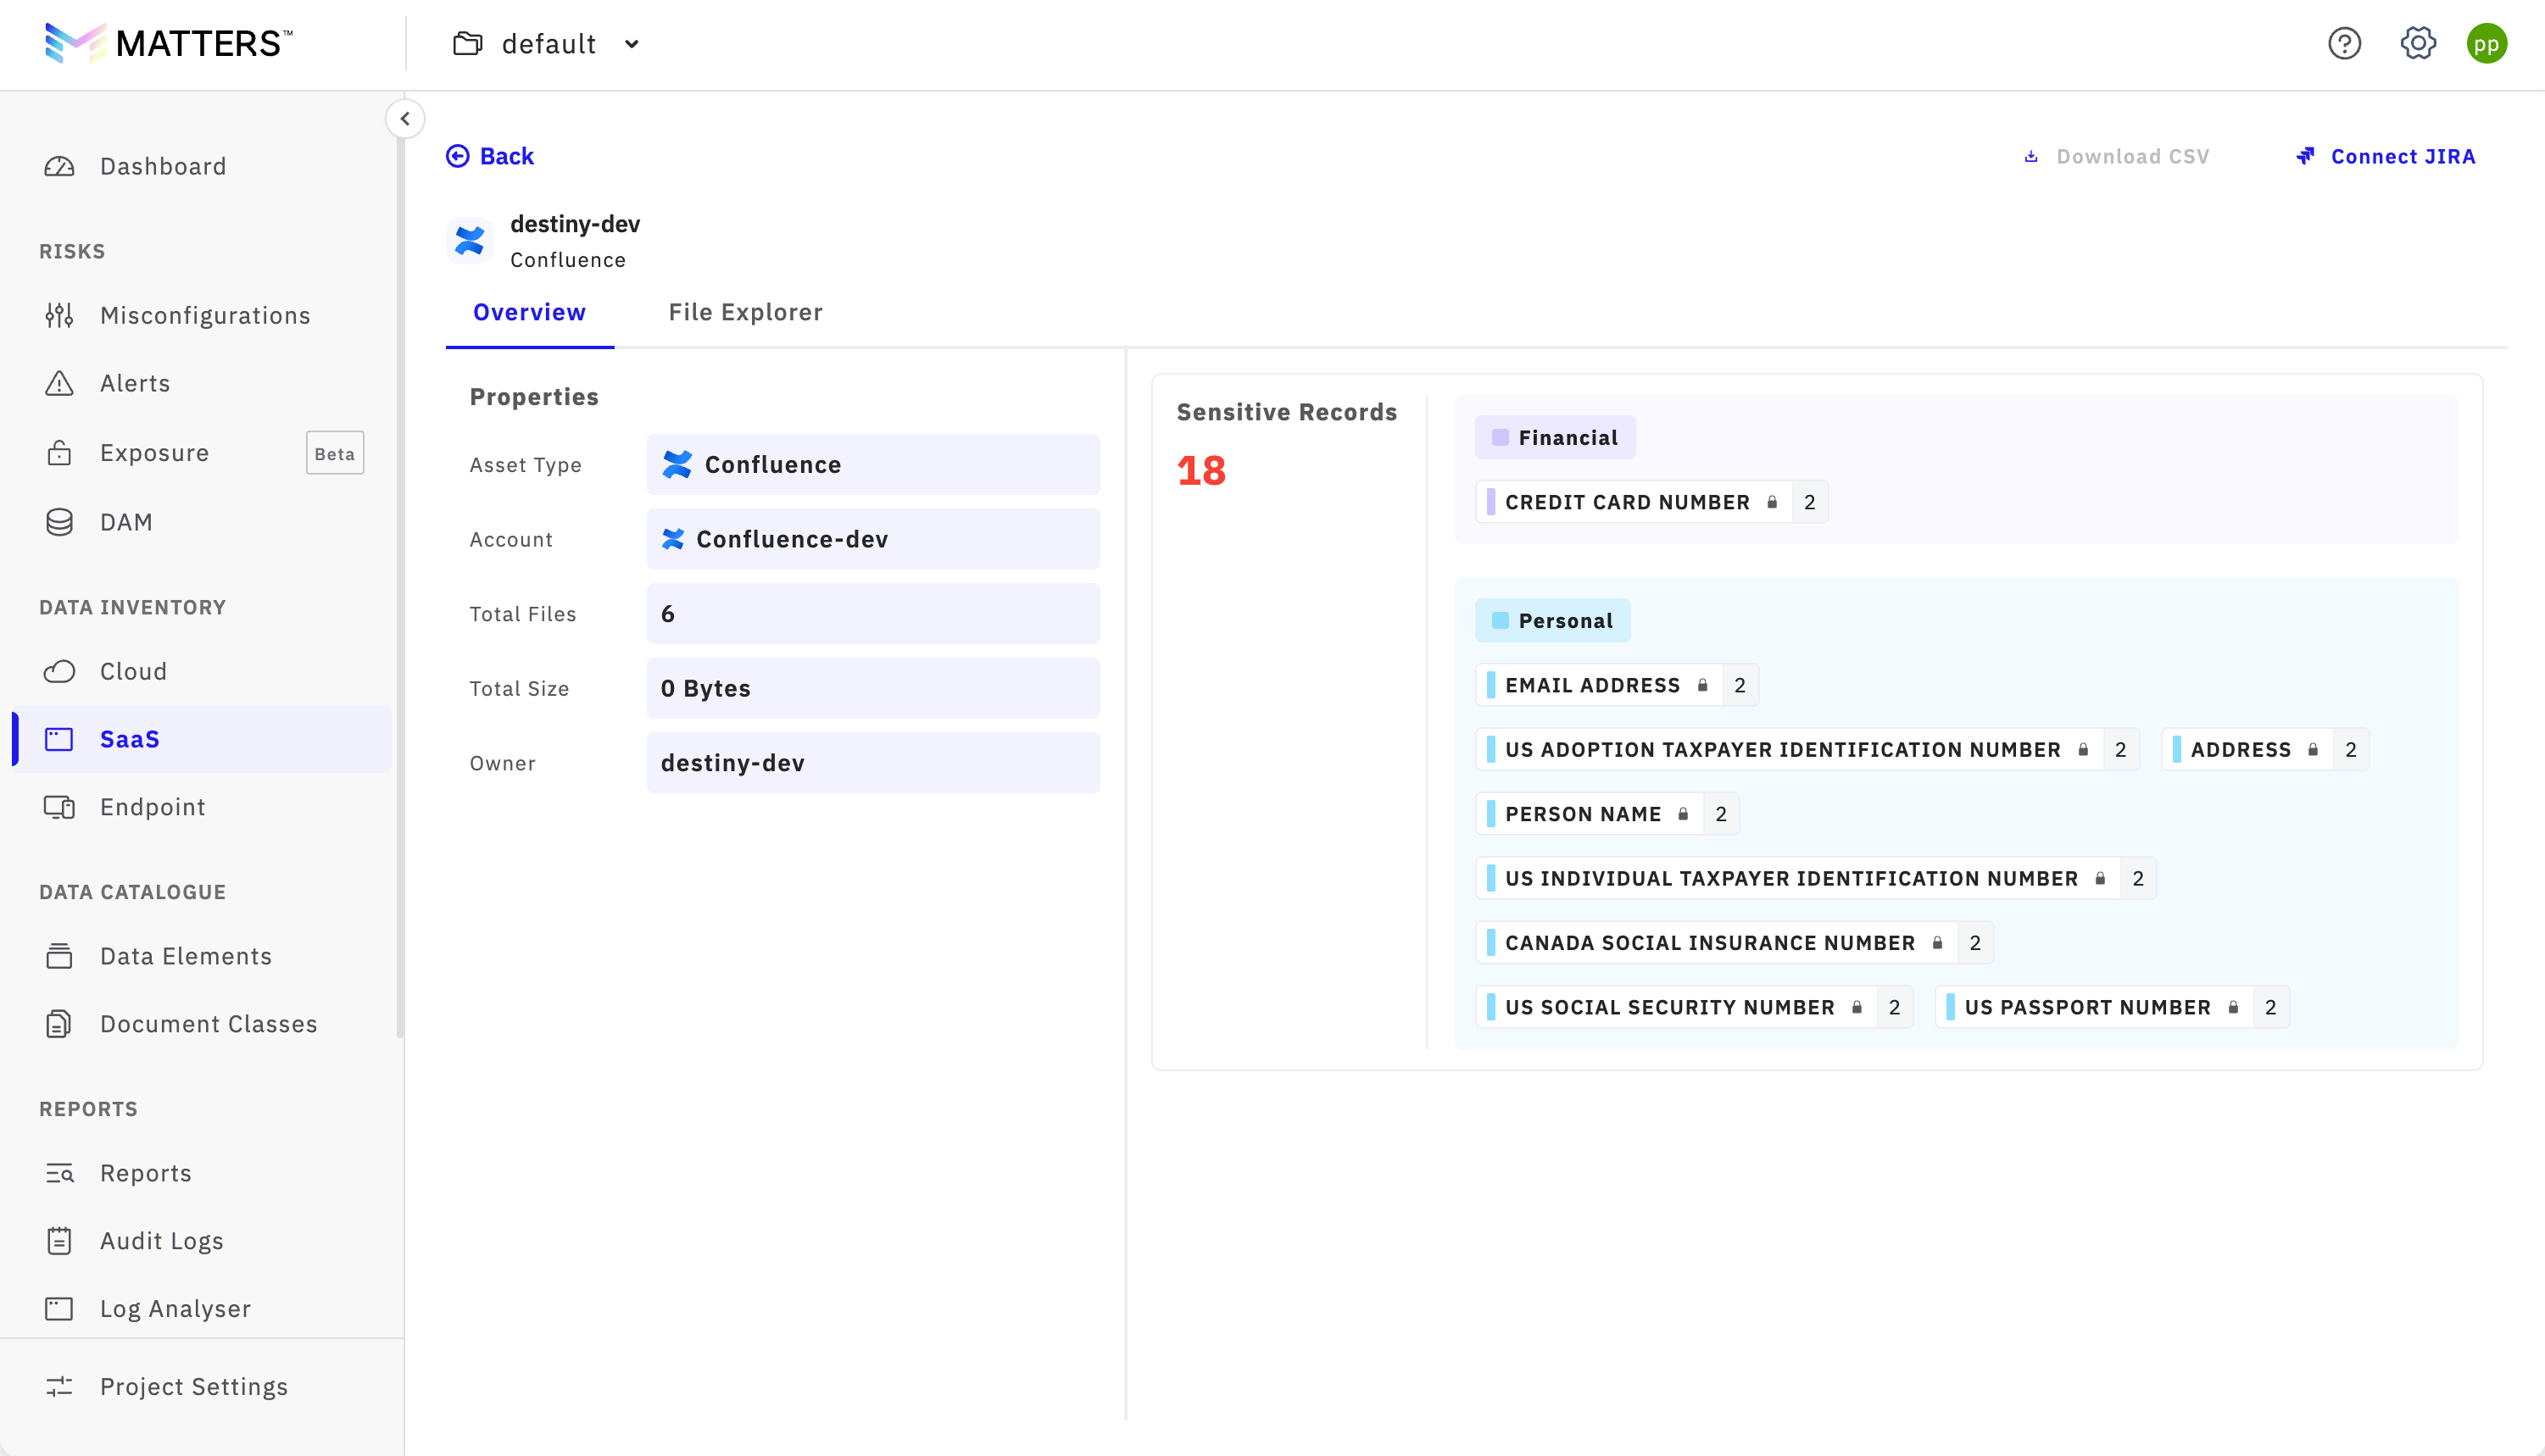
Click File Explorer to browse all connected Confluence files and pages.
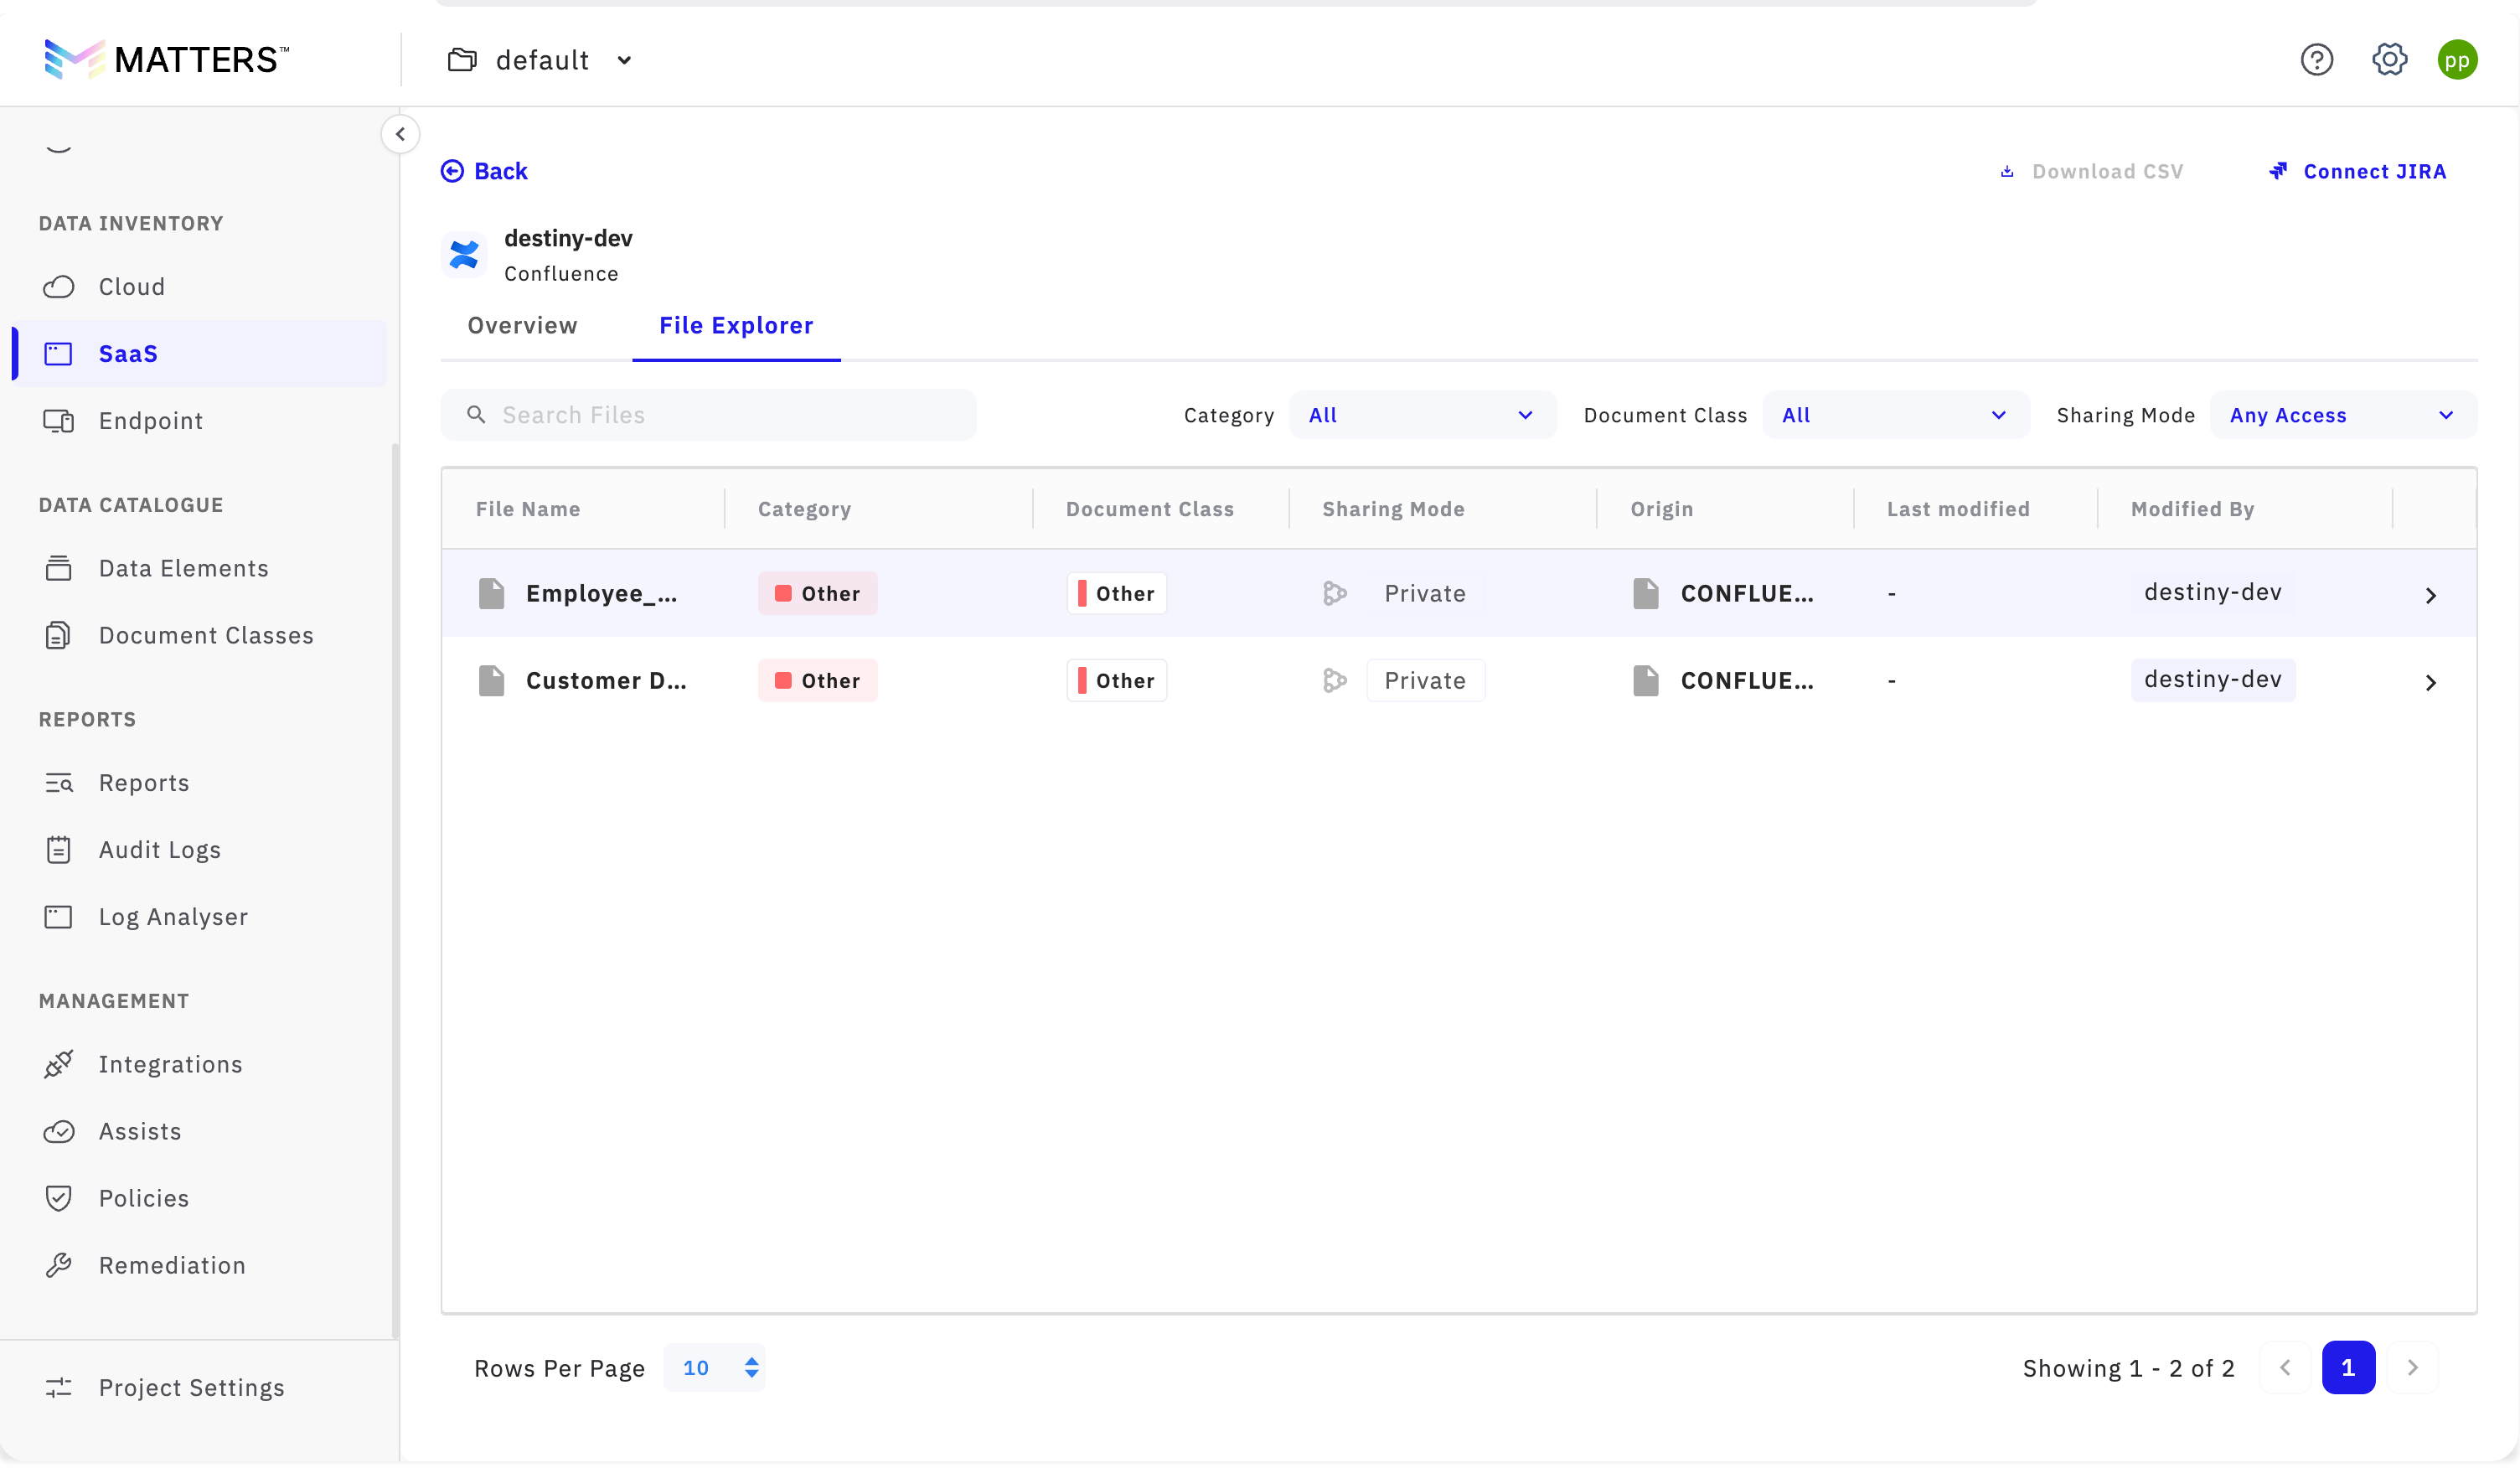
Review the sensitive entities identified across the scanned content.
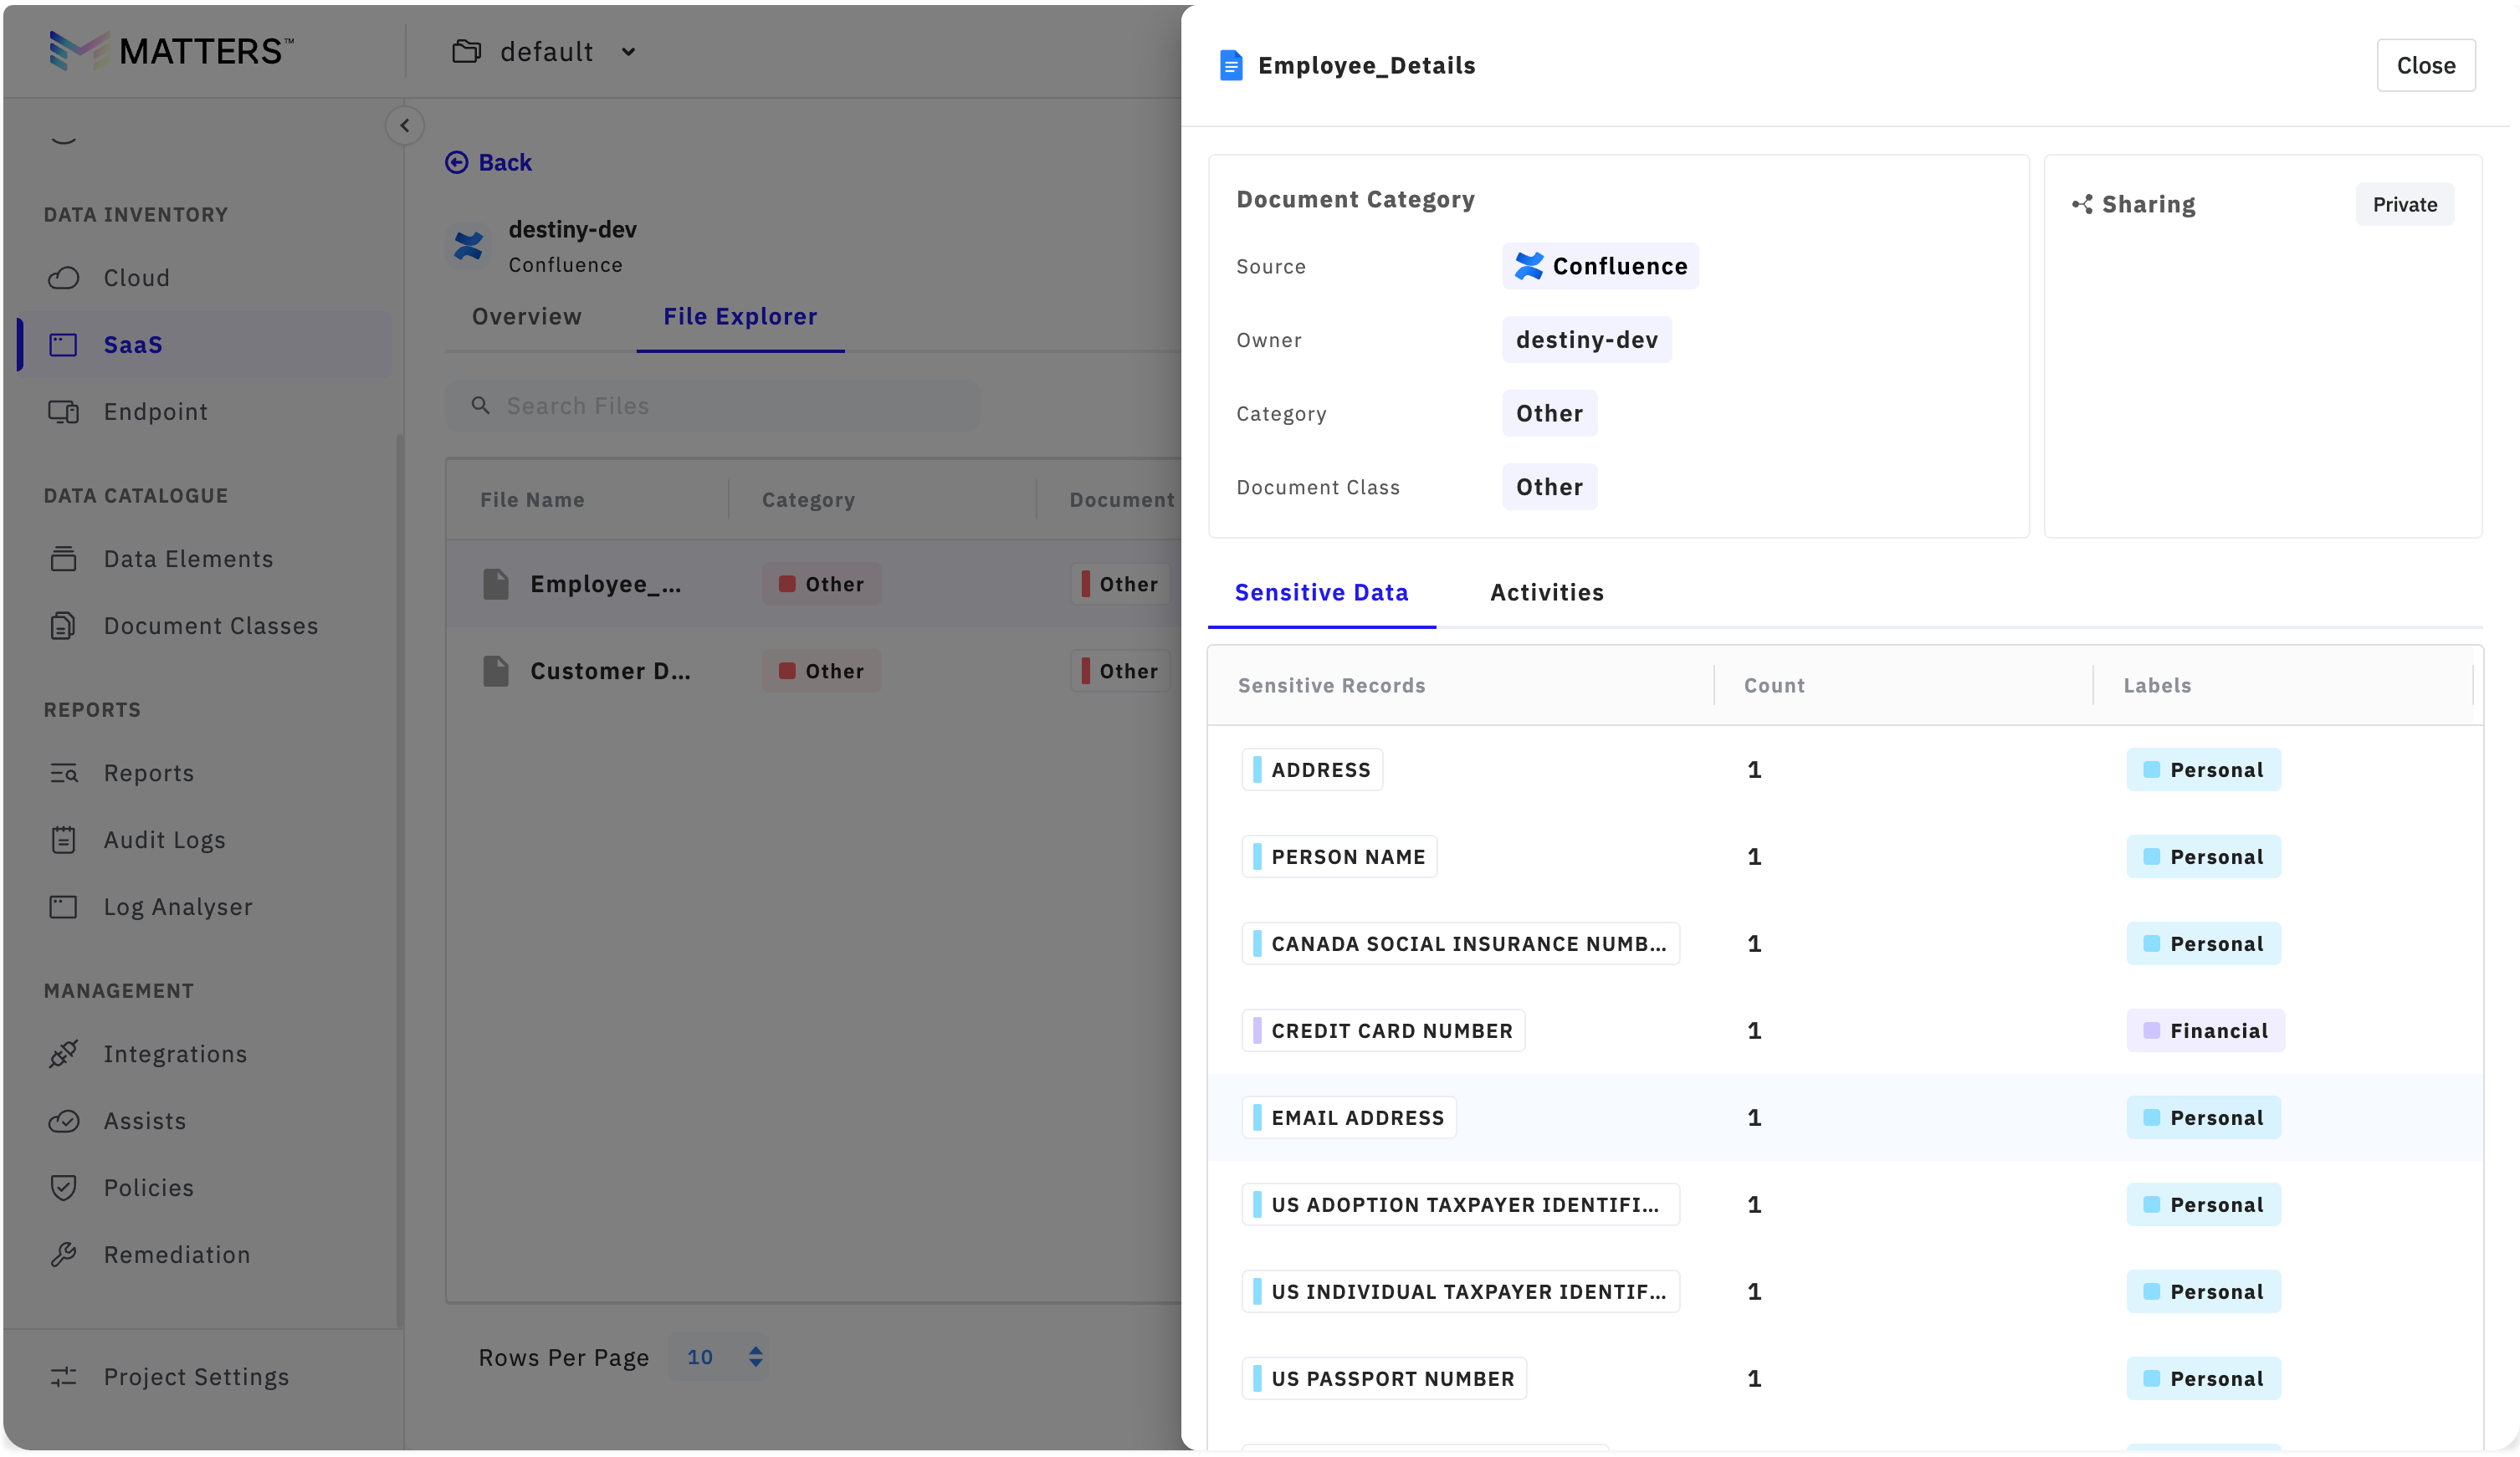
The File Explorer provides visibility into all files connected through the Confluence integration and helps assess the sensitivity findings discovered by Matters.