GitLab Integration
Last updated: April 21, 2026
This guide explains the complete process for integrating GitLab with the Matters SaaS platform. Once the integration is complete, your organization will be able to securely connect GitLab repositories, continuously monitor them, and identify sensitive data such as secrets, credentials, and personally identifiable information (PII).
Overview
The GitLab integration process is divided into two main phases:
Generate a Personal Access Token in GitLab
Connect GitLab to the Matters dashboard and configure repository scanning
By completing these steps, you can enable secure access and automated scanning of your repositories within the Matters platform.
Phase 1: Generate a Personal Access Token in GitLab
To allow Matters to securely access and read data from your GitLab repositories, you must first create a Personal Access Token (PAT) in GitLab with the required read-only permissions.
Step 1.1: Open the Token Management Section
Log in to your GitLab account.
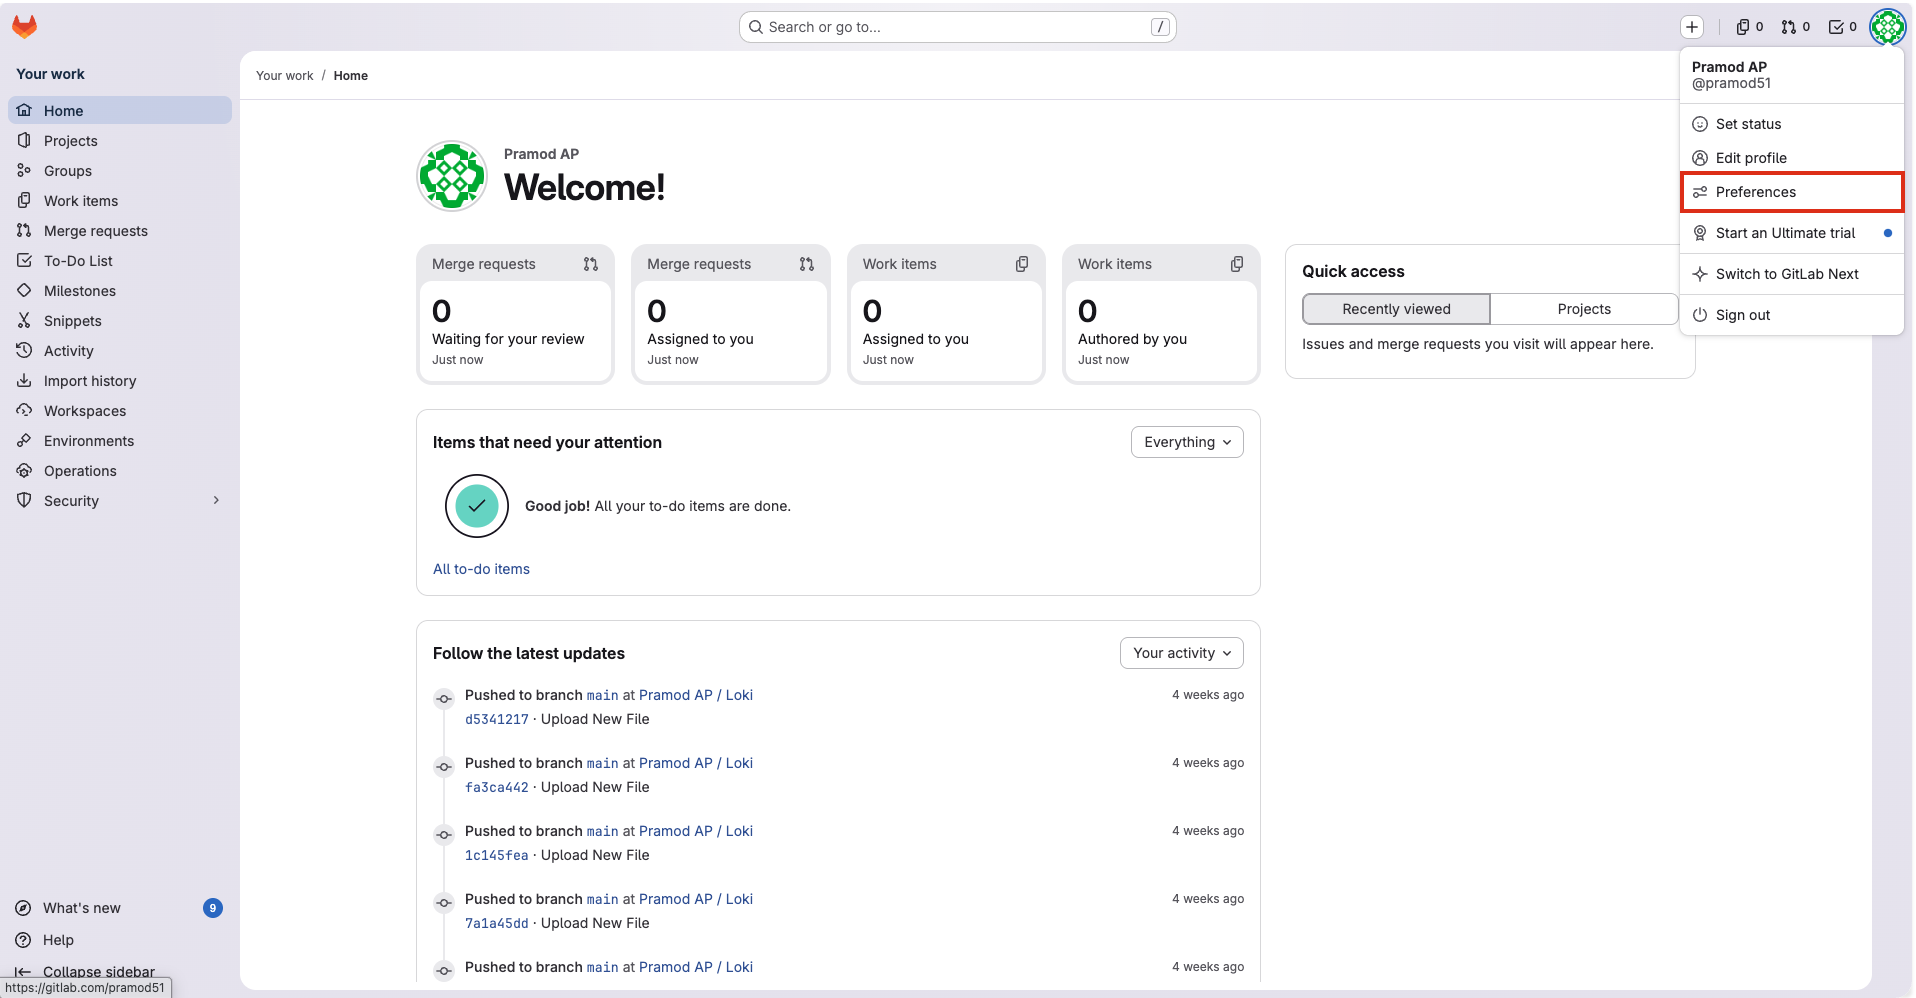
Click on your Profile, then go to Preferences.
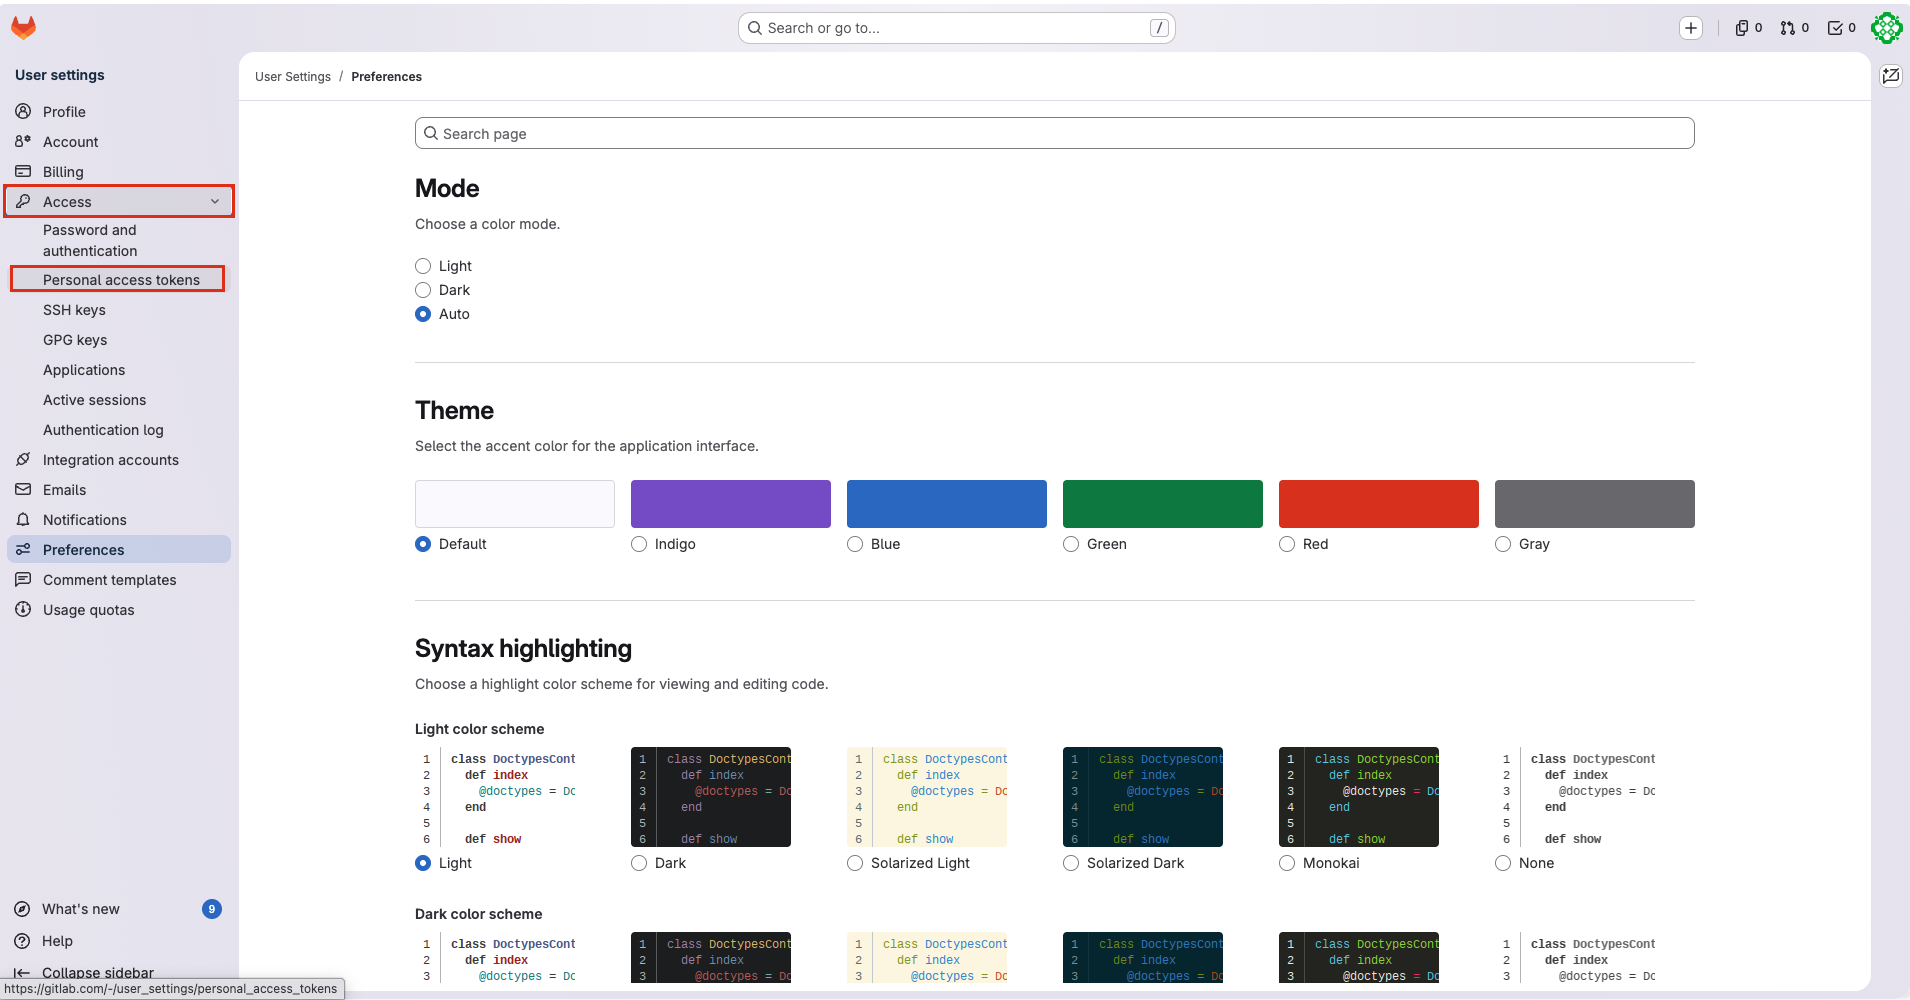
Navigate to Access Tokens and select Personal Access Tokens.
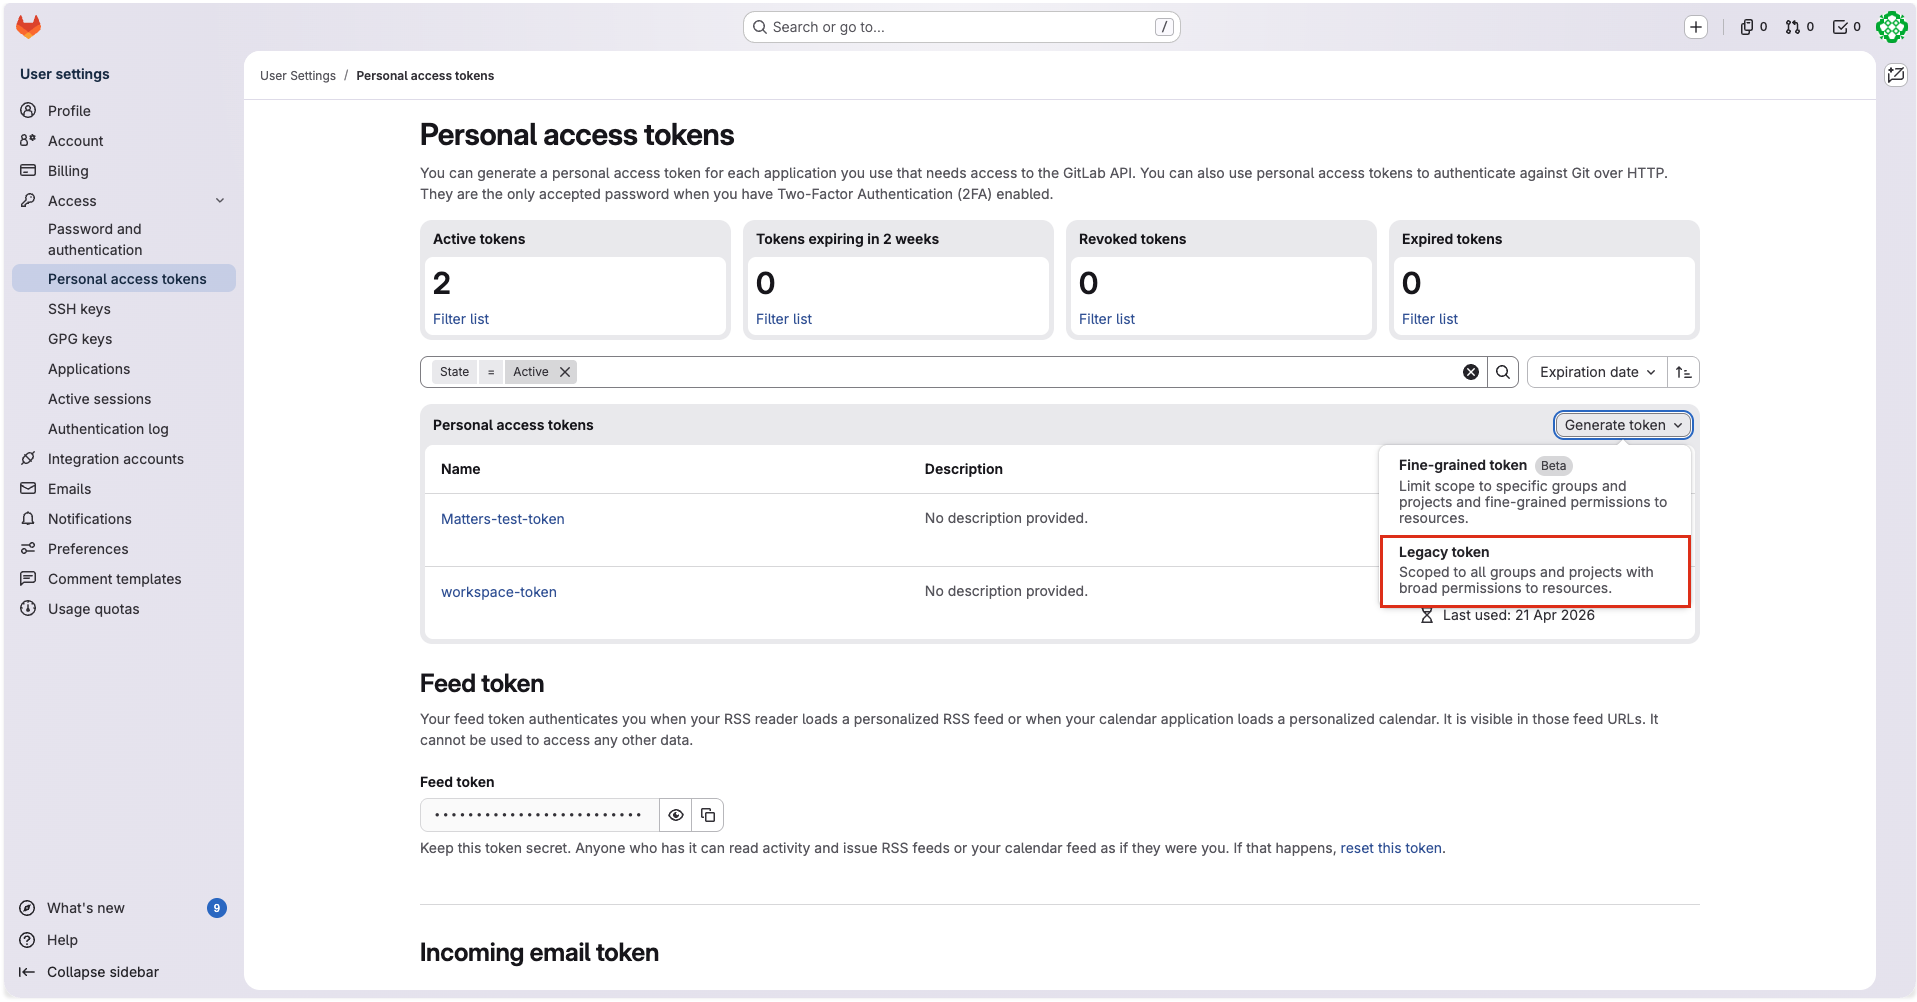
Click Generate Token, then choose Legacy Token.
Step 1.2: Enter the Token Details
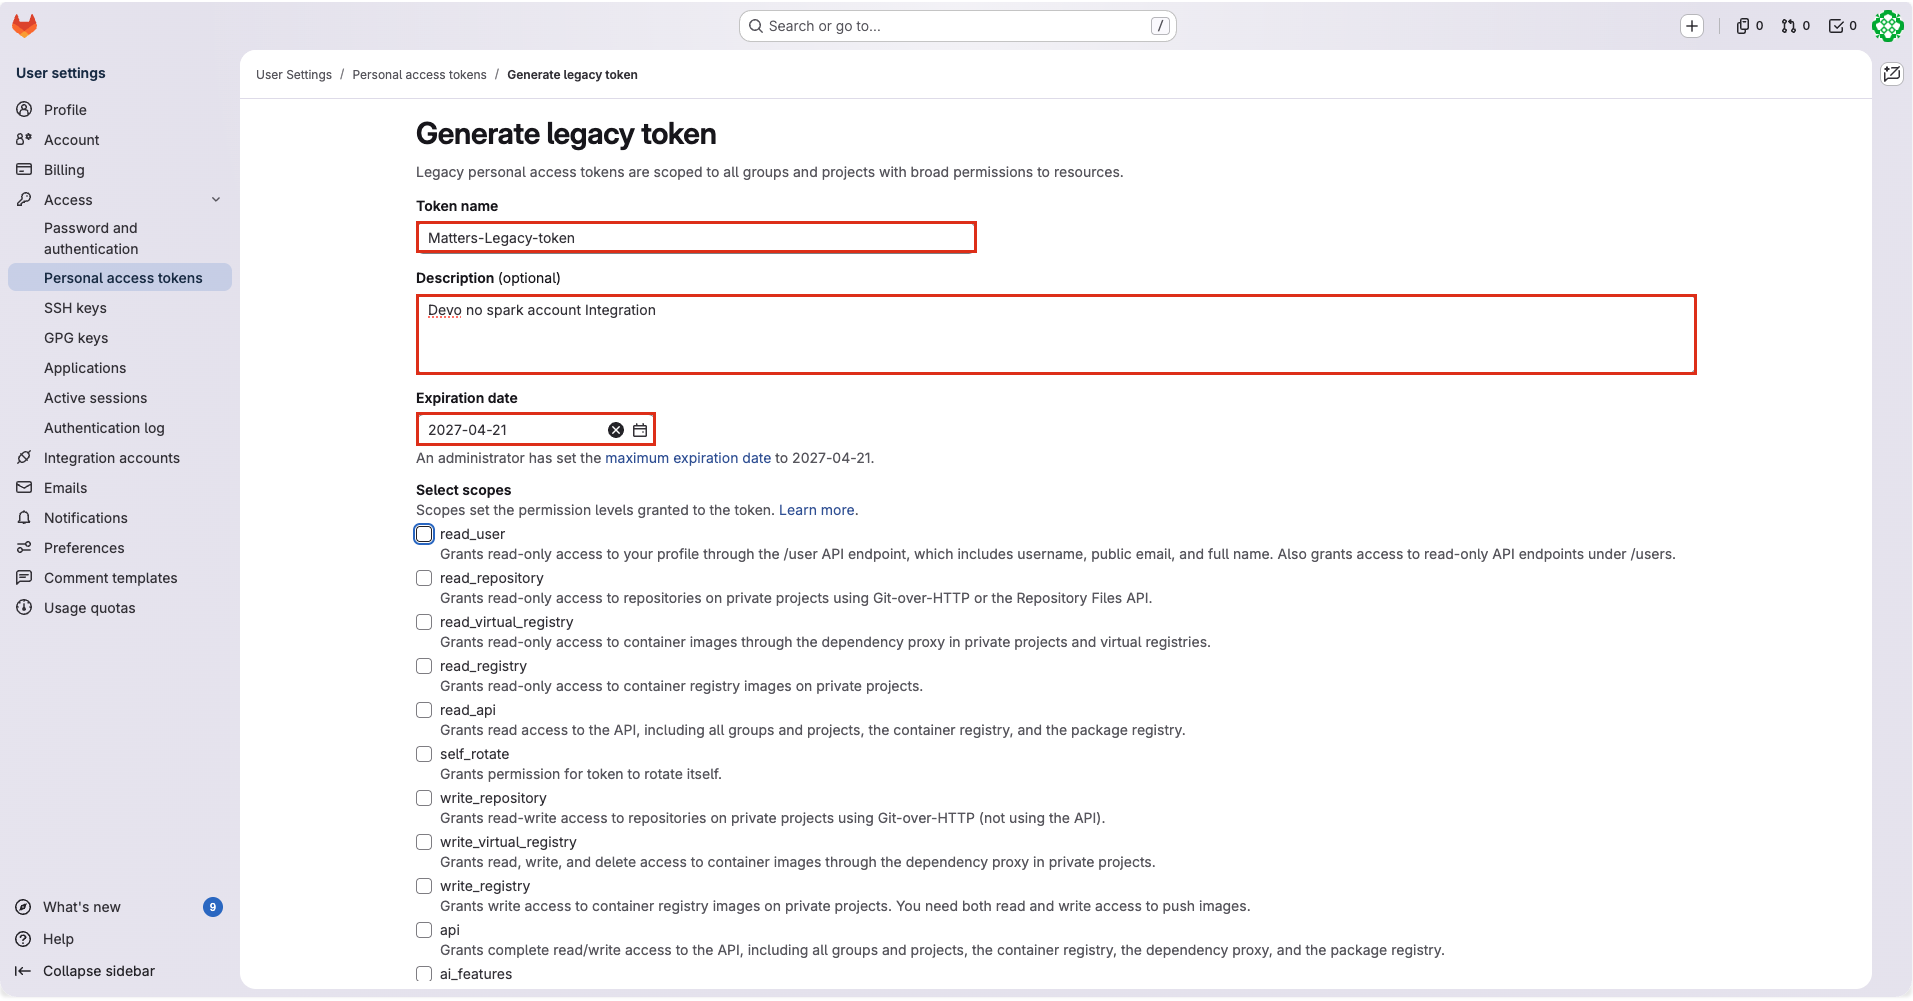
Fill in the required information carefully:
Token Name: For example,
Matters-legacy-tokenExpiration Date: Select a date based on your organization’s token rotation policy
Description: Add a short purpose for the token, for example,
Devo no spark account integration
Step 1.3: Select the Required Access Scopes
To follow security best practices, select only the necessary read-only scopes:
read_userread_apiread_repositoryread_registryread_virtual_registry
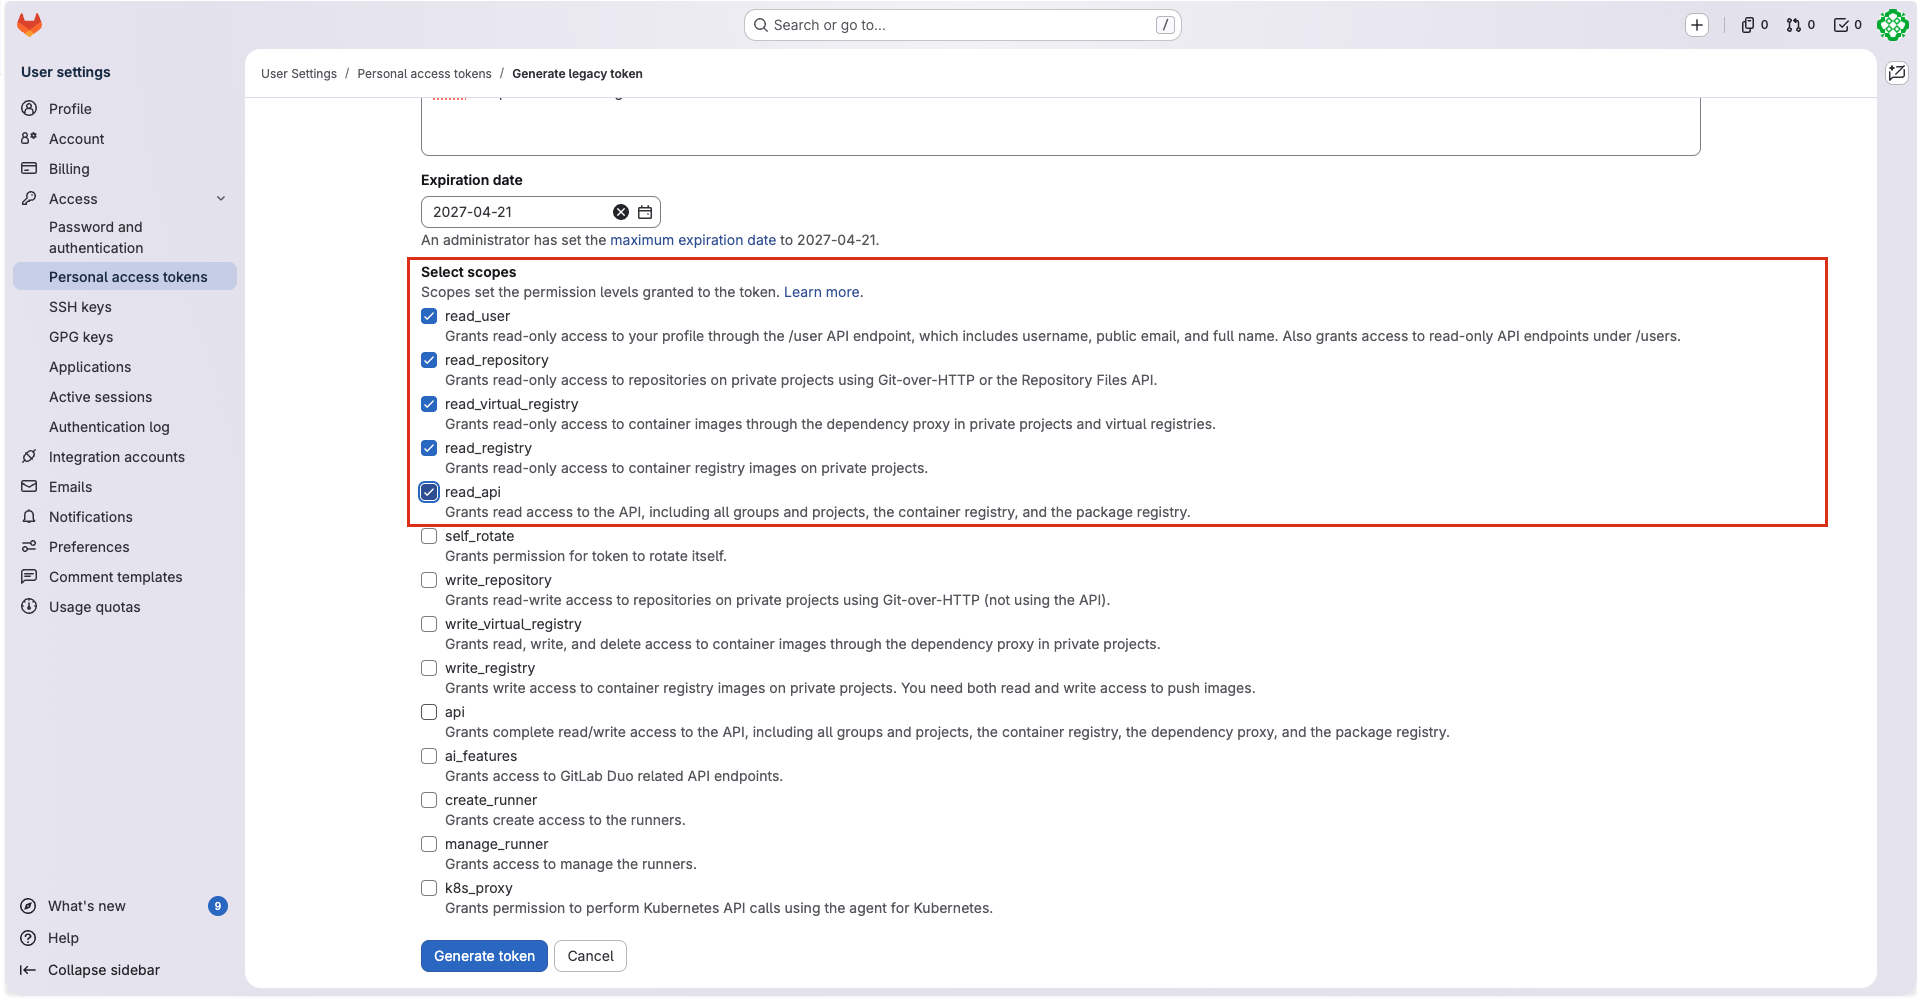
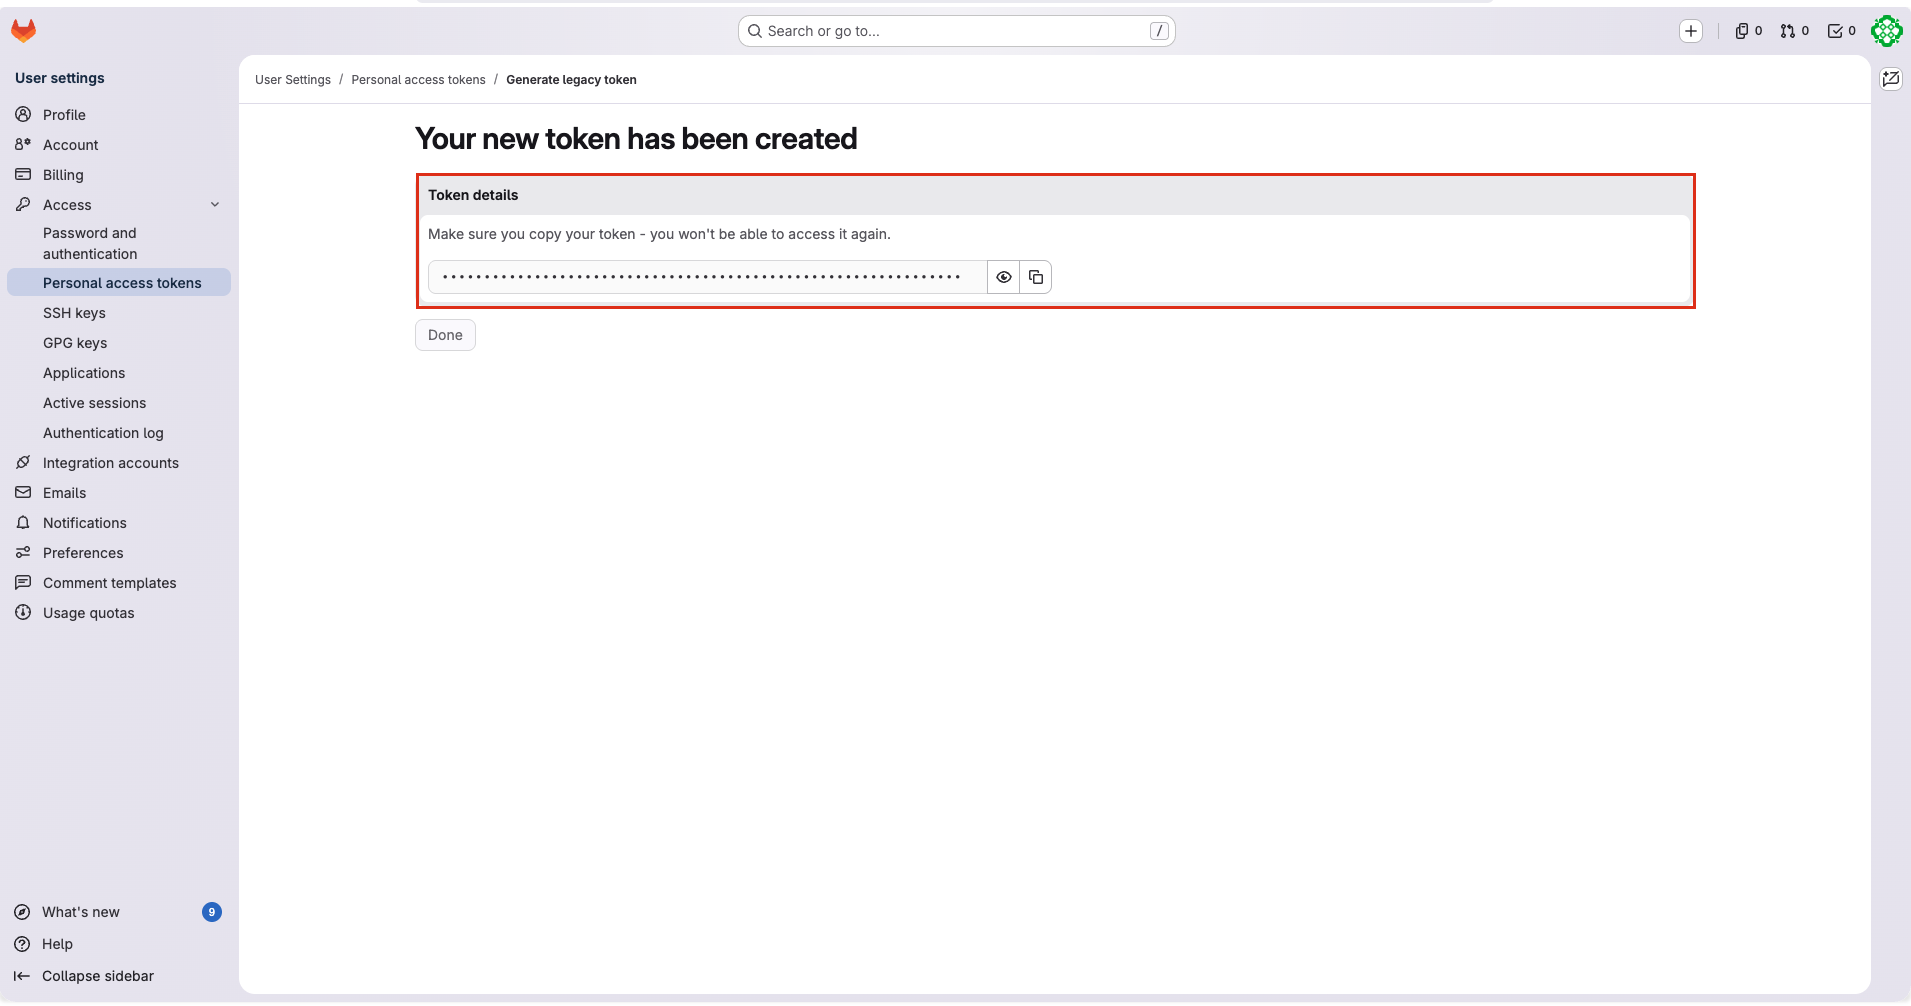
After selecting the scopes, click Generate Token. Once the token is created, copy it immediately and store it securely in a password manager for future use.
Phase 2: Connect GitLab in the Matters Dashboard
After generating the Personal Access Token, the next step is to connect your GitLab account to the appropriate project in the Matters dashboard.
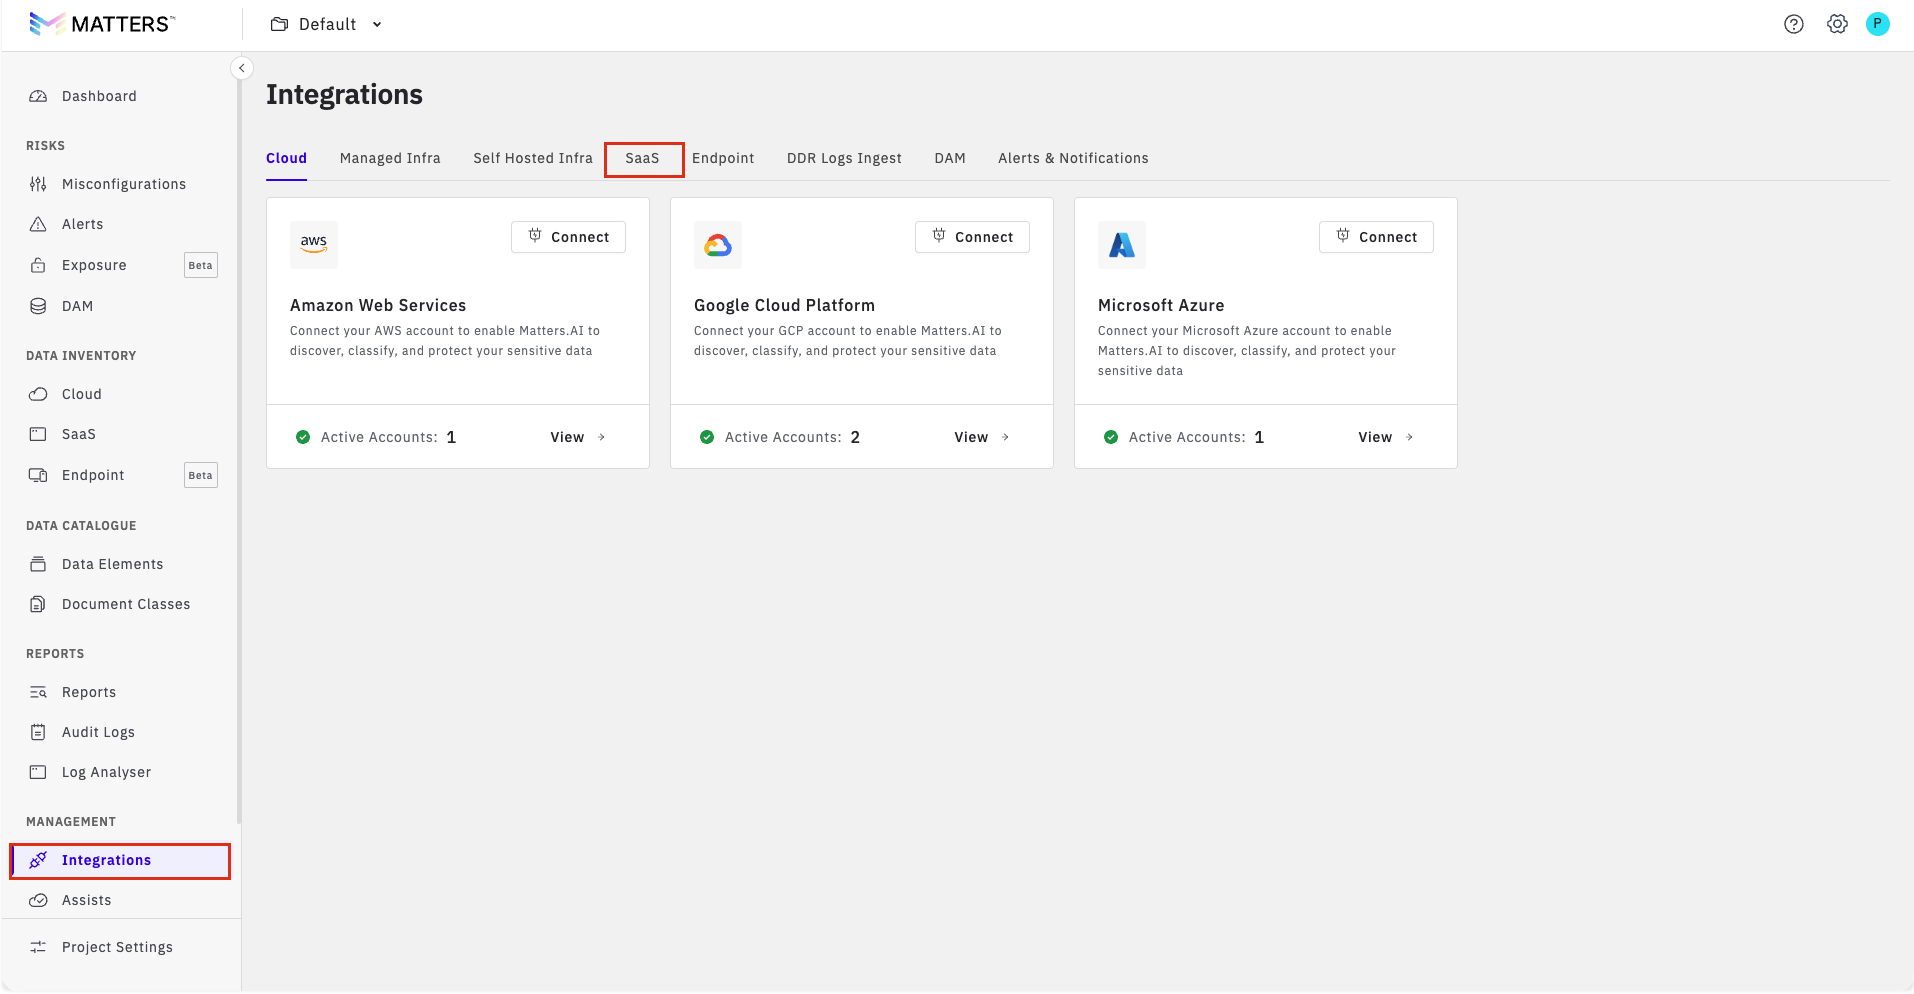
Step 2.1: Go to the Integrations Section
Log in to the Matters Dashboard.
From the navigation menu, go to Integrations > SaaS.
Step 2.2: Connect Your GitLab Account
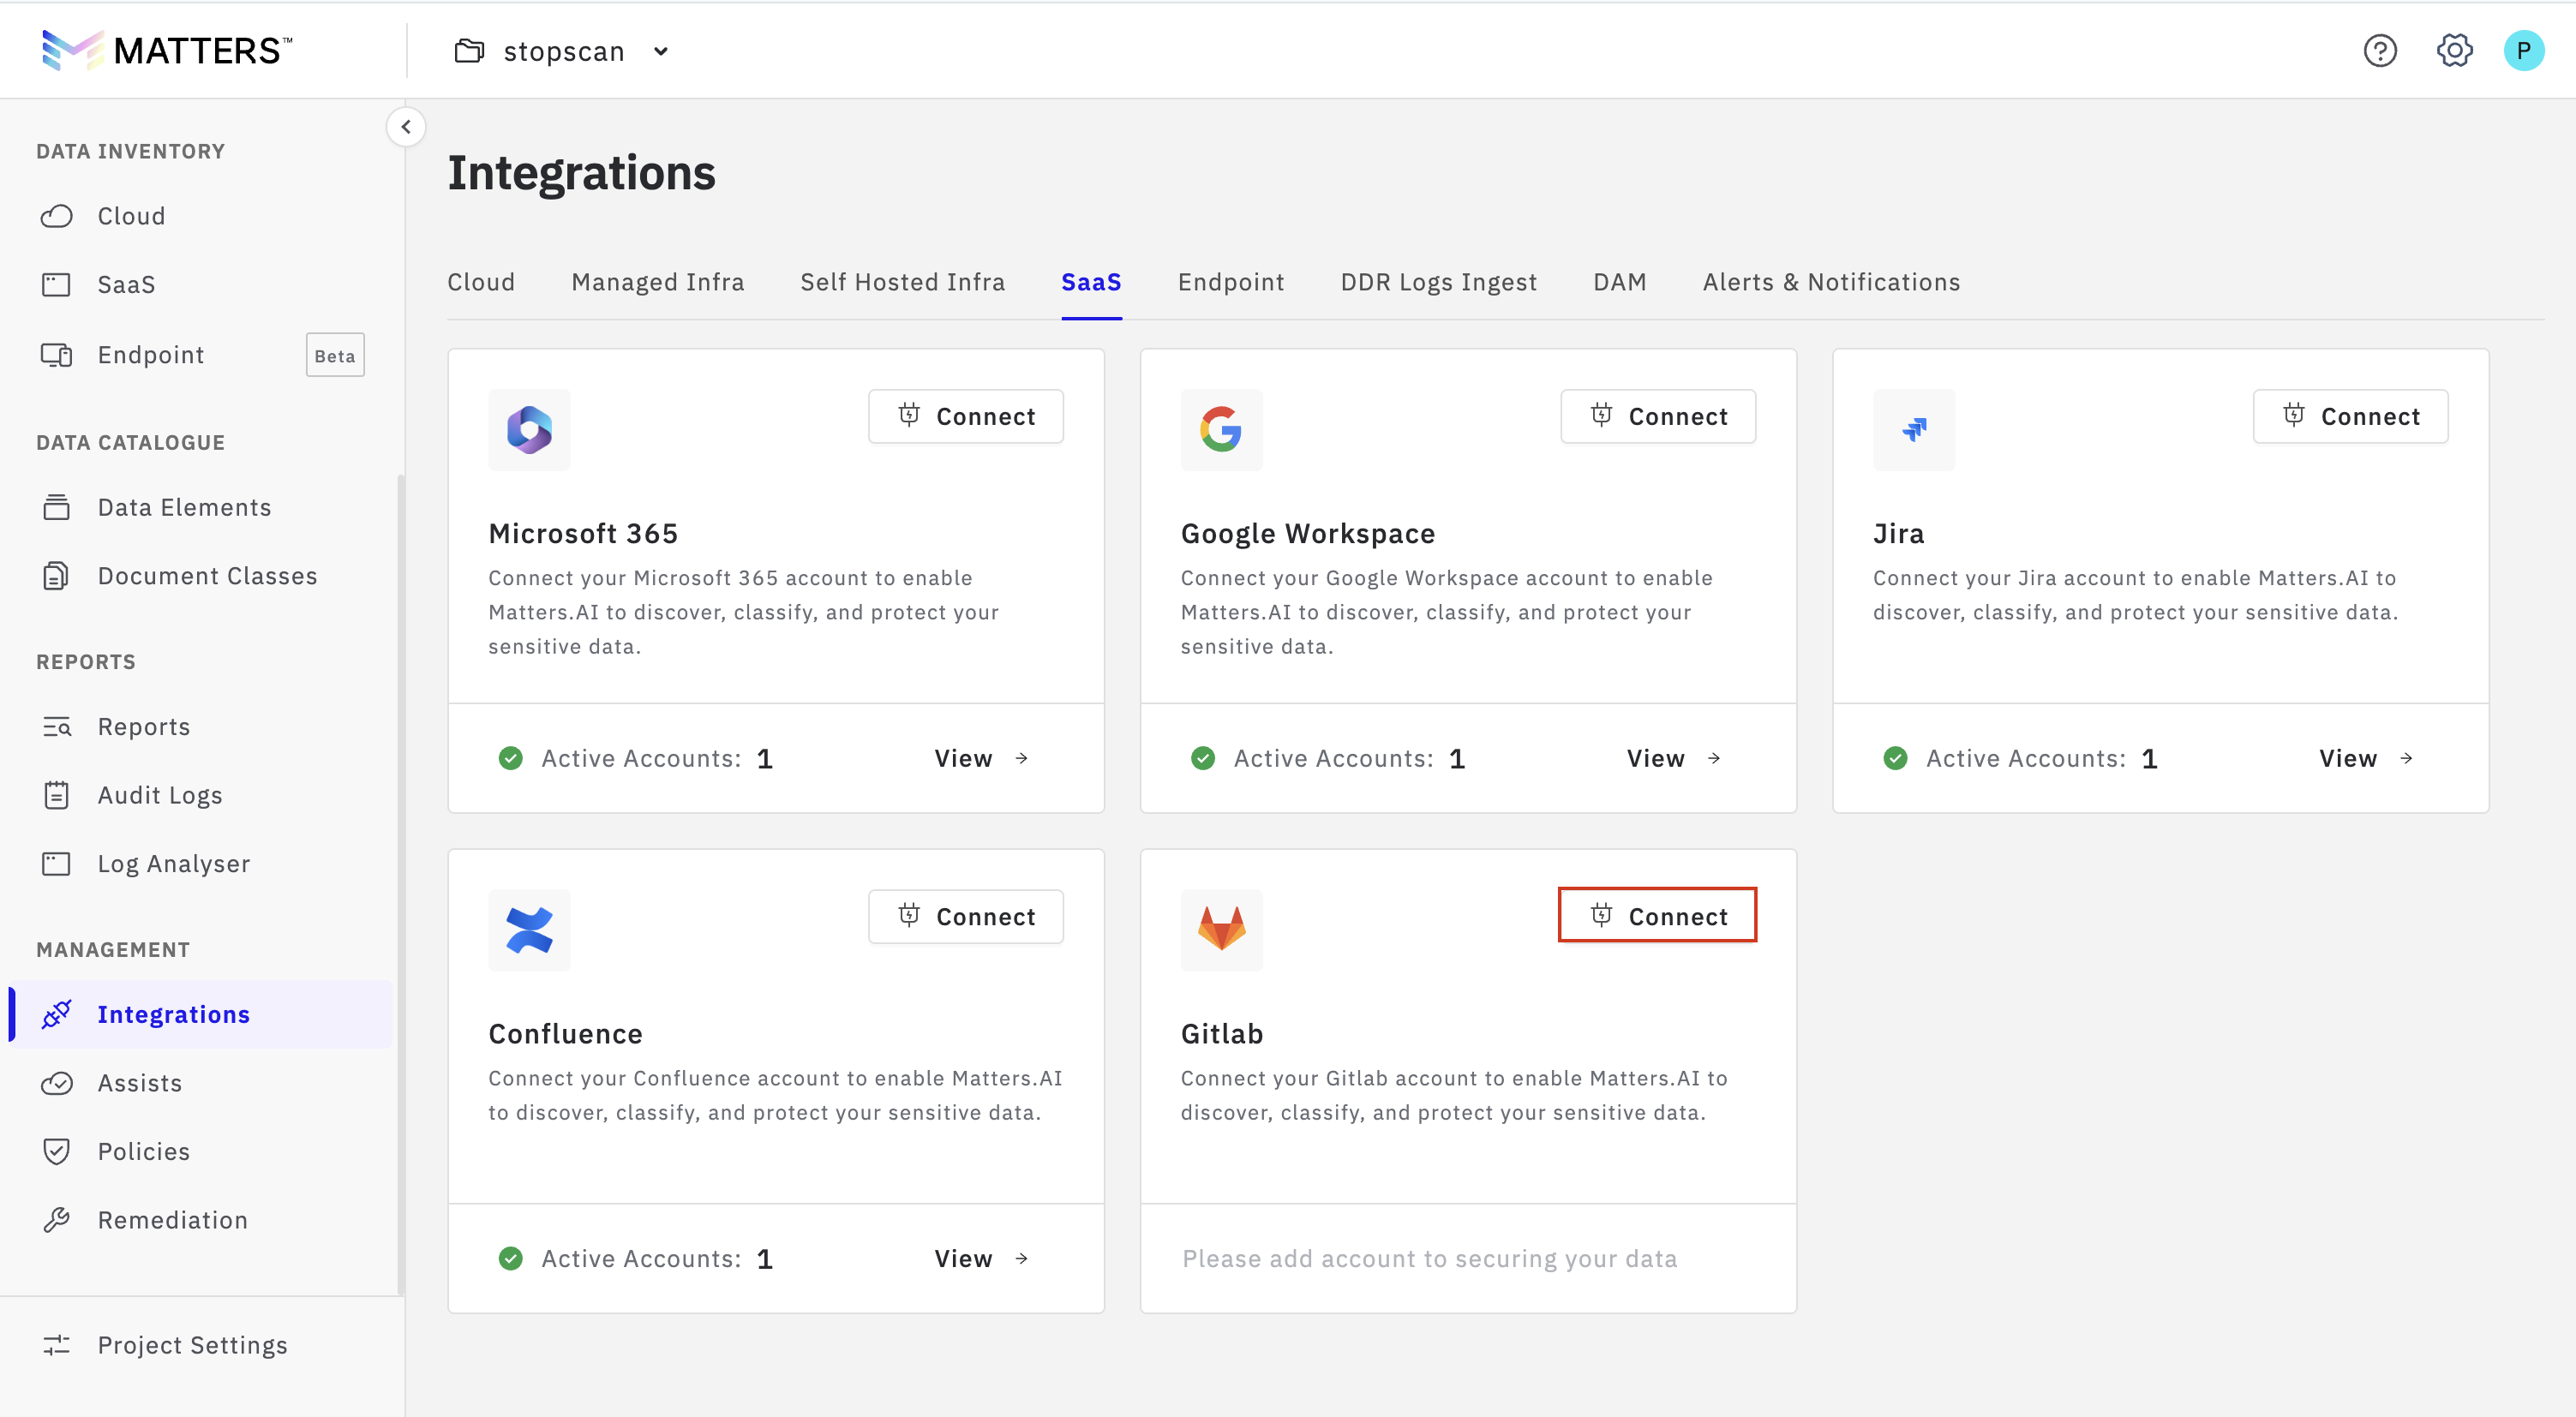
In the GitLab section, click Connect.
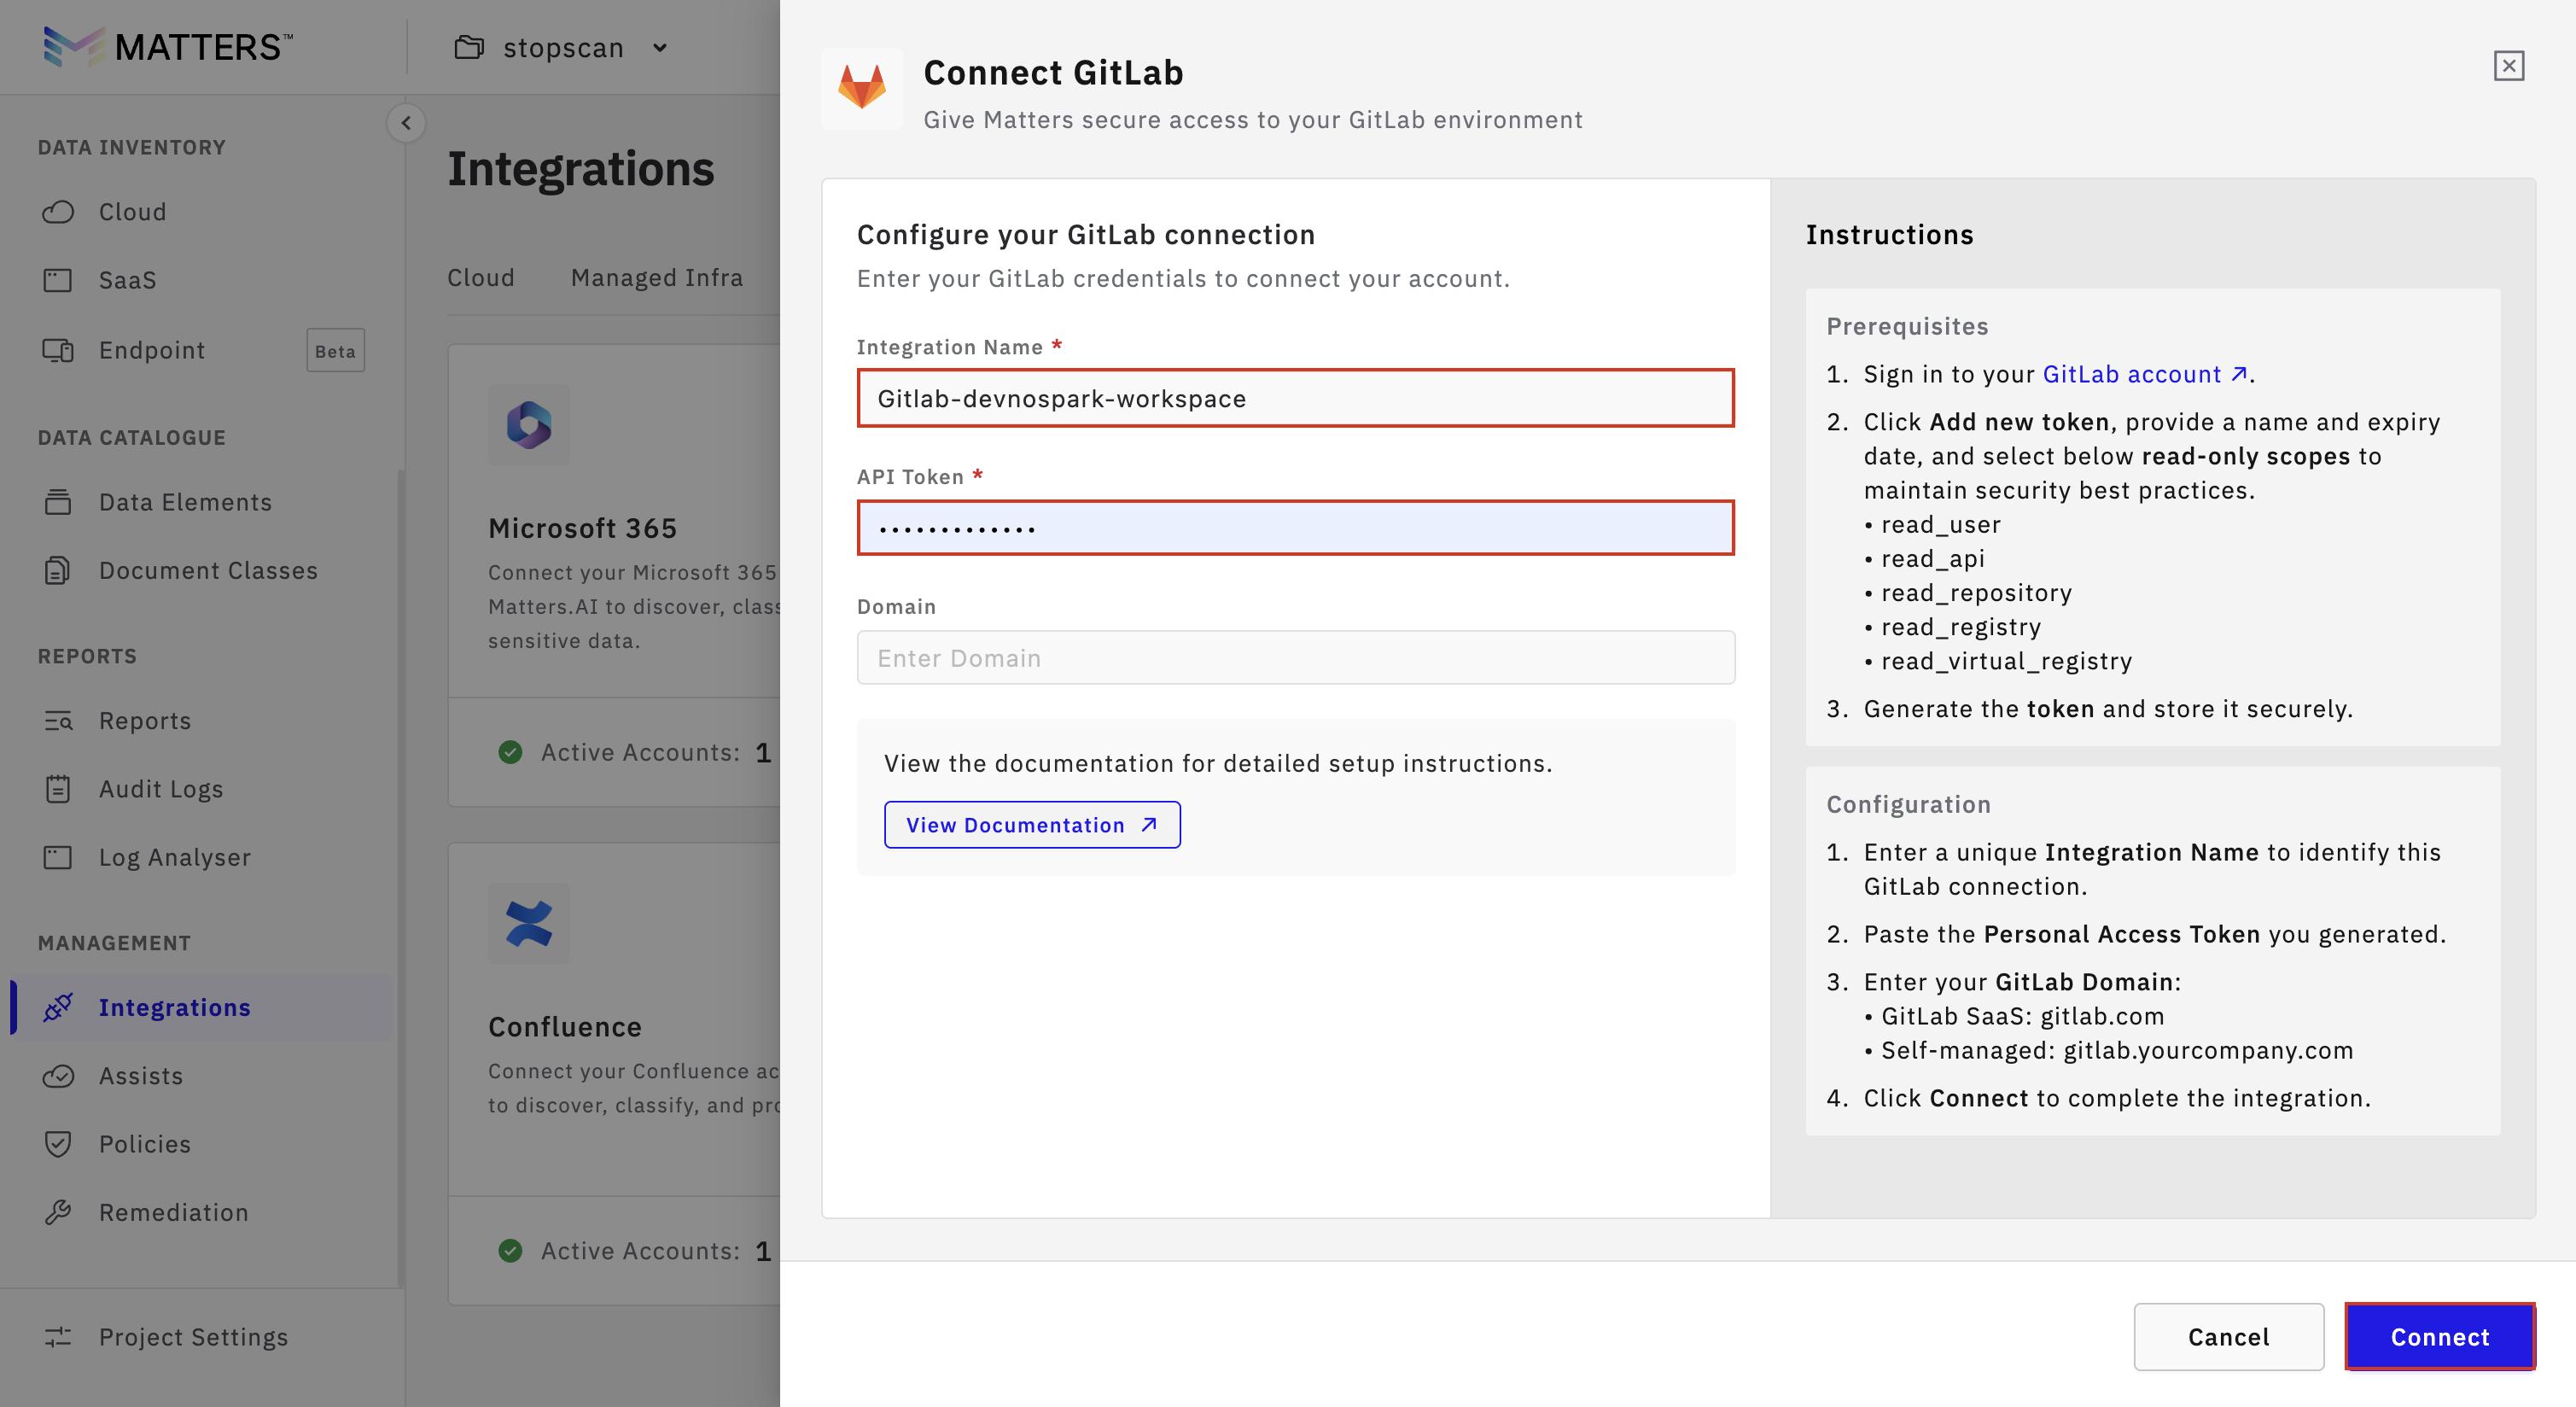
Enter the following details:
Integration Name: For example,
Gitlab-devnospark-workspaceAccess Token: Paste the Personal Access Token you copied from GitLab
Click Connect to complete the integration.
Step 2.3: Verify the Connection
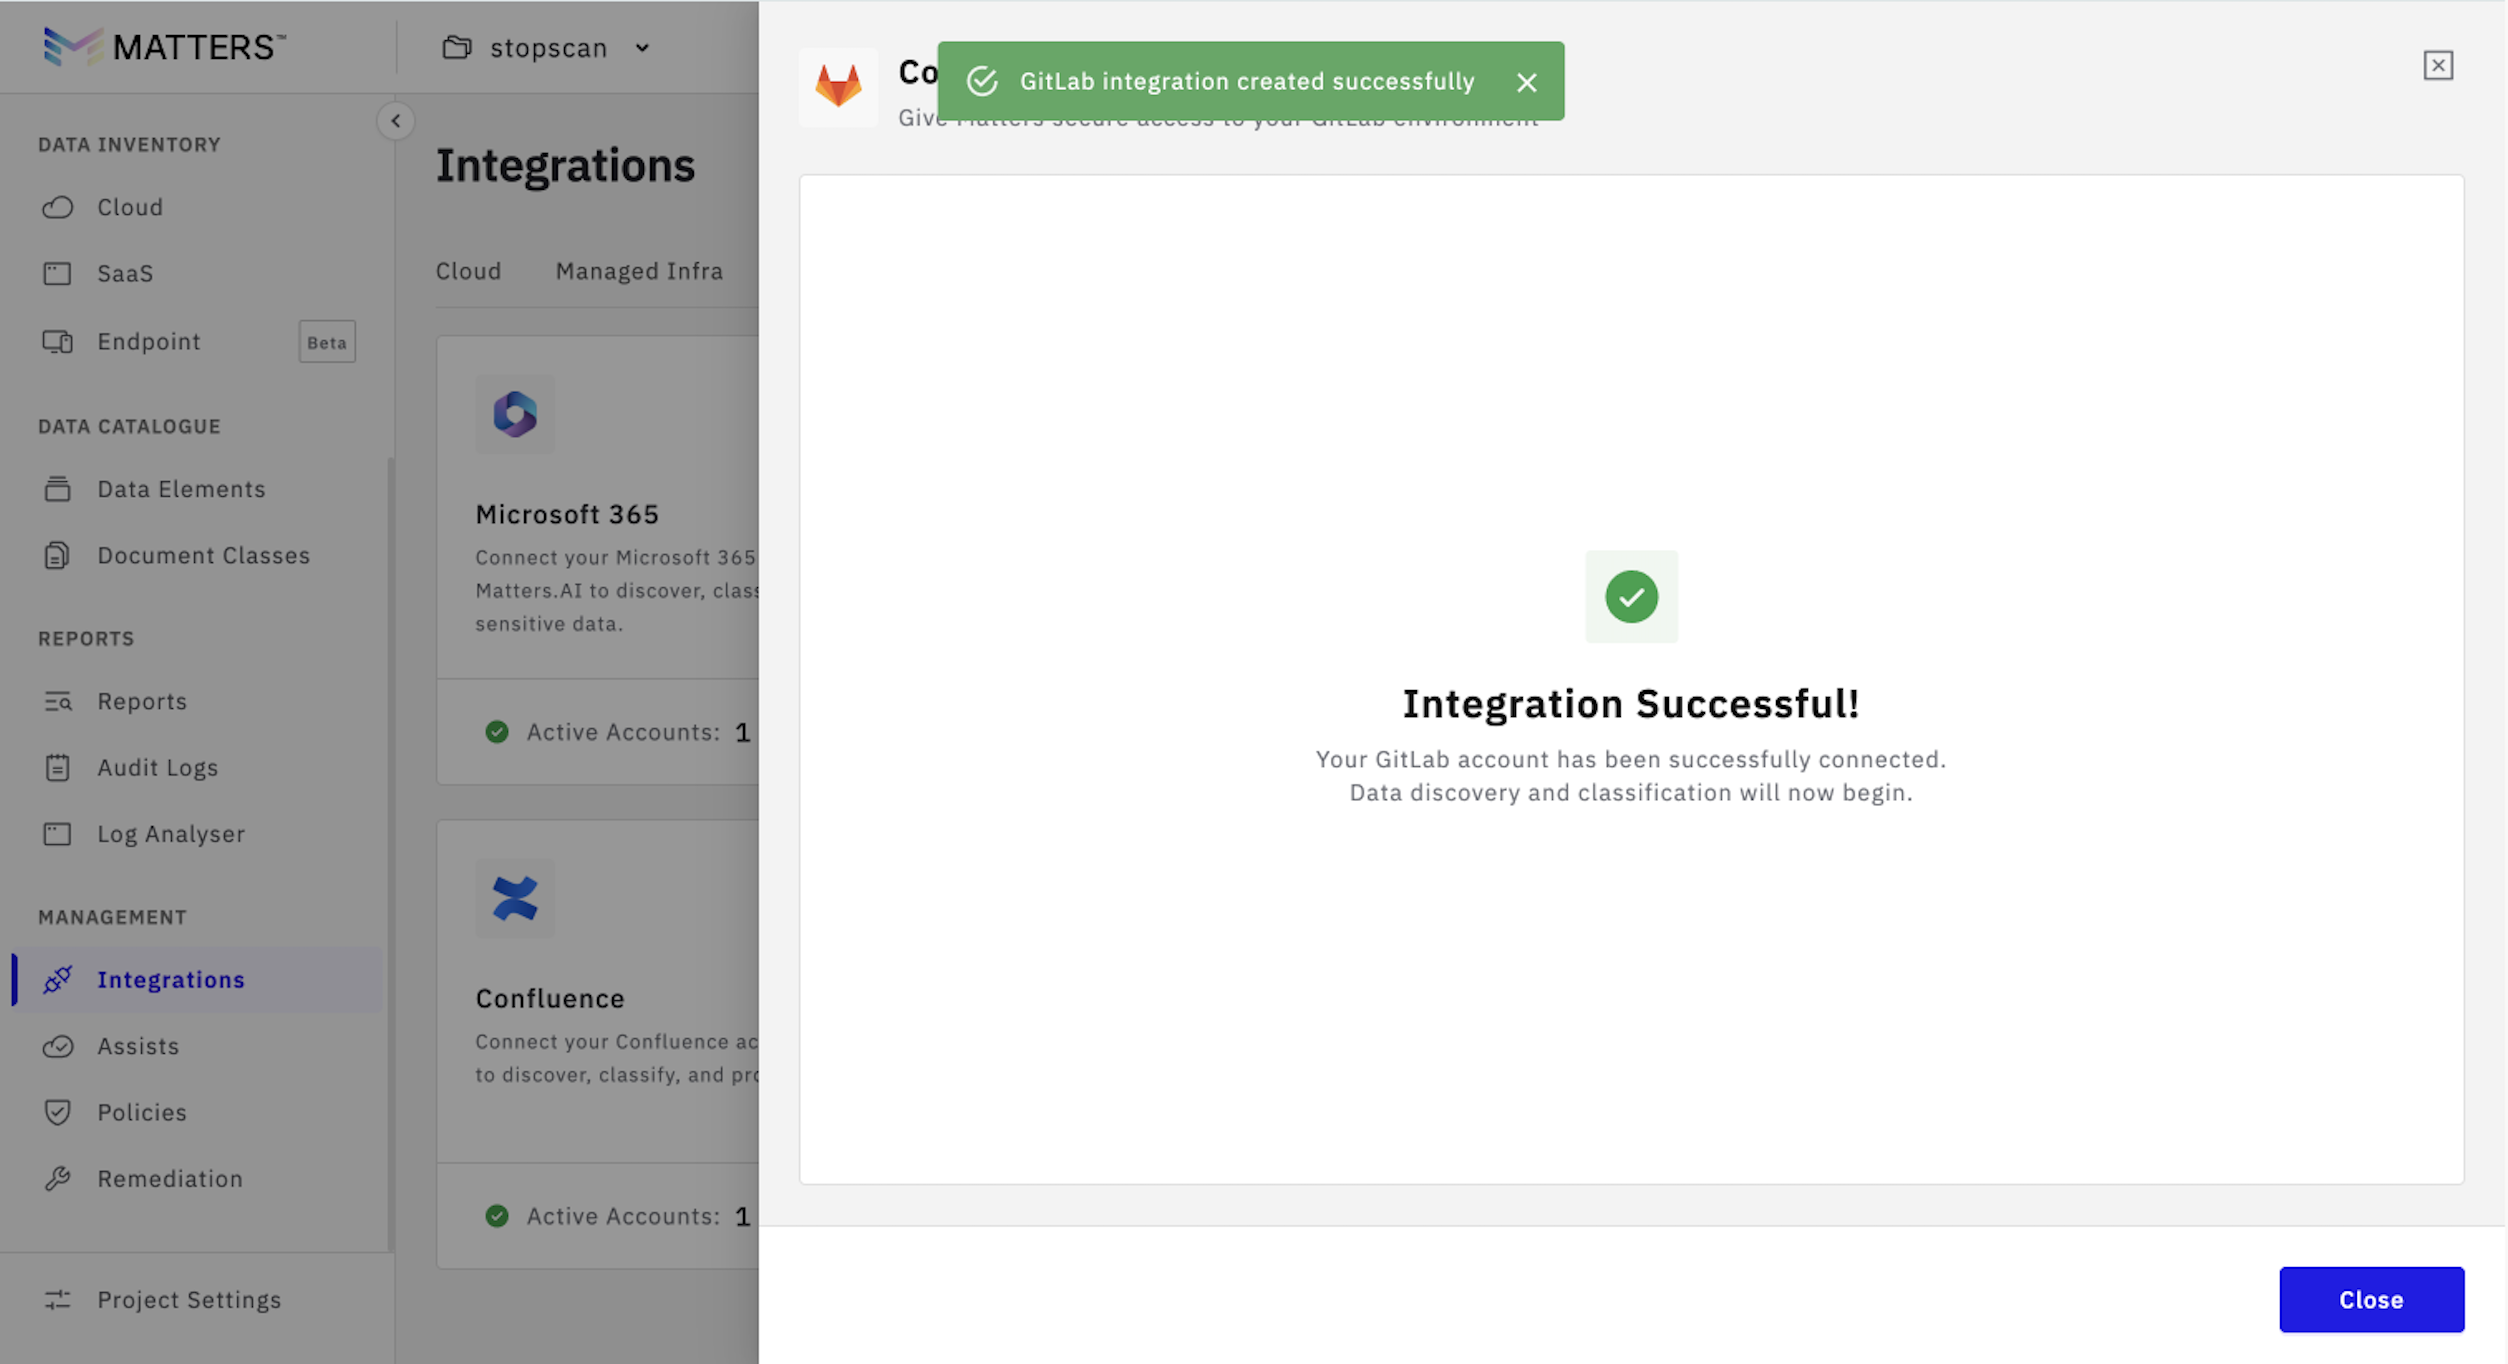
Once the connection is successful, a confirmation message will appear showing that the GitLab integration has been completed successfully.
Phase 3: Configure Repository Scanning
After the integration is complete, you can choose which repositories should be scanned for sensitive entities such as secrets, credentials, or PII.
Step 3.1: Open the SaaS Data Inventory
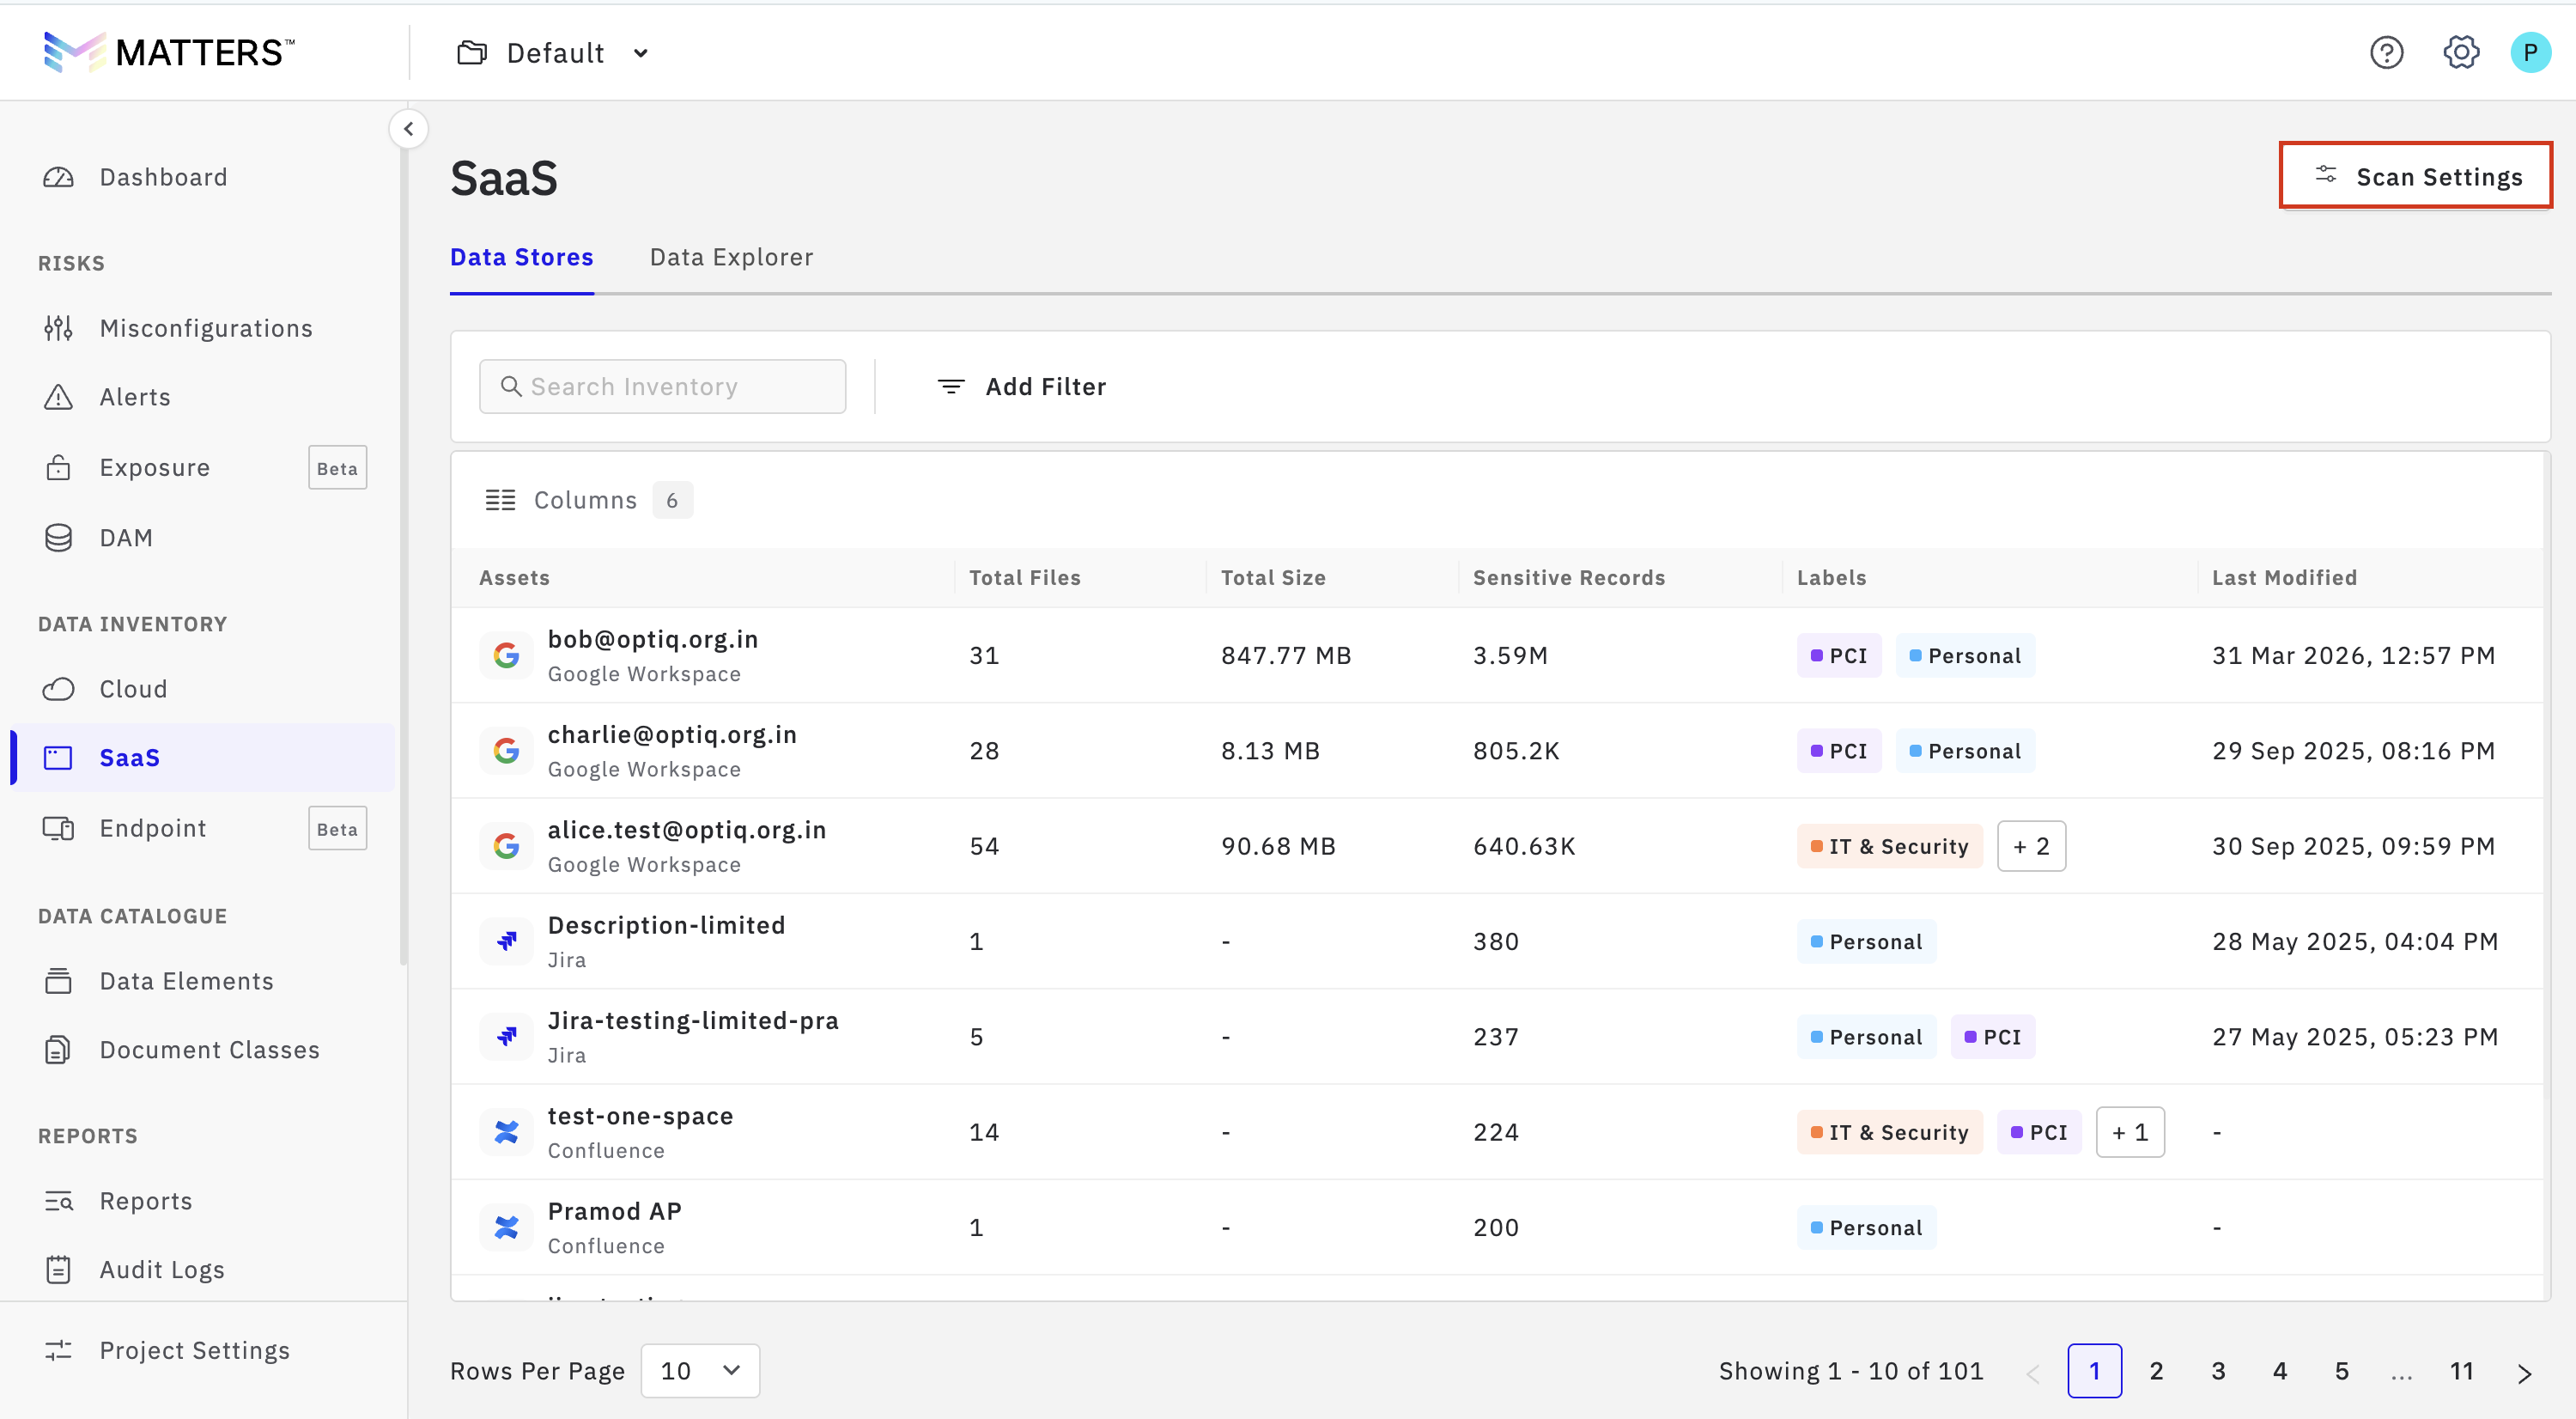
Under Data inventory, Click on SaaS.
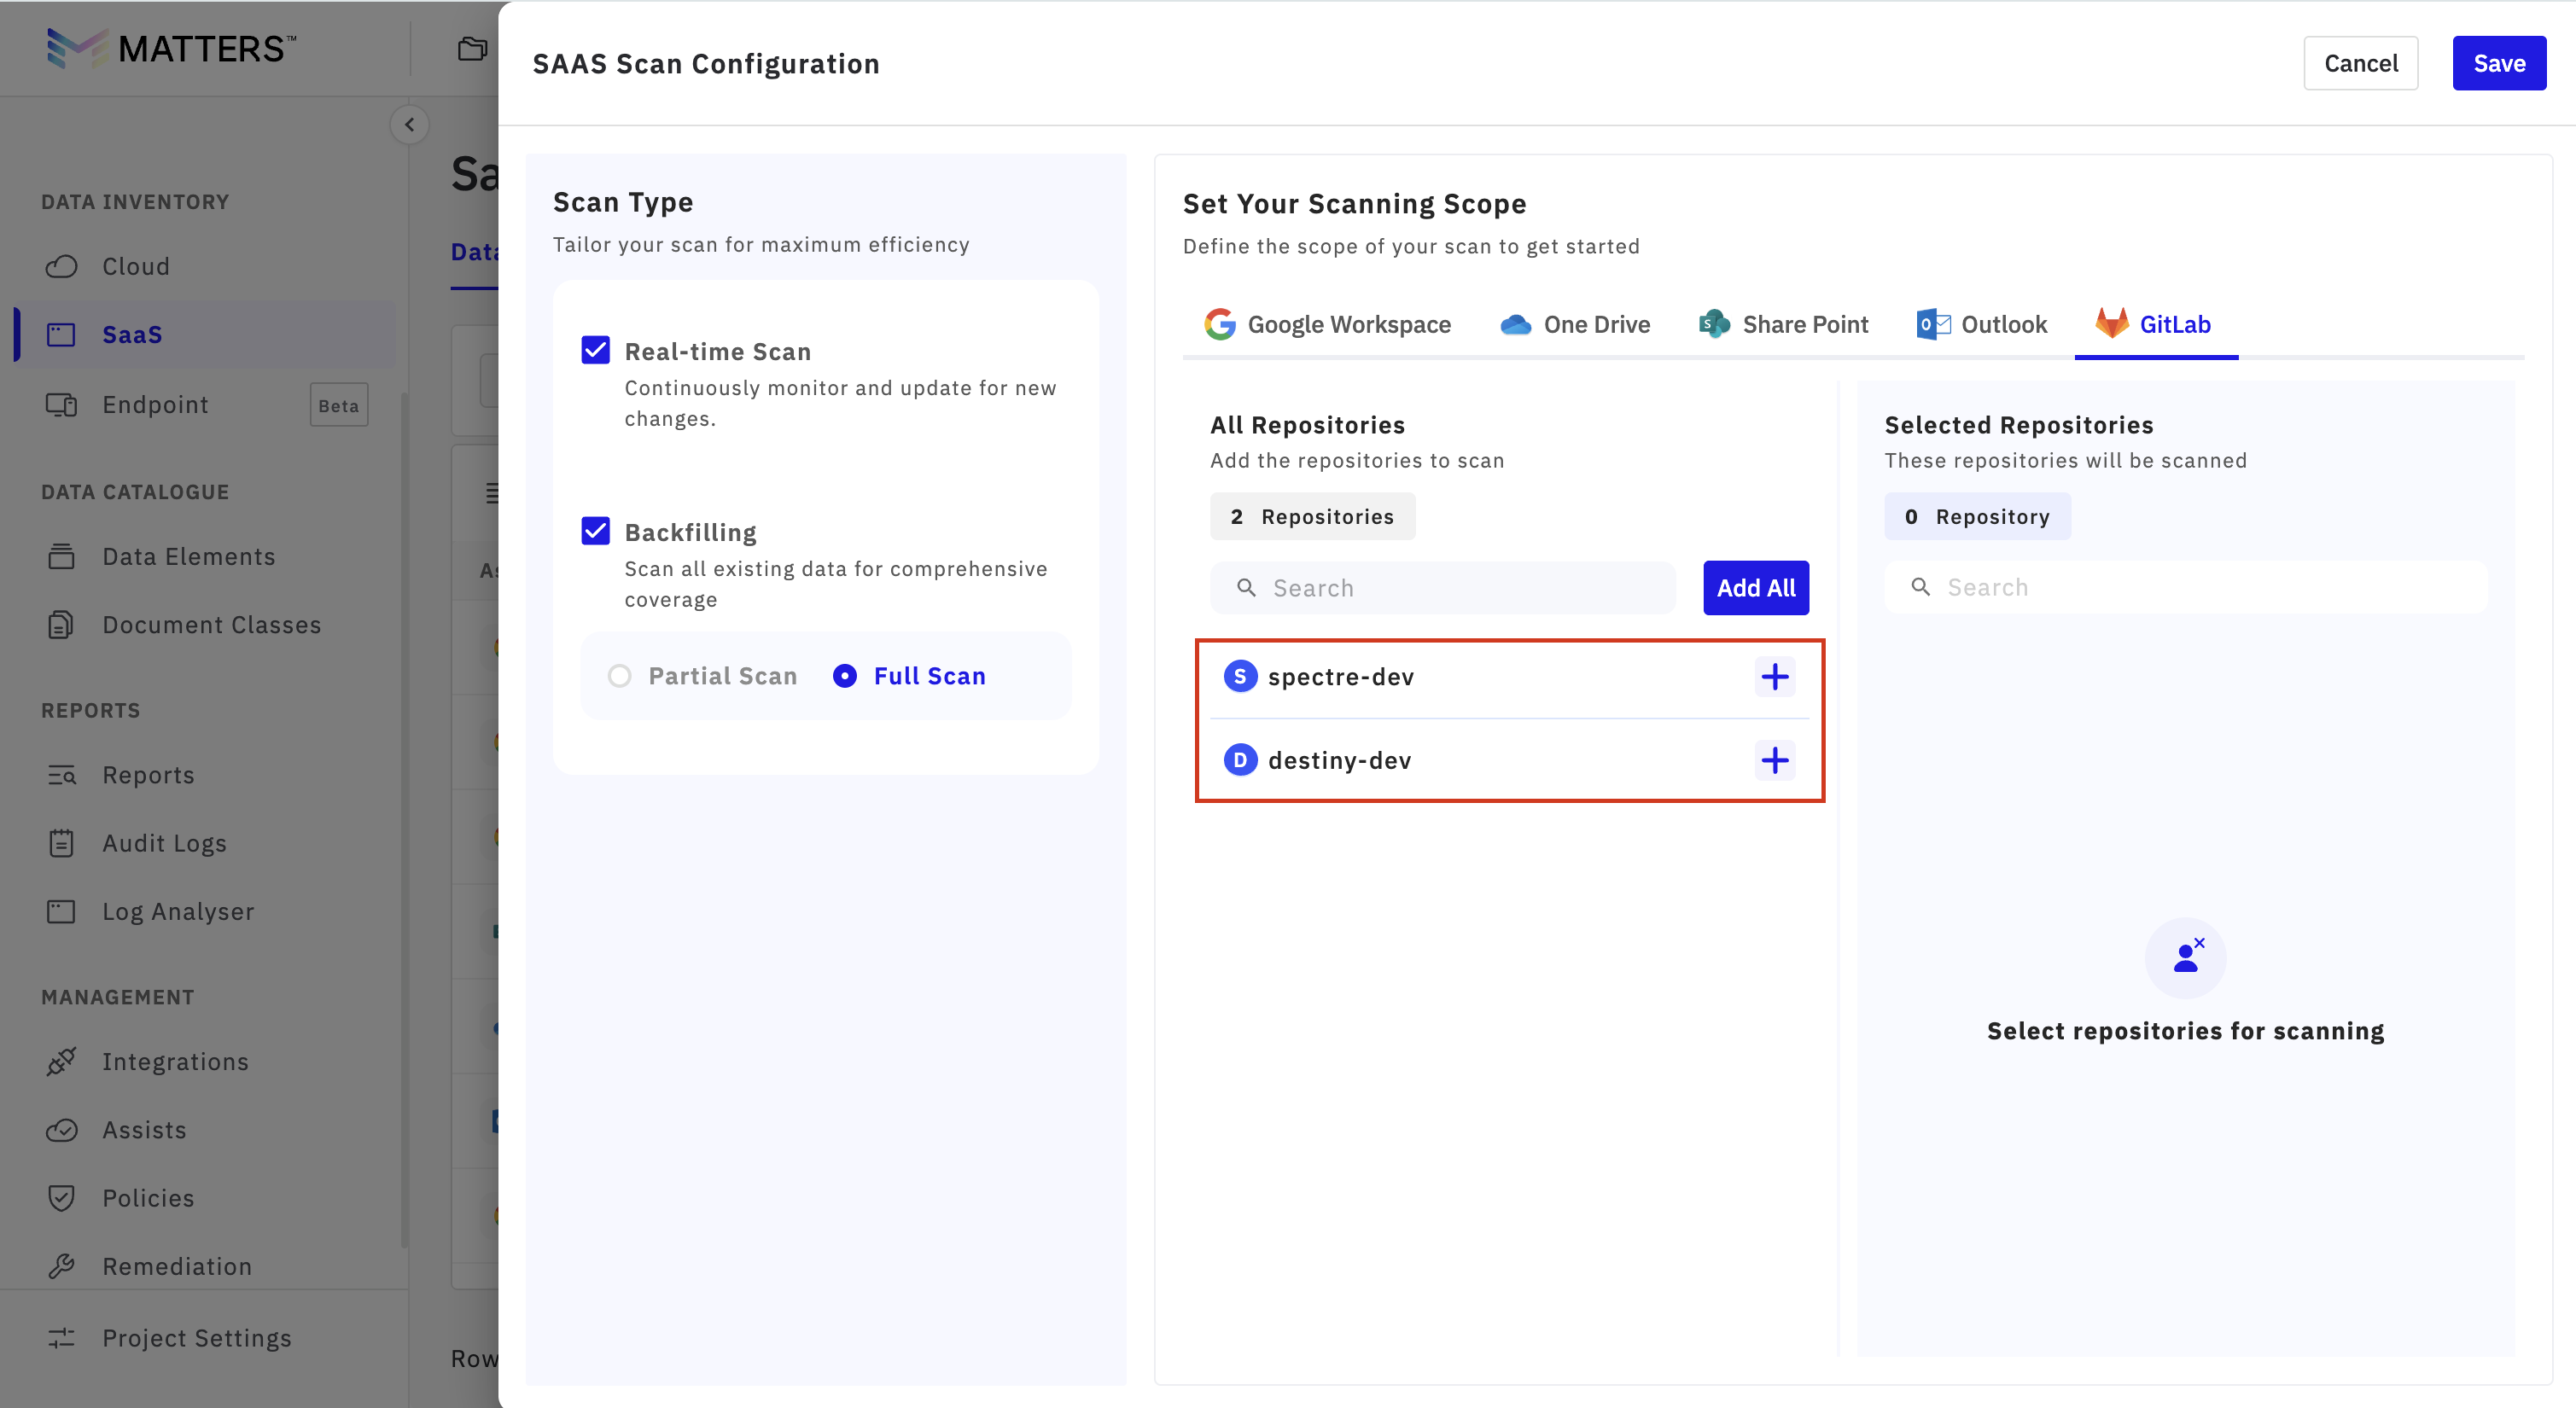
Click Scan Settings to configure the scanning options.
Step 3.2: Select the GitLab
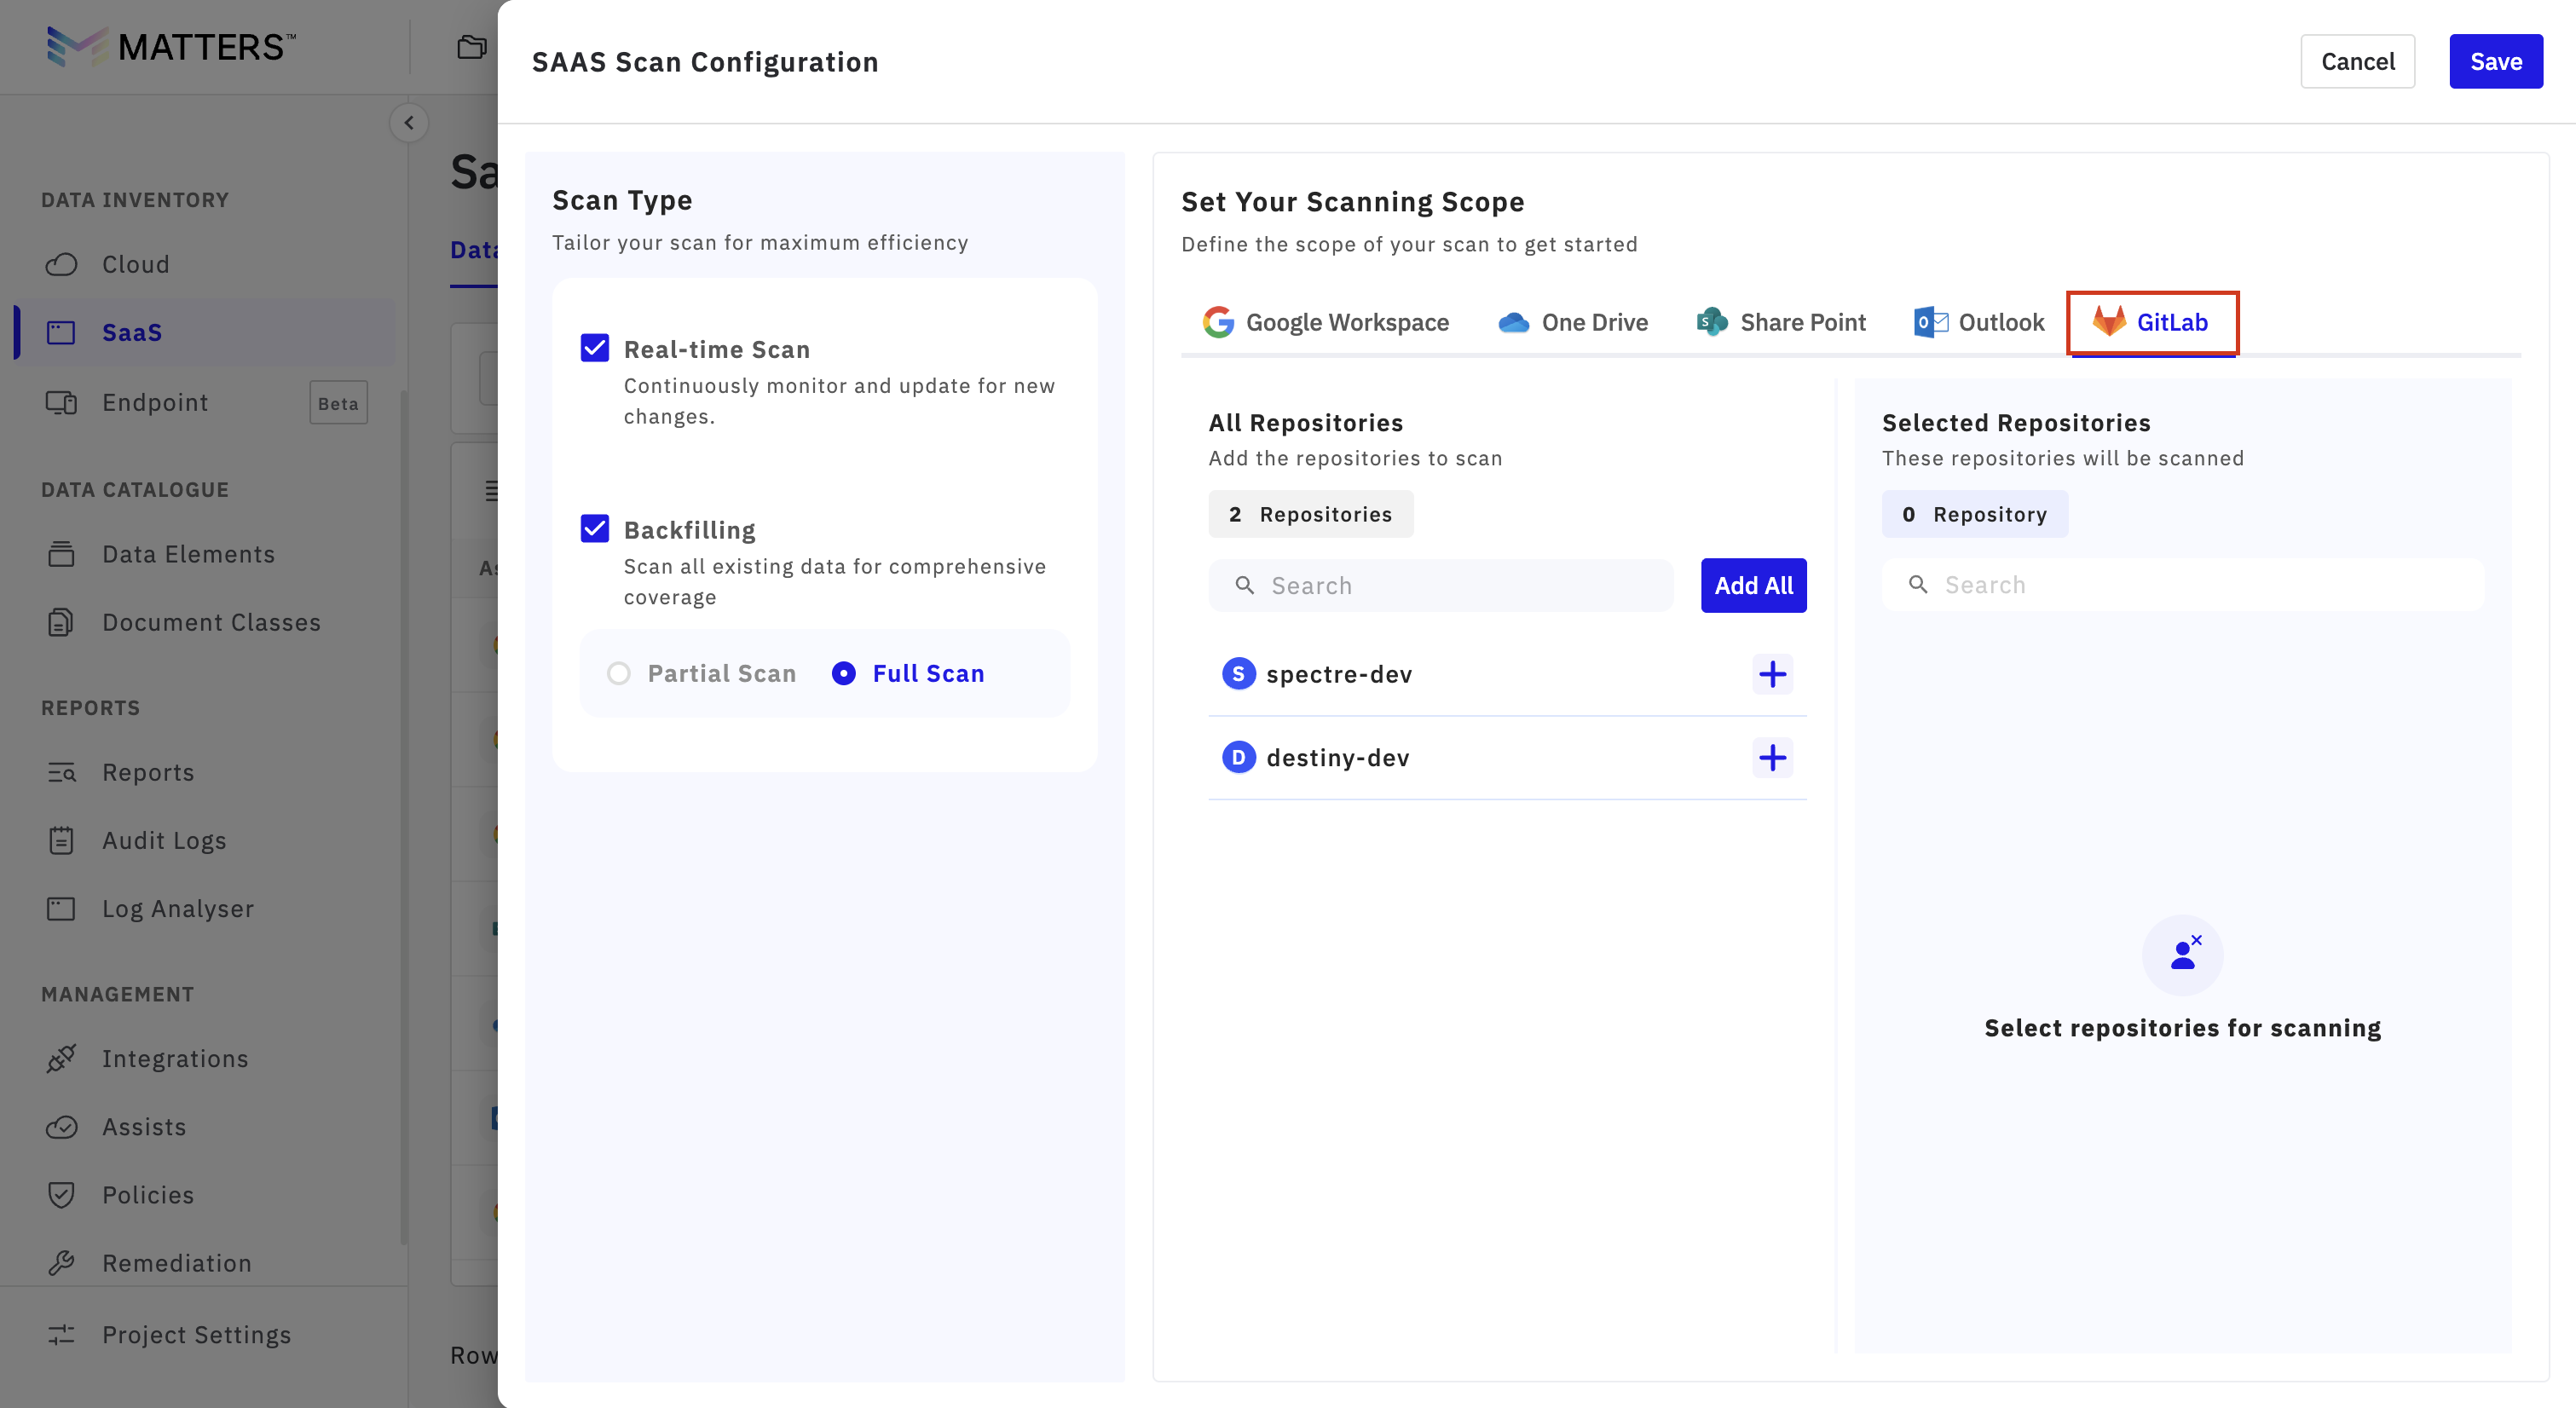
Choose the GitLab account that you have just connected.
Step 3.3: Select Repositories for Scanning
From the list of available repositories, select the repositories you want to scan for sensitive entities.
Click the Save button in the top-right corner.
Step 3.4: Start Automated Scanning
Once the repositories are saved, the system will begin scanning them automatically. During this process, any sensitive entities found in the selected repositories will be identified and displayed.
Step 3.5: Review the Scan Results
To view the details of the detected sensitive entities:
Click on the relevant repository.
Review the information under the Overview tab and the File Explorer tab.
This allows you to examine the findings in more detail and understand where sensitive data has been detected.
The GitLab integration is complete, the repository scan has finished successfully, and the sensitive data has been identified. You are good to go.